darrell


Is Agroforestry Sustainable? How It Works and Why It Matters for Your Farm

Posted by darrell on
0
Uncategorized
Is Agroforestry Sustainable? How It Works and Why It Matters for Your Farm

Agroforestry is sustainable when designed and managed to regenerate soil, conserve water, and provide long-term yields without degrading the land or ecosystem. By intentionally combining trees, crops, and often livestock in the same space, these systems build resilience against drought, erosion, and pest pressure while delivering food, timber, and income year after year.

The question isn’t whether agroforestry can be sustainable in theory. It’s whether farmers can make it work on real ground, with real budgets and timelines. The answer depends on choosing the right combination of plants for your climate, understanding how trees and crops interact as they mature, and committing to a timeframe that extends beyond a single growing season. Unlike monoculture systems that extract nutrients faster than they return, well-designed agroforestry creates a feedback loop where organic matter accumulates, beneficial insects thrive, and the land becomes more productive over time.

Across organic farms and community-supported agriculture (CSA) operations in 2026, agroforestry has moved from experimental plots to core production strategies. Farmers are integrating fruit and nut trees into vegetable beds, planting nitrogen-fixing shrubs along field edges, and using fast-growing timber species to shelter sensitive crops. These aren’t abstract environmental benefits. They translate to lower input costs, diversified revenue streams, and farms that weather climate extremes better than their conventional neighbors.

This article breaks down exactly how agroforestry systems function, which types suit different landscapes and goals, and what makes them viable for the long haul.

Key Takeaway: Agroforestry delivers five critical ecosystem services, carbon storage, water regulation, pollinator support, soil conservation, and biodiversity, that directly reduce input costs, protect yields from climate extremes, and create new revenue streams through improved ecosystem health.

What Agroforestry Sustainability Really Means

Sustainability in agroforestry means building farming systems that endure across generations without depleting the resources they depend on. It’s not just about avoiding harm, it’s about actively regenerating soil, water, and ecosystems while keeping farms profitable and communities thriving. When farmers ask if agroforestry is sustainable, they’re really asking whether these practices can deliver reliable results year after year without requiring costly external inputs or degrading the land.

The answer rests on what are known as the three pillars of sustainability: environmental health, economic viability, and social well-being. All three must work together. A system that protects the environment but bankrupts the farmer isn’t sustainable. Neither is one that turns a profit while eroding topsoil or exploiting workers.

Agroforestry
The intentional integration of trees, crops, and sometimes livestock within the same farming system to create mutually beneficial relationships.
Ecosystem Services
The benefits nature provides, such as pollination, water filtration, carbon storage, and soil fertility, that support both farm productivity and broader environmental health.
Environmental Pillar
Maintaining or improving natural resources like soil, water, and biodiversity so they remain functional for future generations.
Economic Pillar
Ensuring farms generate enough income to support the people who run them, covering costs and providing a livable return on investment.
Social Pillar
Supporting fair labor practices, strong communities, and knowledge-sharing that keeps farming culture alive and resilient.

Conventional monoculture farming typically prioritizes short-term yields, relying on synthetic fertilizers and pesticides to compensate for simplified ecosystems. Agroforestry takes the opposite approach. By diversifying plants and animals across the landscape, it builds complexity that self-regulates over time. Trees fix nitrogen, create windbreaks, and store carbon. Crops benefit from improved microclimates. Livestock graze beneath tree canopies, spreading fertility as they move. This layered design reduces dependency on external inputs while strengthening the farm’s ability to weather droughts, market shifts, and pest pressures.

How Agroforestry Systems Work

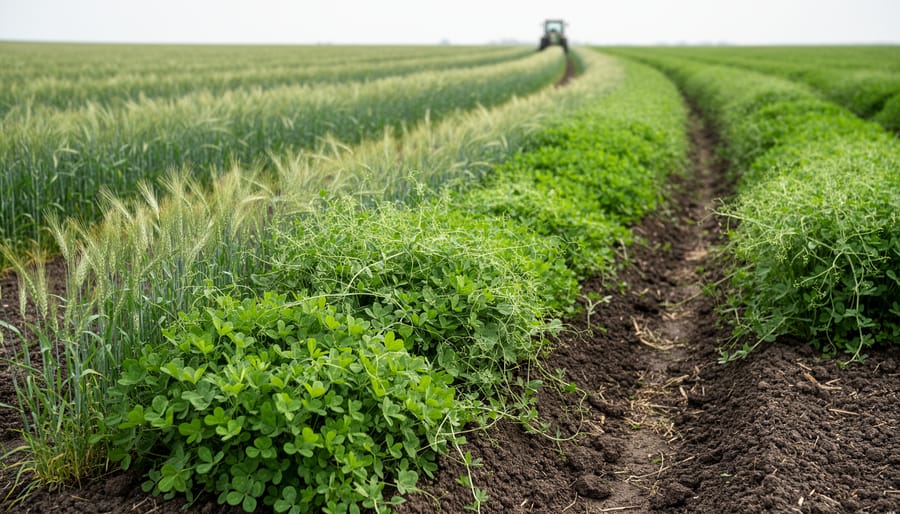
Agroforestry alley cropping with fruit trees and crops growing together in rows
A mature agroforestry alley-cropping system shows trees and crops growing together in the same managed space.

The Role of Trees in the System

Trees function as the structural backbone of agroforestry systems, delivering multiple functions simultaneously. Their deep roots break up compacted soil layers, creating channels for water infiltration and pulling nutrients from depths annual crops can’t reach. When leaves drop and roots die back, this organic matter enriches the topsoil with nitrogen, phosphorus, and carbon, building fertility year after year.

The carbon benefits are substantial. Research shows that agroforestry stores more carbon than traditional row cropping because trees lock up carbon in both above-ground biomass and root systems. A mature tree can sequester hundreds of pounds of CO₂ annually while sheltering crops below.

Tree canopies also alter the farm’s microclimate. They reduce wind speeds by up to 50%, protecting delicate plants and preventing topsoil erosion. Shade from strategically placed trees lowers ground temperatures in summer, reducing water stress for crops and livestock. In winter, windbreaks trap snow, creating insulating layers and boosting soil moisture when the thaw arrives.

For water cycles, tree roots act like sponges, absorbing heavy rains and releasing moisture slowly. This stabilizes groundwater levels and reduces runoff. Meanwhile, the canopy becomes habitat for birds, beneficial insects, and pollinators that support the entire farm ecosystem.

Integration with Crops and Livestock

Farmers layer crops and livestock beneath and around trees by matching each element’s light, nutrient, and space requirements. Annual vegetables like squash or beans grow in the sunny alleys during spring and summer, while the tree canopy is still light. Shade-tolerant perennials such as ramps, ginger, or berry bushes occupy the transition zones where dappled light prevails as trees mature.

Livestock, often sheep, goats, or chickens, graze the understory, eating weeds and fertilizing the soil with manure. Rotational timing matters: animals move through paddocks after crops are harvested or before new plantings emerge, preventing trampling and overgrazing. Tree roots mine deep nutrients and bring them to the surface through leaf drop, which decomposes and feeds shallow-rooted crops.

Spacing determines success. Wide alleys (20 to 40 feet) allow enough sunlight for full-sun crops even as trees grow. Closer spacing suits shade crops or livestock systems where forage quality improves under partial canopy. Farmers adjust planting dates and pruning schedules to keep light levels balanced, ensuring every layer contributes without competing destructively. This stacked use of vertical and horizontal space turns a single acre into multiple productive zones.

Main Types of Agroforestry Practices

Alley Cropping

Alley cropping arranges trees in parallel rows with wide spaces, the alleys, where you grow annual or perennial crops. The tree rows might be fruit or nut species, nitrogen-fixing legumes, or timber trees, depending on your farm goals and climate. Crops in the alleys benefit from windbreak effects, improved soil moisture retention, and gradual nutrient inputs as tree leaves decompose. This setup spreads income across multiple harvests: you sell grain, vegetables, or hay from the alleys while trees mature into longer-term products like apples, pecans, or lumber. Because trees and crops occupy different vertical and root zones, competition stays manageable with proper spacing, and the diversified system buffers against single-crop failures or market swings.

Silvopasture

Cattle grazing in a silvopasture with shade trees
Livestock can be integrated with tree cover to improve pasture comfort and support healthier farm ecosystems.

Silvopasture integrates trees, forage plants, and grazing livestock in a single managed system. Farmers plant scattered trees or tree rows across pastures where cattle, sheep, goats, or poultry graze. The trees provide shade that reduces heat stress in animals, especially during summer months, improving weight gain and milk production. Tree roots reach deeper soil layers than pasture grasses, pulling up nutrients that eventually cycle back through leaf drop and manure decomposition.

This arrangement improves forage quality because shaded grasses stay greener longer and contain higher protein levels than sun-scorched pasture. The trees sequester significant carbon in wood and soil while livestock continue generating income during the years trees mature. Farmers often select nut or fruit trees to add a second revenue stream, walnuts, chestnuts, or apples, alongside meat or dairy production. Silvopasture works well on organic farms seeking diversified income without expanding acreage.

Forest Farming

Forest farming transforms existing woodlands into productive growing spaces by cultivating specialty crops beneath the tree canopy. Instead of clearing trees, farmers work with the forest’s natural shade and humidity to grow high-value products like shiitake mushrooms on logs, ginseng in leaf litter, or shade-loving berries and medicinal herbs.

This practice suits organic growers targeting niche markets where customers pay premium prices for forest-grown goods. The overhead canopy regulates temperature and moisture while leaf fall builds soil organic matter naturally. Forest farming requires minimal external inputs since the ecosystem largely manages itself, making it exceptionally sustainable for farmers with wooded acreage who want to generate income without disrupting established tree cover or converting land to open fields.

Windbreaks and Riparian Buffers

Windbreaks consist of single or multiple rows of trees planted perpendicular to prevailing winds, reducing wind speed across fields by up to 50% within a protected zone that extends 10 to 20 times the tree height. This protection prevents topsoil loss, reduces crop moisture stress, and creates microclimates that can boost yields in adjacent rows by 10 to 20%.

Riparian buffers are tree and shrub plantings along streams, ponds, or drainage ditches. They filter runoff before it enters waterways, trapping sediment and agricultural nutrients that would otherwise degrade water quality. These buffers also stabilize stream banks, reduce flooding risk, and create wildlife corridors connecting habitat patches across the farm landscape. Both practices deliver measurable ecosystem services while requiring minimal land, typically just a few rows or a 15- to 30-foot buffer strip.

Ecosystem Services Delivered by Agroforestry

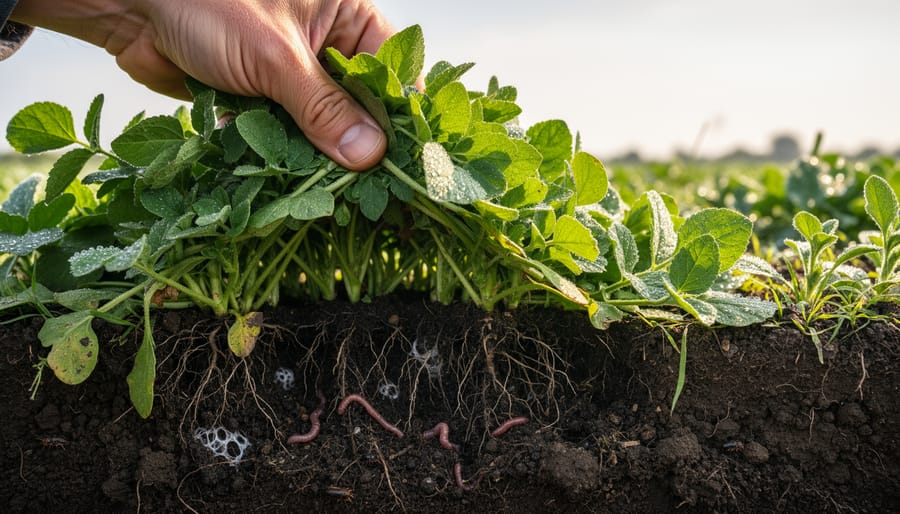
Close-up of healthy dark soil with organic matter and fine roots near a young agroforestry tree
Healthy, living soil is a key sign that agroforestry practices can strengthen long-term environmental resilience.

Agroforestry systems function as working ecosystems that deliver measurable benefits far beyond crop yields. These ecosystem services, the natural processes that support life and productivity, explain why agroforestry stands out as a sustainable farming approach. When you integrate trees with crops and livestock, you activate a suite of ecological functions that strengthen your farm’s resilience while supporting the wider community.

Carbon storage ranks among the most valuable services agroforestry provides. Trees sequester atmospheric carbon dioxide in their woody biomass and root systems, while also pumping carbon into the soil through leaf litter and root exudates. A well-designed silvopasture or alley cropping system can store several tons of carbon per hectare annually, helping offset farm emissions and potentially qualifying for carbon credit programs that generate income.

Water regulation improves dramatically when trees enter the landscape. Deep tree roots break up compacted soil layers, increasing infiltration during heavy rains and reducing runoff that carries topsoil and nutrients off-site. During dry periods, those same roots access deeper moisture and create humid microclimates that reduce crop water stress. Riparian buffers along streams filter agricultural runoff, protecting water quality for downstream communities while maintaining habitat corridors.

The creation of pollinator habitat transforms farm productivity. Trees and hedgerows provide season-long forage, nesting sites, and shelter for bees, butterflies, and other beneficial insects. This translates to better fruit set, increased yields in pollinator-dependent crops, and reduced reliance on rented honeybee hives, a cost savings that shows up immediately in your operating budget.

Soil conservation happens naturally as tree canopies intercept rainfall, roots bind soil particles, and leaf litter builds organic matter. Erosion rates drop measurably compared to bare annual cropping systems, preserving your farm’s most valuable asset. Healthier soil structure also improves nutrient cycling, reducing fertilizer needs.

Biodiversity flourishes in agroforestry environments. The structural complexity of mixed tree-crop systems supports everything from soil microbes to songbirds, creating a balanced ecosystem where pest populations stay in check and beneficial organisms thrive. This biological diversity acts as insurance against disease outbreaks and climate variability, stabilizing production across seasons.

How Agroforestry Is Used on Organic and CSA Farms

On organic and CSA farms, agroforestry offers practical ways to diversify income while building resilience into the farm’s ecology and business model. Many CSA operators integrate nut trees like hazelnuts or chestnuts along field edges, providing members with unique seasonal shares that stand out from conventional produce boxes. These perennials require minimal annual input once established, making them ideal for certified organic operations that prioritize low-intervention management.

Fruit trees planted in alley cropping systems between vegetable rows create layered production. A farm might harvest strawberries and lettuce in spring, then apples and pears later in the season from the same acreage. This staggered harvest spreads labor demands and extends the CSA delivery calendar, keeping members engaged longer and reducing the feast-or-famine cash flow common in vegetable-only operations.

Some farms venture into value-added products like jams, syrups, or specialty mushrooms cultivated under forest canopies. These items command premium prices at farmers’ markets and bolster CSA share value without requiring additional tillable land. Timber species like black walnut can serve as a long-term savings account, maturing over decades while providing shade and wildlife habitat in the interim.

Agroforestry also enhances the farm’s visual appeal, a crucial asset for agritourism. Tree-dotted landscapes invite farm tours, school visits, and u-pick events that generate revenue and deepen community ties. While city farming models face space constraints, rural CSA farms with room to experiment find that agroforestry systems create the diversified, attractive, ecologically sound operations that members actively want to support.

Measuring Long-Term Sustainability in Agroforestry

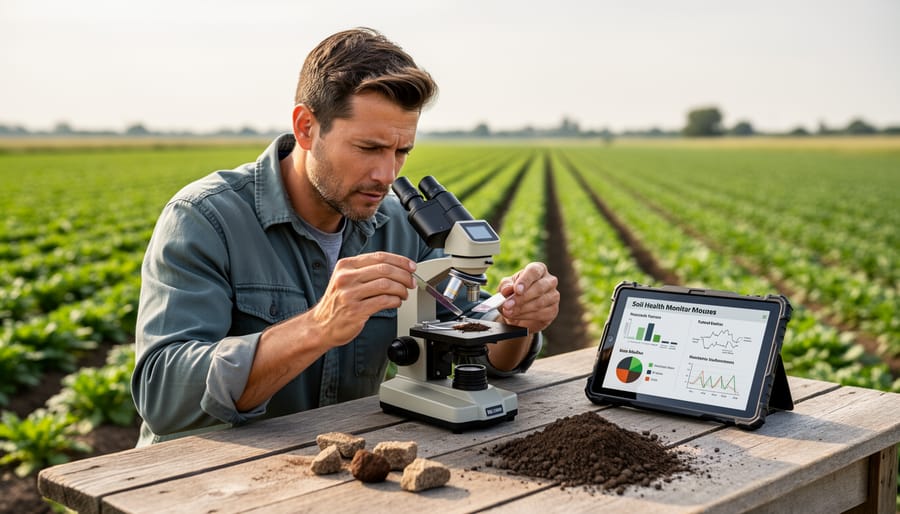
Judging whether agroforestry truly delivers on sustainability requires more than anecdotes. Farmers and researchers track specific indicators over years or decades to see if these systems maintain productivity, protect resources, and stay economically viable. Soil health metrics form the foundation: regular testing for organic matter percentage, nutrient levels, and water infiltration rates reveals whether the soil is improving or degrading. A thriving agroforestry system typically shows rising organic matter and faster water absorption compared to conventional tillage, signaling better structure and fertility.

Carbon accounting has become another critical measure. Trees sequester carbon in their trunks, branches, and roots, while healthier soil stores more carbon underground. Some farmers now use farm tech solutions like soil carbon sensors and remote mapping to quantify these gains and qualify for carbon credit programs. Biodiversity indices track the variety and abundance of species on the farm, from soil microbes to pollinators and birds. More diverse ecosystems tend to be more resilient to pests, disease, and climate swings.

Economic return on investment matters just as much as environmental outcomes. Farmers monitor profit per acre over time, factoring in upfront establishment costs, delayed yields from trees, and eventual income from timber, nuts, fruit, or livestock. Key indicators include:

  • Soil organic matter percentage and trend over five-year intervals
  • Water infiltration rates measured before and after tree integration
  • Species diversity counts for plants, insects, birds, and soil organisms
  • Profit per acre tracked annually, including diversified revenue streams
  • Carbon credits potential based on verified sequestration rates

When these indicators hold steady or improve across a decade or more, the system proves its sustainability. If yields drop, soil degrades, or income stagnates, adjustments are needed. Long-term monitoring separates hopeful claims from real-world performance.

Common Questions About Agroforestry Sustainability

Farmers and gardeners considering agroforestry often wonder whether the investment of time and money will pay off. The upfront costs vary widely depending on the scale and type of system you choose. A simple windbreak or alley cropping setup might require just a few hundred dollars for tree stock and fencing, while a full silvopasture conversion on several acres could run into the thousands. Most organic farms spread the expense over multiple seasons, starting with one practice on a portion of their land before expanding.

Timing is another common concern. Unlike annual crops that produce within months, agroforestry systems need patience. Tree crops typically take three to seven years to mature enough for harvest, though you’ll see ecosystem benefits, improved soil, windbreaks, pollinator habitat, within the first two growing seasons. Many CSA farmers diversify income during this establishment phase by continuing annual vegetable production between young tree rows or by raising livestock under the canopy.

Does agroforestry require more labor?

Initial setup demands hands-on work for planting, mulching, and establishing trees. Once mature, though, perennial systems often need less intensive management than annual crops.

Can I get organic certification for agroforestry?

Yes. Certified organic standards cover tree crops, forest farming, and integrated livestock systems, provided you follow approved practices for pest management and soil amendments without prohibited substances.

Does it work in dry climates?

Absolutely. Drought-tolerant tree species and strategic water harvesting make agroforestry viable in arid regions, where trees actually help conserve moisture and reduce evaporation from the soil.

What about pest management?

Agroforestry systems create habitat for beneficial insects and natural predators, reducing reliance on interventions, though understanding organic pest types still helps when challenges arise.

Climate compatibility is real, not a barrier. From temperate zones to subtropical regions, farmers adapt agroforestry to local conditions by selecting appropriate tree species and matching them to existing crops and livestock. Biodiversity flourishes in these systems, supporting pollinators naturally rather than relying on artificial pollination solutions. Start by observing what trees already thrive on your land and consulting with local extension services or experienced agroforestry practitioners in your region.

Agroforestry stands out as a genuinely sustainable farming approach because it addresses all three pillars at once: environmental health, economic viability, and social well-being. The systems we’ve explored deliver real ecosystem services that compound over time, from carbon storage and soil regeneration to water quality improvement and habitat creation. These aren’t theoretical benefits. They show up in healthier crops, more resilient land, and diversified income streams that buffer farms against market volatility and climate extremes.

That said, agroforestry isn’t a quick fix. Trees take years to mature, and the learning curve can feel steep when you’re integrating multiple elements on the same piece of land. You’ll need patience, careful observation, and a willingness to adapt as your system develops. But the payoff extends far beyond your own farm boundaries. Agroforestry strengthens entire communities by supporting pollinators, filtering runoff before it reaches waterways, and creating landscapes that people want to visit and protect.

If you’re curious about getting started, reach out to agroforestry farmers in your region. Many are happy to share lessons learned, and seeing a mature system in person makes the concepts click faster than any article can. Start with one practice that matches your land and goals, maybe a windbreak along your northern edge or a few rows of nut trees in an underused pasture. Small experiments teach you what works without overwhelming your operation, and they set the foundation for a farming system that truly lasts.

Turn Your CSA Members Into Your Farm’s Best Marketing Team

Posted by darrell on
0
Categories
Turn Your CSA Members Into Your Farm’s Best Marketing Team

Growing a CSA membership base through your existing members works because people trust recommendations from friends and neighbors far more than any advertisement you could buy. The most successful CSA farms in 2026 are turning satisfied members into active ambassadors through structured referral programs that offer tangible rewards, clear expectations, and simple sharing tools.

The beauty of member-driven growth is its authenticity. When a CSA member raves about their weekly harvest box to a coworker, they’re sharing a genuine experience, not a sales pitch. That personal endorsement carries weight no social media campaign can match. But here’s the reality: most members won’t naturally think to recruit others unless you give them a reason and a framework to do so.

Small-scale farms often shy away from formal referral programs, assuming they require complex tracking systems or expensive incentives. The truth is simpler. A well-designed program can be as straightforward as offering a free week of produce for every new member someone brings in, paired with shareable referral cards members can hand out at farmers markets or neighborhood gatherings.

The farms that grow their membership year after year aren’t necessarily the ones with the fanciest websites or biggest advertising budgets. They’re the ones who’ve figured out how to activate their existing community, turning happy customers into enthusiastic advocates. What follows are the exact frameworks, real farmer examples, and practical implementation steps you need to build a referral and ambassador program that fits your farm’s scale and style.

Why CSA Members Make Your Most Credible Advocates

CSA member handing a produce bag to a neighbor at an outdoor pickup table.
A CSA member shares fresh produce at a pickup table, illustrating how personal interactions build trust and word-of-mouth.

When a CSA member tells their neighbor about your farm, something powerful happens that no Facebook ad or farmers market banner can replicate. The conversation carries weight because it comes from someone who has skin in the game, someone who’s actually opened your boxes, cooked your vegetables, and experienced your farming practices firsthand.

Research shows that word of mouth outperforms traditional marketing channels significantly, particularly for products where quality and trust matter. CSA memberships check both boxes. Unlike a one-time purchase at a market, joining a CSA requires commitment and trust. Prospective members aren’t just buying tomatoes, they’re investing in a season-long relationship with a farm they’ve likely never visited.

This is where your current members become invaluable. They’ve weathered the learning curve of storing greens properly, figuring out what to do with kohlrabi, and adjusting their meal planning around what’s in season. When they recommend your farm, they’re not just vouching for your produce quality. They’re saying “I trust these farmers with my food budget” and “this is worth the commitment.”

The community aspect amplifies this effect. CSA members often view their participation as something bigger than a transaction, it’s supporting local agriculture, eating seasonally, and connecting to where their food comes from. When they invite friends to join, they’re extending an invitation into a community and a values-aligned choice, not just selling vegetables.

This authentic enthusiasm can’t be manufactured through marketing copy, no matter how well-written. It emerges naturally from positive experiences, and smart farms create systems to channel that enthusiasm into growth.

Building a CSA Member Referral Program That Actually Works

Choosing the Right Incentives for Your Farm

The incentive you offer can make or break your referral program. Too stingy, and members won’t bother. Too generous, and you’ll undercut your margins. The sweet spot depends on your farm’s size, profit margins, and what genuinely excites your members.

Start by thinking about what costs you least while delivering real value to members. A $20 share credit might feel generous to a member, but if your margins are tight, that same value delivered as extra produce from a bumper harvest week costs you far less. Similarly, value-added products you make on-farm (jams, pickles, bouquets) often work as high-perceived-value incentives with relatively low production costs.

Incentive Type Member Appeal Farm Cost Best Fit
$15-25 share credit High flexibility Direct revenue loss Established farms with healthy margins
Free add-ons (eggs, flowers, preserves) Tangible immediate reward Low if farm-produced Diversified farms with multiple products
Extra weekly produce More of what they love Variable by season Farms with reliable surpluses
10-15% renewal discount Long-term savings Deferred, predictable Farms prioritizing retention

Consider offering tiered rewards. One successful referral might earn a jar of your farm’s tomato sauce, while three referrals unlocks a half-share credit. This approach encourages ongoing advocacy without requiring you to give away your most valuable incentives for a single sign-up.

Match your incentive to your operation’s rhythm. If you’re a veggie-only farm, partnering with a neighboring farm for eggs or honey as referral rewards creates appeal without stretching your production. Startup farms with tighter budgets often find success with experiential rewards like invitations to exclusive farm dinners or u-pick events, which build community while keeping hard costs low.

Making Referrals Easy and Trackable

The easier you make the referral process, the more members will actually use it. A complicated system helps nobody, so design your mechanics around simplicity first.

Digital referral codes work well if you have a basic online signup form. Give each member a unique code, their last name plus a number works fine, that new members enter when joining. Track these in a simple spreadsheet with columns for referring member, new member name, signup date, and reward status. No fancy software needed.

For farms without digital infrastructure, physical referral cards are incredibly effective. Print simple business-card-sized cards with your farm info and a line for the referring member’s name. Members hand these to friends, who bring them to pickup or mail them with their signup. File the cards in a folder and record them weekly.

A dedicated referral signup link makes sharing even easier. Services like Google Forms or Typeform let you create a free form where new signups can enter who referred them. Share one link with all members rather than individual codes, just add a “Who referred you?” field.

Track everything in one place, whether that’s a notebook, spreadsheet, or your member database. Note the referring member, new member, date, and when you issued the reward. Review it monthly to catch any referrals you might have missed and to send thank-you notes.

The key is choosing a method you’ll actually maintain. A simple system you use consistently beats a sophisticated one you abandon after two months.

Setting Clear Program Guidelines

A referral program falls apart when members feel confused about how it works or, worse, when they think they’ve earned something they haven’t. Setting clear guidelines upfront prevents frustration and keeps the program running smoothly season after season.

Warning: Nothing damages trust faster than unclear reward terms, put your program rules in writing and share them with every participant from day one.

Spell out exactly when rewards kick in. Most farms trigger incentives when the new member completes their first payment, not just when they sign up. This protects you from rewarding referrals that never convert while giving referring members a clear milestone to track.

Set reasonable limits per member. Some farms cap referrals at three to five per season to keep the program sustainable, while others leave it unlimited but adjust the reward value after the first few. Whatever you choose, state it clearly so members know what to expect.

Decide when you’ll deliver rewards. Options include applying credits immediately to the next share pickup, adding them to the following season’s account, or distributing them at mid-season or year-end. Just be consistent and communicate the timing in advance.

Include your program terms everywhere members might look: in your welcome packet, on referral cards, in email confirmations, and on any sign-up page. Cover the basics in simple language, what members get, when they get it, how tracking works, and any expiration dates. When everyone understands the rules, your program becomes a trust-builder instead of a headache.

Creating a CSA Ambassador Program

CSA members holding a basket of vegetables while pointing toward a farm field during golden hour.
Members visiting the farm with fresh produce capture the ambassador spirit, sharing the experience and inviting others in.

Identifying Your Ideal Ambassadors

The best ambassadors are already promoting your farm, you just need to recognize them. Look for members who consistently engage: they comment on your social media posts, bring friends to farm events, ask thoughtful questions at pickup, and share photos of your produce. These are the people who genuinely love what you’re doing.

Key qualities include natural enthusiasm (they light up talking about the farm), strong local networks (they’re involved in community groups, schools, or workplaces), and reliability (they show up to events and communicate well). Members who’ve been with you for at least one full season understand your farm’s rhythm and values, making them more credible advocates.

Pay attention during pickup days. Who’s chatting with other members about recipes? Who’s already telling newcomers how the share works? Watch your social media tags, members who regularly post about their weekly haul are showing you exactly who they are.

When inviting someone to be an ambassador, make it personal. A quick conversation at pickup works well: “I’ve noticed how much you enjoy sharing about the farm with others. We’re looking for a few members to help spread the word more formally. Would you be interested in learning more?” Follow up with a simple email outlining what’s involved.

Keep your initial ambassador group small, three to five members. You can always expand once you’ve refined the program.

Ambassador Roles and Responsibilities

Successful ambassador programs work when expectations are clear and manageable. Most farm ambassadors can realistically commit to two or three activities per season, not a constant stream of promotion.

Start with the lowest-effort options. Social media sharing, posting farm photos, tagging the CSA in stories, or writing brief reviews, takes minutes but reaches personal networks organically. Bringing friends to pickup days or open farm events leverages occasions already on their calendar. These activities require enthusiasm, not extra time.

Mid-level involvement includes hosting small farm tours for their social circles. An ambassador might invite neighbors over for a farm visit, introducing four or five potential members in a relaxed setting. Some members enjoy staffing your table at farmers markets for an hour, answering questions from shoppers who trust peer recommendations over farm marketing.

The highest commitment comes from content creation, writing blog posts about favorite recipes, filming cooking videos with your produce, or maintaining a farm share diary. Offer this option but never require it. These ambassadors are rare gems who genuinely love creating content.

Make participation flexible. Provide a menu of options and let ambassadors choose what fits their lifestyle. A busy parent might only share on Instagram, while a retired teacher could lead monthly farm tours. Track contributions loosely, you’re building relationships, not managing employees. The goal is sustained, authentic advocacy that feels rewarding rather than obligatory.

Supporting and Rewarding Your Ambassadors

Your ambassadors invest time and energy promoting your farm, so thoughtful recognition keeps them motivated without breaking your budget.

Compensation structures that work: Many farms offer a 10-20% discount on shares or provide one free week per month of active promotion. Some give ambassadors first pick at premium items like heritage tomatoes or specialty cuts. Match your reward to the effort, someone hosting tours deserves more than someone who simply posts occasionally.

Experiential rewards build deeper connection. Invite ambassadors to exclusive harvest dinners, behind-the-scenes farm tours, or early strawberry picking before the public. These experiences cost you little but create memorable moments ambassadors naturally share with their networks.

Recognition matters as much as tangible rewards. Feature ambassadors in your newsletter with their photo and story. Create a “farm family” page on your website. Thank them publicly at member events. A handwritten note after a particularly helpful referral goes surprisingly far.

Keep it simple to sustain long-term. Track contributions in a basic spreadsheet and check in quarterly. Send a small seasonal gift, a jar of jam, bouquet, or farm store credit. The goal is making ambassadors feel valued, not creating administrative burden that prevents you from farming.

When compensation feels fair and personal, ambassadors remain enthusiastic advocates year after year.

Promoting Your Referral and Ambassador Programs

The best referral program in the world won’t work if your members don’t know it exists. Many farms launch these programs quietly, mention them once in a newsletter, then wonder why participation stays low. Successful promotion requires multiple touchpoints throughout the season, meeting members where they already engage with your farm.

Start by weaving the program into your existing communication channels rather than treating it as a separate announcement. Your weekly newsletter is prime real estate, include a brief referral reminder in the footer or as a P.S. after your farm updates. At pickup locations, place attractive signs near the distribution area where members naturally pause. A simple “Love your CSA? Share it! Ask us about our referral program” catches attention without feeling pushy.

Here’s a practical timeline for introducing and maintaining visibility:

  1. Week 1-2 of season: Launch announcement in newsletter and welcome packet for new members
  2. Week 4-6: Reminder at pickup with printed referral cards members can take
  3. Mid-season farm event: Brief mention during announcements, answer questions in person
  4. Week 12-14: Social media post featuring a member who successfully referred friends
  5. Late season (Week 18-20): Final push in newsletter highlighting year-end deadline
  6. Renewal period: Thank participants and showcase program results in annual recap

Face-to-face moments matter most. Train whoever staffs your pickup to mention the program casually when members express enthusiasm. A simple “So glad you’re enjoying it! We have a referral program if you know anyone who’d love fresh vegetables” plants the seed naturally.

Your welcome packet for new members should include referral details from day one. They’re experiencing peak excitement about joining, making it the perfect time to explain how they can share that with friends. Include a few physical referral cards they can hand out immediately.

Social media works best when you share real stories rather than generic program details. Post photos of referring members with their friends at pickup, or create simple graphics showing what rewards look like. Keep it visual and personal.

Real Success: How Small Farms Grew Their Membership Through Referrals

When Sarah launched Meadowlark Farm in Vermont with just 25 CSA shares in her first season, she knew she couldn’t afford traditional advertising. She decided to offer each founding member one free week of produce for every new member they referred who completed the season. By mid-summer, eight of her original members had brought in friends or family. She ended the season with 38 shares and rolled that momentum into year two, where she started with 52 members, more than double her initial goal.

Sarah’s key lesson: make the ask specific and timely. She sent a mid-season email thanking members for their support and explicitly asking if they knew anyone who might enjoy the farm for next year. She included a simple referral card members could hand to friends. The tangible card, she found, worked better than forwarding emails because it felt more personal and didn’t get lost in inboxes.

Contrast that with Green Valley Farm, a fifteen-year operation in North Carolina with 180 established members. Farm manager Marcus noticed their growth had plateaued despite a waiting list in previous years. He introduced a tiered referral program: one successful referral earned members $25 off their renewal, three referrals meant a free add-on subscription (eggs or flowers), and five referrals earned a complimentary half-share for a friend or family member.

The program brought in 34 new members in the first year, a 19% increase. More importantly, Marcus discovered that his most active referrers were second and third-year members, not the longest-standing ones. These members were still in the enthusiastic phase of CSA membership and had social circles who hadn’t yet joined. He adjusted his outreach to focus more attention on this sweet spot of engaged recent members rather than assuming veterans would be his best advocates.

Both farms learned that authentic enthusiasm, not elaborate incentives, drives referrals.

Common Pitfalls and How to Avoid Them

Farmer and CSA member shaking hands at a farm event with produce stands blurred in the background.
A handshake at a farm gathering symbolizes appreciation and long-term relationships that keep referral programs thriving.

Even the best-intentioned referral program can stumble if you’re not watching for these common traps.

The biggest mistake? Making the program too complicated. When members need to remember codes, fill out forms, or jump through multiple hoops, they simply won’t bother. Keep it simple enough that you can explain it in one sentence. If your program requires more than two steps for members to participate, simplify it.

Warning: Offering rewards you can’t sustain long-term will force you to either cut the program abruptly or strain your farm’s finances, both damage member trust.

Many farms launch generous incentive programs without calculating the actual cost per new member. Run the numbers before you commit. A $50 credit might sound reasonable until you realize it costs you more than that in margin when five members each refer three friends in one month.

Poor tracking derails even simple programs. You forget who referred whom, rewards get missed, and members feel ignored. A basic spreadsheet noting the referrer, new member, date, and reward status prevents most problems. Update it weekly, not whenever you remember.

Farms also commonly fail to promote their programs beyond an initial announcement. Members forget details within weeks. Mention your referral program in every newsletter, post reminders at pickup, and include cards in share bags monthly. Repetition without annoyance is the goal.

Finally, many farmers overlook thanking participants beyond sending the reward. A personal note, public shout-out in your newsletter, or quick conversation at pickup acknowledging their support strengthens the relationship. Recognition costs nothing but makes members feel genuinely valued, encouraging continued advocacy.

The most successful CSA growth doesn’t come from flashy marketing campaigns or aggressive sales tactics. It comes from the genuine enthusiasm of people who love what you’re doing and want their friends to experience it too.

Start small with your referral or ambassador program. Choose one simple incentive, create a straightforward way to track it, and tell your members about it. You can always expand and refine based on what works for your farm and your community.

Remember that these programs do more than just increase member numbers. They deepen the relationships you already have. When members actively participate in growing your farm, they become more invested in its success. They show up more reliably, engage more thoughtfully with what you’re growing, and stick around longer.

Your current members already believe in your farm. Give them an easy way to share that belief with others, recognize their efforts, and watch your community grow organically. The farmers who’ve built lasting CSAs through referrals all say the same thing: the connections matter more than the conversions, and ironically, that’s exactly what makes the conversions happen.

How Fine Dining Restaurants Are Fighting Food Waste (And What It Means for You)

Posted by darrell on
0
Uncategorized
How Fine Dining Restaurants Are Fighting Food Waste (And What It Means for You)

Sustainable fine dining merges exceptional culinary artistry with rigorous environmental stewardship, transforming luxury restaurants into laboratories for zero-waste systems, regenerative agriculture partnerships, and carbon-neutral operations. The movement has grown from a handful of pioneering chefs in the early 2020s to a defining standard across top-tier establishments, where sourcing decisions carry as much weight as plating aesthetics.

At its core, this approach redefines what it means to eat well. Restaurants now build entire menus around what nearby farms harvest each week, composting every scrap, filtering and reusing water, and calculating the carbon footprint of each dish. Some have gone further, planting their own gardens, raising heritage livestock, and fermenting ingredients that would otherwise spoil.

For diners, the experience offers more than a meal. It’s a window into what’s possible when food systems prioritize soil health, biodiversity, and fair labor practices without sacrificing flavor or creativity. The same principles that guide a Michelin-starred kitchen, like understanding seasonal rhythms and building relationships with growers, translate directly to home cooking and community-supported agriculture.

This shift matters because fine dining has always influenced broader food culture. When celebrated chefs champion local organic farmers and prove that sustainability enhances rather than limits culinary excellence, the ripple effects reach farmers’ markets, grocery stores, and backyard gardens. The techniques being refined in these kitchens, from root-to-stem cooking to natural fermentation, offer practical lessons for anyone committed to eating responsibly while supporting their local food economy.

What Makes Fine Dining Sustainable?

Sustainable fine dining reimagines luxury through the lens of environmental responsibility. Rather than showcasing rare ingredients flown in from distant continents, these restaurants demonstrate excellence by working within ecological boundaries. The approach marks a fundamental shift from the traditional fine dining model, where opulence often meant abundance and waste.

At its core, sustainable fine dining operates on a simple philosophy: exceptional food shouldn’t cost the earth. This means rethinking every aspect of how a restaurant sources, prepares, and serves meals. The goal isn’t just to reduce harm, it’s to create dining experiences that actively support healthy food systems and local communities.

The movement relies on several interconnected practices that set it apart from conventional luxury dining:

Farm-to-table fine dining
Direct relationships between chefs and local farms, eliminating middlemen and ensuring ingredients travel minimal distances from harvest to plate. This approach guarantees peak freshness while supporting regional agriculture.
Nose-to-tail cooking
Using every part of an animal or vegetable, turning what conventional kitchens discard into celebrated dishes. This practice honors the ingredient while dramatically reducing waste.
Hyper-local sourcing
Prioritizing ingredients grown or produced within a tight geographic radius, often just miles from the restaurant. This radical commitment to place reduces transportation emissions and celebrates regional flavors.
Zero-waste kitchens
Comprehensive systems that divert food scraps to compost, repurpose by-products, and eliminate single-use packaging. These operations aim for literally nothing entering the landfill.

Seasonal menus form the backbone of this approach. Instead of offering tomatoes year-round, sustainable restaurants celebrate what’s actually growing now. This constraint pushes chefs toward creativity rather than limiting them. Spring might feature tender peas and ramps, while autumn showcases squash and root vegetables.

Ethical ingredient selection extends beyond organic certification. These restaurants ask deeper questions: Were workers paid fairly? Does this seafood come from healthy fish populations? Can we source this locally instead of importing it? The answers shape every menu decision, proving that luxury and responsibility aren’t opposites, they’re partners in creating truly exceptional food.

The Farm-to-Fine-Dining Connection

Why Chefs Are Choosing CSA Partnerships

Fine dining chefs are increasingly drawn to CSA partnerships because these relationships solve problems that traditional supply chains can’t. When a chef receives a box of produce harvested that morning, they’re working with ingredients at peak flavor and nutritional value, something that matters tremendously when every element on a plate needs to shine. That 24-hour difference between harvest and kitchen transforms how vegetables taste and perform.

Beyond freshness, CSA farms offer access to varieties you won’t find through conventional distributors. Heirloom tomatoes in twelve different colors, obscure greens with complex flavor profiles, or fingerling potatoes in unusual shapes, these ingredients become signature elements that distinguish one restaurant from another. A chef might discover a purple cauliflower or lemon cucumbers that spark an entirely new dish concept.

The seasonal constraint actually fuels creativity rather than limiting it. When a farm delivers whatever is ready that week, chefs must adapt and innovate. This pushes culinary teams to develop techniques and combinations they might never have explored with year-round access to the same ingredients. One week might bring an abundance of zucchini blossoms, the next an unexpected surplus of kohlrabi. That variability keeps menus dynamic and forces chefs to stay sharp.

CSA partnerships also eliminate the middleman markup while ensuring farmers receive fair compensation. For restaurants operating on thin margins despite high menu prices, this direct relationship makes financial sense while supporting the local food economy they want to champion.

Seasonal produce in a CSA-style harvest basket on a kitchen counter near cooking tools
A harvest basket of mixed seasonal produce represents the farm-to-dining link that supports freshness and creativity on high-end menus.

How These Partnerships Support Local Agriculture

When fine dining restaurants commit to sourcing from local organic farms, they create a lifeline for small-scale agriculture. These partnerships provide farmers with predictable, year-round income through regular wholesale orders, a stark contrast to the uncertainty of farmers’ markets where sales fluctuate with weather and foot traffic.

The financial advantages extend beyond stable revenue. Direct farm-to-restaurant relationships eliminate middlemen, meaning farmers keep more of each dollar while restaurants gain fresher ingredients. For small operations running on tight margins, this difference can determine whether a farm survives or folds.

These collaborations also boost farm visibility in ways traditional distribution channels never could. When a respected chef highlights a specific farm on their menu or social media, it introduces that producer to an audience of food enthusiasts who might become CSA members or market customers. That word-of-mouth marketing proves invaluable for farms without advertising budgets.

Perhaps most importantly, these partnerships validate sustainable farming practices. When top-tier restaurants publicly choose organic, regenerative methods, they signal to the broader food industry that environmental stewardship and quality aren’t just compatible, they’re inseparable.

Chefs’ hands preparing whole vegetables with leafy tops and roots for a root-to-stem style dish
Root-to-stem cooking emphasizes using the entire ingredient, turning overlooked parts into standout flavors.

Innovative Sustainable Practices in High-End Kitchens

Walk into the kitchen of a top sustainable restaurant and you will see something different from the usual high-end operation. Beyond the precision and artistry, there is a deliberate system where nothing goes to waste and every resource is carefully managed. These kitchens prove that environmental responsibility and culinary excellence are not just compatible but mutually reinforcing.

Composting has moved far beyond simply tossing scraps into a bin. Leading restaurants now separate organic waste into multiple streams, creating closed-loop systems where vegetable trimmings become compost for their own herb gardens or partner farms. Some establishments track waste by weight and ingredient type, using data to refine purchasing decisions and reduce food waste emissions over time. What cannot be composted often finds another purpose entirely.

The creative use of by-products separates sustainable kitchens from conventional ones. Carrot tops become vibrant pestos. Fish bones and vegetable scraps transform into rich stocks. Stale bread gets ground into breadcrumbs or turned into croutons rather than discarded. This root-to-stem philosophy extends the value of every ingredient while reducing the volume heading to landfills. When restaurants save surplus food through preservation techniques like pickling, fermenting, and curing, they create signature items that define their menus.

  • Root-to-stem cooking that uses entire vegetables, from beet greens to broccoli stalks
  • House-made preserves and ferments that transform seasonal surplus into year-round ingredients
  • On-site kitchen gardens and rooftop farms that supply fresh herbs and microgreens
  • Renewable energy systems including solar panels and energy-recovery ventilation
  • Zero-packaging sourcing arrangements where ingredients arrive in reusable containers

Energy efficiency matters tremendously in kitchens that run twelve-plus hours daily. High-end sustainable restaurants invest in induction cooktops that heat faster while using less electricity, combi ovens that combine multiple cooking methods in one appliance, and LED lighting throughout. Smart ventilation systems adjust airflow based on actual cooking activity rather than running at full capacity constantly. These upgrades slash cooking energy consumption by thirty to fifty percent compared to traditional setups.

Water conservation takes multiple forms. Low-flow pre-rinse spray valves at dish stations use a fraction of the water without sacrificing cleaning power. Some restaurants install systems that capture and filter water from ice machines and steamers for reuse in non-food applications. Others work with suppliers who practice water-conscious agriculture, recognizing that sustainability extends backward through the entire supply chain. The result is kitchens that operate with remarkable efficiency while producing food that rivals any conventional fine dining establishment.

Fine dining kitchen compost bin with vegetable peelings and kitchen activity in the background
The composting corner in a high-end kitchen shows how sustainability practices can be integrated without sacrificing refinement.

Seasonal Menus: The Heart of Sustainable Fine Dining

Walk into a truly sustainable fine dining restaurant in July, and you’ll find a menu celebrating summer tomatoes and zucchini blossoms. Return in November, and those same chefs will be crafting dishes around root vegetables and winter squash. This isn’t just culinary whimsy, seasonal menus form the backbone of sustainable restaurant operations.

When restaurants commit to seasonal eating, they drastically cut their carbon footprint. A tomato shipped from halfway around the world in January carries an enormous environmental cost compared to one harvested from a nearby farm at peak ripeness. By aligning menus with local harvest cycles, fine dining establishments eliminate the need for long-haul transportation and energy-intensive greenhouse production. The ingredients arrive fresher, often within hours of harvest, which means better flavor and higher nutritional value on the plate.

This approach also changes how chefs think about their craft. Rather than ordering whatever ingredients they want year-round, seasonal constraints push culinary teams toward creativity. They must ask: What can we do with an abundance of snap peas right now? How do we make Brussels sprouts exciting for the third month running? These limitations spark innovation, leading to unique preparations and flavor combinations that wouldn’t exist in a kitchen with unlimited global access.

Many sustainable restaurants take this further by learning to preserve seasonally extending summer’s harvest into winter months through fermentation, pickling, and canning. A jar of preserved stone fruit becomes a January dessert component. Pickled ramps from spring appear as a garnish in fall dishes. This mirrors what home cooks and farmers have done for generations, connecting modern fine dining to traditional foodways.

The beauty of seasonal menus lies in their honesty. They tell the truth about where you are and what the land can provide right now, turning each meal into a reflection of place and time.

Seasonal fine dining table set with plated dishes featuring vegetables and fresh herbs
A seasonal tasting menu highlights how fine dining can feel luxurious while staying grounded in local harvests and careful sourcing.

What Everyday Diners Can Learn from Sustainable Fine Dining

You don’t need a Michelin star budget to eat more sustainably. The same principles that guide fine dining kitchens, thoughtful sourcing, minimal waste, seasonal eating, work beautifully in home cooking and everyday restaurant choices. What changes is the scale, not the philosophy.

Start by rethinking your relationship with ingredients. Fine dining chefs obsess over provenance because quality and sustainability go hand in hand. You can do the same by choosing local, organic produce when possible. It’s fresher, supports nearby farms, and typically requires less energy to reach your table. Even one farmers market trip per week shifts your eating habits toward seasonal rhythms.

Waste reduction translates directly from restaurant kitchens to home. Professional chefs use every part of an ingredient, carrot tops become pesto, chicken bones turn into stock, stale bread becomes croutons. Apply energy-efficient cooking techniques and plan meals around what you already have rather than impulse shopping. Store produce properly using eco-preservation methods to extend shelf life. These habits save money while reducing your environmental footprint.

Here’s how to incorporate fine dining sustainability principles into your daily routine:

  1. Shop at farmers markets or join a CSA to access seasonal, locally grown ingredients while supporting small-scale organic agriculture.

  2. Plan weekly menus around what’s in season rather than forcing out-of-season ingredients that require long-distance shipping.
  3. Reduce food waste by using scraps creatively, composting what you can’t use, and storing perishables properly.
  4. Support local restaurants that prioritize sustainable practices, even if they’re not fine dining establishments.
  5. Cook at home more often using whole ingredients, which gives you control over sourcing and reduces packaging waste.

The beauty of these practices is their flexibility. You won’t execute them perfectly every time, and that’s fine. Even small shifts matter. Choosing one seasonal vegetable over an imported option, saving vegetable scraps for stock, or asking a restaurant about their sourcing practices all contribute to a more sustainable food system.

Fine dining proves that environmental responsibility and exceptional quality aren’t opposing forces. They enhance each other. The same holds true whether you’re cooking Tuesday dinner or choosing where to celebrate an anniversary. Better ingredients, less waste, stronger connections to local food producers, these principles work at every price point and skill level.

Finding Sustainable Restaurants in Your Area

Finding restaurants that share your commitment to sustainability doesn’t require a hefty budget or inside connections. Start with the menu itself, which often reveals a restaurant’s priorities before you even step inside. Look for specific farm names rather than generic sourcing language. A menu that lists “tomatoes from Green Valley Farm” or “greens from Thompson Family CSA” signals direct relationships with local producers. Restaurants genuinely committed to sustainability typically highlight seasonal availability, sometimes noting when certain dishes will rotate off as ingredients change.

Certifications provide helpful shortcuts in your search. The Green Restaurant Association certification, LEED credentials for the building, and local sustainability seals indicate verified eco-friendly practices. Organic certification for ingredients, Fair Trade partnerships, and membership in organizations like the Sustainable Restaurant Association also matter. Don’t hesitate to ask your server direct questions about sourcing practices, composting programs, or seasonal menu changes. Staff at truly sustainable establishments usually welcome these conversations and can explain their restaurant’s specific commitments.

Online research extends your options significantly. Check restaurant websites for sustainability statements or farm partnership pages. Many now share their composting tonnage, energy reduction goals, or links to their ingredient suppliers. Search local food blogs and sustainability directories, which often maintain curated lists of eco-conscious establishments. Social media accounts frequently showcase chef visits to partner farms or highlight seasonal ingredient arrivals.

Remember that sustainable dining exists across price ranges. A neighborhood café buying from the farmers market and composting scraps lives these values just as authentically as upscale establishments with elaborate zero-waste programs. Your support matters regardless of where you choose to eat.

Sustainable fine dining proves that luxury and environmental stewardship aren’t opposing forces, they’re natural partners. These restaurants show us that the pursuit of excellence actually demands respect for ingredients, producers, and the planet. When a chef treats a carrot with the same reverence as a truffle, sourcing it from a local organic farm and using every part creatively, that’s not compromise. That’s craft at its highest level.

You don’t need a reservation at a Michelin-starred restaurant to embrace these principles. Every time you choose seasonal produce from your farmers market, support a CSA farm, or plan meals that minimize waste, you’re participating in the same movement. The real power of sustainable fine dining lies in its ripple effect, inspiring chefs at neighborhood bistros, home cooks rethinking their grocery habits, and eaters everywhere demanding better practices.

As more restaurants adopt these values and more diners vote with their wallets, we’re building a food system where quality, community, and sustainability reinforce each other. That future is already taking shape, one thoughtfully sourced meal at a time.

How CSA Cooking Classes Turn Farm-Fresh Produce Into Confident Home Cooks

Posted by darrell on
0
Uncategorized
How CSA Cooking Classes Turn Farm-Fresh Produce Into Confident Home Cooks

Cooking basics classes offered through Community Supported Agriculture programs teach CSA members how to prepare unfamiliar seasonal vegetables and transform their weekly produce boxes into practical, delicious meals. These hands-on workshops typically run 60 to 90 minutes and cover knife skills, vegetable preparation techniques, and simple recipes designed around what’s actually in season at your farm.

If you’ve ever stared at a kohlrabi or a bundle of garlic scapes wondering what to do next, you’re exactly who these classes serve. CSA farms across North America have discovered that educational programming doesn’t just help members use their shares more fully. It dramatically reduces turnover, builds community connections, and turns nervous novice cooks into confident advocates who renew year after year.

The concept is straightforward but powerful. Rather than generic cooking instruction, these classes focus on the vegetables members receive in their boxes each week. A June class might tackle spring greens and radishes, while August sessions dive into tomato preservation and summer squash creativity. Many farms bring the instruction right to pickup sites, making it convenient for members to attend before grabbing their CSA meals for the week.

Farmers benefit from reduced waste and stronger member relationships. Members gain practical skills that make their CSA investment more valuable. Whether you’re a farm considering adding classes or a consumer researching which CSA offers the best support, understanding how these programs work helps you make informed decisions about your local food journey.

CSA member in a farm kitchen inspecting seasonal vegetables like kale and kohlrabi before cooking.
A CSA member explores the weekly share and prepares to cook, turning unfamiliar produce into something manageable.

Why CSA Members Need Cooking Basics Classes

Picture this: you’ve just picked up your CSA box, brimming with vibrant greens, oddly-shaped root vegetables, and a bunch of herbs you can’t quite identify. You’re excited about supporting local agriculture, but as you stand in your kitchen staring at three pounds of chard and something labeled “kohlrabi,” a familiar anxiety sets in. You’re not alone. Thousands of well-intentioned CSA members face this weekly dilemma, caught between their commitment to sustainable eating and the practical reality of cooking with unfamiliar, seasonal ingredients.

The challenges stack up quickly:

  • What do I do with kohlrabi, and why does it look like an alien vegetable?
  • How to use a whole bunch of kale before it wilts into a soggy mess
  • Cooking for two when you receive enough produce for six people
  • Making dinner after work when every vegetable needs washing, trimming, and figuring out
  • Avoiding the guilt of throwing away expensive organic produce you couldn’t get to in time

This disconnect costs farms members. When subscribers repeatedly waste produce or feel overwhelmed, they don’t renew. Research shows that knowledge shapes household waste patterns, meaning the gap isn’t commitment but capability. Most CSA dropouts genuinely wanted to continue, they just didn’t know how to turn their weekly shares into actual meals their families would eat.

That’s where cooking workshops change everything. When farms teach practical skills aligned with what’s currently in the box, cooking techniques improve engagement and retention rates. Members gain confidence, waste drops, and the investment in organic produce finally feels manageable rather than stressful. The box transforms from a weekly puzzle into something you actually look forward to unpacking.

What Makes CSA-Based Cooking Workshops Different

CSA cooking workshops aren’t your typical cooking class where you follow a predetermined menu from a glossy cookbook. These sessions respond directly to what’s ripe right now, what’s packed in your share this week, and what’s growing just steps away from the kitchen. That connection creates an entirely different learning experience.

When you walk into a CSA workshop, you’re often handling vegetables harvested that morning. The instructor might point to the field where your rainbow chard came from or explain why this week’s tomatoes taste different from last week’s. This farm-to-table immediacy means the skills you learn apply instantly to the produce sitting in your fridge at home. There’s no wondering whether you can find the ingredients or whether they’ll be as fresh.

The seasonal focus distinguishes these classes from generic cooking instruction. Instead of learning to prepare asparagus in November, you’re mastering what to do with an abundance of summer zucchini or late-fall Brussels sprouts. The curriculum follows nature’s schedule, building your confidence with each season’s unique challenges. You’ll learn preservation when tomatoes flood your box in August, not as an abstract skill but as an immediate solution to the thirty pounds of sauce tomatoes you just brought home.

Perhaps most importantly, you’re learning alongside fellow CSA members who share your specific questions and frustrations. Everyone in the room received the same mysterious kohlrabi or overflowing bunch of kale. This shared experience creates genuine community, transforming isolated home cooks into a supportive network that continues exchanging tips and recipes long after the workshop ends. You’re not just taking a class; you’re joining a community that’s figuring out seasonal eating together.

Essential Skills Covered in CSA Cooking Basics Classes

Instructor and CSA members practicing vegetable prep during a cooking basics class.
Hands-on cooking instruction helps CSA members build confidence with basic prep and techniques for whatever arrives in their boxes.

Knife Skills and Vegetable Prep

Most CSA cooking workshops start with the knife work that intimidates people most: turning a knobby kohlrabi or dense butternut squash into dinner-ready pieces without losing a fingernger or spending 20 minutes wrestling with produce.

Instructors typically begin with proper grip and a stable cutting board, then move quickly to the vegetables members actually struggle with. You’ll learn the peeler trick for kohlrabi’s thick skin, how to safely halve winter squash (microwave it for 90 seconds first), and the fastest way to strip kale leaves from their tough stems. These aren’t restaurant techniques, they’re shortcuts that get food on the table faster.

The real value comes from handling vegetables you’ve never cooked before while someone experienced guides you. When your CSA box arrives with celeriac or romanesco, you’ll remember exactly how to break it down instead of shoving it to the back of the fridge. Workshops often provide cheap Y-peelers and basic chef’s knives so members can practice with decent tools, and many farmers send participants home with technique cards showing the vegetables they’re most likely to encounter in upcoming shares.

Preservation Techniques for Abundant Harvests

When your CSA box overflows with greens or delivers a dozen summer squash at once, knowing simple preservation tricks becomes essential. Most CSA cooking classes dedicate time to quick techniques that make produce last without requiring elaborate equipment or hours of work.

Blanching and freezing greens takes minutes: briefly dunk kale or chard in boiling water, shock in ice water, squeeze dry, and freeze flat in bags. You’ll have ready-to-use greens for soups and sautés all winter. Quick pickling transforms surplus cucumbers, radishes, or green beans into crunchy additions, just pack vegetables in jars with hot vinegar, salt, and spices. They’re fridge-ready within hours.

Herb pastes preserve summer’s bounty beautifully. Blend basil, cilantro, or parsley with olive oil and freeze in ice cube trays for instant flavor bombs. For members who want to go deeper, workshops often introduce basic canning methods like water-bath processing for tomatoes and jams.

Simple storage wisdom matters too: keeping carrots in damp sand, storing potatoes in darkness, wrapping greens in damp towels. These aren’t complex skills, they’re confidence-builders that prevent the heartbreak of wasted organic produce.

Building Flavor Without Complicated Recipes

The real transformation in CSA cooking classes happens when members stop following recipes line-by-line and start understanding flavor principles. Most workshops dedicate time to building confidence with simple seasoning frameworks that work no matter what vegetables arrive in your box.

The teaching starts with salt, acid, fat, and heat as foundational elements rather than mysterious chef secrets. A drizzle of olive oil, a squeeze of lemon, and a pinch of flaky salt can elevate roasted turnips or sautéed greens equally well. Instructors demonstrate this principle with whatever produce is abundant that week, showing how the same technique transforms completely different vegetables.

Many farms teach what they call “formula cooking” rather than rigid recipes. A basic stir-fry formula works for bok choy, snap peas, or sliced kohlrabi: hot pan plus oil plus aromatics plus vegetables plus finishing sauce. Members learn to swap vegetables freely while keeping the method constant, which builds genuine cooking confidence.

Simple sauce templates become game-changers for nervous cooks. A tahini-lemon dressing, a quick garlic-butter finish, or a honey-vinegar glaze each have three ingredients but transform anything from roasted carrots to steamed kale. Workshops often send members home with a handful of these foundational formulas written on cards, creating a toolkit rather than a collection of single-use recipes.

The focus stays relentlessly practical: get dinner on the table using what you have, not what a cookbook assumes you have.

How CSA Farms Structure Their Cooking Workshops

CSA farms have developed diverse workshop models to fit their resources, member needs, and seasonal rhythms. The key is finding a format sustainable for the farm while genuinely helpful to members navigating their weekly shares.

On-farm workshops create the strongest connection between food and place. Members gather in a farm kitchen, barn, or outdoor pavilion while the farmer or guest instructor demonstrates techniques using that week’s harvest. These typically run 90 minutes to two hours, often on weekends when members pick up shares. Equipment and ingredients come from the farm, though participants might bring their own knives or storage containers to practice with tools they’ll actually use at home. The hands-on environment builds community naturally as people chop alongside neighbors.

Virtual demonstrations exploded during 2020 and stuck around because they solve real problems: commute time, childcare conflicts, and weather uncertainties. A farmer can stream a 30-minute demo from their kitchen, showing members how to tackle the week’s challenging vegetable while answering questions in real time. Production quality doesn’t need to be fancy. Members care more about seeing actual techniques than perfect lighting. Recordings stay available for members who couldn’t attend live, extending the workshop’s value.

Seasonal series work well for farms wanting structured programming without weekly commitment. Four sessions timed to spring greens, summer abundance, fall roots, and winter storage crops give members a framework for the entire year. This model allows farms to bring in professional chefs or nutritionists for specific sessions, spreading costs across committed participants who pay upfront for the series.

Format Best For Typical Cost Time Commitment
On-Farm Classes Building community, hands-on learners $25-45 per session 2 hours plus travel
Virtual Demos Busy members, recorded access Free-$15 per session 30-45 minutes
Seasonal Series Committed learners, deeper skills $80-150 for 4 sessions 6-8 hours over season
Drop-In Sessions Flexible schedules, low barrier Free or donation-based 45-60 minutes

Drop-in sessions offer the lowest barrier to entry. Farms schedule informal cooking demos during regular pickup times, perhaps the first Saturday of each month. Members stop by if interested, watch for a bit, grab a recipe card, and continue with their day. No registration, no separate trip required. While engagement runs shallower than dedicated workshops, these casual sessions reach members who wouldn’t commit to a formal class but still need guidance.

Most farms bundle workshop costs into share prices or keep fees minimal, viewing education as member retention rather than profit center. Equipment stays simple: farms provide cutting boards, bowls, and basic tools, but participants bring their own knives to practice with familiar equipment.

Success Stories: Farms Making It Work

Three farms across North America show how cooking workshops transform CSA operations from delivery services into thriving food communities.

Willow Creek Farm: Monthly Potluck Model

Sarah Chen runs a 40-member CSA outside Portland and started hosting monthly potluck cooking sessions in her barn three years ago. Members bring one dish made from their shares while Sarah demonstrates a seasonal technique, like roasting root vegetables or quick-pickling summer squash. “I spend maybe two hours prepping, and members handle the rest,” Sarah explains. Her renewal rate jumped from 62% to 89% after introducing the potlucks. The secret? Members now know each other by name and share recipes via text between sessions. Several have become her farm volunteers during harvest crunch times.

Green Valley Farm: Professional Chef Partnership

This 200-member operation in Vermont partners with a local culinary instructor who leads quarterly hands-on workshops in a rented commercial kitchen. Members pay $25 per class, which covers ingredients and take-home recipe cards. Farm manager Tom Rodriguez initially worried about the logistics but found the investment worthwhile. “We calculated that keeping just eight more members each season pays for the entire workshop program,” he notes. The classes also became unexpected marketing, as participants often bring friends who later join the CSA. The farm-to-table CSA model strengthens when members see exactly how restaurant-quality meals come from their weekly boxes.

Midwest Growers Cooperative: Pooled Resources

Five small farms formed a cooperative that rotates hosting biweekly cooking demos at their farmers market booth. Each farm contributes one session per month, featuring their specialty crops. This shared approach lets tiny operations offer consistent programming without overwhelming any single farmer. Member retention across all five farms improved by an average of 23% in the first year, and the cooperative gained visibility that helped recruit 40 new members collectively.

Finished CSA cooking class meal on a wooden table with roasted vegetables and sautéed greens.
A home-cooked dish made from farm-fresh ingredients shows how CSA workshops turn weekly produce into satisfying meals.

Finding or Starting a CSA Cooking Workshop

Most CSA farms don’t advertise cooking workshops on their main websites, so your first step is simply asking. Email or call your farmer during the off-season when they’re less buried in harvest work. Frame it as member feedback: “I’d love to use more of my share but need help preparing unfamiliar vegetables. Would you consider hosting cooking demonstrations?”

If your farm already runs workshops, ask about frequency, cost, and whether they’re included in membership fees or offered as add-ons. Some farms bundle classes with premium share tiers, while others charge per session to cover instructor costs.

For CSA members wanting to start something new, gauge interest through your farm’s Facebook group or member newsletter. A simple poll asking “Would you attend monthly cooking sessions if offered?” gives farmers concrete data. When half a dozen members express interest, you’ve made a compelling case.

Farmers considering this addition should start small. Partner with a member who’s already a confident cook for an informal harvest potluck where everyone prepares one dish from that week’s box. This tests interest without major investment. Local extension offices and culinary schools often connect farms with instructors seeking teaching experience, sometimes at reduced rates or through grant-funded programs.

The National Sustainable Agriculture Information Service offers planning templates specifically for farm-based educational programming. Your state’s organic farming association likely lists farms successfully running workshops who’ll share their approach.

Cooking basics classes transform the CSA experience from a weekly challenge into a genuine partnership between farm and table. When members gain confidence with their produce, they stop viewing unusual vegetables as intimidating obstacles and start seeing them as exciting possibilities. This shift matters profoundly for both individual households and the broader local food movement.

The ripple effects extend beyond individual kitchens. Members who understand how to use their shares waste less food, support their farmers more enthusiastically, and often renew their memberships year after year. They become ambassadors for seasonal eating, sharing techniques with friends and family who might then join a CSA themselves.

Whether you’re already part of a farm share or considering joining one, cooking workshops deserve attention. Ask your farmer about existing classes or express interest in starting them. For those between CSA seasons, local extension offices and farm cooperatives often know which operations offer this support.

These classes represent sustainable living in action: reducing waste, strengthening local agriculture, building community skills, and celebrating the honest work of growing good food. That’s a recipe worth following.

How to Create a Soil Management Plan for Year-Round Farm Success

Posted by darrell on
0
Uncategorized
How to Create a Soil Management Plan for Year-Round Farm Success

A soil management plan is a written strategy that outlines how you’ll maintain and improve your soil’s health throughout the growing season and beyond. It works by helping you schedule amendments, track nutrient levels, prevent erosion, and build organic matter systematically rather than reacting to problems as they arise. Most farms and gardens can implement a basic plan in just a few hours using soil tests, observation, and seasonal planning calendars.

Key Takeaway: A well-executed soil management plan improves soil structure and fertility while reducing fertilizer costs by 20-30% and increasing crop yields through targeted, timely interventions. This proactive approach builds long-term sustainability instead of chasing short-term fixes.

Creating your plan doesn’t require expensive consultants or complicated software. You need current soil test results, an understanding of your crops’ nutrient demands, and a realistic timeline for applying amendments and cover crops. The payoff shows up quickly. Sarah Chen, who runs a two-acre CSA operation in Oregon, saw her tomato yields jump 40% in the second season after implementing a simple soil plan that focused on fall cover cropping and spring compost applications timed to her planting schedule.

The process adapts to any scale. Whether you’re managing a quarter-acre backyard garden or a 50-acre farm, the same core principles apply: test your soil, know what you’re growing, match amendments to actual needs rather than guessing, and verify results through observation and follow-up testing. This systematic approach transforms soil management from guesswork into a repeatable system that gets better each year as you refine what works on your specific land.

Tools and Materials You’ll Need

Setting up a successful soil management plan doesn’t require expensive equipment, but having the right tools makes the process smoother and more accurate. Start with soil testing equipment, you’ll need a reliable soil pH meter (around $20-40 for a decent probe-style meter) and a soil auger or probe for collecting samples from various depths. Many CSA farmers find that a simple stainless steel soil probe works perfectly for routine checks.

For your baseline assessment and ongoing monitoring, invest in a comprehensive soil test kit or plan to send samples to your local extension office. Home test kits ($15-30) work for quick checks, but professional lab analysis ($20-50 per sample) gives you the detailed nutrient breakdown you need for planning amendments.

Beyond testing, you’ll need tools organized by purpose:

  • Testing equipment: digital or analog pH meter, soil thermometer, penetrometer for compaction testing, sample bags and labels
  • Documentation tools: waterproof field notebook, smartphone with notes app or dedicated farm management software, camera for visual records, clipboard
  • Amendment application: wheelbarrow or garden cart, broadcast spreader for larger areas, measuring buckets or scoops for accuracy
  • Planning materials: large wall calendar or planner, graph paper or digital mapping tool for field layouts, weather tracking system

Don’t overlook a good garden spade and trowel for digging test pits to examine soil structure and root depth. A rain gauge helps you track moisture alongside your soil observations. For record-keeping, some farmers swear by simple spreadsheets, while others prefer apps like FarmLogs or even a dedicated three-ring binder with printed templates. Choose whatever system you’ll actually use consistently, the best documentation method is the one that fits your workflow and gets updated regularly throughout the season.

Close-up of hands holding dark, crumbly soil with visible organic matter.
Healthy soil should look dark and crumbly, with visible organic matter and a lively texture. This kind of baseline improvement is the foundation of a strong soil management plan.

Safety Considerations and Best Practices

While soil management is generally low-risk work, a few thoughtful precautions will protect both you and your land. Understanding proper handling and environmental impacts ensures your soil-building efforts enhance rather than harm your farm ecosystem.

When working with organic amendments like manure, compost, or blood meal, wear gloves to prevent skin irritation and potential pathogen exposure. Fresh manure requires extra care, always wash hands thoroughly after handling, and keep uncomposted manure away from areas where you’ll harvest crops within 120 days. Store amendments in covered containers to prevent moisture infiltration and nutrient leaching.

Warning: Never add amendments without testing your soil first, even organic materials can create nutrient imbalances or pH problems that harm crops and soil biology.

Soil testing equipment poses minimal hazards, but augers and probes can cause hand strain if you’re sampling compacted ground. Take breaks, use proper posture, and consider pre-moistening hard soil to ease penetration. If you’re using pH meters or electrical conductivity tools, follow manufacturer guidelines for calibration fluids and battery disposal.

Environmental precautions matter too. Avoid applying amendments before heavy rain, which can wash nutrients into waterways. Time your interventions for dry, calm days to prevent windborne dust from disturbing neighbors or getting into your lungs. When spreading amendments by hand or equipment, a simple dust mask provides extra respiratory protection. These straightforward practices keep soil management safe, effective, and respectful of the broader environment your farm inhabits.

Step-by-Step: Building Your Soil Management Plan

Step 1: Conduct Your Baseline Soil Assessment

Your soil management plan needs a solid foundation, and that starts with knowing exactly what you’re working with. Think of this baseline assessment as taking your soil’s vital signs, you can’t improve what you haven’t measured.

Start by dividing your growing area into zones based on how you use the space. A tomato bed that gets full sun needs separate testing from a shaded herb garden. For each zone, collect soil samples from 6-8 spots, digging down about 6 inches where roots actively feed. Mix these samples together in a clean bucket to get a representative sample for that area.

Send your samples to your state’s cooperative extension lab or a reputable soil testing service. Request a complete analysis that includes pH, nitrogen, phosphorus, potassium, organic matter percentage, and micronutrients. Some labs also test for soil texture and cation exchange capacity, both valuable for understanding your soil’s structure.

While waiting for results, walk your zones and document what you see. Note drainage patterns after rain, compaction from foot traffic, earthworm activity, and how easily a shovel penetrates the ground. Take photos. These observations, paired with your lab results, create the complete baseline picture you’ll reference throughout the growing year.

Gardener kneeling and using a soil probe near raised vegetable beds.
Soil testing and measurement help you understand current conditions before choosing amendments. This scene represents the hands-on baseline assessment stage of your plan.

Step 2: Set Your Soil Health Goals

With your baseline assessment in hand, it’s time to translate those numbers into concrete, achievable targets. Effective soil health goals are specific, measurable, and tailored to what you’re actually growing.

Start by identifying your priority crops and their specific soil requirements. If you’re planning tomatoes and peppers, aim for a pH between 6.0-6.8. For blueberries, you’ll need much lower, around 4.5-5.5. Don’t try to fix everything at once. Pick two or three key metrics that will have the biggest impact on your main crops.

Make your goals seasonal and incremental. Rather than “improve soil health,” set a target like “raise pH from 5.8 to 6.2 by spring planting” or “increase organic matter from 3% to 4% over the next growing season.” These timelines align with your planting cycles and give you clear checkpoints.

Consider your climate constraints too. If you farm in a region with heavy spring rains, prioritizing drainage and structure improvements might matter more than nutrient levels. Goals should reflect both what your crops need and what your environment allows you to achieve realistically.

Step 3: Map Your Seasonal Interventions

With your goals and baseline data in hand, the next step is translating them into a seasonal roadmap. Think of this as dividing your year into four distinct phases, each with specific soil-building tasks that align with your farm’s natural rhythm.

Spring is your soil preparation window. This is when you incorporate amendments identified in your testing, adding compost to raise organic matter, applying lime if pH is low, or working in rock phosphate for phosphorus deficiency. Schedule these activities two to four weeks before planting to give amendments time to integrate. Spring is also when you terminate winter cover crops, either by mowing and incorporating them or using the roll-crimp method for no-till systems.

Summer focuses on maintenance. Your soil is working hard during peak production, so plan for mulching to conserve moisture and suppress weeds. Schedule compost tea applications or side-dressing with organic fertilizers for heavy feeders like tomatoes. If you rotate quick crops, note when to add compost between plantings.

Fall is amendment season again. After harvest, test soil in beds that performed poorly and apply targeted corrections. This is your prime time to spread compost, manure, or mineral amendments because they’ll break down over winter. Plan which beds will receive cover crops increase soil organic matter and protect against erosion.

Winter means cover crops are doing the work. Map out which species go where, crimson clover for nitrogen, tillage radish for compaction, or winter rye for biomass. A seasonal diagram tool helps visualize these rotations and prevents scheduling conflicts. Mark your calendar for when to seed (typically six to eight weeks before first frost) and when you’ll terminate them in spring.

Step 4: Choose Your Amendments and Practices

Now that you’ve mapped your seasonal timeline, it’s time to select the specific amendments and practices that’ll actually improve your soil. Start with your soil test results, they’re your shopping list. If your pH is low, you’ll need lime; if phosphorus is lacking, bone meal or rock phosphate fits the bill. For nitrogen deficiencies, consider aged compost, blood meal, or well-rotted manure.

Match amendments to your timeline. Spring applications work best for quick-acting amendments like compost tea or fish emulsion. Fall is ideal for slower materials like rock minerals and green manures that break down over winter.

Cover crops deserve special attention in your plan. Legumes like clover and vetch add nitrogen, while grasses like rye build organic matter and prevent erosion. Choose varieties that fit your climate and the gap between cash crops, winter rye protects bare soil, while summer buckwheat suppresses weeds between plantings.

Integrate your amendments with your crop rotation blueprint and organic crop rotations. Heavy feeders like tomatoes benefit from compost applications before planting, while nitrogen-fixing cover crops prepare beds for subsequent crops.

Don’t forget management practices beyond amendments, reduced tillage, mulching, and maintaining permanent pathways all contribute to long-term soil health without requiring purchased inputs.

Step 5: Create Your Implementation Schedule

With your goals and interventions mapped out, you need a timeline that actually works with your farm’s rhythm. Start by pulling out your CSA planning checklist or planting calendar, your soil activities should weave around these commitments, not compete with them.

Block out your busiest weeks first: spring planting, peak harvest, market days. These are non-negotiable periods when complex soil tasks won’t happen. Schedule major activities like compost spreading or cover crop seeding during your slower windows, late fall after harvest wraps up, or early spring before the planting rush.

Break large tasks into smaller chunks. Instead of “spread compost on all beds in April,” plan “compost beds 1-5 on April 10, beds 6-10 on April 17.” This approach keeps you from getting overwhelmed during busy periods and ensures soil work actually gets done.

Include buffer time for weather delays and unexpected farm emergencies. If you need to plant cover crops by October 15, schedule them for October 1. Real farming rarely goes exactly as planned, and your soil management timeline should acknowledge that reality rather than pretend perfect conditions will materialize.

Step 6: Document Your Plan

A good soil management plan lives in a format you’ll actually use. Create a simple one-page calendar showing monthly tasks, or use a spreadsheet with tabs for soil tests, amendment schedules, and observations. Keep it accessible in your barn or phone. Leave space for notes after each activity, what worked, what didn’t, weather conditions, unexpected issues. This running record becomes invaluable when planning next year’s approach and spotting patterns over time.

Verifying Your Plan Is Working

A soil management plan isn’t finished once you write it down, verification keeps you on track and helps you catch problems before they hurt your harvest. Regular monitoring lets you see what’s working, what needs tweaking, and when to celebrate those wins that come from healthier soil.

Start with visual check-ins every three to four weeks during the growing season. Walk your beds or fields with a notepad and look closely at plant growth patterns, leaf color, and overall vigor. Dig down six inches in different spots to examine soil structure, does it crumble nicely in your hand, or is it still compacted? These quick observations often reveal trends before a formal test does.

Schedule follow-up soil tests at strategic points: mid-season (around 8-10 weeks after spring planting) and again in fall after harvest. Compare these results to your baseline assessment from step one. You’re looking for movement in the right direction, pH creeping toward your target range, organic matter ticking upward, nutrient levels stabilizing where your crops need them.

Watch for these key indicators that signal improvement:

  • Soil crumbles easily and holds together when lightly squeezed, showing better structure
  • Earthworms appear in greater numbers when you dig, aim for 10+ per shovel scoop
  • Plants show vigorous growth with deep green leaves and strong stems
  • Soil retains moisture longer between waterings without becoming waterlogged
  • Nutrient test results trend upward or stabilize within optimal ranges over consecutive seasons

If your soil holds moisture better after adding compost, you might integrate water-saving techniques to maximize that improvement and reduce irrigation needs even further.

When verification shows something isn’t working, maybe phosphorus levels haven’t budged despite amendments, or compaction persists in certain beds, adjust your plan immediately. Add that problem area to next season’s intervention schedule with a different approach, whether that means switching amendment types, timing applications differently, or trying a different cover crop mix.

Keep notes on everything you observe. A simple notebook entry like “July 15: peppers in bed 3 showing better color than last year, soil feels looser” gives you data to reference when planning next year’s strategies.

Lush green vegetable rows with visible soil life in healthy farm soil.
Healthy soil practices should show up as vigorous plant growth and signs of biological life like earthworms. This image captures the real-world payoff of verified soil improvements.

Real Success: How Valley View Farm Transformed Their Soil

When Sarah Martinez took over Valley View Farm’s three-acre CSA operation in 2024, she inherited compacted soil with a pH of 5.2 and organic matter barely reaching 2%. Her first-year yields disappointed members, and crop disease pressure was constant.

Rather than continuing the struggle, Sarah committed to a structured soil management plan that winter. Her baseline assessment revealed severe calcium deficiency and poor drainage in two main growing zones. She set clear goals: raise pH to 6.5, double organic matter within two years, and improve water infiltration.

Her seasonal approach started simple. Spring 2025 brought targeted lime applications based on zone-specific needs. She planted buckwheat and clover as summer cover crops in rotation, then added composted manure each fall. Winter rye protected bare beds. Sarah tested quarterly and documented every change in a simple notebook.

By fall 2026, the transformation was measurable. Soil tests showed pH at 6.3, organic matter at 3.8%, and calcium levels in optimal range. But the real proof came in her harvest reports. Tomato yields increased 40%, and she cut disease-related crop losses by half. Members noticed too, her waiting list grew from twelve to forty-seven families.

Sarah’s advice? “Start with one practice and build from there. I didn’t transform everything overnight, but having a plan meant every action moved me forward.”

Common Questions About Soil Management Plans

Creating your first soil management plan can feel overwhelming, and that’s completely natural. These questions come up regularly in our CSA community, so you’re not alone in wondering about the practical realities of soil planning.

How often should I update my soil management plan?

Review and adjust your plan each season based on soil test results and crop performance observations. A complete rewrite isn’t necessary, most farmers make minor tweaks quarterly and conduct full soil retesting annually or every other year.

What does a soil management plan typically cost?

Initial costs range from $50 to $300 depending on testing thoroughness and farm size. Ongoing expenses for amendments and testing average $100 to $500 annually for small CSA operations, though many costs are offset by improved yields and reduced input waste.

How much time does maintaining a plan require?

Expect to spend 2-4 hours creating your initial plan, then 30-60 minutes monthly for record-keeping and monitoring. Seasonal implementation tasks blend naturally into your regular farm work rather than adding separate time blocks.

Do small home gardens really need a formal plan?

Even a simple one-page plan helps backyard gardeners track what works and avoid repeating mistakes. The formality matters less than having written goals and basic records you can reference year to year.

When will I see actual results from my soil management efforts?

Some improvements like better water retention appear within one growing season. Significant organic matter increases and structural changes typically become noticeable after two to three years of consistent management.

The beauty of soil management planning is its flexibility. Start simple with basic soil tests and a few seasonal goals, then expand your plan as you gain confidence and observe what your specific land needs. Many successful CSA farmers admit their first plans were rough sketches on notebook paper, refined through seasons of hands-on learning. The act of intentional planning itself makes you a better soil steward, regardless of how polished your documentation looks.

Creating a soil management plan doesn’t have to be overwhelming. Start simple: test your soil, set one or two realistic goals, and map out basic seasonal activities. You can always add complexity as you learn what works for your specific conditions.

The real power of a soil management plan lies in how it connects everything together. Your soil test results inform which amendments to apply. Your seasonal calendar determines when to add compost or plant cover crops. Your monitoring reveals what’s working and what needs adjustment. Instead of reacting to problems as they arise, you’re building soil health intentionally throughout the year.

Whether you’re managing a small backyard garden or a full CSA operation, treating your soil as a living system that requires thoughtful care pays dividends. Healthier soil means more resilient crops, better yields, and less dependence on external inputs. Your plan becomes a living document that evolves with your understanding and your land’s needs.

The best time to start planning is now. Your soil will thank you, and so will your future harvests.

What Is Heat Preservation in Canned Food Temperature (and How Does It Work)?

Posted by darrell on
0
Uncategorized
What Is Heat Preservation in Canned Food Temperature (and How Does It Work)?

Heat preservation canned food temperature refers to the precise thermal thresholds required to safely eliminate harmful bacteria while locking in nutrients during the canning process, typically between 212°F for high-acid foods and 240°F for low-acid varieties.

Getting temperature right isn’t just a food safety checkbox. It’s the difference between jars that nourish your family through winter and those that spoil within weeks or, worse, harbor invisible dangers like botulism. For CSA members and home gardeners drowning in August’s tomato glut or September’s bean harvest, understanding these temperature principles transforms peak-season abundance into year-round eating security.

The science is straightforward but unforgiving. Each food type demands specific heat levels held for exact durations to destroy pathogens without cooking away the vitamins, minerals, and flavors you grew so carefully. Water bath canning works beautifully for acidic foods like pickles and jams, while pressure canning becomes non-negotiable for vegetables, meats, and anything with a pH above 4.6.

This guide breaks down the temperature requirements that keep your preserved food safe, explains how different preservation methods generate and maintain heat, and walks through practical techniques used by successful small-scale farmers who’ve built thriving value-added businesses around their canning operations. You’ll discover which foods need which temperatures, how to verify your equipment maintains those levels, and common pitfalls that compromise both safety and nutrition. Whether you’re putting up your first dozen jars or scaling to a commercial kitchen, mastering heat preservation means your hard-won harvest feeds you properly all year long.

What Is Heat Preservation in Canned Food Temperature?

Heat preservation in canned food temperature refers to the controlled application and maintenance of specific heat levels throughout the canning process to destroy harmful microorganisms while protecting the nutritional value of preserved foods. This scientific principle hinges on reaching and sustaining temperatures high enough to eliminate pathogens like Clostridium botulinum, which can thrive in the low-oxygen environment inside sealed jars, yet not so extreme that they strip away the vitamins and minerals that make your CSA produce valuable in the first place.

The process works through thermal energy transfer: heat penetrates the jar’s contents, raising the internal temperature to a safe threshold that halts bacterial growth and enzyme activity. For home canners working with seasonal farm share bounty, understanding this temperature relationship transforms preservation from guesswork into reliable food safety. When you process tomatoes at 212°F in a water bath or green beans at 240°F in a pressure canner, you’re not just heating food arbitrarily, you’re executing a precise scientific method that balances microbial destruction against nutrient retention.

Heat Preservation
The sustained application of thermal energy during canning to eliminate spoilage organisms while maintaining food quality and nutritional content.
Headspace Temperature
The temperature of the air gap between the food and the jar lid, which affects vacuum seal formation and heat distribution during processing.
Thermal Processing
The phase where jars are exposed to controlled heat for a specified duration, ensuring the food’s center reaches pathogen-killing temperatures.
Cooling Curves
The rate at which canned foods decrease in temperature after processing, influencing seal integrity and continued enzyme inactivation.

What sets heat preservation apart from simple cooking is its dual purpose: immediate sterilization through high temperature exposure, followed by the creation of anaerobic conditions that prevent recontamination. The vacuum seal formed during cooling keeps new bacteria out, while the initial heat treatment has already neutralized what was inside. This combination gives properly canned CSA vegetables and fruits their remarkable shelf stability, letting you enjoy August’s tomatoes in February without refrigeration.

How Heat Preservation Temperature Control Works

Home canning station with glass jars, lids, a water bath pot, and a thermometer on the counter
A clear look at a home canning station shows how temperature control tools fit into day-to-day preserving. The jars and water bath create a practical visual anchor for heat preservation concepts.

The Thermal Processing Phase

The thermal processing phase kicks off when you place sealed jars into boiling water or a pressure canner. Within minutes, the internal temperature of your CSA vegetables begins climbing toward the target range needed for safe preservation. This rapid heating doesn’t just warm the food, it initiates a crucial transformation that makes home canning possible.

As temperatures rise above 140°F, harmful microorganisms start to weaken. The real magic happens between 212°F and 250°F, depending on your canning method. At these temperatures, the destruction of bacteria by heat becomes highly effective, neutralizing pathogens like Clostridium botulinum that could otherwise thrive in your sealed jars. The sustained heat penetrates to the jar’s center, reaching every bean, tomato slice, or corn kernel from your farm share.

What’s remarkable is that this same heat treatment preserves most vitamins and minerals when done correctly. Water-soluble vitamins like vitamin C experience some loss, but overall nutritional value remains high, far better than letting fresh produce spoil unused in your fridge.

Temperature Maintenance and Cooling

After the initial heat treatment destroys harmful bacteria, the cooling phase becomes equally critical for preserving your CSA vegetables’ nutritional value. Rapid temperature drops can cause nutrient loss, particularly water-soluble vitamins like C and B-complex that leach out when condensation forms inside jars.

The ideal cooling process maintains gradual temperature reduction, typically dropping from processing heat to room temperature over 12 to 24 hours. This controlled descent allows the jar contents to contract slowly, creating the vacuum seal that prevents recontamination. When you rush cooling by placing hot jars in cold water or drafty areas, you risk thermal shock that cracks jars and incomplete seals that let spoilage organisms back in.

During cooling, the lid’s sealing compound softens from residual heat, then firms as it cools, bonding to the jar rim. You’ll hear that satisfying “ping” as each lid pulls down and seals. This process works best when jars cool undisturbed on towels or racks away from temperature extremes.

For your farm share produce, patient cooling means those summer tomatoes and green beans retain more of their original vitamin content months later.

Types of Heat Preservation Methods for Canned Foods

Water Bath Canning

Water bath canning operates at 212°F, the temperature at which water boils at sea level. This approach works for high-acid foods (pH below 4.6) because the acidic environment naturally inhibits bacterial growth, making the lower temperature sufficient for safety. When your CSA box arrives loaded with tomatoes, berries, peaches, or cucumbers for pickling, these are perfect candidates for boiling-water processing for high-acid foods.

The process requires submerging filled jars in boiling water for a specific duration based on jar size and altitude. At this temperature, yeasts, molds, and most bacteria die off, while the heat drives air from the jar to create a vacuum seal during cooling. Processing times range from ten minutes for small jars of jam to forty-five minutes for quart jars of whole tomatoes.

These time-tested canning methods preserve vitamin C and antioxidants reasonably well in your farm-fresh produce. Tomatoes, pickled vegetables, fruit preserves, salsas, and chutneys all thrive with water bath canning. The key is maintaining that rolling boil throughout processing and adjusting time upward if you live above 1,000 feet elevation, where water boils at lower temperatures.

Pressure Canning

Pressure canning uses higher temperatures than water bath methods, making it essential for preserving low-acid foods like green beans, corn, carrots, and other vegetables commonly found in your CSA delivery. While water bath canning reaches 212°F, pressure canners achieve temperatures of 240 to 250°F for low-acid foods by creating a pressurized environment. This elevated heat is necessary to destroy Clostridium botulinum spores, which can survive at boiling temperature but are eliminated at these higher ranges.

The pressure canner’s sealed environment traps steam, building pressure that raises the boiling point of water. At 10 to 15 pounds of pressure (depending on your altitude and canner type), you create the conditions needed to safely preserve proteins and low-acid vegetables. This method allows CSA members to make produce last longer while retaining valuable nutrients like vitamin C and B vitamins that might otherwise deteriorate with improper processing. The key is maintaining steady pressure throughout the recommended processing time, ensuring every jar reaches the target temperature at its center.

Steam Canning

Steam canning has gained traction among CSA members as a faster, more energy-efficient alternative to traditional water bath methods for high-acid foods. This technique uses atmospheric steam rather than boiling water to achieve the necessary 212°F processing temperature.

The method works by heating a small amount of water in the base of a specialized steam canner. As steam rises and surrounds the jars, it transfers heat directly through convection. Most CSA vegetables and fruits suitable for water bath canning, including tomatoes, pickles, jams, and chutneys, process well with steam, completing in roughly the same time.

Steam canning offers practical advantages when you’re facing a bumper crop from your farm share. The canner uses only 1-2 quarts of water versus the 7-8 gallons a water bath requires, reducing both heating time and kitchen humidity during summer preservation sessions. The lightweight equipment makes it easier to handle multiple batches.

However, steam canning isn’t suitable for low-acid foods requiring pressure processing, and you’ll need an approved steam canner with a temperature indicator to ensure safe processing. Always verify that your specific produce and recipe are approved for steam canning before proceeding.

Temperature Ranges and Their Impact on Nutrition

Different nutrients respond to heat in distinct ways, which is why understanding temperature ranges helps you stop nutrient loss from your CSA harvest. Water-soluble vitamins like vitamin C and several B vitamins start degrading around 180°F, while fat-soluble vitamins A and E tolerate higher temperatures better. The sweet spot for most home canning falls between 212°F for water bath methods and 240°F for pressure canning, hot enough to destroy pathogens but not so extreme that it obliterates nutritional value.

Processing time matters just as much as peak temperature. Those gorgeous heirloom tomatoes from your farm share retain about 90% of their lycopene when processed at 212°F for the minimum safe time, but holding them at that temperature for twice as long drops retention to around 70%. Minerals like calcium, iron, and potassium stay stable across all canning temperatures, which is good news for preserving leafy greens and beans.

Here’s what happens to specific nutrients at different temperature points:

  • Vitamin C degrades rapidly above 180°F; process berries and peppers at minimum safe times to preserve it
  • Folate in green beans and spinach retains best at 240°F for shorter durations rather than lower temperatures for longer periods
  • Beta-carotene in carrots and squash actually becomes more bioavailable with heat processing between 212-240°F
  • Polyphenol antioxidants in stone fruits survive best when canned immediately after harvest, regardless of temperature method

Your freshest CSA produce preserves best because enzymes haven’t had time to degrade nutrients before canning begins. Blanching vegetables from your farm box for 2-3 minutes at 212°F before packing jars deactivates enzymes that would otherwise continue breaking down vitamins during storage. This pre-treatment step, combined with quick processing at the correct temperature for your food’s acid level, locks in the nutritional benefits you’re counting on for winter meals.

Fresh CSA produce in a harvest basket on a table before canning
Fresh CSA produce ready for canning sets the stage for why heat preservation temperature matters. It reinforces the connection between peak-season nutrition and correct thermal processing.

Practical Uses for CSA Members

Managing Your Weekly Farm Share

When your CSA box arrives each week, resist the urge to can everything at once. Instead, group items by their acidity and required processing method. High-acid tomatoes, cucumbers, and berries can go straight into water bath canning at 212°F, while low-acid vegetables like green beans and carrots need pressure canning at higher temperatures.

Sort produce immediately: refrigerate what you’ll eat fresh within three days, and prioritize canning anything showing soft spots within 24 hours to lock in nutrients before they degrade. Check your month-by-month produce calendar to anticipate peak abundance weeks when you’ll need extended canning sessions.

Set aside three-hour blocks for pressure canning sessions since the warm-up and cool-down phases can’t be rushed without compromising safety. Water bath canning fits smaller time windows, you can process a batch of pickles or jam in under 90 minutes. Pack jars the night before if needed, but never start heating them until you’re ready to complete the full process that same day.

Success Story: Sarah’s Summer Tomato Preservation

Sarah Martinez joined Valley View CSA in 2020, overwhelmed by 40 pounds of peak-season tomatoes arriving every August. “They’d ripen faster than I could use them,” she recalls. After attending a local canning workshop, she learned that maintaining 212°F for 45 minutes in water bath canning preserved both safety and nutrients, vitamin C retention exceeded 85% compared to refrigeration alone.

She now dedicates two Saturdays each August to processing tomatoes at proper temperatures, tracking her thermometer religiously. “I discovered that rushing the warm-up phase compromised texture, while holding steady heat created restaurant-quality sauce,” Sarah explains. Her pantry now holds 60 jars annually, supplying her family with farm-fresh nutrition through winter.

Sarah’s system extends beyond tomatoes. She adapted temperature timing for peppers, green beans, and pickles using seasonal canning recipes as guides. Her advice? “Invest in a reliable thermometer and never rush the process. Proper heat preservation means my family eats genuinely local food year-round, not just during growing season.”

Common Temperature Mistakes to Avoid

Home canners eager to preserve their CSA haul often make preventable temperature mistakes that undermine safety or nutrition. Recognizing these errors helps you protect your investment in local, organic produce.

The most dangerous mistake is failing to reach and maintain required processing temperatures. Pressure canners must reach 240°F for low-acid foods like green beans and corn. Stopping early or assuming “close enough” creates conditions where botulinum spores survive. Always use a tested recipe and verify your pressure gauge accuracy yearly.

Rushing the cooling process ranks second among common errors. Opening the canner lid immediately or running cold water over jars causes rapid temperature drops that compromise seals and can crack jars. Natural cooling also allows time for heat to penetrate the jar center fully. Let pressure canners return to zero pressure naturally, then wait ten minutes before opening.

Underestimating the impact of jar size on processing creates hidden risks. A quart jar of tomato sauce requires longer processing than a pint because heat travels more slowly through greater mass. Using the wrong time for your jar size leaves cool spots where bacteria thrive.

Temperature inconsistency during processing happens when canners reduce heat too much mid-process to prevent vigorous boiling. This drops internal temperatures below the safety threshold. Maintain steady heat throughout the recommended time, gentle boiling is normal and necessary.

Starting with cold jars in hot water or hot jars in cold water creates thermal shock that cracks glass and wastes hours of work. Match jar temperature to water temperature before processing, and your carefully preserved CSA bounty will remain intact.

Person holding a sealed glass canning jar with sunlit reflections during cooling
A sealed jar cooling/finished on a table conveys successful heat preservation without relying on diagrams. It helps readers connect proper temperature control to reliable sealing and confident storage.

Frequently Asked Questions

CSA members who start preserving their farm share often have specific questions about temperature control. These answers address the most common concerns about heat preservation in home canning.

What temperature should I maintain for water bath canning my CSA tomatoes?

Water bath canning requires maintaining a rolling boil at 212°F (100°C) at sea level for the duration of your processing time. High-acid foods like tomatoes, pickles, and fruit preserves need this consistent temperature to eliminate harmful microorganisms while preserving nutrients.

Do I need to adjust temperatures if I live at high altitude?

Temperature remains the same, but processing time increases with altitude because water boils at lower temperatures above sea level. Add 5 minutes for every 3,000 feet above sea level for water bath canning, or adjust pressure for pressure canning according to USDA guidelines.

Can I reprocess jars that didn’t seal properly?

You can reprocess within 24 hours using the same temperature and time requirements, though you’ll lose some additional nutrients with the second heat exposure. After 24 hours, it’s safer to refrigerate and consume the food within a week rather than reprocess.

How much nutrition do I lose through heat preservation?

Properly temperature-controlled canning typically retains 60-80% of heat-sensitive vitamins like vitamin C, while minerals and fiber remain largely intact. This compares favorably to fresh produce stored for weeks, which can lose 50% or more of certain nutrients.

The key to successful canning lies in following tested temperature guidelines rather than experimenting. Your local extension office can provide altitude-specific charts and answer questions about unusual CSA items you want to preserve. Many CSA farms also host canning workshops where experienced members share their temperature control techniques and troubleshooting strategies for common crops in your area.

Types or components

Understanding the key elements that work together during canning helps CSA members control temperature effectively and preserve their harvest safely.

Heat Source: Your burner or heating element must deliver consistent, measurable heat. Gas stoves offer quick temperature adjustments, while electric coils provide steady output once calibrated. For pressure canning those low-acid CSA vegetables, reliability matters more than speed.

Thermal Mass: The water or steam surrounding your jars acts as a thermal battery, distributing heat evenly and maintaining target temperatures throughout processing. Insufficient water creates hot spots that compromise preservation.

Sealed Container: Mason jars with two-piece lids form an airtight barrier once processed. The vacuum seal that forms during cooling prevents recontamination and locks in the nutritional benefits you’re working to preserve.

Temperature Monitoring: Accurate thermometers and pressure gauges aren’t optional, they’re your safety net. Guessing temperatures risks both nutrition loss and dangerous bacterial survival.

Insulation: Your canner’s design, including lid fit and material thickness, determines how efficiently it maintains processing temperatures without constant fuel input, especially during those longer processing times required for root vegetables from your farm share.

Mastering heat preservation temperature isn’t just about food safety, it’s about honoring the work your farmers put into growing nutrient-dense produce. When you control temperature precisely during canning, you’re locking in the vitamins, minerals, and antioxidants that make your CSA share so valuable. Those peak-season tomatoes, peppers, and green beans retain their nutritional punch months after harvest, giving your family real food security.

Start small if you’re new to temperature-controlled canning. Pick one or two favorite CSA items and practice getting the temperatures right. Use a reliable thermometer, follow tested processing times, and don’t rush the cooling phase. You’ll quickly develop confidence as you see those perfectly sealed jars lining your pantry shelves.

The beauty of understanding heat preservation is that it transforms your relationship with seasonal abundance. Instead of feeling overwhelmed when thirty pounds of beets arrive in your farm share, you’ll see opportunity. You’re not just preserving food; you’re preserving the connection to your local food system, supporting sustainable agriculture, and ensuring your household enjoys farm-fresh nutrition year-round.

Your farmers grew it with care. You can preserve it with the same intention.

How to Choose Procurement and Logistics Systems for Your CSA: A Buying Guide

Posted by darrell on
0
Uncategorized
How to Choose Procurement and Logistics Systems for Your CSA: A Buying Guide

Efficient procurement and logistics management stands as the backbone of a successful CSA operation, directly determining whether members receive fresh produce on time and whether your farm stays profitable. The right system connects sourcing decisions, inventory tracking, and delivery coordination into a streamlined process that saves hours each week while reducing waste and ensuring consistent quality for your shareholders.

Most CSA farmers juggle procurement and logistics without a formal system, relying on memory and paper lists until the chaos of peak season overwhelms them. Orders get duplicated, supplies arrive late, delivery routes become inefficient, and produce sits too long before reaching members. The financial impact hits hard: one mid-sized CSA in Vermont calculated they lost nearly $8,000 in 2025 from spoilage and missed deliveries before implementing basic inventory management.

Key Takeaway: Optimized procurement and logistics cut waste by up to 30%, reduce delivery time by an average of two hours per distribution day, and improve member satisfaction through consistent quality and reliability. These systems pay for themselves within a single growing season for most operations.

The good news? You don’t need enterprise-level software or complex tracking systems to see dramatic improvements. CSA operations of every size can benefit from structured approaches that match their volume, budget, and technical comfort level. Small farms serving 30 members need different tools than larger operations coordinating multiple pickup sites for 300 shareholders.

This guide walks through the procurement and logistics systems available in 2026, comparing their costs, complexity, and suitability for different farm sizes. You’ll learn which factors matter most when choosing your approach, discover practical recommendations based on your operation’s scale, and avoid the common mistakes that drain time and money from CSA businesses.

Key Factors to Consider When Choosing Procurement and Logistics Solutions

Farm worker packing fresh mixed greens into reusable CSA crates on a packing table.
A packing room scene conveys how procurement and logistics support consistent quality from harvest to member delivery.

Scale and Complexity of Operations

The scale of your CSA operation determines whether a simple notebook and weekly truck run suffice or whether you need inventory software and coordinated delivery routes. A 25-member farm selling lettuce, tomatoes, and herbs can track supplies on a single spreadsheet and pack boxes in a few hours. Once you grow to 100 members offering fifteen crops plus occasional add-ons, you’re managing multiple plantings, staggered harvests, variable yields, and different delivery windows, suddenly you need clear procurement schedules, standardized packing procedures, and reliable reusable bins to move produce efficiently.

Product variety amplifies complexity faster than member count alone. Offering storage crops, value-added items, and seasonal extras means juggling diverse suppliers, varied shelf lives, and changing packing requirements week to week. A farm delivering only vegetables to nearby drop points faces different logistics than one coordinating eggs, bread, and dairy from partner farms across a twenty-mile radius. Match your procurement and logistics approach to your actual operational demands, not to what you hope to achieve someday.

Budget and Resource Availability

Every CSA faces the tension between what procurement and logistics systems *could* do and what the farm can realistically afford right now. The smartest approach isn’t choosing the cheapest option or the most feature-rich platform, it’s matching investment to actual operational pain points and available resources.

Start by calculating your true costs: staff hours spent on manual ordering, tracking errors that lead to waste or emergency purchases, delivery inefficiencies that burn fuel and time. A $50-per-month software subscription might seem expensive until you realize it eliminates six hours of weekly administrative work, effectively paying for itself at typical farm labor rates.

Consider infrastructure realistically. Do you have reliable internet for cloud-based systems? Adequate storage for bulk purchasing? A delivery vehicle that can handle route optimization? These foundational requirements often matter more than the management system itself.

Labor availability shapes everything. If you’re already stretched thin during peak season, a complex system requiring daily data entry will fail regardless of its capabilities. Sometimes the right choice is a simpler approach that your current team can actually maintain consistently, rather than an advanced solution that sits unused.

Technology Integration Needs

Technology comfort level plays a surprisingly large role in whether a procurement system actually gets used. A farmer who dreads screen time won’t maintain a sophisticated farm management platform, no matter how many features it offers. Conversely, a tech-savvy operator might waste hours on manual spreadsheets that digital tools could automate in minutes.

Start by honestly assessing your current technology habits. If you already use email, online banking, and smartphone apps comfortably, transitioning to farm management software will feel natural. If computers frustrate you, a hybrid approach works better, perhaps a simple inventory app paired with paper ordering forms you’re already familiar with.

Consider your staff’s abilities too. A system requiring daily tablet updates fails if seasonal workers struggle with the interface or lack reliable devices. The best technology matches your team’s real-world capabilities, not theoretical ideals.

Integration with existing tools matters equally. Will your procurement system sync with your accounting software? Can it export data for tax preparation? Standalone systems that require duplicate data entry create more work than they save, defeating the purpose entirely.

Types of Procurement and Logistics Systems Compared

Manual and Spreadsheet-Based Systems

Manual spreadsheet-based systems remain popular among small CSA farms because they require minimal upfront investment and work well for straightforward operations. You can track seed orders, supplies, and harvest quantities using free tools like Google Sheets or Excel, creating custom templates that match your workflow. Many farmers keep paper logs in the field for immediate recording, then transfer details to digital spreadsheets weekly.

These systems shine when operations are simple. A CSA serving thirty members can easily manage procurement by listing supplier contacts, order dates, quantities, and costs in one spreadsheet, while another tracks what goes into each week’s boxes. You control the format completely and can access records without internet connectivity if you maintain offline backups.

The main limitation appears as your operation grows. Manual entry takes considerable time and invites errors when you’re juggling harvest, packing, and delivery. Tracking inventory across multiple storage locations becomes cumbersome without automated updates, making smart warehousing practices harder to maintain. Spreadsheets also lack built-in member communication features, requiring separate emails or texts for delivery updates. If you’re comfortable with basic formulas and disciplined about weekly updates, this approach can serve you well through your first few seasons before scaling demands more integrated solutions.

Refrigerated storage room with clean shelves and bins for CSA produce inventory.
A refrigerated storage scene illustrates the physical capacity and inventory control needed to protect freshness and reduce waste.

Farm Management Software Platforms

Farm management software platforms offer CSA operators a centralized hub for handling procurement, inventory, and member logistics through a single digital interface. These systems typically combine supplier ordering tools with real-time inventory tracking, automated member communications, and delivery route planning. Popular platforms like Harvie, LocalLine, and Farmigo allow you to manage everything from seed orders to share box packing lists without switching between spreadsheets.

The main advantage is automation. Instead of manually updating harvest quantities and member allocations, the software adjusts inventory as you pack boxes and flags when you need to reorder supplies. Many platforms generate delivery manifests, send pickup reminders to members, and track payments in one workflow. This drastically cuts administrative time once you’re past the initial setup.

The tradeoff is cost and learning curve. Monthly fees typically run $50 to $300 depending on member count and features, and your team needs time to master the system. Tech-savvy operations with 50 or more members usually see the fastest return on investment, while smaller farms may find the upfront effort outweighs the efficiency gains until they expand.

Close-up of gloved hands holding procurement receipts and a clipboard near farm storage racks.
This close-up emphasizes procurement paperwork and record-keeping habits that help CSA teams stay organized without chaos.

Hybrid Approaches

Many CSA operators find their sweet spot by blending traditional methods with targeted digital upgrades rather than committing to an all-or-nothing approach. This strategy lets you maintain familiar workflows while solving specific pain points with technology.

A common hybrid model uses spreadsheets for procurement planning and inventory tracking while adopting specialized apps for member communication and delivery scheduling. For instance, you might keep supplier orders and seasonal planting schedules in Excel but use a mobile app like Harvie or LocalLine to automate harvest tracking and member notifications about box contents.

Another effective combination pairs paper-based field logs with cloud-based accounting software. Farmers often prefer handwritten notes during harvest and planting but appreciate QuickBooks or FreshBooks for invoicing members and tracking expenses. This approach preserves the convenience of clipboard-and-pencil fieldwork while ensuring clean financial records.

The key advantage is flexibility. You can add digital tools incrementally as your comfort grows and specific needs become clear, avoiding both the learning curve of comprehensive platforms and the limitations of purely manual systems. Start by digitizing your biggest bottleneck, whether that’s member billing, delivery route planning, or supplier coordination.

Cooperative and Network-Based Systems

Partnering with neighboring CSA farms transforms procurement and logistics from isolated challenges into shared opportunities. In cooperative networks, multiple farms pool their purchasing power to negotiate better prices on seeds, soil amendments, and packaging materials. A group of five CSAs ordering boxes together, for example, can cut packaging costs by 30% compared to individual purchases.

Distribution hubs serve as central collection points where farms drop off shares and members pick up from multiple CSAs at once. This reduces each farm’s delivery radius and fuel costs while offering members more variety. Some networks rotate truck usage weekly, so one farm handles all deliveries while others focus on production.

Food hubs and regional aggregators provide another model, managing procurement logistics for multiple farms through shared warehouse space, cold storage, and transportation routes. You pay a percentage of sales (typically 15-25%) but gain professional logistics management and access to institutional buyers alongside CSA sales.

The trade-off is coordination overhead. Networks require regular communication, standardized packaging, and aligned delivery schedules. Start small with one or two trusted farms before expanding your cooperative relationships.

Recommendations for Different CSA Models

For Small-Scale CSAs (Under 50 Members)

For farms serving fewer than 50 members, simplicity is your best friend. A basic spreadsheet paired with a paper checklist can handle most procurement tracking without overwhelming you during peak season. Keep one master sheet listing your seed suppliers, packaging vendors, and recurring inputs with contact details and typical order sizes. Update it after each purchase rather than trying to reconstruct everything at tax time.

For delivery logistics, a shared Google Sheet or simple email system works well to communicate pickup times and box contents. Many small CSAs successfully use a single central pickup location, your farm gate or a community spot, which eliminates complex routing and keeps fuel costs minimal. Invest in durable, stackable CSA crates rather than disposable boxes; the upfront cost pays back quickly through reuse and easier handling.

Track inventory with physical counts weekly rather than elaborate software. A whiteboard in your packing shed showing what’s ready to harvest and what needs ordering keeps the whole team aligned without logins or training.

For Mid-Size CSAs (50-200 Members)

Mid-size CSA operations hit a sweet spot where basic systems start creaking but full enterprise software feels like overkill. At this scale, you’re juggling enough volume that manual tracking becomes error-prone, yet you still need solutions you can actually manage without a dedicated IT person.

A dedicated farm management platform makes sense here, look for systems like Harvie, Local Line, or Farmigo that handle member management, delivery routing, and basic inventory tracking in one place. These typically run $100-300 monthly but save 10-15 hours weekly in administrative time. The payoff comes from automated packing lists, integrated member communications, and delivery route optimization.

For procurement, establish standing orders with key suppliers rather than ordering week-to-week. Create a seasonal procurement calendar that anticipates needs three months ahead, accounting for planting schedules and typical yields. Many mid-size CSAs benefit from joining a regional growers cooperative for bulk purchasing power on seeds, packaging materials, and storage supplies.

Keep one manual backup system, a simple spreadsheet tracking critical suppliers and delivery commitments. When your software hiccups during peak season, you’ll thank yourself for maintaining that safety net.

For Large or Multi-Farm CSAs (200+ Members)

Large CSA operations face coordination challenges that manual methods can’t handle efficiently. With multiple farms, hundreds of members, and complex delivery routes, you need robust systems that prevent bottlenecks and ensure accurate fulfillment.

Invest in comprehensive farm management software that handles multi-location inventory, automated ordering, route optimization, and member portal integration. Platforms like Harvie, Local Line, or Farmigo are built for this scale and can consolidate procurement data across partner farms while managing different distribution sites. Expect annual software costs of $2,000-$5,000, but the labor savings and reduced errors typically justify this investment within the first season.

Consider establishing a centralized packing and distribution hub rather than managing pickup points individually. Some multi-farm CSAs lease warehouse space where partner farms deliver consolidated orders, then pack and route member shares from one location. This streamlines logistics dramatically and allows you to employ dedicated packing staff rather than pulling farmers away from field work.

Implement barcode scanning or RFID tracking for procurement items and packed shares to maintain accuracy at scale. Springfield Valley Collective, a seven-farm CSA with 320 members, reduced packing errors by 87% after adopting scanning technology.

Build formal procurement agreements with partner farms that specify delivery windows, quality standards, and communication protocols. Weekly coordination meetings become essential to synchronize supply with member demand and adjust for crop fluctuations across multiple growing sites.

Common Mistakes to Avoid

Starting with overly complex technology is one of the most expensive mistakes new CSA operators make. Many farmers invest thousands in comprehensive farm management software before they’ve established their basic procurement workflows, only to find themselves overwhelmed by features they don’t need while still struggling with fundamental inventory issues. Begin with simple systems, even a well-organized spreadsheet, and add technology only when manual processes become genuine bottlenecks. You’ll save money and avoid the frustration of learning complicated software while simultaneously learning the rhythms of CSA operations.

Neglecting seasonal planning creates procurement chaos throughout the growing season. CSA operations have predictable seasonal patterns, yet many managers fail to plan procurement needs around planting schedules, harvest windows, and peak delivery periods. This oversight leads to last-minute scrambles for packaging supplies during harvest rushes, emergency orders that cost more, and missed opportunities to negotiate better prices through advance bulk purchasing. Map out your entire season’s procurement needs in winter, identify critical supply delivery dates, and build relationships with vendors who understand agricultural timelines.

Here are additional pitfalls that undermine CSA procurement and logistics efficiency:

  • Poor inventory tracking that leads to over-ordering supplies while running out of essential items at critical moments
  • Inadequate member communication about delivery changes, leaving subscribers confused and frustrated when logistics shift
  • No buffer capacity for handling crop failures or unexpected surpluses, forcing rushed decisions about alternative sourcing or storage
  • Ignoring storage capacity limitations when planning procurement, resulting in spoilage and wasted resources
  • Failing to standardize box sizes and packaging, which complicates packing procedures and increases labor time
  • Underestimating delivery logistics complexity, particularly fuel costs, route efficiency, and time requirements

Another critical error is not investing in proper systems to keep produce fresh throughout the procurement and delivery chain. Farmers sometimes focus entirely on growing beautiful vegetables while neglecting the cold storage, washing stations, and packing facilities that preserve quality from harvest to member pickup. Without adequate infrastructure for handling produce properly, even the best procurement planning won’t prevent quality deterioration that disappoints members.

Finally, trying to manage everything alone without building a support network limits your problem-solving capacity. Connect with other CSA operators to share vendor recommendations, discuss common procurement challenges, and learn from their mistakes rather than repeating them yourself.

Insulated delivery cooler and produce crates beside a rural roadside with a farmer in the distance.
This scene symbolizes the logistics side of CSA work, keeping produce protected and reliable until it reaches members.

Real-World Success: How Green Valley CSA Streamlined Their Operations

Sarah Chen started Green Valley CSA in 2019 with 35 members and a simple dream: connect her community with fresh, organic vegetables grown on her family’s 8-acre farm outside Portland. By year three, she’d grown to 120 members, but her procurement and delivery system hadn’t kept pace.

“I was spending twelve hours a week just managing supplies orders and coordinating deliveries,” Sarah recalls. “I’d forget to order twine until we were harvesting tomatoes, or I’d buy way too much of something because I couldn’t remember what we had left from last season.”

Her delivery chaos was worse. Members received inconsistent communication about pickup times. Some weeks Sarah would pack boxes at 5 AM to hit three different drop points, only to find members hadn’t shown up because they forgot their day.

The breaking point came when a seed order arrived three weeks late because Sarah had written the supplier’s email incorrectly in her notebook. She missed her broccoli planting window entirely.

Sarah started small. She adopted a basic farm management software that cost $40 monthly and let her track inventory, automate member emails, and plan procurement around her planting calendar. She consolidated her three pickup locations to one central spot with extended hours, which cut her delivery time from eight hours to three.

Within one season, the changes paid off. Sarah reduced her supply costs by 18% because she could see exactly what she had in stock before reordering. Her weekly administrative time dropped from twelve hours to four. Member retention jumped from 67% to 89%, with surveys showing that consistent communication made the biggest difference.

“I’m not naturally organized,” Sarah admits. “But having a system that works with how I farm, not against it, gave me back the time to actually grow food.”

Frequently Asked Questions

Starting with simple improvements to your existing system usually works better than a complete overhaul. Many CSA managers wonder whether they need specialized software or if their current spreadsheets will suffice. The answers depend heavily on your farm’s size, growth plans, and how much time you’re currently spending on procurement and logistics tasks.

What’s a realistic budget for procurement and logistics software?

Entry-level farm management platforms typically cost $20-50 monthly for small CSAs, while comprehensive systems range from $100-300 monthly for mid-size operations. Many farms start with free spreadsheet templates and upgrade only when manual tracking becomes a bottleneck.

How much time should I expect to spend on procurement planning each week?

Small CSAs generally need 2-4 hours weekly for procurement tasks, while larger operations might require 8-12 hours. This includes supplier communication, inventory checks, order placement, and delivery coordination.

Can I switch systems mid-season without disrupting member deliveries?

Transitioning between seasons is safest, but gradual mid-season changes work if you run systems in parallel for 2-3 weeks. Start by testing the new approach with one aspect like delivery route planning before moving procurement tracking over.

Which software platforms do CSA farmers recommend most?

Harvie, Local Line, and Farmigo consistently receive positive feedback from CSA operators for their balance of features and usability. However, the best choice depends on whether you prioritize member management, route optimization, or supplier integration.

The transition process itself needs careful planning. Keep backup records in your old system for at least one full growing season after switching, since you’ll often need to reference previous years’ procurement patterns and delivery data. Train any staff or family members helping with logistics before fully committing to a new approach.

Budget concerns shouldn’t force you into systems that don’t fit your operation. Free or low-cost options can work excellently for years if they match your workflow and scale. The key is choosing tools that save you more time than they cost to learn and maintain, allowing you to focus energy on growing quality produce rather than wrestling with overly complex logistics platforms.

Key buying factors

When selecting procurement and logistics systems for your CSA, prioritize solutions that match your current operational scale rather than overbuilding for hypothetical growth. A 30-member farm doesn’t need enterprise software, while a 150-member operation will outgrow spreadsheets quickly.

Budget realistically for total costs. Initial software fees are just the start. Factor in training time, hardware needs, ongoing subscription costs, and potential integration expenses. Many farms underestimate the labor hours required to transition systems.

Evaluate ease of use for your actual team. The best system is the one your staff will consistently use. If you have volunteers handling deliveries or rotating crew members managing inventory, complex platforms create bottlenecks. Test interfaces before committing.

Check integration capabilities with tools you already use. Your procurement system should connect with accounting software, member management platforms, and mobile apps for delivery tracking. Isolated systems create duplicate data entry and errors.

Finally, assess vendor support quality. CSA operations have seasonal peaks when you can’t afford system downtime. Choose providers with responsive support, clear documentation, and active user communities.

Choosing the right procurement and logistics approach for your CSA operation isn’t about finding the perfect system from day one. It’s about selecting solutions that work for where you are now while leaving space to adapt as your farm grows and member needs evolve.

Start small. Pick one area that currently drains your time or creates the most friction, maybe it’s coordinating deliveries, tracking seed orders, or managing member communication. Improve that single piece of your operation first, then build from there. This focused approach prevents overwhelm and lets you measure what actually makes a difference before investing more resources.

Remember that sustainable operations support sustainable farming. When you spend less time wrestling with spreadsheets or scrambling to source last-minute supplies, you have more energy for what matters most: growing nutrient-dense food and building relationships with your members. Efficient procurement and logistics systems don’t just save hours; they reduce stress during peak season and help you maintain the farming practices that drew you to CSA in the first place.

Connect with other CSA farmers in your region. They’ve already navigated these challenges and can share what worked, what flopped, and which investments paid off. Local farming networks and CSA coalitions offer practical wisdom you won’t find in any software demo. Your best procurement strategy might come from a conversation at the farmers market, not a sales pitch.

The systems you choose today shape the farm you’ll be running tomorrow. Choose wisely, start simply, and grow deliberately.

These 7 HACCP Principles Keep Your Harvest Safe from Farm to Table

Posted by darrell on
0
CSA Finder & Directory
These 7 HACCP Principles Keep Your Harvest Safe from Farm to Table

Food safety isn’t just for big processing plants—it belongs on your farm too. Whether you’re washing lettuce for your CSA boxes, storing tomatoes for market day, or preparing value-added products in your farm kitchen, the same principles that protect consumers at industrial facilities can safeguard your customers and your reputation. The Hazard Analysis and Critical Control Points (HACCP) system might sound intimidating, but it’s simply a logical, step-by-step approach to identifying where food safety risks exist in your operation and controlling them before they become problems.

For small-scale farmers and market gardeners, implementing HACCP doesn’t require fancy equipment or extensive documentation. It means understanding your workflow—from soil to sale—and recognizing critical moments where contamination could occur. Think of it as creating a safety net woven throughout your entire farm operation, complementing your existing post-harvest handling standards with systematic hazard prevention.

The seven HACCP principles follow a natural sequence that builds a complete food safety system. Master these in order, and you’ll transform how you think about producing safe food. You’ll identify potential hazards before they affect your harvest, establish control points that actually matter, and create simple records that demonstrate your commitment to quality. This practical framework adapts beautifully to farm-scale operations, protecting both the customers who trust your produce and the farming business you’ve worked hard to build.

Why HACCP Matters for Small Farms and CSA Operations

When you’re running a small farm or CSA operation, food safety might seem like something only big food companies need to worry about. But the reality is that farm reputation and customer wellbeing depend heavily on the care you take from harvest to delivery. HACCP (Hazard Analysis and Critical Control Points) provides a straightforward framework that helps protect both your customers and your business.

Fresh produce carries real risks when handling practices fall short. Contamination from soil, water, equipment, or human contact can introduce harmful bacteria like E. coli, Salmonella, and Listeria into leafy greens, tomatoes, melons, and other crops. According to the CDC, produce is responsible for nearly half of all foodborne illnesses in the United States. For small farms engaged in direct-to-consumer agriculture, one food safety incident can devastate years of relationship-building and trust.

Note: Even if you’re farming just a few acres, implementing HACCP principles demonstrates your commitment to food safety and helps build lasting consumer confidence in your products.

The good news is that HACCP doesn’t require expensive equipment or complicated processes. The FDA’s HACCP Principles & Application Guidelines outline a methodical way of identifying where problems could occur in your post-harvest handling and putting safeguards in place. Whether you’re washing lettuce, packing tomatoes, or storing root vegetables, HACCP helps you think through potential hazards and create simple, effective controls. For example, a Vermont CSA farmer discovered that implementing basic HACCP steps, like monitoring wash water temperature and tracking cooling times, actually streamlined her packing process while giving members peace of mind about the safety of their weekly shares. This practical approach to food safety strengthens your operation without compromising the personal touch that makes small farms special.

Principle 1: Conduct a Hazard Analysis

The first HACCP principle lays the foundation for your entire food safety plan by systematically identifying potential dangers that could affect your fresh produce. Think of it as putting on detective glasses to spot anything that might compromise the safety of your harvest before it reaches your CSA members’ tables.

Hazards fall into three main categories. Biological hazards include harmful bacteria like E. coli or Salmonella that can contaminate produce through manure-amended soil, wildlife intrusion, or unsanitary handling practices. Chemical hazards might involve pesticide residue from neighboring conventional farms, cleaning solutions used improperly, or fuel contamination from farm equipment. Physical hazards are tangible objects like stones, glass fragments, jewelry pieces, or bits of packaging material that could accidentally end up in your harvest bins.

To conduct your hazard analysis effectively, walk through your entire operation step by step. Start at the field where irrigation water quality matters tremendously. Is your water source tested regularly? Move to harvest activities where unwashed hands or dirty tools could introduce contamination. Consider your washing and packing stations where contaminated wash water can actually spread pathogens from one batch to another if not properly managed.

One inspiring example comes from Green Valley Farm in Ontario, where farmer Sarah discovered through her hazard analysis that birds roosting above her packing area posed a contamination risk. She installed simple netting and repositioned her work stations, dramatically reducing potential hazards without expensive renovations.

Document everything you identify, rating each hazard’s likelihood and severity. This creates your roadmap for the remaining HACCP principles and shows your commitment to delivering safe, wholesome food to your community.

Principle 2: Identify Critical Control Points (CCPs)

Once you’ve mapped out your entire harvest-to-storage process, the next step is identifying your Critical Control Points, or CCPs. Think of these as the make-or-break moments in your operation where a food safety hazard could develop if something goes wrong. A critical control point is defined as a step at which control can be applied and is essential to prevent or eliminate a food safety hazard or reduce it to acceptable levels.

Critical Control Points differ from regular control points because they’re essential for food safety. For example, while trimming damaged leaves from lettuce is a good practice, it’s not a CCP. However, your final wash station where you remove dirt and potential pathogens is definitely a CCP that requires careful monitoring.

So how do you identify these critical points on your farm? Ask yourself: If this step fails, could it directly lead to a food safety problem? Is this my last chance to prevent or eliminate a hazard before the product reaches customers? If you answer yes, you’ve likely found a CCP.

Common CCPs in farm operations include washing stations where produce gets its final cleaning, cooling processes that reduce temperatures quickly to prevent bacterial growth, and cold storage areas that maintain safe temperatures. For Ready Farms, a small lettuce operation outside Portland, identifying their refrigerated cooler as a CCP transformed their food safety approach. Owner Maria Chen shared that simply recognizing this critical point led them to install an alarm system that alerts them if temperatures rise above safe levels.

Remember, different farms will have different CCPs based on what they grow and how they handle it. A berry farm’s CCPs might look completely different from a root vegetable operation.

Proper washing stations are critical control points where farmers can prevent contamination and ensure food safety.

Principle 3: Establish Critical Limits

Once you’ve identified your Critical Control Points, the next step is setting measurable standards that tell you when things are safe and when they’re not. Think of critical limits as your safety boundaries—concrete numbers or conditions that separate acceptable from unacceptable.

For small-scale vegetable operations, these limits need to be specific and easy to monitor. Instead of saying “keep produce cold,” you’d specify “maintain cooler temperature between 34-38°F.” This precision removes guesswork and makes it clear when corrective action is needed.

According to food safety experts, critical limits must specify measurable parameters that can be consistently monitored and verified.

Here are common critical limits that work well for farm-scale operations:

Critical Control Point Critical Limit Why It Matters
Wash water temperature 50°F or below Prevents bacteria from entering produce
Cooling time after harvest Within 2 hours Slows bacterial growth
Cold storage temperature 34-38°F Maintains freshness and safety
Sanitizer concentration Per manufacturer specs Ensures effective cleaning

These standards should be based on scientific evidence or regulatory guidance. For wash water, the temperature matters because water warmer than your vegetables can actually pull bacteria inside through the pores. For leafy greens, that two-hour cooling window is critical for quality retention.

One Michigan farmer shared how implementing specific temperature limits transformed her CSA operation. By installing simple thermometers in her wash station and cooler, she could demonstrate to customers that safety wasn’t just a priority—it was measured and verified. The investment was minimal, but the confidence it built was invaluable. Your critical limits should be realistic for your operation while never compromising safety.

Principle 4: Establish Monitoring Procedures

Once you’ve identified your critical control points, the next step is keeping a watchful eye on them through consistent monitoring. Think of this as taking your farm’s vital signs—simple checks that help you catch potential issues before they become problems.

For small farm operations, monitoring doesn’t require expensive equipment or complicated systems. Start with temperature logs for your refrigeration units and wash water. A basic notebook with date, time, and temperature readings works perfectly. Check these at least twice daily, and you’ll quickly notice patterns or equipment issues that need attention.

Visual inspections are equally valuable and completely free. Train yourself and your team to spot signs of pest activity, equipment wear, or contamination risks during daily routines. Create a simple checklist that covers your packing area cleanliness, water clarity, and produce quality before distribution.

Water testing deserves special attention since it touches so much of your operation. Schedule regular testing based on your water source—well water might need monthly bacterial testing, while municipal supplies require less frequent monitoring. Keep a dedicated binder with all test results and inspection records.

Here’s a tip from successful farmer Maria Rodriguez, who runs a thriving CSA in Vermont: “I use my smartphone to take quick photos of temperature gauges and my packing area setup. It creates a visual record without extra paperwork, and I can easily share updates with my food safety team.”

The key is consistency over complexity. Choose monitoring methods you’ll actually maintain throughout the growing season. Document everything in a way that makes sense for your operation—whether that’s traditional paper logs, spreadsheets, or mobile apps designed for farm management.

Digital thermometer monitoring temperature of stored vegetables in farm cooler
Regular temperature monitoring ensures produce stays within safe ranges throughout storage and distribution.

Principle 5: Establish Corrective Actions

Even with the best monitoring systems in place, things can go wrong on a farm. Principle 5 is all about having a clear game plan for when critical limits aren’t met. Think of corrective actions as your emergency response protocol—a set of predetermined steps that protect food safety and get operations back on track quickly.

Warning: Corrective action plans must be established before problems occur, not scrambled together during a crisis when food safety is already at risk.

When monitoring reveals a deviation, your corrective action plan should address three key areas: what to do with the affected product, how to fix the immediate problem, and how to prevent it from happening again.

Let’s look at practical farm scenarios. If your walk-in cooler temperature rises above 40°F, your corrective actions might include: moving produce to a backup cooler immediately, checking the cooling unit for malfunctions, and evaluating whether the affected produce is still safe to distribute or needs to be discarded. If wash water testing shows contamination, you’d stop washing operations, drain and sanitize the system, verify water quality before resuming, and investigate the contamination source.

When freshly harvested greens sit too long before reaching cold storage, corrective actions could include implementing a harvest scheduling adjustment, adding interim cooling stations in the field, or reassigning staff to speed up the post-harvest workflow.

Documentation is critical here. Record what went wrong, when it happened, what actions you took, and how you verified the problem was resolved. Sarah Martinez, who runs a certified organic vegetable CSA in Vermont, keeps a simple corrective action log in her pack shed. “It’s saved us multiple times,” she shares. “We can spot patterns and fix recurring issues before they become serious problems.”

Principle 6: Establish Verification Procedures

Think of verification as stepping back to check the big picture of your food safety system. While monitoring is your day-to-day watch (like checking temperatures during harvesting), verification confirms that your entire HACCP plan actually works as intended.

Verification involves several activities that happen less frequently but are equally important. First, review your HACCP plan regularly—at least annually or whenever you introduce new crops, change processes, or experience a food safety issue. Sarah Chen, who runs a small vegetable CSA in Oregon, schedules her reviews every six months during her slower seasons, ensuring her procedures still make sense for her operation.

Equipment calibration is another key verification step. Your thermometers, pH meters, and scales need regular testing to ensure accuracy. A thermometer that reads incorrectly could mean you’re storing produce at unsafe temperatures without knowing it. Most small farms calibrate equipment monthly using simple ice-water tests or calibration solutions.

Testing procedures provide scientific confirmation that your system works. This might include periodic water testing from your irrigation source or swab tests on your washing station surfaces. While this sounds technical, many county extension offices offer affordable testing services specifically for small farms.

Finally, conduct periodic audits—even informal ones. Walk through your entire process with fresh eyes, or better yet, invite a fellow farmer or food safety expert to review your practices. These audits often reveal small improvements that make big differences in food safety.

Documentation of all verification activities keeps your system accountable and helps you spot patterns or problems over time.

Principle 7: Establish Record-Keeping and Documentation

The final principle brings everything together by creating a paper trail that demonstrates your farm’s commitment to food safety. Think of documentation as your farm’s food safety story—it shows what you’re doing, when you’re doing it, and how you’re keeping your produce safe for the families you serve.

Start with the essentials. You’ll want to maintain temperature logs if you’re storing produce in coolers, cleaning and sanitizing schedules for your wash stations and equipment, records of any corrective actions when something goes wrong, and notes from staff training sessions. Keep supplier information for inputs like organic fertilizers or seeds, along with any certifications you receive. These records prove you’re following your food safety plan consistently.

Key Takeaway: Essential farm records include temperature monitoring logs, cleaning schedules, corrective action documentation, employee training records, and supplier verification information. Maintain these records for at least two years to demonstrate your ongoing commitment to food safety.

For small farms, simplicity works best. A dedicated three-ring binder kept in a clean, dry location can serve as your documentation hub. Use plastic sheet protectors to shield records from dirt and moisture—farm environments can be tough on paperwork. Create simple checklists and forms that take just minutes to complete daily.

Digital options work wonderfully too. Free apps or basic spreadsheet templates on a tablet let you record information quickly while working. Many farmers photograph their paper logs weekly and store them in cloud folders as backup.

The magic number for retention is two years minimum, though keeping records longer provides valuable patterns about your growing seasons and operations. One organic farmer in Vermont shares that reviewing her three years of harvest logs helped identify the perfect timing for her tomato plantings, improving both yield and quality.

Remember, good documentation isn’t about creating mountains of paperwork—it’s about having simple, practical records that protect your customers and your farm’s reputation.

Farmer documenting food safety procedures in logbook at farm packing station
Maintaining detailed records of food safety practices protects both consumers and farm operations.

Putting It All Together: A Day in the Life of HACCP on Your Farm

Let’s follow Sarah, a small-scale organic farmer, through her Wednesday harvest. Before dawn, she reviews her Hazard Analysis (Principle 1) notes—wildlife near the lettuce patch means extra vigilance today. At her Critical Control Points (Principle 2), she checks the wash water temperature: 34°F, perfectly within her Critical Limits (Principle 3) of 32-38°F to prevent bacterial growth.

As workers arrive, Sarah implements her Monitoring Procedures (Principle 4). She records the water temperature every 30 minutes and watches her team follow proper handwashing protocols. When the thermometer reads 40°F mid-morning, her Corrective Actions (Principle 5) kick in immediately—she adds ice to bring temperatures back down and sets aside those greens for rewashing.

Throughout the day, her Verification Procedures (Principle 6) ensure everything runs smoothly. She spot-checks sanitizer concentration and reviews yesterday’s temperature logs. Every observation goes into her Record-Keeping system (Principle 7)—a simple binder with daily checklists and temperature sheets.

By afternoon, Sarah’s produce is properly cooled and packed for the farmers market or CSA pickup. Her HACCP system works quietly in the background, protecting her customers while giving her peace of mind. What once seemed overwhelming now feels like second nature—just part of growing food safely and responsibly.

Implementing the seven HACCP principles might seem overwhelming at first, but here’s the truth: these food safety practices are absolutely achievable for farms of all sizes. Whether you’re running a small backyard CSA or managing several acres, protecting your customers through proper food safety isn’t just good practice—it’s essential for building trust and safeguarding your farm’s reputation.

The beauty of HACCP is that you don’t need to tackle everything at once. Start small. Maybe begin by identifying your critical control points during harvest, then gradually build your monitoring and record-keeping systems as you grow more comfortable. Sarah Jenkins, a small-scale organic farmer in Vermont, started with simple handwritten logs and now has a streamlined system that takes just minutes each day to maintain.

Numerous resources are available to help you on this journey, from cooperative extension offices to online food safety courses designed specifically for small farms. The peace of mind that comes with knowing you’re doing everything possible to keep your customers safe is invaluable.

Your farm’s commitment to food safety reflects your dedication to quality and customer care. Take that first step today—review your current practices, identify one area to improve, and begin building your HACCP plan. Your customers, your community, and your farm’s future will thank you.

Why Whole Animal Butchery Connects You to Real Food (And Where to Experience It)

Posted by darrell on
0
Farm-to-Table Experiences
Why Whole Animal Butchery Connects You to Real Food (And Where to Experience It)

Whole animal butchery transforms your relationship with meat by connecting you directly to where your food comes from and honoring every part of the animal. When you participate in a farm-to-table butchery experience, you’re learning an ancient craft that reduces waste, supports local farmers, and ensures no protein goes unused—from premium cuts to organ meats and bone broth ingredients.

These hands-on workshops teach you to break down a whole pig, lamb, or beef into recognizable cuts while understanding muscle groups, proper knife techniques, and storage methods. You’ll leave with knowledge about which cuts work best for different cooking methods, how to save money by buying directly from farms, and the confidence to request custom cuts from your local butcher.

The sustainability impact is significant. Industrial meat processing often discards 30-40% of each animal, while whole animal butchery utilizes nearly everything. This approach supports farmers who raise livestock humanely on pasture, creating a transparent supply chain where you know exactly how your meat was raised, what the animals ate, and how they were processed.

Beyond the practical skills, these experiences build community connections. You’ll meet farmers who prioritize animal welfare, fellow food enthusiasts committed to ethical eating, and educators passionate about reviving traditional food crafts. Many participants discover that understanding the full process—though sometimes challenging emotionally—deepens their gratitude and mindfulness around meat consumption, leading to more intentional choices about quality over quantity.

What Whole Animal Butchery Really Means

Whole animal butchery represents a return to traditional meat processing methods where skilled craftspeople break down entire animals into various cuts, using virtually every part from nose to tail. Unlike conventional meat processing, which typically involves centralized facilities that reduce animals to standardized, plastic-wrapped portions, whole animal butchery happens on a smaller scale with deep attention to the unique qualities of each animal. This approach requires extensive knowledge of anatomy, blade skills, and an understanding of how different muscles and parts can be transformed into everything from premium steaks to flavorful sausages, bone broths, and rendered fats.

The philosophy behind this practice centers on honoring the animal’s life by ensuring nothing goes to waste. When a farmer raises livestock humanely on pasture and a butcher commits to utilizing the entire animal, it creates a circle of respect and responsibility. Organs become pâtés, bones turn into nutrient-rich stock, trim becomes ground meat or charcuterie, and even fat serves valuable culinary purposes.

Note: Whole animal butchery embodies a zero-waste philosophy that honors the animal’s sacrifice by using every possible part, transforming what conventional systems might discard into nourishing food.

This practice connects directly to sustainable agriculture principles by supporting small-scale farmers who prioritize animal welfare and environmental stewardship. When you purchase a quarter or half animal from a local farm, you’re participating in a food system that values quality over quantity and relationship over anonymity. The butcher becomes an educator, helping consumers understand different cuts and cooking methods, while farmers can receive fair compensation for their careful work.

Learning whole animal butchery takes time and dedication. Many passionate individuals now seek apprenticeships at local butcher shops or attend hands-on workshops at farms, discovering skills that were once passed down through generations. This revival strengthens local food systems and helps communities reconnect with where their meat truly comes from.

Butcher's hands skillfully breaking down beef on wooden butcher block in farm setting
Whole animal butchery requires skilled hands and deep knowledge of anatomy to properly break down and utilize every part of the animal.

The Farm-to-Table Connection: Why It Matters

Supporting Local Farmers and Economies

When you purchase a whole animal directly from a local farm, you’re making a meaningful investment in your community’s agricultural economy. Unlike conventional meat purchasing where farmers receive only a fraction of retail prices, whole-animal buying ensures producers receive fair compensation for their work. This direct relationship means farmers can sustain their operations, invest in sustainable livestock practices, and continue providing quality meat to their communities.

Consider Sarah Chen, a small-scale rancher in Ontario who nearly closed her operation five years ago. By partnering with local butchers to offer whole-animal purchases, she now serves 40 families annually, earning enough to expand her pasture-raised herd while implementing rotational grazing techniques that improve soil health.

This purchasing model also reduces financial pressure on farmers to maximize production at the expense of animal welfare. With guaranteed sales and fair prices, producers can focus on quality over quantity, raising animals humanely on pasture and avoiding factory farming shortcuts. Your decision to buy whole animals creates a ripple effect, strengthening local food systems and encouraging more farmers to adopt ethical, environmentally responsible practices.

Environmental Impact You Can Feel Good About

When you choose whole animal butchery from local farms, you’re making a choice that ripples positively through the environment. Unlike conventional meat that travels thousands of miles through multiple facilities, locally raised and processed animals dramatically reduce transportation emissions. Research confirms that local production offers environmental benefits across multiple measures.

Pastured animals play a surprisingly beneficial role in ecosystem health. As they graze, their hooves naturally aerate soil, while their manure returns vital nutrients to the earth. This creates a regenerative cycle that builds topsoil rather than depleting it. Well-managed grazing operations also support biodiversity by maintaining diverse plant communities and providing habitat for native species.

Small-scale farms practicing whole animal butchery typically embrace rotational grazing and responsible land stewardship. These farmers view their animals as partners in soil health rather than commodities to maximize. The result is healthier pastures, reduced erosion, and farmland that actually captures carbon rather than releasing it. By supporting these farms, you’re investing in agricultural practices that leave the land better than they found it.

What to Expect at a Whole-Animal Butchery Experience

Stepping into a whole-animal butchery workshop offers a transformative journey that connects you directly with the source of your food. These intimate, hands-on sessions typically take place in working farm settings or dedicated teaching facilities, where small groups gather around a carefully prepared workspace. The atmosphere strikes a balance between educational and reverent, acknowledging both the skill involved and the animal that made the learning possible.

Most workshops begin with introductions and a discussion about the animal’s life, the farm’s practices, and the philosophy behind nose-to-tail butchery. Instructors—often experienced farmers, butchers, or chefs—create a welcoming environment where questions are encouraged and no prior experience is assumed. The space itself usually features proper equipment, refrigeration, and safety gear, ensuring participants can focus on learning rather than logistics.

A typical session unfolds through these stages:

  1. Welcome and safety briefing covering proper knife handling, workspace organization, and hygiene protocols
  2. Educational overview explaining anatomy, muscle groups, and how different cuts suit various cooking methods
  3. Demonstration by the instructor breaking down primary sections and revealing the animal’s structure
  4. Hands-on practice where participants work individually or in pairs to separate specific cuts under guidance
  5. Discussion about utilizing every part, from organ meats to bones for stock
  6. Packaging session where participants prepare their portions to take home, often receiving recipe suggestions

Throughout the experience, instructors share stories about their farming journey, seasonal challenges, and why they’ve committed to sustainable practices. These personal narratives add depth to the technical skills being taught, helping participants understand the broader context of ethical meat production.

The learning process moves at a comfortable pace, with plenty of time for observation before attempting techniques yourself. Expect moments of uncertainty mixed with genuine accomplishment as you master new skills. Many participants describe feeling more connected to their food choices afterward, understanding the work and respect involved in bringing meat to their tables.

These workshops complement other farm tours and experiences, offering deeper engagement with sustainable agriculture. You’ll leave with practical knowledge, properly butchered cuts, and often newfound appreciation for the farmers and butchers who do this work daily.
Workshop participants learning butchery techniques from instructor at farm classroom table
Hands-on butchery workshops bring participants together to learn traditional skills while connecting with sustainable food practices.

Skills You’ll Learn and Cuts You’ll Discover

A whole-animal butchery workshop transforms your relationship with meat, teaching you skills that go far beyond what you’d find in a supermarket aisle. These immersive sessions guide participants through the complete breakdown of an animal, revealing the craftsmanship behind every cut and helping you understand exactly where your food comes from.

You’ll learn fundamental knife skills, including proper sharpening techniques and the essential cuts needed to navigate bone, muscle, and connective tissue safely and efficiently. Instructors demonstrate how to identify different muscle groups and explain why certain cuts suit specific cooking methods. Through these hands-on cooking skills, you’ll gain confidence working with whole cuts and develop an intuitive understanding of meat quality.

The real treasure lies in discovering cuts you’ve probably never seen packaged at the grocery store. Many workshops introduce participants to bavette steak, a flavorful cut from the flank that rivals expensive options when prepared correctly. You’ll encounter the teres major, often called the shoulder tender, which delivers exceptional taste at a fraction of premium prices. Collar cuts, cheeks, and various organ meats each offer unique flavors and textures that add diversity to your cooking repertoire.

Learning to utilize lesser-known cuts means less waste and better value. Workshop participants often share success stories about transforming tough cuts like shanks into rich, tender braises or making their own ground meat blends tailored to specific recipes. You’ll discover how to prepare stocks from bones, render fat for cooking, and cure simple charcuterie at home.

This knowledge empowers you to communicate confidently with local farmers and butchers, requesting specific cuts and understanding fair pricing. Rather than feeling limited by pre-packaged options, you’ll approach meat purchasing with creativity and purpose, making choices that honor both the animal and your commitment to sustainable, transparent food systems.

Assortment of various meat cuts arranged on wooden cutting board with fresh herbs
Understanding diverse cuts from whole animal butchery empowers consumers to use every part and discover flavorful options beyond standard supermarket selections.

Finding Farm-to-Table Butchery Experiences Near You

Finding local whole animal butchery experiences has become easier as more farms and food artisans recognize the growing interest in hands-on meat education. Your journey to discovering these unique opportunities starts closer to home than you might expect.

Community Supported Agriculture (CSA) farms often lead the way in offering educational programs beyond weekly vegetable boxes. Many CSAs that raise livestock host seasonal butchery workshops where members can learn traditional cutting techniques while gaining appreciation for every part of the animal. These intimate farm experiences create meaningful connections between eaters and their food sources, transforming abstract concepts of sustainability into tangible skills.

Specialty butcher shops in your area may offer weekend classes covering everything from basic knife skills to advanced charcuterie. These urban and suburban learning spaces make whole animal butchery accessible even if you don’t have direct farm access. Call ahead to ask about their educational calendar, as many shops schedule workshops around seasonal meat availability.

To locate these valuable experiences in your region, try exploring:

  • Local farmers markets where you can speak directly with livestock farmers about upcoming demonstrations
  • County agricultural extension offices that maintain directories of farm education programs
  • Online platforms dedicated to farm experiences and sustainable food workshops
  • Social media groups focused on homesteading and local food systems in your area

Don’t overlook the power of direct conversation. Many small-scale farmers who practice whole animal butchery host private workshops but don’t advertise widely. Strike up conversations at markets, join farm tours, and let farmers know you’re interested. These personal connections often lead to the most rewarding educational experiences, where you’ll learn not just techniques but the stories and philosophy behind ethical meat production.

Success Stories: Farmers and Butchers Making It Happen

Across North America, passionate farmers and butchers are revolutionizing how we think about meat by bringing whole-animal butchery back to local communities. These farmers’ stories showcase diverse approaches united by a common commitment to sustainability and education.

In Vermont’s Green Mountains, Sarah Chen transformed her family’s sheep farm into a hands-on learning destination. After struggling to find processors who valued every cut, she became a certified butcher herself. Now she hosts quarterly workshops where participants learn to break down whole lambs while discovering how nose-to-tail eating reduces waste. “People leave understanding that a lamb is more than just chops,” Sarah explains. “They take home cuts they’ve never tried and recipes that honor the whole animal.” Her waiting list extends six months, and her community has seen three new farm-to-table restaurants emerge from workshop alumni.

Meanwhile, in rural Oregon, fourth-generation rancher Miguel Rodriguez partners with a traveling butcher collective that serves multiple small farms. Together, they offer mobile butchery demonstrations at farmers markets, turning education into entertainment. Miguel raises heritage-breed cattle on rotational pastures and believes transparency builds trust. “When customers see the skill and respect involved in butchery, they understand why whole-animal purchases support better farming,” he notes. His model has inspired neighboring farms to coordinate community meat shares, making whole-animal buying more accessible.

In Ontario, Emma and James Foster run educational farm stays where guests participate in ethical livestock management and butchery basics. Their approach emphasizes the connection between pasture health, animal welfare, and meat quality. Visitors return home as ambassadors for sustainable agriculture, often starting their own buying clubs.

These innovators prove that whole-animal butchery creates ripple effects beyond individual farms, building food-literate communities invested in sustainable agriculture.

Making the Most of Your Whole Animal Purchase

Attending a whole animal butchery workshop often inspires people to take the leap and purchase directly from local farms. But before you commit to a whole or half animal, there’s some practical groundwork to cover. Let’s walk through what you need to know to make this sustainable choice work beautifully for your household.

First, assess your freezer situation. A quarter beef requires approximately 4 cubic feet of freezer space, while a half needs around 8 cubic feet, and a whole animal demands 16 cubic feet or more. If you don’t have a chest freezer, consider it a worthwhile investment—many farmers say it’s the single best purchase they made for their sustainable eating journey. Alternatively, split your order with friends, family, or neighbors who share your values about ethical meat sourcing. This creates community connections while making the financial commitment more manageable.

Note: Buying in bulk typically saves $2-4 per pound compared to retail prices, and splitting a half animal between two families often provides the perfect variety without overwhelming your freezer.

Speaking of variety, you’ll receive cuts you might not normally purchase—from premium steaks to ground meat, roasts, organ meats, and soup bones. This diversity is actually a gift that encourages culinary creativity and nose-to-tail eating. Start meal planning around your cuts rather than shopping for specific recipes. Dedicate time to learning new cooking methods for unfamiliar cuts—slow-braising tougher cuts yields incredibly flavorful meals, while organ meats pack exceptional nutrition. Many farmers provide cut sheets explaining each piece and cooking recommendations, turning your freezer into an adventure in sustainable gastronomy.

Embracing whole animal butchery experiences offers far more than just learning to cut meat—it creates a profound shift in how we relate to our food. These hands-on opportunities transform us into conscious consumers who understand the true value of every cut, the effort behind sustainable farming, and the responsibility that comes with eating meat. By participating in these workshops, you’re directly supporting farmers who prioritize animal welfare and environmental stewardship, helping build a more resilient local food system.

The journey from whole animal to table reconnects us with traditions nearly lost in our modern convenience culture. You’ll gain practical skills, deepen your appreciation for quality ingredients, and join a growing community committed to transparency in food production. Whether you’re already shopping at farmers markets or just beginning to explore sustainable options, seeking out butchery classes near you is a powerful next step.
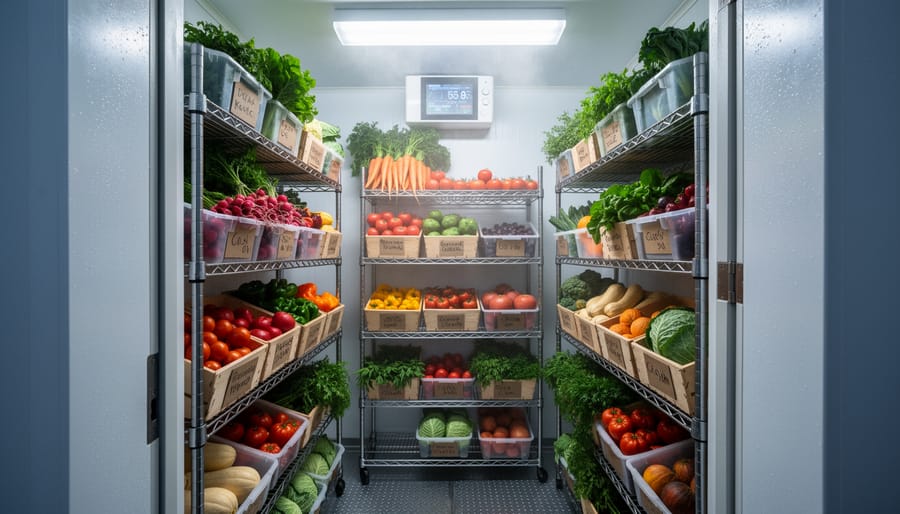
Start by reaching out to local farms, culinary schools, or meat CSAs in your area. Ask questions, get your hands dirty, and don’t be intimidated by the learning curve. Every expert butcher started exactly where you are now. This investment in knowledge pays dividends through better meals, reduced waste, and meaningful connections with the people growing your food.

The Three Pesticide Types Every Organic Gardener Should Understand

Posted by darrell on
0
Agroecology and Ecosystem Practices
The Three Pesticide Types Every Organic Gardener Should Understand

Identify your pest problem before reaching for any solution—even organic pesticides work best when you know exactly what you’re fighting and can time applications to target vulnerable life stages. Natural pesticides fall into three distinct categories that every sustainable grower should understand: biological controls using living organisms like beneficial nematodes or Bacillus thuringiensis bacteria, botanical pesticides derived from plants such as neem oil or pyrethrin, and mineral-based options like diatomaceous earth or copper sprays.

Start with the least disruptive option first. Biological pesticides target specific pests without harming beneficial insects, making them ideal for maintaining garden ecosystem balance. When Sarah Chen introduced parasitic wasps to her quarter-acre market garden in Vermont, she eliminated cabbage worm damage by 90% without spraying anything at all. Botanical pesticides offer broader action when problems escalate, though they require careful timing since many break down quickly in sunlight. Apply neem oil in early morning or evening to maximize effectiveness and protect pollinators during their active hours.

Reserve mineral pesticides for persistent problems or preventative protection against fungal diseases. These options often have longer residual effects but can impact soil chemistry with repeated use, so rotate your approaches seasonally. Understanding these three categories empowers you to create an integrated pest management strategy that protects your crops while nurturing the complex web of life that makes organic growing successful. The goal isn’t eliminating every pest—it’s maintaining balance where your plants thrive alongside the beneficial organisms that support them naturally.

What Makes a Pesticide ‘Agroecological’?

When most people hear “pesticide,” they picture chemical sprays that eliminate every bug in sight. But in agroecological farming, pesticides serve a fundamentally different purpose. Rather than waging war against nature, agroecological pest management works in harmony with it, treating challenges as opportunities to strengthen your farm’s natural defenses.

The key difference lies in philosophy and approach. Conventional pest control typically relies on synthetic chemicals designed to quickly kill target pests, often disrupting entire ecosystems in the process. Agroecological methods, on the other hand, focus on ecosystem management, building biodiversity and resilience so your farm can naturally regulate pest populations. Think of it as supporting your immune system rather than constantly taking antibiotics.

Note: In agroecological systems, the goal isn’t to eliminate all pests, but to manage them at levels where beneficial insects, birds, and other natural predators keep populations in balance.

This approach requires rethinking what we mean by “pesticide.” In organic and agroecological contexts, these products come from natural sources like plants, minerals, or beneficial microorganisms. They work more gently, targeting specific problems while preserving the helpful insects and soil organisms that keep your garden thriving.

Sarah Martinez, who runs a successful CSA operation in Ontario, describes her shift in thinking: “I stopped asking ‘How do I kill this pest?’ and started asking ‘Why is this pest here, and what’s out of balance?’ Once I focused on building healthy soil and attracting beneficial insects, my pest problems practically solved themselves.”

This holistic perspective means that agroecological pesticides are always used as part of a broader strategy, never as standalone solutions. They’re the safety net, not the foundation.

Close-up of biological pesticide application on cabbage leaf with caterpillar pest
Biological pesticides like Bacillus thuringiensis target specific pests while preserving beneficial insects in the garden ecosystem.

Type 1: Biological Pesticides (Biopesticides)

Microbial Pesticides

Nature has its own pest control army, and microbial pesticides harness these tiny warriors to protect your crops. These living organisms—bacteria, fungi, and viruses—work like precision tools, targeting specific pests while leaving beneficial insects, pollinators, and other garden helpers completely unharmed.

The star player in this category is Bacillus thuringiensis, commonly called Bt. This naturally occurring soil bacterium produces proteins that are toxic to caterpillars but harmless to humans, pets, and beneficial insects. When caterpillars ingest Bt-treated plants, the proteins disrupt their digestive system, stopping them from feeding within hours. It’s particularly effective against cabbage worms, tomato hornworms, and other leaf-munching larvae. Apply Bt in the early morning or evening when caterpillars are actively feeding, and reapply after rain.

Another effective option is Beauveria bassiana, a fungus that naturally infects soft-bodied insects like aphids, whiteflies, and thrips. The fungal spores attach to the pest’s body, penetrate its outer shell, and grow inside, eventually killing it. This works best in humid conditions and may take several days to show results.

Ontario farmer Maria Chen shares her success: “After switching to Bt for my organic brassicas, I finally conquered cabbage worms without harming the ladybugs and lacewings that patrol my garden. It’s been a game-changer for maintaining my organic certification while keeping plants healthy.”

These microbial pesticides work best as preventive measures or when pest populations are young and small.

Plant-Derived Pesticides

Nature provides some of the most effective pest control solutions right in our gardens and forests. Plant-derived pesticides, also called botanical insecticides, harness the protective compounds that plants have evolved over millions of years to defend themselves against pests.

Neem oil, extracted from the neem tree native to India, stands out as a versatile organic pest fighter. It works by disrupting insect hormones, preventing larvae from maturing while also acting as a feeding deterrent. Many organic farmers swear by weekly neem applications during growing season to manage aphids, whiteflies, and spider mites. The beauty of neem is its gentle impact on beneficial insects like bees and ladybugs when applied correctly.

Pyrethrum, derived from chrysanthemum flowers, delivers quick knockdown action against a broad spectrum of insects. It attacks the nervous systems of pests rapidly, making it ideal for immediate infestations. However, its fast breakdown in sunlight means you’ll need to time applications for early morning or evening.

Essential oils from rosemary, peppermint, and clove offer another botanical approach. These work primarily as repellents and contact killers, perfect for smaller garden areas or greenhouse settings.

Within integrated pest management strategies, these plant-derived options shine brightest when combined with other practices. Sarah Chen, an Oregon vegetable grower, rotates neem treatments with beneficial insect releases and has reduced pest damage by 80 percent. She emphasizes patience: “Botanical pesticides work with nature’s timeline, not against it.” The key is consistency, proper timing, and remembering that these tools work best as part of a holistic approach rather than standalone solutions.

Real Farm Success: Maria’s Vineyard Story

Maria Rodriguez transformed her five-acre California vineyard after persistent pest issues pushed her to rethink her approach. “I was spending over $3,000 annually on synthetic pesticides, and the grape leafhoppers kept coming back stronger,” she shares.

Three years ago, Maria made the switch to biological pesticides, starting with Bacillus thuringiensis for caterpillar control and introducing beneficial nematodes for soil-dwelling pests. The transition wasn’t without hurdles. “The first season was rough,” Maria admits. “I had to learn patience and accept that biological control works differently—it’s about balance, not elimination.”

She now uses pheromone traps for monitoring and releases lacewings to manage aphid populations naturally. Her biggest challenge was adjusting her expectations around pest damage thresholds. “I learned that a few chewed leaves don’t mean crop failure.”

The results speak for themselves: Maria’s input costs dropped by 40%, her soil health improved dramatically, and she achieved organic certification. “My wines actually taste better now,” she says with pride. “Customers tell me they can taste the difference when grapes grow in truly healthy soil.”

Best Practices for Using Biopesticides

Getting the most from biopesticides requires thoughtful timing and application. Apply them early in the morning or late evening when beneficial insects are less active and conditions are cooler. Since many biopesticides contain living organisms, they work best when temperatures are moderate and humidity is present.

Store biopesticides properly in cool, dry locations away from direct sunlight, and always check expiration dates since their active ingredients can lose potency over time. Mix only what you’ll use immediately, as prepared solutions often don’t keep well.

Combine biopesticides with other sustainable practices for better results. Rotate different biopesticide types to prevent pest resistance, and integrate them with companion planting, crop rotation, and habitat creation for beneficial insects. One Michigan CSA farmer shared how pairing Bt applications with strategic marigold borders reduced her pest problems by 70% while creating a haven for pollinators.

Remember that biopesticides work preventatively and may take longer than synthetic options. Monitor your crops regularly, apply at the first sign of pests, and be patient. You’re building a balanced ecosystem, not just eliminating problems.

Type 2: Botanical and Mineral-Based Pesticides

Mineral Pesticides in Action

Mineral-based pesticides have been protecting crops for centuries, and they remain valuable tools in organic farming today. Unlike synthetic chemicals, these naturally occurring substances offer effective pest management while fitting perfectly into sustainable growing systems.

Sulfur stands as one of the oldest fungicides still in use. When applied as a fine dust or wettable powder, sulfur particles disrupt fungal spores, preventing diseases like powdery mildew, rust, and black spot from taking hold. Many organic orchardists swear by sulfur sprays during humid spring weather when fungal pressure peaks. The key limitation? Sulfur can harm beneficial insects if overused, and it becomes less effective in temperatures above 90 degrees Fahrenheit, sometimes even causing leaf burn in extreme heat.

Copper compounds work wonders against bacterial diseases such as fire blight and bacterial spot. These minerals create an inhospitable surface environment where bacteria simply cannot thrive. Small-scale vegetable growers often apply copper sprays preventatively during wet periods when bacterial infections spread most rapidly.

Mineral Type Target Issues Best Application Timing Organic Certified
Sulfur Fungal diseases Early morning, cool weather Yes
Copper Bacterial problems Before rain events Yes
Diatomaceous Earth Soft-bodied insects Dry conditions Yes

Diatomaceous earth takes a completely different approach. These microscopic fossilized algae create sharp edges that pierce insect exoskeletons, causing dehydration. It works brilliantly against slugs, beetles, and aphids when applied as a barrier around plant bases.

The main consideration with mineral pesticides is persistence. Copper can accumulate in soil over time, potentially affecting soil health. The sustainable approach means using these tools strategically and sparingly, rotating with biological controls, and always monitoring for actual pest pressure rather than spraying preventatively out of habit.

Macro view of diatomaceous earth mineral pesticide on soil with insect pests
Mineral-based pesticides like diatomaceous earth work through physical action rather than chemical toxicity.

Soap and Oil Sprays

Soap and oil sprays represent some of the gentlest yet effective pest control methods available to organic gardeners. These low-impact solutions work by suffocating soft-bodied insects like aphids, whiteflies, spider mites, and mealybugs, making them perfect for anyone committed to sustainable growing practices.

Insecticidal soaps use potassium salts of fatty acids to break down insect cell membranes on contact. You can purchase ready-made products like Safer Brand Insect Killing Soap, or create your own by mixing 1-2 tablespoons of pure liquid castile soap with one quart of water. Just avoid dish detergents, as they often contain degreasers and additives that can harm plants.

Horticultural oils, including neem oil and dormant oils, coat insects and their eggs, disrupting their life cycles. These work especially well during dormant seasons when you can apply heavier concentrations without damaging foliage. During the growing season, lightweight summer oils protect delicate leaves while still controlling pests.

Sarah Chen, an organic farmer in Vermont, swears by her weekly neem oil routine. “I spray early morning or evening when beneficial insects are less active,” she shares. “It’s kept my tomatoes pest-free for three seasons without harsh chemicals.”

Application timing matters tremendously. Always test on a small plant area first, spray during cooler parts of the day to prevent leaf burn, and reapply after rain. Remember, direct contact is essential since these sprays don’t have residual effects. With consistent application and proper timing, soap and oil sprays become powerful allies in your organic pest management toolkit.

Environmental Considerations

Here’s the truth many gardeners don’t realize: just because a pesticide is natural or organic doesn’t mean it’s completely harmless. Even botanical pesticides like neem oil can harm beneficial insects if applied carelessly, and products containing copper can accumulate in soil over time, affecting microbial communities essential for soil health.

Note: Always apply pesticides during early morning or evening hours to minimize contact with bees and other protecting pollinators during their active foraging times.

Responsible use means following label instructions precisely, targeting applications only where needed, and timing treatments to protect beneficial species. Consider your farm’s watershed too—runoff from any pesticide can impact nearby water systems. The goal isn’t perfection but mindful stewardship, using the least toxic option at the right time and always prioritizing prevention through healthy soil and biodiversity first.

Type 3: Behavioral and Physical Control Pesticides

Pheromone Traps and Mating Disruptors

These clever pest management tools work like nature’s version of mixed signals. Pheromone traps use synthetic versions of insects’ natural chemical messengers to lure male pests into traps, while mating disruptors saturate your garden with these same scents, making it impossible for males to locate females. The beauty? Beneficial insects like ladybugs and bees aren’t affected since each pheromone is species-specific.

Codling moth pheromone traps are garden heroes for apple and pear growers, capturing males before they can mate and reducing the next generation’s numbers. For vegetable gardens, tomato pinworm disruptors work wonders by preventing reproduction without harming pollinators or predatory insects. Oriental fruit moth dispensers help stone fruit enthusiasts protect their peaches and plums organically.

Sarah, an organic orchardist in Washington, shares her success: “After switching to pheromone disruption three years ago, my codling moth damage dropped from 30% to just 5%, and my beneficial insect populations have thrived.”

These methods require patience since they prevent future generations rather than eliminating current pests immediately. However, they’re incredibly effective as part of an integrated approach, especially when combined with physical barriers and careful monitoring of your crops throughout the growing season.

Row covers protecting vegetable garden beds as physical pest barrier
Physical barriers like row covers prevent pest access without any chemical intervention, representing the most ecologically gentle approach.

Physical Barriers and Deterrents

Sometimes the best pest control doesn’t involve sprays at all. Physical barriers create a protective shield between your crops and hungry pests, offering immediate protection without any environmental concerns.

Row covers are garden workhorses, lightweight fabric sheets that float over plants to exclude insects while allowing sunlight and water through. They’re particularly effective against flea beetles, cabbage moths, and cucumber beetles. Just remember to remove them when plants need pollination.

For slug and snail problems, copper tape works like magic. These pests won’t cross copper barriers due to a natural chemical reaction with their slime. Apply tape around raised beds or individual pots for season-long protection.

Reflective mulches confuse aphids and whiteflies by disrupting their ability to locate host plants. Silver or aluminum-coated plastic mulches work especially well for squash and tomatoes during early growth stages.

Sticky traps capture flying insects before they can cause damage. Yellow attracts whiteflies and aphids, while blue draws thrips. Position them at plant canopy height for best results.

Maria, an organic farmer in Vermont, combines row covers with beneficial insect releases. “The covers protect young plants during their vulnerable stage, then I remove them and let my ladybugs take over,” she explains. This integrated approach maximizes protection while minimizing labor and supporting natural ecosystem balance.

Creating Your Integrated Approach

The real magic happens when you weave these three pesticide types together into a customized pest management plan. Think of it as creating layers of defense that work in harmony with nature rather than against it.

Start by observing your garden or farm regularly. Walk your rows each morning with coffee in hand, checking for pest activity and beneficial insect populations. This behavioral control forms your foundation. Remove affected plant parts, adjust watering schedules, and practice crop rotation to discourage pests before they become problematic.

Next, invite biological allies into your space. Plant flowering borders to attract parasitic wasps and ladybugs. Consider purchasing beneficial nematodes for soil-dwelling pests. When problems arise despite these efforts, reach for your botanical options as targeted interventions rather than blanket solutions.

One small-scale farmer in Oregon shared how this approach reduced her pest losses by 60% while actually increasing biodiversity on her three-acre plot. She scouts daily, releases lacewings bi-weekly during peak season, and keeps neem oil as her backup plan.

Remember, successful integrated pest management means accepting some crop damage as part of a healthy ecosystem. Your goal isn’t perfection but balance, creating a resilient growing system that sustains itself season after season while producing abundant, chemical-free harvests.

Choosing the Right Pesticide Type for Your Garden

Making smart pesticide choices starts with understanding that the goal isn’t perfection—it’s balance. The most successful gardeners and farmers approach pest management like a ladder, always starting at the bottom with the gentlest options and climbing only when necessary.

Your decision-making process should follow a strategic assessment:

  1. Identify the pest accurately and research its life cycle to determine vulnerable stages
  2. Evaluate the actual damage level—minor cosmetic issues rarely justify intervention
  3. Consider your crop type and harvest timeline, as edible crops require extra caution
  4. Check weather conditions and pest pressure intensity in your specific microclimate
  5. Start with biological controls or physical barriers before moving to other options
  6. Reserve botanical pesticides for moderate pressure when monitoring shows escalating issues
  7. Use mineral-based solutions only when facing severe infestations that threaten crop viability

Remember that timing matters tremendously. Sarah Martinez, an organic berry farmer in Oregon, shares her philosophy: “I watch my plants daily during peak season. Catching aphids early means a strong spray of water works wonders. Wait too long, and I’m reaching for neem oil.”

Your ecological goals should guide every choice. If you’re cultivating habitat for pollinators and beneficial insects, prioritize targeted biological controls over broad-spectrum botanicals. Container gardeners often find that combining preventive practices—crop rotation, companion planting, healthy soil—reduces their need for any pesticides dramatically. The least disruptive option that effectively manages your specific problem is always the right choice.

Effective pest management in agroecological systems isn’t about finding the one perfect pesticide solution. Instead, it’s about understanding all three types—biological, botanical, and mineral-based—and knowing when and how to use each one thoughtfully. The real magic happens when these tools become part of a broader ecosystem management strategy that includes crop rotation, companion planting, habitat diversity, and soil health.

Think of pesticides as just one instrument in your sustainable farming orchestra. Sarah, a third-generation farmer who transitioned to organic methods five years ago, puts it perfectly: “I used to think going organic meant choosing between pests or chemicals. Now I realize it’s about creating a system where healthy soil and beneficial insects do most of the work, and these gentler pesticides are my backup plan, not my first line of defense.”

Whether you’re tending a backyard vegetable garden or planning your own small-scale farming venture, start by observing your ecosystem. Notice which beneficial insects are already present. Test your soil. Build relationships with plants that attract natural predators. When pest pressure does require intervention, you’ll be equipped to choose the right biological, botanical, or mineral option for that specific situation.

Ready to see these principles in action? Connect with local CSA farms in your area. Many offer farm tours, workshops, and volunteer opportunities where you can witness integrated pest management firsthand and learn from experienced growers who’ve perfected the balance.