Category Archives

10 Articles

Revitalize Your Organic Garden with THCA: A Surprising Ally

Posted by darrell on
0
Categories
Revitalize Your Organic Garden with THCA: A Surprising Ally

Incorporate THCA into your organic gardening by focusing on soil health and plant vitality. Begin by adding thca flower extracts to your compost to enhance microbial activity, which boosts nutrient availability for your plants. Integrate a foliar spray made from THCA-rich tincture to naturally deter pests while encouraging robust growth. Regularly apply this spray in the early morning or late afternoon for optimal absorption and protection against environmental stresses. Finally, mix THCA-infused organic matter into your soil to improve its structure, increase moisture retention, and support sustainable, chemical-free gardening practices. These methods not only optimize your garden’s productivity but also align with eco-friendly goals, making your produce healthier and your gardening endeavors more rewarding.

What is THCA?

Understanding THCA

THCA, or tetrahydrocannabinolic acid, is a fascinating compound derived from the cannabis plant that’s capturing the interest of organic gardening enthusiasts. In its raw form, THCA is a non-psychoactive cannabinoid found in the trichomes, the tiny, crystal-like structures on cannabis flowers. This compound is a precursor to THC, meaning it undergoes a transformation to become THC when exposed to heat through a process called decarboxylation. While THCA itself doesn’t produce a high, it’s valued for its potential benefits to plants. This natural compound is believed to enhance the resilience of plants against pests and diseases, making it a handy ally in organic gardening by reducing the need for synthetic chemicals. Embracing THCA not only supports a more sustainable approach but also promotes healthier plant growth, aligning perfectly with a gardener’s mission to nurture naturally thriving organic gardens.

Difference between THCA and THC

THCA (tetrahydrocannabinolic acid) and THC (tetrahydrocannabinol) are often confused, yet they are distinct compounds found in cannabis plants. THCA is the non-psychoactive precursor to THC. When raw cannabis is heated or aged, a process called decarboxylation occurs, transforming THCA into THC, which is responsible for the plant’s psychoactive effects. For organic gardening enthusiasts, THCA holds interest due to its potential benefits in plant growth and pest resistance, all without the psychoactive properties of THC. This distinction is vital for those looking to harness natural compounds while maintaining a sustainable garden.

Illustrative comparison of THCA and THC compounds
Diagram explaining the differences between THCA and THC

Benefits of THCA in Organic Gardening

Natural Pest Control

In the quest for a thriving, chemical-free garden, many are discovering the benefits of THCA, the acid form of THC found in cannabis plants. This compound is gaining attention for its potential role in natural pest control, helping to deter unwanted insects and reduce reliance on chemical treatments. Unlike traditional pesticides, THCA offers an environmentally friendly solution, making it perfect for those passionate about sustainable agriculture.

Garden enthusiasts report that THCA can repel pests like aphids, caterpillars, and beetles by affecting their feeding and reproductive patterns. This natural deterrent allows your plants to thrive without harming beneficial insects or the surrounding ecosystem. Aspiring farmers and eco-conscious growers can easily incorporate THCA into their gardening routine by using cannabis leaf extracts or incorporating whole plants into their borders. By embracing this approach, you’re not just protecting your crops but also contributing to a healthier planet.

Close-up of garden pests being repelled naturally
Pests on a plant being naturally deterred

Growth Enhancement

Recent explorations into the world of organic gardening highlight the intriguing role of THCA (tetrahydrocannabinolic acid) in enhancing plant growth and health. Though primarily known for its presence in cannabis plants, preliminary studies suggest that THCA might offer benefits to a wider range of garden flora. It’s believed that THCA could help plants bolster their natural defense mechanisms, potentially leading to more robust and resilient growth. Aspiring gardeners, who often rely on natural methods, might find THCA a helpful advocate in their quest for flourishing gardens.

Using THCA as a supplement in organic gardening aligns with the eco-friendly ethos of nurturing healthy plants without resorting to synthetic chemicals. Anecdotal evidence from some gardeners supports claims that THCA can contribute to improved nutrient uptake and better soil health, resulting in stronger, more vibrant plants. While more scientific research is needed to firmly establish THCA’s benefits, the possibility of supporting plant health naturally is certainly an exciting prospect for those passionate about sustainable agriculture. As organic gardening continues to evolve, the role of THCA could become an important tool in the toolkit of eco-conscious growers, promising an enriched and bountiful harvest season after season.

Environmental Impact

Using THCA in organic gardening offers an eco-friendly approach compared to synthetic options. THCA, derived from cannabis plants, plays a pivotal role in fostering healthy plant growth while minimizing environmental harm. Unlike conventional chemicals that often seep into the soil and water, potentially harming microorganisms and aquatic life, THCA promotes nutrient absorption and enhances plant resilience naturally. Gardening enthusiasts appreciate that it supports sustainable agriculture by maintaining soil health and reducing the need for harmful pesticides. This shift not only benefits the environment but encourages a more self-sufficient and earth-friendly way of producing locally grown organic produce.

How to Incorporate THCA into Your Organic Garden

Integrating THCA

To introduce THCA into your organic garden, start by understanding its role in enhancing plant health and resilience. THCA, a compound found in raw cannabis, helps in natural pest control and boosts plant growth. To integrate THCA, begin by sourcing organic cannabis leaves or flowers, ensuring they are free from pesticides and contaminants. You can juice these raw parts and create a foliar spray by mixing the juice with water. Apply this spray to your plants, focusing on the leaves, as THCA is highly effective when absorbed through the foliage. This not only helps in fortifying the plants against pests but also enhances their nutrient uptake. For soil application, consider composting cannabis waste to enrich your garden’s ecosystem naturally. Always monitor the plants’ response and adjust your methods as needed. By embedding THCA into your gardening practices, you’re embracing a sustainable and natural approach, fostering a thriving garden without synthetic chemicals.

Step-by-step process of incorporating THCA into garden soil
Visual guide on integrating THCA into the garden

Tips from Successful Farmers

Many farmers are embracing THCA for its natural benefits in organic gardening. Take Jessica, who runs a small organic farm in Ohio. By integrating THCA as part of her compost mix, she’s seen improved soil fertility and healthier plants, attributing it to enhanced microbial activity. Similarly, Tom from California uses THCA extracts on his vegetable patches. He shares that it’s boosted pest resistance naturally, reducing the need for synthetic pesticides. Their advice? Start small by incorporating THCA into your compost or soil amendments and observe its effects. It’s an eco-friendly way to enhance your garden’s productivity and sustainability.

Safety and Legal Considerations

When exploring the intersection of THCA in organic gardening, it’s important to understand both the legal landscape and safety measures involved. THCA, a non-psychoactive compound found in cannabis plants, holds potential for enhancing soil health and plant growth. However, its use is subject to strict regulations. Before incorporating THCA, verify local laws regarding cannabis-related substances in gardening to ensure compliance. Safety is equally vital; use proper protective gear like gloves and masks when handling THCA to avoid skin contact or inhalation. With due diligence, integrating THCA can align with broader organic gardening benefits by fostering sustainable and eco-friendly practices. Always source from reputable suppliers to maintain quality and safety standards.

Conclusion

Exploring THCA in organic gardening presents a promising avenue for those passionate about sustainable practices. With its potential to enhance plant health and soil vitality, THCA could be a game-changer for both aspiring farmers and gardening enthusiasts. Its natural origin aligns beautifully with the principles of organic farming, offering a viable, eco-friendly alternative to synthetic chemicals. As you delve into its applications, you’ll join a growing community focused on enriching local produce efforts while protecting our environment. Take this opportunity to experiment with THCA and see firsthand how it can support your gardening goals towards a more sustainable future.

A Step-by-Step Guide to Turning Your Fresh Fruits into Freeze Dried Snacks

Posted by darrell on
0
Categories
A Step-by-Step Guide to Turning Your Fresh Fruits into Freeze Dried Snacks

In recent years, freeze dried snacks have gained popularity for their crispy texture, intense flavor, and impressive shelf life. Whether you’re a health-conscious snacker or simply love experimenting with new culinary trends, creating your own freeze dried treats at home straight from your own produce can be both rewarding and surprisingly straightforward.

If you want to get started with the best freeze dryer canada, here’s a step-by-step guide to help you turn your fresh fruits into delicious freeze dried snacks right in your own kitchen.

What is Freeze Drying?

First of all, let’s have an overview of what freeze drying is all about.

Basically, freeze drying is a unique preservation method that removes moisture from food while preserving its natural flavors and nutrients. Unlike traditional drying methods that often involve heat, freeze drying operates under sub-zero temperatures and low pressure.

This process allows water in the food to transition directly from solid ice to vapor without melting. Due to this, it lets you preserve the food’s structure and nutritional integrity. The result is lightweight, crunchy snacks that retain the original taste and appearance of fresh fruits.

Now that you’re ready, let’s have a look at the steps you have to follow.

Step 1: Choose Your Fruits

Selecting the right fruits is essential for successful freeze drying. Opt for fruits with high water content, such as strawberries, mangoes, bananas, and apples. These fruits freeze dry particularly well and maintain their natural sweetness and nutritional benefits.

It’s crucial to pick ripe fruits that are free from bruises or blemishes, as these imperfections can affect the final texture and taste of the freeze dried snacks. If you’re interested in growing your own fruits, you might want to explore plants you can cultivate and harvest in just a month.

Step 2: Prepare the Fruits

Preparing fruits for freeze drying involves thorough washing and, in some cases, peeling. Removing any seeds, stems, or tough parts ensures uniform drying and a pleasant eating experience.

For fruits like strawberries or apples, slicing them into consistent pieces helps to achieve even drying throughout the process. This step is important for maintaining the structural integrity and texture of the fruits after freeze drying.

Step 3: Pre-Treat if Desired

While not mandatory, pre-treating fruits can enhance their flavor and appearance during freeze drying.

For example, dipping fruits like apples or pears in a lemon juice solution helps prevent oxidation and preserves their natural color.

Alternatively, lightly coating fruits in a sugar syrup can add sweetness and a glossy finish to the final freeze dried product. Experimenting with different pre-treatments allows you to customize the taste and appearance of your snacks according to your preferences.

Step 4: Arrange on Trays

Once prepared and pre-treated if desired, arrange the fruit slices evenly on freeze drying trays. It’s essential to leave space between each slice to ensure proper airflow during the drying process.

Adequate airflow promotes efficient sublimation of moisture from the fruits, resulting in crisp, evenly dried snacks. Proper arrangement on the trays also prevents fruits from sticking together to allow for easier removal and storage once the drying process is complete.

Step 5: Freeze Drying Process

The freeze drying process begins by placing the loaded trays into a home freeze dryer.

Depending on the model and quantity of fruits being processed, this step can take several hours to complete. The freeze dryer first freezes the trays to sub-zero temperatures, causing the water content in the fruits to solidify.

Subsequently, the dryer gradually reduces the surrounding pressure, allowing the frozen water to sublimate without passing through a liquid phase. This gentle process preserves the fruits’ cellular structure and nutrients, resulting in crunchy, lightweight snacks that are ideal for long-term storage.

Step 6: Check for Dryness

After the designated drying period, carefully check the freeze dried fruits for dryness. The fruits should feel brittle and crisp to the touch, indicating that all moisture has been removed. If any pieces appear soft or pliable, they may require additional drying time to achieve the desired texture.

Thoroughly dried fruits ensure optimal flavor and shelf stability, making them suitable for extended storage without compromising quality.

Step 7: Cool and Store

Once fully dried, allow the freeze dried fruits to cool to room temperature before transferring them to airtight containers or resealable bags. Proper storage in a cool, dry place helps maintain the snacks’ crispness and flavor over time. If you’re curious about other best practices for plant care, you may find it useful to learn what kind of water is best for your plants.

Freeze dried fruits can remain shelf-stable for months or even years when stored correctly, making them convenient for snacking, backpacking, or incorporating into recipes whenever needed.

Close-up of sliced strawberries and apples neatly arranged on a freeze drying tray, showing proper preparation and spacing.

Step 8: Enjoy Your Freeze Dried Treats!

The final step in creating homemade freeze dried snacks is to savor the fruits of your labor! Whether enjoyed as a standalone snack, added to breakfast cereals or trail mixes, or used in baking and cooking, freeze dried fruits offer a burst of natural sweetness and crunch that’s hard to resist.

Embrace the versatility and nutritional benefits of homemade freeze dried snacks, and share your creations with family and friends to enjoy the delicious flavors of fresh fruits year-round.

Final Thoughts

Creating freeze dried snacks at home is a rewarding culinary endeavor that allows you to explore new flavors and enjoy the natural goodness of fruits in a unique and convenient form.

By following these step-by-step instructions and experimenting with different fruits and flavors, you can elevate your snacking experience and appreciate the benefits of homemade freeze dried treats.

Embrace the simplicity and satisfaction of freeze drying, and discover a healthier, more flavorful way to enjoy your favorite fruits anytime, anywhere.

From Wilted to Wow: The Art of Spray Painting Dead Plants

Posted by darrell on
0
Projects
From Wilted to Wow: The Art of Spray Painting Dead Plants

Spray painting dead plants is a quirky trend and the concept might seem a bit odd initially. The transformation of brown relics into brilliant sculptures can add an unexpected pop of color and character to any space. But not all plants will hold up well to being painted. Thicker plants tend to handle the paint better, while delicate plants might not sustain the weight of the paint. You must know how to handle spray paint safely, especially when it comes to accidental skin contact. Knowing how to get spray paint off the skin is crucial. Typically, a combination of oil (like cooking oil or baby oil) and a gentle scrubbing agent (like sugar or salt) can help remove paint from the skin effectively. Always use protective gloves and long sleeves when handling spray paint to minimize skin exposure.

Now, let’s dive into how to turn your wilted greens into a gallery of color!

Choose the Right Spray Paint

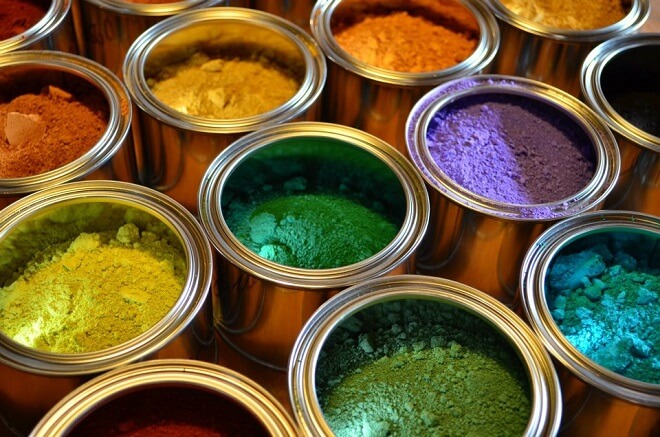
Select a spray paint that is suitable for the material of your plant and the location where it will be displayed. For outdoor display, use a paint that is labeled as weather-resistant to prevent fading and water damage. For indoor use, almost any spray paint, even vegetable paint, will work, but consider using one with low fume emissions for better indoor air quality. Metallic and bright colors can add a dramatic effect, while pastels offer a softer appearance.

Prepare the Plant

Before you start painting, clean the plant thoroughly to remove any dirt, debris, or insects. If the plant is brittle or fragile, handle it gently to avoid breaking it further. Let the plant dry completely if you’ve had to wash it.

Set Up Your Painting Area

Choose a well-ventilated area to work in, ideally outside or in a space like a garage with doors or windows open. Lay down newspapers, a drop cloth, or plastic sheeting to protect the surrounding area from paint. If it’s windy, secure the sheets with weights or tape to keep them from moving.

Apply the Paint

Shake the spray paint can for a minute or two to mix the paint thoroughly. Hold the can approximately 6-12 inches away from the plant. Start spraying with a side-to-side motion, beginning and ending the spray off the plant to prevent excessive build-up of paint in one area. Apply a light coat first, allowing it to dry for at least 10-15 minutes before applying a second coat. Multiple light coats are better than one thick coat as they prevent drips and help achieve an even finish.

Add Finishing Touches

Once the plant is fully painted and dry, you can add embellishments if desired. This could include glitter spray, a clear protective coat for extra durability, or even painting specific parts in different colors for a more dynamic effect.

Let It Dry

Allow the plant to cure for at least 24 hours in a dry, well-ventilated area. Once cured, you can place it in a pot or directly integrate it into your decor. If kept outdoors, make sure it’s in a spot sheltered from extreme elements to prolong the life of the paint.

Maintenance Tips

Spray-painted plants might eventually chip or fade, especially if exposed to harsh weather. You can retouch them as needed by cleaning the surface and following the same painting process. Avoid using harsh chemicals or scrubbers on the painted surface to keep the paint intact.

How the Hemp Industry Is Changing Agriculture and the Economy

Posted by darrell on
0
Projects
How the Hemp Industry Is Changing Agriculture and the Economy

The hemp industry has been on the rise since 2018, with its national legalization taking effect in the same year. Of course, hemp-derived products have also been helpful, especially CBD Canada, which is often used to ease people’s anxiety and arthritis.

The use of CBD oil in Canada has also led many experts to predict that many territories in Canada will jump and invest in the hemp industry. This process will, in turn, lead to higher demand for hemp from farmers, researchers, marketing experts, and many more.

Hemp Industry

However, the hemp industry has also led to many positive changes in agriculture and the economy. What were these changes? Continue reading to learn more.

Decades-long laws are being changed due to the high demand for hemp

Legislators passed the 2018 Farm Bill through Congress, which was a significant sign that the hemp industry would change for the better. Through this bill, legislators removed restrictions on hemp products, allowing them to be sold all over the country.

Moreover, because of this, the Marijuana Tax Act of 1937 was changed by legislators since Congress had categorized hemp the same as marijuana.

With the bill’s passage, the buying and selling of hemp products have boosted the economy and intensified agricultural practices, especially those related to hemp.

Huge bets are being placed on the hemp industry by farmers

After Congress passed the 2018 Farm Bill, many farmers switched to the hemp industry by placing huge hemp bets. In fact, in 2018, more than seventy-eight thousand hectares of land were used to grow hemp by farmers.

In addition, in 2019, more than five hundred thousand hectares of land were also used to plant hemp, increasing more than 455% from 2018. This is notable since very few industries are capable of such growth. Therefore, it indicates that many farmers genuinely want to invest in the hemp industry.

However, farmers are needed to meet the growing demand for hemp, and other small business owners could aid in launching hemp products.

New careers are being created through the hemp industry

Research conducted in 2019 showed that the hemp industry would grow to almost $2.2billion come 2022. Because of this, many jobs have been created through the hemp industry that enabled people to make a living.

The hemp industry has created and boosted jobs in sections like sales and marketing. Moreover, more and more people are advertising hemp products such as CBD oils to make more sales, generating more income.

Aside from this, the industry’s sudden popularity has also created other jobs, such as researchers.

After all, hemp is also being researched to identify essential components that can ease problems in the human body, such as insomnia.

Moreover, it’s also important to note that projections foresee that the hemp industry’s job generation will exceed those of the cannabis industry in a few years.

The hemp industry has been critical in growing the economy and agricultural sectors. Because of this, the hemp industry needs to be protected so that people can continue to benefit from its growth.

How to Deal with Mosquitoes in Your Garden

Posted by darrell on
0
Projects
How to Deal with Mosquitoes in Your Garden

Almost 700 million people become ill because of illnesses caused by mosquitoes every year, while more than a million of them die. Therefore, it’s not surprising why many people are adamant about figuring out ways to eliminate mosquitoes in their gardens and around their homes.

Still, prevention proves to be the best way since it can be hard to control mosquitoes if they have a very large population. If you’re wondering how to manage mosquitoes in the garden, then we’ve got just the right tips for you.

How to Protect Yourself

When working in the yard, make sure that you protect your exposed skin. You can cover it by wearing a long-sleeved shirt and long pants. Wearing shoes, socks, a hat, and gloves can also provide extra protection.

You can even use different mosquito killer sprays on your clothes. For this, you can choose a spray with diethyltoluamide, a chemical known as Deet in different concentrations. Though further research is still needed on how safe Deet is, it is generally safe to use low concentrations. However, rather than applying it to the skin, you have to apply it to your clothing for mosquito protection instead.

You can also purchase shirts that have a fabric infused with mosquito repellent. You don’t have to worry about washing these shirts since the repellent will be effective even if you launder them many times. You can also use lotions and sprays for mosquito protection on your skin. Get ones with citrus oil, such as wipes that you can rub on your skin.

If you don’t want to use chemicals, you can opt for a Bug Baffler shirt which can cover you from the head down to your waist. It is also made from a very fine mesh material to help prevent mosquitoes and flies from coming near you. Moreover, it is more comfortable than a long-sleeved shirt as you can move more freely when working in your garden.

How to Prevent Mosquitoes

Mosquito prevention is more effective and important than protection. Just keep in mind that you don’t have to protect yourself too much if you can control the mosquito population even before they invade your garden.

You can remove standing water from drain outlets everywhere and anywhere in your house to get rid of their breeding sites. You can also use citronella since it is known to protect you from mosquitoes. You can opt to get citronella torches with oil or candles and place them in small areas in your home, such as the patio, when you have guests over.

Placing an electric fan on your patio or porch also works because mosquitoes and flies hate wind.

Conclusion

Always remember to also practice protective and preventive measures even inside your home. Don’t wait before it’s too late before you start acting. As early as possible, get rid of their breeding grounds to ensure they won’t multiply. This way, you can enjoy a mosquito-free backyard and property.

How to Attract Hedgehogs into Your Garden

Posted by darrell on
0
Projects
How to Attract Hedgehogs into Your Garden

Hedgehogs are innocent little furry creatures that are not harmful to humans. Generally, hedgehogs will get scared and will run away from humans, or they will curl up into a spiky ball. However, their spikes can penetrate the skin and may cause a little discomfort.

Despite their timid demeanor, the hedgehog population has been declining. According to a report in Britain, the population of hedgehogs has fallen by about 50 percent. With this knowledge, we should take certain actions to increase the hedgehog population. This can be done by attracting them to friendly gardens and giving them a home.

However, hedgehogs don’t just wander around your garden normally. There are things you must do to make your garden hedgehog-friendly. Here are some tips that will certainly help attract hedgehogs into garden hedgehog houses.

Before we dive deeper into the different ways of how to attract hedgehogs into your garden, let’s watch some interesting watch about these little animals.

5 Ways to Attract Hedgehogs into Your Garden

1. Create Pathways for The Hedgehogs

While you may want to fence your property to ensure privacy, this may keep the hedgehogs out. So, how do you invite them in? First, you need to create a pathway that will allow your hedgehogs to get into your garden.

Also, by creating hedgehog holes, you are allowing these furry little creatures to enter your garden. A hedgehog hole allows the hedgehog to travel from garden to garden. At night, hedgehogs usually travel around 1 mile. They like to stay near the edges as they feel much safer. Nonetheless, they will also wander around from time to time. During the breeding season, males can go about 2 miles.

The best way to create these pathways is to set up a meeting with your neighbors and devise a plan or come up with an agreement to create hedgehog pathways. The right pathways will undoubtedly attract hedgehogs to your garden.

2. Build a Hedgehog Home

You can also attract hedgehogs into garden hedgehog houses by building one for them.

You can build hedgehog houses by yourself, or you can buy hog houses from different online shops. If you opt to go DIY, you can randomly pile logs and add some leaves to the box.

For an average size garden, perhaps 2 to 3 hedgehog houses are best. Place the box in your garden under the garden shed or thick vegetation. Ultimately, you need to create a safe nesting for your hedgehog. Although these shelters are specifically made for hedgehogs, they can add any aesthetic to your garden. These hedgehog houses can be very decorative, depending on your creativity.

3. Avoid Noisy Places

If you are looking to attract hedgehogs, you should know that they require peace. This is especially true during the day since this is their sleeping time, and they need some quiet.

Therefore, when creating a good hedgehog home, make sure that it is far from busy roadways, businesses, or construction sites. Also, children and noisy dogs can scare them away.

4. Supplement Them with Food and Water

This is very obvious, but this is still worth noting. Hedgehogs need a lot of water, and supplying enough will attract them into your garden. For food, you can use cat or dog pellets to supplement their natural diet. Also, make sure that you put a bowl of water in your garden.

If you already have a hedgehog house, you can leave it somewhere close to it. This is also to encourage them to stay there. During the cold months, you may have to change the water supply regularly as it may get frozen if it gets too cold.

5. Do Not Disturb Them During Hibernation

This is pretty tricky since it is very hard to determine whether a hedgehog is hibernating in your garden or not. However, you need to resist the temptation to disturb the hedgehog if you find that it is hibernating in your garden. Just leave them be and let them hibernate. Usually, hedgehogs hibernate during November and March.

Final thoughts

Being at the top of the food chain, human beings are quite unchallenged by most species. However, this does not mean that we should pay attention to other living things, especially those declining in population. Hedgehogs are not harmful and deserve to live well and populate. The above tips can help you attract hedgehogs into garden hedgehog houses.

How to Make Natural Paint Using Leftover Fruits and Veggies

Posted by darrell on
0
Projects
How to Make Natural Paint Using Leftover Fruits and Veggies

Did you know that you can turn your food leftovers into natural paint? According to The experts you heard it right! By simply adding a little bit of creativity plus patience, you can convert every leftover fruits and veggies to an art material your toddlers would love. Let’s get started.

Things You Need:

  • For green dye, prepare Swiss chard, kale, and spinach
  • For orange dye, prepare orange peels, carrot, and onion skins (yellow)
  • For red dye, prepare beets, strawberry, raspberry, or grenade
  • For blue dye, prepare blackberry, red cabbage, or blueberry

To make a fruity paint, here’s what you need to do:

First, get a small saucepan then mix each cup of vegetable or fruit along with two cups of water. Set the heat to medium. Wait for it to simmer within an hour. Don’t forget to switch off the cooker. Let the water cool down. After that, pour and filter the juice in a container.

On the other hand, to make a veggie paint, you need to blend a teaspoon of dye with 6 tablespoons of sugar. Repeat the second and third procedures.

Improve Your Room’s Curb Appeal With This Paint

Now that you have a new set of natural paint, you can grab this opportunity to bond with your kids. Improve your room’s curb appeal with a personalized and dramatic result by giving your interior a fresh coat of paint.

It can also bring harmony in your room spaces by complementing the color of your furniture, paintings, floors, ceiling, and other things inside your abode. Furthermore, an appealing room paint does not only boost the visual aesthetic of your home, but it also has the capability to promote positive and relaxing moods.

On top of that, it will give your kids a chance to show off their creative side through house painting. Let them draw to their heart’s content.

Natural Paint Can Help Keep Surfaces Protected

Aside from covering up stains, marks, and other imperfections, room paint can excellently protect your walls from further damages. Both your exterior and interior walls are subject to corrosion and detrimental effects of aging despite your best effort to maintain them. To cover up these imperfections and touch up your room’s surfaces, painting will be a good choice.

Final Words

There you have it – quick and easy ways on you can turn your food leftovers to good art materials. This may not just save you extra cash, but it will also help you enhance your child’s skills.

Don’t just limit yourself to making beautiful paintworks. As much as you could, try experimenting with your own way of decorating your furniture. Begin with applying your favorite colors or by mixing this natural paint that will add dimension to your furniture surface.

For cabinets, for example, make your personal blend of colors by applying a light color on the exterior & dark shade inside or vice versa. You can either use a dark-colored shade on its interior. However, the color preference still depends on your own choice – you just need to freely do it yourself.

Farmers Market Convention

Posted by darrell on
0
Projects
Farmers Market Convention

On a quarterly basis, we host an event where farmers, partners, and customers can exchange information about how to buy, sell, and trade their products. We provide booths, snacks and refreshments, and a safe, comfortable space for the public. These are organized in different venues around the area, and people of all ages are welcome to join.

We also partner with professionals from all over the country to host workshops/seminars or sponsor our event. The event is free of charge and is open to the public. For concessionaire applications or partnership proposals, contact us to discuss your ideas.

Organic Farming Innovation

Posted by darrell on
0
Projects
Organic Farming Innovation

The CSA Farms has been awarded and duly acknowledged by the Farm Alliance for our innovative organic farming methods presented on this website. With their support, we have offered our team trips to various farms, homesteads, and plantations so they can further explore, discover, and study vegetable farming.

Additionally, we continue to develop new knowledge to share with the community. FA invites members of the Earth Association (UK) annually, so we can receive real-time consultation from fellow professionals. They also collaborate with us to provide free e-books and webinars about the food and farming industry.

Eco-Friendly Drive

Posted by darrell on
0
Projects
Eco-Friendly Drive

In an effort to continuously promote sustainability, some farms gather junks from different farm’s partner establishments and customers then recycle them on their farm. Last year, CSA farms gathered plastic bottles to create “Ecobricks” and donated them to non-profit organizations or groups to use as furniture or construction projects.

During the previous years, CSA farms also collected food waste and used them to create compost and deliver them to nearby farms in our area. The possibilities are endless, and this project helps farms prove how important sustainability is. If you have an idea for any upcoming eco-friendly drives, please let us know!