Yearly Archives

8 Articles

8 Plants You Can Cultivate and Harvest in a Month

Posted by Darrell Ross on
0
Gardening Tips
8 Plants You Can Cultivate and Harvest in a Month

There’s this lovely feeling that comes with seeing your garden already blooming. However, let’s face reality. Waiting a long time for your garden to produce can be quite discouraging.

The good news is you can start your gardening experience with some of these fast-growing seeds to fill your empty plant beds.

Is Gardening Worth the Stress?

Owning and tending to a garden can be frustrating. It’s tough to live in an urban area and know you can get these vegetables and flowering plants from the nearest grocery store.

Well, don’t give up yet. Did you know you can cultivate several fast-growing seeds and see results in 30 days? Yes, there are!

So maybe you’ve had to wait for a long time before your garden produces because you’ve been cultivating the wrong plants.

Having a steady supply of produce almost all year round is excellent, especially when you plant seeds that can be grown quickly.

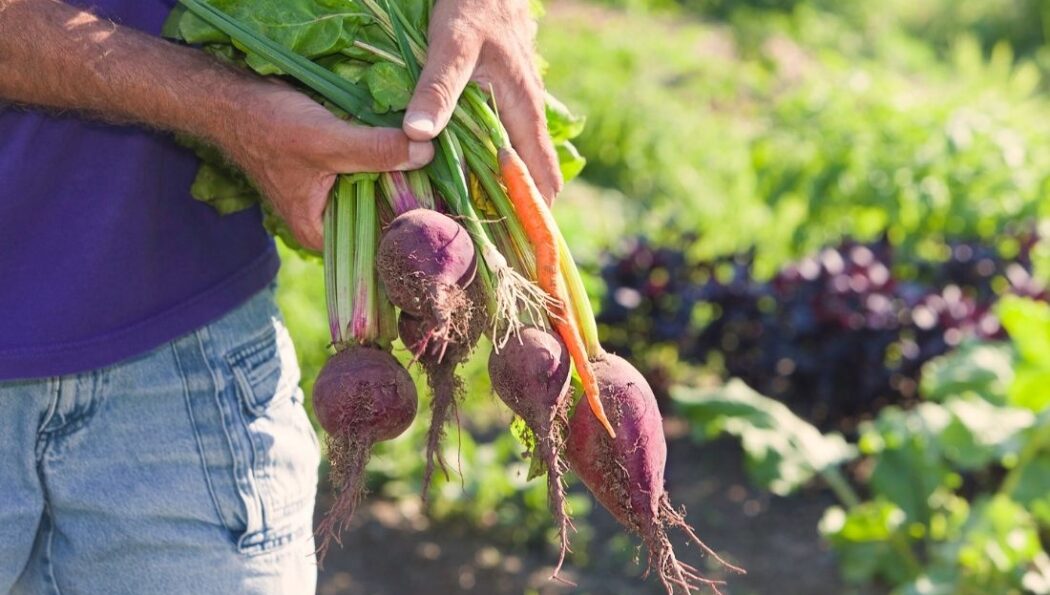
Here are eight plants you can cultivate and harvest in a month.

Radishes

fast growing seeds Radishes

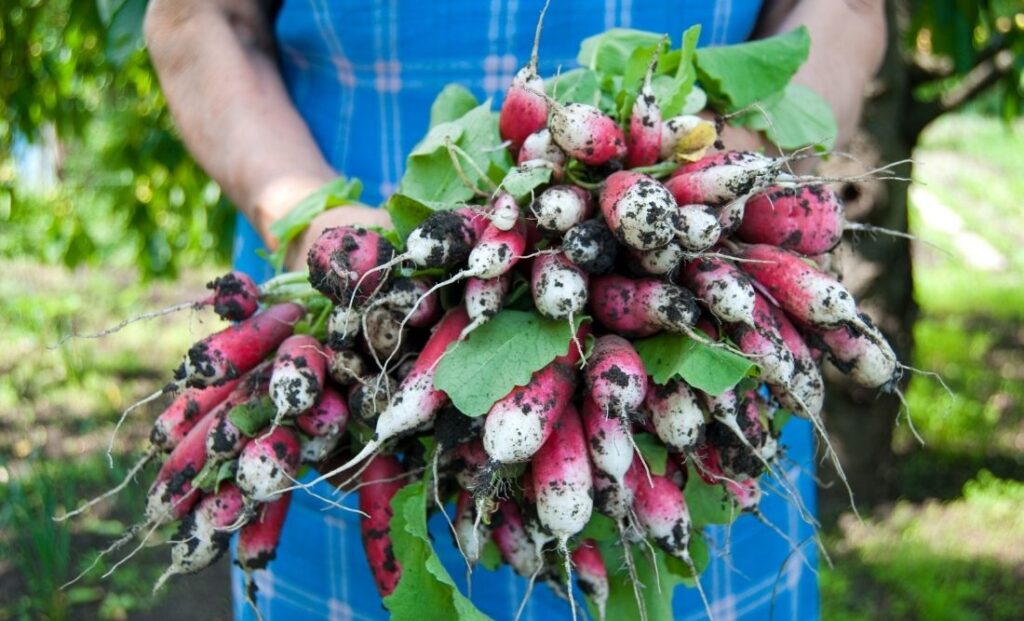
Looking for a plant that starts showing green shoots less than a week after they’ve been planted? Well, you’ve got the radish!

You can choose to cultivate the Heirloom radish for a variety in flavor and colour. They are a great option for short-term produce because they are a fast-growing crop. If planted every week, you’ve got a steady supply of radishes all year.

Lettuce

Everyone knows lettuces are the most common vegetables to plant if you start harvesting in less than two months. If you want a vegetable that can start producing in 30 days or less, you should consider planting lettuce. They grow super-fast and can continue to produce almost all year long.

Sunflowers

Sunflowers are among the most beautiful flowers ever, and seeing a garden of them can be breathtaking.

Luckily, they are one of the fastest flowery plants to grow. All they need is loose soil coupled with adequate sunlight, and in a month, you’ve got yourself a beautiful view of sunflowers scattered around your garden.

Spinach

Spinach is another fast-growing plant that grows almost as soon as it is planted. They are a special staple great for spicing up your meals and salad. Fortunately, this vegetable can be harvested within 30 days after cultivation, so you’ve got yourself a supply of this useful green to spice up your casserole, stew, salads, and other meals.

However, you must use the right water for this plant, as spinach can easily wither and die off if it doesn’t get adequate water.

Marigolds

Something about Marigolds puts you in a cheerful mood, and having a garden filled with these bright beauties is worth it. If you’re looking for a plant that will sprout easily within a month of cultivating, then get yourself some marigold seeds. The sad news is, Marigolds tend to wither and die during the cold season.

Arugula

Arugula is a popular peppery green used in salads, so there is usually a great rush. If you own a garden, you can have your supply of Arugula as they are very easy to grow. When cultivated, you can start harvesting your Arugula as early as 20 – 25days after planting.

Cucumber

Cucumbers are a great choice of vegetables to plant in your garden for quick production. It takes less space when planted, and its growth is so fast that you can start harvesting your blooming cucumbers 30 days after planting. For an extremely quick harvest, you can either plant the Northern Pickler or Picklebush variety of cucumber.

Petunias

If you ever need a flowering plant that would add the perfect blast of bright colours to your garden, then consider getting some petunia seeds. They grow fast and can withstand almost any weather condition. Aside from that, they also add a sweet scent to your garden and make your garden a paradise of colours.

Anxious to see your garden in full bloom all summer? Then these plants are some of the best choices for you if you want to have that perfect garden variety and get instant satisfaction for your planting efforts.

How to Keep Rodents and Wildlife Out of the Chicken Coop

Posted by Darrell Ross on
0
Gardening Tips
How to Keep Rodents and Wildlife Out of the Chicken Coop

Rodents are a problem for Canadian farmers, gardeners, and keepers of chicken. They are very good at hiding and they reproduce faster than most of us can keep up. Besides the messes they can make, it is important that you keep rodents away from your livestock because they are carriers of disease. Rodents spread harmful pathogens that can infect both humans and animals.

Mice and rats are attracted to barns and chicken coops for their warmth, security, and easy access to food. If you’ve started a hobby farm, you may be wondering how to keep them out. The key is to physically exclude them from the coop and to keep food out of reach. The following lists what you can do to keep rodents and other creatures out of the chicken coop, so your chickens can be safe.

kid feeds chicken

1. Exclude the chicken coop

The first thing you should do when managing rodents is to block the pests out of the coop. Seal up any gaps you find in the structure of the coop so that mice and rats cannot get in. Remember that mice can squeeze through gaps only 6mm wide. Use caulking or mesh to fill in the gaps.

Ideally, your chicken coop should be above ground. Rats are burrowers that dig tunnels to get around. Dig a trench around your chicken run, then secure a mesh along the sides of the fence. Ensure the mesh is at least a foot deep into the ground to prevent rats from digging through. Use a quarter-inch, 16-gauge, galvanized steel mesh or similar. Bury the mesh when you’re done. For bonus protection, you can cover the ground with concrete.

2. Store feed in sealed containers

Proper feed storage is a must. Store feed in airtight containers and keep them in a shed, out of reach. The better the seal, the less it will smell to rodents. Use heavy plastic or metal containers that cannot be chewed through and place the containers above ground, in a cool, dry place. Remove feed from the chicken run at night so you do not attract predators.

3. Switch to an automatic chicken feeder

Some feeders are designed to reduce waste and lessen the risk of a pest problem. Check out covered automatic feeders that open only when they are triggered. It is only when a hen steps onto the platform that the feeder’s lid opens, and the chicken can feed. These feeders require a little training upfront for the chickens to understand, but they will get the hang of it in no time.

4. Clean regularly

Every night, remove wasted and extra feed and throw it out or use it for compost. Pick up spilled feet as best as you can. You should also clean up droppings from your dropping boards every day and clean up the floor of your run if you have one. Rodents are just as likely to eat droppings as they are to eat feed. Deep clean the coop every 6 months and keep it clean.

5. Maintain the yard

Mice and rats love clutter and foliage where they can hide. So, it’s important that you maintain the exterior of the chicken coop as well. Pull weeds, mow the lawn, rake the leaves, and keep the yard and garden as tidy as you can. Keep woodpiles away from the chicken coop. If you grow fruits and vegetables, cover them in an ultra-fine mesh to help keep pests out. Harvest your produce on time and don’t let anything rot on the ground.

6. Use proper fencing

chicken cage

Rodents, raccoons, and other animals can tear through chicken wire. If you want to keep rodents out, the best fencing consists of welded, galvanized steel mesh. Use a 16-gauge, quarter-inch mesh so that rodents cannot chew through. Use this same material to secure the perimeter of the run, one foot underground.

How to Stop Birds From Eating Your Garden Plants

Posted by Darrell Ross on
0
Gardening Tips
How to Stop Birds From Eating Your Garden Plants

A small bird’s beak can cause big trouble in your garden. Just let the feathered reach the tasty plants and seedlings, and you will see. Fortunately, you are already reading this quick guide by Pest Control Hacks experts and will learn how to protect your entire garden from hungry birds’ invasions.

Employ Bird Deterrents

Placing the right bird deterrents in the right places can make your garden a lot less attractive landing surface. Here are some of the best options you have:

  • Repellent disks or reflective scare tape – this humane deterrent uses sunlight to scare small and medium birds with sunlight reflections. It’s also a pretty nice accessory for any garden! If you live in a sunny area, hang repellent disks around the garden for extra protection. Reflective scare tape works the same way, but you can apply it to any landing site to make it unattractive. Both remedies aren’t that effective against large birds, though.
  • Bird spikes – these aggressive deterrent is very effective against those larger birds as it doesn’t let them land without hurting themselves. It’s probably too powerful for small birds, but can be used if you don’t have any other choice but to combat large pests with sharp metal spikes.
  • Gel bird deterrents – gel deterrents can be applied to any surfaces that look like potential pest landing sites. The sticky texture of gel makes them feel uncomfortable and avoid the site in the future. It’s a 100% humane remedy that won’t deal any damage to your property.
  • Fake horned owls – most small birds are very scared of owls. A fake owl can effectively deter smaller species during the day and at night. Look for the owls that can make sounds, turn their heads, and/or flash their eyes as they look more natural to other species. Don’t forget to relocate the decoy regularly to maintain the high grade of realism. You can also try fake snakes, but they might scare you as well!
  • Put garden spinners (wind vanes) and windchimes – spinners can produce sudden movements when the wind blows, which can be quite scary for those smaller birds. Windchimes works the same way but also produce sounds for a better effect.

Cast Garden Netting or Fleece

Garden netting isn’t the most aesthetical solution, but definitely the most effective way to protect plants from pest infringements. You can place hoops of any shape and height above the plant beds and cast butterfly netting over them to create impenetrable protective barriers. The good news is that butterfly netting lets in beneficial insects. You have to keep the netting pulled taunt to ensure that those determined birds don’t get caught in the loose netting.

It’s also not recommended to use standard bird netting as it catches birds very easily due to the larger holes. Finally, the netting must be made of temperature and UV-resistant material. Low-quality materials break and quickly become hazardous for the wildlife and the environment. Alternatively, you can cover some of the smaller greens with garden fleece.

Let the Dogs Out

That’s right, you can train your dog (if it’s big enough) to scare away the birds. Isn’t it a great option?

Relocate the Birds

Some species, including pheasants, feral chickens, and alike, can be live-trapped and relocated if the local population is too large and encroaches on your garden all the time. Unfortunately, this won’t work with pigeons, magpies, or crows as they are clever enough to return.

Don’t Forget About the Benefits

Even though the birds can destroy your garden, many of them are also beneficial and can save the plants from dangerous insects! Analyze what’s more dangerous and make the right moves to protect the greens.

How to Deal with Fallen Leaves in Yard

Posted by Darrell Ross on
0
Gardening Tips
How to Deal with Fallen Leaves in Yard

Fallen leaves can be a serious issue. Especially if you don’t know how to deal with them. Hopefully, you find this guide before your yard drowns in leaves as it will help you prepare in advance. Use our best tips to get rid of leaves effectively and get the most out of them afterward!

Shred (Mulch) The Leaves

If processing the fallen leaves sounds like the best option for you, prepare your leaf shredder to make some high-quality mulch! But are your $100-$200 worth an option to shred leaves into smaller pieces? The answer is yes, regardless of the use case. First, you can mulch leaves to reduce the space they take. It can simplify disposal a lot. Second, you can use the mulch around the garden to:

  • suppress weed growth in the plant beds;
  • prevent plants from frosting in winter;
  • improve soil drainage for plants that require well-drained soil;
  • improve soil nutrient capacity;
  • make the garden bed look more visually appealing in places where lawn cannot be grown.

Compost or Make Leaf Mold

Alternatively, you can use leaf mulch as a brown material for your compost pile or make leaf mold. The first option requires mixing the mulch with other compost materials in the right proportions. It’s a good way to process any organic litter and reuse it for good. Fallen leaves include the important nitrogen component that balances nitrogen levels in the compost.

If your compost pile is full, you can store the leaves in garden composters and take out the brown matter when needed. The second option requires you to rake the leaves into one huge pile. Keep the leaves moist, and you will receive a valuable soil conditioner in 1-3 years. You can later add it to the tired garden or potting soil to supply it with more calcium and magnesium.

Vacuum Them Up

If raking the leaves and mulching them afterward isn’t the best option for you, you can benefit from using a vacuum leaf shredder. These tools let you simply vacuum the leaves from the entire yard and mulch them right away. Once the container gets full, you can easily relocate the leaves into the trash bags for disposal or anywhere else for processing.

Mow the Leaves into Lawn

This may sound crazy, but you can actually mulch the leaves with the mulching lawnmower and leave them right on the lawn as a fertilizer. Set the blades 3” high and mow once a week until the leaves stop falling. Evenly spread mulch will fertilize the soil and add up the strength to your lawn. However, you should avoid thick layers of leaves as they may block oxygen and destroy entire patches of the lawn. Use rakes to spread the mulch more evenly if needed.

Use Leaves to Store Root Vegetables

Root vegetables, such as kale, carrots, and kale can be stored between the layers of fresh, crisp leaves. Blow or rake some leaves into a bag, relocate them to a cool humid spot and put all your carrots, beet, and any other root veggies to keep them fresh for months. You can sprinkle the layers of leaves with some water to make the environment more humid if it’s too dry.

Use Leaves as Insulation

Unmulched fallen leaves can be used as winter insulation for trees and shrubs. You have to circle plants with wire fencing and fill the space inside with leaves. They will keep the temperature higher up until spring. When the warmer days come, simply remove the fences and relocate the leaves to the compost bin.

The Most Underrated Crops

Congratulations! Your gardening skills are now much more advanced. You can give a second life to the fallen leaves in your yard and save up on fertilizers and disposal. The power of the fallen leaves is underrated, but it is all under your control now!

Tips to Keep Rodents and Wildlife Out of the Garden

Posted by Darrell Ross on
0
Gardening Tips
Tips to Keep Rodents and Wildlife Out of the Garden

Gardening is a rewarding pastime that requires a lot of hard work. It takes months of tender loving care for your fruits and vegetables to ripen. Finding that your plants have been eaten or damaged by wildlife after so much time is a truly disheartening experience. Try implementing the following tips to stop animals from raiding your garden.

Cover Your Plants

Covering your plants with row covers or netting will help prevent flies and wildlife from getting inside. They will also continue to let the sunshine in. You can purchase these in hardware stores or online. Ultrafine mesh covers are great for keeping rodents out.

For bonus protection, consider building a raised garden bed. The higher it is off the ground, the better. Skunks will have a hard time climbing into the bed, and you can stop rodents from digging underneath by lining them with mesh. You can also install hinged covers that you can open and close when gardening. Raised beds are great for city gardening and extend the length of the growing season by keeping the soil warm.

Build a Fence

Like raised beds, you can help keep animals out of the garden by surrounding your plants with a fence. A soft, mesh fence is difficult for skunks and raccoons to climb and can be set up temporarily. If rabbits, deer, or marmots are giving you trouble, you can alternatively set up an electric fence. You can find electric wires that emit just enough voltage to scare away wildlife in most hardware stores. These can also be set up temporarily.

Get Rid of Other Food Sources

Skunks, rats, raccoons, and other animals are drawn to yards where they can find food. Get rid of the bird feeder and store your seeds and gardening materials in a shed. Make your garbage cans and recycling bins inaccessible, as well. Use lidded receptacles and store them in the garage or shed until collection day. You should also clean them out with vinegar every few weeks to make them unappealing to wildlife. Always clean up after a meal outside, and don’t leave any pet food out.

Use Apple Cider Vinegar and Spices

Pests dislike the smell of apple cider vinegar because it is similar to predator urine. It is also effective at repelling ants because it covers up their scent trails. Soak some rags in apple cider vinegar and place them in sandwich bags, then poke holes in the bags and place them around the garden. Next, try mixing one part apple cider vinegar with one part water and spraying the sides of the garden to keep bugs out. You can also spray your plants directly by diluting the vinegar further. This works best when the weather is warm, sunny, and dry.

Mice and rats especially dislike cayenne pepper and red pepper flakes. Sprinkle some of these spices in the garden to ward them off. You can also make a hot pepper spray by mixing one tablespoon of hot sauce with a gallon of water and a drop of dish soap. Spray the mixture around the edges of the garden.

Set Up Motion-activated Deterrents

There are all kinds of electronic deterrents out there. Some flashlights make high-pitched sounds or spray water when an animal comes near. Try installing one or two motion-activated repellents in the garden to encourage the animals to leave. These can be purchased from hardware stores, home supply stores, or online retailers.

Hire a Wildlife Remover or Pest Control Professional

If there is an animal living on your property and you want it removed, call a professional for help. They have the tools and know-how to remove them safely. Attempting to remove an animal yourself could result in injury and risks separating a mother from her young. And you definitely don’t want to get sprayed by a skunk!

If you have been dealing with rats, the problem won’t go away without professional intervention. Rats are common in city gardens and spread from one area to the next. Call The Exterminators in Peterborough or near you. A technician can set up bait stations for you and service them regularly to keep the rodent population under control. This won’t harm your garden or the other species in the neighborhood.

Conclusion

Growing produce without attracting wildlife is a bit tricky, but it can be managed with a combination of the tricks above. Remember to restrict the animals’ access to food – keep as much as you can out of reach. If it’s too much, call a professional for help. They can get rid of pests and help keep them out by excluding the garden for you.

From Farm to Table: How Does Coffee Reach Our Mugs?

Posted by Darrell Ross on
0
Projects
From Farm to Table: How Does Coffee Reach Our Mugs?

Coffee is undoubtedly one of the most popular drinks in modern history. Currently, more than 166 million 60-kilogram bags of coffee beans are consumed annually across the world. With such a large consumption, it is normal to wonder how coffee travels from the farms and reaches the tables to consumers. The best coffee makers in Canada are only the start of this story, where do the beans actually come from?

Planting

Before coffee becomes the drink that is known and loved by many, it undergoes several processes. The first process involves planting the caffea. Caffea is a flowering plant that bears “coffee cherries” that contain coffee beans required to make coffee. The caffea shrub is cultivated on several continents, usually in tropical areas.

Unlike most fruits, coffee cherries do not ripen after harvest. Thus, during harvest season, only the most experienced pickers are called to do the job to make sure that the best cherries are plucked.

Harvesting

The coffee beans are then harvested either by selective picking or strip picking. Selective harvesting is done by experienced pickers to harvest high-quality Arabica coffee. This method is labor-intensive and time-consuming. On the other hand, strip picking harvesting coffee by hand or mechanical harvester.

Processing

Once the cherries have been sorted and organized, they are immediately processed to prevent spoilage. There are different methods of processing the coffee cherries to get the coffee beans and this depends on the region and resources available.

There are different types of processing methods including:

  • Washed (wet)
  • Sun-drying
  • Mechanical drying
  • Natural drying
  • Semi-washed
  • Resting

After the processing, the coffee beans must be in the resting period, where they remain in parchment for 15 to 90 days. Several factors must be taken into consideration when resting the coffee beans. If the resting is not done properly, the coffee beans will age faster and have unwanted flavors once it is milled.

Milling

Once the coffee beans are well-rested, milling follows. Milling involves hulling which is the removal of all remaining materials in the bean, followed by polishing, then cleaning and sorting, and lastly grading. At this point, the coffee beans will be prepared for shipping.

Roasting

The next process is roasting the beans. Roasting is usually done in the importing country to maintain the freshness of the coffee beans. During roasting, the coffee beans are heated until they attain the well-known brown color.

Once again, there are many factors to be considered when roasting coffee beans because these variables will affect the flavor of the coffee. Once the roasting is done, the coffee beans are cooled and rested for a few hours to one whole day.

Packaging

After the long process, the coffee beans can now be packaged and sold to the public. Most consumers are concerned with the roast date and level of roasting because these are indicators of whether the coffee beans are still viable or stale.

If they are still fresh, which is usually within four to seven days from roasting, the coffee beans are ground to the desired consistency. You may grind them to be coarse or fine.

Brewing

Once the desired consistency has been obtained, the final step is brewing. This is the culmination of all the processes because coffee the drink is finally made. Several techniques can be used to brew coffee depending on the preferred coffee profile of the coffee drinker.

Conclusion

Getting coffee from coffee plants is a long journey from the farm to the table. We hope that you now have insight into what is involved in making this delicious drink.

How to Deal with Mosquitoes in Your Garden

Posted by Darrell Ross on
0
Projects
How to Deal with Mosquitoes in Your Garden

Almost 700 million people become ill because of illnesses caused by mosquitoes every year, while more than a million of them die. Therefore, it’s not surprising why many people are adamant about figuring out ways to eliminate mosquitoes in their gardens and around their homes.

Still, prevention proves to be the best way since it can be hard to control mosquitoes if they have a very large population. If you’re wondering how to manage mosquitoes in the garden, then we’ve got just the right tips for you.

How to Protect Yourself

When working in the yard, make sure that you protect your exposed skin. You can cover it by wearing a long-sleeved shirt and long pants. Wearing shoes, socks, a hat, and gloves can also provide extra protection.

You can even use different mosquito killer sprays on your clothes. For this, you can choose a spray with diethyltoluamide, a chemical known as Deet in different concentrations. Though further research is still needed on how safe Deet is, it is generally safe to use low concentrations. However, rather than applying it to the skin, you have to apply it to your clothing for mosquito protection instead.

You can also purchase shirts that have a fabric infused with mosquito repellent. You don’t have to worry about washing these shirts since the repellent will be effective even if you launder them many times. You can also use lotions and sprays for mosquito protection on your skin. Get ones with citrus oil, such as wipes that you can rub on your skin.

If you don’t want to use chemicals, you can opt for a Bug Baffler shirt which can cover you from the head down to your waist. It is also made from a very fine mesh material to help prevent mosquitoes and flies from coming near you. Moreover, it is more comfortable than a long-sleeved shirt as you can move more freely when working in your garden.

How to Prevent Mosquitoes

Mosquito prevention is more effective and important than protection. Just keep in mind that you don’t have to protect yourself too much if you can control the mosquito population even before they invade your garden.

You can remove standing water from drain outlets everywhere and anywhere in your house to get rid of their breeding sites. You can also use citronella since it is known to protect you from mosquitoes. You can opt to get citronella torches with oil or candles and place them in small areas in your home, such as the patio, when you have guests over.

Placing an electric fan on your patio or porch also works because mosquitoes and flies hate wind.

Conclusion

Always remember to also practice protective and preventive measures even inside your home. Don’t wait before it’s too late before you start acting. As early as possible, get rid of their breeding grounds to ensure they won’t multiply. This way, you can enjoy a mosquito-free backyard and property.

How to Attract Hedgehogs into Your Garden

Posted by Darrell Ross on
0
Projects
How to Attract Hedgehogs into Your Garden

Hedgehogs are innocent little furry creatures that are not harmful to humans. Generally, hedgehogs will get scared and will run away from humans, or they will curl up into a spiky ball. However, their spikes can penetrate the skin and may cause a little discomfort.

Despite their timid demeanor, the hedgehog population has been declining. According to a report in Britain, the population of hedgehogs has fallen by about 50 percent. With this knowledge, we should take certain actions to increase the hedgehog population. This can be done by attracting them to friendly gardens and giving them a home.

However, hedgehogs don’t just wander around your garden normally. There are things you must do to make your garden hedgehog-friendly. Here are some tips that will certainly help attract hedgehogs into garden hedgehog houses.

Before we dive deeper into the different ways of how to attract hedgehogs into your garden, let’s watch some interesting watch about these little animals.

5 Ways to Attract Hedgehogs into Your Garden

1. Create Pathways for The Hedgehogs

While you may want to fence your property to ensure privacy, this may keep the hedgehogs out. So, how do you invite them in? First, you need to create a pathway that will allow your hedgehogs to get into your garden.

Also, by creating hedgehog holes, you are allowing these furry little creatures to enter your garden. A hedgehog hole allows the hedgehog to travel from garden to garden. At night, hedgehogs usually travel around 1 mile. They like to stay near the edges as they feel much safer. Nonetheless, they will also wander around from time to time. During the breeding season, males can go about 2 miles.

The best way to create these pathways is to set up a meeting with your neighbors and devise a plan or come up with an agreement to create hedgehog pathways. The right pathways will undoubtedly attract hedgehogs to your garden.

2. Build a Hedgehog Home

You can also attract hedgehogs into garden hedgehog houses by building one for them.

You can build hedgehog houses by yourself, or you can buy hog houses from different online shops. If you opt to go DIY, you can randomly pile logs and add some leaves to the box.

For an average size garden, perhaps 2 to 3 hedgehog houses are best. Place the box in your garden under the garden shed or thick vegetation. Ultimately, you need to create a safe nesting for your hedgehog. Although these shelters are specifically made for hedgehogs, they can add any aesthetic to your garden. These hedgehog houses can be very decorative, depending on your creativity.

3. Avoid Noisy Places

If you are looking to attract hedgehogs, you should know that they require peace. This is especially true during the day since this is their sleeping time, and they need some quiet.

Therefore, when creating a good hedgehog home, make sure that it is far from busy roadways, businesses, or construction sites. Also, children and noisy dogs can scare them away.

4. Supplement Them with Food and Water

This is very obvious, but this is still worth noting. Hedgehogs need a lot of water, and supplying enough will attract them into your garden. For food, you can use cat or dog pellets to supplement their natural diet. Also, make sure that you put a bowl of water in your garden.

If you already have a hedgehog house, you can leave it somewhere close to it. This is also to encourage them to stay there. During the cold months, you may have to change the water supply regularly as it may get frozen if it gets too cold.

5. Do Not Disturb Them During Hibernation

This is pretty tricky since it is very hard to determine whether a hedgehog is hibernating in your garden or not. However, you need to resist the temptation to disturb the hedgehog if you find that it is hibernating in your garden. Just leave them be and let them hibernate. Usually, hedgehogs hibernate during November and March.

Final thoughts

Being at the top of the food chain, human beings are quite unchallenged by most species. However, this does not mean that we should pay attention to other living things, especially those declining in population. Hedgehogs are not harmful and deserve to live well and populate. The above tips can help you attract hedgehogs into garden hedgehog houses.