Category Archives

29 Articles

Small Space Composting That Actually Works (Even in Apartments)

Posted by darrell on
0
Home and Urban Gardening
Small Space Composting That Actually Works (Even in Apartments)

Transform your kitchen counter, balcony, or closet into a thriving compost hub by learning to maximize small spaces for eco-friendly waste management. Start with a compact bokashi bin under your sink to ferment food scraps without odors, creating nutrient-rich fertilizer in just two weeks. Stack multiple trays in a vermicomposting system the size of a shoe box, letting red wiggler worms process your organic waste while producing premium casting soil. Install a sleek, counter-top compost collector with activated charcoal filters to store daily scraps odor-free until processing. These space-conscious composting methods not only reduce household waste but also create premium soil amendments for indoor plants and container gardens, making sustainable living achievable regardless of space constraints.

Smart Indoor Composting Methods

Bokashi Composting

Bokashi composting is a game-changer for small-space dwellers who want to reduce food waste while creating nutrient-rich soil. This Japanese method uses beneficial microorganisms to ferment kitchen waste, including meat and dairy products that traditional composting typically can’t handle.

The process begins with a special bucket system featuring a spigot to drain liquid. Layer your food scraps with Bokashi bran (which contains the essential microorganisms), pressing down to remove air pockets. When the bucket is full, seal it tightly and let it ferment for two weeks. During this time, drain the liquid every few days – this “tea” makes an excellent diluted fertilizer for your plants.

What makes Bokashi perfect for apartments? It’s completely odor-free when done correctly, takes up minimal space (just one or two small buckets), and processes waste quickly. Plus, it’s indoor-friendly since the sealed system prevents pests and produces no foul smells.

The fermented waste can be buried in garden soil or added to a traditional compost pile. For apartment dwellers without outdoor space, you can create a soil factory using a large container with regular soil to break down the fermented material into usable compost.

Diagram showing the different layers inside a Bokashi composting bin with visible fermentation stages
Cross-sectional view of a Bokashi bin showing layers of kitchen scraps and fermentation process

Vermicomposting

Vermicomposting is a perfect solution for urban dwellers, transforming kitchen scraps into nutrient-rich compost using red wiggler worms. These industrious creatures can process up to half their body weight in food waste daily, all while living contentedly in a compact bin under your sink or in a closet corner.

To start, choose a shallow plastic bin with drainage holes and a catch tray for excess moisture. Layer the bottom with moistened shredded paper, cardboard, or coco coir, then add your worm colony. Red wigglers thrive in temperatures between 55-77°F, making indoor spaces ideal for year-round composting.

Feed your worms a diet of fruit and vegetable scraps, coffee grounds, and crushed eggshells. Avoid meat, dairy, oils, and citrus fruits. Keep the bedding moist like a wrung-out sponge and harvest the dark, crumbly castings every 3-4 months.

A well-maintained worm bin is odorless and takes up minimal space – typically no larger than a shoe box. Urban gardener Maria Chen shares, “My under-sink worm bin produces enough compost for all my houseplants and balcony garden, plus it’s a fascinating conversation starter when guests visit!”

Indoor vermicomposting system fitted neatly in an under-sink cabinet with visible worms and bedding
Compact worm composting bin setup under a kitchen sink with labeled parts

Balcony and Patio Solutions

Compact Tumbling Composters

Compact tumbling composters are a game-changer for small-space composting, offering a clean and efficient solution that fits on balconies, patios, or tiny yards. These innovative devices consist of a sealed drum that rotates on an axis, allowing you to mix your compost materials with just a few easy turns.

Unlike traditional compost piles, tumblers keep everything contained and pest-free while speeding up the decomposition process. Most models can transform kitchen scraps and yard waste into rich, garden-ready compost in just 4-8 weeks. The elevated design also makes adding materials and harvesting finished compost a breeze – no bending or heavy lifting required!

Look for dual-chamber tumblers that let you add fresh materials to one side while the other batch finishes composting. For optimal results, maintain a good balance of green materials (food scraps, coffee grounds) and brown materials (dried leaves, paper), and give your tumbler a few spins every couple of days.

Many urban gardeners find that a 37-gallon tumbler provides enough capacity for a small household while taking up minimal space. Plus, the sealed design helps control moisture and odors, making it perfect for shared living spaces.

Space-efficient tumbling composter on an urban apartment balcony with container garden
Small balcony setup featuring a compact tumbling composter next to potted plants

Stack-and-Leave Systems

Stack-and-leave composting systems offer an innovative vertical solution for space-challenged composters. These systems typically consist of stackable trays or bins that can be placed one above another, making efficient use of vertical space while allowing gravity to aid in the composting process.

The basic setup involves adding fresh materials to the top tray while finished compost accumulates in lower levels. As organic matter breaks down, it naturally shifts downward through mesh or perforated bottoms, creating a continuous flow system. Most stack-and-leave designs feature 3-4 tiers and can fit comfortably on a balcony or in a corner of your kitchen.

One of the biggest advantages of these systems is their hands-off nature – there’s no need for regular turning or mixing. The vertical design also promotes better airflow, which speeds up decomposition and reduces odors. Many models come with secure lids and tight seals to keep pests out and contain any potential smells, making them perfect for indoor use.

To maximize efficiency, layer your materials with a mix of browns (paper, cardboard) and greens (food scraps) in the top tray, and let nature do the rest. Within a few months, you’ll have rich compost ready to harvest from the bottom.

What to Compost (and What to Avoid)

Successful small-space composting starts with knowing exactly what materials to include and what to keep out. For the “greens” category, add kitchen scraps like fruit and vegetable waste, coffee grounds, and eggshells. These nitrogen-rich materials provide essential nutrients for your compost. Tea bags (remove staples first), fresh grass clippings, and composting fallen leaves make excellent additions too.

For “browns,” incorporate paper products like cardboard, newspaper (torn into small pieces), and paper towel rolls. These carbon-rich materials help maintain proper moisture levels and prevent odors. Small amounts of dried leaves, straw, or sawdust work well in limited quantities.

Just as important is knowing what to avoid. Never add meat, dairy, or oily foods, as these attract pests and create unpleasant odors – especially crucial in small spaces. Skip diseased plants, chemically treated wood products, and glossy or colored paper. Pet waste, while organic, doesn’t belong in your compost bin either.

For apartment composting, keep materials small and manageable. Chop kitchen scraps into smaller pieces to speed up decomposition. Maintain a rough ratio of three parts browns to one part greens to achieve the perfect balance. Remember that in small-space composting, less is more – start with modest amounts and adjust as you become more comfortable with the process.

Store food scraps in a countertop container with a tight-fitting lid between additions to your main composting bin. This prevents fruit flies and keeps your kitchen tidy while you build your composting routine.

Troubleshooting Common Issues

Even the most experienced composters face common composting challenges, but don’t worry – most issues have simple solutions! Here’s how to tackle the most frequent problems in small-space composting:

Unpleasant Odors
If your compost starts smelling bad, it’s usually due to too much moisture or too many “green” materials. Add more brown materials like dried leaves or paper, and ensure proper airflow by turning the mixture regularly. For indoor bins, sprinkle a thin layer of soil or coconut coir on top to absorb odors.

Fruit Flies
These pesky visitors often appear when food scraps are exposed. Combat them by always covering fresh kitchen scraps with brown materials or finished compost. You can also keep a small container of scraps in your freezer and add them to your compost frozen to discourage flies.

Slow Decomposition
If your compost isn’t breaking down, it might need better balance. Aim for smaller pieces (chop kitchen scraps before adding), maintain moisture like a wrung-out sponge, and ensure a good mix of green and brown materials. For small bins, try adding a handful of finished compost to introduce beneficial microorganisms.

Moisture Issues
Too wet? Add dry browns and ensure proper drainage. Too dry? Spritz with water and add more green materials. For indoor composting, line the bottom of your bin with newspaper to absorb excess moisture.

Limited Space
When your bin gets full, try removing finished compost from the bottom while continuing to add materials on top. You can also start a second small container while the first “rests” and completes decomposition.

Temperature Concerns
Small-space composters might not heat up like larger piles, and that’s okay! Focus on maintaining consistent moisture and a good material mix. Your compost will still break down, just more slowly through cold composting.

Remember, perfection isn’t necessary – even small-scale composting makes a positive environmental impact. With these troubleshooting tips, you’ll be well-equipped to handle any challenges that arise in your composting journey.

Don’t let limited space hold you back from joining the composting revolution! As we’ve explored throughout this guide, there are numerous creative and efficient ways to turn your kitchen scraps into valuable organic matter, even in the tiniest of spaces. Whether you choose a compact bin system, worm composting, or an electric composter, the key is selecting a method that fits your lifestyle and available space.

Remember, successful small-space composting is all about maintaining the right balance of materials, managing moisture levels, and staying consistent with your routine. The benefits far outweigh the initial learning curve – you’ll reduce waste, create nutrient-rich soil for your plants, and contribute to a more sustainable future.

Start small, experiment with different techniques, and don’t be afraid to adjust your approach as you learn. Even a modest composting setup can make a significant environmental impact while providing you with satisfaction and valuable organic material for your indoor or balcony garden. Take that first step today – your plants and the planet will thank you!

Small Space Composting That Actually Works (Even in Apartments)

Posted by darrell on
0
Home and Urban Gardening
Small Space Composting That Actually Works (Even in Apartments)

Transform your kitchen counter, balcony, or closet into a thriving compost hub by learning to maximize small spaces for eco-friendly waste management. Start with a compact bokashi bin under your sink to ferment food scraps without odors, creating nutrient-rich fertilizer in just two weeks. Stack multiple trays in a vermicomposting system the size of a shoe box, letting red wiggler worms process your organic waste while producing premium casting soil. Install a sleek, counter-top compost collector with activated charcoal filters to store daily scraps odor-free until processing. These space-conscious composting methods not only reduce household waste but also create premium soil amendments for indoor plants and container gardens, making sustainable living achievable regardless of space constraints.

Smart Indoor Composting Methods

Bokashi Composting

Bokashi composting is a game-changer for small-space dwellers who want to reduce food waste while creating nutrient-rich soil. This Japanese method uses beneficial microorganisms to ferment kitchen waste, including meat and dairy products that traditional composting typically can’t handle.

The process begins with a special bucket system featuring a spigot to drain liquid. Layer your food scraps with Bokashi bran (which contains the essential microorganisms), pressing down to remove air pockets. When the bucket is full, seal it tightly and let it ferment for two weeks. During this time, drain the liquid every few days – this “tea” makes an excellent diluted fertilizer for your plants.

What makes Bokashi perfect for apartments? It’s completely odor-free when done correctly, takes up minimal space (just one or two small buckets), and processes waste quickly. Plus, it’s indoor-friendly since the sealed system prevents pests and produces no foul smells.

The fermented waste can be buried in garden soil or added to a traditional compost pile. For apartment dwellers without outdoor space, you can create a soil factory using a large container with regular soil to break down the fermented material into usable compost.

Diagram showing the different layers inside a Bokashi composting bin with visible fermentation stages
Cross-sectional view of a Bokashi bin showing layers of kitchen scraps and fermentation process

Vermicomposting

Vermicomposting is a perfect solution for urban dwellers, transforming kitchen scraps into nutrient-rich compost using red wiggler worms. These industrious creatures can process up to half their body weight in food waste daily, all while living contentedly in a compact bin under your sink or in a closet corner.

To start, choose a shallow plastic bin with drainage holes and a catch tray for excess moisture. Layer the bottom with moistened shredded paper, cardboard, or coco coir, then add your worm colony. Red wigglers thrive in temperatures between 55-77°F, making indoor spaces ideal for year-round composting.

Feed your worms a diet of fruit and vegetable scraps, coffee grounds, and crushed eggshells. Avoid meat, dairy, oils, and citrus fruits. Keep the bedding moist like a wrung-out sponge and harvest the dark, crumbly castings every 3-4 months.

A well-maintained worm bin is odorless and takes up minimal space – typically no larger than a shoe box. Urban gardener Maria Chen shares, “My under-sink worm bin produces enough compost for all my houseplants and balcony garden, plus it’s a fascinating conversation starter when guests visit!”

Indoor vermicomposting system fitted neatly in an under-sink cabinet with visible worms and bedding
Compact worm composting bin setup under a kitchen sink with labeled parts

Balcony and Patio Solutions

Compact Tumbling Composters

Compact tumbling composters are a game-changer for small-space composting, offering a clean and efficient solution that fits on balconies, patios, or tiny yards. These innovative devices consist of a sealed drum that rotates on an axis, allowing you to mix your compost materials with just a few easy turns.

Unlike traditional compost piles, tumblers keep everything contained and pest-free while speeding up the decomposition process. Most models can transform kitchen scraps and yard waste into rich, garden-ready compost in just 4-8 weeks. The elevated design also makes adding materials and harvesting finished compost a breeze – no bending or heavy lifting required!

Look for dual-chamber tumblers that let you add fresh materials to one side while the other batch finishes composting. For optimal results, maintain a good balance of green materials (food scraps, coffee grounds) and brown materials (dried leaves, paper), and give your tumbler a few spins every couple of days.

Many urban gardeners find that a 37-gallon tumbler provides enough capacity for a small household while taking up minimal space. Plus, the sealed design helps control moisture and odors, making it perfect for shared living spaces.

Space-efficient tumbling composter on an urban apartment balcony with container garden
Small balcony setup featuring a compact tumbling composter next to potted plants

Stack-and-Leave Systems

Stack-and-leave composting systems offer an innovative vertical solution for space-challenged composters. These systems typically consist of stackable trays or bins that can be placed one above another, making efficient use of vertical space while allowing gravity to aid in the composting process.

The basic setup involves adding fresh materials to the top tray while finished compost accumulates in lower levels. As organic matter breaks down, it naturally shifts downward through mesh or perforated bottoms, creating a continuous flow system. Most stack-and-leave designs feature 3-4 tiers and can fit comfortably on a balcony or in a corner of your kitchen.

One of the biggest advantages of these systems is their hands-off nature – there’s no need for regular turning or mixing. The vertical design also promotes better airflow, which speeds up decomposition and reduces odors. Many models come with secure lids and tight seals to keep pests out and contain any potential smells, making them perfect for indoor use.

To maximize efficiency, layer your materials with a mix of browns (paper, cardboard) and greens (food scraps) in the top tray, and let nature do the rest. Within a few months, you’ll have rich compost ready to harvest from the bottom.

What to Compost (and What to Avoid)

Successful small-space composting starts with knowing exactly what materials to include and what to keep out. For the “greens” category, add kitchen scraps like fruit and vegetable waste, coffee grounds, and eggshells. These nitrogen-rich materials provide essential nutrients for your compost. Tea bags (remove staples first), fresh grass clippings, and composting fallen leaves make excellent additions too.

For “browns,” incorporate paper products like cardboard, newspaper (torn into small pieces), and paper towel rolls. These carbon-rich materials help maintain proper moisture levels and prevent odors. Small amounts of dried leaves, straw, or sawdust work well in limited quantities.

Just as important is knowing what to avoid. Never add meat, dairy, or oily foods, as these attract pests and create unpleasant odors – especially crucial in small spaces. Skip diseased plants, chemically treated wood products, and glossy or colored paper. Pet waste, while organic, doesn’t belong in your compost bin either.

For apartment composting, keep materials small and manageable. Chop kitchen scraps into smaller pieces to speed up decomposition. Maintain a rough ratio of three parts browns to one part greens to achieve the perfect balance. Remember that in small-space composting, less is more – start with modest amounts and adjust as you become more comfortable with the process.

Store food scraps in a countertop container with a tight-fitting lid between additions to your main composting bin. This prevents fruit flies and keeps your kitchen tidy while you build your composting routine.

Troubleshooting Common Issues

Even the most experienced composters face common composting challenges, but don’t worry – most issues have simple solutions! Here’s how to tackle the most frequent problems in small-space composting:

Unpleasant Odors
If your compost starts smelling bad, it’s usually due to too much moisture or too many “green” materials. Add more brown materials like dried leaves or paper, and ensure proper airflow by turning the mixture regularly. For indoor bins, sprinkle a thin layer of soil or coconut coir on top to absorb odors.

Fruit Flies
These pesky visitors often appear when food scraps are exposed. Combat them by always covering fresh kitchen scraps with brown materials or finished compost. You can also keep a small container of scraps in your freezer and add them to your compost frozen to discourage flies.

Slow Decomposition
If your compost isn’t breaking down, it might need better balance. Aim for smaller pieces (chop kitchen scraps before adding), maintain moisture like a wrung-out sponge, and ensure a good mix of green and brown materials. For small bins, try adding a handful of finished compost to introduce beneficial microorganisms.

Moisture Issues
Too wet? Add dry browns and ensure proper drainage. Too dry? Spritz with water and add more green materials. For indoor composting, line the bottom of your bin with newspaper to absorb excess moisture.

Limited Space
When your bin gets full, try removing finished compost from the bottom while continuing to add materials on top. You can also start a second small container while the first “rests” and completes decomposition.

Temperature Concerns
Small-space composters might not heat up like larger piles, and that’s okay! Focus on maintaining consistent moisture and a good material mix. Your compost will still break down, just more slowly through cold composting.

Remember, perfection isn’t necessary – even small-scale composting makes a positive environmental impact. With these troubleshooting tips, you’ll be well-equipped to handle any challenges that arise in your composting journey.

Don’t let limited space hold you back from joining the composting revolution! As we’ve explored throughout this guide, there are numerous creative and efficient ways to turn your kitchen scraps into valuable organic matter, even in the tiniest of spaces. Whether you choose a compact bin system, worm composting, or an electric composter, the key is selecting a method that fits your lifestyle and available space.

Remember, successful small-space composting is all about maintaining the right balance of materials, managing moisture levels, and staying consistent with your routine. The benefits far outweigh the initial learning curve – you’ll reduce waste, create nutrient-rich soil for your plants, and contribute to a more sustainable future.

Start small, experiment with different techniques, and don’t be afraid to adjust your approach as you learn. Even a modest composting setup can make a significant environmental impact while providing you with satisfaction and valuable organic material for your indoor or balcony garden. Take that first step today – your plants and the planet will thank you!

Smart Water-Wise Garden Techniques That Actually Work in Dry Climates

Posted by darrell on
0
Home and Urban Gardening
Smart Water-Wise Garden Techniques That Actually Work in Dry Climates

Transform your arid landscape into a thriving garden by mastering these essential gardening tips for dry climates. Select drought-resistant Mediterranean plants like lavender, rosemary, and sage to create a water-wise foundation. Layer organic mulch 3-4 inches deep around plants to retain crucial soil moisture and reduce evaporation by up to 70%. Install a drip irrigation system beneath the mulch, delivering water directly to root zones while using 30-50% less water than traditional sprinklers.

Design your garden with strategic microclimates – group thirsty plants in naturally cooler, shadier areas while positioning sun-loving xerophytes in full exposure. Create berms and swales to capture and channel precious rainfall, transforming water management challenges into opportunities for lush growth. Choose native species adapted to local rainfall patterns – they require minimal supplemental watering once established and attract beneficial wildlife.

This water-conscious approach doesn’t mean sacrificing beauty or productivity. By embracing these climate-smart techniques, you’ll cultivate a resilient garden that thrives with less water while maintaining visual appeal throughout the seasons.

Understanding Your Dry Climate Garden Environment

Identifying Your Climate Zone

Understanding your climate zone is crucial for successful dry climate gardening. Start by checking your USDA hardiness zone, which provides information about temperature ranges in your area. However, in dry climate gardening, you’ll need to look beyond just temperature to factors like annual rainfall, humidity levels, and seasonal weather patterns.

Pay attention to your property’s unique microclimate conditions. South-facing slopes receive more sun and typically experience higher evaporation rates. Areas near buildings or walls may create heat islands that affect plant growth. Wind patterns can significantly impact moisture loss, so note any natural windbreaks or exposed areas in your garden space.

Document your observations over different seasons. Monitor how long areas receive direct sunlight, where water naturally collects after rain, and which spots tend to dry out first. Local weather stations and agricultural extension offices can provide valuable historical climate data for your area.

Consider consulting experienced local gardeners or joining community gardening groups. Their firsthand knowledge of regional climate challenges and successful adaptation strategies can be invaluable for your garden planning.

Soil Considerations for Dry Gardens

Good soil management is crucial for successful dry climate gardening, as it directly impacts water retention and plant health. Sandy soils, while common in arid regions, can be improved by adding organic matter like compost, aged manure, or leaf mulch. These amendments help create a soil structure that holds moisture longer while maintaining good drainage.

Consider incorporating water-retaining materials like vermiculite or coconut coir, which can significantly boost your soil’s water-holding capacity. A layer of organic mulch on top of your soil (about 2-3 inches deep) will reduce evaporation and keep root zones cooler, helping plants thrive with less water.

Pay attention to your soil’s pH levels, as arid soils tend to be alkaline. Regular soil testing can help you make informed decisions about amendments. Adding sulfur or pine needles can help lower pH if needed.

For slopes or uneven terrain, consider creating terraces or swales to prevent water runoff and encourage natural water collection. Building raised beds with rich, well-amended soil can also give you better control over soil conditions and water management in challenging dry climates.

Side-by-side comparison of dry, cracked soil and healthy garden soil with moisture monitoring
Split comparison photo showing dry, cracked soil next to well-amended garden soil with moisture meter

Water-Smart Design Strategies

Xeriscaping Basics

Xeriscaping combines smart design with drought-tolerant plants to create beautiful, water-efficient landscapes perfect for dry climates. This approach to gardening isn’t about replacing your lawn with rocks and cacti – it’s about working with nature to create a thriving garden that requires minimal irrigation.

The core principles of xeriscaping start with proper planning. Group plants with similar water needs together, a practice known as hydrozoning. This prevents overwatering some plants while underwatering others. Choose native and drought-resistant plants that naturally thrive in your local climate, as they’ll require less maintenance and supplemental watering once established.

Soil preparation plays a crucial role in xeriscaping success. Adding organic matter improves soil structure and water retention, while proper grading helps direct rainfall where it’s needed most. Mulching is another essential practice, helping to retain soil moisture and suppress water-hungry weeds.

Efficient irrigation is key – consider drip systems or soaker hoses instead of sprinklers, and water deeply but infrequently to encourage deep root growth. Regular maintenance, including proper pruning and weeding, helps keep your xeriscape looking its best while maintaining its water-efficient design.

The beauty of xeriscaping lies in its versatility – you can create anything from a Mediterranean-style garden to a native wildflower meadow, all while conserving water and reducing maintenance time.

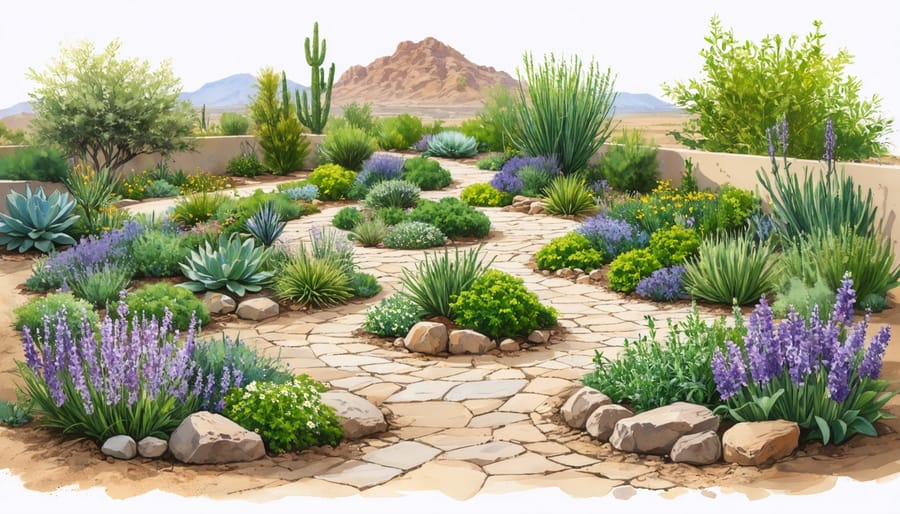
Well-designed xeriscape garden showing various drought-tolerant plants and hardscaping elements
Beautiful xeriscape garden design featuring different zones with drought-resistant plants and decorative rock features

Strategic Plant Grouping

Strategic plant grouping is essential for successful dry climate gardening. The key is to organize your plants based on their water requirements and sun tolerance, a practice known as hydrozoning. This approach not only conserves water but also helps plants thrive in challenging conditions.

Start by creating distinct zones in your garden based on water needs. Group thirsty plants together in one area, making irrigation more efficient. Place drought-tolerant plants in a separate section where they can receive less frequent watering. This prevents overwatering of drought-resistant species while ensuring water-loving plants get what they need.

Consider sun exposure when planning your layout. Use taller plants to create shade for more delicate species, and position sun-loving plants in open areas. Native plants often work well in the hottest spots since they’re naturally adapted to local conditions.

For optimal water conservation, arrange plants in concentric circles, with the most water-dependent species in the center. This creates a microclimate where moisture naturally collects, benefiting all plants in the grouping. Place ground covers and low-growing plants around taller specimens to reduce soil moisture evaporation.

Remember to factor in mature plant sizes when grouping. Plants that will grow tall should be positioned where they won’t overshadow smaller species that need full sun. This thoughtful arrangement ensures your garden remains balanced as it matures.

Drought-Resistant Plant Selection

Native Plants That Thrive

Native plants are your secret weapon for a thriving dry climate garden. These resilient species have evolved over thousands of years to flourish in your local conditions, requiring minimal intervention and maintenance. Desert marigolds bring cheerful splashes of yellow while requiring almost no supplemental water. Salvias, with their aromatic leaves and vibrant blooms, attract pollinators and survive extended dry spells. The tough-as-nails verbena produces delicate purple flowers that seem to dance in hot winds.

Consider incorporating drought-resistant grasses like blue grama or buffalo grass, which create beautiful movement in your landscape while stabilizing soil. Agaves and yuccas add striking architectural elements and store water in their thick leaves. For groundcover, ice plants offer low-growing succulent foliage topped with daisy-like flowers in vibrant jewel tones.

Native sages, penstemons, and blanket flowers provide reliable color throughout the growing season while supporting local wildlife. Desert willows and smoke trees can serve as anchor plants, offering dappled shade for other species. Remember that native plants typically need minimal fertilizer and develop deep root systems that help prevent soil erosion. Once established, these hardy plants will reward you with years of low-maintenance beauty while conserving precious water resources.

Edible Options for Dry Gardens

Growing edible plants in dry conditions is entirely possible with the right selection of drought-resistant varieties. Mediterranean herbs like rosemary, thyme, sage, and oregano actually thrive in hot, dry environments and require minimal watering once established. These herbs not only provide fresh flavors for your kitchen but also create beautiful, aromatic garden spaces.

For vegetables, focus on heat-loving crops like tomatoes, peppers, and eggplants, which can produce abundantly with strategic watering. Bush beans, cowpeas, and okra are excellent choices that maintain productivity even during dry spells. Sweet potatoes and Jerusalem artichokes develop deep root systems that help them survive with less water.

Consider growing drought-tolerant fruits like pomegranates, figs, and certain varieties of grapes. These plants not only provide delicious harvests but also add visual interest to your garden with their unique growth habits.

For maximum success, group your edibles according to their water needs and use mulch generously to retain soil moisture. Installing a drip irrigation system can ensure your plants receive consistent water directly at their roots, minimizing waste and maximizing growth. Remember to plant during cooler seasons to give roots time to establish before hot weather arrives.

Smart Irrigation Techniques

Drip Systems and Timers

Efficient irrigation is crucial for dry climate gardening, and drip systems coupled with smart timers offer the most effective solution for delivering the best water for plants while minimizing waste. A well-designed drip system delivers water directly to plant roots, reducing evaporation and preventing water from reaching unwanted areas where weeds might grow.

Start by mapping your garden zones based on plant water needs. Install a main water line with smaller tubes branching off to each plant or row. Use pressure-compensating emitters to ensure even water distribution, typically spaced 12-18 inches apart for vegetables and closer for thirsty plants like tomatoes.

Modern irrigation timers make water management effortless. Choose a smart timer that connects to local weather data and adjusts watering schedules automatically. Program different zones to run at optimal times – usually early morning or evening to minimize evaporation. Many timers now offer smartphone control, letting you adjust settings remotely.

Consider adding a moisture sensor to your system. These devices monitor soil moisture levels and prevent unnecessary watering cycles, saving both water and money. For maximum efficiency, combine your drip system with mulch to retain moisture and protect irrigation components from sun damage.

Remember to inspect your system monthly for clogs or leaks, and flush the lines seasonally to prevent mineral buildup. With proper maintenance, a drip system can reduce water usage by up to 70% compared to traditional sprinklers.

Drip irrigation emitters delivering water efficiently through protective mulch layer
Close-up of drip irrigation system in action, showing emitters watering plant roots through mulch

Mulching and Water Conservation

Mulching is your garden’s best friend in dry climates, acting as a protective blanket that keeps precious moisture where it belongs – in the soil. A 2-3 inch layer of organic mulch can reduce water evaporation by up to 70% while keeping soil temperatures more stable and suppressing thirsty weeds.

Choose materials readily available in your area: straw, wood chips, pine needles, or even dried grass clippings work well. For vegetable gardens, many successful dry-climate gardeners use a combination of newspaper or cardboard as a base layer, topped with organic mulch for maximum moisture retention.

Local farmer Maria Rodriguez in Arizona shares, “I’ve cut my irrigation needs by half since implementing deep mulching throughout my garden. The soil stays moist longer, and my plants are healthier than ever.”

Remember to keep mulch a few inches away from plant stems to prevent rot, and reapply as needed throughout the growing season. For additional water conservation, consider installing a drip irrigation system beneath your mulch layer. This combination delivers water directly to plant roots while minimizing evaporation loss.

Other effective moisture-retention strategies include creating shallow basins around plants to catch water, using shade cloth during peak summer months, and grouping plants with similar water needs together. These techniques, combined with proper mulching, create a water-wise garden that thrives in dry conditions.

Maintenance Tips for Long-Term Success

Maintaining a thriving garden in dry conditions requires consistent attention and smart practices. Regular monitoring helps you catch signs of plant stress early, allowing you to address issues before they become serious problems.

Start by establishing a routine inspection schedule, checking your plants at least twice weekly during peak growing seasons. Pay special attention to soil moisture levels by inserting your finger about 2 inches into the soil – if it’s dry at that depth, it’s time to water. Adjust your irrigation schedule based on weather patterns and seasonal changes.

Mulch maintenance is crucial for long-term success. Refresh your mulch layer annually, or whenever you notice significant decomposition. Aim to maintain a 2-4 inch layer, being careful not to pile it against plant stems or tree trunks. This helps retain moisture and suppress weed growth.

Pruning becomes especially important in dry climates. Remove dead or damaged growth promptly to reduce water waste and prevent disease spread. Time your pruning sessions for early morning or late evening to minimize plant stress.

Keep your soil healthy by adding compost twice yearly – once in spring and again in fall. This improves water retention and provides essential nutrients. Consider applying organic fertilizers during the growing season, but use them sparingly as over-fertilization can increase water needs.

Lastly, maintain your irrigation system’s efficiency by checking for leaks, clogs, or damaged components monthly. Clean filters regularly and adjust sprinkler heads to ensure even coverage. Remember that a well-maintained garden requires less water and provides better yields, making your efforts worthwhile in the long run.

Dry climate gardening isn’t just about surviving – it’s about thriving while being mindful of our precious water resources. By implementing water-wise plant selection, efficient irrigation systems, and proper soil management techniques, you can create a beautiful, sustainable garden that flourishes even in challenging conditions. Remember that mulching, proper timing of watering, and choosing native plants are your best allies in maintaining a drought-resistant garden. Whether you’re starting small with a few containers or planning a full xeriscaped landscape, every water-conscious choice makes a difference. Take the first step today by incorporating these practices into your garden, and join the growing community of gardeners who are proving that sustainable, water-wise gardening is not only possible but rewarding. Your efforts will contribute to environmental conservation while creating a resilient and beautiful outdoor space that can be enjoyed for years to come.

Fix Your Sick Plants: A Simple Diagnosis Method That Actually Works

Posted by darrell on
0
Home and Urban Gardening
Fix Your Sick Plants: A Simple Diagnosis Method That Actually Works

Diagnose plant problems systematically by examining leaves, stems, and roots for early warning signs of disease, pest damage, or nutrient deficiencies. Start at the base of affected plants, checking soil moisture levels and root health before moving upward to inspect stems for discoloration, spots, or unusual growth patterns. Document symptoms with clear photos and detailed notes, comparing healthy and unhealthy plants to pinpoint specific issues.

Most plant problems stem from just four core issues: improper watering, nutrient imbalances, pest infestations, or environmental stress. Learning to recognize these common indicators – yellowing leaves, wilting, spotted foliage, or stunted growth – transforms mysterious plant ailments into solvable challenges. By following a methodical diagnostic approach, even novice gardeners can become skilled plant detectives, catching problems early when solutions are most effective.

This practical guide will walk you through the essential steps of plant problem diagnosis, helping you identify and correct issues before they compromise your garden’s health.

The Plant Detective Method: Observation First

Visual Inspection Checklist

When inspecting your plants for problems, start with a systematic approach from top to bottom. Examine leaves closely, noting any discoloration, spots, or unusual patterns. Look for yellowing, which often indicates nutrient deficiencies, or brown spots that might signal fungal issues. Check both the upper and lower surfaces of leaves, as pests often hide underneath.

Move on to the stems, checking for any unusual swelling, discoloration, or damage. Healthy stems should be firm and properly colored for the plant variety. Look for signs of splitting, lesions, or unusual growth patterns that might indicate disease or pest problems.

Don’t forget to inspect the roots, though this may require carefully removing the plant from its container. Healthy roots should be firm and light-colored, while problematic roots often appear brown, mushy, or have an unpleasant odor. Be on the lookout for root binding in containers or signs of soil-borne pests.

Remember to document what you observe, perhaps with photos, as this can help track the progression of issues and assist in identifying recurring problems. Consider the overall plant appearance, including its growth pattern and any recent changes in its environment.

Step-by-step visual guide for inspecting plant leaves, stems, and roots
Infographic showing proper plant inspection steps with arrows pointing to key areas to check

Environmental Assessment

Before diving into specific symptoms, it’s crucial to evaluate your plant’s growing environment. Start by assessing the amount and quality of light your plant receives throughout the day. Too much or too little light can cause various issues, from leggy growth to leaf burn. Take note of any recent changes in light patterns or exposure.

Next, examine your watering practices and ensure you’re using the best water for plants. Check soil moisture at different depths using your finger or a moisture meter. Overwatering often causes more problems than underwatering, so pay attention to drainage and water frequency.

Soil quality plays a vital role in plant health. Look for signs of compaction, poor drainage, or nutrient deficiencies. Feel the soil texture and observe its color and smell. Healthy soil should be dark, crumbly, and have an earthy aroma. Consider testing your soil pH, as improper levels can prevent plants from absorbing necessary nutrients.

Remember to factor in temperature fluctuations, humidity levels, and air circulation, as these environmental conditions significantly impact plant health.

Common Symptoms and Their Likely Causes

Side-by-side comparison of healthy green leaves and diseased leaves showing common problems
Split comparison showing healthy vs diseased plant leaves with common symptoms like yellowing, spots, and wilting

Leaf Problems

Leaves are like nature’s warning lights, often revealing the first signs of plant stress before other symptoms appear. Yellow or pale leaves typically indicate nutrient deficiencies, with yellowing between leaf veins pointing to iron issues, while overall yellowing might suggest nitrogen shortage. Brown spots or patches could mean fungal problems, especially if accompanied by fuzzy growth in humid conditions.

Curling leaves often signal water stress – upward curling suggests underwatering, while downward curling might mean overwatering. Watch for irregular holes or chewed edges, as these are telltale signs of insect damage. If you notice black or sticky residue on leaves, look closer – this could be honeydew from sap-sucking pests like aphids.

Leaf patterns can also reveal environmental stress. Crispy brown edges might indicate salt buildup from hard water or excess fertilizer, while pale, bleached spots could mean sun damage. Twisted or distorted growth often points to herbicide exposure or viral infections.

Remember to check both leaf surfaces and examine new growth versus old leaves, as this can help pinpoint whether the issue is ongoing or from past stress. Quick identification of leaf problems allows for timely intervention, helping maintain healthy, productive plants in your garden.

Stem and Root Issues

Stem and root issues often reveal themselves through visible signs that can help you pinpoint problems before they become severe. Watch for stems that appear soft or mushy at the base, as this typically indicates root rot from overwatering or poor drainage. Dark or discolored stems, especially near the soil line, may signal fungal infections that require immediate attention.

Healthy roots should be firm and white or light tan. If you gently pull up a struggling plant, roots that are brown, black, or mushy suggest root rot, while few or stunted roots might indicate nutrient deficiencies or soil compaction. The presence of small knots or swellings on roots often points to nematode damage.

Look for stems that appear weak, bent, or unable to support the plant’s weight, which could indicate structural problems or insufficient light. Cracks or splits in stems might be caused by irregular watering or rapid growth spurts. Some stems may show signs of insect damage, like holes or scarring, requiring close inspection with a magnifying glass to spot tiny pests.

For container plants, gently slide the plant from its pot occasionally to inspect root health. Roots circling the bottom of the pot suggest the plant needs repotting, while a foul smell from the soil often indicates root decay. Remember that healthy stems and roots form the foundation of plant health, so regular monitoring helps catch issues early.

Simple Solutions for Common Problems

Quick Fixes

When you spot trouble with your plants, quick action can often prevent minor issues from becoming major problems. Here are some immediate steps you can take while investigating common plant problems and solutions.

For wilting plants, check soil moisture immediately. If dry, water thoroughly but avoid overwatering. If the soil is already wet, improve drainage by gently loosening the soil around the plant.

Yellow leaves often signal nutrient deficiencies. A quick foliar spray with organic seaweed solution can provide immediate relief while you work on long-term soil improvements.

For pest infestations, remove affected leaves and manually pick off visible insects. A gentle spray of diluted neem oil or insecticidal soap can offer quick protection without harming beneficial insects.

If you notice signs of fungal disease, immediately remove infected plant parts and improve air circulation by pruning crowded areas. A spray of diluted milk solution (1 part milk to 9 parts water) can help control powdery mildew.

For stunted growth, apply a balanced organic fertilizer and mulch around the plant base. This provides immediate nutrients while building long-term soil health.

Remember, these are temporary solutions while you determine the root cause. Always monitor your plants’ response to these quick fixes and adjust your approach accordingly.

Before and after images showing plant recovery process over time
Photo series showing the progression of treating a sick plant back to health

Long-term Prevention

Preventing future plant problems starts with creating a strong foundation for plant health. Think of it as building your garden’s immune system! Start by developing healthy soil through regular composting and crop rotation. These practices naturally build resistance against diseases and pests while promoting vigorous growth.

Maintain detailed garden records to track which plants thrive in specific locations and what issues you’ve encountered. This information becomes invaluable for planning future growing seasons and avoiding repeat problems. Consider implementing companion planting strategies, where certain plant combinations naturally support each other’s health and deter pests.

Regular maintenance is key to long-term prevention. Establish a consistent schedule for pruning, removing dead plant material, and monitoring for early signs of trouble. Keep your tools clean and sharp, sanitizing them between uses to prevent the spread of diseases. Installing proper irrigation systems helps maintain consistent moisture levels, reducing stress on your plants.

Create biodiversity in your garden by incorporating flowering plants that attract beneficial insects. These natural allies help control pest populations without the need for chemical interventions. Consider adding physical barriers like row covers or netting to protect vulnerable plants during critical growth periods.

Remember, healthy plants are naturally more resistant to problems. Focus on providing optimal growing conditions through proper spacing, adequate sunlight, and appropriate nutrient levels. By taking these preventive measures, you’ll spend less time treating problems and more time enjoying your thriving garden.

Successfully diagnosing plant problems doesn’t have to be a daunting task. By following a systematic approach and paying attention to the key signs we’ve discussed, you can become more confident in identifying and addressing issues in your garden. Remember to always start with the basics: examine the entire plant, check the growing conditions, and consider recent environmental factors or changes in care routines.

Keep a garden journal to track symptoms and treatments – this will be invaluable for future reference and help you spot patterns over time. Don’t hesitate to take photos of concerning issues, as these can help document the progression of problems and assist in getting accurate diagnoses from local extension offices or gardening communities.

Most importantly, take preventive action whenever possible. Maintain good garden hygiene, provide appropriate water and nutrients, and regularly monitor your plants for early warning signs. The sooner you catch and address an issue, the better chance your plants have of making a full recovery.

If you’re ever unsure about a diagnosis, don’t be afraid to reach out to experienced gardeners or local agricultural resources. Remember, every gardener faces plant problems at some point – it’s part of the learning journey. With practice and patience, you’ll develop an intuitive understanding of your plants’ needs and become more skilled at keeping them healthy and thriving.

Start Your First Garden Right: Simple Steps for Growing Success

Posted by darrell on
0
Home and Urban Gardening
Start Your First Garden Right: Simple Steps for Growing Success

Transform your backyard into a thriving garden by mastering three essential first steps in starting a garden for beginners. Select a sunny location receiving 6-8 hours of direct sunlight daily, then test your soil’s pH using an affordable home testing kit to ensure optimal growing conditions. Start small with just 3-4 vegetable varieties known for reliability – tomatoes, lettuce, and bush beans adapt well to most conditions and deliver satisfying harvests. Build raised beds 4 feet wide to easily reach the center without stepping on soil, filling them with a mix of 60% topsoil, 30% compost, and 10% perlite for ideal drainage and nutrients. This foundation sets you up for success while avoiding common beginner mistakes that can derail your gardening journey.

Choose Your Garden Space Wisely

Sunlight Requirements

Understanding sunlight requirements is crucial for a successful garden. Start by observing your garden space throughout the day to track sun patterns. Most vegetables and herbs need 6-8 hours of direct sunlight daily to thrive. Use a simple notebook to record sunny and shady spots at different times – morning, noon, and afternoon.

South-facing areas typically receive the most sunlight, making them ideal for sun-loving plants like tomatoes, peppers, and squash. Don’t worry if your garden has partial shade; leafy greens, herbs, and root vegetables can flourish with 4-6 hours of sun. For urban gardeners with limited direct sunlight, consider container gardens that can be moved to follow the sun.

Remember that seasonal changes affect sun patterns, so what’s sunny in summer might be shaded in fall. Make your observations during the growing season for the most accurate planning.

Comparison of sunny and shaded garden locations showing optimal garden placement
Split image showing different garden locations with varying sunlight exposure, demonstrating ideal vs poor placement

Space Assessment

Starting small is key for first-time gardeners, even if you’re excited to grow everything at once. Begin by assessing your available space realistically – whether it’s a sunny windowsill, small balcony, or backyard plot. Remember, successful gardening is about quality over quantity.

For apartment dwellers, focus on container gardening. A few well-maintained pots can yield impressive harvests of herbs, cherry tomatoes, or leafy greens. South-facing windows or balconies typically offer the best growing conditions. If you’re working with a patio, consider vertical gardening using trellises or wall-mounted planters to maximize your growing area.

Those with yard space should start with a manageable 4×8 foot raised bed. This size provides enough room to grow several different crops while remaining easy to maintain. When planning your layout, leave adequate walking space between planting areas and ensure you can reach the center of each bed without stepping on the soil.

For any space, prioritize crops that give you the most value for your area. Fast-growing vegetables like radishes and lettuce offer quick rewards, while compact varieties of popular vegetables help maximize limited space.

Soil Basics for Beginners

Demonstration of soil quality testing with testing kit and handful of dark soil
Hand holding rich garden soil next to a simple soil testing kit

Getting Started with Good Soil

Good soil is the foundation of a successful garden, and testing your soil doesn’t have to be complicated. Start by grabbing a handful of soil and giving it the squeeze test – if it holds shape when pressed but crumbles easily, you’re on the right track. For a more thorough assessment, pick up a basic soil testing kit from your local garden center to check pH levels and nutrient content.

To improve your soil naturally, add organic matter like compost, aged manure, or leaf mulch. A good rule of thumb is to incorporate 2-3 inches of compost into the top 6-8 inches of soil. This helps with drainage, adds nutrients, and creates a welcoming environment for beneficial organisms.

If your soil is particularly clay-heavy or sandy, don’t worry! Clay soil can be improved by adding organic matter and coarse sand, while sandy soil benefits from extra compost to help retain moisture. Remember, building good soil is a gradual process, so be patient and consistent with your improvements. Your plants will thank you with abundant growth and healthy yields.

For best results, prepare your soil a few weeks before planting to give amendments time to integrate naturally.

Container vs. Ground Planting

Starting your first garden presents two main options: container gardening or planting directly in the ground. Each approach has its unique benefits for beginners. Container gardening offers excellent flexibility – you can grow plants on patios, balconies, or even windowsills. It’s perfect for those with limited space or renters who can’t modify their yard. Containers also make it easier to control soil quality and manage pests.

Ground planting, however, gives plants more room to develop strong root systems and typically requires less frequent watering. It’s ideal if you have a suitable yard space and plan to grow larger vegetables like tomatoes, squash, or root crops. The initial setup cost is usually lower, though you may need to invest in soil improvement.

For first-time gardeners, we often recommend starting with a mix of both methods. Try growing herbs and compact vegetables like lettuce or peppers in containers while experimenting with heartier plants in the ground. This combination allows you to learn different growing techniques while minimizing risk and maximizing your chances of success.

Display of easy-to-grow vegetables and herbs for beginners including tomatoes, lettuce, basil, and mint
Organized collection of beginner-friendly vegetables and herbs labeled for easy identification

Beginner-Friendly Plants

Foolproof Vegetables

Starting your garden with easy-to-grow vegetables builds confidence and ensures early success. Leafy greens like lettuce, spinach, and kale are perfect choices as they grow quickly and can be harvested continuously. Radishes are another beginner-friendly option, ready to harvest in just 3-4 weeks.

Bush beans and snap peas are excellent choices that provide abundant yields with minimal maintenance. Cherry tomatoes are more forgiving than their larger cousins and produce fruits throughout the season. For root vegetables, try carrots and beets – they’re straightforward to grow and offer the satisfaction of pulling fresh produce from the earth.

Zucchini and summer squash are known for their generous harvests – one or two plants will feed a family all season. Herbs like basil, mint, and parsley are also foolproof additions that enhance both your garden and your cooking. These plants not only thrive with basic care but also provide a steady supply of fresh, homegrown vegetables for your table.

Simple Herbs

Herbs are the perfect gateway into gardening, offering quick rewards with minimal effort. Start with resilient varieties like basil, mint, rosemary, and thyme – these hardy plants forgive most beginner mistakes. Plant them in well-draining soil, either in containers or directly in your garden bed, making sure they receive at least 6 hours of sunlight daily.

Mint is particularly vigorous (some might say aggressive), so consider growing it in a separate container to prevent it from taking over. Basil loves warm conditions and pairs beautifully with summer tomatoes, while rosemary and thyme thrive in drier conditions and provide year-round harvests in many climates.

Remember to pinch off flower buds to encourage leaf growth, and regularly harvest your herbs to promote bushier growth. Most herbs actually become more productive when frequently trimmed, making them perfect for everyday cooking use. Just avoid cutting more than one-third of the plant at once to ensure healthy regrowth.

Basic Care and Maintenance

Watering Done Right

Proper watering is crucial for garden success, and it’s simpler than you might think. The key is finding the right balance – not too much, not too little. Start by checking your soil moisture with the finger test: stick your finger about an inch into the soil. If it feels dry at that depth, it’s time to water.

Water deeply but less frequently to encourage strong root growth. This means giving your plants a good soak until water reaches the root zone, rather than frequent light sprinklings. The best water for your plants comes early in the morning, allowing leaves to dry before evening and preventing fungal issues.

Different plants have different needs, but most vegetables prefer about 1-1.5 inches of water per week. Use mulch around your plants to retain moisture and reduce evaporation. Watch your plants for signs of water stress – wilting leaves in the morning usually indicate underwatering, while yellowing leaves might mean you’re overdoing it.

Remember, rainwater is nature’s perfect irrigation system, so consider installing a rain barrel to capture this free resource for your garden.

Weed Management

Weeds can quickly become a gardener’s biggest challenge, but don’t let them overwhelm you! The key to successful weed management is prevention and regular maintenance. Start by laying down a 2-3 inch layer of organic mulch around your plants, which helps suppress weed growth while retaining soil moisture. Consider using landscape fabric in pathways and between rows for added protection.

Make weeding a part of your daily garden routine – just 10 minutes each morning can prevent small problems from becoming major headaches. Pull weeds when they’re young and the soil is slightly damp, making sure to remove the entire root system. A handheld cultivator or hoe can help disturb weed seedlings before they establish themselves.

For an eco-friendly approach, try companion planting with ground covers or dense plantings that naturally crowd out weeds. Remember, bare soil is an invitation for weeds, so keep your garden beds planted or mulched throughout the growing season.

Pest Prevention

Protecting your garden from unwanted visitors doesn’t have to involve harsh chemicals. Start by choosing companion plants like marigolds, lavender, and basil, which naturally repel many common pests. Create physical barriers using row covers or netting to shield young plants from insects and birds. Regularly inspect your plants for signs of pest damage and remove any affected leaves promptly. Encourage beneficial insects like ladybugs and praying mantises by providing water sources and native flowering plants. For a comprehensive approach to natural pest control methods, maintain healthy soil and proper plant spacing to prevent pest-friendly conditions. Hand-picking larger pests like caterpillars and beetles can be surprisingly effective. Remember, a few nibbled leaves aren’t a disaster – focus on maintaining overall plant health rather than achieving perfection.

Starting your first garden is an exciting journey that connects you with nature and provides a sense of accomplishment like no other. Remember, every experienced gardener started exactly where you are now, and each season brings new learning opportunities. Don’t be discouraged by early setbacks – they’re valuable lessons that will help you grow into a more skilled gardener.

Begin small, stay patient, and celebrate your successes, whether it’s your first sprouted seed or your first homegrown salad. Keep a garden journal to track what works and what doesn’t, and don’t hesitate to join local gardening groups or online communities for support and advice.

As you gain confidence, gradually expand your garden and experiment with different plants and techniques. The satisfaction of harvesting food you’ve grown yourself is truly unmatched, and your garden will become more productive with each passing season.

Take that first step today – whether it’s planning your garden layout, preparing your soil, or planting your first seeds. Your gardening adventure awaits, and you’re now equipped with the basic knowledge to begin this rewarding journey.

Transform Your Urban Rooftop Into a Thriving Garden Oasis

Posted by darrell on
0
Home and Urban Gardening
Transform Your Urban Rooftop Into a Thriving Garden Oasis

Transform your concrete jungle into a thriving oasis by converting unused rooftop space into a sustainable urban garden. Growing fresh produce above the city skyline not only maximizes limited urban space but also reduces your carbon footprint and creates a personal sanctuary for sustainable living. Whether you’re a seasoned gardener or just getting started with these gardening tips for beginners, rooftop gardens offer a unique opportunity to contribute to urban food security while enjoying the therapeutic benefits of tending to your own green space.

A well-planned rooftop garden combines smart design principles with ecological practices, turning barren concrete into productive growing spaces that support local biodiversity. From compact container gardens bursting with herbs and vegetables to elaborate hydroponic systems yielding year-round harvests, urban rooftop gardens represent a powerful solution to food sovereignty in densely populated areas. By implementing proper waterproofing, weight distribution, and climate-appropriate plant selection, anyone can create a successful rooftop growing space that thrives in challenging urban conditions.

Getting Started: Essential Rooftop Garden Requirements

Structural Considerations and Safety

Before starting your rooftop garden, it’s crucial to assess your building’s structural capacity and safety requirements. Most buildings weren’t designed with rooftop gardens in mind, so consulting a structural engineer is essential to determine weight-bearing limits and necessary modifications.

Consider that a typical container garden with saturated soil can weigh 80-150 pounds per square foot. Factor in additional weight from equipment, people, and snow or rain accumulation. Your building may need reinforcement to handle this extra load safely.

Install proper drainage systems to prevent water pooling and ensure waterproof membranes are intact to protect the building structure. Safety railings or barriers are mandatory, typically requiring a minimum height of 42 inches according to most building codes.

Wind exposure at roof level can be significant, so secure all containers and implements properly. Create designated walkways between planting areas to prevent damage to the roof membrane and ensure safe access for maintenance. Regular structural inspections should be scheduled to monitor the roof’s condition and address any concerns promptly.

Consider liability insurance specifically covering rooftop garden activities, and always check local building codes and obtain necessary permits before beginning construction.

Basic Infrastructure Setup

Setting up a rooftop garden starts with selecting the right containers for your space. Raised beds, fabric grow bags, and traditional planters each offer unique benefits. Raised beds provide deep root space and excellent drainage, while lightweight fabric grow bags are perfect for those concerned about weight restrictions. For space optimization, consider implementing vertical gardening solutions using trellises or tiered planters.

A reliable irrigation system is crucial for rooftop success. Drip irrigation systems are ideal, delivering water directly to plant roots while minimizing waste. Consider installing a timer-controlled system with moisture sensors to maintain consistent soil moisture levels. Rain barrels can help collect and store water, reducing dependency on municipal supplies while keeping your garden eco-friendly.

Weather protection is essential in rooftop environments where plants face increased exposure to wind, sun, and temperature fluctuations. Install windbreaks using bamboo screens or hardy shrubs to protect delicate plants. Shade cloth can shield plants from intense afternoon sun, while cold frames or mini greenhouse structures extend the growing season by protecting plants from frost.

Don’t forget about proper drainage – all containers should have adequate holes and be slightly elevated to prevent water pooling. Use high-quality potting mix specifically designed for container gardening, and consider adding water-retaining crystals to help maintain moisture levels during hot spells. Remember to check your building’s weight restrictions and ensure your setup complies with local building codes and regulations.

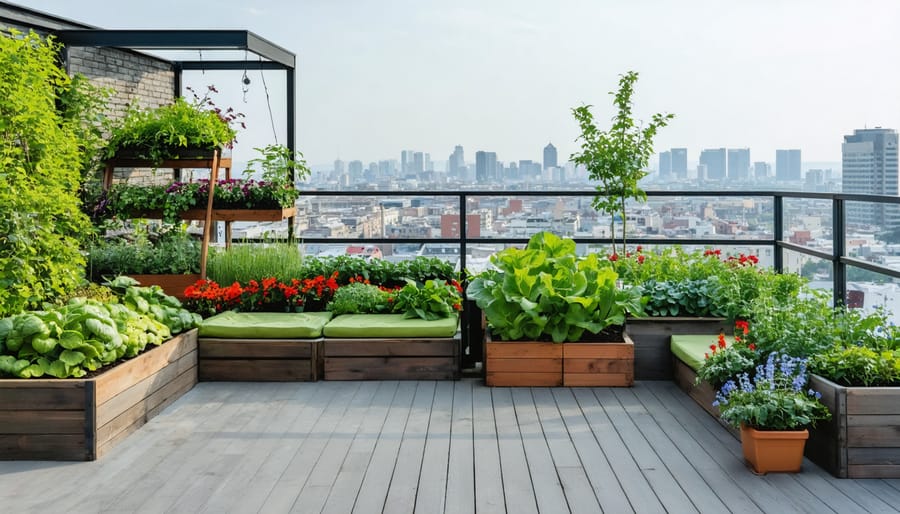
Well-designed urban rooftop garden with various container plants and comfortable seating
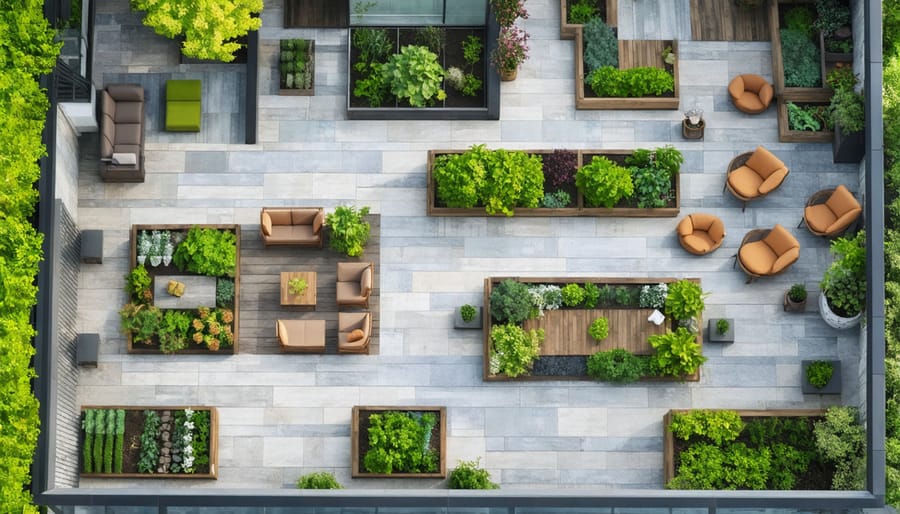
Aerial view of a modern rooftop garden featuring raised beds, container plants, and seating areas

Best Plants for Your Rooftop Garden

Vegetables and Herbs

Rooftop gardens offer the perfect environment for growing your own vegetables and herbs, even in the heart of the city. Many vegetables thrive in containers and raised beds, making them ideal for rooftop cultivation.

Leafy greens like lettuce, spinach, and kale are excellent choices for beginners, as they grow quickly and can be harvested multiple times throughout the season. Cherry tomatoes and determinate tomato varieties perform wonderfully in containers, especially when provided with proper support and consistent watering.

Peppers, both sweet and hot varieties, love the extra sunshine that rooftops provide. Bush beans and compact cucumber varieties can yield impressive harvests in limited spaces. Root vegetables like radishes and carrots grow well in deeper containers, while compact herbs such as basil, thyme, mint, and rosemary add both flavor and beauty to your garden.

For successful rooftop growing, choose dwarf or container-specific varieties when possible. Most vegetables need at least 6 hours of direct sunlight daily, so plan your layout accordingly. Use lightweight potting mix specifically designed for containers, and ensure proper drainage in all your planters.

Consider vertical growing solutions for vining plants to maximize space. Trellises and wall-mounted planters can double your growing area while creating an attractive garden feature. Remember to group plants with similar water needs together, and incorporate companion planting principles to naturally deter pests and enhance growth.

Start small with a few reliable crops and expand as you gain confidence. Many urban gardeners find that fresh herbs and salad greens provide the most immediate reward for their efforts.

Various vegetables and herbs growing in containers on an urban rooftop garden
Collection of thriving vegetables and herbs in container gardens on a rooftop

Ornamental Plants and Flowers

Ornamental plants can transform your rooftop garden into a vibrant oasis while being hardy enough to handle urban conditions. Lavender thrives in full sun and windy conditions, offering beautiful purple blooms and a delightful fragrance. Ornamental grasses like Blue Fescue and Mexican Feather Grass create movement and texture while requiring minimal maintenance.

For stunning vertical interest, consider drought-resistant Russian Sage or tall Salvias, which attract pollinators and provide bursts of color throughout the growing season. Sedum varieties, with their thick, succulent leaves, create excellent ground cover and can withstand intense sun exposure while offering seasonal color changes.

Yarrow is another excellent choice, producing clusters of tiny flowers in various colors while being incredibly wind-resistant. For container gardens, consider incorporating trailing plants like Wave Petunias or Creeping Jenny, which cascade beautifully over pot edges and can handle both sun and wind exposure.

Mediterranean herbs like Rosemary and Sage double as both ornamental and culinary plants, offering attractive foliage and flowers while being naturally adapted to sunny, exposed conditions. For year-round interest, consider evergreen shrubs like Dwarf Mugo Pine or Boxwood, which provide structure and can act as windbreaks for more delicate plants.

Remember to group plants with similar water needs together and use deep containers with good drainage to ensure root stability. Adding decorative elements like weather-resistant art pieces or colorful pottery can enhance your garden’s aesthetic appeal while maintaining functionality in an urban setting.

Sustainable Rooftop Gardening Practices

Sustainable water management system showing rain barrels and drip irrigation in a rooftop garden
Rainwater harvesting system integrated with rooftop garden irrigation

Water Management

Water management is crucial for a successful rooftop garden, and implementing efficient systems can help you maintain healthy plants while conserving resources. Understanding what constitutes the best water for your plants is just the first step in creating a sustainable irrigation plan.

A well-designed drip irrigation system can deliver water directly to plant roots, minimizing waste through evaporation. Consider installing a timer to automate watering schedules, ensuring your plants receive consistent moisture even when you’re away. Many urban gardeners are now incorporating smart irrigation controllers that adjust watering based on weather conditions and soil moisture levels.

Rainwater harvesting is another eco-friendly approach that can significantly reduce your reliance on municipal water supplies. Install rain barrels or cisterns to collect precipitation from your roof’s surface. This stored water can be used during dry spells and helps manage stormwater runoff, a common concern in urban areas.

Consider using moisture-retaining materials like coconut coir or water-absorbing crystals in your soil mix to help maintain consistent moisture levels. Adding a layer of mulch around your plants will also help reduce evaporation and keep roots cool. Some innovative gardeners are even incorporating self-watering planters and wicking beds, which use capillary action to deliver water from a reservoir directly to plant roots.

Organic Soil Management

Maintaining healthy soil in your rooftop garden starts with understanding the basics of organic soil management. A well-balanced growing medium is the foundation of successful urban gardening, and composting is your secret weapon. Create your own nutrient-rich compost by collecting kitchen scraps, coffee grounds, and plant waste from your garden. Layer these materials with dry leaves and paper to achieve the perfect balance of green and brown materials.

Natural fertilization methods complement your composting efforts beautifully. Consider brewing compost tea by steeping finished compost in water for 24-48 hours. This nutrient-rich liquid can be applied directly to your plants’ roots or used as a foliar spray. Worm castings are another excellent organic fertilizer option, providing essential nutrients while improving soil structure.

Cover cropping between growing seasons helps maintain soil health by preventing erosion and adding organic matter. Plants like clover and buckwheat work well in container settings and can be cut down and worked into the soil before your next planting.

Remember to regularly test your soil pH and adjust it naturally using materials like crushed eggshells for calcium or coffee grounds for acidity. Mulching with organic materials such as straw or leaf litter helps retain moisture and slowly releases nutrients as it breaks down. This creates a self-sustaining system that mimics natural soil ecosystems, even in an urban setting.

Seasonal Maintenance Tips

Keeping your rooftop garden thriving requires attention to seasonal changes and specific maintenance routines throughout the year. In spring, start by clearing any winter debris and inspecting your containers and irrigation systems for damage. This is the perfect time to replenish soil with fresh compost and prepare beds for new plantings. Test your soil pH and adjust as needed to ensure optimal growing conditions.

Summer maintenance focuses on regular watering, especially during heat waves when rooftop gardens can dry out quickly. Water deeply in the early morning or evening to minimize evaporation. Install shade cloth over sensitive plants during peak summer heat, and monitor your plants daily for signs of heat stress. Maintain consistent mulch layers to retain moisture and keep soil temperatures stable.

Fall brings its own set of tasks. Begin by harvesting the last of your summer crops and planting cold-hardy varieties. Clean and store summer gardening tools, and check that drainage systems are clear of fallen leaves. This is also the ideal time to add winter protection for perennial plants and install windbreaks if needed.

Winter maintenance is minimal but crucial. Remove snow carefully to prevent damage to plants and infrastructure, ensuring weight limits aren’t exceeded. Check winter protection structures regularly, especially after storms. Use this quieter season to maintain tools, plan next year’s garden layout, and order seeds.

Year-round tasks include:
– Weekly checks of irrigation systems
– Regular pruning and deadheading
– Monitoring for pests and diseases
– Maintaining proper soil moisture levels
– Checking structural integrity of containers and supports
– Composting garden waste
– Rotating crops to prevent soil depletion

Remember that rooftop gardens face unique challenges like increased wind exposure and temperature fluctuations. Adjust your maintenance schedule based on your specific climate conditions and the types of plants you’re growing. Keep detailed records of what works best in your space to refine your approach each season.

Creating your own urban rooftop garden is an exciting journey that brings numerous rewards – from fresh, homegrown produce to a greener urban environment. As we’ve explored throughout this guide, rooftop gardens offer a sustainable solution to urban food production while providing a peaceful retreat above the bustling city streets.

Remember that success in rooftop gardening starts with proper planning. Ensure your roof can support the weight of your garden, install appropriate waterproofing and drainage systems, and choose containers and plants suitable for your specific conditions. Consider starting small and gradually expanding as you gain confidence and experience.

The benefits of maintaining a rooftop garden extend far beyond your dinner table. You’ll be contributing to urban biodiversity, reducing your carbon footprint, and helping to combat the urban heat island effect. Plus, the satisfaction of growing your own food and creating a green oasis in the sky is truly unmatched.

Don’t let limited space or urban living hold you back from pursuing your gardening dreams. With the right preparation, tools, and knowledge, you can transform your rooftop into a thriving garden that provides fresh produce, enhances your quality of life, and makes our cities more sustainable.

Take that first step today – whether it’s researching local regulations, selecting your first containers, or choosing your initial crops. Your urban rooftop garden adventure awaits!

These Garden Hacks Save Hours (And Your Back)

Posted by darrell on
0
Home and Urban Gardening
These Garden Hacks Save Hours (And Your Back)

Transform empty plastic milk jugs into self-watering planters by cutting drainage holes and filling them with potting mix – perfect for growing herbs and small vegetables in limited spaces. Mix crushed eggshells directly into planting holes to prevent blossom end rot and boost calcium levels naturally. Repurpose old pallets into vertical garden walls by sanding rough edges, lining with landscape fabric, and securing them firmly to sturdy surfaces. While these DIY solutions can revolutionize your garden setup, be sure to avoid common gardening mistakes to avoid that could compromise your plants’ health. Create organic pest deterrent by steeping crushed garlic and hot peppers in water for 24 hours, then spraying directly on affected plants. Install recycled wine bottles upside-down in soil near deep-rooted plants for consistent, slow-release watering during dry spells.

Smart Soil Solutions That Actually Work

Kitchen Scraps to Garden Gold

Transform your kitchen waste into gardening gold with these smart composting shortcuts. Start by collecting coffee grounds, eggshells, and vegetable scraps in a countertop compost bin for easy access. Speed up decomposition by chopping food waste into smaller pieces before adding it to your pile. Create a “compost tea” by steeping banana peels in water for 48 hours – this nutrient-rich liquid works wonders for plant growth.

Don’t toss those citrus peels! Dry and grind them to create a natural pest deterrent. Used tea bags can be placed directly around plants to slowly release nutrients, while coffee grounds make an excellent addition to soil for acid-loving plants like tomatoes and blueberries.

For apartment dwellers, try vermicomposting with red wiggler worms in a compact bin system. These efficient decomposers turn kitchen scraps into rich castings within weeks. Remember to maintain a balance of green materials (food scraps) and brown materials (dried leaves, paper) for optimal decomposition.

Keep a spray bottle of diluted cooking water from vegetables to give plants an extra nutrient boost. This zero-waste approach helps create a sustainable garden while reducing kitchen waste.

Before and after comparison of kitchen waste becoming garden compost
Split image showing kitchen scraps transforming into rich compost

No-Till Gardening Shortcuts

No-till gardening is a game-changer for busy gardeners who want to maintain healthy soil without the backbreaking work of traditional tilling. Instead of disrupting soil structure, simply layer organic materials directly on top of your existing soil. Start with a thick layer of cardboard or newspaper to suppress weeds, then add alternating layers of compost, leaves, and grass clippings.

For new garden beds, use the “lasagna gardening” method: layer green materials (kitchen scraps, fresh grass clippings) with brown materials (dried leaves, straw) directly over your lawn. Within a few months, you’ll have rich, plantable soil without ever lifting a shovel.

To plant in a no-till bed, simply pull back the mulch layer and create small planting pockets. The undisturbed soil beneath maintains its natural structure, beneficial microorganisms, and earthworm populations. This method not only saves time and energy but also helps retain soil moisture and reduces weed growth.

Keep your no-till garden thriving by adding fresh layers of compost and mulch each season, letting nature do the hard work for you.

Water-Wise Garden Tricks

Self-Watering Solutions

Creating your own self-watering system doesn’t require expensive equipment – just a bit of creativity and some recyclable materials from around your home. While understanding the best water for plants is important, ensuring consistent delivery is equally crucial for healthy growth.

One simple solution involves using plastic bottles as water reservoirs. Cut the bottom off a clean 2-liter bottle, drill small holes in the cap, and bury it cap-down next to your plants. Fill the exposed end with water, and it will slowly seep into the soil as needed.

For container gardens, try the wick method. Thread a piece of cotton rope or fabric strip through the drainage hole of your pot, leaving one end in the soil and the other in a water reservoir below. The wick draws water up to your plants through capillary action.

Old wine bottles make excellent slow-release waterers. Simply fill them with water and quickly flip them into pre-made holes in your garden soil. They’ll gradually release water as the soil dries out.

For raised beds, create a simple irrigation system using PVC pipes with drilled holes. Connect them to a rain barrel for an eco-friendly watering solution that works while you’re away.

Plastic bottle irrigation system keeping garden plants hydrated
DIY self-watering system made from recycled plastic bottles in a vegetable garden

Moisture-Retention Magic

Keeping your garden hydrated doesn’t have to drain your water bill or your energy. Try layering different organic materials for a moisture-retaining mulch that works like magic. Start with a layer of cardboard or newspaper as a base, then add straw, leaves, or grass clippings. This multi-layer approach creates a natural moisture barrier that keeps your soil damp for longer periods.

Coffee grounds aren’t just for your morning brew – they’re excellent moisture retainers! Spread used grounds around your plants to help retain water and add nutrients to the soil. For container gardens, try mixing water-absorbing crystals or hydrogels into your potting mix. These tiny powerhouses can hold up to 500 times their weight in water.

Here’s a clever trick: bury unglazed terra cotta pots near your thirsty plants. Fill these pots with water, and they’ll slowly release moisture into the surrounding soil. Wine bottles can serve a similar purpose – just flip them upside down in the soil after filling them with water.

For raised beds, consider adding a layer of rocks or gravel at the bottom before filling with soil. This creates a natural reservoir that helps regulate moisture levels. Remember to water deeply but less frequently to encourage deeper root growth and better drought resistance.

Plant Protection Made Easy

DIY Pest Deterrents

Keep unwanted garden visitors at bay with these eco-friendly natural pest control methods using common household items. Create a powerful deterrent spray by steeping crushed garlic and hot peppers in water for 24 hours, then spraying it around plant bases to repel various insects and small mammals.

Coffee grounds aren’t just for your morning brew – scatter them around your plants to deter slugs and snails while adding nutrients to your soil. For aphid control, mix one tablespoon of dish soap with a quart of water and spray affected plants. The solution breaks down the insects’ protective coating without harming your vegetables.

Plant companion flowers like marigolds and nasturtiums throughout your garden – they naturally repel harmful insects while attracting beneficial pollinators. Create protective barriers using eggshells around tender seedlings to prevent slug damage and add calcium to your soil as they decompose.

For larger pests, try placing reflective items like old CDs or aluminum pie plates near your plants – the light reflection confuses birds and other creatures. A simple mixture of vinegar and water sprayed around garden borders helps keep four-legged visitors away while being safe for your plants.

Remember to reapply these natural solutions after rain and rotate different methods to prevent pests from becoming resistant to any single approach.

Weather Protection Tricks

Protecting your garden from unpredictable weather doesn’t have to be complicated or expensive. One of the simplest tricks is using plastic milk jugs as mini greenhouses – just cut off the bottom, remove the cap, and place them over tender seedlings to shield them from frost and harsh winds.

For larger plants, create instant protection using old bed sheets or lightweight blankets draped over garden stakes or hoops. This temporary coverage works wonders during unexpected cold snaps. Remember to remove the covers during the day to prevent overheating.

Empty plastic soda bottles make excellent plant protectors too. Cut them in half and use the bottom portion as a cloche to protect young plants. The top half can be inverted and stuck into the soil around plants to create a self-watering system during hot spells.

During intense summer heat, use old window screens or shade cloth suspended above plants to provide filtered sunlight. For container gardens, group pots together to create a microclimate that helps retain moisture and protect roots from temperature extremes.

Don’t forget about mulching – a thick layer of straw, leaves, or grass clippings helps regulate soil temperature and moisture levels year-round. For raised beds, attach PVC pipes in hoops and cover with clear plastic to create instant cold frames or rain shelters when needed.

These simple solutions use everyday items to keep your garden thriving through challenging weather conditions while maintaining organic growing practices.

Time-Saving Tools and Techniques

Transform everyday household items into clever gardening solutions with these time-saving tricks. Old plastic milk jugs make perfect watering cans – just punch small holes in the cap and fill with water. Keep your tools organized by mounting an old wooden pallet on your shed wall, creating instant storage slots for rakes, shovels, and other long-handled equipment.

Save time on weeding by laying down newspaper or cardboard as a natural weed barrier before adding mulch. This biodegradable solution keeps weeds at bay while enriching your soil as it decomposes. Turn plastic containers into self-watering planters by cutting small drainage holes near the bottom and adding a water reservoir.

Create instant plant markers using plastic spoons – write plant names with permanent marker on the bowl of the spoon and stick the handle into the soil. For seed starting, empty toilet paper rolls make excellent biodegradable starter pots that can be planted directly into the ground.

Old window blinds cut into strips make perfect plant labels, while wine corks stuck on bamboo skewers create charming garden markers. Use a rubber-coated wire hanger bent into a circle as a flexible plant support for climbing vegetables. For precise seed spacing, create a planting template from cardboard with properly spaced holes – just lay it down and drop seeds through.

These simple hacks not only save money but also reduce waste by repurposing items you already have at home.

Everyday household items transformed into practical gardening tools
Collection of repurposed household items being used as creative gardening tools

These DIY gardening hacks prove that you don’t need expensive equipment or years of experience to create a thriving garden. By repurposing everyday items and embracing natural solutions, you can solve common gardening challenges while staying eco-friendly and budget-conscious. Whether you’re using eggshells for pest control, creating self-watering systems from plastic bottles, or turning kitchen scraps into nutrient-rich compost, these creative solutions make gardening more accessible and enjoyable. Remember, sustainable gardening is about working smarter, not harder. Start with one or two of these hacks and gradually incorporate more as you become comfortable. Your garden – and the environment – will thank you for choosing these natural, cost-effective approaches to growing your own food and beautiful plants.

Smart Urban Planting: How Zoning Makes Your Garden Thrive Year-Round

Posted by darrell on
0
Home and Urban Gardening
Smart Urban Planting: How Zoning Makes Your Garden Thrive Year-Round

Zoning regulations shape the very fabric of our cities, determining not just where we can grow food, but how entire neighborhoods develop and thrive. From small-scale community gardens to urban farming initiatives, understanding zoning codes has become essential for anyone looking to cultivate their piece of the urban landscape. Today’s city planners and community activists are reimagining these regulations to support local food production while maintaining neighborhood character and safety standards. As cities evolve to meet sustainability goals and food security challenges, zoning has emerged as a powerful tool for creating greener, more resilient urban environments. Whether you’re planning a backyard garden or launching a commercial urban farm, navigating these regulations is your first step toward contributing to a more sustainable food system.

This introduction blends technical understanding with practical relevance, setting up readers to learn about both zoning compliance and urban agriculture opportunities. It maintains an approachable tone while establishing authority on the subject matter.

Understanding Urban Zoning for Community Gardens

Local Zoning Laws and Garden Restrictions

Urban gardening enthusiasts often face various zoning regulations that can impact their growing ambitions. While community gardens transform neighborhoods in positive ways, it’s essential to understand and navigate local restrictions successfully.

Common zoning regulations include height limitations for structures like greenhouses, setback requirements from property lines, and restrictions on the types of plants you can grow. Many municipalities also have specific rules about composting, water usage, and the sale of produce from residential properties.

To navigate these regulations effectively, start by checking your local zoning code or contacting your city planning office. Some areas require permits for raised beds or garden structures, while others might restrict front yard vegetable gardens. Consider joining local gardening groups or cooperatives, as they often have experience dealing with zoning challenges and can provide valuable guidance.

If you encounter restrictions, don’t get discouraged. Many cities are becoming more garden-friendly and offer variance processes or special permits for urban agriculture. Some even provide incentives for sustainable gardening practices and community food production.

Illustrated city zoning map showing designated areas for community gardens and urban agriculture
Urban zoning map overlaid with garden plots and community spaces

CSA-Friendly Zones in Urban Areas

In progressive urban planning, CSA-friendly zones are emerging as vital components of sustainable city development. These designated areas allow for community-supported agriculture initiatives, enabling residents to grow food locally while fostering neighborhood connections. Many cities now incorporate urban agriculture overlays in their zoning codes, specifically permitting activities like community gardens, rooftop farming, and small-scale market gardens.

Success stories like the Green Thumb program in New York City demonstrate how formerly vacant lots can transform into thriving community gardens. These zones typically require specific permits and must meet certain criteria, such as proper soil testing, water access, and compliance with height restrictions for structures like greenhouses.

Urban planners increasingly recognize the value of integrating agricultural spaces into residential and mixed-use zones. Some cities offer incentives for developers who include community garden spaces in new projects. Additionally, many municipalities are updating their codes to allow for innovative farming methods like vertical gardens and hydroponic systems, making efficient use of limited urban space while providing fresh, local produce to residents.

These agricultural zones not only support food security but also create green spaces that enhance urban biodiversity and community wellbeing.

Seasonal Planting Strategies by Zone

Thermal imaging visualization of different urban microclimates affecting plant growth
Side-by-side comparison of urban microclimates showing temperature and shade variations

Microclimate Mapping in Urban Settings

Microclimate mapping in urban settings is a fascinating way to make the most of your growing space while working within zoning regulations. Urban areas naturally create diverse microclimates due to building placement, surface materials, and air flow patterns. By understanding these variations, you can choose the perfect spots for different plants and maximize your growing success.

Start by observing how sunlight moves across your property throughout the day. South-facing walls typically create warm, sunny microclimates perfect for heat-loving plants, while north-facing areas offer cooler conditions ideal for shade-tolerant varieties. Building walls also store heat during the day and release it at night, creating protected growing zones.

Wind patterns significantly impact urban microclimates. Tall buildings can create wind tunnels or sheltered pockets, affecting plant growth and temperature. Consider installing windbreaks like trellises or strategic plant groupings to protect sensitive crops.

Water flow and drainage patterns create unique moisture zones. Areas where water naturally collects are perfect for moisture-loving plants, while elevated or quick-draining spots suit drought-resistant varieties. Hard surfaces like concrete and asphalt influence temperature and moisture levels in nearby growing areas.

Document these observations over different seasons to create a microclimate map. This valuable tool helps you make informed decisions about plant placement and growing strategies while staying within urban zoning guidelines. Remember that even small spaces can host multiple microclimates, offering diverse growing opportunities.

Season-Specific Plant Selection

In urban planning, selecting the right plants for each season is crucial for maintaining vibrant and functional green spaces throughout the year. Spring zones typically benefit from flowering plants like tulips, daffodils, and cherry blossoms, which add color while supporting local pollinators. These areas often include dedicated spaces for early vegetable gardens, taking advantage of the warming temperatures.

Summer zones require careful consideration of heat-tolerant species and water management. Drought-resistant plants like lavender, sage, and native grasses work well in public spaces, while shade trees are strategically placed to create cooling microenvironments. Community gardens in these zones often incorporate heat-loving vegetables and herbs.

Fall planning focuses on plants that provide striking autumn colors, such as maple trees and ornamental grasses. These zones may include areas for late-season crops and plants that help prevent soil erosion during winter months. Many urban planners also incorporate berry-producing shrubs that provide food for local wildlife.

Winter zones need evergreen species to maintain year-round interest and wind barriers. Plants like holly, spruce, and winter jasmine add texture and color during colder months. Protected spaces for winter vegetables can be integrated into community gardens, using cold frames or greenhouse structures where zoning permits.

Smart seasonal plant selection helps create resilient urban landscapes that serve multiple purposes while respecting local climate conditions and zoning requirements.

Maximizing Limited Space in Urban Zones

Vertical Gardening Solutions

In urban environments where space is at a premium, innovative vertical gardening techniques are revolutionizing how residents grow food while adhering to zoning regulations. Living walls and green facades have become increasingly popular solutions, allowing property owners to maximize growing space without compromising valuable ground area.

Modular growing systems, such as stackable planters and hydroponic towers, offer flexible options that can be easily modified to comply with local building codes. These systems are particularly effective for growing leafy greens, herbs, and compact vegetables like cherry tomatoes and peppers. Many urban farmers successfully incorporate trellises and climbing supports along building walls, creating productive growing spaces that double as attractive green architecture.

Rooftop gardens represent another vertical solution, though they require careful consideration of weight limits and safety regulations. Successful implementations often use lightweight growing media and strategic placement of containers to distribute weight effectively. Some innovative urban gardeners combine vertical growing with rainwater harvesting systems, creating sustainable ecosystems that maximize limited space while meeting stormwater management requirements.

For those just starting out, window boxes and balcony gardens offer entry-level vertical growing opportunities that typically face fewer zoning restrictions while still contributing to urban food production.

Multi-level vertical garden installation showing diverse plants growing on a city building facade
Modern vertical garden system installed on an urban building wall

Container Gardens for Zoned Areas

Container gardens offer a creative solution for urban dwellers navigating zoning restrictions while pursuing their gardening passion. These mobile growing spaces can be easily adapted to different urban zones, making them ideal for areas where permanent landscaping might face regulatory challenges.

Vertical container systems work particularly well in commercial zones, where space is limited but foot traffic is high. Think stackable planters mounted on wheels or modular systems that can be rearranged to comply with changing zoning requirements. In residential zones, container gardens can transform balconies, patios, and rooftops into productive growing spaces without violating local ordinances.

For mixed-use zones, portable container gardens create flexible green spaces that can be moved as needed. Consider using lightweight materials like fabric grow bags or self-watering containers that are easy to relocate. Industrial zones benefit from raised container systems that keep crops away from potentially contaminated soil while meeting zoning requirements for temporary structures.

Success tip: Always check local zoning codes regarding height restrictions and setback requirements before setting up your container garden. Many urban farmers find that mobile container systems help them maintain compliance while maximizing growing space in challenging urban environments.

Community Success Stories

Seattle’s Capitol Hill neighborhood showcases a prime example of community-driven urban agriculture success. In 2010, residents transformed an unused lot into the Beacon Food Forest, working closely with city planners to modify zoning regulations. Today, this 7-acre food forest provides fresh produce to over 3,000 community members annually while operating within updated urban agriculture zoning codes.

In Detroit, Michigan, the Michigan Urban Farming Initiative turned vacant residential lots into a thriving three-acre urban farm. By engaging with local officials and securing proper permits, they created a sustainable model that produces over 50,000 pounds of produce yearly while providing educational opportunities for local schools.

Brooklyn’s Red Hook Community Farm demonstrates how industrial zones can be reimagined for agricultural use. After successfully petitioning for zoning amendments, the community converted a former asphalt playground into a 2.75-acre urban farm. They now operate a successful farmers market and youth employment program, serving as a model for other cities nationwide.

Portland, Oregon’s Green Fingers Community Garden showcases how residential zones can accommodate urban agriculture. Through careful planning and community advocacy, residents worked with city officials to create flexible zoning regulations that allow for small-scale farming operations in backyard spaces. The initiative has led to the creation of over 50 similar neighborhood gardens throughout the city.

These success stories demonstrate how communities can work within zoning frameworks to create thriving urban agricultural spaces that benefit local residents while maintaining neighborhood character.

Urban zoning doesn’t have to be a barrier to your gardening dreams. By understanding local regulations, choosing appropriate spaces, and implementing creative growing solutions, you can create a thriving urban garden that complies with zoning laws. Whether you start with a small balcony herb garden, join a community garden, or transform your backyard into a productive oasis, the key is to start small and expand gradually. Remember to engage with your local planning office, connect with fellow urban gardeners, and stay informed about sustainable practices. Your urban garden journey not only contributes to personal well-being but also helps build more resilient, green communities. Take that first step today – even a single potted tomato plant can be the beginning of your urban farming adventure.

Transform Your Tiny Space Into a Thriving Urban Garden (Even Without a Yard)

Posted by darrell on
0
Home and Urban Gardening
Transform Your Tiny Space Into a Thriving Urban Garden (Even Without a Yard)

Transform your tiny urban space into a thriving garden oasis by maximizing vertical surfaces with wall-mounted planters, hanging baskets, and tiered growing systems. Stack vegetables strategically – place sun-loving tomatoes and peppers on upper levels while growing shade-tolerant herbs and leafy greens below. Create instant growing space by repurposing wooden pallets, milk crates, and rain gutters into modular garden units that fit snugly against walls or railings.

City dwellers with just a balcony or windowsill can produce remarkable harvests using intensive planting methods like square foot gardening and succession planting. Plant quick-growing microgreens and compact varieties bred specifically for containers – bush beans instead of pole beans, determinate tomatoes rather than sprawling indeterminate types. Integrate edible plants with ornamentals in self-watering containers to maximize both beauty and function while minimizing maintenance.

The secret to successful small-space gardening lies in viewing every vertical surface, sunny corner, and unused nook as potential growing space. Even the smallest urban plots can yield fresh herbs, crisp salad greens, and vine-ripened vegetables when you embrace creative solutions and space-saving techniques. Start small, grow up instead of out, and watch your tiny garden transform into an abundant urban oasis.

Smart Space Assessment: Making the Most of What You Have

Light Mapping Your Space

Light mapping is a crucial first step in urban gardening success. Take a week to observe how sunlight moves across your space throughout the day. Different spots may receive varying amounts of light due to surrounding buildings, trees, or other structures casting shadows. Use a simple notebook to track sunny areas during morning, afternoon, and evening hours.

Most edible plants need at least 6 hours of direct sunlight daily to thrive. South-facing windows and balconies typically receive the most light, while north-facing areas might be better suited for shade-loving herbs and leafy greens. Don’t forget to consider seasonal changes – winter sun patterns will differ from summer ones.

If your space receives limited direct sunlight, you’re not out of options. Reflective surfaces like white walls or strategically placed mirrors can help bounce light to your plants. For very shady spots, consider installing grow lights to supplement natural light. Remember that even partial sun areas can be productive growing spaces when you choose the right plants for the conditions.

Time-lapse diagram showing sunlight movement across an urban balcony at different times of day
Split-panel diagram showing sun patterns across a balcony space throughout the day

Identifying Microclimate Zones

Every urban garden has its own unique microclimates – small areas with distinct growing conditions that can vary significantly from the surrounding space. Start by observing how sunlight moves across your garden throughout the day. South-facing windowsills and balconies typically receive the most sun, making them perfect for heat-loving plants like tomatoes and peppers. North-facing areas, while shadier, can successfully host leafy greens and herbs.

Pay attention to wind patterns, especially in balcony gardens where buildings can create wind tunnels. Use these breezy spots for wind-resistant plants or install simple barriers for protection. Watch for heat-reflecting surfaces like concrete walls or metal railings – these areas often create warm pockets perfect for Mediterranean herbs.

Different levels in your space can create temperature variations. Upper levels tend to be warmer and drier, while ground levels stay cooler and retain moisture longer. Corners and areas near walls may offer protection from frost, creating cozy spots for less hardy plants. By mapping these microclimate zones, you can match plants to the conditions where they’ll thrive best, maximizing your garden’s potential.

Space-Maximizing Growing Solutions

Vertical Growing Systems

When space is at a premium, thinking vertically opens up endless possibilities for urban gardening. Innovative vertical garden solutions can transform bare walls and unused vertical spaces into thriving gardens that maximize your growing potential.

Wall-mounted gardens are perfect for both indoor and outdoor spaces, featuring modular pocket planters or fabric growing panels that create stunning living walls. These systems work beautifully for herbs, leafy greens, and compact vegetables like cherry tomatoes or bush beans. For a budget-friendly approach, repurposed wooden pallets can be converted into vertical planters with minimal DIY skills.

Hanging planters offer another dimension to vertical growing, ideal for trailing plants like strawberries, cherry tomatoes, and cascading herbs. Try using macramé plant hangers, mounted window boxes, or tiered hanging baskets to create layers of greenery without occupying floor space.

Don’t forget about climbing supports! A simple trellis, garden netting, or even strings attached to hooks can support vining crops like pole beans, cucumbers, and peas. These climbing plants naturally grow upward, making efficient use of vertical space while creating beautiful green screens that can add privacy to your urban oasis.

Remember to consider weight limitations and proper mounting techniques when installing vertical systems, ensuring both safety and optimal growing conditions for your plants.

Vertical garden system mounted on wall with various vegetables and herbs growing in containers
Modern vertical garden setup showing multiple growing levels with herbs and vegetables

Container Gardening Innovations

Container gardening has evolved far beyond basic pots and planters, with innovative solutions that maximize growing space while minimizing maintenance. Self-watering containers have revolutionized urban gardening by incorporating water reservoirs that provide consistent moisture to plants. These smart systems use wicking action to deliver water as needed, making them perfect for busy gardeners and ensuring optimal growth even during hot summer months.

Vertical space optimization has never been easier with modern stackable planters. These clever designs allow you to grow multiple plants in the footprint of a single container, creating living walls of herbs, leafy greens, and compact vegetables. Popular options include tower gardens, pocket planters, and modular systems that can be customized to fit your space.

Space-efficient designs now include multi-tiered planters with built-in trellises, hanging systems with pulley mechanisms for easy maintenance, and corner units that maximize typically unused spaces. Hydroponic wall gardens combine vertical growing with soil-free cultivation, perfect for indoor spaces or small balconies.

For those with limited floor space, railing planters and window boxes have been reimagined with deeper growing chambers and improved drainage systems. Some innovative containers even feature built-in composting sections, creating a mini ecosystem that reduces waste while providing nutrients to your plants.

These modern container solutions often incorporate sustainable materials like recycled plastics or biodegradable compounds, aligning with eco-friendly gardening practices while providing years of reliable use.

Multi-Level Growing

Make the most of your vertical space by creating a multi-level growing system that maximizes your small urban garden’s potential. Start with sturdy shelving units designed for outdoor use, ensuring they can handle the weight of pots, soil, and water. Metal or treated wood shelves work well, and you can position them against walls or railings for added stability.

Consider installing a tiered garden system, where each level steps back from the one below, allowing sunlight to reach all plants. These work particularly well for herbs and leafy greens, which don’t require deep soil. Hanging baskets can be incorporated at different heights, perfect for trailing plants like cherry tomatoes or strawberries.

For balcony gardens, utilize railing planters that hook securely over the edge, creating an additional growing space without taking up precious floor area. Combine these with wall-mounted pocket planters or vertical garden panels to create a living wall effect. Don’t forget to use the ceiling space – suspended planters can host vining plants that create natural shade and privacy.

When arranging your multi-level garden, place sun-loving plants on upper levels and shade-tolerant varieties below. Remember to consider water drainage – place trays under pots and ensure excess water has somewhere to go without affecting lower levels. With proper planning, even the smallest urban space can become a thriving multi-story garden.

Plant Selection for Small-Space Success

Compact Vegetables

Container gardening doesn’t mean sacrificing variety – there are plenty of compact vegetables perfectly suited for small-space growing. These fast-growing plants for small spaces can help you maximize your urban harvest without taking up too much room.

Cherry tomatoes, particularly determinate varieties like Tiny Tim and Red Robin, grow beautifully in hanging baskets or small pots. Mini bell peppers and compact chili varieties like Thai Hot offer the same flavors as their full-sized cousins while staying manageable in containers.

Look for dwarf varieties of traditionally large plants – bush beans instead of pole beans, and compact cucumber varieties like Spacemaster. These plants deliver impressive yields without sprawling. Baby greens like leaf lettuce, arugula, and spinach are natural space-savers that can be harvested continuously.

For root vegetables, consider round carrots like Paris Market or small radish varieties that develop well in shallow containers. Herbs are also excellent choices, with compact varieties like spicy globe basil and dwarf sage offering intense flavors from small plants.

Many seed companies now specifically breed vegetables for container growing, labeling them as “patio,” “bush,” or “compact” varieties. These plants have been carefully selected to thrive in small spaces while maintaining excellent flavor and productivity.

Various dwarf vegetables growing in space-saving containers on a small urban patio
Collection of compact vegetable varieties growing in creative container arrangements

Herbs and Microgreens

Herbs and microgreens are perfect crops for urban gardeners working with limited space. These high-value plants don’t require much room but deliver impressive yields and intense flavors that can transform your cooking and boost your nutrition.

Start with easy-to-grow herbs like basil, mint, and parsley, which thrive in small containers on windowsills or balconies. A single well-maintained herb plant can provide fresh leaves for months, saving you money on store-bought alternatives. Plus, many herbs are perennial, meaning they’ll come back year after year with proper care.

Microgreens are another space-efficient option, offering concentrated nutrition and gourmet appeal. These tiny powerhouses can be grown in shallow trays and harvested within 2-3 weeks. Popular varieties include radish, sunflower, and pea shoots, which pack more nutrients per gram than their full-grown counterparts.

Create a productive herb and microgreen garden by:
– Using vertical space with hanging planters or wall-mounted containers
– Implementing succession planting to ensure continuous harvests
– Growing complementary herbs together in single containers
– Utilizing recycled containers like mason jars or tea tins
– Maintaining proper indoor lighting with LED grow lights during winter months

Remember to harvest herbs regularly to encourage bushier growth, and keep microgreen trays clean between plantings to prevent mold. With minimal investment and space, you can maintain a year-round supply of fresh, flavorful greens right in your kitchen.

Maintaining Your Urban Organic Garden

Water-Wise Techniques

Water conservation is crucial in urban gardening, and choosing the right irrigation methods can make a big difference. Understanding the best water for container plants is just the first step. Self-watering containers are a game-changer for busy gardeners, using a reservoir system that delivers moisture directly to plant roots as needed.

Consider installing a drip irrigation system with a timer – it’s a simple setup that delivers precise amounts of water right where plants need it, reducing waste and preventing leaf diseases. For smaller setups, water-retaining crystals mixed into your potting soil can help maintain consistent moisture levels.

Mulching is another water-wise essential. A 2-inch layer of organic mulch like straw or wood chips will slow evaporation and keep soil temperatures stable. Group plants with similar water needs together, and collect rainwater in barrels to use during dry spells. Remember to water deeply but less frequently to encourage strong root growth, and always water at the base of plants early in the morning to minimize evaporation.

Natural Pest Management

Managing pests in your urban garden doesn’t require harsh chemicals. Instead, focus on organic pest control methods that work harmoniously with nature. Start by attracting beneficial insects like ladybugs and praying mantises by planting flowers such as marigolds and lavender. These helpful garden allies naturally control harmful pests.

Create physical barriers using row covers or mesh netting to protect your plants from flying insects and birds. Companion planting is another effective strategy – try growing basil near tomatoes or nasturtiums alongside cucumbers to naturally repel unwanted visitors.

For common urban garden pests like aphids and spider mites, a simple solution of diluted neem oil or insecticidal soap can work wonders. Keep your garden clean by removing dead leaves and plant debris where pests might hide. Regular inspection of your plants helps catch problems early, making them easier to manage naturally.

Remember, a healthy garden is naturally more resistant to pests. Focus on building rich soil, providing adequate airflow between plants, and watering appropriately to create a thriving ecosystem in your small urban space.

Urban gardening in small spaces is more than just a creative solution to growing food – it’s a rewarding journey that connects you with nature, provides fresh, organic produce, and creates a peaceful sanctuary in the midst of city life. As you’ve seen throughout this guide, even the tiniest balcony or windowsill can become a thriving garden with the right approach and planning.

The benefits extend far beyond your dinner table. Urban gardening helps reduce your carbon footprint, supports local biodiversity, and creates a stronger connection to the food you eat. Many urban gardeners report feeling less stressed and more fulfilled as they watch their first seedlings emerge and harvest their own homegrown vegetables.

Remember, everyone starts somewhere. Whether you begin with a single herb pot or transform your entire patio into a vegetable paradise, each small step contributes to a more sustainable future. Don’t be afraid to experiment, learn from both successes and setbacks, and adapt your garden to suit your space and lifestyle.

As you embark on your urban gardening adventure, join local gardening communities, share your experiences, and celebrate your achievements. Your small-space garden isn’t just about growing food – it’s about growing as a person and being part of a movement toward more sustainable cities.

Start your garden today. Your future self will thank you for taking that first step toward a greener, more self-sufficient lifestyle.

Start Your Dream Kitchen Garden: Easy Hydroponic Growing for City Dwellers

Posted by darrell on
0
Home and Urban Gardening
Start Your Dream Kitchen Garden: Easy Hydroponic Growing for City Dwellers

Transform your kitchen or spare room into a thriving hydroponic garden that produces fresh, nutrient-rich vegetables year-round – even in the smallest urban spaces. Growing without soil eliminates many traditional gardening challenges while using 90% less water than conventional methods.

Modern hydroponic systems let you harvest crisp lettuce, juicy tomatoes, and aromatic herbs right from your home, regardless of outdoor growing conditions or seasonal limitations. Whether you’re a sustainability enthusiast or simply want guaranteed access to pesticide-free produce, hydroponics offers a practical solution for indoor food production.

Getting started requires minimal investment: a basic deep water culture system, LED grow lights, and your choice of seedlings. This efficient growing method delivers faster growth rates and higher yields than traditional soil gardening, with many plants reaching maturity up to 25% quicker. Plus, the controlled environment means no weeds, fewer pests, and consistent production throughout the year.

Ready to join the indoor growing revolution? This guide will walk you through everything you need to know about setting up and maintaining your own hydroponic garden, from choosing the right system to harvesting your first crop.

Why Hydroponics is Perfect for Urban Homes

Space-Saving Solutions

Don’t let limited space hold you back from creating your hydroponic garden! Modern vertical garden solutions make it possible to grow an abundance of produce in even the tiniest apartments. Stack your growing systems vertically using wall-mounted rails or tiered setups that maximize your available square footage while minimizing floor space usage.

Consider compact tower gardens that can house up to 20 plants while occupying just two square feet of floor space. Floating shelf systems attached to sturdy walls provide excellent spots for herb gardens and leafy greens. For ultra-compact spaces, try window-mounted hydroponic units that capture natural light without taking up any floor space.

Modular systems are particularly appealing for apartment dwellers, as they can be expanded or reduced based on your needs and available space. Many of these systems are also designed with clean aesthetics that complement modern home décor, turning your garden into a living art piece.

Vertical hydroponic garden system mounted on an apartment wall growing various leafy greens
Modern vertical hydroponic setup in a bright apartment setting

Resource Efficiency

Hydroponic gardens are champions of resource efficiency, using up to 90% less water than traditional soil-based gardening. This remarkable water conservation happens because the system recirculates water, delivering it directly to plant roots rather than losing it to soil absorption or evaporation. A typical hydroponic setup for growing lettuce might use only 1/10th of the water needed in conventional farming.

Energy efficiency is another significant benefit, especially for indoor setups. While hydroponic systems do require electricity for pumps and lighting, modern LED grow lights consume minimal power while providing optimal light spectrums for plant growth. Many home gardeners report lower utility bills than expected, particularly when taking advantage of natural light sources and using timers to optimize lighting schedules.

For the environmentally conscious gardener, these resource savings translate to a smaller carbon footprint while producing fresh, nutritious food year-round. Some growers even incorporate solar panels to create nearly self-sustaining systems.

Setting Up Your First Hydroponic Garden

Essential Equipment

To start your hydroponic garden, you’ll need several essential pieces of equipment. First, you’ll need a growing container or reservoir system – this can range from simple plastic tubs to specialized hydroponic trays. A reliable water pump is crucial for circulating nutrient solution through your system, ensuring your plants receive consistent nourishment.

Growing media is another vital component – popular options include rockwool cubes, clay pellets, or coconut coir. These materials support your plants’ roots while allowing for excellent water flow and optimal water quality for plants.

Lighting is essential for indoor growing. LED grow lights are energy-efficient and provide the specific light spectrum plants need. You’ll also need a timer to control your lighting schedule. For monitoring your system, invest in basic testing equipment like pH meters and EC (electrical conductivity) meters to maintain proper nutrient levels.

Don’t forget about nutrients – you’ll need a complete hydroponic nutrient solution specifically formulated for soilless growing. Other helpful tools include air stones and air pumps for oxygenating your nutrient solution, plant support structures like trellises or plant clips, and basic gardening tools for maintenance.

For beginners, we recommend starting with a simple setup and expanding as you gain experience. Many of these items are available at local gardening stores or can be purchased online through reputable hydroponic suppliers.

Organized display of essential hydroponic equipment including grow lights, nutrients, containers, and pumps
Basic hydroponic equipment layout with labeled components

Choosing Your Growing System

When starting your hydroponic journey, you’ll need to choose from several growing systems, each with its unique advantages. For beginners, the Deep Water Culture (DWC) system offers simplicity and reliability. Plants float on a nutrient solution while their roots hang directly in the water, making it perfect for leafy greens and herbs.

The Nutrient Film Technique (NFT) system creates a continuous flow of nutrient solution through channels, ideal for compact spaces and lightweight plants. This method works wonderfully for lettuce, spinach, and other small vegetables, though it requires a bit more setup than DWC.

Wick systems are the most straightforward and budget-friendly option. They use a passive method where nutrients travel up through wicks to reach plant roots. While they’re great for small herbs and microgreens, they may not support larger plants effectively.

For those ready to invest more, the Ebb and Flow (Flood and Drain) system provides excellent versatility. It periodically floods the growing area with nutrient solution before draining it back to a reservoir, making it suitable for a wide variety of plants.

Vertical tower systems are perfect for maximizing limited space in urban homes. These systems can grow multiple plants in a small footprint, making them increasingly popular among city dwellers who want to grow their own food.

Consider factors like available space, maintenance time, and the types of plants you want to grow when selecting your system. Start small with a simple setup, and you can always expand as your experience grows.

First-Time Setup Guide

Setting up your first hydroponic garden is an exciting journey that begins with careful preparation. Start by choosing a well-lit location in your home that maintains a consistent temperature between 65-75°F. If natural light is limited, consider investing in LED grow lights for optimal plant growth.

Begin assembly by thoroughly cleaning your chosen hydroponic system components with a mild soap solution. Rinse everything carefully to avoid any soap residue that could affect plant growth. Next, connect your water pump to the reservoir and ensure all connections are watertight. Fill the reservoir with filtered water and adjust the pH to between 5.5 and 6.5 using pH adjustment solutions.

Add your chosen growing medium to the net pots – popular options include clay pellets, rockwool, or coco coir. Mix your hydroponic nutrients according to the manufacturer’s instructions, typically starting with half-strength solution for young plants. Install your air pump and air stone to provide essential oxygen to the root system.

Before adding plants, run your system for 24 hours to ensure everything functions properly. Check for leaks, confirm proper water circulation, and verify that your air pump creates visible bubbles. Once satisfied, you can transplant your seedlings into the net pots, ensuring the roots reach the nutrient solution.

Remember to maintain proper spacing between plants and secure any loose cables or tubes. Your system is now ready for its first growing cycle!

Best Plants for Home Hydroponic Gardens

Herbs and Leafy Greens

For beginners in hydroponic gardening, herbs and leafy greens are ideal quick-growing plants that offer both satisfaction and practical value. Basil, mint, and cilantro thrive in hydroponic systems, producing aromatic leaves perfect for cooking. These herbs typically reach harvestable size within 3-4 weeks, providing fresh flavors year-round.

Leafy greens like lettuce, spinach, and kale are equally rewarding choices. They adapt well to indoor conditions and can be harvested multiple times from the same plant. Butter lettuce and arugula are particularly successful in hydroponic systems, often ready for harvest in just 30-35 days.

Swiss chard and watercress add variety to your indoor garden while offering excellent nutritional benefits. These greens grow vigorously in nutrient-rich water and require minimal maintenance. For best results, maintain water temperature between 65-75°F and pH levels between 5.5-6.5.

Start with 2-3 varieties and expand as you gain confidence. Most herbs and leafy greens can grow successfully under standard LED grow lights, making them perfect for apartment dwellers or those with limited space. Remember to prune regularly to encourage bushier growth and prevent flowering, which can make leaves bitter.

Multiple varieties of herbs growing in a small hydroponic system, including basil, cilantro, and mint
Thriving hydroponic herb garden showing different growth stages

Vegetables and Small Fruits

While leafy greens are the easiest to grow hydroponically, advancing to vegetables and small fruits can be incredibly rewarding. Tomatoes, peppers, cucumbers, and strawberries thrive in hydroponic systems when given proper care and attention.

Tomatoes are particularly popular among hydroponic gardeners, with cherry varieties being the most manageable for beginners. These plants require strong light and careful pruning, but they can produce fruit year-round in ideal conditions. For best results, choose determinate varieties that won’t grow too tall for your indoor space.

Peppers, both sweet and hot varieties, adapt well to hydroponic systems. They need similar conditions to tomatoes but take up less space, making them perfect for compact setups. Bell peppers and smaller varieties like Thai chilies are excellent choices for indoor cultivation.

Strawberries are another fantastic option, especially ever-bearing varieties that can produce fruit continuously. These plants work particularly well in vertical systems or specialized strawberry towers, maximizing space efficiency while providing fresh berries throughout the year.

Cucumbers can also flourish hydroponically, though they require strong support systems and regular pruning. Bush varieties or “patio” cucumbers are more suitable for indoor growing than their sprawling counterparts.

Remember that these crops typically need more intense lighting, careful temperature control, and regular maintenance compared to leafy greens. However, the satisfaction of harvesting your own fresh vegetables and fruits makes the extra effort worthwhile.

Maintenance and Troubleshooting

Daily Care Routine

Maintaining your hydroponic garden doesn’t have to be time-consuming, but consistency is key to success. Start each day by checking water levels in your reservoir – plants should always have access to nutrient-rich water. Test the pH levels daily using a reliable meter, aiming to keep them between 5.5 and 6.5 for most plants. If needed, adjust using pH up or down solutions.

Monitor your nutrient solution’s strength with an EC (electrical conductivity) meter every other day. Different growth stages require different nutrient concentrations, so be prepared to adjust accordingly. Inspect your plants for any signs of stress, pest infestations, or nutrient deficiencies. Look for discolored leaves, spots, or unusual growth patterns.

Keep your growing environment clean by removing any dead leaves or plant debris daily. This prevents disease and maintains proper air circulation. Check that all pumps and aerators are functioning correctly – the gentle hum of equipment should be consistent. If you’re using LED grow lights, ensure they’re operating on schedule and positioned at the right height above your plants.

Once a week, perform a more thorough cleaning of your system’s components and change out the nutrient solution completely. This prevents salt buildup and ensures your plants have access to fresh nutrients. Remember to sanitize any tools you use to prevent cross-contamination between plants.

Common Problems and Solutions

While hydroponic gardening can be rewarding, newcomers often encounter several common challenges. Learning to identify plant stress signals early on can help you maintain a thriving garden. One frequent issue is nutrient imbalance, which manifests as yellowing leaves or stunted growth. The solution is regular monitoring of nutrient levels and pH, adjusting as needed with calibrated meters.

Algae growth in the system is another common problem, usually caused by light exposure to the nutrient solution. Combat this by covering exposed water surfaces and ensuring your growing medium stays dark. Root rot can occur due to poor oxygenation – installing an air stone or ensuring proper water circulation can prevent this issue.

Temperature fluctuations can stress your plants. Maintain consistent temperatures between 65-75°F (18-24°C) using fans or climate control. If you notice wilting despite adequate water, check your humidity levels – most plants thrive in 40-60% humidity.

Pest problems, while less common indoors, can still occur. Natural solutions like neem oil or beneficial insects can help without compromising your organic growing goals. System leaks are preventable with regular maintenance and proper sealing of all connections.

Remember, most issues are easier to prevent than fix. Regular monitoring, cleanliness, and prompt attention to small problems will help ensure your hydroponic garden’s success.

Home hydroponic gardening offers an exciting and rewarding way to grow fresh, nutritious produce right in your own home. By embracing this innovative growing method, you’re not just cultivating plants – you’re investing in a sustainable future while enjoying the satisfaction of harvesting your own food year-round. The space-saving nature of hydroponics makes it perfect for urban dwellers, while its water efficiency appeals to environmentally conscious gardeners.

Whether you’re growing leafy greens, herbs, or even fruiting plants, hydroponics provides faster growth rates and higher yields than traditional soil gardening. The ability to control growing conditions means fewer pests and diseases, resulting in healthier plants without the need for harmful pesticides.

Starting your hydroponic journey doesn’t have to be overwhelming. Begin with a simple setup and expand as your confidence grows. The initial investment in equipment will quickly pay off through abundant harvests and reduced grocery bills. Plus, there’s nothing quite like the pride of serving home-grown produce to family and friends.

Take the first step today – your indoor garden adventure awaits!