

Food preservation technologies give you the power to keep fresh produce edible for months instead of days, using methods that range from vacuum sealing and freeze-drying to controlled-atmosphere storage and modern dehydration systems. Whether you’re dealing with a bumper crop from your backyard garden or want to make the most of your CSA box, these technologies transform perishable foods into stable ingredients that retain most of their nutrients, flavor, and texture.
The gap between harvest and spoilage is where most food loss happens. A tomato picked at peak ripeness has perhaps five days before it turns mushy. Berries fare even worse. But run those same fruits through a freeze-dryer or vacuum-seal system, and you’re looking at shelf life measured in years, not days.
Modern preservation equipment has become surprisingly accessible for home use. What once required industrial facilities now fits on a kitchen counter. The real shift happened when manufacturers started designing for small-batch processing, making it practical to preserve 10 pounds of strawberries instead of 100.
This guide walks you through the essential technologies available in 2026, from setup and safety protocols to step-by-step processes for each method. You’ll learn which eco-conservative methods work best for different foods, how to verify your results, and what equipment delivers the best return on investment for home preservers and small-scale farmers alike.
Essential Equipment and Materials for Eco-Friendly Food Preservation
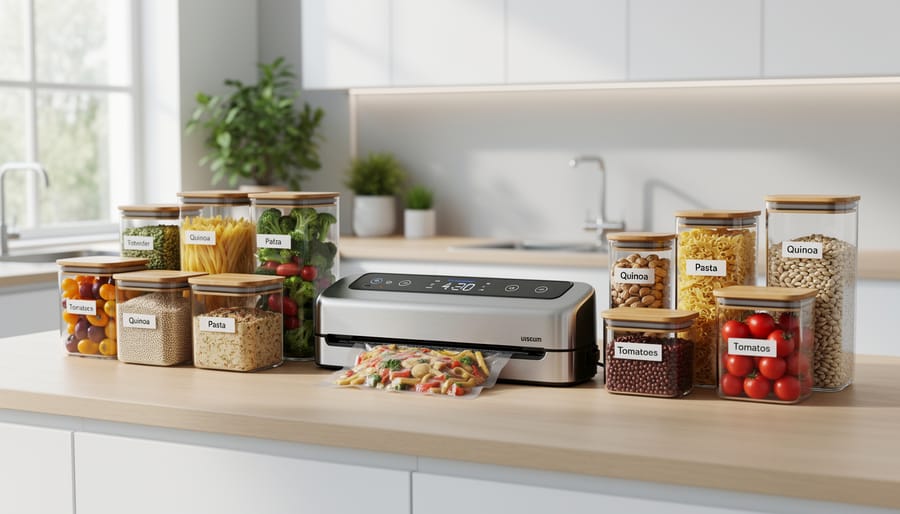
Starting with the right equipment sets you up for successful eco-friendly preservation without wasting energy or materials. Your specific needs will vary based on which methods you choose, but investing in quality, energy-efficient tools pays off through years of reliable use and lower environmental impact.
For dehydration, you have two main paths: solar-powered models that harness free sunlight or electric dehydrators with efficient heating elements. Solar dehydrators work beautifully in sunny climates and cost nothing to run, though they depend on weather conditions. Electric models offer consistent results regardless of season, and 2026’s newer units use 30-40% less power than older designs while maintaining precise temperature control. Look for models with stackable trays and adjustable thermostats between 95-165°F.
Vacuum sealing equipment has evolved beyond single-use plastic bags. Modern chamber vacuum sealers work with reusable silicone bags and glass containers fitted with valve lids, eliminating the constant need for disposable materials. These systems remove air more completely than external sealers, extending storage time while helping you slash cooking energy by preserving batch-cooked meals efficiently.
Here’s a practical breakdown of essential equipment organized by method:
- Dehydration: solar drying boxes or 600W electric dehydrators with 4-9 trays, food-grade mesh screens
- Vacuum sealing: chamber sealer or handheld model, reusable silicone bags, glass containers with vacuum-seal lids
- Fermentation: ceramic or glass crocks (1-5 gallon capacity), water-filled airlock systems, pH strips
- Freeze-drying: home freeze dryer (for serious preservers), silicone or Mylar storage bags, oxygen absorbers
- General supplies: wide-mouth glass jars (pint to half-gallon), stainless steel utensils, digital thermometer
Container materials matter significantly for both sustainability and food safety. Glass jars and ceramic crocks last decades and don’t leach chemicals, making them ideal for fermentation and storage. When plastic is necessary, choose BPA-free, food-grade options rated for your specific preservation method’s temperatures. Reusable silicone bags have emerged as a practical middle ground, withstanding freezing and moderate heat while reducing single-use waste.
Fermentation crocks with built-in water moats or modern airlock systems prevent oxygen exposure while allowing carbon dioxide to escape, creating ideal conditions for healthy bacteria. The water seal is remarkably simple yet effective technology that has preserved foods for centuries.
Safety Considerations and Precautions

Before you begin preserving food at home, understanding safety fundamentals will protect your family from serious foodborne illness. Modern preservation technologies offer convenience, but each method carries specific risks if not executed properly.
Temperature control is your first line of defense against bacterial growth. Dehydrators should maintain 135-145°F for vegetables and herbs, while meats require 155-165°F to eliminate pathogens. Freeze dryers must reach -40°F during the freezing phase to prevent ice crystal damage and microbial survival. For pressure canning (though primarily a traditional method, some newer preservation systems incorporate it), low-acid foods need 240-250°F to destroy Clostridium botulinum spores, which thrive in oxygen-free environments like sealed jars and vacuum-sealed bags.
pH levels matter critically for fermentation and certain preservation methods. Successful lacto-fermentation requires a starting pH below 4.6, with most vegetables reaching 3.0-4.0 after proper fermentation. Always use pH strips or a digital meter to verify acidity before storing fermented foods long-term. High-acid foods like pickled vegetables are safer than low-acid items, which demand pressure processing rather than simple vacuum sealing for shelf-stable storage.
Equipment maintenance prevents contamination between batches. Clean dehydrator trays, vacuum sealer channels, and fermenting crocks with hot soapy water after each use, and sanitize fermenting vessels with a diluted bleach solution (one tablespoon per gallon of water) or boiling water. Inspect vacuum sealer gaskets monthly for wear and replace when cracked. Check airlock water levels in fermenting crocks every few days to maintain the oxygen barrier.
Discard preserved foods immediately if you notice bulging vacuum-sealed bags, off odors, slimy textures, mold growth beyond surface kahm yeast in ferments, or any discoloration inconsistent with the original food. When rehydrating dried foods, if they develop an unusual smell or fail to soften properly after adequate soaking, composting them is the safest choice.
Step-by-Step Preservation Methods Using Modern Technologies
Dehydration: Solar and Electric Methods
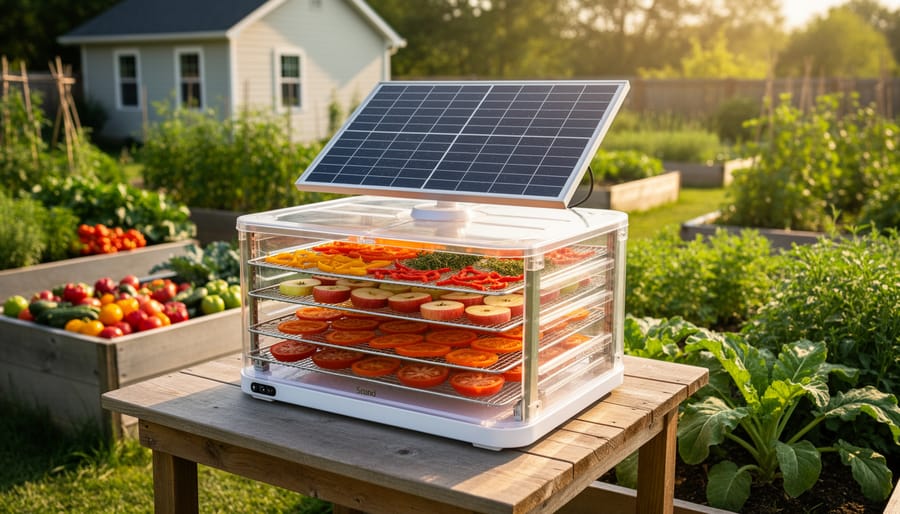
Dehydration removes moisture that bacteria and mold need to thrive, making it one of the most energy-efficient food preservation technologies for home use. Solar dehydrators harness free energy from the sun, while modern electric models consume 75% less power than older designs thanks to improved insulation and airflow engineering.
Start by washing and slicing your produce uniformly, aim for ¼-inch thickness for vegetables and ⅛-inch for fruits. Thinner slices dry faster and more evenly. Pat everything completely dry with clean towels since surface moisture extends drying time.
- Arrange prepared food in a single layer on trays, leaving space between pieces for air circulation. Overlapping slows the process and risks uneven drying.
- For electric dehydrators, set the temperature based on food type: 135°F for vegetables and herbs, 125°F for fruits, and 145°F for meat jerky. Solar units typically reach 130-150°F on sunny days.
- Run the dehydrator for 6-12 hours for most fruits and vegetables, checking every 2 hours after the halfway point. Tomatoes might finish in 8 hours while apple slices often need 10-12.
- Test doneness by removing a piece, letting it cool for 5 minutes, then bending it. Vegetables should be brittle and snap cleanly. Fruits are ready when leathery with no moisture beads when squeezed.
- Condition dried foods by storing them in glass jars for 7-10 days, shaking daily to redistribute any remaining moisture. If condensation appears, return the batch to the dehydrator for another hour.
Solar dehydrators work best during peak sunshine (10 AM to 4 PM) and may require two days for dense foods. Position your unit where it’ll catch direct sun and won’t be shaded by trees or buildings. Electric models offer consistent results regardless of weather, making them reliable for year-round preservation when paired with renewable energy sources like home solar panels.
Vacuum Sealing for Extended Freshness
Vacuum sealing offers one of the most effective ways to fight food waste while preserving nutrients and freshness in your CSA haul and garden harvest. This method removes air that causes oxidation and bacterial growth, extending refrigerated produce life by 2-3 weeks and freezer storage by 2-3 years compared to conventional storage.
- Wash and thoroughly dry your produce. Any moisture left on food surfaces can interfere with the seal and promote ice crystal formation in the freezer.
- Choose bag size appropriately, leaving 3-4 inches of space beyond your food. BPA-free, reusable bags work best for sustainability and can handle multiple vacuum-seal cycles.
- Pre-freeze delicate items like berries or soft vegetables for 2 hours. This prevents crushing during the vacuum process.
- Place food in the bag, smooth out wrinkles, and position the open end in the sealer’s vacuum channel.
- Activate the vacuum cycle and watch for the bag to collapse tightly around the contents. Most machines automatically switch to sealing mode when air removal completes.
- Check the seal by running your fingers along the sealed edge, it should feel rigid and uniform without any soft spots or gaps.
Label each package with contents and date, then store in your freezer’s coldest section (typically the back or bottom). For prepared meals, cool completely before sealing to prevent condensation. Vacuum-sealed dry goods like grains or dehydrated vegetables can be stored at room temperature in a cool, dark pantry, maintaining quality for 6-12 months.
Lacto-Fermentation Using Modern Crocks and Airlocks
Lacto-fermentation transforms fresh vegetables into probiotic-rich preserved foods using nothing but salt, water, and beneficial bacteria already present on the produce. This ancient technique has seen a modern revival with specialized fermentation crocks featuring water-sealed airlock channels that allow carbon dioxide to escape while preventing oxygen and contaminants from entering.
Start by preparing a brine using non-iodized sea salt (avoid table salt, as iodine can inhibit fermentation). For most vegetables, dissolve 2 tablespoons of salt per quart of filtered water. Chlorinated tap water can kill beneficial bacteria, so use filtered or boiled-then-cooled water instead.
Prep your vegetables by washing thoroughly and cutting into uniform pieces. Pack them tightly into your fermentation crock, leaving at least two inches of headspace. Pour the brine over the vegetables until they’re completely submerged, then place a weight on top to keep everything below the liquid surface. Fill the airlock channel with water according to your crock’s instructions.
- Day 1-2: Place the crock in a cool spot (65-75°F) away from direct sunlight. Check that the airlock channel stays filled with water.
- Day 3-5: You’ll see bubbles and clouding in the brine as fermentation accelerates. Taste after day 3 to monitor tanginess.
- Day 6-7: Continue tasting daily. Most vegetables reach ideal flavor between days 5-10, depending on temperature and personal preference.
- Day 8-14: Once fermented to your liking, transfer to clean jars and refrigerate to slow fermentation.
This preservation method requires zero energy beyond maintaining room temperature, produces no plastic waste when using glass or ceramic crocks, and creates nutrient-dense foods with enhanced digestibility. The fermentation process actually increases certain vitamins while making minerals more bioavailable.
Freeze-Drying for Long-Term Storage
Home freeze-drying transforms fresh produce into shelf-stable foods that retain 97% of their nutrients while lasting 20-25 years when stored properly. Modern 2026 models consume 40% less energy than earlier versions through improved insulation and smart cycling technology, making this once-industrial process viable for eco-conscious home food preservation.
Start by selecting foods at peak ripeness. Berries, herbs, diced vegetables, and cooked meals freeze-dry exceptionally well, while high-fat items like avocados don’t preserve effectively with this method. Cut produce into uniform pieces no thicker than one inch to ensure even processing.
Pre-freeze your prepared foods in a standard freezer for 8-12 hours. This step reduces the initial load on your freeze-dryer and cuts total processing time by several hours. Arrange frozen items on the machine’s trays in a single layer, leaving space between pieces for sublimation to occur.
Load the trays and seal the chamber. Most home units run automatically once started, but check your model’s specifications. The freeze-drying cycle typically takes 20-40 hours depending on food moisture content and batch size. The machine removes moisture through sublimation, converting ice directly to vapor without passing through a liquid phase.
When the cycle completes, test a cooled piece by breaking it in half. Properly freeze-dried food should snap cleanly with no moisture visible in the center. If you see ice crystals or moisture, run an additional drying cycle.
Immediately transfer dried foods to airtight containers or Mylar bags with oxygen absorbers. Condition for 7-10 days by shaking containers daily to redistribute any remaining moisture, then repackage for long-term storage in a cool, dark location.
Testing Results and Quality Verification
After investing effort in preserving your harvest using food preservation technologies, verifying that your work achieved safe, high-quality results protects both your health and your efforts to save money and planet. Each preservation method requires specific quality checks.
For dehydrated foods, bend a piece: properly dried vegetables should snap rather than bend, while fruits should be pliable but not sticky. No moisture should appear when you squeeze a handful in your palm. Rehydrate a small sample in warm water for 15 minutes; it should plump up and look close to its original state without off-odors.
Vacuum-sealed packages must maintain their tight seal with no air pockets. Run your fingers along all seams to feel for any wrinkles or gaps where air might have entered. The package should remain completely flat against the food with no cushioning when you press down. Any puffiness after storage indicates seal failure or bacterial growth, both requiring immediate disposal.
Test fermented foods by checking pH with strips: properly fermented vegetables should register between 3.0 and 4.6, which inhibits harmful bacteria. The brine should remain cloudy but not moldy, with bubbles during active fermentation normal. Taste a small amount; it should be pleasantly tangy and crisp, never slimy or musty.
Use this quick verification checklist for each technology:
- Dehydrated: snaps when bent, no visible moisture, successful rehydration
- Vacuum-sealed: completely flat package, intact seams, no air infiltration
- Fermented: pH 3.0-4.6, cloudy brine, tangy smell and taste
- Freeze-dried: bone-dry texture, crumbles easily, rapid rehydration in under 5 minutes
Label everything with the preservation date and contents. Discard any preserved food showing mold, unusual discoloration, foul odors, or texture changes that seem off. Trust your senses: when in doubt, throw it out.
Next Steps: Integrating Preservation into Your CSA and Garden Harvest
Once you’ve mastered these food preservation technologies, the real magic happens when you sync them with your CSA deliveries and garden harvest cycles. Plan your preservation sessions around peak harvest times rather than trying to preserve everything at once. When your CSA box arrives loaded with summer tomatoes or your garden’s zucchini plants go into overdrive, that’s your signal to fire up the dehydrator or break out the vacuum sealer.
Create a simple preservation calendar that tracks what produce peaks when in your region. June strawberries? Perfect for freeze-drying. August cucumbers? Ideal for lacto-fermentation. This approach prevents the overwhelm of trying to preserve 20 pounds of green beans on a Tuesday night after work. Instead, dedicate a few hours each weekend during growing season to batch processing whatever’s abundant. You’ll build a diverse pantry of preserved foods that carries you through winter while supporting local farmers year-round.
How long can I store CSA produce using these preservation methods?
Properly vacuum-sealed and frozen vegetables last 12-18 months, dehydrated foods stay good for 6-12 months in airtight containers, fermented vegetables keep 4-6 months refrigerated, and freeze-dried items remain viable for up to 25 years when stored correctly.
Should I adjust my garden plantings based on preservation capacity?
Absolutely. If you have limited freezer space but own a dehydrator, plant more tomatoes, peppers, and herbs that dry beautifully rather than water-heavy crops like lettuce that don’t preserve well.
Can I preserve my entire CSA share each week?
Not everything needs preserving. Eat fresh greens and delicate produce within days, then focus preservation efforts on surplus items and crops that store well using the technologies you have available.
Talk with your CSA farmer about your preservation goals. Many farms offer bulk quantities of single crops at reduced prices specifically for members who preserve, and they appreciate knowing their produce won’t go to waste. Apply waste reduction tips from professional kitchens by preserving vegetable scraps (dehydrate for soup powder), fermenting stems and cores, and vacuum-sealing herb bundles with oil in ice cube trays for winter cooking.
