Category Archives

5 Articles

How Fine Dining Restaurants Are Fighting Food Waste (And What It Means for You)

Posted by darrell on
0
Uncategorized
How Fine Dining Restaurants Are Fighting Food Waste (And What It Means for You)

Sustainable fine dining merges exceptional culinary artistry with rigorous environmental stewardship, transforming luxury restaurants into laboratories for zero-waste systems, regenerative agriculture partnerships, and carbon-neutral operations. The movement has grown from a handful of pioneering chefs in the early 2020s to a defining standard across top-tier establishments, where sourcing decisions carry as much weight as plating aesthetics.

At its core, this approach redefines what it means to eat well. Restaurants now build entire menus around what nearby farms harvest each week, composting every scrap, filtering and reusing water, and calculating the carbon footprint of each dish. Some have gone further, planting their own gardens, raising heritage livestock, and fermenting ingredients that would otherwise spoil.

For diners, the experience offers more than a meal. It’s a window into what’s possible when food systems prioritize soil health, biodiversity, and fair labor practices without sacrificing flavor or creativity. The same principles that guide a Michelin-starred kitchen, like understanding seasonal rhythms and building relationships with growers, translate directly to home cooking and community-supported agriculture.

This shift matters because fine dining has always influenced broader food culture. When celebrated chefs champion local organic farmers and prove that sustainability enhances rather than limits culinary excellence, the ripple effects reach farmers’ markets, grocery stores, and backyard gardens. The techniques being refined in these kitchens, from root-to-stem cooking to natural fermentation, offer practical lessons for anyone committed to eating responsibly while supporting their local food economy.

What Makes Fine Dining Sustainable?

Sustainable fine dining reimagines luxury through the lens of environmental responsibility. Rather than showcasing rare ingredients flown in from distant continents, these restaurants demonstrate excellence by working within ecological boundaries. The approach marks a fundamental shift from the traditional fine dining model, where opulence often meant abundance and waste.

At its core, sustainable fine dining operates on a simple philosophy: exceptional food shouldn’t cost the earth. This means rethinking every aspect of how a restaurant sources, prepares, and serves meals. The goal isn’t just to reduce harm, it’s to create dining experiences that actively support healthy food systems and local communities.

The movement relies on several interconnected practices that set it apart from conventional luxury dining:

Farm-to-table fine dining
Direct relationships between chefs and local farms, eliminating middlemen and ensuring ingredients travel minimal distances from harvest to plate. This approach guarantees peak freshness while supporting regional agriculture.
Nose-to-tail cooking
Using every part of an animal or vegetable, turning what conventional kitchens discard into celebrated dishes. This practice honors the ingredient while dramatically reducing waste.
Hyper-local sourcing
Prioritizing ingredients grown or produced within a tight geographic radius, often just miles from the restaurant. This radical commitment to place reduces transportation emissions and celebrates regional flavors.
Zero-waste kitchens
Comprehensive systems that divert food scraps to compost, repurpose by-products, and eliminate single-use packaging. These operations aim for literally nothing entering the landfill.

Seasonal menus form the backbone of this approach. Instead of offering tomatoes year-round, sustainable restaurants celebrate what’s actually growing now. This constraint pushes chefs toward creativity rather than limiting them. Spring might feature tender peas and ramps, while autumn showcases squash and root vegetables.

Ethical ingredient selection extends beyond organic certification. These restaurants ask deeper questions: Were workers paid fairly? Does this seafood come from healthy fish populations? Can we source this locally instead of importing it? The answers shape every menu decision, proving that luxury and responsibility aren’t opposites, they’re partners in creating truly exceptional food.

The Farm-to-Fine-Dining Connection

Why Chefs Are Choosing CSA Partnerships

Fine dining chefs are increasingly drawn to CSA partnerships because these relationships solve problems that traditional supply chains can’t. When a chef receives a box of produce harvested that morning, they’re working with ingredients at peak flavor and nutritional value, something that matters tremendously when every element on a plate needs to shine. That 24-hour difference between harvest and kitchen transforms how vegetables taste and perform.

Beyond freshness, CSA farms offer access to varieties you won’t find through conventional distributors. Heirloom tomatoes in twelve different colors, obscure greens with complex flavor profiles, or fingerling potatoes in unusual shapes, these ingredients become signature elements that distinguish one restaurant from another. A chef might discover a purple cauliflower or lemon cucumbers that spark an entirely new dish concept.

The seasonal constraint actually fuels creativity rather than limiting it. When a farm delivers whatever is ready that week, chefs must adapt and innovate. This pushes culinary teams to develop techniques and combinations they might never have explored with year-round access to the same ingredients. One week might bring an abundance of zucchini blossoms, the next an unexpected surplus of kohlrabi. That variability keeps menus dynamic and forces chefs to stay sharp.

CSA partnerships also eliminate the middleman markup while ensuring farmers receive fair compensation. For restaurants operating on thin margins despite high menu prices, this direct relationship makes financial sense while supporting the local food economy they want to champion.

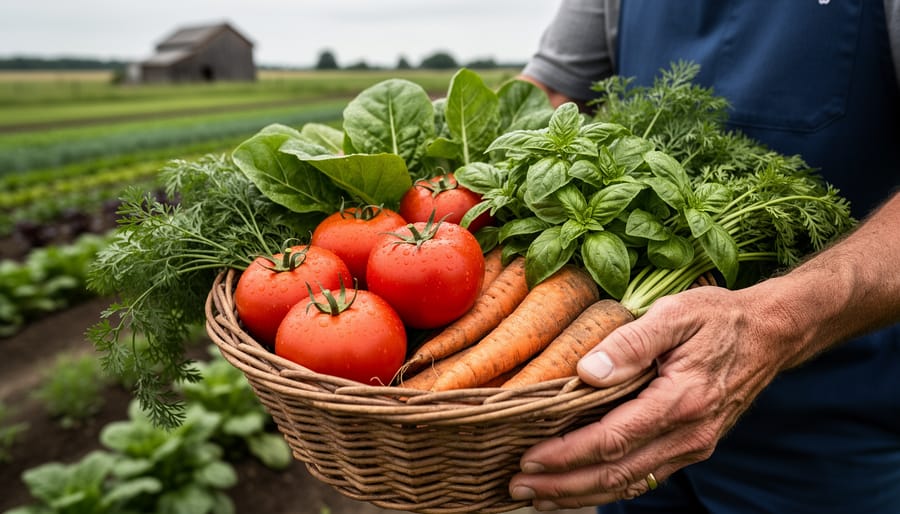
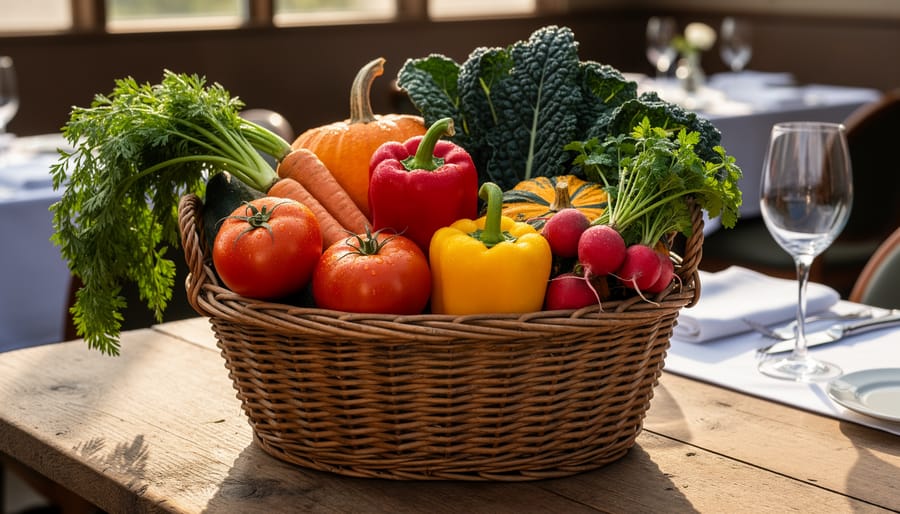
Seasonal produce in a CSA-style harvest basket on a kitchen counter near cooking tools
A harvest basket of mixed seasonal produce represents the farm-to-dining link that supports freshness and creativity on high-end menus.

How These Partnerships Support Local Agriculture

When fine dining restaurants commit to sourcing from local organic farms, they create a lifeline for small-scale agriculture. These partnerships provide farmers with predictable, year-round income through regular wholesale orders, a stark contrast to the uncertainty of farmers’ markets where sales fluctuate with weather and foot traffic.

The financial advantages extend beyond stable revenue. Direct farm-to-restaurant relationships eliminate middlemen, meaning farmers keep more of each dollar while restaurants gain fresher ingredients. For small operations running on tight margins, this difference can determine whether a farm survives or folds.

These collaborations also boost farm visibility in ways traditional distribution channels never could. When a respected chef highlights a specific farm on their menu or social media, it introduces that producer to an audience of food enthusiasts who might become CSA members or market customers. That word-of-mouth marketing proves invaluable for farms without advertising budgets.

Perhaps most importantly, these partnerships validate sustainable farming practices. When top-tier restaurants publicly choose organic, regenerative methods, they signal to the broader food industry that environmental stewardship and quality aren’t just compatible, they’re inseparable.

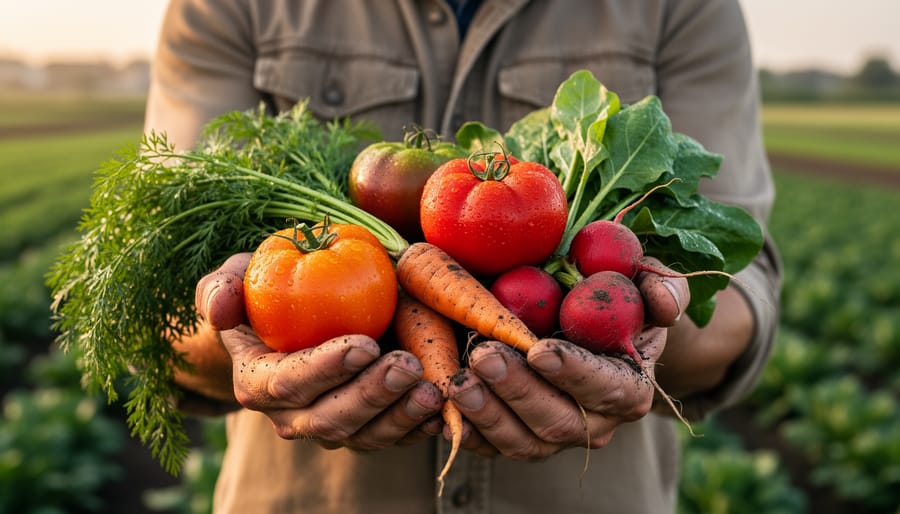
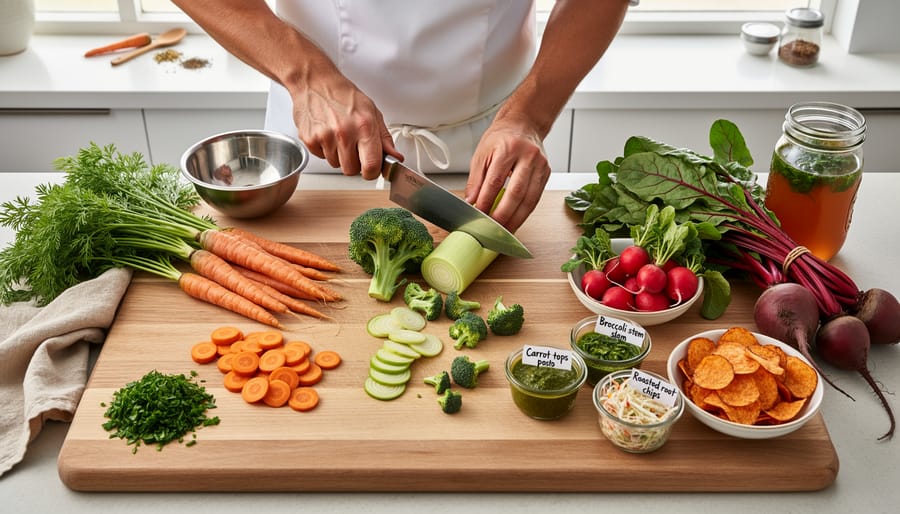
Chefs’ hands preparing whole vegetables with leafy tops and roots for a root-to-stem style dish
Root-to-stem cooking emphasizes using the entire ingredient, turning overlooked parts into standout flavors.

Innovative Sustainable Practices in High-End Kitchens

Walk into the kitchen of a top sustainable restaurant and you will see something different from the usual high-end operation. Beyond the precision and artistry, there is a deliberate system where nothing goes to waste and every resource is carefully managed. These kitchens prove that environmental responsibility and culinary excellence are not just compatible but mutually reinforcing.

Composting has moved far beyond simply tossing scraps into a bin. Leading restaurants now separate organic waste into multiple streams, creating closed-loop systems where vegetable trimmings become compost for their own herb gardens or partner farms. Some establishments track waste by weight and ingredient type, using data to refine purchasing decisions and reduce food waste emissions over time. What cannot be composted often finds another purpose entirely.

The creative use of by-products separates sustainable kitchens from conventional ones. Carrot tops become vibrant pestos. Fish bones and vegetable scraps transform into rich stocks. Stale bread gets ground into breadcrumbs or turned into croutons rather than discarded. This root-to-stem philosophy extends the value of every ingredient while reducing the volume heading to landfills. When restaurants save surplus food through preservation techniques like pickling, fermenting, and curing, they create signature items that define their menus.

  • Root-to-stem cooking that uses entire vegetables, from beet greens to broccoli stalks
  • House-made preserves and ferments that transform seasonal surplus into year-round ingredients
  • On-site kitchen gardens and rooftop farms that supply fresh herbs and microgreens
  • Renewable energy systems including solar panels and energy-recovery ventilation
  • Zero-packaging sourcing arrangements where ingredients arrive in reusable containers

Energy efficiency matters tremendously in kitchens that run twelve-plus hours daily. High-end sustainable restaurants invest in induction cooktops that heat faster while using less electricity, combi ovens that combine multiple cooking methods in one appliance, and LED lighting throughout. Smart ventilation systems adjust airflow based on actual cooking activity rather than running at full capacity constantly. These upgrades slash cooking energy consumption by thirty to fifty percent compared to traditional setups.

Water conservation takes multiple forms. Low-flow pre-rinse spray valves at dish stations use a fraction of the water without sacrificing cleaning power. Some restaurants install systems that capture and filter water from ice machines and steamers for reuse in non-food applications. Others work with suppliers who practice water-conscious agriculture, recognizing that sustainability extends backward through the entire supply chain. The result is kitchens that operate with remarkable efficiency while producing food that rivals any conventional fine dining establishment.

Fine dining kitchen compost bin with vegetable peelings and kitchen activity in the background
The composting corner in a high-end kitchen shows how sustainability practices can be integrated without sacrificing refinement.

Seasonal Menus: The Heart of Sustainable Fine Dining

Walk into a truly sustainable fine dining restaurant in July, and you’ll find a menu celebrating summer tomatoes and zucchini blossoms. Return in November, and those same chefs will be crafting dishes around root vegetables and winter squash. This isn’t just culinary whimsy, seasonal menus form the backbone of sustainable restaurant operations.

When restaurants commit to seasonal eating, they drastically cut their carbon footprint. A tomato shipped from halfway around the world in January carries an enormous environmental cost compared to one harvested from a nearby farm at peak ripeness. By aligning menus with local harvest cycles, fine dining establishments eliminate the need for long-haul transportation and energy-intensive greenhouse production. The ingredients arrive fresher, often within hours of harvest, which means better flavor and higher nutritional value on the plate.

This approach also changes how chefs think about their craft. Rather than ordering whatever ingredients they want year-round, seasonal constraints push culinary teams toward creativity. They must ask: What can we do with an abundance of snap peas right now? How do we make Brussels sprouts exciting for the third month running? These limitations spark innovation, leading to unique preparations and flavor combinations that wouldn’t exist in a kitchen with unlimited global access.

Many sustainable restaurants take this further by learning to preserve seasonally extending summer’s harvest into winter months through fermentation, pickling, and canning. A jar of preserved stone fruit becomes a January dessert component. Pickled ramps from spring appear as a garnish in fall dishes. This mirrors what home cooks and farmers have done for generations, connecting modern fine dining to traditional foodways.

The beauty of seasonal menus lies in their honesty. They tell the truth about where you are and what the land can provide right now, turning each meal into a reflection of place and time.

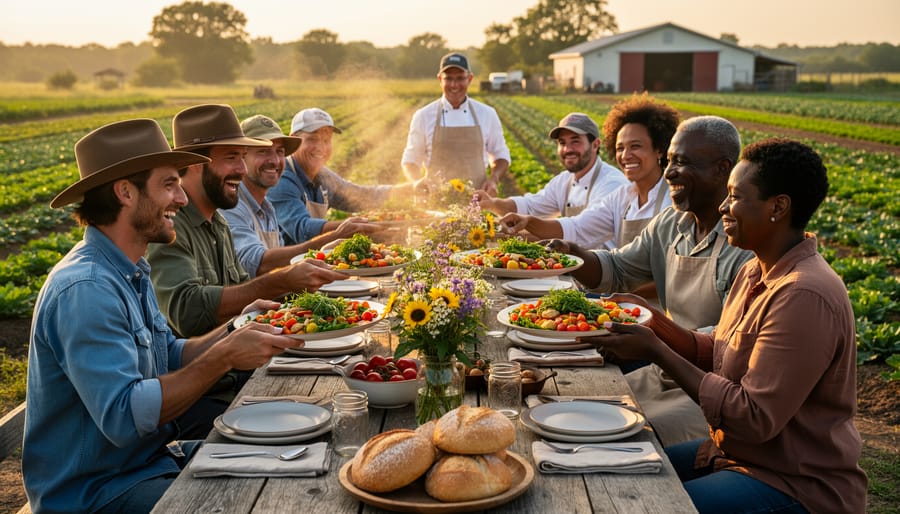
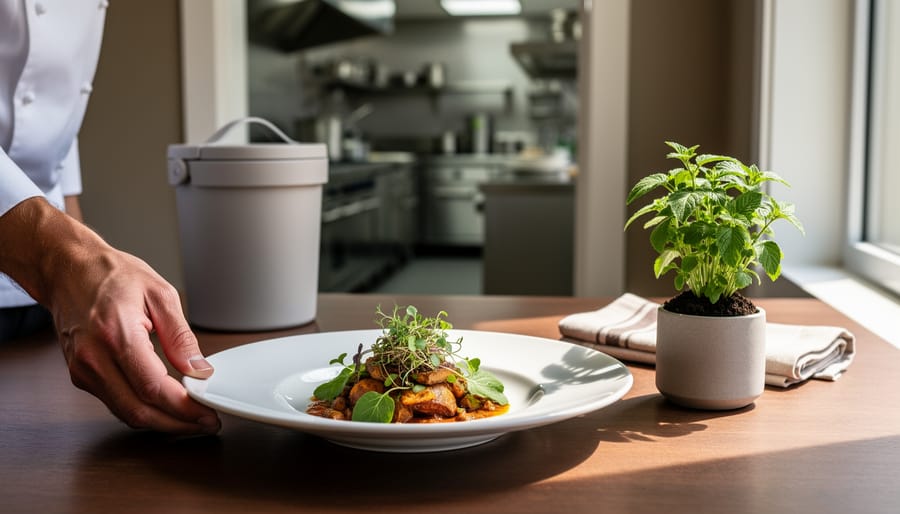
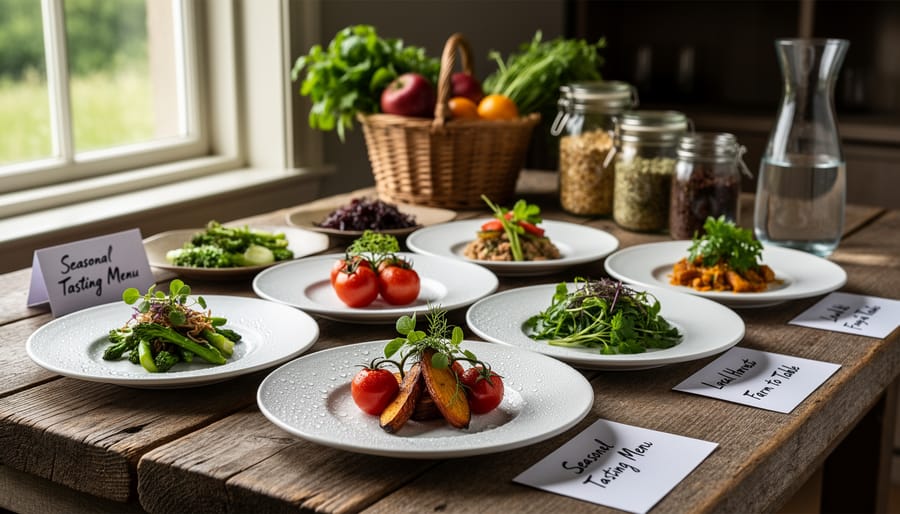
Seasonal fine dining table set with plated dishes featuring vegetables and fresh herbs
A seasonal tasting menu highlights how fine dining can feel luxurious while staying grounded in local harvests and careful sourcing.

What Everyday Diners Can Learn from Sustainable Fine Dining

You don’t need a Michelin star budget to eat more sustainably. The same principles that guide fine dining kitchens, thoughtful sourcing, minimal waste, seasonal eating, work beautifully in home cooking and everyday restaurant choices. What changes is the scale, not the philosophy.

Start by rethinking your relationship with ingredients. Fine dining chefs obsess over provenance because quality and sustainability go hand in hand. You can do the same by choosing local, organic produce when possible. It’s fresher, supports nearby farms, and typically requires less energy to reach your table. Even one farmers market trip per week shifts your eating habits toward seasonal rhythms.

Waste reduction translates directly from restaurant kitchens to home. Professional chefs use every part of an ingredient, carrot tops become pesto, chicken bones turn into stock, stale bread becomes croutons. Apply energy-efficient cooking techniques and plan meals around what you already have rather than impulse shopping. Store produce properly using eco-preservation methods to extend shelf life. These habits save money while reducing your environmental footprint.

Here’s how to incorporate fine dining sustainability principles into your daily routine:

  1. Shop at farmers markets or join a CSA to access seasonal, locally grown ingredients while supporting small-scale organic agriculture.
  2. Plan weekly menus around what’s in season rather than forcing out-of-season ingredients that require long-distance shipping.
  3. Reduce food waste by using scraps creatively, composting what you can’t use, and storing perishables properly.
  4. Support local restaurants that prioritize sustainable practices, even if they’re not fine dining establishments.
  5. Cook at home more often using whole ingredients, which gives you control over sourcing and reduces packaging waste.

The beauty of these practices is their flexibility. You won’t execute them perfectly every time, and that’s fine. Even small shifts matter. Choosing one seasonal vegetable over an imported option, saving vegetable scraps for stock, or asking a restaurant about their sourcing practices all contribute to a more sustainable food system.

Fine dining proves that environmental responsibility and exceptional quality aren’t opposing forces. They enhance each other. The same holds true whether you’re cooking Tuesday dinner or choosing where to celebrate an anniversary. Better ingredients, less waste, stronger connections to local food producers, these principles work at every price point and skill level.

Finding Sustainable Restaurants in Your Area

Finding restaurants that share your commitment to sustainability doesn’t require a hefty budget or inside connections. Start with the menu itself, which often reveals a restaurant’s priorities before you even step inside. Look for specific farm names rather than generic sourcing language. A menu that lists “tomatoes from Green Valley Farm” or “greens from Thompson Family CSA” signals direct relationships with local producers. Restaurants genuinely committed to sustainability typically highlight seasonal availability, sometimes noting when certain dishes will rotate off as ingredients change.

Certifications provide helpful shortcuts in your search. The Green Restaurant Association certification, LEED credentials for the building, and local sustainability seals indicate verified eco-friendly practices. Organic certification for ingredients, Fair Trade partnerships, and membership in organizations like the Sustainable Restaurant Association also matter. Don’t hesitate to ask your server direct questions about sourcing practices, composting programs, or seasonal menu changes. Staff at truly sustainable establishments usually welcome these conversations and can explain their restaurant’s specific commitments.

Online research extends your options significantly. Check restaurant websites for sustainability statements or farm partnership pages. Many now share their composting tonnage, energy reduction goals, or links to their ingredient suppliers. Search local food blogs and sustainability directories, which often maintain curated lists of eco-conscious establishments. Social media accounts frequently showcase chef visits to partner farms or highlight seasonal ingredient arrivals.

Remember that sustainable dining exists across price ranges. A neighborhood café buying from the farmers market and composting scraps lives these values just as authentically as upscale establishments with elaborate zero-waste programs. Your support matters regardless of where you choose to eat.

Sustainable fine dining proves that luxury and environmental stewardship aren’t opposing forces, they’re natural partners. These restaurants show us that the pursuit of excellence actually demands respect for ingredients, producers, and the planet. When a chef treats a carrot with the same reverence as a truffle, sourcing it from a local organic farm and using every part creatively, that’s not compromise. That’s craft at its highest level.

You don’t need a reservation at a Michelin-starred restaurant to embrace these principles. Every time you choose seasonal produce from your farmers market, support a CSA farm, or plan meals that minimize waste, you’re participating in the same movement. The real power of sustainable fine dining lies in its ripple effect, inspiring chefs at neighborhood bistros, home cooks rethinking their grocery habits, and eaters everywhere demanding better practices.

As more restaurants adopt these values and more diners vote with their wallets, we’re building a food system where quality, community, and sustainability reinforce each other. That future is already taking shape, one thoughtfully sourced meal at a time.

How CSA Cooking Classes Turn Farm-Fresh Produce Into Confident Home Cooks

Posted by darrell on
0
Uncategorized
How CSA Cooking Classes Turn Farm-Fresh Produce Into Confident Home Cooks

Cooking basics classes offered through Community Supported Agriculture programs teach CSA members how to prepare unfamiliar seasonal vegetables and transform their weekly produce boxes into practical, delicious meals. These hands-on workshops typically run 60 to 90 minutes and cover knife skills, vegetable preparation techniques, and simple recipes designed around what’s actually in season at your farm.

If you’ve ever stared at a kohlrabi or a bundle of garlic scapes wondering what to do next, you’re exactly who these classes serve. CSA farms across North America have discovered that educational programming doesn’t just help members use their shares more fully. It dramatically reduces turnover, builds community connections, and turns nervous novice cooks into confident advocates who renew year after year.

The concept is straightforward but powerful. Rather than generic cooking instruction, these classes focus on the vegetables members receive in their boxes each week. A June class might tackle spring greens and radishes, while August sessions dive into tomato preservation and summer squash creativity. Many farms bring the instruction right to pickup sites, making it convenient for members to attend before grabbing their CSA meals for the week.

Farmers benefit from reduced waste and stronger member relationships. Members gain practical skills that make their CSA investment more valuable. Whether you’re a farm considering adding classes or a consumer researching which CSA offers the best support, understanding how these programs work helps you make informed decisions about your local food journey.

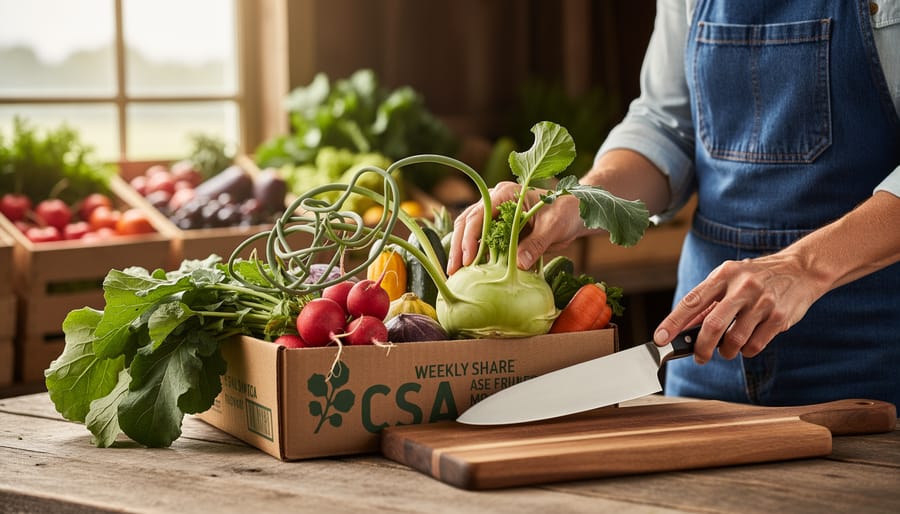
CSA member in a farm kitchen inspecting seasonal vegetables like kale and kohlrabi before cooking.
A CSA member explores the weekly share and prepares to cook, turning unfamiliar produce into something manageable.

Why CSA Members Need Cooking Basics Classes

Picture this: you’ve just picked up your CSA box, brimming with vibrant greens, oddly-shaped root vegetables, and a bunch of herbs you can’t quite identify. You’re excited about supporting local agriculture, but as you stand in your kitchen staring at three pounds of chard and something labeled “kohlrabi,” a familiar anxiety sets in. You’re not alone. Thousands of well-intentioned CSA members face this weekly dilemma, caught between their commitment to sustainable eating and the practical reality of cooking with unfamiliar, seasonal ingredients.

The challenges stack up quickly:

  • What do I do with kohlrabi, and why does it look like an alien vegetable?
  • How to use a whole bunch of kale before it wilts into a soggy mess
  • Cooking for two when you receive enough produce for six people
  • Making dinner after work when every vegetable needs washing, trimming, and figuring out
  • Avoiding the guilt of throwing away expensive organic produce you couldn’t get to in time

This disconnect costs farms members. When subscribers repeatedly waste produce or feel overwhelmed, they don’t renew. Research shows that knowledge shapes household waste patterns, meaning the gap isn’t commitment but capability. Most CSA dropouts genuinely wanted to continue, they just didn’t know how to turn their weekly shares into actual meals their families would eat.

That’s where cooking workshops change everything. When farms teach practical skills aligned with what’s currently in the box, cooking techniques improve engagement and retention rates. Members gain confidence, waste drops, and the investment in organic produce finally feels manageable rather than stressful. The box transforms from a weekly puzzle into something you actually look forward to unpacking.

What Makes CSA-Based Cooking Workshops Different

CSA cooking workshops aren’t your typical cooking class where you follow a predetermined menu from a glossy cookbook. These sessions respond directly to what’s ripe right now, what’s packed in your share this week, and what’s growing just steps away from the kitchen. That connection creates an entirely different learning experience.

When you walk into a CSA workshop, you’re often handling vegetables harvested that morning. The instructor might point to the field where your rainbow chard came from or explain why this week’s tomatoes taste different from last week’s. This farm-to-table immediacy means the skills you learn apply instantly to the produce sitting in your fridge at home. There’s no wondering whether you can find the ingredients or whether they’ll be as fresh.

The seasonal focus distinguishes these classes from generic cooking instruction. Instead of learning to prepare asparagus in November, you’re mastering what to do with an abundance of summer zucchini or late-fall Brussels sprouts. The curriculum follows nature’s schedule, building your confidence with each season’s unique challenges. You’ll learn preservation when tomatoes flood your box in August, not as an abstract skill but as an immediate solution to the thirty pounds of sauce tomatoes you just brought home.

Perhaps most importantly, you’re learning alongside fellow CSA members who share your specific questions and frustrations. Everyone in the room received the same mysterious kohlrabi or overflowing bunch of kale. This shared experience creates genuine community, transforming isolated home cooks into a supportive network that continues exchanging tips and recipes long after the workshop ends. You’re not just taking a class; you’re joining a community that’s figuring out seasonal eating together.

Essential Skills Covered in CSA Cooking Basics Classes

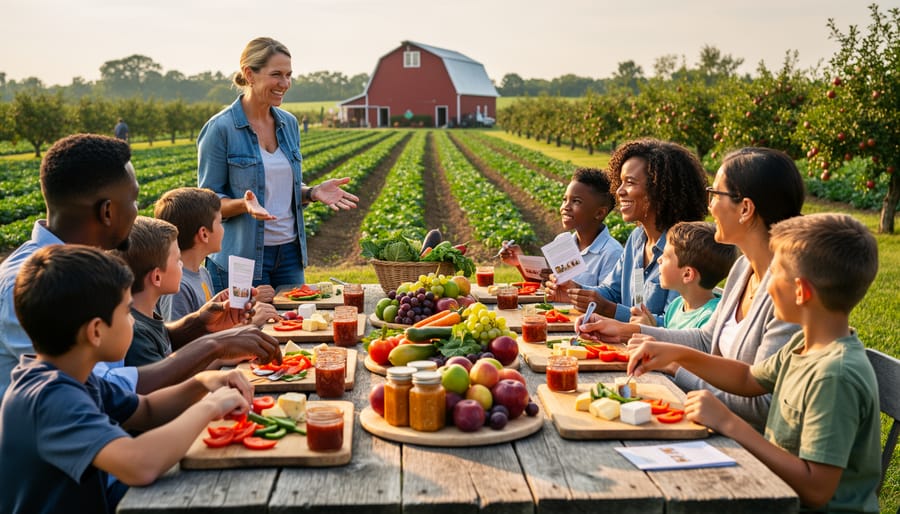
Instructor and CSA members practicing vegetable prep during a cooking basics class.
Hands-on cooking instruction helps CSA members build confidence with basic prep and techniques for whatever arrives in their boxes.

Knife Skills and Vegetable Prep

Most CSA cooking workshops start with the knife work that intimidates people most: turning a knobby kohlrabi or dense butternut squash into dinner-ready pieces without losing a fingernger or spending 20 minutes wrestling with produce.

Instructors typically begin with proper grip and a stable cutting board, then move quickly to the vegetables members actually struggle with. You’ll learn the peeler trick for kohlrabi’s thick skin, how to safely halve winter squash (microwave it for 90 seconds first), and the fastest way to strip kale leaves from their tough stems. These aren’t restaurant techniques, they’re shortcuts that get food on the table faster.

The real value comes from handling vegetables you’ve never cooked before while someone experienced guides you. When your CSA box arrives with celeriac or romanesco, you’ll remember exactly how to break it down instead of shoving it to the back of the fridge. Workshops often provide cheap Y-peelers and basic chef’s knives so members can practice with decent tools, and many farmers send participants home with technique cards showing the vegetables they’re most likely to encounter in upcoming shares.

Preservation Techniques for Abundant Harvests

When your CSA box overflows with greens or delivers a dozen summer squash at once, knowing simple preservation tricks becomes essential. Most CSA cooking classes dedicate time to quick techniques that make produce last without requiring elaborate equipment or hours of work.

Blanching and freezing greens takes minutes: briefly dunk kale or chard in boiling water, shock in ice water, squeeze dry, and freeze flat in bags. You’ll have ready-to-use greens for soups and sautés all winter. Quick pickling transforms surplus cucumbers, radishes, or green beans into crunchy additions, just pack vegetables in jars with hot vinegar, salt, and spices. They’re fridge-ready within hours.

Herb pastes preserve summer’s bounty beautifully. Blend basil, cilantro, or parsley with olive oil and freeze in ice cube trays for instant flavor bombs. For members who want to go deeper, workshops often introduce basic canning methods like water-bath processing for tomatoes and jams.

Simple storage wisdom matters too: keeping carrots in damp sand, storing potatoes in darkness, wrapping greens in damp towels. These aren’t complex skills, they’re confidence-builders that prevent the heartbreak of wasted organic produce.

Building Flavor Without Complicated Recipes

The real transformation in CSA cooking classes happens when members stop following recipes line-by-line and start understanding flavor principles. Most workshops dedicate time to building confidence with simple seasoning frameworks that work no matter what vegetables arrive in your box.

The teaching starts with salt, acid, fat, and heat as foundational elements rather than mysterious chef secrets. A drizzle of olive oil, a squeeze of lemon, and a pinch of flaky salt can elevate roasted turnips or sautéed greens equally well. Instructors demonstrate this principle with whatever produce is abundant that week, showing how the same technique transforms completely different vegetables.

Many farms teach what they call “formula cooking” rather than rigid recipes. A basic stir-fry formula works for bok choy, snap peas, or sliced kohlrabi: hot pan plus oil plus aromatics plus vegetables plus finishing sauce. Members learn to swap vegetables freely while keeping the method constant, which builds genuine cooking confidence.

Simple sauce templates become game-changers for nervous cooks. A tahini-lemon dressing, a quick garlic-butter finish, or a honey-vinegar glaze each have three ingredients but transform anything from roasted carrots to steamed kale. Workshops often send members home with a handful of these foundational formulas written on cards, creating a toolkit rather than a collection of single-use recipes.

The focus stays relentlessly practical: get dinner on the table using what you have, not what a cookbook assumes you have.

How CSA Farms Structure Their Cooking Workshops

CSA farms have developed diverse workshop models to fit their resources, member needs, and seasonal rhythms. The key is finding a format sustainable for the farm while genuinely helpful to members navigating their weekly shares.

On-farm workshops create the strongest connection between food and place. Members gather in a farm kitchen, barn, or outdoor pavilion while the farmer or guest instructor demonstrates techniques using that week’s harvest. These typically run 90 minutes to two hours, often on weekends when members pick up shares. Equipment and ingredients come from the farm, though participants might bring their own knives or storage containers to practice with tools they’ll actually use at home. The hands-on environment builds community naturally as people chop alongside neighbors.

Virtual demonstrations exploded during 2020 and stuck around because they solve real problems: commute time, childcare conflicts, and weather uncertainties. A farmer can stream a 30-minute demo from their kitchen, showing members how to tackle the week’s challenging vegetable while answering questions in real time. Production quality doesn’t need to be fancy. Members care more about seeing actual techniques than perfect lighting. Recordings stay available for members who couldn’t attend live, extending the workshop’s value.

Seasonal series work well for farms wanting structured programming without weekly commitment. Four sessions timed to spring greens, summer abundance, fall roots, and winter storage crops give members a framework for the entire year. This model allows farms to bring in professional chefs or nutritionists for specific sessions, spreading costs across committed participants who pay upfront for the series.

Format Best For Typical Cost Time Commitment
On-Farm Classes Building community, hands-on learners $25-45 per session 2 hours plus travel
Virtual Demos Busy members, recorded access Free-$15 per session 30-45 minutes
Seasonal Series Committed learners, deeper skills $80-150 for 4 sessions 6-8 hours over season
Drop-In Sessions Flexible schedules, low barrier Free or donation-based 45-60 minutes

Drop-in sessions offer the lowest barrier to entry. Farms schedule informal cooking demos during regular pickup times, perhaps the first Saturday of each month. Members stop by if interested, watch for a bit, grab a recipe card, and continue with their day. No registration, no separate trip required. While engagement runs shallower than dedicated workshops, these casual sessions reach members who wouldn’t commit to a formal class but still need guidance.

Most farms bundle workshop costs into share prices or keep fees minimal, viewing education as member retention rather than profit center. Equipment stays simple: farms provide cutting boards, bowls, and basic tools, but participants bring their own knives to practice with familiar equipment.

Success Stories: Farms Making It Work

Three farms across North America show how cooking workshops transform CSA operations from delivery services into thriving food communities.

Willow Creek Farm: Monthly Potluck Model

Sarah Chen runs a 40-member CSA outside Portland and started hosting monthly potluck cooking sessions in her barn three years ago. Members bring one dish made from their shares while Sarah demonstrates a seasonal technique, like roasting root vegetables or quick-pickling summer squash. “I spend maybe two hours prepping, and members handle the rest,” Sarah explains. Her renewal rate jumped from 62% to 89% after introducing the potlucks. The secret? Members now know each other by name and share recipes via text between sessions. Several have become her farm volunteers during harvest crunch times.

Green Valley Farm: Professional Chef Partnership

This 200-member operation in Vermont partners with a local culinary instructor who leads quarterly hands-on workshops in a rented commercial kitchen. Members pay $25 per class, which covers ingredients and take-home recipe cards. Farm manager Tom Rodriguez initially worried about the logistics but found the investment worthwhile. “We calculated that keeping just eight more members each season pays for the entire workshop program,” he notes. The classes also became unexpected marketing, as participants often bring friends who later join the CSA. The farm-to-table CSA model strengthens when members see exactly how restaurant-quality meals come from their weekly boxes.

Midwest Growers Cooperative: Pooled Resources

Five small farms formed a cooperative that rotates hosting biweekly cooking demos at their farmers market booth. Each farm contributes one session per month, featuring their specialty crops. This shared approach lets tiny operations offer consistent programming without overwhelming any single farmer. Member retention across all five farms improved by an average of 23% in the first year, and the cooperative gained visibility that helped recruit 40 new members collectively.

Finished CSA cooking class meal on a wooden table with roasted vegetables and sautéed greens.
A home-cooked dish made from farm-fresh ingredients shows how CSA workshops turn weekly produce into satisfying meals.

Finding or Starting a CSA Cooking Workshop

Most CSA farms don’t advertise cooking workshops on their main websites, so your first step is simply asking. Email or call your farmer during the off-season when they’re less buried in harvest work. Frame it as member feedback: “I’d love to use more of my share but need help preparing unfamiliar vegetables. Would you consider hosting cooking demonstrations?”

If your farm already runs workshops, ask about frequency, cost, and whether they’re included in membership fees or offered as add-ons. Some farms bundle classes with premium share tiers, while others charge per session to cover instructor costs.

For CSA members wanting to start something new, gauge interest through your farm’s Facebook group or member newsletter. A simple poll asking “Would you attend monthly cooking sessions if offered?” gives farmers concrete data. When half a dozen members express interest, you’ve made a compelling case.

Farmers considering this addition should start small. Partner with a member who’s already a confident cook for an informal harvest potluck where everyone prepares one dish from that week’s box. This tests interest without major investment. Local extension offices and culinary schools often connect farms with instructors seeking teaching experience, sometimes at reduced rates or through grant-funded programs.

The National Sustainable Agriculture Information Service offers planning templates specifically for farm-based educational programming. Your state’s organic farming association likely lists farms successfully running workshops who’ll share their approach.

Cooking basics classes transform the CSA experience from a weekly challenge into a genuine partnership between farm and table. When members gain confidence with their produce, they stop viewing unusual vegetables as intimidating obstacles and start seeing them as exciting possibilities. This shift matters profoundly for both individual households and the broader local food movement.

The ripple effects extend beyond individual kitchens. Members who understand how to use their shares waste less food, support their farmers more enthusiastically, and often renew their memberships year after year. They become ambassadors for seasonal eating, sharing techniques with friends and family who might then join a CSA themselves.

Whether you’re already part of a farm share or considering joining one, cooking workshops deserve attention. Ask your farmer about existing classes or express interest in starting them. For those between CSA seasons, local extension offices and farm cooperatives often know which operations offer this support.

These classes represent sustainable living in action: reducing waste, strengthening local agriculture, building community skills, and celebrating the honest work of growing good food. That’s a recipe worth following.

How to Create a Soil Management Plan for Year-Round Farm Success

Posted by darrell on
0
Uncategorized
How to Create a Soil Management Plan for Year-Round Farm Success

A soil management plan is a written strategy that outlines how you’ll maintain and improve your soil’s health throughout the growing season and beyond. It works by helping you schedule amendments, track nutrient levels, prevent erosion, and build organic matter systematically rather than reacting to problems as they arise. Most farms and gardens can implement a basic plan in just a few hours using soil tests, observation, and seasonal planning calendars.

Key Takeaway: A well-executed soil management plan improves soil structure and fertility while reducing fertilizer costs by 20-30% and increasing crop yields through targeted, timely interventions. This proactive approach builds long-term sustainability instead of chasing short-term fixes.

Creating your plan doesn’t require expensive consultants or complicated software. You need current soil test results, an understanding of your crops’ nutrient demands, and a realistic timeline for applying amendments and cover crops. The payoff shows up quickly. Sarah Chen, who runs a two-acre CSA operation in Oregon, saw her tomato yields jump 40% in the second season after implementing a simple soil plan that focused on fall cover cropping and spring compost applications timed to her planting schedule.

The process adapts to any scale. Whether you’re managing a quarter-acre backyard garden or a 50-acre farm, the same core principles apply: test your soil, know what you’re growing, match amendments to actual needs rather than guessing, and verify results through observation and follow-up testing. This systematic approach transforms soil management from guesswork into a repeatable system that gets better each year as you refine what works on your specific land.

Tools and Materials You’ll Need

Setting up a successful soil management plan doesn’t require expensive equipment, but having the right tools makes the process smoother and more accurate. Start with soil testing equipment, you’ll need a reliable soil pH meter (around $20-40 for a decent probe-style meter) and a soil auger or probe for collecting samples from various depths. Many CSA farmers find that a simple stainless steel soil probe works perfectly for routine checks.

For your baseline assessment and ongoing monitoring, invest in a comprehensive soil test kit or plan to send samples to your local extension office. Home test kits ($15-30) work for quick checks, but professional lab analysis ($20-50 per sample) gives you the detailed nutrient breakdown you need for planning amendments.

Beyond testing, you’ll need tools organized by purpose:

  • Testing equipment: digital or analog pH meter, soil thermometer, penetrometer for compaction testing, sample bags and labels
  • Documentation tools: waterproof field notebook, smartphone with notes app or dedicated farm management software, camera for visual records, clipboard
  • Amendment application: wheelbarrow or garden cart, broadcast spreader for larger areas, measuring buckets or scoops for accuracy
  • Planning materials: large wall calendar or planner, graph paper or digital mapping tool for field layouts, weather tracking system

Don’t overlook a good garden spade and trowel for digging test pits to examine soil structure and root depth. A rain gauge helps you track moisture alongside your soil observations. For record-keeping, some farmers swear by simple spreadsheets, while others prefer apps like FarmLogs or even a dedicated three-ring binder with printed templates. Choose whatever system you’ll actually use consistently, the best documentation method is the one that fits your workflow and gets updated regularly throughout the season.

Close-up of hands holding dark, crumbly soil with visible organic matter.
Healthy soil should look dark and crumbly, with visible organic matter and a lively texture. This kind of baseline improvement is the foundation of a strong soil management plan.

Safety Considerations and Best Practices

While soil management is generally low-risk work, a few thoughtful precautions will protect both you and your land. Understanding proper handling and environmental impacts ensures your soil-building efforts enhance rather than harm your farm ecosystem.
When working with organic amendments like manure, compost, or blood meal, wear gloves to prevent skin irritation and potential pathogen exposure. Fresh manure requires extra care, always wash hands thoroughly after handling, and keep uncomposted manure away from areas where you’ll harvest crops within 120 days. Store amendments in covered containers to prevent moisture infiltration and nutrient leaching.

Warning: Never add amendments without testing your soil first, even organic materials can create nutrient imbalances or pH problems that harm crops and soil biology.

Soil testing equipment poses minimal hazards, but augers and probes can cause hand strain if you’re sampling compacted ground. Take breaks, use proper posture, and consider pre-moistening hard soil to ease penetration. If you’re using pH meters or electrical conductivity tools, follow manufacturer guidelines for calibration fluids and battery disposal.

Environmental precautions matter too. Avoid applying amendments before heavy rain, which can wash nutrients into waterways. Time your interventions for dry, calm days to prevent windborne dust from disturbing neighbors or getting into your lungs. When spreading amendments by hand or equipment, a simple dust mask provides extra respiratory protection. These straightforward practices keep soil management safe, effective, and respectful of the broader environment your farm inhabits.

Step-by-Step: Building Your Soil Management Plan

Step 1: Conduct Your Baseline Soil Assessment

Your soil management plan needs a solid foundation, and that starts with knowing exactly what you’re working with. Think of this baseline assessment as taking your soil’s vital signs, you can’t improve what you haven’t measured.

Start by dividing your growing area into zones based on how you use the space. A tomato bed that gets full sun needs separate testing from a shaded herb garden. For each zone, collect soil samples from 6-8 spots, digging down about 6 inches where roots actively feed. Mix these samples together in a clean bucket to get a representative sample for that area.

Send your samples to your state’s cooperative extension lab or a reputable soil testing service. Request a complete analysis that includes pH, nitrogen, phosphorus, potassium, organic matter percentage, and micronutrients. Some labs also test for soil texture and cation exchange capacity, both valuable for understanding your soil’s structure.

While waiting for results, walk your zones and document what you see. Note drainage patterns after rain, compaction from foot traffic, earthworm activity, and how easily a shovel penetrates the ground. Take photos. These observations, paired with your lab results, create the complete baseline picture you’ll reference throughout the growing year.

Gardener kneeling and using a soil probe near raised vegetable beds.
Soil testing and measurement help you understand current conditions before choosing amendments. This scene represents the hands-on baseline assessment stage of your plan.

Step 2: Set Your Soil Health Goals

With your baseline assessment in hand, it’s time to translate those numbers into concrete, achievable targets. Effective soil health goals are specific, measurable, and tailored to what you’re actually growing.

Start by identifying your priority crops and their specific soil requirements. If you’re planning tomatoes and peppers, aim for a pH between 6.0-6.8. For blueberries, you’ll need much lower, around 4.5-5.5. Don’t try to fix everything at once. Pick two or three key metrics that will have the biggest impact on your main crops.

Make your goals seasonal and incremental. Rather than “improve soil health,” set a target like “raise pH from 5.8 to 6.2 by spring planting” or “increase organic matter from 3% to 4% over the next growing season.” These timelines align with your planting cycles and give you clear checkpoints.

Consider your climate constraints too. If you farm in a region with heavy spring rains, prioritizing drainage and structure improvements might matter more than nutrient levels. Goals should reflect both what your crops need and what your environment allows you to achieve realistically.

Step 3: Map Your Seasonal Interventions

With your goals and baseline data in hand, the next step is translating them into a seasonal roadmap. Think of this as dividing your year into four distinct phases, each with specific soil-building tasks that align with your farm’s natural rhythm.

Spring is your soil preparation window. This is when you incorporate amendments identified in your testing, adding compost to raise organic matter, applying lime if pH is low, or working in rock phosphate for phosphorus deficiency. Schedule these activities two to four weeks before planting to give amendments time to integrate. Spring is also when you terminate winter cover crops, either by mowing and incorporating them or using the roll-crimp method for no-till systems.

Summer focuses on maintenance. Your soil is working hard during peak production, so plan for mulching to conserve moisture and suppress weeds. Schedule compost tea applications or side-dressing with organic fertilizers for heavy feeders like tomatoes. If you rotate quick crops, note when to add compost between plantings.

Fall is amendment season again. After harvest, test soil in beds that performed poorly and apply targeted corrections. This is your prime time to spread compost, manure, or mineral amendments because they’ll break down over winter. Plan which beds will receive cover crops increase soil organic matter and protect against erosion.

Winter means cover crops are doing the work. Map out which species go where, crimson clover for nitrogen, tillage radish for compaction, or winter rye for biomass. A seasonal diagram tool helps visualize these rotations and prevents scheduling conflicts. Mark your calendar for when to seed (typically six to eight weeks before first frost) and when you’ll terminate them in spring.

Step 4: Choose Your Amendments and Practices

Now that you’ve mapped your seasonal timeline, it’s time to select the specific amendments and practices that’ll actually improve your soil. Start with your soil test results, they’re your shopping list. If your pH is low, you’ll need lime; if phosphorus is lacking, bone meal or rock phosphate fits the bill. For nitrogen deficiencies, consider aged compost, blood meal, or well-rotted manure.

Match amendments to your timeline. Spring applications work best for quick-acting amendments like compost tea or fish emulsion. Fall is ideal for slower materials like rock minerals and green manures that break down over winter.

Cover crops deserve special attention in your plan. Legumes like clover and vetch add nitrogen, while grasses like rye build organic matter and prevent erosion. Choose varieties that fit your climate and the gap between cash crops, winter rye protects bare soil, while summer buckwheat suppresses weeds between plantings.

Integrate your amendments with your crop rotation blueprint and organic crop rotations. Heavy feeders like tomatoes benefit from compost applications before planting, while nitrogen-fixing cover crops prepare beds for subsequent crops.

Don’t forget management practices beyond amendments, reduced tillage, mulching, and maintaining permanent pathways all contribute to long-term soil health without requiring purchased inputs.

Step 5: Create Your Implementation Schedule

With your goals and interventions mapped out, you need a timeline that actually works with your farm’s rhythm. Start by pulling out your CSA planning checklist or planting calendar, your soil activities should weave around these commitments, not compete with them.

Block out your busiest weeks first: spring planting, peak harvest, market days. These are non-negotiable periods when complex soil tasks won’t happen. Schedule major activities like compost spreading or cover crop seeding during your slower windows, late fall after harvest wraps up, or early spring before the planting rush.

Break large tasks into smaller chunks. Instead of “spread compost on all beds in April,” plan “compost beds 1-5 on April 10, beds 6-10 on April 17.” This approach keeps you from getting overwhelmed during busy periods and ensures soil work actually gets done.

Include buffer time for weather delays and unexpected farm emergencies. If you need to plant cover crops by October 15, schedule them for October 1. Real farming rarely goes exactly as planned, and your soil management timeline should acknowledge that reality rather than pretend perfect conditions will materialize.

Step 6: Document Your Plan

A good soil management plan lives in a format you’ll actually use. Create a simple one-page calendar showing monthly tasks, or use a spreadsheet with tabs for soil tests, amendment schedules, and observations. Keep it accessible in your barn or phone. Leave space for notes after each activity, what worked, what didn’t, weather conditions, unexpected issues. This running record becomes invaluable when planning next year’s approach and spotting patterns over time.

Verifying Your Plan Is Working

A soil management plan isn’t finished once you write it down, verification keeps you on track and helps you catch problems before they hurt your harvest. Regular monitoring lets you see what’s working, what needs tweaking, and when to celebrate those wins that come from healthier soil.

Start with visual check-ins every three to four weeks during the growing season. Walk your beds or fields with a notepad and look closely at plant growth patterns, leaf color, and overall vigor. Dig down six inches in different spots to examine soil structure, does it crumble nicely in your hand, or is it still compacted? These quick observations often reveal trends before a formal test does.

Schedule follow-up soil tests at strategic points: mid-season (around 8-10 weeks after spring planting) and again in fall after harvest. Compare these results to your baseline assessment from step one. You’re looking for movement in the right direction, pH creeping toward your target range, organic matter ticking upward, nutrient levels stabilizing where your crops need them.

Watch for these key indicators that signal improvement:

  • Soil crumbles easily and holds together when lightly squeezed, showing better structure
  • Earthworms appear in greater numbers when you dig, aim for 10+ per shovel scoop
  • Plants show vigorous growth with deep green leaves and strong stems
  • Soil retains moisture longer between waterings without becoming waterlogged
  • Nutrient test results trend upward or stabilize within optimal ranges over consecutive seasons

If your soil holds moisture better after adding compost, you might integrate water-saving techniques to maximize that improvement and reduce irrigation needs even further.

When verification shows something isn’t working, maybe phosphorus levels haven’t budged despite amendments, or compaction persists in certain beds, adjust your plan immediately. Add that problem area to next season’s intervention schedule with a different approach, whether that means switching amendment types, timing applications differently, or trying a different cover crop mix.

Keep notes on everything you observe. A simple notebook entry like “July 15: peppers in bed 3 showing better color than last year, soil feels looser” gives you data to reference when planning next year’s strategies.

Lush green vegetable rows with visible soil life in healthy farm soil.
Healthy soil practices should show up as vigorous plant growth and signs of biological life like earthworms. This image captures the real-world payoff of verified soil improvements.

Real Success: How Valley View Farm Transformed Their Soil

When Sarah Martinez took over Valley View Farm’s three-acre CSA operation in 2024, she inherited compacted soil with a pH of 5.2 and organic matter barely reaching 2%. Her first-year yields disappointed members, and crop disease pressure was constant.

Rather than continuing the struggle, Sarah committed to a structured soil management plan that winter. Her baseline assessment revealed severe calcium deficiency and poor drainage in two main growing zones. She set clear goals: raise pH to 6.5, double organic matter within two years, and improve water infiltration.

Her seasonal approach started simple. Spring 2025 brought targeted lime applications based on zone-specific needs. She planted buckwheat and clover as summer cover crops in rotation, then added composted manure each fall. Winter rye protected bare beds. Sarah tested quarterly and documented every change in a simple notebook.

By fall 2026, the transformation was measurable. Soil tests showed pH at 6.3, organic matter at 3.8%, and calcium levels in optimal range. But the real proof came in her harvest reports. Tomato yields increased 40%, and she cut disease-related crop losses by half. Members noticed too, her waiting list grew from twelve to forty-seven families.

Sarah’s advice? “Start with one practice and build from there. I didn’t transform everything overnight, but having a plan meant every action moved me forward.”

Common Questions About Soil Management Plans

Creating your first soil management plan can feel overwhelming, and that’s completely natural. These questions come up regularly in our CSA community, so you’re not alone in wondering about the practical realities of soil planning.

How often should I update my soil management plan?

Review and adjust your plan each season based on soil test results and crop performance observations. A complete rewrite isn’t necessary, most farmers make minor tweaks quarterly and conduct full soil retesting annually or every other year.

What does a soil management plan typically cost?

Initial costs range from $50 to $300 depending on testing thoroughness and farm size. Ongoing expenses for amendments and testing average $100 to $500 annually for small CSA operations, though many costs are offset by improved yields and reduced input waste.

How much time does maintaining a plan require?

Expect to spend 2-4 hours creating your initial plan, then 30-60 minutes monthly for record-keeping and monitoring. Seasonal implementation tasks blend naturally into your regular farm work rather than adding separate time blocks.

Do small home gardens really need a formal plan?

Even a simple one-page plan helps backyard gardeners track what works and avoid repeating mistakes. The formality matters less than having written goals and basic records you can reference year to year.

When will I see actual results from my soil management efforts?

Some improvements like better water retention appear within one growing season. Significant organic matter increases and structural changes typically become noticeable after two to three years of consistent management.

The beauty of soil management planning is its flexibility. Start simple with basic soil tests and a few seasonal goals, then expand your plan as you gain confidence and observe what your specific land needs. Many successful CSA farmers admit their first plans were rough sketches on notebook paper, refined through seasons of hands-on learning. The act of intentional planning itself makes you a better soil steward, regardless of how polished your documentation looks.

Creating a soil management plan doesn’t have to be overwhelming. Start simple: test your soil, set one or two realistic goals, and map out basic seasonal activities. You can always add complexity as you learn what works for your specific conditions.

The real power of a soil management plan lies in how it connects everything together. Your soil test results inform which amendments to apply. Your seasonal calendar determines when to add compost or plant cover crops. Your monitoring reveals what’s working and what needs adjustment. Instead of reacting to problems as they arise, you’re building soil health intentionally throughout the year.

Whether you’re managing a small backyard garden or a full CSA operation, treating your soil as a living system that requires thoughtful care pays dividends. Healthier soil means more resilient crops, better yields, and less dependence on external inputs. Your plan becomes a living document that evolves with your understanding and your land’s needs.

The best time to start planning is now. Your soil will thank you, and so will your future harvests.

What Is Heat Preservation in Canned Food Temperature (and How Does It Work)?

Posted by darrell on
0
Uncategorized
What Is Heat Preservation in Canned Food Temperature (and How Does It Work)?

Heat preservation canned food temperature refers to the precise thermal thresholds required to safely eliminate harmful bacteria while locking in nutrients during the canning process, typically between 212°F for high-acid foods and 240°F for low-acid varieties.

Getting temperature right isn’t just a food safety checkbox. It’s the difference between jars that nourish your family through winter and those that spoil within weeks or, worse, harbor invisible dangers like botulism. For CSA members and home gardeners drowning in August’s tomato glut or September’s bean harvest, understanding these temperature principles transforms peak-season abundance into year-round eating security.

The science is straightforward but unforgiving. Each food type demands specific heat levels held for exact durations to destroy pathogens without cooking away the vitamins, minerals, and flavors you grew so carefully. Water bath canning works beautifully for acidic foods like pickles and jams, while pressure canning becomes non-negotiable for vegetables, meats, and anything with a pH above 4.6.

This guide breaks down the temperature requirements that keep your preserved food safe, explains how different preservation methods generate and maintain heat, and walks through practical techniques used by successful small-scale farmers who’ve built thriving value-added businesses around their canning operations. You’ll discover which foods need which temperatures, how to verify your equipment maintains those levels, and common pitfalls that compromise both safety and nutrition. Whether you’re putting up your first dozen jars or scaling to a commercial kitchen, mastering heat preservation means your hard-won harvest feeds you properly all year long.

What Is Heat Preservation in Canned Food Temperature?

Heat preservation in canned food temperature refers to the controlled application and maintenance of specific heat levels throughout the canning process to destroy harmful microorganisms while protecting the nutritional value of preserved foods. This scientific principle hinges on reaching and sustaining temperatures high enough to eliminate pathogens like Clostridium botulinum, which can thrive in the low-oxygen environment inside sealed jars, yet not so extreme that they strip away the vitamins and minerals that make your CSA produce valuable in the first place.

The process works through thermal energy transfer: heat penetrates the jar’s contents, raising the internal temperature to a safe threshold that halts bacterial growth and enzyme activity. For home canners working with seasonal farm share bounty, understanding this temperature relationship transforms preservation from guesswork into reliable food safety. When you process tomatoes at 212°F in a water bath or green beans at 240°F in a pressure canner, you’re not just heating food arbitrarily, you’re executing a precise scientific method that balances microbial destruction against nutrient retention.

Heat Preservation
The sustained application of thermal energy during canning to eliminate spoilage organisms while maintaining food quality and nutritional content.
Headspace Temperature
The temperature of the air gap between the food and the jar lid, which affects vacuum seal formation and heat distribution during processing.
Thermal Processing
The phase where jars are exposed to controlled heat for a specified duration, ensuring the food’s center reaches pathogen-killing temperatures.
Cooling Curves
The rate at which canned foods decrease in temperature after processing, influencing seal integrity and continued enzyme inactivation.

What sets heat preservation apart from simple cooking is its dual purpose: immediate sterilization through high temperature exposure, followed by the creation of anaerobic conditions that prevent recontamination. The vacuum seal formed during cooling keeps new bacteria out, while the initial heat treatment has already neutralized what was inside. This combination gives properly canned CSA vegetables and fruits their remarkable shelf stability, letting you enjoy August’s tomatoes in February without refrigeration.

How Heat Preservation Temperature Control Works

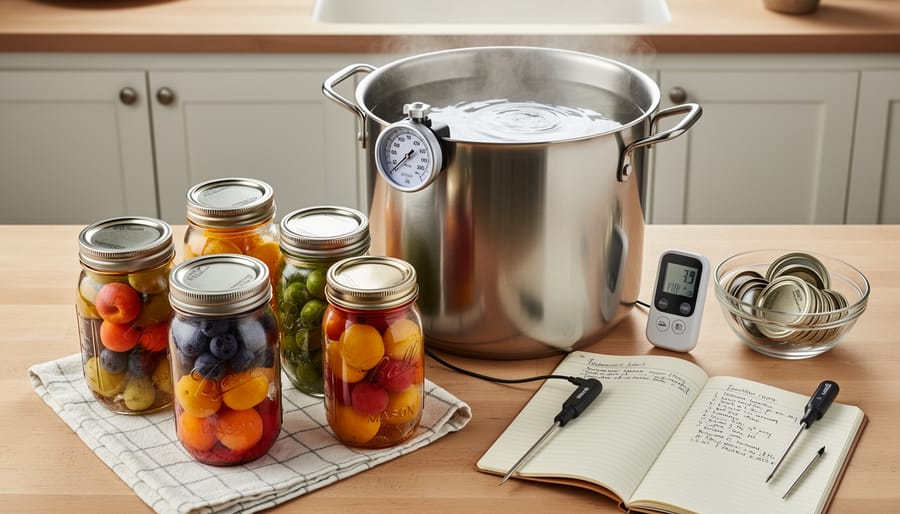
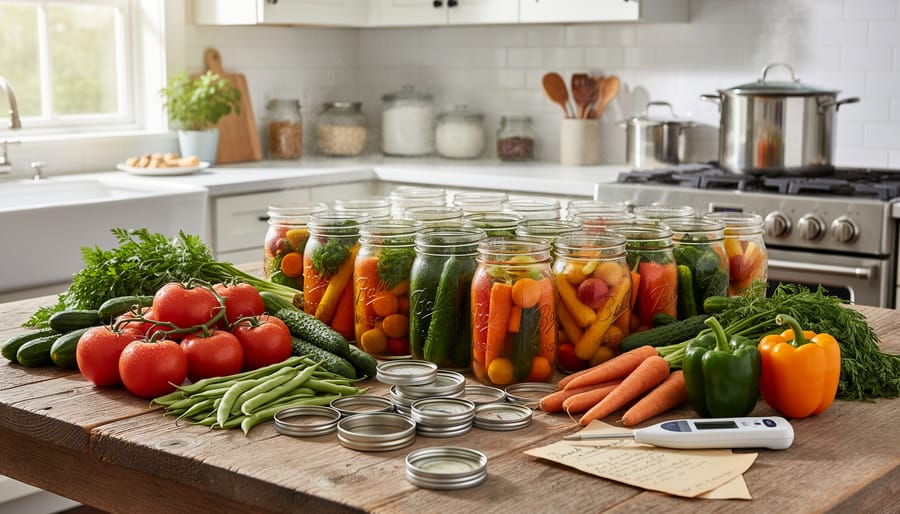
Home canning station with glass jars, lids, a water bath pot, and a thermometer on the counter
A clear look at a home canning station shows how temperature control tools fit into day-to-day preserving. The jars and water bath create a practical visual anchor for heat preservation concepts.

The Thermal Processing Phase

The thermal processing phase kicks off when you place sealed jars into boiling water or a pressure canner. Within minutes, the internal temperature of your CSA vegetables begins climbing toward the target range needed for safe preservation. This rapid heating doesn’t just warm the food, it initiates a crucial transformation that makes home canning possible.

As temperatures rise above 140°F, harmful microorganisms start to weaken. The real magic happens between 212°F and 250°F, depending on your canning method. At these temperatures, the destruction of bacteria by heat becomes highly effective, neutralizing pathogens like Clostridium botulinum that could otherwise thrive in your sealed jars. The sustained heat penetrates to the jar’s center, reaching every bean, tomato slice, or corn kernel from your farm share.

What’s remarkable is that this same heat treatment preserves most vitamins and minerals when done correctly. Water-soluble vitamins like vitamin C experience some loss, but overall nutritional value remains high, far better than letting fresh produce spoil unused in your fridge.

Temperature Maintenance and Cooling

After the initial heat treatment destroys harmful bacteria, the cooling phase becomes equally critical for preserving your CSA vegetables’ nutritional value. Rapid temperature drops can cause nutrient loss, particularly water-soluble vitamins like C and B-complex that leach out when condensation forms inside jars.

The ideal cooling process maintains gradual temperature reduction, typically dropping from processing heat to room temperature over 12 to 24 hours. This controlled descent allows the jar contents to contract slowly, creating the vacuum seal that prevents recontamination. When you rush cooling by placing hot jars in cold water or drafty areas, you risk thermal shock that cracks jars and incomplete seals that let spoilage organisms back in.

During cooling, the lid’s sealing compound softens from residual heat, then firms as it cools, bonding to the jar rim. You’ll hear that satisfying “ping” as each lid pulls down and seals. This process works best when jars cool undisturbed on towels or racks away from temperature extremes.

For your farm share produce, patient cooling means those summer tomatoes and green beans retain more of their original vitamin content months later.

Types of Heat Preservation Methods for Canned Foods

Water Bath Canning

Water bath canning operates at 212°F, the temperature at which water boils at sea level. This approach works for high-acid foods (pH below 4.6) because the acidic environment naturally inhibits bacterial growth, making the lower temperature sufficient for safety. When your CSA box arrives loaded with tomatoes, berries, peaches, or cucumbers for pickling, these are perfect candidates for boiling-water processing for high-acid foods.

The process requires submerging filled jars in boiling water for a specific duration based on jar size and altitude. At this temperature, yeasts, molds, and most bacteria die off, while the heat drives air from the jar to create a vacuum seal during cooling. Processing times range from ten minutes for small jars of jam to forty-five minutes for quart jars of whole tomatoes.

These time-tested canning methods preserve vitamin C and antioxidants reasonably well in your farm-fresh produce. Tomatoes, pickled vegetables, fruit preserves, salsas, and chutneys all thrive with water bath canning. The key is maintaining that rolling boil throughout processing and adjusting time upward if you live above 1,000 feet elevation, where water boils at lower temperatures.

Pressure Canning

Pressure canning uses higher temperatures than water bath methods, making it essential for preserving low-acid foods like green beans, corn, carrots, and other vegetables commonly found in your CSA delivery. While water bath canning reaches 212°F, pressure canners achieve temperatures of 240 to 250°F for low-acid foods by creating a pressurized environment. This elevated heat is necessary to destroy Clostridium botulinum spores, which can survive at boiling temperature but are eliminated at these higher ranges.

The pressure canner’s sealed environment traps steam, building pressure that raises the boiling point of water. At 10 to 15 pounds of pressure (depending on your altitude and canner type), you create the conditions needed to safely preserve proteins and low-acid vegetables. This method allows CSA members to make produce last longer while retaining valuable nutrients like vitamin C and B vitamins that might otherwise deteriorate with improper processing. The key is maintaining steady pressure throughout the recommended processing time, ensuring every jar reaches the target temperature at its center.

Steam Canning

Steam canning has gained traction among CSA members as a faster, more energy-efficient alternative to traditional water bath methods for high-acid foods. This technique uses atmospheric steam rather than boiling water to achieve the necessary 212°F processing temperature.

The method works by heating a small amount of water in the base of a specialized steam canner. As steam rises and surrounds the jars, it transfers heat directly through convection. Most CSA vegetables and fruits suitable for water bath canning, including tomatoes, pickles, jams, and chutneys, process well with steam, completing in roughly the same time.

Steam canning offers practical advantages when you’re facing a bumper crop from your farm share. The canner uses only 1-2 quarts of water versus the 7-8 gallons a water bath requires, reducing both heating time and kitchen humidity during summer preservation sessions. The lightweight equipment makes it easier to handle multiple batches.

However, steam canning isn’t suitable for low-acid foods requiring pressure processing, and you’ll need an approved steam canner with a temperature indicator to ensure safe processing. Always verify that your specific produce and recipe are approved for steam canning before proceeding.

Temperature Ranges and Their Impact on Nutrition

Different nutrients respond to heat in distinct ways, which is why understanding temperature ranges helps you stop nutrient loss from your CSA harvest. Water-soluble vitamins like vitamin C and several B vitamins start degrading around 180°F, while fat-soluble vitamins A and E tolerate higher temperatures better. The sweet spot for most home canning falls between 212°F for water bath methods and 240°F for pressure canning, hot enough to destroy pathogens but not so extreme that it obliterates nutritional value.

Processing time matters just as much as peak temperature. Those gorgeous heirloom tomatoes from your farm share retain about 90% of their lycopene when processed at 212°F for the minimum safe time, but holding them at that temperature for twice as long drops retention to around 70%. Minerals like calcium, iron, and potassium stay stable across all canning temperatures, which is good news for preserving leafy greens and beans.

Here’s what happens to specific nutrients at different temperature points:

  • Vitamin C degrades rapidly above 180°F; process berries and peppers at minimum safe times to preserve it
  • Folate in green beans and spinach retains best at 240°F for shorter durations rather than lower temperatures for longer periods
  • Beta-carotene in carrots and squash actually becomes more bioavailable with heat processing between 212-240°F
  • Polyphenol antioxidants in stone fruits survive best when canned immediately after harvest, regardless of temperature method

Your freshest CSA produce preserves best because enzymes haven’t had time to degrade nutrients before canning begins. Blanching vegetables from your farm box for 2-3 minutes at 212°F before packing jars deactivates enzymes that would otherwise continue breaking down vitamins during storage. This pre-treatment step, combined with quick processing at the correct temperature for your food’s acid level, locks in the nutritional benefits you’re counting on for winter meals.

Fresh CSA produce in a harvest basket on a table before canning
Fresh CSA produce ready for canning sets the stage for why heat preservation temperature matters. It reinforces the connection between peak-season nutrition and correct thermal processing.

Practical Uses for CSA Members

Managing Your Weekly Farm Share

When your CSA box arrives each week, resist the urge to can everything at once. Instead, group items by their acidity and required processing method. High-acid tomatoes, cucumbers, and berries can go straight into water bath canning at 212°F, while low-acid vegetables like green beans and carrots need pressure canning at higher temperatures.

Sort produce immediately: refrigerate what you’ll eat fresh within three days, and prioritize canning anything showing soft spots within 24 hours to lock in nutrients before they degrade. Check your month-by-month produce calendar to anticipate peak abundance weeks when you’ll need extended canning sessions.

Set aside three-hour blocks for pressure canning sessions since the warm-up and cool-down phases can’t be rushed without compromising safety. Water bath canning fits smaller time windows, you can process a batch of pickles or jam in under 90 minutes. Pack jars the night before if needed, but never start heating them until you’re ready to complete the full process that same day.

Success Story: Sarah’s Summer Tomato Preservation

Sarah Martinez joined Valley View CSA in 2020, overwhelmed by 40 pounds of peak-season tomatoes arriving every August. “They’d ripen faster than I could use them,” she recalls. After attending a local canning workshop, she learned that maintaining 212°F for 45 minutes in water bath canning preserved both safety and nutrients, vitamin C retention exceeded 85% compared to refrigeration alone.

She now dedicates two Saturdays each August to processing tomatoes at proper temperatures, tracking her thermometer religiously. “I discovered that rushing the warm-up phase compromised texture, while holding steady heat created restaurant-quality sauce,” Sarah explains. Her pantry now holds 60 jars annually, supplying her family with farm-fresh nutrition through winter.

Sarah’s system extends beyond tomatoes. She adapted temperature timing for peppers, green beans, and pickles using seasonal canning recipes as guides. Her advice? “Invest in a reliable thermometer and never rush the process. Proper heat preservation means my family eats genuinely local food year-round, not just during growing season.”

Common Temperature Mistakes to Avoid

Home canners eager to preserve their CSA haul often make preventable temperature mistakes that undermine safety or nutrition. Recognizing these errors helps you protect your investment in local, organic produce.

The most dangerous mistake is failing to reach and maintain required processing temperatures. Pressure canners must reach 240°F for low-acid foods like green beans and corn. Stopping early or assuming “close enough” creates conditions where botulinum spores survive. Always use a tested recipe and verify your pressure gauge accuracy yearly.

Rushing the cooling process ranks second among common errors. Opening the canner lid immediately or running cold water over jars causes rapid temperature drops that compromise seals and can crack jars. Natural cooling also allows time for heat to penetrate the jar center fully. Let pressure canners return to zero pressure naturally, then wait ten minutes before opening.

Underestimating the impact of jar size on processing creates hidden risks. A quart jar of tomato sauce requires longer processing than a pint because heat travels more slowly through greater mass. Using the wrong time for your jar size leaves cool spots where bacteria thrive.

Temperature inconsistency during processing happens when canners reduce heat too much mid-process to prevent vigorous boiling. This drops internal temperatures below the safety threshold. Maintain steady heat throughout the recommended time, gentle boiling is normal and necessary.

Starting with cold jars in hot water or hot jars in cold water creates thermal shock that cracks glass and wastes hours of work. Match jar temperature to water temperature before processing, and your carefully preserved CSA bounty will remain intact.

Person holding a sealed glass canning jar with sunlit reflections during cooling
A sealed jar cooling/finished on a table conveys successful heat preservation without relying on diagrams. It helps readers connect proper temperature control to reliable sealing and confident storage.

Frequently Asked Questions

CSA members who start preserving their farm share often have specific questions about temperature control. These answers address the most common concerns about heat preservation in home canning.

What temperature should I maintain for water bath canning my CSA tomatoes?

Water bath canning requires maintaining a rolling boil at 212°F (100°C) at sea level for the duration of your processing time. High-acid foods like tomatoes, pickles, and fruit preserves need this consistent temperature to eliminate harmful microorganisms while preserving nutrients.

Do I need to adjust temperatures if I live at high altitude?

Temperature remains the same, but processing time increases with altitude because water boils at lower temperatures above sea level. Add 5 minutes for every 3,000 feet above sea level for water bath canning, or adjust pressure for pressure canning according to USDA guidelines.

Can I reprocess jars that didn’t seal properly?

You can reprocess within 24 hours using the same temperature and time requirements, though you’ll lose some additional nutrients with the second heat exposure. After 24 hours, it’s safer to refrigerate and consume the food within a week rather than reprocess.

How much nutrition do I lose through heat preservation?

Properly temperature-controlled canning typically retains 60-80% of heat-sensitive vitamins like vitamin C, while minerals and fiber remain largely intact. This compares favorably to fresh produce stored for weeks, which can lose 50% or more of certain nutrients.

The key to successful canning lies in following tested temperature guidelines rather than experimenting. Your local extension office can provide altitude-specific charts and answer questions about unusual CSA items you want to preserve. Many CSA farms also host canning workshops where experienced members share their temperature control techniques and troubleshooting strategies for common crops in your area.

Types or components

Understanding the key elements that work together during canning helps CSA members control temperature effectively and preserve their harvest safely.

Heat Source: Your burner or heating element must deliver consistent, measurable heat. Gas stoves offer quick temperature adjustments, while electric coils provide steady output once calibrated. For pressure canning those low-acid CSA vegetables, reliability matters more than speed.

Thermal Mass: The water or steam surrounding your jars acts as a thermal battery, distributing heat evenly and maintaining target temperatures throughout processing. Insufficient water creates hot spots that compromise preservation.

Sealed Container: Mason jars with two-piece lids form an airtight barrier once processed. The vacuum seal that forms during cooling prevents recontamination and locks in the nutritional benefits you’re working to preserve.

Temperature Monitoring: Accurate thermometers and pressure gauges aren’t optional, they’re your safety net. Guessing temperatures risks both nutrition loss and dangerous bacterial survival.

Insulation: Your canner’s design, including lid fit and material thickness, determines how efficiently it maintains processing temperatures without constant fuel input, especially during those longer processing times required for root vegetables from your farm share.

Mastering heat preservation temperature isn’t just about food safety, it’s about honoring the work your farmers put into growing nutrient-dense produce. When you control temperature precisely during canning, you’re locking in the vitamins, minerals, and antioxidants that make your CSA share so valuable. Those peak-season tomatoes, peppers, and green beans retain their nutritional punch months after harvest, giving your family real food security.

Start small if you’re new to temperature-controlled canning. Pick one or two favorite CSA items and practice getting the temperatures right. Use a reliable thermometer, follow tested processing times, and don’t rush the cooling phase. You’ll quickly develop confidence as you see those perfectly sealed jars lining your pantry shelves.

The beauty of understanding heat preservation is that it transforms your relationship with seasonal abundance. Instead of feeling overwhelmed when thirty pounds of beets arrive in your farm share, you’ll see opportunity. You’re not just preserving food; you’re preserving the connection to your local food system, supporting sustainable agriculture, and ensuring your household enjoys farm-fresh nutrition year-round.

Your farmers grew it with care. You can preserve it with the same intention.

How to Choose Procurement and Logistics Systems for Your CSA: A Buying Guide

Posted by darrell on
0
Uncategorized
How to Choose Procurement and Logistics Systems for Your CSA: A Buying Guide

Efficient procurement and logistics management stands as the backbone of a successful CSA operation, directly determining whether members receive fresh produce on time and whether your farm stays profitable. The right system connects sourcing decisions, inventory tracking, and delivery coordination into a streamlined process that saves hours each week while reducing waste and ensuring consistent quality for your shareholders.

Most CSA farmers juggle procurement and logistics without a formal system, relying on memory and paper lists until the chaos of peak season overwhelms them. Orders get duplicated, supplies arrive late, delivery routes become inefficient, and produce sits too long before reaching members. The financial impact hits hard: one mid-sized CSA in Vermont calculated they lost nearly $8,000 in 2025 from spoilage and missed deliveries before implementing basic inventory management.

Key Takeaway: Optimized procurement and logistics cut waste by up to 30%, reduce delivery time by an average of two hours per distribution day, and improve member satisfaction through consistent quality and reliability. These systems pay for themselves within a single growing season for most operations.

The good news? You don’t need enterprise-level software or complex tracking systems to see dramatic improvements. CSA operations of every size can benefit from structured approaches that match their volume, budget, and technical comfort level. Small farms serving 30 members need different tools than larger operations coordinating multiple pickup sites for 300 shareholders.

This guide walks through the procurement and logistics systems available in 2026, comparing their costs, complexity, and suitability for different farm sizes. You’ll learn which factors matter most when choosing your approach, discover practical recommendations based on your operation’s scale, and avoid the common mistakes that drain time and money from CSA businesses.

Key Factors to Consider When Choosing Procurement and Logistics Solutions

Farm worker packing fresh mixed greens into reusable CSA crates on a packing table.
A packing room scene conveys how procurement and logistics support consistent quality from harvest to member delivery.

Scale and Complexity of Operations

The scale of your CSA operation determines whether a simple notebook and weekly truck run suffice or whether you need inventory software and coordinated delivery routes. A 25-member farm selling lettuce, tomatoes, and herbs can track supplies on a single spreadsheet and pack boxes in a few hours. Once you grow to 100 members offering fifteen crops plus occasional add-ons, you’re managing multiple plantings, staggered harvests, variable yields, and different delivery windows, suddenly you need clear procurement schedules, standardized packing procedures, and reliable reusable bins to move produce efficiently.

Product variety amplifies complexity faster than member count alone. Offering storage crops, value-added items, and seasonal extras means juggling diverse suppliers, varied shelf lives, and changing packing requirements week to week. A farm delivering only vegetables to nearby drop points faces different logistics than one coordinating eggs, bread, and dairy from partner farms across a twenty-mile radius. Match your procurement and logistics approach to your actual operational demands, not to what you hope to achieve someday.

Budget and Resource Availability

Every CSA faces the tension between what procurement and logistics systems *could* do and what the farm can realistically afford right now. The smartest approach isn’t choosing the cheapest option or the most feature-rich platform, it’s matching investment to actual operational pain points and available resources.

Start by calculating your true costs: staff hours spent on manual ordering, tracking errors that lead to waste or emergency purchases, delivery inefficiencies that burn fuel and time. A $50-per-month software subscription might seem expensive until you realize it eliminates six hours of weekly administrative work, effectively paying for itself at typical farm labor rates.

Consider infrastructure realistically. Do you have reliable internet for cloud-based systems? Adequate storage for bulk purchasing? A delivery vehicle that can handle route optimization? These foundational requirements often matter more than the management system itself.

Labor availability shapes everything. If you’re already stretched thin during peak season, a complex system requiring daily data entry will fail regardless of its capabilities. Sometimes the right choice is a simpler approach that your current team can actually maintain consistently, rather than an advanced solution that sits unused.

Technology Integration Needs

Technology comfort level plays a surprisingly large role in whether a procurement system actually gets used. A farmer who dreads screen time won’t maintain a sophisticated farm management platform, no matter how many features it offers. Conversely, a tech-savvy operator might waste hours on manual spreadsheets that digital tools could automate in minutes.

Start by honestly assessing your current technology habits. If you already use email, online banking, and smartphone apps comfortably, transitioning to farm management software will feel natural. If computers frustrate you, a hybrid approach works better, perhaps a simple inventory app paired with paper ordering forms you’re already familiar with.

Consider your staff’s abilities too. A system requiring daily tablet updates fails if seasonal workers struggle with the interface or lack reliable devices. The best technology matches your team’s real-world capabilities, not theoretical ideals.

Integration with existing tools matters equally. Will your procurement system sync with your accounting software? Can it export data for tax preparation? Standalone systems that require duplicate data entry create more work than they save, defeating the purpose entirely.

Types of Procurement and Logistics Systems Compared

Manual and Spreadsheet-Based Systems

Manual spreadsheet-based systems remain popular among small CSA farms because they require minimal upfront investment and work well for straightforward operations. You can track seed orders, supplies, and harvest quantities using free tools like Google Sheets or Excel, creating custom templates that match your workflow. Many farmers keep paper logs in the field for immediate recording, then transfer details to digital spreadsheets weekly.

These systems shine when operations are simple. A CSA serving thirty members can easily manage procurement by listing supplier contacts, order dates, quantities, and costs in one spreadsheet, while another tracks what goes into each week’s boxes. You control the format completely and can access records without internet connectivity if you maintain offline backups.

The main limitation appears as your operation grows. Manual entry takes considerable time and invites errors when you’re juggling harvest, packing, and delivery. Tracking inventory across multiple storage locations becomes cumbersome without automated updates, making smart warehousing practices harder to maintain. Spreadsheets also lack built-in member communication features, requiring separate emails or texts for delivery updates. If you’re comfortable with basic formulas and disciplined about weekly updates, this approach can serve you well through your first few seasons before scaling demands more integrated solutions.

Refrigerated storage room with clean shelves and bins for CSA produce inventory.
A refrigerated storage scene illustrates the physical capacity and inventory control needed to protect freshness and reduce waste.

Farm Management Software Platforms

Farm management software platforms offer CSA operators a centralized hub for handling procurement, inventory, and member logistics through a single digital interface. These systems typically combine supplier ordering tools with real-time inventory tracking, automated member communications, and delivery route planning. Popular platforms like Harvie, LocalLine, and Farmigo allow you to manage everything from seed orders to share box packing lists without switching between spreadsheets.

The main advantage is automation. Instead of manually updating harvest quantities and member allocations, the software adjusts inventory as you pack boxes and flags when you need to reorder supplies. Many platforms generate delivery manifests, send pickup reminders to members, and track payments in one workflow. This drastically cuts administrative time once you’re past the initial setup.

The tradeoff is cost and learning curve. Monthly fees typically run $50 to $300 depending on member count and features, and your team needs time to master the system. Tech-savvy operations with 50 or more members usually see the fastest return on investment, while smaller farms may find the upfront effort outweighs the efficiency gains until they expand.

Close-up of gloved hands holding procurement receipts and a clipboard near farm storage racks.
This close-up emphasizes procurement paperwork and record-keeping habits that help CSA teams stay organized without chaos.

Hybrid Approaches

Many CSA operators find their sweet spot by blending traditional methods with targeted digital upgrades rather than committing to an all-or-nothing approach. This strategy lets you maintain familiar workflows while solving specific pain points with technology.

A common hybrid model uses spreadsheets for procurement planning and inventory tracking while adopting specialized apps for member communication and delivery scheduling. For instance, you might keep supplier orders and seasonal planting schedules in Excel but use a mobile app like Harvie or LocalLine to automate harvest tracking and member notifications about box contents.

Another effective combination pairs paper-based field logs with cloud-based accounting software. Farmers often prefer handwritten notes during harvest and planting but appreciate QuickBooks or FreshBooks for invoicing members and tracking expenses. This approach preserves the convenience of clipboard-and-pencil fieldwork while ensuring clean financial records.

The key advantage is flexibility. You can add digital tools incrementally as your comfort grows and specific needs become clear, avoiding both the learning curve of comprehensive platforms and the limitations of purely manual systems. Start by digitizing your biggest bottleneck, whether that’s member billing, delivery route planning, or supplier coordination.

Cooperative and Network-Based Systems

Partnering with neighboring CSA farms transforms procurement and logistics from isolated challenges into shared opportunities. In cooperative networks, multiple farms pool their purchasing power to negotiate better prices on seeds, soil amendments, and packaging materials. A group of five CSAs ordering boxes together, for example, can cut packaging costs by 30% compared to individual purchases.

Distribution hubs serve as central collection points where farms drop off shares and members pick up from multiple CSAs at once. This reduces each farm’s delivery radius and fuel costs while offering members more variety. Some networks rotate truck usage weekly, so one farm handles all deliveries while others focus on production.

Food hubs and regional aggregators provide another model, managing procurement logistics for multiple farms through shared warehouse space, cold storage, and transportation routes. You pay a percentage of sales (typically 15-25%) but gain professional logistics management and access to institutional buyers alongside CSA sales.

The trade-off is coordination overhead. Networks require regular communication, standardized packaging, and aligned delivery schedules. Start small with one or two trusted farms before expanding your cooperative relationships.

Recommendations for Different CSA Models

For Small-Scale CSAs (Under 50 Members)

For farms serving fewer than 50 members, simplicity is your best friend. A basic spreadsheet paired with a paper checklist can handle most procurement tracking without overwhelming you during peak season. Keep one master sheet listing your seed suppliers, packaging vendors, and recurring inputs with contact details and typical order sizes. Update it after each purchase rather than trying to reconstruct everything at tax time.

For delivery logistics, a shared Google Sheet or simple email system works well to communicate pickup times and box contents. Many small CSAs successfully use a single central pickup location, your farm gate or a community spot, which eliminates complex routing and keeps fuel costs minimal. Invest in durable, stackable CSA crates rather than disposable boxes; the upfront cost pays back quickly through reuse and easier handling.

Track inventory with physical counts weekly rather than elaborate software. A whiteboard in your packing shed showing what’s ready to harvest and what needs ordering keeps the whole team aligned without logins or training.

For Mid-Size CSAs (50-200 Members)

Mid-size CSA operations hit a sweet spot where basic systems start creaking but full enterprise software feels like overkill. At this scale, you’re juggling enough volume that manual tracking becomes error-prone, yet you still need solutions you can actually manage without a dedicated IT person.

A dedicated farm management platform makes sense here, look for systems like Harvie, Local Line, or Farmigo that handle member management, delivery routing, and basic inventory tracking in one place. These typically run $100-300 monthly but save 10-15 hours weekly in administrative time. The payoff comes from automated packing lists, integrated member communications, and delivery route optimization.

For procurement, establish standing orders with key suppliers rather than ordering week-to-week. Create a seasonal procurement calendar that anticipates needs three months ahead, accounting for planting schedules and typical yields. Many mid-size CSAs benefit from joining a regional growers cooperative for bulk purchasing power on seeds, packaging materials, and storage supplies.

Keep one manual backup system, a simple spreadsheet tracking critical suppliers and delivery commitments. When your software hiccups during peak season, you’ll thank yourself for maintaining that safety net.

For Large or Multi-Farm CSAs (200+ Members)

Large CSA operations face coordination challenges that manual methods can’t handle efficiently. With multiple farms, hundreds of members, and complex delivery routes, you need robust systems that prevent bottlenecks and ensure accurate fulfillment.

Invest in comprehensive farm management software that handles multi-location inventory, automated ordering, route optimization, and member portal integration. Platforms like Harvie, Local Line, or Farmigo are built for this scale and can consolidate procurement data across partner farms while managing different distribution sites. Expect annual software costs of $2,000-$5,000, but the labor savings and reduced errors typically justify this investment within the first season.

Consider establishing a centralized packing and distribution hub rather than managing pickup points individually. Some multi-farm CSAs lease warehouse space where partner farms deliver consolidated orders, then pack and route member shares from one location. This streamlines logistics dramatically and allows you to employ dedicated packing staff rather than pulling farmers away from field work.

Implement barcode scanning or RFID tracking for procurement items and packed shares to maintain accuracy at scale. Springfield Valley Collective, a seven-farm CSA with 320 members, reduced packing errors by 87% after adopting scanning technology.

Build formal procurement agreements with partner farms that specify delivery windows, quality standards, and communication protocols. Weekly coordination meetings become essential to synchronize supply with member demand and adjust for crop fluctuations across multiple growing sites.

Common Mistakes to Avoid

Starting with overly complex technology is one of the most expensive mistakes new CSA operators make. Many farmers invest thousands in comprehensive farm management software before they’ve established their basic procurement workflows, only to find themselves overwhelmed by features they don’t need while still struggling with fundamental inventory issues. Begin with simple systems, even a well-organized spreadsheet, and add technology only when manual processes become genuine bottlenecks. You’ll save money and avoid the frustration of learning complicated software while simultaneously learning the rhythms of CSA operations.

Neglecting seasonal planning creates procurement chaos throughout the growing season. CSA operations have predictable seasonal patterns, yet many managers fail to plan procurement needs around planting schedules, harvest windows, and peak delivery periods. This oversight leads to last-minute scrambles for packaging supplies during harvest rushes, emergency orders that cost more, and missed opportunities to negotiate better prices through advance bulk purchasing. Map out your entire season’s procurement needs in winter, identify critical supply delivery dates, and build relationships with vendors who understand agricultural timelines.

Here are additional pitfalls that undermine CSA procurement and logistics efficiency:

  • Poor inventory tracking that leads to over-ordering supplies while running out of essential items at critical moments
  • Inadequate member communication about delivery changes, leaving subscribers confused and frustrated when logistics shift
  • No buffer capacity for handling crop failures or unexpected surpluses, forcing rushed decisions about alternative sourcing or storage
  • Ignoring storage capacity limitations when planning procurement, resulting in spoilage and wasted resources
  • Failing to standardize box sizes and packaging, which complicates packing procedures and increases labor time
  • Underestimating delivery logistics complexity, particularly fuel costs, route efficiency, and time requirements

Another critical error is not investing in proper systems to keep produce fresh throughout the procurement and delivery chain. Farmers sometimes focus entirely on growing beautiful vegetables while neglecting the cold storage, washing stations, and packing facilities that preserve quality from harvest to member pickup. Without adequate infrastructure for handling produce properly, even the best procurement planning won’t prevent quality deterioration that disappoints members.

Finally, trying to manage everything alone without building a support network limits your problem-solving capacity. Connect with other CSA operators to share vendor recommendations, discuss common procurement challenges, and learn from their mistakes rather than repeating them yourself.

Insulated delivery cooler and produce crates beside a rural roadside with a farmer in the distance.
This scene symbolizes the logistics side of CSA work, keeping produce protected and reliable until it reaches members.

Real-World Success: How Green Valley CSA Streamlined Their Operations

Sarah Chen started Green Valley CSA in 2019 with 35 members and a simple dream: connect her community with fresh, organic vegetables grown on her family’s 8-acre farm outside Portland. By year three, she’d grown to 120 members, but her procurement and delivery system hadn’t kept pace.
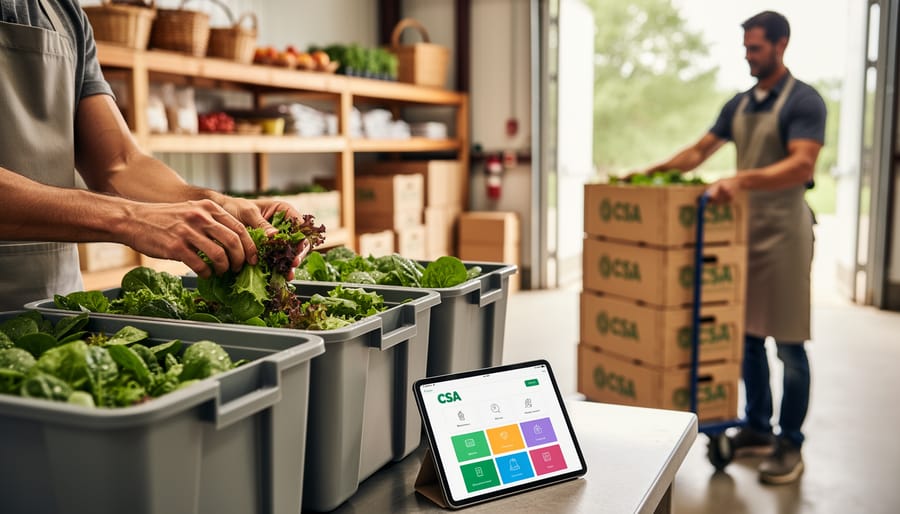
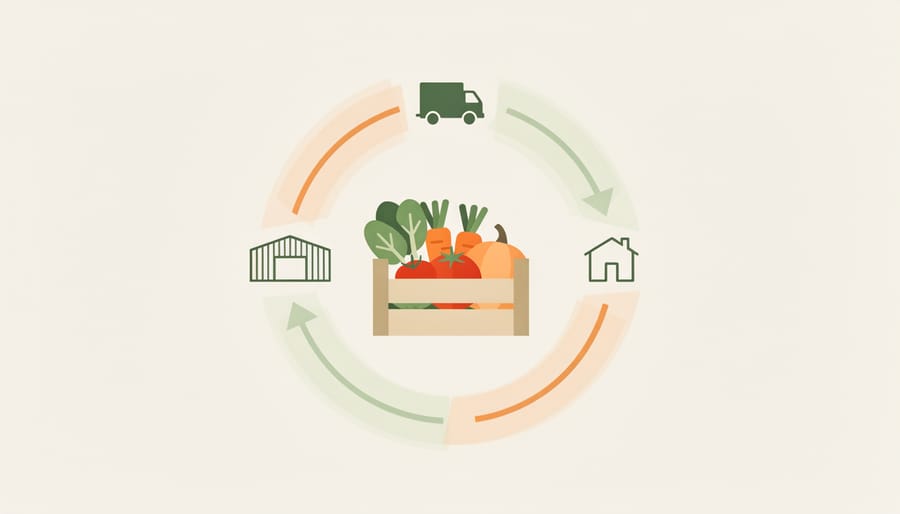
“I was spending twelve hours a week just managing supplies orders and coordinating deliveries,” Sarah recalls. “I’d forget to order twine until we were harvesting tomatoes, or I’d buy way too much of something because I couldn’t remember what we had left from last season.”

Her delivery chaos was worse. Members received inconsistent communication about pickup times. Some weeks Sarah would pack boxes at 5 AM to hit three different drop points, only to find members hadn’t shown up because they forgot their day.

The breaking point came when a seed order arrived three weeks late because Sarah had written the supplier’s email incorrectly in her notebook. She missed her broccoli planting window entirely.

Sarah started small. She adopted a basic farm management software that cost $40 monthly and let her track inventory, automate member emails, and plan procurement around her planting calendar. She consolidated her three pickup locations to one central spot with extended hours, which cut her delivery time from eight hours to three.

Within one season, the changes paid off. Sarah reduced her supply costs by 18% because she could see exactly what she had in stock before reordering. Her weekly administrative time dropped from twelve hours to four. Member retention jumped from 67% to 89%, with surveys showing that consistent communication made the biggest difference.

“I’m not naturally organized,” Sarah admits. “But having a system that works with how I farm, not against it, gave me back the time to actually grow food.”

Frequently Asked Questions

Starting with simple improvements to your existing system usually works better than a complete overhaul. Many CSA managers wonder whether they need specialized software or if their current spreadsheets will suffice. The answers depend heavily on your farm’s size, growth plans, and how much time you’re currently spending on procurement and logistics tasks.

What’s a realistic budget for procurement and logistics software?

Entry-level farm management platforms typically cost $20-50 monthly for small CSAs, while comprehensive systems range from $100-300 monthly for mid-size operations. Many farms start with free spreadsheet templates and upgrade only when manual tracking becomes a bottleneck.

How much time should I expect to spend on procurement planning each week?

Small CSAs generally need 2-4 hours weekly for procurement tasks, while larger operations might require 8-12 hours. This includes supplier communication, inventory checks, order placement, and delivery coordination.

Can I switch systems mid-season without disrupting member deliveries?

Transitioning between seasons is safest, but gradual mid-season changes work if you run systems in parallel for 2-3 weeks. Start by testing the new approach with one aspect like delivery route planning before moving procurement tracking over.

Which software platforms do CSA farmers recommend most?

Harvie, Local Line, and Farmigo consistently receive positive feedback from CSA operators for their balance of features and usability. However, the best choice depends on whether you prioritize member management, route optimization, or supplier integration.

The transition process itself needs careful planning. Keep backup records in your old system for at least one full growing season after switching, since you’ll often need to reference previous years’ procurement patterns and delivery data. Train any staff or family members helping with logistics before fully committing to a new approach.

Budget concerns shouldn’t force you into systems that don’t fit your operation. Free or low-cost options can work excellently for years if they match your workflow and scale. The key is choosing tools that save you more time than they cost to learn and maintain, allowing you to focus energy on growing quality produce rather than wrestling with overly complex logistics platforms.

Key buying factors

When selecting procurement and logistics systems for your CSA, prioritize solutions that match your current operational scale rather than overbuilding for hypothetical growth. A 30-member farm doesn’t need enterprise software, while a 150-member operation will outgrow spreadsheets quickly.

Budget realistically for total costs. Initial software fees are just the start. Factor in training time, hardware needs, ongoing subscription costs, and potential integration expenses. Many farms underestimate the labor hours required to transition systems.

Evaluate ease of use for your actual team. The best system is the one your staff will consistently use. If you have volunteers handling deliveries or rotating crew members managing inventory, complex platforms create bottlenecks. Test interfaces before committing.

Check integration capabilities with tools you already use. Your procurement system should connect with accounting software, member management platforms, and mobile apps for delivery tracking. Isolated systems create duplicate data entry and errors.

Finally, assess vendor support quality. CSA operations have seasonal peaks when you can’t afford system downtime. Choose providers with responsive support, clear documentation, and active user communities.

Choosing the right procurement and logistics approach for your CSA operation isn’t about finding the perfect system from day one. It’s about selecting solutions that work for where you are now while leaving space to adapt as your farm grows and member needs evolve.

Start small. Pick one area that currently drains your time or creates the most friction, maybe it’s coordinating deliveries, tracking seed orders, or managing member communication. Improve that single piece of your operation first, then build from there. This focused approach prevents overwhelm and lets you measure what actually makes a difference before investing more resources.

Remember that sustainable operations support sustainable farming. When you spend less time wrestling with spreadsheets or scrambling to source last-minute supplies, you have more energy for what matters most: growing nutrient-dense food and building relationships with your members. Efficient procurement and logistics systems don’t just save hours; they reduce stress during peak season and help you maintain the farming practices that drew you to CSA in the first place.

Connect with other CSA farmers in your region. They’ve already navigated these challenges and can share what worked, what flopped, and which investments paid off. Local farming networks and CSA coalitions offer practical wisdom you won’t find in any software demo. Your best procurement strategy might come from a conversation at the farmers market, not a sales pitch.

The systems you choose today shape the farm you’ll be running tomorrow. Choose wisely, start simply, and grow deliberately.