Why Chlorinated Water Is Quietly Harming Your Garden — and How a Carbon Block Filter Can Fix It
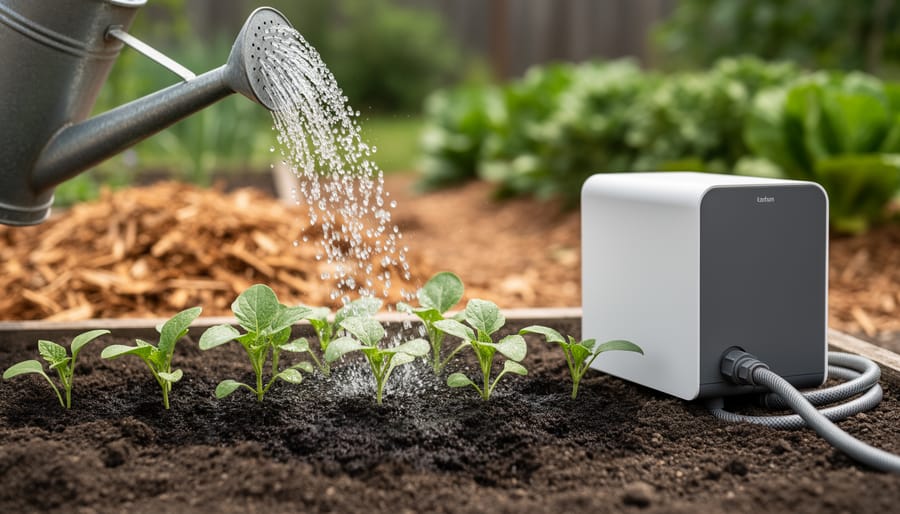
Every time you fill a watering can from the tap, you’re doing more than hydrating your plants — you’re delivering a low dose of disinfectant chemistry straight to their roots. Municipal water treatment plants add chlorine (or the longer-lasting chloramine) to kill bacteria and keep drinking water safe. It’s a public health triumph. But the same properties that make chlorine an effective germ-killer make it a quiet stressor for the living ecosystem in your garden soil and the plants growing in it.
Chlorine Doesn’t Know the Difference Between “Bad” Bacteria and “Good” Ones
Soil isn’t just dirt — it’s a dense, living network of bacteria, fungi, and microorganisms that break down organic matter, cycle nutrients, and form symbiotic relationships with plant roots. Mycorrhizal fungi, for example, extend a plant’s root system dramatically, helping it absorb water and phosphorus that it couldn’t reach on its own.
Chlorine is non-selective. When chlorinated water is poured onto soil, it doesn’t just pass through — it kills off a portion of the microorganisms living there, much like it’s designed to kill pathogens in a water treatment plant. According to Colorado State University Extension’s PlantTalk program, the effect is real but limited under typical drinking-water chlorine levels: chlorine tends to bind to surface soil particles, so most of the microbial die-off is confined to the top half-inch of soil, and populations rebound quickly once watering stops. That’s reassuring for established lawns and garden beds, but it’s a different story anywhere the whole point is to keep a fresh microbial population intact right at the surface — freshly applied compost tea, seed-starting mix, potting soil for houseplants, or containers where roots never get the buffering depth of open ground. In those settings, repeated chlorinated watering can undercut the benefit before the microbes even get a chance to establish.
Which Plants Actually Show the Damage?
Some plants tolerate chlorinated tap water without much visible complaint. Others are far more sensitive, and gardeners who grow them often notice a pattern of symptoms without realizing the water is the culprit:
Spider plants (Chlorophytum comosum) are notorious among houseplant growers for developing brown, crispy leaf tips — a classic sign of chlorine and fluoride sensitivity.
Peace lilies (Spathiphyllum) often show yellowing edges and stunted new growth when watered exclusively with chlorinated tap water over time.
Boston ferns and other true ferns are shallow-rooted and highly sensitive to chemical buildup, frequently reacting with browning frond tips and slowed growth.
Dracaena species are so reliably affected by chlorine and fluoride that leaf-tip burn on Dracaena is a standard diagnostic photo in houseplant care guides.
Orchids, particularly Phalaenopsis, are sensitive to chemical residues on their exposed roots, which lack the protective bark covering found on terrestrial roots.
Seedlings and young transplants across nearly every species are more vulnerable than mature plants, since their root hairs and emerging microbiomes are less developed and less resilient to chemical stress.
None of this means chlorinated tap water will kill a garden overnight. The effect is usually cumulative — slightly reduced vigor, tip burn, slower germination rates, and a soil biology that never quite reaches its full potential.
It’s Not Just Chlorine
Municipal water can also contain trihalomethanes (THMs) and other disinfection byproducts formed when chlorine reacts with organic material in the water supply, as well as trace volatile organic compounds (VOCs) from industrial and agricultural runoff. In some regions, PFAS — the so-called “forever chemicals” used for decades in water- and stain-resistant products — are also present in tap water. These compounds don’t break down naturally, and while research on their specific effects on ornamental and food-crop plants is still developing, none of them are things a gardener wants concentrating in soil that’s meant to grow food.
The Fix: Filtering Your Garden Water at the Source
The good news is that this is one of the easier gardening problems to solve. A quality coconut carbon block filter removes free chlorine and chloramine, along with a meaningful percentage of VOCs and PFAS, before the water ever reaches your plants or your soil.
Not all carbon filters perform equally, though. Standard coconut shell carbon is naturally hydrophobic — it repels water, which limits how much contact time the water actually spends interacting with the carbon’s pore structure. Filters built with hydrophilic carbon, by contrast, are engineered so water is drawn into and held within the carbon’s pores, dramatically increasing contact time and improving contaminant reduction across the board. Combined with a high iodine value (a measure of the carbon’s adsorption capacity) and a binder process designed to resist premature clogging, a well-built carbon block cartridge can filter garden water at a high flow rate without bottlenecking your watering routine.
One option built specifically around this hydrophilic approach is the Aquarenaissance premium carbon block filter cartridge. Made from 100% premium coconut shell carbon with a 1200 iodine value, the PCB line is engineered to reduce chlorine, VOCs, and PFAS while resisting the premature clogging that shortens the life of lower-quality filters. For gardeners dealing with cysts like Giardia or Cryptosporidium in their water source, the sub-micron PCB10SM model adds a 0.5-micron rating on top of the same chlorine and chemical reduction, making it a solid fit for anyone filtering water for edible crops or sensitive propagation work.
What Dechlorinated Water Does for Growth
Once chlorine and other disinfection byproducts are filtered out, the benefits show up in a few concrete ways:
Healthier root systems. Roots aren’t fighting off a mild chemical irritant with every watering, so they can devote more energy to growth and nutrient uptake.
A more active soil microbiome. Beneficial bacteria and mycorrhizal fungi are free to establish and multiply, improving long-term nutrient cycling.
Better results from compost tea and biological amendments. Living microbial inoculants survive contact with water rather than being knocked back immediately.
Improved germination rates. Seedlings, which are the most chemically sensitive stage of a plant’s life, tend to establish more reliably in filtered water.
Less visible leaf damage on chlorine-sensitive species like spider plants, ferns, Dracaena, and orchids — fewer brown tips, more consistent new growth.
A Simple Upgrade for a Complex System
Gardening is already an exercise in managing dozens of variables — light, nutrients, pests, timing. Water quality is one variable that’s easy to overlook because chlorine is invisible and its effects are gradual rather than dramatic. But for anyone growing sensitive houseplants, raising seedlings, or trying to build genuinely living, biologically active soil, running irrigation water through a hydrophilic coconut carbon block filter is a small, one-time upgrade that pays off in the compounding form of healthier roots, more resilient plants, and better yields season after season.
Food preservation technologies give you the power to keep fresh produce edible for months instead of days, using methods that range from vacuum sealing and freeze-drying to controlled-atmosphere storage and modern dehydration systems. Whether you’re dealing with a bumper crop from your backyard garden or want to make the most of your CSA box, these technologies transform perishable foods into stable ingredients that retain most of their nutrients, flavor, and texture.
Key Takeaway: Food waste contributes roughly 8-10% of global greenhouse gas emissions. By preserving surplus produce with these technologies, you’re not just saving money but actively reducing your carbon footprint while supporting local, seasonal eating year-round.
The gap between harvest and spoilage is where most food loss happens. A tomato picked at peak ripeness has perhaps five days before it turns mushy. Berries fare even worse. But run those same fruits through a freeze-dryer or vacuum-seal system, and you’re looking at shelf life measured in years, not days.
Modern preservation equipment has become surprisingly accessible for home use. What once required industrial facilities now fits on a kitchen counter. The real shift happened when manufacturers started designing for small-batch processing, making it practical to preserve 10 pounds of strawberries instead of 100.
This guide walks you through the essential technologies available in 2026, from setup and safety protocols to step-by-step processes for each method. You’ll learn which eco-conservative methods work best for different foods, how to verify your results, and what equipment delivers the best return on investment for home preservers and small-scale farmers alike.
Essential Equipment and Materials for Eco-Friendly Food Preservation
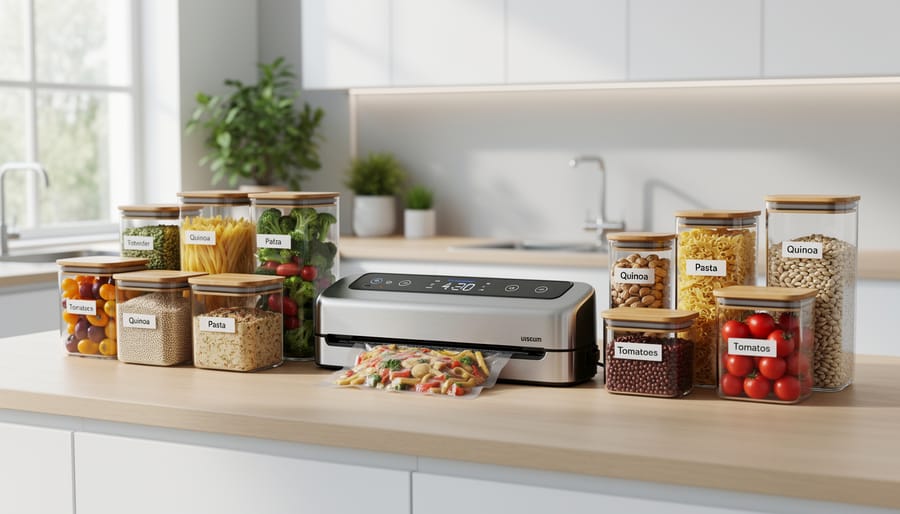
A modern home setup with vacuum sealing and reusable glass containers demonstrates how eco-conscious preservation can be organized efficiently.
Starting with the right equipment sets you up for successful eco-friendly preservation without wasting energy or materials. Your specific needs will vary based on which methods you choose, but investing in quality, energy-efficient tools pays off through years of reliable use and lower environmental impact.
For dehydration, you have two main paths: solar-powered models that harness free sunlight or electric dehydrators with efficient heating elements. Solar dehydrators work beautifully in sunny climates and cost nothing to run, though they depend on weather conditions. Electric models offer consistent results regardless of season, and 2026’s newer units use 30-40% less power than older designs while maintaining precise temperature control. Look for models with stackable trays and adjustable thermostats between 95-165°F.
Vacuum sealing equipment has evolved beyond single-use plastic bags. Modern chamber vacuum sealers work with reusable silicone bags and glass containers fitted with valve lids, eliminating the constant need for disposable materials. These systems remove air more completely than external sealers, extending storage time while helping you slash cooking energy by preserving batch-cooked meals efficiently.
Here’s a practical breakdown of essential equipment organized by method:
Dehydration: solar drying boxes or 600W electric dehydrators with 4-9 trays, food-grade mesh screens
Vacuum sealing: chamber sealer or handheld model, reusable silicone bags, glass containers with vacuum-seal lids
Freeze-drying: home freeze dryer (for serious preservers), silicone or Mylar storage bags, oxygen absorbers
General supplies: wide-mouth glass jars (pint to half-gallon), stainless steel utensils, digital thermometer
Container materials matter significantly for both sustainability and food safety. Glass jars and ceramic crocks last decades and don’t leach chemicals, making them ideal for fermentation and storage. When plastic is necessary, choose BPA-free, food-grade options rated for your specific preservation method’s temperatures. Reusable silicone bags have emerged as a practical middle ground, withstanding freezing and moderate heat while reducing single-use waste.
Fermentation crocks with built-in water moats or modern airlock systems prevent oxygen exposure while allowing carbon dioxide to escape, creating ideal conditions for healthy bacteria. The water seal is remarkably simple yet effective technology that has preserved foods for centuries.
Safety Considerations and Precautions
Checking pH and handling fermentation equipment carefully supports safe results and reduces contamination risk.
Before you begin preserving food at home, understanding safety fundamentals will protect your family from serious foodborne illness. Modern preservation technologies offer convenience, but each method carries specific risks if not executed properly.
Temperature control is your first line of defense against bacterial growth. Dehydrators should maintain 135-145°F for vegetables and herbs, while meats require 155-165°F to eliminate pathogens. Freeze dryers must reach -40°F during the freezing phase to prevent ice crystal damage and microbial survival. For pressure canning (though primarily a traditional method, some newer preservation systems incorporate it), low-acid foods need 240-250°F to destroy Clostridium botulinum spores, which thrive in oxygen-free environments like sealed jars and vacuum-sealed bags.
pH levels matter critically for fermentation and certain preservation methods. Successful lacto-fermentation requires a starting pH below 4.6, with most vegetables reaching 3.0-4.0 after proper fermentation. Always use pH strips or a digital meter to verify acidity before storing fermented foods long-term. High-acid foods like pickled vegetables are safer than low-acid items, which demand pressure processing rather than simple vacuum sealing for shelf-stable storage.
Warning: Never vacuum-seal raw mushrooms, fresh garlic in oil, or soft cheeses at room temperature, these create anaerobic conditions perfect for botulism growth. Always refrigerate or freeze vacuum-sealed low-acid foods.
Equipment maintenance prevents contamination between batches. Clean dehydrator trays, vacuum sealer channels, and fermenting crocks with hot soapy water after each use, and sanitize fermenting vessels with a diluted bleach solution (one tablespoon per gallon of water) or boiling water. Inspect vacuum sealer gaskets monthly for wear and replace when cracked. Check airlock water levels in fermenting crocks every few days to maintain the oxygen barrier.
Discard preserved foods immediately if you notice bulging vacuum-sealed bags, off odors, slimy textures, mold growth beyond surface kahm yeast in ferments, or any discoloration inconsistent with the original food. When rehydrating dried foods, if they develop an unusual smell or fail to soften properly after adequate soaking, composting them is the safest choice.
Step-by-Step Preservation Methods Using Modern Technologies
Dehydration: Solar and Electric Methods
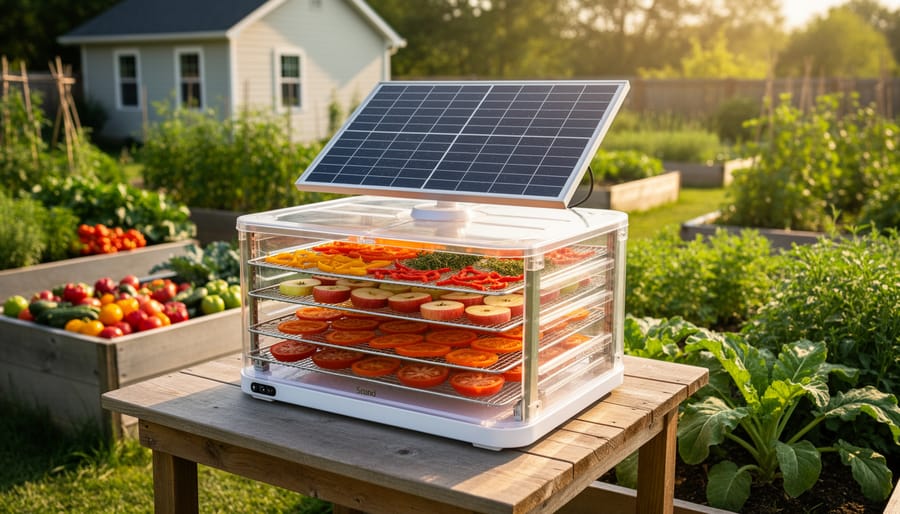
Sun-powered dehydration turns garden harvests into shelf-stable snacks with minimal energy use when conditions allow.
Dehydration removes moisture that bacteria and mold need to thrive, making it one of the most energy-efficient food preservation technologies for home use. Solar dehydrators harness free energy from the sun, while modern electric models consume 75% less power than older designs thanks to improved insulation and airflow engineering.
Start by washing and slicing your produce uniformly, aim for ¼-inch thickness for vegetables and ⅛-inch for fruits. Thinner slices dry faster and more evenly. Pat everything completely dry with clean towels since surface moisture extends drying time.
Arrange prepared food in a single layer on trays, leaving space between pieces for air circulation. Overlapping slows the process and risks uneven drying.
For electric dehydrators, set the temperature based on food type: 135°F for vegetables and herbs, 125°F for fruits, and 145°F for meat jerky. Solar units typically reach 130-150°F on sunny days.
Run the dehydrator for 6-12 hours for most fruits and vegetables, checking every 2 hours after the halfway point. Tomatoes might finish in 8 hours while apple slices often need 10-12.
Test doneness by removing a piece, letting it cool for 5 minutes, then bending it. Vegetables should be brittle and snap cleanly. Fruits are ready when leathery with no moisture beads when squeezed.
Condition dried foods by storing them in glass jars for 7-10 days, shaking daily to redistribute any remaining moisture. If condensation appears, return the batch to the dehydrator for another hour.
Solar dehydrators work best during peak sunshine (10 AM to 4 PM) and may require two days for dense foods. Position your unit where it’ll catch direct sun and won’t be shaded by trees or buildings. Electric models offer consistent results regardless of weather, making them reliable for year-round preservation when paired with renewable energy sources like home solar panels.
Vacuum Sealing for Extended Freshness
Vacuum sealing offers one of the most effective ways to fight food waste while preserving nutrients and freshness in your CSA haul and garden harvest. This method removes air that causes oxidation and bacterial growth, extending refrigerated produce life by 2-3 weeks and freezer storage by 2-3 years compared to conventional storage.
Wash and thoroughly dry your produce. Any moisture left on food surfaces can interfere with the seal and promote ice crystal formation in the freezer.
Choose bag size appropriately, leaving 3-4 inches of space beyond your food. BPA-free, reusable bags work best for sustainability and can handle multiple vacuum-seal cycles.
Pre-freeze delicate items like berries or soft vegetables for 2 hours. This prevents crushing during the vacuum process.
Place food in the bag, smooth out wrinkles, and position the open end in the sealer’s vacuum channel.
Activate the vacuum cycle and watch for the bag to collapse tightly around the contents. Most machines automatically switch to sealing mode when air removal completes.
Check the seal by running your fingers along the sealed edge, it should feel rigid and uniform without any soft spots or gaps.
Label each package with contents and date, then store in your freezer’s coldest section (typically the back or bottom). For prepared meals, cool completely before sealing to prevent condensation. Vacuum-sealed dry goods like grains or dehydrated vegetables can be stored at room temperature in a cool, dark pantry, maintaining quality for 6-12 months.
Lacto-Fermentation Using Modern Crocks and Airlocks
Lacto-fermentation transforms fresh vegetables into probiotic-rich preserved foods using nothing but salt, water, and beneficial bacteria already present on the produce. This ancient technique has seen a modern revival with specialized fermentation crocks featuring water-sealed airlock channels that allow carbon dioxide to escape while preventing oxygen and contaminants from entering.
Start by preparing a brine using non-iodized sea salt (avoid table salt, as iodine can inhibit fermentation). For most vegetables, dissolve 2 tablespoons of salt per quart of filtered water. Chlorinated tap water can kill beneficial bacteria, so use filtered or boiled-then-cooled water instead.
Prep your vegetables by washing thoroughly and cutting into uniform pieces. Pack them tightly into your fermentation crock, leaving at least two inches of headspace. Pour the brine over the vegetables until they’re completely submerged, then place a weight on top to keep everything below the liquid surface. Fill the airlock channel with water according to your crock’s instructions.
Day 1-2: Place the crock in a cool spot (65-75°F) away from direct sunlight. Check that the airlock channel stays filled with water.
Day 3-5: You’ll see bubbles and clouding in the brine as fermentation accelerates. Taste after day 3 to monitor tanginess.
Day 6-7: Continue tasting daily. Most vegetables reach ideal flavor between days 5-10, depending on temperature and personal preference.
Day 8-14: Once fermented to your liking, transfer to clean jars and refrigerate to slow fermentation.
This preservation method requires zero energy beyond maintaining room temperature, produces no plastic waste when using glass or ceramic crocks, and creates nutrient-dense foods with enhanced digestibility. The fermentation process actually increases certain vitamins while making minerals more bioavailable.
Freeze-Drying for Long-Term Storage
Home freeze-drying transforms fresh produce into shelf-stable foods that retain 97% of their nutrients while lasting 20-25 years when stored properly. Modern 2026 models consume 40% less energy than earlier versions through improved insulation and smart cycling technology, making this once-industrial process viable for eco-conscious home food preservation.
Start by selecting foods at peak ripeness. Berries, herbs, diced vegetables, and cooked meals freeze-dry exceptionally well, while high-fat items like avocados don’t preserve effectively with this method. Cut produce into uniform pieces no thicker than one inch to ensure even processing.
Pre-freeze your prepared foods in a standard freezer for 8-12 hours. This step reduces the initial load on your freeze-dryer and cuts total processing time by several hours. Arrange frozen items on the machine’s trays in a single layer, leaving space between pieces for sublimation to occur.
Load the trays and seal the chamber. Most home units run automatically once started, but check your model’s specifications. The freeze-drying cycle typically takes 20-40 hours depending on food moisture content and batch size. The machine removes moisture through sublimation, converting ice directly to vapor without passing through a liquid phase.
When the cycle completes, test a cooled piece by breaking it in half. Properly freeze-dried food should snap cleanly with no moisture visible in the center. If you see ice crystals or moisture, run an additional drying cycle.
Immediately transfer dried foods to airtight containers or Mylar bags with oxygen absorbers. Condition for 7-10 days by shaking containers daily to redistribute any remaining moisture, then repackage for long-term storage in a cool, dark location.
Testing Results and Quality Verification
After investing effort in preserving your harvest using food preservation technologies, verifying that your work achieved safe, high-quality results protects both your health and your efforts to save money and planet. Each preservation method requires specific quality checks.
For dehydrated foods, bend a piece: properly dried vegetables should snap rather than bend, while fruits should be pliable but not sticky. No moisture should appear when you squeeze a handful in your palm. Rehydrate a small sample in warm water for 15 minutes; it should plump up and look close to its original state without off-odors.
Vacuum-sealed packages must maintain their tight seal with no air pockets. Run your fingers along all seams to feel for any wrinkles or gaps where air might have entered. The package should remain completely flat against the food with no cushioning when you press down. Any puffiness after storage indicates seal failure or bacterial growth, both requiring immediate disposal.
Test fermented foods by checking pH with strips: properly fermented vegetables should register between 3.0 and 4.6, which inhibits harmful bacteria. The brine should remain cloudy but not moldy, with bubbles during active fermentation normal. Taste a small amount; it should be pleasantly tangy and crisp, never slimy or musty.
Use this quick verification checklist for each technology:
Dehydrated: snaps when bent, no visible moisture, successful rehydration
Vacuum-sealed: completely flat package, intact seams, no air infiltration
Fermented: pH 3.0-4.6, cloudy brine, tangy smell and taste
Freeze-dried: bone-dry texture, crumbles easily, rapid rehydration in under 5 minutes
Label everything with the preservation date and contents. Discard any preserved food showing mold, unusual discoloration, foul odors, or texture changes that seem off. Trust your senses: when in doubt, throw it out.
Next Steps: Integrating Preservation into Your CSA and Garden Harvest
Once you’ve mastered these food preservation technologies, the real magic happens when you sync them with your CSA deliveries and garden harvest cycles. Plan your preservation sessions around peak harvest times rather than trying to preserve everything at once. When your CSA box arrives loaded with summer tomatoes or your garden’s zucchini plants go into overdrive, that’s your signal to fire up the dehydrator or break out the vacuum sealer.
Create a simple preservation calendar that tracks what produce peaks when in your region. June strawberries? Perfect for freeze-drying. August cucumbers? Ideal for lacto-fermentation. This approach prevents the overwhelm of trying to preserve 20 pounds of green beans on a Tuesday night after work. Instead, dedicate a few hours each weekend during growing season to batch processing whatever’s abundant. You’ll build a diverse pantry of preserved foods that carries you through winter while supporting local farmers year-round.
How long can I store CSA produce using these preservation methods?
Properly vacuum-sealed and frozen vegetables last 12-18 months, dehydrated foods stay good for 6-12 months in airtight containers, fermented vegetables keep 4-6 months refrigerated, and freeze-dried items remain viable for up to 25 years when stored correctly.
Should I adjust my garden plantings based on preservation capacity?
Absolutely. If you have limited freezer space but own a dehydrator, plant more tomatoes, peppers, and herbs that dry beautifully rather than water-heavy crops like lettuce that don’t preserve well.
Can I preserve my entire CSA share each week?
Not everything needs preserving. Eat fresh greens and delicate produce within days, then focus preservation efforts on surplus items and crops that store well using the technologies you have available.
Talk with your CSA farmer about your preservation goals. Many farms offer bulk quantities of single crops at reduced prices specifically for members who preserve, and they appreciate knowing their produce won’t go to waste. Apply waste reduction tips from professional kitchens by preserving vegetable scraps (dehydrate for soup powder), fermenting stems and cores, and vacuum-sealing herb bundles with oil in ice cube trays for winter cooking.
THCA pre-rolls from organic hemp farm CSAs bring the convenience of ready-to-use flower directly from regenerative farms committed to soil health, biodiversity, and transparent growing practices. When you join a local CSA that includes hemp products, you’re securing a seasonal supply of pre-rolls crafted from certified organic flower, often at 15-30% below retail prices while supporting farmers who prioritize living soil amendments, integrated pest management, and hand-trimmed quality over industrial shortcuts.
The CSA model works beautifully for hemp consumers seeking predictable access to fresh, lab-tested products. Rather than navigating dispensary shelves or online marketplaces, members receive monthly or quarterly allotments of pre-rolls from strains the farm actually cultivated that season. You’ll know exactly which fields your flower came from, what amendments fed the soil, and how the harvest was cured.
This guide walks you through what separates exceptional organic THCA pre-rolls from mediocre options, how to evaluate farms before committing to a share, and which CSA structures deliver the best value for your consumption patterns. Whether you’re drawn to the environmental benefits of regenerative hemp agriculture or simply want clean, potent flower without the markup, understanding how to choose and partner with the right farm will transform both your experience and the landscapes these growers steward.
Key Takeaway: CSA hemp farms offer verified organic growing practices, direct farmer relationships, and diverse strain selections (indica, sativa, balanced hybrids in 1G and 1.5G formats) while keeping your dollars in the local farming community instead of corporate retail chains.
What Makes CSA Hemp Farm THCA Pre-Rolls Different
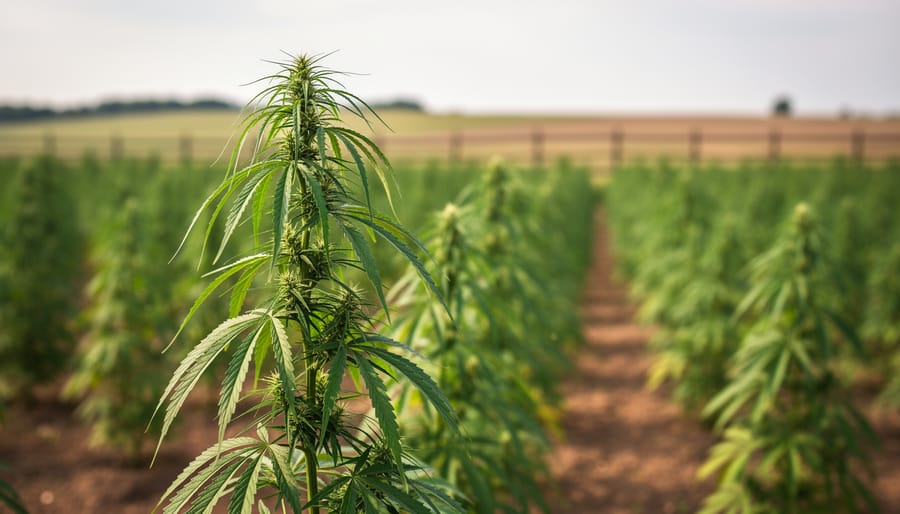
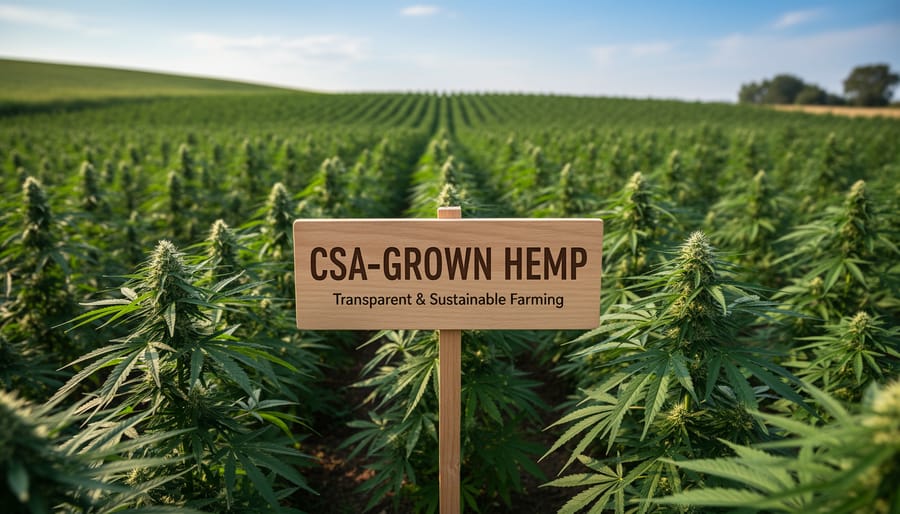
A lush organic hemp field sets the stage for understanding why CSA-grown hemp can be transparent and sustainability-focused.
When you buy THCA pre-rolls through a Community Supported Agriculture program at an organic hemp farm, you’re getting something fundamentally different from a retail dispensary product. CSA hemp farms give you direct access to the grower, you know who cultivated your cannabis, where the plants grew, and exactly what went into the soil. This transparency matters because you can verify organic practices firsthand rather than trusting labels alone, and you’re supporting a farmer who follows organic farming benefits like regenerative soil health and chemical-free cultivation.
The strain selection tells another part of the story. Unlike mass-market retailers limited to whatever distributors stock, CSA farms often grow multiple cultivars from Health Canada’s approved list for the 2026 growing season, giving you access to indica, sativa, and balanced hybrid options tailored to different needs. Since pre-rolls became the top revenue category in Canada’s cannabis market by mid-2025 and the 1-gram limit lifted in March 2026, CSA farms now offer both 1G and 1.5G formats to match your consumption preferences.
Community support creates the biggest distinction. Your CSA membership payment funds a local organic farmer’s season before harvest, sharing both risk and reward. You’re not a transaction at a counter; you’re a partner in sustainable agriculture who gets seasonal updates, farm visit invitations, and input on which strains the farm grows next year. That relationship builds accountability no retail shelf can match.
Understanding THCA Pre-Roll Strains and Formats
THCA pre-rolls from organic hemp CSAs typically fall into three main strain categories that affect your experience: indica, sativa, and balanced hybrids. Each type offers distinct characteristics that align with different times of day, activities, and personal preferences.
Indica strains tend to produce relaxing, body-centered sensations. Many CSA members choose indica THCA pre-rolls for evening use or winding down after farm work. These cultivars often feature earthy, musky aromas and may help with physical relaxation without the psychoactive effects of traditional THC.
Sativa strains generally deliver more uplifting, energizing qualities. Organic hemp farmers often grow sativa varieties that maintain mental clarity while providing the full entourage effect of cannabinoids and terpenes. Users report these work well for daytime activities, creative projects, or social gatherings.
Balanced hybrids blend indica and sativa genetics to create middle-ground effects. For first-time CSA members exploring THCA pre-rolls, balanced strains offer versatility without leaning too heavily in either direction. Many sustainable farms prioritize hybrid cultivars that thrive in their specific climate while delivering consistent experiences.
Strain Type
Typical Characteristics
Best Use Scenarios
Recommended For
Indica
Relaxing, body-focused, earthy aroma profile
Evening relaxation, physical recovery, rest periods
Experienced users seeking deep relaxation
Sativa
Uplifting, energizing, mentally clarifying
Daytime activities, creative work, social settings
Active consumers and daytime users
Balanced Hybrid
Moderate effects, versatile terpene combinations
Any time of day, varied activities, exploring preferences
First-time CSA members and flexibility seekers
Format options matter as much as strain selection. Since March 2026, Canadian regulations no longer cap pre-rolled dried cannabis at one gram, giving organic farms more flexibility. CSA members can now choose between 1G and 1.5G sizes based on consumption habits and budget.
The 1G format suits occasional users, those managing tight budgets, or anyone who prefers variety across multiple strains rather than larger quantities of one cultivar. A 1G pre-roll typically provides one to two sessions for most consumers.
The 1.5G option delivers better value for regular users and ensures you won’t run short between CSA pickups. Larger formats also reduce packaging waste per gram consumed, which aligns with the sustainability values many organic farm CSA members prioritize. When selecting your share, consider how frequently you consume and whether you want consistency or variety across your harvest allocation.
Key Factors When Choosing Your THCA Pre-Rolls
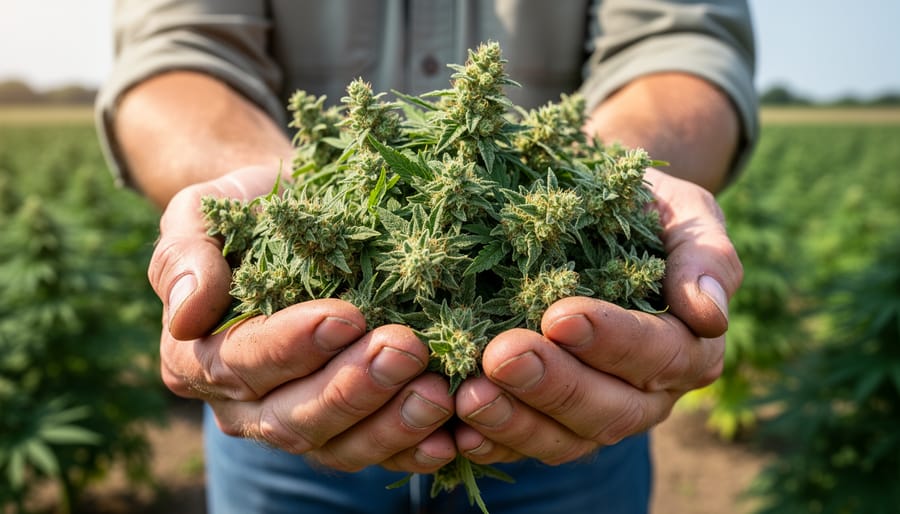
Freshly harvested hemp buds in a farmer’s hands highlight farm-to-consumer transparency behind CSA products.
Organic Certification and Growing Practices
When evaluating a hemp farm’s organic credentials, start by asking to see their certification documents directly. Legitimate organic operations hold certificates from recognized bodies and renew them annually, request to view the current year’s paperwork, not last season’s. If a farm uses terms like “naturally grown” or “pesticide-free” without formal certification, understand they’re not legally organic, though their practices may still be sound.
Beyond the certificate, dig into their actual growing methods during a farm visit or detailed conversation. Ask what they use for pest management, soil amendments, and weed control. Organic hemp growers typically rely on crop rotation, companion planting, and compost rather than synthetic inputs. A farmer who can walk you through their integrated pest management strategy and explain their soil-building practices demonstrates genuine commitment to organic principles, not just paperwork compliance.
Pay attention to transparency around their entire operation. Trustworthy farms willingly discuss their cultivar choices from Health Canada’s 2026 approved list, show you their fields, and explain harvest timing. They’ll also clarify whether their certification covers all acres or just portions of their land. If a farm dodges these questions or can’t produce documentation, that’s your signal to keep looking for a more open operation in your region.
Approved Cultivars and Compliance
When purchasing THCA pre-rolls through a CSA hemp farm, verify that the operation grows only licensed varieties. Health Canada maintains an approved cultivars list for industrial hemp, updated each growing season, and farms must hold proper licences to cultivate these specific strains legally for 2026. Ask your CSA farmer which cultivars they’re growing this season and confirm they appear on Health Canada’s current list.
A compliant farm will happily share its licence details and explain why they selected particular cultivars for their THCA pre-roll program. Some varieties produce higher cannabinoid levels while others offer disease resistance or better flavor profiles, so understanding their selection criteria helps you gauge the farm’s expertise. If a grower hesitates to discuss their cultivar choices or can’t name the specific varieties they planted, consider that a warning sign. Legitimate organic hemp CSA operations embrace transparency about compliance because it protects both their business and their members from legal complications down the line.
CSA Membership Models for Hemp Products
CSA farms structure THCA pre-roll offerings through several membership models, each suited to different consumption patterns and commitment levels. Weekly share programs deliver a fixed quantity, typically two to four 1G or 1.5G pre-rolls, throughout the growing season, ideal for regular users who want consistent access to rotating strains as harvests come in. Monthly shares offer larger quantities less frequently, working well for consumers who prefer stocking up or sharing with friends. Some farms also run one-time harvest boxes that let you try CSA share models without a season-long commitment, though these typically cost more per pre-roll than subscription options.
Consider your actual consumption rate before signing up: a weekly share delivering four pre-rolls means sixteen per month, which can overwhelm occasional users while leaving daily consumers wanting more. Ask farms about flexibility, some allow you to pause deliveries during travel or swap strain preferences mid-season, while others require full upfront payment with no modifications.
Finding and Vetting Organic Hemp CSA Farms
Finding local organic hemp farms with CSA programs takes detective work, but the effort pays off in quality products and community connection. Start with Canada’s provincial organic farming directories and CSA networks, where some hemp operations now list alongside vegetable farms. Search terms like “organic hemp CSA [your region]” plus “industrial hemp growers” narrow results quickly. Farmers markets, cannabis industry events and local sustainability groups often know which operations offer direct-to-consumer programs.
Once you’ve identified potential farms, ask pointed questions before joining. Confirm their organic certification body and certificate number, which you can verify through the Canadian Food Inspection Agency database. Request their approved cultivar list for 2026 and ask how they source seeds, legitimate operations grow only Health Canada approved varieties under proper licensing. Find out what their CSA share includes: how many pre-rolls, which strains, what sizes (1G versus 1.5G), and delivery frequency. Ask about their growing practices beyond organic requirements, do they use cover crops, companion planting or biological pest controls?
Tip: Visit the farm before committing to a full-season share, observe soil health, ask to see cultivation areas, and check whether their operation matches what they describe online.
During farm visits, watch for healthy plants, clean processing areas and transparent record-keeping. Farmers who eagerly explain their methods and invite questions typically run solid operations. Red flags include vague answers about certification, reluctance to share cultivar names, no visible growing infrastructure or pressure to pay upfront without clear terms.
Building lasting relationships means showing up, attend farm events, provide feedback on products and refer others when you’re satisfied. Most hemp farmers juggle cultivation with CSA logistics, so patience during harvest delays and understanding about strain availability goes far. Treat your CSA farmer as a neighbour, not just a vendor, and you’ll get better communication, first access to new strains and insider knowledge about upcoming harvests.
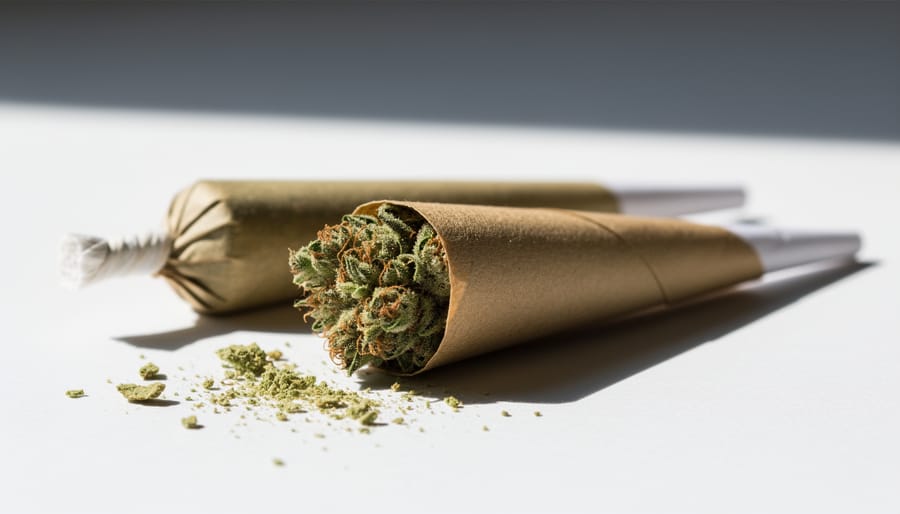
Close-up product photography shows the craftsmanship and materials of hemp pre-rolls sourced from farm-grown flower.
Recommendations for Different User Needs
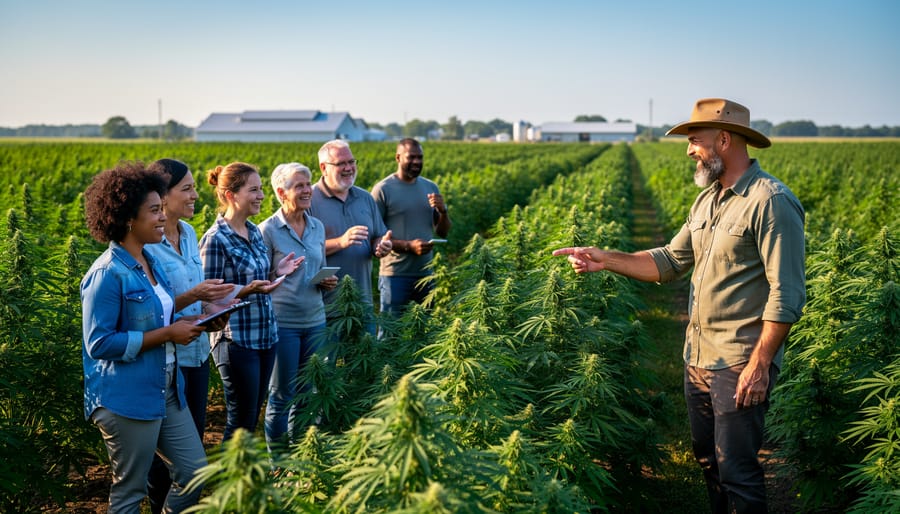
Farm visitors touring hemp rows illustrates the CSA vetting experience and encourages questions before committing.
Choosing the right organic hemp farm CSA THCA pre-rolls depends on your experience level, goals, and values. Here’s how to match products and share structures to your specific needs.
For First-Time CSA Members
Start with a half-season or quarter-share commitment to test the model without overcommitting. Request balanced hybrid strains in 1G format, they offer a middle ground between indica and sativa effects while the smaller size lets you sample without waste. Ask your chosen farm about trial memberships or smaller introductory shares. Many operations designed around community engagement offer flexible entry points for newcomers unsure about long-term commitments.
For Experienced Cannabis Consumers
If you already know your preferred strain profiles, target farms growing specific approved cultivars that match your taste. Request full-season shares with strain variety options so you receive rotating selections of indica, sativa, and hybrid pre-rolls throughout the harvest cycle. The 1.5G format delivers better value for regular users. Ask farmers which cultivars from Health Canada’s 2026 approved list they’re planting, then research those varieties’ terpene profiles and effects.
For Therapeutic and Budget-Conscious Buyers
Those seeking specific therapeutic applications should discuss cannabinoid profiles directly with growers, some farms specialize in high-THCA strains suited to particular needs. Budget-conscious consumers benefit most from full-season shares paid upfront, which typically offer the lowest per-gram cost. Pooling a share with a friend or family member splits the commitment while maintaining CSA pricing advantages over retail purchases.
For Sustainability-Focused Consumers
Prioritize farms with certified organic credentials and regenerative agriculture practices. Visit the operation before joining to observe composting systems, water conservation methods, and biodiversity initiatives. Full-season shares with pick-up options (rather than delivery) further reduce your environmental footprint while strengthening your connection to the land producing your pre-rolls.
Common Mistakes to Avoid
Joining a hemp CSA sounds simple, sign up, get your pre-rolls, support local agriculture. But many first-time members stumble over preventable missteps that leave them disappointed with their experience or their product quality.
The most common errors include:
Signing up without visiting the farm or verifying organic certification credentials
Misunderstanding CSA commitment terms and getting locked into a share size that doesn’t match consumption habits
Ignoring strain profiles and ending up with effects that don’t align with personal preferences
Failing to ask how farmers handle post-harvest drying and curing processes
Overlooking proper storage requirements and letting pre-rolls degrade after pickup
The verification mistake happens when enthusiasm overrides due diligence. Some farms use “organic practices” language without holding actual certification, or they grow approved 2026 cultivars but skip rigorous testing protocols. Always ask to see certification documents and confirm they’re growing from Health Canada’s approved industrial hemp list for the current season.
Wrong share sizes plague buyers who underestimate or overestimate their needs. A 12-pre-roll monthly commitment might sound reasonable until you realize you only consume on weekends. Most farms won’t refund unused portions mid-season, so start conservative. You can always increase next cycle.
Harvest timing confusion is subtler but frustrating. Hemp follows seasonal cycles, meaning your CSA deliveries arrive when the farm harvests, not necessarily when you joined. If you sign up in late summer expecting immediate pickup, you might wait months for the next harvest window. Ask farmers upfront about their growing calendar and delivery schedule.
Recovery is possible for most mistakes. If you’ve overcommitted, see whether your farm allows share transfers to friends or splitting your portion. For verification concerns after joining, request a farm visit and documentation review. Most legitimate organic operations welcome transparency and will gladly show you their practices.
Supporting Your Local Hemp Farming Community
When you support a local organic hemp CSA, you’re doing more than purchasing pre-rolls, you’re investing in regenerative agriculture that rebuilds soil health with every growing season. Hemp’s deep taproots break up compacted earth, while its dense canopy suppresses weeds without herbicides, creating ecosystems where beneficial insects thrive and carbon gets sequestered back into the ground.
Take Green Valley Hemp Farm in southern Ontario, where third-generation farmer Sarah Chen converted her family’s conventional operation to organic hemp cultivation in 2024. “Our CSA members aren’t just customers, they’re partners in our mission,” Sarah explains. Her 40-member CSA provides predictable income that lets her invest in cover cropping and no-till practices, while members receive monthly pre-roll shares featuring approved 2026 cultivars like Grandi and Anka. The upfront payments help Sarah cover spring planting costs without debt, and members pay 30% less than retail prices while knowing exactly how their THCA pre-rolls were grown.
Your purchasing decisions create ripple effects through your local economy. Every dollar spent at a regional hemp farm generates roughly three dollars in additional economic activity, equipment repairs at the local shop, seeds from nearby suppliers, wages for harvest workers who spend earnings in your community. You’re also preserving farmland that might otherwise face development pressure.
Make the most of your CSA membership by learning to store CSA products properly, attending farm events to connect with growers, and sharing your experience with neighbours who might join next season.
Frequently Asked Questions
Community Supported Agriculture programs for organic hemp products are still a developing model in Canada, and many consumers have practical questions about how THCA pre-rolls from local farms differ from retail cannabis purchases. Understanding the legal framework, quality considerations, and CSA-specific details helps you make informed decisions when connecting with hemp farmers in your region.
Are THCA pre-rolls legal in Canada?
Canada permits adult recreational and medical cannabis use under federal law. THCA pre-rolls fall under this framework when sourced from licensed producers, and organic hemp farms participating in CSA models must hold appropriate cultivation licences from Health Canada, which maintains an approved industrial hemp cultivars list for each growing season.
How long do CSA pre-rolls stay fresh?
Properly stored organic pre-rolls maintain quality for three to six months when kept in airtight containers away from light, heat, and moisture. Many CSA farms provide harvest dates on packaging, and the farm-direct model means you’re receiving fresher products than retail options that may sit on shelves for months.
Can I visit the farm where my pre-rolls are grown?
Most organic hemp CSA operations welcome farm visits as part of their community-building philosophy. Connecting with your farmer allows you to see growing practices firsthand, ask questions about strain selection and cultivation methods, and build trust in your product source.
How does CSA pricing work for hemp products?
CSA pricing typically involves upfront share purchases that cover a season’s allocation of pre-rolls, often at 15-25% below retail prices. You’re paying for the harvest ahead of time, which gives farmers operating capital while you benefit from cost savings and guaranteed access to organic products in both 1G and 1.5G formats.
Another common question involves the difference between hemp-derived and cannabis-derived THCA products. From a botanical standpoint, hemp and cannabis are the same plant species, distinguished only by THC concentration thresholds in regulatory definitions. When you purchase from an organic hemp farm with proper licensing, you’re supporting sustainable agriculture practices while accessing quality pre-rolls that meet the same standards as commercial cannabis products, with the added benefit of knowing your farmer and their growing methods.
Main Options Compared
When selecting organic hemp farm CSA THCA pre-rolls, your decision centres on three core variables: strain category, pre-roll size, and CSA membership structure.
Strain categories break into indica-dominant options (producing relaxing, body-focused effects), sativa-leaning varieties (offering energizing, cerebral experiences), and balanced hybrids (combining both profiles). Indica strains suit evening unwinding, sativas work well for daytime use, and hybrids provide versatility across occasions. Your choice depends on desired effect and tolerance level.
Format sizes now include both 1G and 1.5G pre-rolls following Canada’s March 2026 regulatory change removing the one-gram limit. The 1G format suits occasional users and those sampling multiple strains, while 1.5G options appeal to experienced consumers and offer better value per gram through reduced packaging waste.
CSA models vary by farm commitment level. Weekly share programs provide continuous supply with fresh harvests, bi-weekly options balance variety and storage capacity, and bulk seasonal shares deliver the lowest per-unit cost for consumers with proper storage. Some farms offer flexible shares allowing strain rotation, while others feature curated boxes showcasing their full cultivar range from Health Canada’s approved list.
Matching these three elements to your consumption patterns, budget, and sustainability priorities determines which organic hemp CSA option serves you best.
Choosing organic hemp farm CSA THCA pre-rolls connects you with quality products while supporting the sustainable agriculture movement happening right in your community. When you buy directly from local organic hemp farms through CSA models, you’re getting transparent access to cultivation practices, approved cultivars, and farming methods that prioritize soil health and environmental stewardship over mass production shortcuts.
The selection criteria covered in this guide, verifying organic credentials, confirming approved cultivar compliance for 2026, understanding strain differences between indica, sativa, and balanced hybrids, and choosing the right CSA share structure, help you make informed decisions that align with your values. Whether you’re drawn to the 1G format for variety or the 1.5G size for value, purchasing through a CSA means you know exactly where your pre-rolls come from and how they were grown.
Beyond the product itself, your CSA membership directly supports farmers committed to regenerative practices and local food systems. Take the time to visit farms in your region, ask questions about their growing methods, and build relationships with the people cultivating your hemp. These connections strengthen local economies, reduce environmental impact, and create a community around shared values. Your choice to support organic hemp CSA farms today helps build a more sustainable agricultural future for everyone.

 darrell on