How Anyone Can Garden at Home—No Matter Your Physical Ability

Gardening transforms lives regardless of physical ability when you adapt your space and methods thoughtfully. Raise growing beds to waist height using sturdy containers, eliminating the need to kneel or bend while providing better soil drainage and pest control. Install drip irrigation systems with timer controls to reduce physical strain from watering, ensuring plants receive consistent moisture without heavy lifting or repetitive motion. Choose compact, high-yield varieties like cherry tomatoes, herbs, and salad greens that thrive in accessible containers and require minimal maintenance compared to sprawling garden plots.
Vertical growing structures—trellises, wall planters, and hanging baskets—maximize limited urban spaces while keeping harvests within easy reach. Lightweight tools with ergonomic grips and extended handles reduce joint stress and accommodate varying strength levels. Wheelchair-accessible pathways measuring at least 36 inches wide with firm, level surfaces enable independent navigation through garden areas.
The beauty of accessible gardening lies in its adaptability: every gardener can cultivate fresh, organic produce by matching growing methods to individual abilities and available space. Whether you’re managing mobility challenges, limited strength, or small urban quarters, these practical adjustments create opportunities for the therapeutic benefits and fresh harvests that make gardening so rewarding.
Why Accessible Gardening Matters in Urban Spaces
The Physical and Mental Health Benefits
Accessible gardening offers remarkable benefits that extend far beyond simply growing plants. For individuals with disabilities, chronic conditions, or limited mobility, tending to a garden provides gentle, low-impact exercise that helps maintain flexibility and strength. Simple activities like reaching for plants, light digging, or pruning can improve hand-eye coordination and fine motor skills without the strain of traditional exercise routines.
The mental health advantages are equally compelling. Spending time among plants reduces stress levels, eases anxiety, and creates a sense of purpose and accomplishment. There’s something deeply therapeutic about nurturing life and watching your efforts bloom into tangible results. Many gardeners report improved mood and better sleep patterns after incorporating regular gardening into their routines.
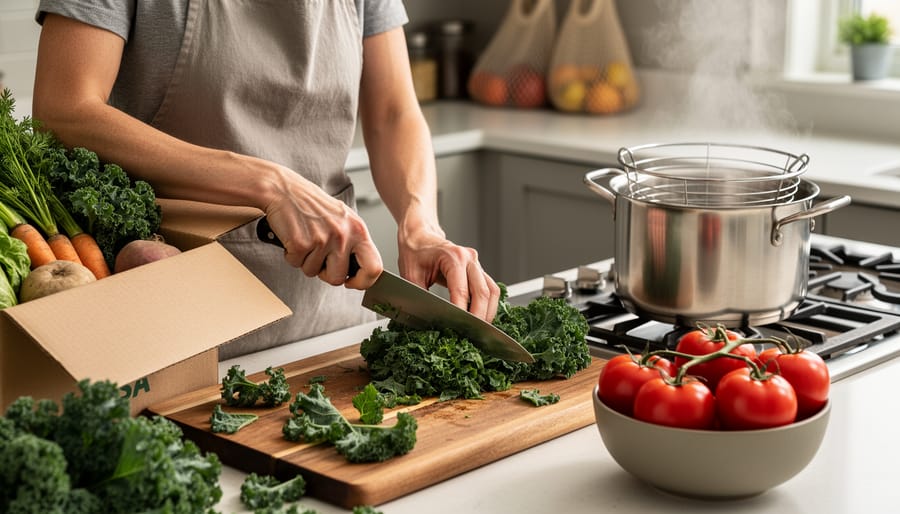
Perhaps the most rewarding benefit is harvesting your own fresh, organic produce right from your adapted garden space. Growing vegetables, herbs, and fruits puts you in control of what goes into your food, eliminating pesticides and ensuring peak nutritional value. Even small container gardens can yield impressive harvests of tomatoes, lettuce, and herbs, providing both cost savings and the unmatched flavor of homegrown ingredients. This connection to your food source empowers individuals to make healthier choices while enjoying the satisfaction of self-sufficiency.
Breaking Down Common Barriers
Gardening is for everyone, but certain physical challenges can make it feel out of reach. Bending and kneeling to tend plants at ground level puts strain on backs, knees, and hips, making traditional garden beds uncomfortable or impossible for many. Reaching overhead to prune or harvest can be equally challenging, especially when balance or shoulder mobility is limited. Heavy lifting becomes a real barrier too, whether you’re moving bags of soil, large containers, or watering cans. Navigating narrow garden paths with mobility aids like wheelchairs, walkers, or canes can turn a peaceful activity into a frustrating obstacle course.
The good news? Recognizing these barriers is the first step toward removing them. With thoughtful design and smart adaptations, you can create a garden that works with your body, not against it. From raised beds at comfortable heights to lightweight containers and wider pathways, accessible gardening transforms these common obstacles into manageable solutions that let you focus on what matters most: growing beautiful, nutritious food.
Smart Garden Design for Every Ability
Raised Beds and Container Gardens
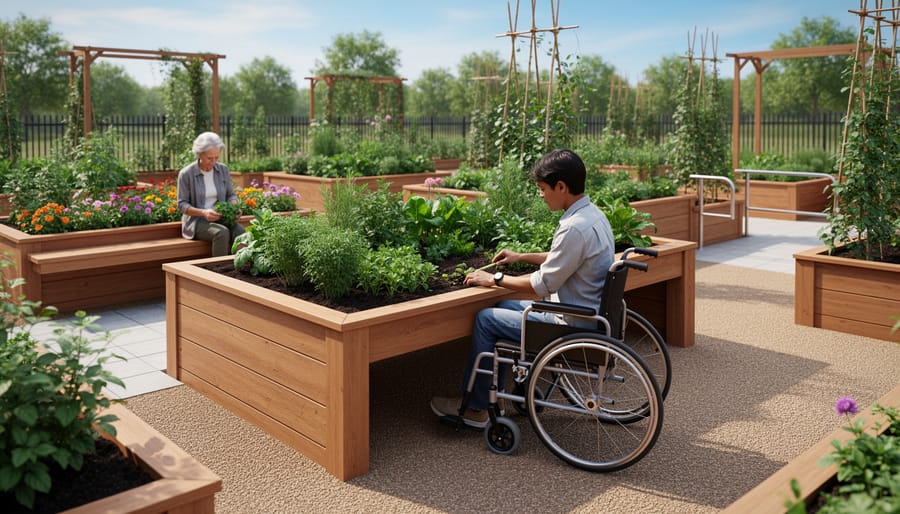
Raised beds and container gardens transform gardening into an accessible activity for everyone, regardless of physical ability or space constraints. When building raised garden beds, aim for heights between 24 and 36 inches. This elevation eliminates the need for bending or kneeling, making it comfortable for gardeners using wheelchairs or those with back and knee concerns. For wheelchair users, keep bed widths at 24 to 30 inches maximum so you can easily reach the center from either side without straining.
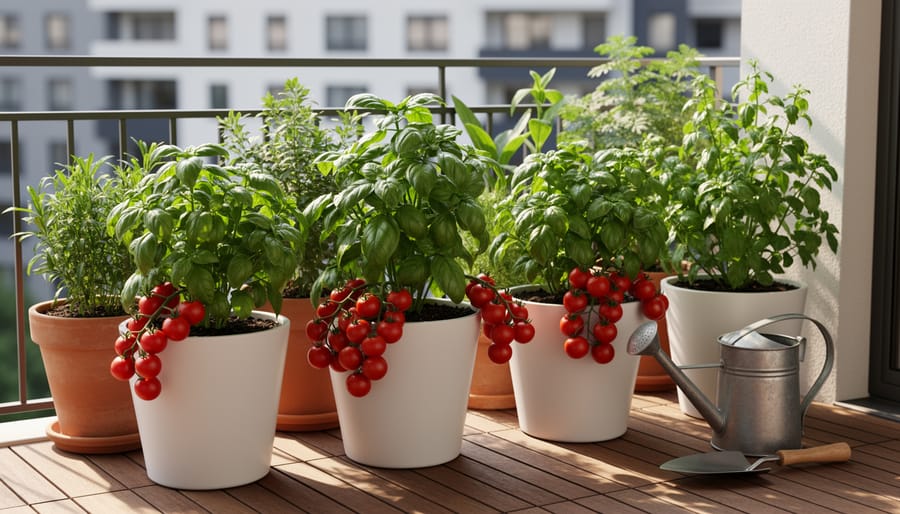
Container gardens offer incredible flexibility for balconies, patios, and smaller spaces. Choose lightweight materials like resin or fabric grow bags instead of heavy ceramic pots, especially for elevated locations. These containers are easier to move and rearrange as your needs change throughout the season. Self-watering containers reduce the physical demands of daily watering while keeping your plants healthy and hydrated.
Consider adding casters or wheeled platforms beneath larger containers so you can follow the sun or bring tender plants indoors without heavy lifting. Vertical gardening systems and tiered plant stands maximize growing space while keeping everything within comfortable reach.
Maria, a community gardener in Vancouver, shares her success: “After installing raised beds at waist height, I went from struggling with arthritis pain to harvesting fresh tomatoes and herbs daily. It gave me back my independence and joy in growing food.”
Vertical Gardening Solutions
Bringing your plants up to eye level and arm’s reach transforms gardening from a challenge into pure joy. Vertical gardening solutions make it possible to grow fresh herbs, vegetables, and flowers without bending, kneeling, or straining your back.
Wall-mounted planters are game-changers for accessibility. These sturdy containers attach directly to fences, balcony railings, or exterior walls, positioning plants at whatever height works best for you. Choose models with built-in water reservoirs to reduce maintenance, and opt for lightweight materials that won’t strain mounting hardware.
Trellises do double duty by supporting climbing plants like peas, beans, and cucumbers while keeping harvest within comfortable reach. Position them alongside pathways or raised beds where you can easily access both sides. Tomatoes, squash, and even melons thrive when trained vertically, saving precious ground space.
Hanging gardens add dimension to small urban balconies and patios. Cascading strawberries, trailing herbs, and cherry tomatoes flourish in hanging baskets positioned at shoulder height. This setup eliminates the need for ground-level gardening entirely while creating an abundant edible landscape that’s both beautiful and productive.
Pathways and Workspace Design
Creating pathways that welcome everyone starts with width. Aim for a minimum of 36 inches, though 48 inches is even better for comfortable wheelchair navigation and turning radius. This generous width also accommodates walkers, canes, and garden carts loaded with fresh produce.
Surface selection matters tremendously for safety and accessibility. Choose non-slip materials like textured concrete, firmly packed decomposed granite, or interlocking pavers with minimal gaps. Avoid loose gravel or mulch, which can catch wheels and create tripping hazards. Ensure pathways remain level, with gentle slopes no steeper than 1:12 ratio if elevation changes are necessary.
Workspace design should prioritize comfort and function. Position raised beds where wheelchair users can roll directly underneath, leaving 27-30 inches of clearance. For gardeners who prefer standing, incorporate sturdy benches every 10-15 feet for rest breaks. Sarah, a community garden coordinator in Portland, transformed her space by adding padded garden kneelers and fold-down seats along pathways. “Everyone deserves to experience the joy of harvesting their own tomatoes,” she shares. “Thoughtful design makes that possible.” Consider creating shaded work zones with pergolas or umbrellas, protecting gardeners from sun exposure during those rewarding hours tending vegetables.
Adaptive Tools That Make Gardening Easier
Ergonomic Hand Tools
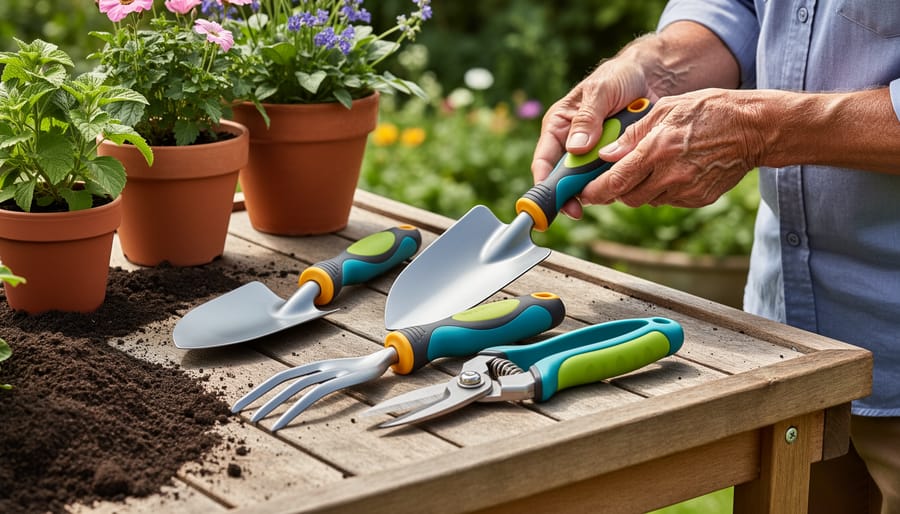
The right tools can transform gardening from a frustrating challenge into an enjoyable activity for everyone, regardless of physical ability. Ergonomic hand tools are specifically designed to reduce strain and make garden tasks more comfortable and achievable.
Look for tools with cushioned, non-slip grips that are easier to hold for extended periods, especially if you experience arthritis or reduced hand strength. Extended handles provide extra leverage and reach without requiring you to bend or stretch uncomfortably. Lightweight materials like aluminum or reinforced plastic reduce fatigue while maintaining durability.
Ratchet pruners are game-changers for those with weak grip strength, as they cut in stages with each squeeze, requiring significantly less hand power than traditional pruners. Similarly, ergonomic trowels with angled handles keep your wrist in a natural position, preventing strain during planting and weeding.
Many gardeners with mobility challenges have found that investing in quality ergonomic tools has allowed them to continue their passion for growing their own organic produce. Start with a few essential tools and build your collection as you discover which designs work best for your specific needs and gardening style.
Long-Handled and Seated Gardening Tools
The right tools can transform your gardening experience from physically demanding to genuinely enjoyable, regardless of mobility challenges. Long-handled tools are game-changers for anyone who struggles with bending or kneeling. Long-handled weeders and cultivators let you maintain your garden beds from a standing position, saving your back and knees from strain. Look for models with ergonomic grips and lightweight construction, typically around 36 to 48 inches in length.
Rolling garden seats offer another excellent solution, bringing you closer to soil level while providing comfortable support. These low-profile seats on wheels let you glide along your garden rows without repeatedly standing and sitting. Many models include built-in storage compartments underneath for keeping hand tools within easy reach.
Kneeler benches deserve special mention for their versatility. These clever designs function as both a padded kneeling surface and a raised seat when flipped over. The sturdy side handles provide essential support when lowering yourself down or standing back up, reducing stress on joints. Some gardeners find that having multiple seating options throughout their garden space creates natural resting points, making longer gardening sessions more sustainable. These accessible tools prove that with thoughtful adaptations, everyone can nurture their own organic harvest.
Watering Solutions That Save Energy
Smart watering solutions can transform your garden routine from a heavy chore into an effortless task. Drip irrigation systems deliver water directly to plant roots through a network of tubes, eliminating the need for lifting heavy watering cans or dragging hoses. These systems conserve water while you conserve energy. Soaker hoses work similarly, slowly seeping moisture along their length when you simply turn on the tap. For hands-on watering, lightweight watering wands with extended reaches let you water from a comfortable standing or seated position without bending or straining. Self-watering containers are game-changers for accessible gardening, featuring built-in reservoirs that keep plants hydrated for days. You simply fill the reservoir occasionally rather than daily watering. Choose containers with easy-to-access fill tubes and water level indicators. These solutions work beautifully when combined with the best water for plants, whether rainwater collected in barrels or filtered tap water, ensuring your garden thrives with minimal physical effort.
Choosing the Right Plants for Low-Maintenance Success
Hardy Vegetables and Herbs
Starting with quick-growing vegetables can build confidence and momentum in your accessible garden. Lettuce varieties are perfect for container gardening and can be harvested as needed, making them ideal for gardeners with limited mobility. Cherry tomatoes thrive in pots and produce abundant fruit throughout the season with minimal maintenance, often requiring just a simple stake for support.
Herbs offer wonderful sensory experiences while being remarkably forgiving. Basil grows vigorously in sunny spots and provides fresh flavor all summer. Mint is nearly indestructible and spreads enthusiastically, perfect for containers where it won’t take over your garden. Oregano tolerates neglect beautifully and comes back stronger each year.
Consider perennial vegetables that return annually, reducing the physical demands of replanting. Asparagus, rhubarb, and walking onions establish themselves and produce for years with minimal intervention. These reliable performers mean less bending, digging, and seasonal preparation while still delivering fresh harvests. One urban gardener with arthritis shared how her perennial herb spiral now provides ingredients year after year without the strain of annual gardening tasks, proving that smart plant choices truly make gardening accessible for everyone.
Native and Drought-Tolerant Options
Choosing native and drought-tolerant plants is one of the smartest decisions you can make for an accessible garden. These resilient varieties naturally thrive in your local climate, which means less watering, fewer pest problems, and minimal fussing once they’re established. For gardeners managing physical limitations, this translates to less time hauling heavy watering cans or wrestling with hoses.
Native plants have evolved alongside local pollinators and wildlife, creating a supportive ecosystem right in your backyard. You’ll notice more butterflies, beneficial insects, and birds visiting your space, making garden time even more rewarding. Drought-resistant options like sedums, lavender, yarrow, and ornamental grasses require significantly less irrigation than traditional garden favorites, conserving both water and your energy.
When selecting plants, consult your local extension office or native plant society for region-specific recommendations. Many drought-tolerant edibles exist too, including Mediterranean herbs like rosemary, thyme, and oregano, which actually prefer drier conditions. These low-maintenance choices mean you can spend more time enjoying your garden and less time maintaining it, making gardening truly accessible regardless of your physical abilities. Plus, you’re supporting local ecosystems while reducing your environmental footprint—a win for everyone.
Real Gardeners, Real Solutions
Meet Sarah, a wheelchair user from Chicago who transformed her apartment balcony into a productive vegetable garden using vertical planters mounted at arm level. She discovered that attaching lightweight fabric grow bags to a sturdy wall-mounted grid system eliminated the need for bending or reaching. Sarah grows cherry tomatoes, lettuce, and herbs year-round, harvesting fresh produce without leaving her chair. Her biggest lesson? Start small and adjust as you go—she began with just three planters before expanding to her current setup of twelve.
In Seattle, retired teacher Marcus manages his rooftop garden despite limited grip strength from arthritis. He swapped traditional tools for ergonomic options with cushioned, oversized handles and installed a drip irrigation system controlled by a smartphone app. This eliminated the daily struggle with heavy watering cans. Marcus built raised beds at table height using composite materials, which are lighter than wood and require no maintenance. He now grows enough salad greens and peppers to share with neighbors, and his advice resonates with many: invest in quality adaptive tools from the start rather than fighting with standard equipment.
Jennifer in Austin faced multiple challenges as a gardener with visual impairment. She created texture-based plant markers using different materials like sandpaper, fabric, and corrugated cardboard, allowing her to identify plants by touch. She organized her container garden in a consistent grid pattern, always keeping basil in the front left corner and tomatoes in the back right. Jennifer also chose strongly scented varieties like lemon balm and rosemary that she could identify by aroma. Her garden thrives because she designed systems that work with her abilities rather than against them.
These gardeners prove that accessible gardening isn’t about limitation—it’s about creative problem-solving. Their innovations often benefit all gardeners, making the growing experience more comfortable and enjoyable for everyone.
Getting Started: Your First Accessible Garden
Starting your accessible garden doesn’t have to be overwhelming. Begin by taking an honest inventory of your space and abilities. Can you comfortably stand for 15 minutes, or would seated gardening work better? Do you have a sunny balcony, a shaded patio, or a small yard? There’s no wrong answer here—successful gardens come in all shapes and sizes.
Once you understand your starting point, choose a manageable scale. One elevated planter box or three container pots is perfect for beginners. Position them where you’ll interact with them most easily, whether that’s near a porch chair or at a comfortable height for wheelchair access.
For your first plants, select forgiving varieties that match your light conditions. Herbs like basil, mint, and parsley thrive in containers and offer quick rewards. Lettuce and spinach are excellent choices for partial shade, while cherry tomatoes bring joy to sunny spots. These beginner-friendly options build confidence and provide fresh ingredients for your kitchen.
Set up simple systems from the start. Place saucers under pots to reduce watering frequency. Use lightweight potting mix instead of heavy garden soil. Consider a small watering can with an extended spout to minimize reaching and bending.
Local farmer Maria started with just two tomato plants on her apartment balcony after a knee injury limited her mobility. “I thought my gardening days were over,” she shares, “but adapting my approach opened new possibilities.” She now maintains a thriving container garden that supplies herbs and vegetables year-round.
Remember, accessible gardening is about working with your abilities, not against them. For more gardening tips for beginners, explore resources that emphasize sustainable practices and realistic expectations. Start small, celebrate each harvest, and adjust your setup as you learn what works best for you.
Gardening truly is for everyone, regardless of physical ability, age, or experience level. The beauty of accessible gardening lies in its flexibility—you can start with a single container on your balcony or a raised bed in your backyard. What matters most is taking that first step and discovering the joy of growing your own food.
The accessible gardening movement connects beautifully with the broader organic and sustainable farming community. Many Community Supported Agriculture programs and local farms are passionate about making fresh, organic produce available to everyone while sharing their knowledge. Consider reaching out to farmers in your area who often offer workshops, volunteer opportunities, and guidance for home gardeners of all abilities.
Starting small allows you to build confidence and adapt techniques to your unique needs. Perhaps you’ll begin with easy-to-grow herbs in adaptive containers, then gradually expand as you discover what works best for you. Remember, every experienced gardener started somewhere, and the supportive community of organic growers and sustainability advocates is ready to welcome you.
Your garden, no matter its size or setup, contributes to a healthier planet and connects you to the timeless practice of nurturing life from seed to harvest.