Monthly Archives

10 Articles

Why Your CSA Farm Needs Certified Scales (And What Happens If You Don’t)

Posted by darrell on
0
Policy, Law & Certification
Why Your CSA Farm Needs Certified Scales (And What Happens If You Don’t)

Register your farm scale with the California Division of Measurement Standards before your first CSA harvest—most counties require certification for any device used to determine the price of produce sold by weight. Download the device registration form from your county’s agriculture department website, pay the nominal fee (typically $50-150 annually), and schedule your initial inspection at least 30 days before you plan to weigh products for customers.

Purchase a commercial-grade scale certified for legal trade, identifiable by the NTEP (National Type Evaluation Program) seal or Certificate of Conformance number on the device. Avoid bathroom scales, kitchen scales, or unmarked equipment, as inspectors will reject these during certification. Place your scale on a stable, level surface away from wind and vibration, and test it weekly using certified test weights to maintain accuracy between official inspections.

Keep detailed records of all scale calibrations, inspection certificates, and any adjustments made to your measuring equipment. California law requires these documents remain accessible during farmers market sales and CSA pickups, protecting both your farm and your members. Most county sealers conduct annual re-inspections, so mark your calendar and ensure your scale remains in compliance—a simple practice that builds trust with CSA members who appreciate transparent, legally compliant farming operations.

Understanding these requirements transforms what seems like bureaucratic red tape into a straightforward process that legitimizes your farm business and reassures customers they’re receiving honest value for their investment in local, sustainable agriculture.

What Weights and Measures Compliance Actually Means for CSA Farms

If you’re running a CSA farm in California, you’re probably familiar with various regulations already, like sales tax compliance. But weights and measures laws often catch new farmers by surprise. Here’s what you need to know.

California’s weights and measures regulations exist to ensure fairness in commercial transactions. When you sell produce by weight, whether to CSA members or at farmers markets, you’re legally required to use certified scales and follow specific practices. These rules apply to farms of all sizes, from backyard operations to large commercial growers.

County Sealers of Weights and Measures are the local officials who enforce these regulations in your area. Think of them as your go-to resource rather than just enforcers. Most County Sealers genuinely want to help small farms succeed and understand the unique challenges you face. They conduct annual inspections, test your scales for accuracy, and provide guidance on compliance.

Why do CSA farms fall under these requirements? The moment you engage in commercial transactions involving weight-based pricing, you’re subject to weights and measures laws. This includes selling produce shares, operating farm stands, or participating in farmers markets. The key trigger is the commercial exchange of goods by weight, not the size of your operation.

The good news? Compliance doesn’t have to be complicated or expensive. Most County Sealers offer affordable annual certification services, typically ranging from thirty to one hundred dollars depending on your equipment. They’ll test your scales, apply certification seals, and ensure you’re meeting legal standards. Many farmers report that once they understand the process, maintaining compliance becomes a simple part of their annual routine alongside other farm management tasks.

Commercial certified scale weighing fresh produce on farm stand table
Certified scales are essential equipment for CSA farms selling produce by weight at farmers markets and farm stands.

When Your CSA Farm Needs Certified Scales

Weight-Based Pricing and Share Distributions

When you’re selling produce by the pound at farmers markets or through direct sales, California law requires you to use certified scales. This means your scale must be inspected and approved by your local county weights and measures office. The certification process is straightforward: contact your county office to schedule an inspection, pay a modest fee (typically between $25-$75), and receive your official certification seal. These scales need recertification annually to ensure accuracy and protect both you and your customers.

Here’s where it gets interesting for CSA farmers: share distributions operate in a gray area. If you’re providing predetermined boxes or bags as part of a subscription model where members pay upfront for a season’s worth of produce, you’re generally not required to use certified scales. The key distinction is that members are buying a share of the harvest, not purchasing produce by weight. However, if you offer add-ons or extra items priced by the pound, those transactions do require certified scales.

Many successful CSA farmers keep a certified scale on hand anyway. It builds trust with members, helps with harvest planning, and gives you flexibility if you decide to sell at farmers markets. Consider it an investment in transparency and professional operation of your farm business.

Farmer weighing fresh carrots on commercial scale at farm
Weight-based sales at CSA farms require properly certified and maintained scales to ensure accuracy and legal compliance.

Farmers Market and Direct Sales

When you’re selling your fresh harvest at farmers market sales venues or from your farm stand, California’s Division of Measurement Standards requires your scales to meet the same certification standards as retail stores. This means you’ll need a Type Approved scale with a valid Certificate of Approval, even if you’re only selling a few times per month.

The good news? Many portable battery-operated scales designed for farmers markets already come Type Approved. Look for a National Type Evaluation Program certificate number on the device. Your scale must display weights clearly to both you and your customers, and it needs annual inspection by your county’s weights and measures department.

Here’s a practical tip from successful market vendors: invest in a quality digital scale with a large display that’s easy to read in outdoor lighting conditions. Keep your most recent inspection certificate handy at your booth, as inspectors can make surprise visits during market hours.

Remember, accurate weighing builds trust with your customers and protects your farming business from potential fines. Many counties offer dedicated farmers market inspection days to make compliance easier for small-scale growers. Contact your local agricultural commissioner’s office to schedule your inspection and join their support programs for sustainable farming operations.

Getting Your Scales Certified in California

Getting your scales certified might sound intimidating, but it’s actually a straightforward process that protects both you and your customers. Think of it as getting a health inspection for your farm stand—just with numbers instead of lettuce.

Your first step is locating your County Sealer of Weights and Measures. Every California county has one, and they’re genuinely there to help you succeed. A quick online search for “weights and measures” plus your county name will pull up contact information. Many sealers now offer online appointment scheduling, making the process even easier. Don’t hesitate to call them with questions before your inspection—most are friendly folks who appreciate farmers taking compliance seriously.

When inspection day arrives, the sealer will test your scales using certified test weights to ensure accuracy. They’ll check that your equipment meets California’s tolerance standards, which typically allow for minimal variance. For a 10-pound measurement, your scale needs to be accurate within about 0.1 ounces. If your scale passes, you’ll receive a certification sticker valid for one year. If it doesn’t pass initially, the sealer will explain what adjustments are needed—often it’s something simple like recalibration.

Fees vary by county but generally range from 25 to 75 dollars per scale annually. Some counties charge based on scale capacity, while others have flat rates. It’s a small investment considering the trust it builds with your CSA members. One organic farmer in Sonoma County shared that displaying her certification sticker actually increased customer confidence and led to more word-of-mouth referrals.

Annual recertification is required in California, so mark your calendar each year. Pro tip: schedule your inspection during your slower season to avoid any disruption to peak harvest times.

To make the process smoother, keep your scales clean and level, store them properly when not in use, and avoid placing them on uneven surfaces. Test them periodically with known weights—like a bag of flour—to catch potential drift early. Many farmers keep a simple log of their own accuracy checks, which demonstrates good faith effort during inspections.

Remember, certification isn’t about catching you doing something wrong—it’s about ensuring fairness in the marketplace and protecting the integrity of sustainable farming practices.

Choosing the Right Scales for Your CSA Operation

Selecting the right scale for your CSA operation doesn’t have to break the bank, but it does require meeting California’s legal standards. The good news? You have several options that balance compliance with affordability.

For most small to medium CSA operations, a legal-for-trade bench scale is your best bet. These scales must carry a Certificate of Conformance (CoC) number, which indicates they’ve been approved by the National Type Evaluation Program. Look for this number on the scale itself or in the product documentation before purchasing. Prices typically range from $200 to $800 for models suitable for weighing produce.

When shopping for scales, prioritize these features: a capacity of at least 30 to 60 pounds to accommodate larger orders, readability in 0.01-pound increments for accuracy, and a platform large enough for boxes or bags. Stainless steel platforms are worth the investment since they’re easy to clean and resist corrosion from moisture. Battery operation provides flexibility for farmers market setups, while AC adapters work well for on-farm sales.

Popular brands among CSA farmers include Avery Weigh-Tronix, Ohaus, and Brecknell, all of which offer legal-for-trade models. Sarah Chen, who runs a thriving CSA in Sonoma County, shares this tip: “I started with a basic $300 bench scale, and it’s served me perfectly for five years. Don’t feel pressured to buy top-of-the-line equipment when you’re starting out.”

Remember to factor in the annual certification fee, usually around $50 to $100, when budgeting for your scale investment. This small ongoing cost ensures your measurements remain accurate and legally compliant, protecting both you and your customers.

Common Mistakes CSA Farmers Make (And How to Avoid Them)

Nobody starts their CSA journey planning to run into compliance issues, but even well-intentioned farmers sometimes stumble with weights and measures requirements. The good news? Most mistakes are easily preventable once you know what to watch for.

One of the most common pitfalls happens when farmers purchase a scale at a big-box store or online marketplace without checking certification status. Sarah, who runs a thriving CSA in Sonoma County, learned this the hard way during her first year. “I bought what I thought was a professional scale, only to discover during an inspection that it wasn’t certified for commercial use in California,” she recalls. Now she always verifies that scales carry the appropriate Certificate of Approval sticker before making purchases.

Another frequent issue involves scale maintenance. Scales can drift out of calibration over time, especially with regular use and seasonal temperature changes. Setting a quarterly reminder to check calibration and scheduling annual professional inspections keeps you ahead of potential problems. Think of it like maintaining your tractor – preventive care beats emergency repairs.

Pricing signage causes confusion too. Some farmers display only the price per box without clarifying the weight or unit cost, which can lead to misunderstandings with both customers and inspectors. Clear signage showing “5 lbs for $15” or “$3 per pound” eliminates ambiguity and builds trust with your members.

Unit conversion mistakes also crop up occasionally, particularly when farmers work with recipes or planting guides using different measurement systems. A simple conversion chart posted near your packing station prevents errors when customers request specific weights.

Remember, regulatory compliance isn’t about catching farmers doing something wrong – it’s about protecting consumers and creating fair marketplaces. Viewing these requirements as part of your commitment to transparency and quality service helps maintain the integrity that makes CSA farming so special.

Success Story: How Green Valley Farm Simplified Their Compliance

When Maria Rodriguez launched Green Valley Farm CSA in Sonoma County three years ago, she felt overwhelmed by California’s weights and measures requirements. Like many small-scale farmers, she worried that compliance would eat into her limited time and budget.

“I was selling produce at farmers markets and running my CSA boxes, but I wasn’t sure if my home scale was legal,” Maria recalls. “The regulations seemed complicated, and I didn’t want to risk fines or lose customer trust.”

Maria decided to tackle compliance head-on. She contacted her local County Agricultural Commissioner’s office and discovered the process was more straightforward than expected. Within two weeks, she had her scale tested and certified for just $50. The inspector even provided helpful tips on proper weighing procedures.

The results surprised her. “Customers noticed the certification sticker on my scale immediately,” Maria explains. “It boosted their confidence, and I actually saw an increase in sales.” She also discovered that accurate weighing helped reduce waste and improved her profit margins by ensuring consistent portions.

Today, Maria maintains her certification annually and has invested in a second certified scale for her packing area. She estimates the entire compliance process takes less than four hours per year, including record-keeping.

“It seemed daunting at first, but getting certified was one of the best business decisions I made,” she says. “My customers trust me, and I sleep better knowing everything is above board.”

CSA farmer preparing vegetable share box with certified scale on work table
Successful CSA operations build customer trust through transparent weighing practices and proper compliance with weights and measures regulations.

Here’s the good news: staying compliant with California’s weights and measures requirements doesn’t have to be complicated or overwhelming. Think of it as an investment in your farm’s future rather than just another regulatory hurdle. When you consistently use certified scales and follow proper measuring practices, you’re doing more than checking boxes—you’re building a foundation of trust with your customers that can set your CSA apart.

Accurate weights and measures show your members that you respect their investment and take your business seriously. This transparency strengthens the connection between you and the people who depend on your farm for fresh, healthy food. Plus, proper compliance protects you legally, giving you peace of mind as your operation grows.

Your next steps are straightforward: locate your nearest County Sealer of Weights and Measures office, schedule an inspection for your scales, and establish a simple system for regular checks. Many successful CSA farmers report that once they’ve set up their initial practices, maintaining compliance becomes second nature.

Remember, every accurate measure you provide contributes to the integrity of local food systems across California. You’re not just following regulations—you’re helping to create a marketplace where honesty and quality thrive, benefiting farmers and eaters alike.

Why Your Local Farm’s Food Safety Matters More Than You Think

Posted by darrell on
0
Local Food Systems and Distribution
Why Your Local Farm’s Food Safety Matters More Than You Think

Understand that food safety in local farming isn’t about massive industrial equipment or complicated laboratory tests—it starts with knowing your soil, water sources, and handling practices from seed to sale. Visit your local CSA farms and ask farmers about their water testing schedules, compost aging processes, and employee hygiene protocols to gauge their commitment to safety standards.

Implement a simple three-step safety system: test your irrigation water twice yearly for coliform bacteria, maintain detailed harvest and washing logs, and establish clear hand-washing stations in all work areas. These foundational practices prevent contamination more effectively than reactive measures after problems arise.

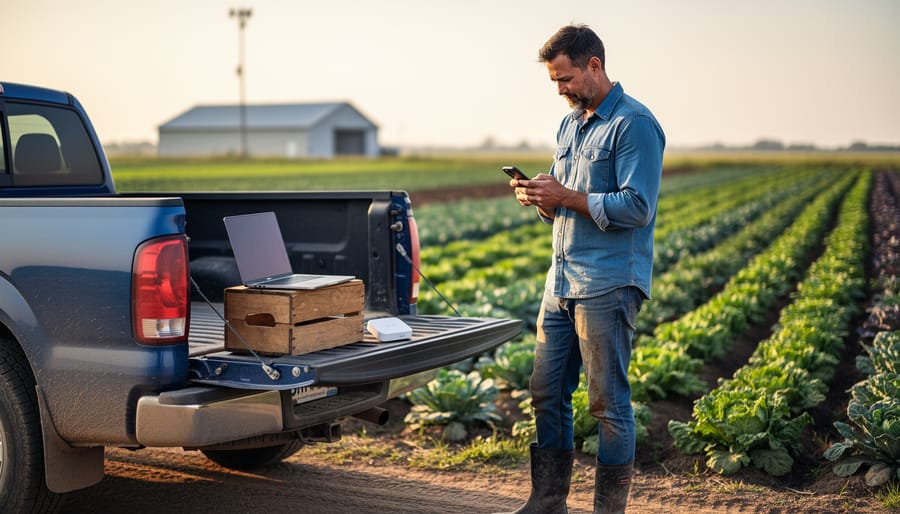
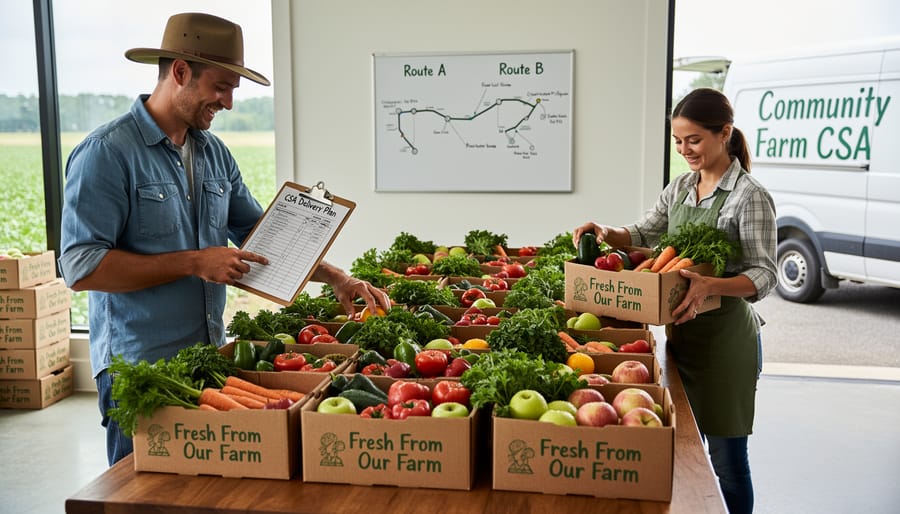
Recognize that small-scale producers face the same pathogen risks as conventional operations—E. coli, Salmonella, and Listeria don’t discriminate by farm size. The difference lies in traceability advantages: when Sarah Chen’s Oregon farm identified potential contamination in her lettuce crop, she contacted all 47 CSA members within two hours, while conventional supply chains often take days to trace affected products.

Build relationships with farmers who welcome farm visits and openly discuss their safety practices. Ask about their staff training frequency, equipment sanitization routines, and how they handle recalls. Transparent producers view these questions as opportunities to demonstrate their expertise, not intrusions on their operations.

Whether you’re growing food for your community or purchasing from local sources, food safety requires consistent attention to detail, not just good intentions. Understanding these fundamentals protects everyone while supporting the local food movement’s growth.

What Manufacturing Food Safety Means for Small Farms

Farmer washing fresh leafy greens under running water in commercial sink
Proper washing and handling procedures are essential steps in local farm food safety protocols.

The Journey from Farm to Your Table

Your locally grown lettuce takes quite an adventure before landing in your salad bowl! Understanding this journey helps us appreciate where food safety measures make the biggest difference.

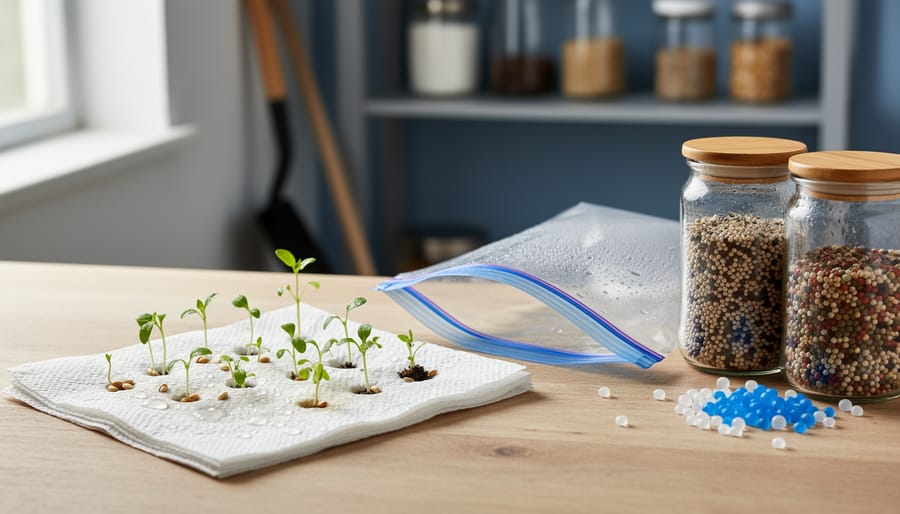
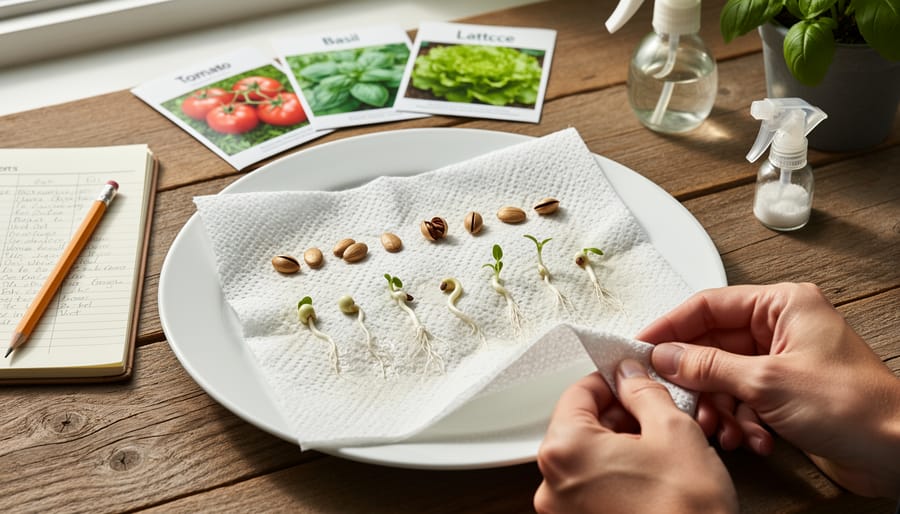
The path begins right in the soil. Farmers start with healthy seeds and carefully manage water quality, composting practices, and field conditions. This foundation stage is critical because contamination prevented early saves headaches later. Think of it like building a house—you want a solid base from the start.

Next comes harvesting, where proper timing and handling techniques protect produce from damage and potential contamination. Clean tools, properly trained workers, and immediate cooling all play vital roles. Local farmer Maria Rodriguez from Green Valley Farm shares her approach: “We harvest in the cool morning hours and refrigerate within an hour. It’s simple but makes all the difference in keeping our greens safe and fresh.”

During processing and packing, even small-scale operations need designated clean areas, sanitized surfaces, and temperature control. This is where many local farms distinguish themselves—smaller batches mean more attention to detail at each step.

Transportation might seem straightforward, but maintaining proper temperatures during those farmers market trips matters tremendously. Finally, storage at your local co-op or in your own refrigerator completes the chain.

Each stage represents what food safety experts call a “critical control point”—moments where careful attention prevents problems. When local farmers implement good practices throughout this journey, you get not just fresher food, but safer food too.

How Local Differs from Industrial

Local food production operates on a wonderfully different scale than industrial manufacturing, creating unique safety advantages and considerations. While large facilities process thousands of pounds daily through complex equipment, local farmers often handle smaller batches with direct oversight at every step. This hands-on approach means you’re less likely to see widespread contamination issues that can affect millions of products in industrial recalls.

One significant advantage? Shorter supply chains mean fresher food with fewer touchpoints where contamination could occur. When Sarah Martinez started her community-supported agriculture program, she discovered that harvesting greens in the morning for afternoon pickup eliminated the need for extended cold storage that industrial operations require. This immediacy naturally reduces certain risks while maintaining peak nutritional value.

However, local producers face distinct challenges too. Without dedicated quality control departments, farmers wear multiple hats, balancing food safety protocols with planting, harvesting, and customer relationships. Equipment might be simpler, but proper sanitization remains equally critical whether you’re washing vegetables in a three-compartment sink or an automated facility.

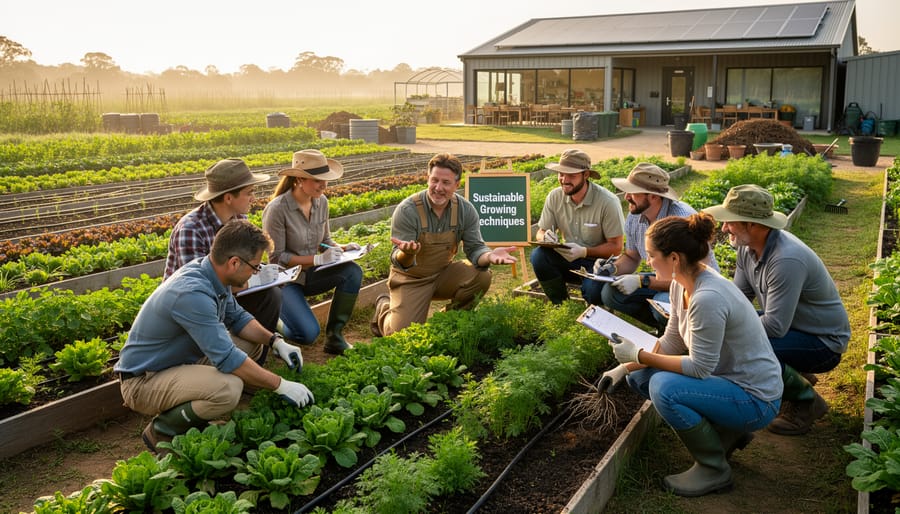
The testing requirements differ as well. Industrial operations conduct frequent laboratory testing for pathogens, while local farmers often rely more heavily on preventive practices like crop rotation, water quality monitoring, and careful record-keeping. Many successful local producers join food safety cooperatives, sharing resources for occasional testing and training that would be cost-prohibitive individually.

Understanding these differences helps consumers appreciate the care local farmers invest in keeping food safe while recognizing that good safety practices transcend scale.

Core Food Safety Practices Local Producers Follow

Growing and Harvesting with Safety in Mind

Food safety begins long before harvest day, right in your fields and growing beds. The foundation starts with water quality—whether you’re using well water, municipal sources, or irrigation systems, regular testing ensures you’re not introducing harmful bacteria to your crops. Many small-scale farmers test their water at least twice per growing season, especially after heavy rainfall or flooding events.

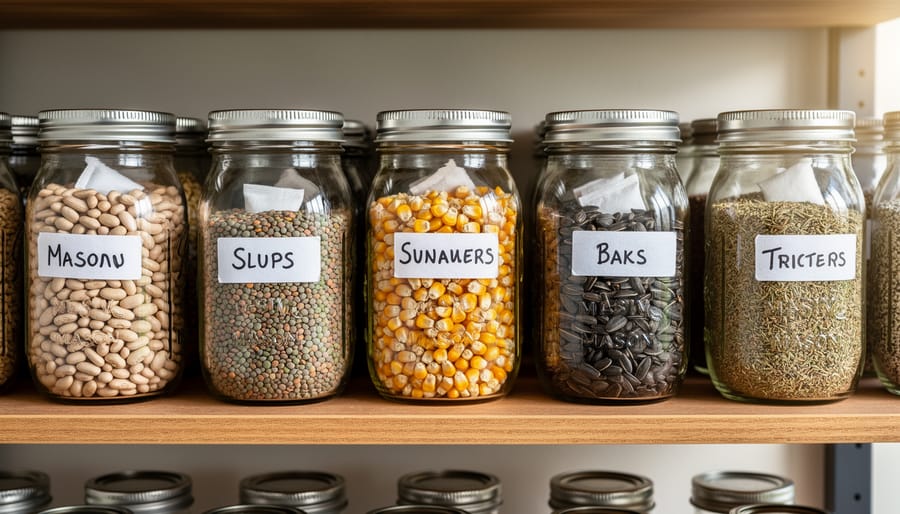
Soil amendments deserve careful attention too. While compost is a cornerstone of organic farming, improperly aged compost can harbor pathogens. The key is reaching those magic temperatures—131 to 170 degrees Fahrenheit—during the composting process to kill harmful organisms. Most experienced growers wait at least 90 to 120 days before applying compost to crops that touch the soil directly, like lettuce or strawberries.

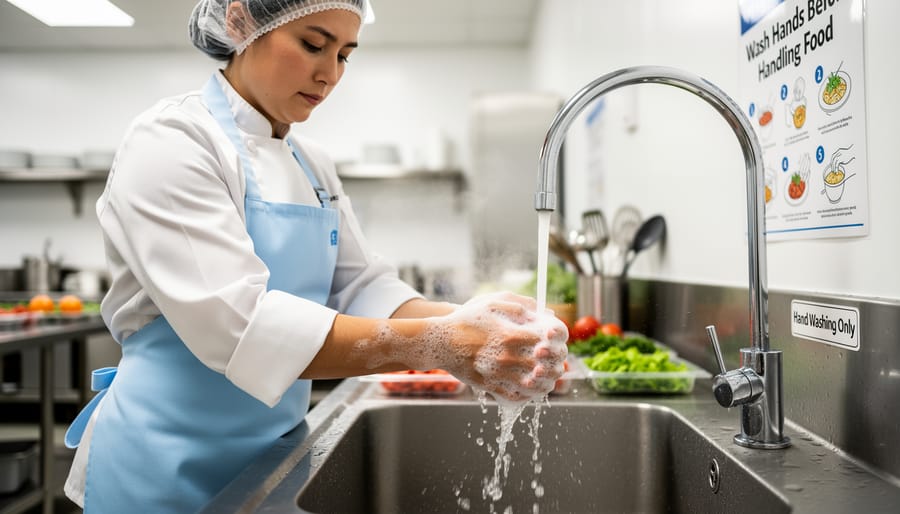
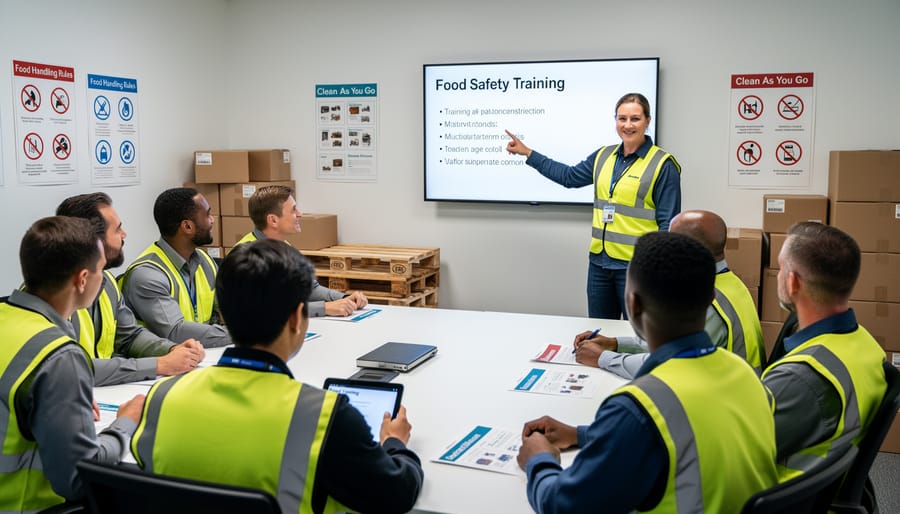
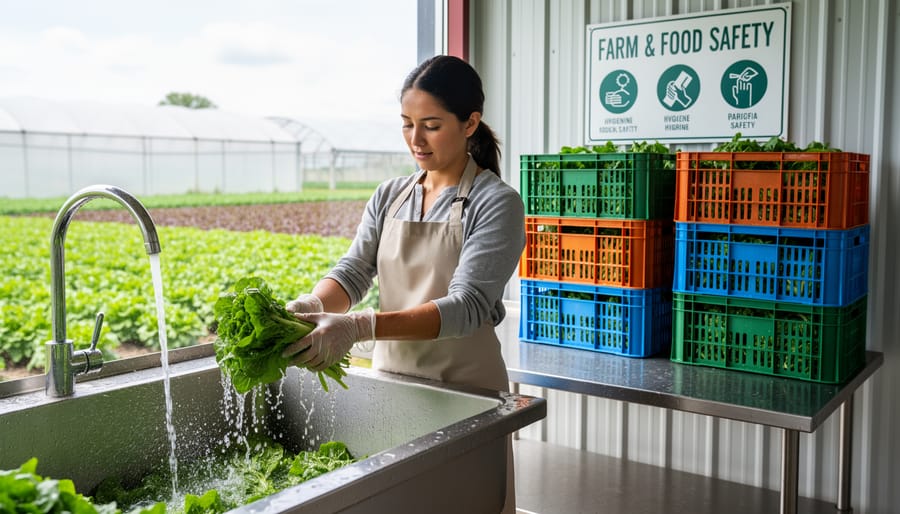
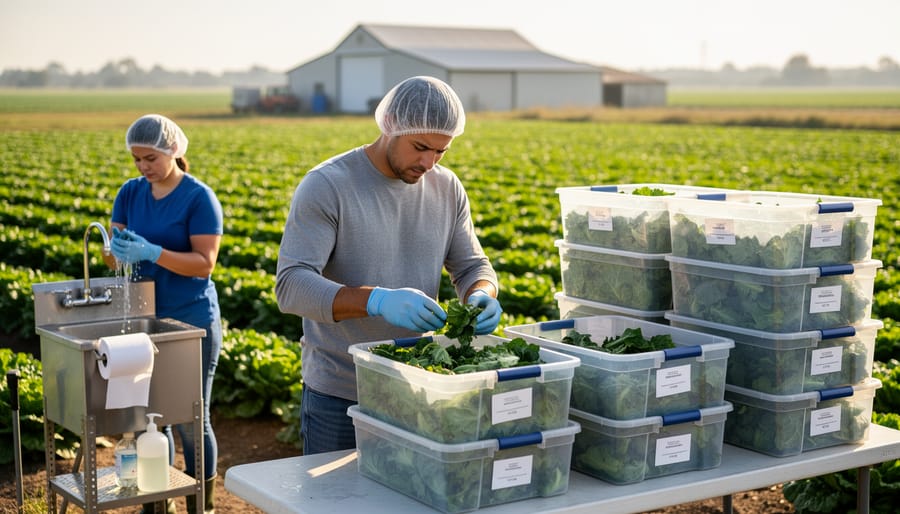
Worker hygiene practices protect both your team and your customers. Simple steps make a big difference: providing handwashing stations in the field, ensuring access to clean restrooms, and training everyone on proper hygiene protocols. One CSA farmer in Vermont shared how posting visual reminders near harvest bins reduced contamination risks significantly.

Harvest timing matters more than you might think. Picking produce during cooler morning hours and getting it into shade or refrigeration quickly slows bacterial growth dramatically. Avoid harvesting wet crops when possible, as moisture creates an ideal environment for bacteria to multiply. These straightforward practices demonstrate your commitment to delivering safe, nutritious food to your community while maintaining the integrity of your sustainable farming methods.

Farmer harvesting vegetables into clean crates in field setting
Local farmers implement rigorous safety practices during harvest, including worker hygiene and clean container protocols.

Processing and Packaging Standards

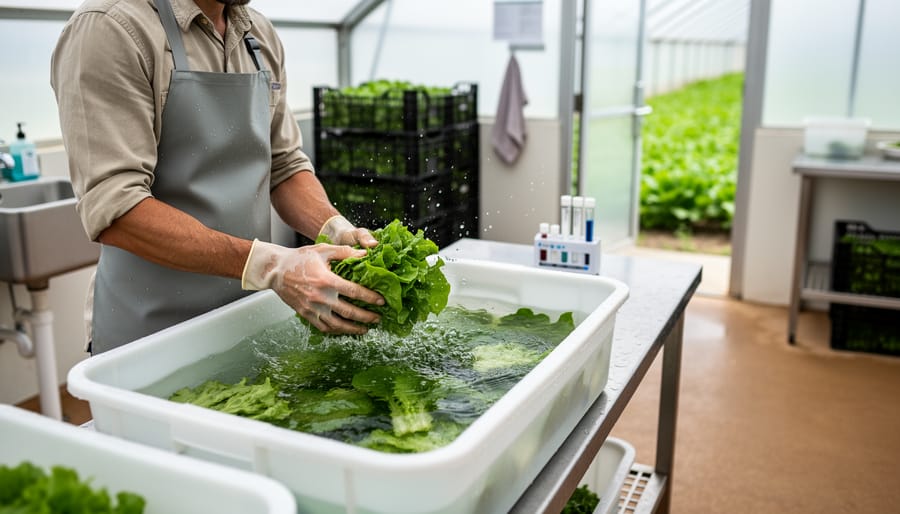
Once your beautiful produce comes off the field, maintaining food safety during processing becomes your next priority. Whether you’re washing lettuce for market bundles or transforming tomatoes into salsa, every step matters for protecting your customers and building trust in your farm business.

Start with proper washing techniques using potable water. A three-sink system works wonderfully for leafy greens: wash, rinse, and sanitize with food-grade solutions. Change water frequently to prevent cross-contamination, and remember that cold water helps maintain freshness while removing dirt and potential pathogens.

Your cutting and prep area deserves special attention. Use dedicated cutting boards for different product types, sanitizing between batches. Stainless steel surfaces clean more thoroughly than wood or plastic, making them ideal for small-scale operations. Keep all utensils and equipment spotlessly clean, establishing a regular sanitizing schedule that becomes second nature.

For value-added products like jams, sauces, or baked goods, temperature control becomes critical. Invest in a reliable food thermometer and document your cooking temperatures. Most bacteria cannot survive proper heat processing, but you need consistent records for both safety and potential inspections.

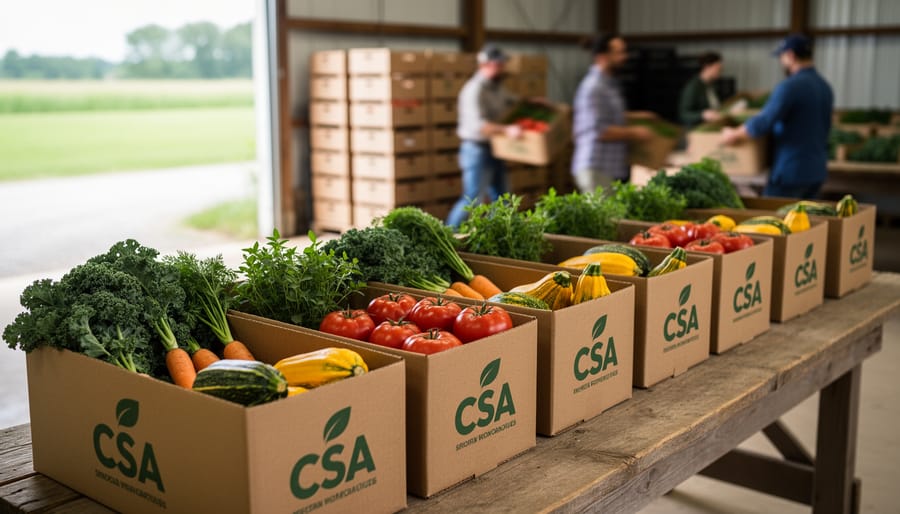
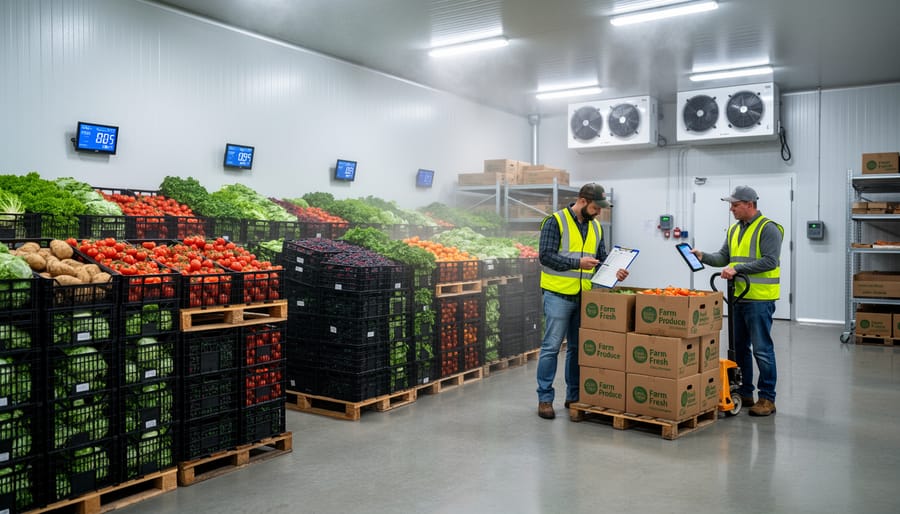
Storage conditions make or break your food safety efforts. Refrigerate perishables promptly at 40°F or below, and maintain dry storage areas for shelf-stable items. Label everything with production dates and use proper food-grade packaging materials that protect products without introducing contaminants.

Many successful local farmers find that creating simple standard operating procedures for each processing task helps maintain consistency, especially when training new helpers or family members joining the farm work.

Temperature Control and Storage

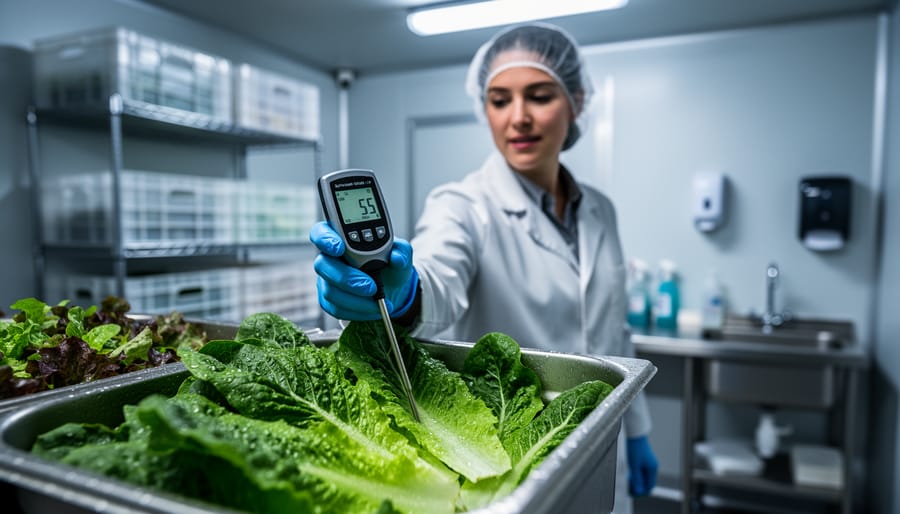
Proper temperature control is your frontline defense against foodborne illness, whether you’re running a small CSA operation or storing your harvest at home. The danger zone—temperatures between 4°C and 60°C (40°F to 140°F)—allows harmful bacteria to multiply rapidly, so keeping perishables outside this range is essential.

For local farmers, maintaining effective cold chain maintenance starts right after harvest. Fresh greens, berries, and dairy products need immediate cooling to preserve quality and safety. Simple solutions like pre-cooling with ice water or investing in a walk-in cooler make a significant difference.

Consider Sarah Chen’s farm in Ontario, where she installed solar-powered refrigeration units to maintain consistent temperatures during transport to farmers markets. This investment reduced spoilage by 40% while ensuring food safety compliance.

For consumers, check that refrigerated items at your farmers market feel properly chilled, and get perishables home quickly. Use insulated bags for shopping trips, and monitor your home refrigerator temperature regularly—it should stay at or below 4°C (40°F).

Interior of farm cold storage unit with organized produce crates
Temperature-controlled storage facilities help local farms maintain the cold chain for perishable products.

Regulations and Compliance Requirements

Understanding FSMA for Small Farms

The Food Safety Modernization Act, passed in 2011, represents the most significant update to our nation’s food safety laws in decades. For small-scale farmers and local food producers, understanding FSMA is essential, but the good news is that the legislation includes thoughtful provisions specifically designed with you in mind.

FSMA focuses on preventing foodborne illness rather than simply responding to outbreaks. It covers areas like water quality, employee hygiene, equipment sanitation, and record-keeping. However, recognizing that small farms operate differently than large industrial facilities, the law includes important exemptions.

If your farm generates less than $500,000 in annual food sales and sells more than half of your products directly to consumers, restaurants, or retailers within your state or within 275 miles, you may qualify for the Qualified Exemption. This dramatically reduces your regulatory burden while still requiring you to maintain basic safety practices.

Even smaller operations selling less than $25,000 annually are typically exempt from most FSMA requirements altogether. These accommodations allow beginning farmers to focus on growing their business while implementing food safety practices that make sense for their scale. The key is documenting your sales and understanding which category your operation falls into as you grow.

Certifications That Matter

When shopping at farmers markets or joining a CSA, you might notice farms displaying various certifications on their stalls or in their newsletters. These credentials tell you a lot about the farm’s commitment to food safety and quality practices.

Good Agricultural Practices, commonly known as GAPs, is one certification you’ll frequently encounter. This voluntary program focuses on reducing microbial contamination risks in fresh produce. Farms with GAPs certification follow specific protocols for water quality, worker hygiene, field sanitation, and harvest handling. Think of it as a comprehensive checklist that covers everything from how irrigation water is tested to how bins are cleaned between uses.

Organic certification is another credential many local farms pursue. While people often associate organic with pesticide-free growing, it actually encompasses food safety practices too. Certified organic farms must maintain detailed records, prevent contamination from prohibited substances, and follow strict handling procedures. The certification process requires annual inspections and can take three years to complete, demonstrating a farm’s long-term dedication to these standards.

Some regions offer additional certifications like Certified Naturally Grown, which provides similar standards to organic but with a peer-review model that’s more accessible for smaller operations. You might also see food safety training certificates, indicating that farm staff have completed courses in proper handling techniques.

Remember, certification involves costs and paperwork that some excellent small farms can’t manage. Many non-certified farms still follow rigorous safety practices. Don’t hesitate to ask farmers about their food safety measures during your next market visit—most are passionate about sharing their commitment to keeping your food safe.

Real Stories: How Local Farmers Prioritize Safety

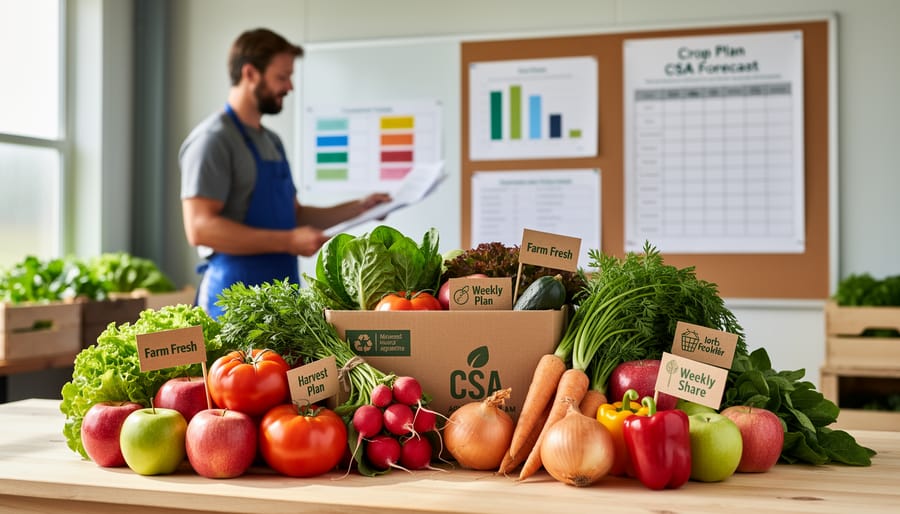
Meet Sarah Chen, who runs a 50-member CSA farm in Vermont. When she started five years ago, food safety felt overwhelming. “I knew how to grow amazing tomatoes, but navigating GAPs certification seemed like a different language,” she admits. Sarah began with simple steps: implementing a harvest log to track which fields were picked when, establishing a cleaning schedule for harvest bins, and creating a designated hand-washing station in her packing barn.

Her biggest breakthrough came after a close call during her second season. A volunteer accidentally placed freshly harvested lettuce in bins that had contained root vegetables still covered in soil. “That moment changed everything,” Sarah explains. She immediately instituted a color-coded bin system—green for leafy greens, brown for root crops, and blue for fruits. This visual system meant anyone helping on the farm, regardless of experience, could maintain proper food safety protocols.

Down in North Carolina, Miguel Rodriguez transformed his three-acre farm after attending a regional food safety workshop. He discovered that his well water, which he assumed was pristine, actually needed regular testing. “I invested in quarterly water testing, and while it’s never shown problems, that peace of mind is invaluable for my members,” he shares. Miguel also built a simple but effective wash-and-pack station with proper drainage, separate areas for different crops, and clear signage reminding workers about hygiene protocols.

The challenges these farmers faced weren’t just technical. Sarah struggled with the cost of infrastructure improvements on a tight budget, solving this by applying for a local farm safety grant and phasing improvements over two seasons. Miguel initially worried that emphasizing food safety might seem impersonal to members who valued the farm’s intimate feel. Instead, he found that transparency about his practices deepened trust. “Now I include a ‘safety spotlight’ in my weekly newsletter, explaining things like why we refrigerate greens within two hours of harvest,” he says.

Both farmers stress that food safety doesn’t require perfection—it requires consistency and a commitment to continuous improvement. Their practical approach proves that even small farms can implement robust safety measures while maintaining the personal connection that makes local food special.

What You Can Do as a Conscious Consumer

Questions to Ask Your Farmer

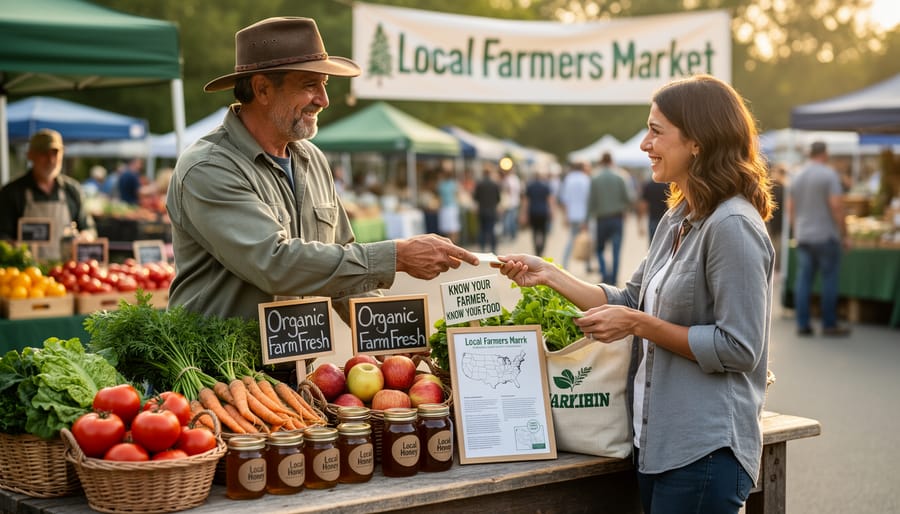
Building a relationship with your local farmer starts with genuine curiosity. When visiting your farmers market or CSA pickup, consider asking questions like “Can you tell me about your food safety practices?” or “How do you ensure your produce stays fresh from harvest to sale?” Most farmers are passionate about their work and appreciate the interest.

You might also inquire, “Do you follow any specific food safety certifications or guidelines?” This shows you value their commitment to quality without implying distrust. For those curious about handling practices, try “What’s your process for washing and storing produce?” or “How quickly does your food get from the field to the market?”

If you’re interested in their growing methods, ask “What steps do you take to protect your crops from contamination?” These conversations not only help you make informed choices but also support farmers who prioritize safety. Remember, farmers are your partners in accessing fresh, wholesome food, and most welcome the opportunity to share their dedication to growing safely and sustainably.

Safe Food Handling After You Buy

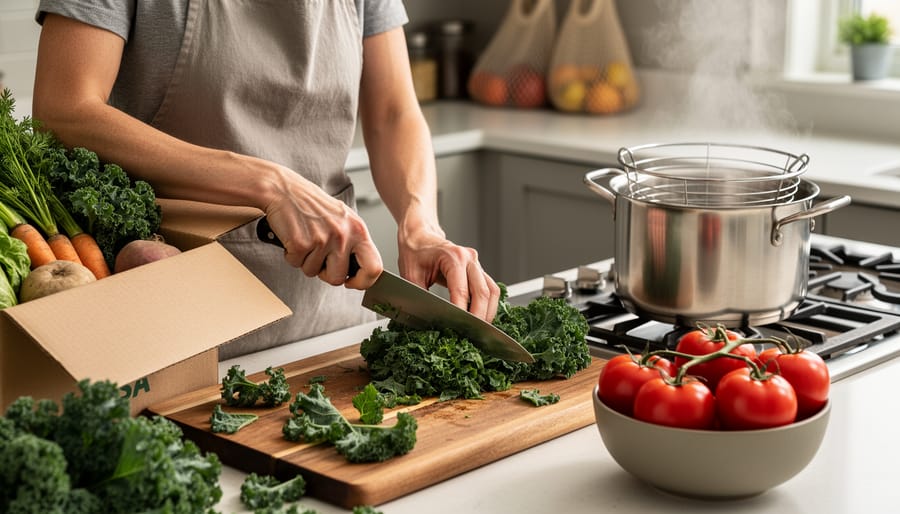
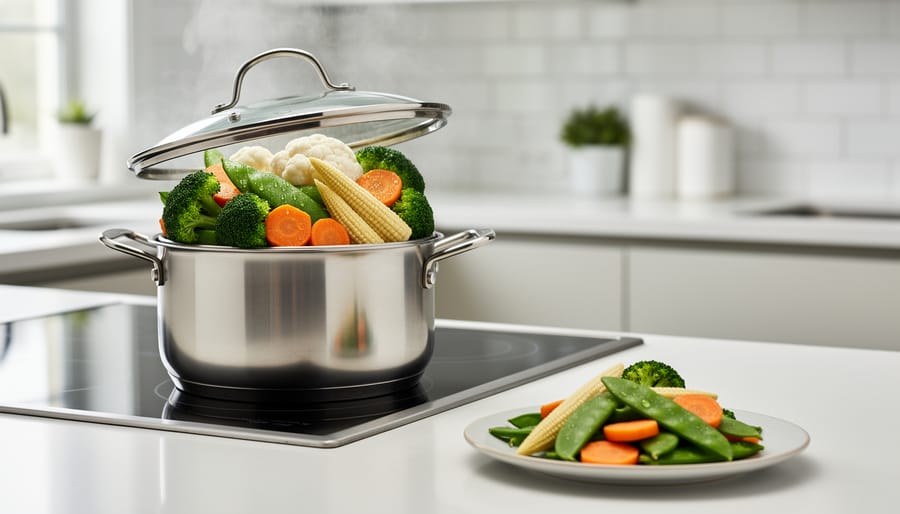
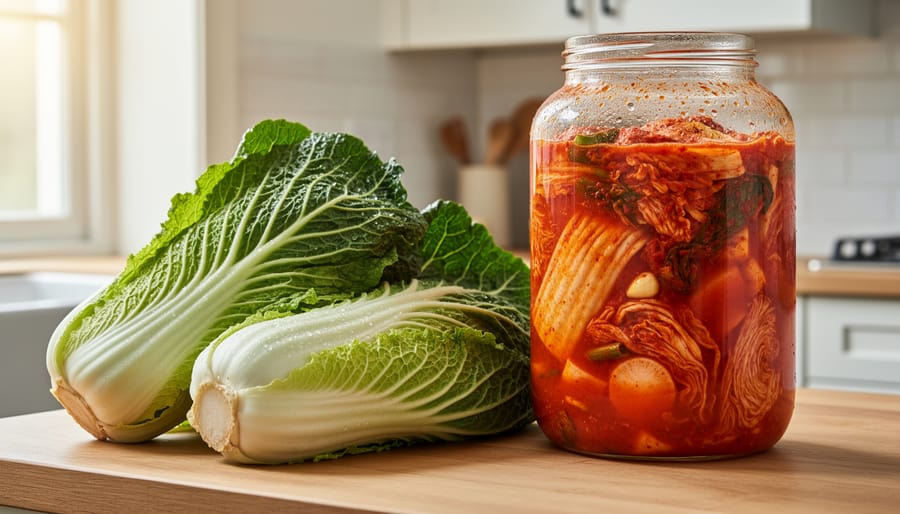
Food safety doesn’t end when farmers deliver quality produce—it continues in your kitchen. Once you bring home those beautiful tomatoes from the farmers market or unpack your CSA box, you share the responsibility for keeping food safe.

Start by refrigerating perishables within two hours of purchase, or one hour if temperatures exceed 90°F. Store fruits and vegetables in clean, designated produce drawers, keeping them separate from raw meats to prevent cross-contamination.

Before preparing your locally grown treasures, wash your hands thoroughly with soap and warm water for at least 20 seconds. Rinse produce under running water, even items you’ll peel. For firm produce like potatoes or carrots, use a clean vegetable brush. Skip the soap or produce washes—plain water works best and won’t leave residues.

Keep your cutting boards, knives, and countertops clean, sanitizing them between different food items. Consider designating one cutting board for produce and another for raw proteins.

By following these simple practices, you’re honoring the care your local farmers put into growing safe, nutritious food while protecting your family’s health. This partnership between growers and consumers creates a stronger, safer local food system for everyone.

Building Trust Through Transparency

One of the most powerful food safety advantages of local farming is the ability to see exactly where your food comes from. When you buy from a nearby farm, you’re not just purchasing produce—you’re entering into a relationship built on transparency and accountability. This connection fundamentally changes how food safety works.

Unlike industrial food systems where products pass through multiple anonymous facilities, direct farmer-consumer relationships create natural accountability. Local farmers know their customers by name, shop at the same stores, and participate in the same community events. This social connection motivates careful attention to food safety practices because reputation matters deeply in tight-knit communities.

Many local farms welcome visitors for tours, offering an open-door policy that would be unthinkable in large-scale operations. During these visits, you can observe growing practices, ask questions about pest management, and see exactly how produce is harvested and handled. This level of access empowers consumers to make informed decisions about their food sources.

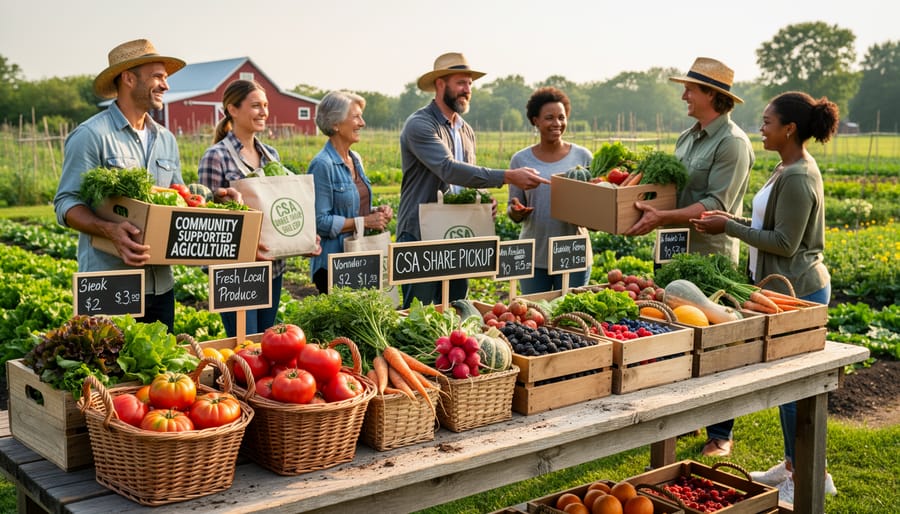
Community Supported Agriculture programs take this transparency even further. Members often participate in harvest days, volunteer at the farm, and receive regular newsletters detailing what’s happening in the fields. This ongoing communication creates shared investment in food safety outcomes.

When issues do arise, local systems enable rapid communication. A farmer can send text alerts or make phone calls to specific customers within hours, rather than waiting for large-scale recalls that might take days or weeks. This personal connection transforms food safety from abstract regulations into a shared responsibility between people who genuinely care about each other’s wellbeing, creating a culture where safety practices are strengthened through mutual respect and community trust.

Farmer and customer conversing at farmers market produce stand
Direct relationships between farmers and consumers create transparency and accountability in local food systems.

Food safety in local distribution thrives on partnership. When you know your farmer, you gain more than fresh produce—you build a relationship grounded in transparency and mutual accountability. Unlike the anonymous nature of industrial food chains, local food systems allow you to ask questions, visit farms, and witness safety practices firsthand. This connection transforms food safety from a bureaucratic concern into a shared commitment between those who grow your food and those who enjoy it.

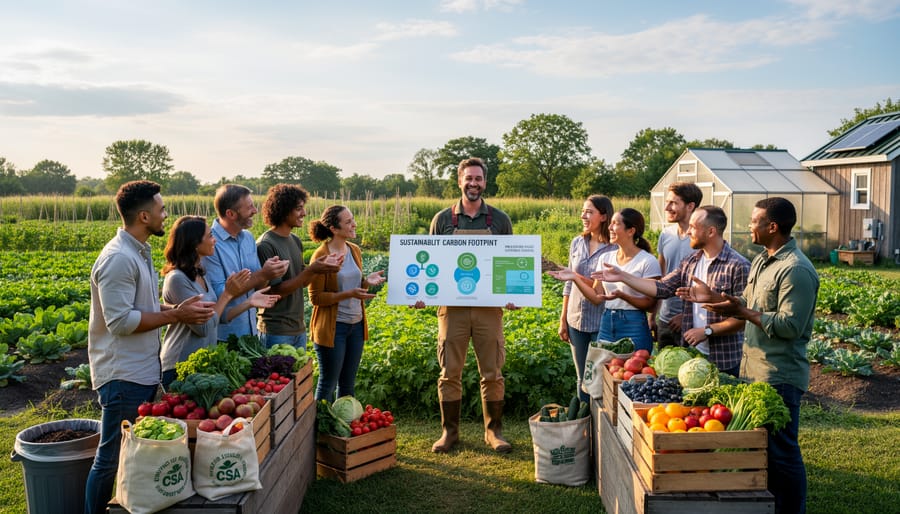
Farms that prioritize both sustainability and safety understand that these values aren’t competing priorities—they’re complementary. Healthy soil produces resilient crops, diverse ecosystems reduce pest pressures naturally, and careful handling protects your family’s wellbeing. These farmers deserve your support and engagement.

Ready to take the next step? Reach out to your local CSA or farmers market vendor and start a conversation about their food safety practices. Ask about their growing methods, handling procedures, and certifications. Most farmers are passionate about sharing their approach and appreciate consumers who care about these details. By supporting farms committed to excellence in both sustainability and safety, you’re investing in a healthier food system for your community and future generations. Your choices matter—make them count.

Why Your CSA Farm Might Be Leaving Members Behind (And How to Bridge the Digital Gap)

Posted by darrell on
0
Technology and Innovation
Why Your CSA Farm Might Be Leaving Members Behind (And How to Bridge the Digital Gap)

The WiFi signal drops just as you’re about to send your weekly CSA newsletter. Your farm’s Instagram post won’t upload from the field. Members email asking why they can’t access your online harvest schedule, but you’re still waiting for that page to load yourself.

Sound familiar? You’re not alone. Nearly 19 million rural Americans lack reliable high-speed internet, and CSA farmers face unique challenges when limited connectivity meets the growing expectation for digital engagement. Your members want real-time updates, online ordering, and social media glimpses of their food’s journey from seed to table, but delivering these experiences feels impossible when your internet crawls slower than your tomato seedlings in April.

The rural digital divide isn’t just an inconvenience. It directly impacts your ability to retain members, attract new subscribers, and compete with grocery stores offering seamless online experiences. When urban CSAs post daily farm stories and offer text message harvest reminders while you struggle to send a single email, the gap widens between customer expectations and what you can realistically deliver.

But here’s the encouraging truth: you don’t need Silicon Valley-level connectivity to create meaningful digital engagement. Smart farmers across the country are finding creative, affordable solutions that work within rural limitations. From offline-friendly strategies to strategic timing of digital tasks, you can bridge the connectivity gap and build the thriving member community your farm deserves, even with inconsistent internet access.

What the Rural Digital Divide Actually Means for CSA Communities

The rural digital divide refers to the gap in internet access and connectivity quality between urban areas and rural communities. While city dwellers typically enjoy high-speed, reliable internet, many rural regions struggle with slow connections, limited service options, or no internet access at all. For Community Supported Agriculture operations, this divide creates unique challenges that affect both farmers and members.

When your farm sits in an area with spotty internet service, basic tasks that urban businesses take for granted become frustrating obstacles. Uploading weekly newsletters with photos of the harvest can take hours instead of minutes. Video content showcasing farm activities might be impossible to share. Even simple email communications can become unreliable when connections drop unexpectedly. Many CSA farmers find themselves driving to town just to send member updates or process online payments.

The impact extends to your members too. While urban subscribers enjoy seamless access to digital community platforms, recipe databases, and farm updates, the connectivity gap means these resources might not reach everyone equally. Members living in rural areas face similar challenges accessing your carefully crafted content, participating in online discussions, or viewing pickup schedules.

This digital barrier affects the heart of what makes CSA communities thrive: connection and communication. When farmers cannot easily share their stories, growing practices, or seasonal updates, members miss out on the educational aspect that makes CSA membership meaningful. The photos of new baby goats, the excitement of the first tomato harvest, or tips for storing root vegetables all become harder to share when technology works against you.

Understanding this divide is the first step toward finding practical solutions that keep your community engaged regardless of where they live or farm.

Farmer in field holding smartphone showing rural connectivity challenges
Many rural farmers struggle with unreliable internet connectivity that makes digital member communication challenging.

The Real-World Impact on Your Farm-Member Relationship

When Members Can’t Access Your Weekly Updates

When your CSA members face unreliable internet access, they miss crucial weekly updates about what’s in their share, pickup times, and storage tips. Imagine a member receiving a box of delicate greens without knowing they should be refrigerated immediately, or missing the announcement about an extra-early harvest day. This disconnect leads to forgotten pickups, spoiled produce, and frustrated members who feel out of the loop.

The ripple effects go beyond individual inconvenience. Members who can’t reliably access your newsletters might overlook creative recipe ideas for unfamiliar vegetables like kohlrabi or romanesco, leading those items to languish unused. They miss seasonal cooking workshops, farm tour invitations, and volunteer opportunities that build community connection. Over time, this communication gap erodes the relationship between farmer and member, turning what should be an engaging partnership into a simple transaction.

Poor connectivity also prevents members from providing timely feedback about their shares or asking questions about growing practices. This two-way communication breakdown means you’re farming in the dark, unable to adjust offerings based on member preferences, ultimately affecting retention rates and community satisfaction.

The Challenge of Digital Payment Systems

Digital payment challenges create real headaches for CSA communities when internet connectivity is spotty. Picture this: a farmer trying to process membership renewals from their barn, only to have their connection drop mid-transaction. Meanwhile, members in rural areas struggle to complete online payments, leading to frustration on both sides.

These technical hiccups can seriously impact your farm’s cash flow. When payment portals time out or fail to load, members might give up entirely, delaying their renewals or missing payment deadlines. Some farmers have shared stories of losing potential members who simply couldn’t complete the signup process due to poor connectivity.

The solution often involves offering multiple payment options. Consider accepting checks or cash alongside digital payments, and communicate clearly about offline alternatives. Some successful CSA operations send paper invoices with pre-addressed envelopes as backup options. Others schedule specific “payment days” at farmers markets where members can pay in person.

For farmers with limited connectivity, batching payment processing during trips to town or areas with better internet can help. Simple mobile payment apps that work offline and sync later can be lifesavers. The key is building flexibility into your payment systems so connectivity issues don’t become barriers to participation.

Missing Out on Community Building Online

Modern CSAs thrive on connection, not just through farm visits, but increasingly through vibrant online communities. Unfortunately, when rural internet access falls short, farmers and members alike miss out on these meaningful digital interactions that strengthen the farm-to-table bond.

Picture a CSA member who wants to share photos of last night’s roasted beet salad on the farm’s Facebook group, or a farmer hoping to send weekly recipe videos featuring the harvest. Without reliable connectivity, these simple acts of building digital CSA communities become frustratingly difficult or impossible. Member forums where people swap cooking tips, ask questions about storage, and celebrate their farm-fresh meals remain inaccessible to those on the wrong side of the digital divide.

CSA apps that allow members to customize their shares, view farm updates, or participate in polls about upcoming crops require consistent internet access. When farmers can’t reliably upload content or members can’t engage with these platforms, the community feeling weakens. That recipe exchange thread where someone shares their grandmother’s kale technique? Those photos of kids harvesting carrots? The weekly newsletter with planting updates? All of these connection points fade away.

The impact goes beyond convenience. Strong digital communities help with member retention, create enthusiasm for challenging vegetables, and build the personal relationships that make CSA membership feel special. When connectivity barriers prevent participation, both farmers and members lose out on the rich, supportive community that makes sustainable agriculture so rewarding.

Farmer Success Story: How Meadowbrook Farm Overcame Connectivity Challenges

When Sarah and Tom Mitchell took over Meadowbrook Farm in rural Vermont three years ago, they quickly discovered that their dream of running a thriving CSA came with an unexpected obstacle: internet speeds that barely reached 3 Mbps on good days. With over 150 CSA members expecting weekly updates, recipe ideas, and seamless communication, the couple knew they needed creative solutions.

Their first challenge was the weekly newsletter. Large photo files would take hours to upload, often timing out completely. Sarah’s solution was refreshingly simple: she began compressing photos using free mobile apps before uploading, reducing file sizes by 70% without sacrificing quality. She also scheduled uploads for early morning hours when bandwidth competition was lowest, setting her alarm for 5 AM on newsletter days.

For member communication, the Mitchells moved away from bandwidth-heavy video content and embraced what Tom calls “strategic scheduling.” They downloaded member questions and emails during off-peak hours, crafted responses offline using a simple document, then uploaded everything in one batch. This approach transformed their communication from frustrating to efficient.

The farm’s most innovative solution came through community partnership. Meadowbrook established a “farm ambassador” program, recruiting five members who lived in town with reliable internet. These ambassadors helped manage the farm’s social media presence, shared real-time updates during harvest days, and even hosted virtual farm tours from their own homes. In exchange, they received discounted CSA shares and first pick of specialty crops.

The results exceeded expectations. Member retention jumped from 68% to 89% within one year. The Mitchells also discovered that their offline-first approach created richer content. Sarah’s handwritten notes, later photographed and shared, became beloved features that members said felt more personal than typical digital updates.

Perhaps most importantly, the farm attracted media attention for their creative connectivity solutions, leading to feature articles that brought in 40 new members. As Tom reflects, “Poor internet forced us to be more intentional about our communication. We can’t rely on constant posting, so every message we send has real value. Our members appreciate that authenticity, and honestly, it’s less stressful for us too.”

Practical Solutions That Work Right Now

Low-Tech Communication Alternatives

Sometimes the best solutions are the simplest ones. When internet connectivity becomes a barrier, stepping back to low-tech communication methods can actually strengthen your CSA community connections.

Text-only emails work wonderfully in low-bandwidth areas. Strip away images, logos, and fancy formatting to create messages that load quickly even on spotty connections. Your members will appreciate the straightforward updates about harvest schedules and pickup reminders.

SMS text messages reach nearly everyone, regardless of internet access. Set up a simple text alert system for urgent updates like weather-related pickup changes or unexpected crop availability. Many farmers find that members actually prefer these quick notifications over lengthy emails.

Don’t underestimate the power of printed newsletters at your pickup location. A single-page update about upcoming harvests, recipes, and farm happenings creates a tangible connection. Members can take them home, post them on refrigerators, and share with neighbors who might be interested in joining.

Phone trees remain incredibly effective for time-sensitive information. Designate a few reliable members to help spread the word when you need to reach everyone quickly. This builds community while solving communication challenges.

Consider combining methods too. A farmer in Tennessee successfully uses text confirmations for pickups alongside monthly printed newsletters, ensuring everyone stays informed regardless of their internet situation.

Farm bulletin board with printed newsletters at CSA pickup location
Low-tech communication solutions like printed newsletters and bulletin boards at pickup locations ensure all members stay informed.

Smart Use of Offline-First Tools

When internet access comes and goes in rural areas, offline-first tools become game-changers for keeping your CSA community connected. These smart applications are designed to work beautifully even when connectivity is spotty, storing information locally on phones or tablets and syncing updates whenever a connection becomes available.

Think of tools like Google Drive or Evernote that let you draft newsletters, update member lists, or create seasonal recipes entirely offline. When you’re back in range, everything syncs automatically. For CSA operations, apps like Farmigo or Harvie can cache member preferences and ordering data, allowing farmers to manage pickups and deliveries without constant internet access.

Downloadable content is another powerful approach. Create PDF guides about seasonal produce, preservation techniques, or farm updates that members can download once and reference anytime. Video content about sustainable farming practices can be downloaded during good connectivity periods and watched later. This strategy complements your digital marketing strategies by ensuring your content remains accessible regardless of signal strength.

Sarah from Meadowbrook Farm batches her social media posts weekly using scheduling tools during her Saturday market trips to town, keeping followers engaged throughout the week without daily internet needs. This practical approach keeps communities thriving despite connectivity challenges.

Creating Hybrid Engagement Models

The beauty of CSA engagement is that it doesn’t have to live entirely online. Some of the most meaningful connections happen face-to-face, making hybrid models perfect for rural communities facing connectivity challenges.

Start by transforming your pickup sites into community hubs. A simple bulletin board at each location can share weekly updates, recipes, and farm news without requiring internet access. Members can post their own messages, creating organic conversations that might never happen in a Facebook group.

Member ambassadors are another powerful tool. These enthusiastic supporters act as communication bridges, sharing important updates through phone calls, text messages, or in-person conversations at pickup. One Vermont farm recruits one ambassador per pickup site, ensuring every member stays informed regardless of their digital access.

Farm visits create irreplaceable experiences that no virtual tour can match. Host monthly open farm days where members can walk the fields, meet the farmers, and understand where their food comes from. These events strengthen relationships while giving you direct feedback about what members want.

Community potlucks, seasonal celebrations, and hands-on workshops bring people together without requiring stable internet. A spring planting party or fall harvest festival builds the kind of loyalty that transcends any digital platform. These gatherings remind everyone that community-supported agriculture is fundamentally about people supporting people, with or without Wi-Fi.

Exploring Connectivity Improvement Options

Good news! Several practical solutions exist to bridge the connectivity gap in rural CSA communities. Federal and state programs like the USDA’s ReConnect Program offer grants and loans specifically for rural broadband infrastructure, helping farm communities invest in lasting connectivity improvements.

For immediate needs, mobile hotspots provide flexible internet access using cellular networks, perfect for farmers market setups or on-farm member events. Satellite internet has evolved dramatically, with newer low-earth orbit options delivering faster speeds than traditional satellite services, though weather can still affect performance.

Community broadband cooperatives represent an exciting grassroots approach where neighbors pool resources to build shared infrastructure. Several farming communities have successfully launched their own internet networks, reducing costs while maintaining local control. Some CSA farmers have partnered with nearby farms to share installation costs and create stronger connectivity zones.

Libraries and community centers often offer free WiFi access and can serve as pickup locations where members can connect while collecting shares. Additionally, many telecommunications companies provide discounted services for agricultural businesses, though you’ll need to ask specifically about these programs as they’re not always widely advertised. Start by researching what’s available in your area and don’t hesitate to explore multiple solutions simultaneously.

Building an Inclusive Digital Strategy for Your CSA

Creating an inclusive digital strategy starts with understanding your members’ actual access to technology. Consider sending a simple survey (available in both digital and paper formats at pickup) asking members about their internet reliability, preferred communication methods, and device access. This information becomes your roadmap for reaching everyone effectively.

The foundation of an inclusive approach is multi-channel communication. Never rely solely on email or social media to share important updates. Pair digital communications with physical bulletin boards at pickup locations, printed newsletters tucked into share boxes, and occasional phone calls for critical announcements. Some of the most successful innovative CSA approaches combine traditional and digital methods seamlessly.

Consider implementing a tiered communication system. Essential information like pickup schedule changes or safety alerts should go through multiple channels simultaneously. Weekly newsletters with recipes and farm updates can lean more digital while ensuring print versions are available upon request. Member stories and community-building content work well as optional extras through social media or blog posts.

Make digital tools work harder by keeping them simple and accessible. If using a member portal, ensure it works on smartphones with slow connections and includes downloadable PDF options for offline viewing. Text messaging can be surprisingly effective for quick updates since most phones receive texts even in low-signal areas.

Build personal connections that transcend technology. Designate team members as community liaisons who chat with members during pickup, gathering feedback and sharing updates face-to-face. These conversations often reveal concerns that never make it into online forums and strengthen the human bonds that make CSAs special.

Remember that flexibility is key. Some members will embrace digital platforms enthusiastically while others prefer traditional methods, and both preferences are equally valid. By honoring these differences and creating multiple pathways for engagement, you ensure every member feels connected to your farm community regardless of their internet access.

CSA members and farmers gathering together at outdoor farm event
In-person community events strengthen CSA connections beyond digital platforms and ensure inclusive engagement.

Looking Ahead: The Future of Connected Rural Communities

The future looks brighter for rural farmers and CSA communities navigating the digital divide. Recent federal and state initiatives are directing billions toward rural broadband expansion, recognizing that connectivity is no longer a luxury but essential infrastructure. For CSA operators, this means better days are ahead, with improved connectivity solutions becoming increasingly accessible even in remote areas.

Innovation is also meeting rural farmers where they are. Agricultural technology companies are developing smart farming tools designed specifically for low-bandwidth environments. These include offline-capable farm management apps that sync when connectivity is available, SMS-based communication systems for member updates, and lightweight platforms that work smoothly even with slower internet speeds. Some progressive CSAs are already testing these solutions with remarkable success.

What’s particularly exciting is the unique position CSA communities hold in advocating for rural digital infrastructure. Your members are your most powerful advocates. Many CSA supporters live in urban and suburban areas where high-speed internet is taken for granted. When they understand how connectivity challenges affect their farmers’ ability to communicate, process payments, and operate efficiently, they become passionate voices for change. Consider organizing member letter-writing campaigns to local representatives or partnering with other rural businesses to demonstrate collective need.

Farmer-led cooperatives are also pooling resources to negotiate better internet packages or invest in shared connectivity solutions. By working together, rural agricultural communities are finding creative paths forward. The digital divide won’t disappear overnight, but with continued advocacy, targeted investment, and innovative tools designed for rural realities, connected farming communities are within reach.

The rural digital divide is absolutely real, but here’s the good news: it’s not insurmountable. When farmers and members work together to bridge connectivity gaps, the entire CSA community becomes stronger and more resilient. Remember, the heart of Community Supported Agriculture has always been about connection, trust, and partnership. Technology simply gives us new tools to nurture those relationships, even when internet access is spotty.

If you’re facing connectivity challenges, don’t struggle in silence. Farmers, let your members know about your limitations and celebrate your creative solutions. Members, be patient and communicate your preferences. Sometimes the best engagement happens through a simple phone call or a handwritten note tucked into the weekly veggie box.

Your next step? Choose just one strategy from this article and implement it this week. Maybe it’s setting up an offline pickup station newsletter, establishing a member buddy system for those without reliable internet, or scheduling your social media posts during your weekly library visit. Small steps lead to meaningful change.

The digital divide doesn’t have to mean disconnection. With understanding, creativity, and commitment to community, your CSA can thrive regardless of bandwidth limitations. After all, the most important connections happen heart to heart, not just screen to screen.

Your CSA Box is Losing Nutrients Before Dinner (Here’s How to Stop It)

Posted by darrell on
0
Culinary and Food Preservation
Your CSA Box is Losing Nutrients Before Dinner (Here’s How to Stop It)

Steam vegetables for 3-5 minutes maximum to retain up to 90% of water-soluble vitamins like vitamin C and folate, compared to boiling which destroys nearly half. Cut your CSA greens immediately before cooking rather than hours in advance—exposure to air degrades nutrients rapidly, with some vegetables losing 25% of their vitamin content within the first hour of chopping.

Store your farm-fresh produce properly the moment it arrives: keep leafy greens in breathable bags in high-humidity crisper drawers, tomatoes at room temperature away from sunlight, and root vegetables in cool, dark spaces. This simple triage prevents nutrient loss before cooking even begins. When you do cook, embrace quick, high-heat methods like stir-frying or roasting at 400°F for 15-20 minutes. These techniques create flavorful caramelization while minimizing the time nutrients are exposed to heat.

The beauty of CSA cooking lies in working with produce picked at peak ripeness just days earlier—vegetables that already contain 30-50% more nutrients than supermarket equivalents. Your challenge isn’t just preserving these nutrients but celebrating them through cooking methods that honor the farmer’s work and your commitment to nourishing your family. Every technique you master transforms your weekly CSA box from overwhelming abundance into therapeutic, nutrient-dense meals that taste as vibrant as they look.

Why CSA Produce Demands Different Cooking Strategies

When you pick up your CSA box each week, you’re receiving produce at its nutritional peak. That bundle of kale was likely harvested just hours or days before reaching your kitchen, compared to store-bought greens that may have traveled thousands of miles over one to two weeks. This freshness creates a remarkable difference in vitamin content, enzyme activity, and phytonutrient levels.

Here’s what many home cooks don’t realize: ultra-fresh CSA produce contains significantly higher levels of water-soluble vitamins like vitamin C and folate, along with active enzymes that support digestion. Studies show that some vegetables lose up to 50% of their vitamin C within a week of harvest. Your CSA carrots, tomatoes, and leafy greens arrive with their nutritional armor intact.

Traditional cooking methods were developed partly to make aging produce palatable and safe. Boiling vegetables for extended periods, for instance, made sense when produce sat in storage or traveled long distances. But these same methods become wasteful when applied to farm-fresh ingredients. When you boil just-picked broccoli for ten minutes, you’re pouring precious nutrients straight down the drain.

Sarah Chen, a CSA member from Oregon, discovered this firsthand. After switching from boiling to quick-steaming her weekly greens, she noticed her family actually enjoyed the vegetables more. The vibrant colors, crisp textures, and sweeter flavors of minimally cooked fresh produce won over even her skeptical teenagers. Understanding this freshness advantage helps you choose cooking techniques that honor the farmer’s careful work and your produce’s exceptional quality.

Overhead view of fresh CSA produce box filled with colorful vegetables and herbs
A typical CSA box contains nutrient-dense, freshly harvested produce that requires specific handling to preserve its superior nutritional value.

The Science Behind Nutrient Loss in Your Kitchen

Water-Soluble vs. Fat-Soluble Nutrients

Understanding how nutrients behave in cooking helps you make the best choices with your CSA bounty. Nutrients fall into two categories: water-soluble and fat-soluble, and each responds differently to heat and cooking methods.

Water-soluble nutrients include vitamin C and B vitamins. These delicate compounds dissolve in water and can leach out when you boil or blanch vegetables. When CSA member Maria started steaming her leafy greens instead of boiling them, she noticed they tasted brighter and retained more color—signs that nutrients were staying put. Save cooking water from vegetables to use in soups or stocks, capturing those nutrients that did escape.

Fat-soluble nutrients like vitamins A, D, E, and K need fat for your body to absorb them properly. This is great news for your fresh CSA carrots and kale. Adding a drizzle of olive oil or a pat of butter to these vegetables doesn’t just enhance flavor—it actually helps you absorb more nutrients. Lightly sautéing tomatoes in healthy fat increases your absorption of lycopene, turning simple cooking into nutritional amplification.

The key is matching your method to your produce’s nutritional profile for maximum benefit.

Heat Sensitivity of Common Vegetables

Understanding how heat affects your CSA haul helps you make smart cooking choices. Delicate greens like spinach, kale, and chard lose vitamin C and folate quickly when exposed to high heat, so save these for quick sautés or enjoy them raw in salads. Broccoli, cauliflower, and Brussels sprouts retain more nutrients with gentle steaming rather than boiling.

Here’s the good news: some vegetables actually become more nutritious when cooked. Tomatoes release more lycopene when heated, making that fresh CSA tomato sauce a nutritional powerhouse. Carrots increase their beta-carotene availability through light cooking, and mushrooms boost their antioxidant levels when gently sautéed.

Local farmer Maria Chen from Riverside Organic Farm shares her approach: “I tell my CSA members to think of cooking as unlocking potential. Those beautiful heirloom tomatoes? Roast half for enhanced nutrition and slice the rest fresh for vitamin C.”

The key is matching your method to the vegetable. Water-soluble vitamins in peppers, cucumbers, and summer squash benefit from quick, minimal cooking or raw preparations, while root vegetables like beets and sweet potatoes release beneficial compounds through roasting or steaming.

Preservation Techniques That Lock in Maximum Nutrition

Fresh green vegetables being blanched in pot of boiling water
Quick blanching preserves both the vibrant color and nutritional content of fresh greens from your CSA box.

Quick Blanching and Shocking

This simple two-step technique helps you lock in those vibrant colors and essential nutrients when your CSA box arrives packed with greens and fresh vegetables. Here’s how to do it right:

Start by bringing a large pot of water to a rolling boil—no salt needed, as it can actually diminish nutrient retention. While waiting, prepare an ice bath in a large bowl. Drop your vegetables into the boiling water for just 30-90 seconds, depending on thickness. Tender greens like spinach need only 30 seconds, while heartier vegetables like green beans or broccoli benefit from 60-90 seconds.

Immediately transfer the vegetables to your ice bath using a slotted spoon or spider strainer. This shocking process halts the cooking instantly, preserving heat-sensitive vitamins like vitamin C and folate while keeping that gorgeous farm-fresh color intact. Let them sit for the same amount of time they were blanched.

Local farmer Maria Sanchez swears by this method for her weekly CSA prep. “I blanch and shock everything Sunday evening,” she shares. “It cuts my weeknight cooking time in half, and my kale still tastes garden-fresh on Friday.” Pat your vegetables completely dry before storing in airtight containers—they’ll stay crisp and ready-to-eat for up to five days, making nutritious meals effortless all week long.

Hands holding bamboo steamer basket with colorful fresh vegetables and rising steam
Low-temperature steaming preserves maximum nutrients while achieving perfectly tender vegetables.

Low-Temperature Steaming

Low-temperature steaming preserves up to 90% of water-soluble vitamins in your CSA vegetables, making it one of the gentlest cooking methods available. The key is keeping your steaming temperature between 180-200°F rather than a rolling boil, which typically reaches 212°F.

To steam at lower temperatures, bring water to a gentle simmer before adding your steamer basket. You’ll know it’s right when you see light wisps of steam rather than vigorous clouds. This approach works beautifully with delicate greens like chard and spinach, which cook in just 2-3 minutes, and heartier vegetables like broccoli and carrots that need 5-7 minutes.

Local farmer Sarah Chen from Green Valley Farm shares her favorite tip: “I add fresh herbs from my garden to the steaming water. The aromatic steam infuses subtle flavor into the vegetables without adding salt or oil.” This technique especially enhances the natural sweetness of your farm-fresh produce.

For best results, cut vegetables into uniform sizes to ensure even cooking, and avoid overcrowding your steamer basket. The vegetables should sit in a single layer with space for steam to circulate. This gentle method maintains the crisp texture and vibrant colors that make CSA produce so appealing while keeping all those valuable nutrients intact.

The Raw Integration Method

Think of raw integration as giving your CSA veggies a nutrient-packed encore. The technique is simple: finish your cooked dishes with a generous handful of fresh, raw produce right before serving. When Sarah Chen started adding raw spinach to her just-drained pasta and tossing shredded kale into hot grain bowls, she noticed her family enjoyed brighter flavors while preserving those delicate vitamin C and B vitamins that cooking destroys.

The heat from your cooked base gently wilts the raw additions without demolishing their living enzymes. Try stirring fresh arugula into warm soups, topping roasted vegetables with chopped fresh herbs and diced tomatoes, or mixing raw grated beets into hot quinoa. This method works beautifully with your weekly CSA haul since you’re using produce at peak freshness when enzyme activity is highest. The contrast in textures adds appeal too—crisp cucumber ribbons over warm lentil stew or fresh corn kernels scattered across black bean tacos create satisfying variety that makes nutritious eating genuinely enjoyable.

Smart Sautéing with Healthy Fats

Here’s a cooking secret that might surprise you: adding healthy fats to your CSA vegetables isn’t just delicious—it actually helps your body absorb more nutrients. Many vitamins in your farm-fresh greens, carrots, and tomatoes are fat-soluble, meaning they need a little fat to be properly absorbed during digestion.

When sautéing your weekly haul, choose nutrient-friendly fats like olive oil, avocado oil, or grass-fed butter. The key is temperature control: keep your heat at medium (around 325°F) to preserve both the fat’s beneficial properties and your vegetables’ delicate nutrients. High heat can destroy valuable compounds and create harmful oxidation.

Timing matters too. Add heartier vegetables like kale or chard stems first, then introduce tender items like tomatoes or zucchini later. This prevents overcooking while ensuring even coating with your healthy fat. Local farmer Maria Chen discovered this technique transformed her CSA cooking, allowing her to prepare an entire week’s worth of vegetables without nutrient loss. A light sauté with quality fat takes just 5-7 minutes and makes those farm-fresh flavors shine while maximizing nutritional benefits.

Preservation Cooking for Surplus Weeks

When your CSA box overflows with gorgeous greens and abundant vegetables, preservation becomes your best friend for maintaining those farm-fresh nutrients. Fermentation techniques actually boost nutritional value by creating beneficial probiotics while preserving vitamins. Try transforming surplus cabbage, cucumbers, or carrots into tangy sauerkraut and pickles that’ll keep for months in your fridge.

Minimal-heat dehydration is another nutrient-preserving powerhouse, especially for herbs, tomatoes, and leafy greens. Set your dehydrator below 118°F to maintain enzyme activity and vitamin content. Local farmer Maria transformed her overwhelming kale harvests into crispy snacks that her family still enjoys months later, all while retaining their deep green nutrition. These simple methods mean nothing goes to waste, and you’ll enjoy your local organic bounty year-round.

Timing Tricks That Make All the Difference

The first 24 hours after picking up your CSA box are crucial for locking in nutrients. Fresh produce begins losing vitamins the moment it’s harvested, with some vegetables losing up to 50% of their vitamin C within a week. Your game plan? Unpack immediately and sort items by perishability.

Start by identifying your most delicate greens like spinach, arugula, and lettuce. These should hit your dinner plate within the first two days. Next, plan meals around tender items like zucchini, tomatoes, and fresh herbs by midweek. Heartier vegetables like carrots, beets, and winter squash can wait until the weekend while maintaining their nutritional punch.

Sarah, a longtime CSA member from Ontario, transformed her cooking routine using this simple system. “I used to find wilted greens at the bottom of my fridge on Thursdays,” she shares. “Now I plan a big salad night on pickup day and sauté my delicate greens the next evening. Everything gets used, and my family actually enjoys more variety.”

Create a visual meal map on Sunday evenings. Match your most nutrient-dense, perishable items with your busiest cooking nights when you need maximum nutrition for minimal effort. Pair this strategy with proper food storage techniques for anything you can’t use immediately. This rhythm ensures you’re eating produce at peak freshness when nutrients, flavor, and texture are all at their absolute best.

Real CSA Member Success Story

Meet Sarah Chen, a graphic designer and mother of two who joined her local CSA three years ago. Like many new members, she initially felt overwhelmed by the weekly bounty of unfamiliar vegetables arriving at her doorstep. Her family’s diet consisted mainly of convenience foods, and she noticed her kids constantly battling low energy and frequent colds.

Sarah decided to focus on nutrient-preserving cooking techniques rather than complicated recipes. She started with simple changes: steaming broccoli instead of boiling it, which research shows retains up to 90% of vitamin C compared to just 50% with boiling. Within six weeks, her family noticed a significant difference in their energy levels.

Her breakthrough came when she developed a rotating system of seasonal recipes that required minimal prep time. During summer months, she perfected a raw zucchini ribbon salad dressed with lemon and herbs, preserving all the heat-sensitive nutrients. For fall root vegetables, she adopted quick roasting at high temperatures, creating caramelized exteriors while keeping interiors tender and nutrient-rich.

Sarah tracked her family’s health improvements over 18 months. Her children’s sick days dropped by 60%, and her own cholesterol levels improved by 25 points. She credits these changes to eating produce at peak freshness and using cooking methods that preserve nutritional value.

Her advice to new CSA members is straightforward: start with one or two techniques, practice them until they become second nature, then gradually expand your repertoire as confidence grows.

Your Week-by-Week CSA Cooking Action Plan

Managing your CSA box becomes second nature when you match preservation methods to seasonal arrivals. In spring, your box overflows with delicate greens like spinach and lettuce—steam or quick-sauté these within 24 hours to preserve their vitamin C and folate. A light steam takes just 2-3 minutes and locks in nutrients better than boiling.

Summer brings abundant tomatoes, peppers, and zucchini. This is prime blanching season. Blanch summer vegetables for 2-3 minutes, then freeze them in portions for winter meals. The quick heat treatment preserves color, texture, and nutritional content for months. Raw storage in breathable containers keeps tomatoes flavorful on your counter.

Fall root vegetables like carrots, beets, and squash shine with gentle roasting at 375°F. Their natural sugars caramelize while beta-carotene remains stable. Store unwashed roots in your crisper drawer for weeks of steady use.

Winter shares featuring hearty greens and storage crops benefit from blanching before freezing. Developing strong farm-to-table cooking skills helps you confidently adapt techniques as seasons change, ensuring nothing goes to waste while maximizing the nutritional value of every harvest.

How Homemade Kimchi Transforms Your Gut Health From the Inside Out

Posted by darrell on
0
Consumer Health and Nutrition
How Homemade Kimchi Transforms Your Gut Health From the Inside Out

Your gut contains trillions of microorganisms that influence everything from digestion to immunity, and the living bacteria in kimchi can profoundly enhance this internal ecosystem. This traditional Korean fermented food delivers powerful probiotic strains like Lactobacillus plantarum and Leuconostoc mesenteroides directly to your digestive tract, where they help crowd out harmful bacteria, strengthen your intestinal barrier, and even produce vitamins your body needs.

Unlike shelf-stable pickles or pasteurized products, genuine fermented kimchi contains billions of active cultures per serving. These beneficial microbes survive the journey through your stomach acid to colonize your intestines, supporting diverse gut flora that scientists now link to reduced inflammation, improved mental health, and stronger immune function.

The connection between fermented foods and wellness runs deeper than probiotics alone. Kimchi provides prebiotic fiber from cabbage and vegetables that feeds your existing gut bacteria, creating a synergistic effect. The fermentation process also breaks down compounds that can cause digestive discomfort while increasing nutrient bioavailability, making vitamins and minerals easier for your body to absorb.

Sourcing matters tremendously. Mass-produced kimchi often undergoes heat treatment that kills beneficial bacteria, while organic, traditionally fermented versions from local producers maintain their microbial potency. Understanding how to identify quality kimchi and incorporate it meaningfully into your daily routine can transform your digestive wellness while supporting sustainable food systems that prioritize living, nutrient-dense ingredients over industrial convenience.

What Makes Kimchi a Microbiome Powerhouse

Glass jar of fermenting kimchi with visible layers of cabbage and fermentation bubbles
Homemade kimchi fermenting in a glass jar showcases the active probiotic cultures that support gut health.

The Living Cultures Inside Every Batch

Every spoonful of traditionally fermented kimchi contains billions of beneficial bacteria working to support your digestive health. The most abundant strains include Lactobacillus plantarum, which helps break down food and produce vitamins, and Leuconostoc mesenteroides, known for creating that signature tangy flavor while strengthening your gut lining.

What makes kimchi special is the diversity of these living cultures. Unlike single-strain supplements, fermented vegetables naturally develop multiple probiotic species that work together. Lactobacillus brevis supports your immune system, while Weissella species help maintain the proper pH balance in your digestive tract. These friendly bacteria also produce short-chain fatty acids that reduce inflammation and improve nutrient absorption.

The key to getting these benefits is choosing organic, unpasteurized kimchi. Heat treatment kills the beneficial bacteria, so look for refrigerated versions from local farms or farmers’ markets. Many small-scale organic farmers are now crafting kimchi using their own cabbage and radishes, ensuring the vegetables haven’t been exposed to pesticides that could interfere with the fermentation process. When you support these local producers, you’re getting fresher, more potent probiotics while strengthening sustainable food systems in your community.

Why Organic Ingredients Make a Difference

When you choose organic ingredients for your kimchi, you’re setting the stage for a healthier fermentation process right from the start. Pesticide-free cabbages, radishes, and other organic vegetables provide a cleaner environment where beneficial bacteria can thrive without chemical interference. Research shows that pesticide residues can actually disrupt the growth of probiotic strains during fermentation, reducing the diversity of microorganisms in your final product.

Organic produce also tends to carry more naturally occurring beneficial bacteria on its surface, which contributes to a richer starter culture for fermentation. These native microbes work alongside the salt and natural sugars in your vegetables to create that complex ecosystem of probiotics that makes kimchi so powerful for gut health.

Local organic farmers often harvest vegetables at peak ripeness too, meaning higher nutrient density. When you ferment nutrient-rich ingredients, you’re creating a probiotic food that delivers both live cultures and the vitamins, minerals, and fiber your gut microbiome needs to flourish. It’s a simple choice that makes a real difference in the quality of your fermented foods.

The Science Behind Kimchi and Your Gut Microbiome

Building a Diverse Bacterial Community

When you eat kimchi, you’re introducing billions of beneficial bacteria into your digestive system, particularly strains of Lactobacillus and other lactic acid bacteria that naturally develop during fermentation. Think of it like planting a garden—these friendly microbes settle into your gut and begin to flourish, creating a thriving ecosystem that leaves less room for harmful bacteria to take hold.

This process, called competitive exclusion, is one of kimchi’s greatest gifts to your digestive health. The beneficial bacteria from kimchi actively compete for nutrients and attachment sites along your intestinal walls, effectively crowding out potentially harmful microbes. They also produce natural antimicrobial compounds that further discourage unwanted bacterial growth.

Beyond just adding good bacteria, kimchi promotes gut microbiome diversity—a key marker of digestive wellness. A diverse bacterial community is more resilient, better equipped to handle dietary changes, and more effective at supporting your immune system. The various vegetable ingredients in kimchi, especially when made with organically grown produce, also provide prebiotics—the fiber compounds that feed your beneficial bacteria and help them thrive long after you’ve enjoyed that last spicy, tangy bite.

Beyond Digestion: Whole-Body Benefits

While kimchi’s impact on digestive health is well-documented, its benefits extend far beyond your stomach. The beneficial bacteria in this fermented superfood work throughout your entire system, creating ripple effects that support overall wellness.

Your immune system gets a significant boost from regular kimchi consumption. About 70% of your immune cells actually live in your gut, so when you feed them probiotic-rich foods, you’re essentially fortifying your body’s natural defense system. The living cultures in kimchi help train these immune cells to distinguish between helpful and harmful bacteria, improving your body’s response to potential threats.

Kimchi also excels at inflammation reduction thanks to compounds found in fermented cabbage and the various organic vegetables used in traditional recipes. This anti-inflammatory action may help with everything from joint discomfort to skin health.

Another often-overlooked benefit is enhanced nutrient absorption. When your gut microbiome is balanced and healthy, your body becomes more efficient at extracting vitamins and minerals from the foods you eat. Those organic vegetables from your CSA box deliver even more nutritional value when your digestive system is functioning optimally, making kimchi a perfect companion to your farm-fresh produce.

Making Your Own Kimchi: A Farm-to-Jar Journey

Farmer holding freshly harvested organic napa cabbage in vegetable field
Organic napa cabbage grown without pesticides provides the foundation for nutrient-rich kimchi with diverse beneficial bacteria.

Sourcing Organic Vegetables for Maximum Benefits

The quality of your kimchi starts with the vegetables you choose, and there’s no better source than local CSA farms or farmers markets. When shopping for kimchi ingredients, timing matters. Fall and winter napa cabbage tends to be sweeter and crisper, making it ideal for fermentation. Look for heads that feel heavy for their size with tightly packed, vibrant green outer leaves—these indicate freshness and nutrient density.

At your local farmers market, chat with growers about their practices. Organic vegetables grown in healthy, living soil contain more beneficial microbes that contribute to your kimchi’s probiotic diversity. Don’t worry about minor blemishes or irregular shapes; these are signs of chemical-free growing methods and won’t affect fermentation quality.

For daikon radishes and carrots, choose firm specimens without soft spots. Green onions should have crisp, bright green tops. Since you’ll be eating these vegetables raw and fermented, organic really matters—you’re preserving everything, including any pesticide residues from conventional farming.

Consider buying direct from farms through CSA subscriptions. Many farmers harvest vegetables the same day you pick them up, ensuring maximum freshness and microbial vitality. This farm-to-fermentation approach gives you the best possible foundation for creating gut-healthy kimchi while supporting your local agricultural community.

Simple Steps to Start Fermenting

Making your own kimchi at home is surprisingly simple and incredibly rewarding. Start by gathering your ingredients: napa cabbage, Korean chili flakes (gochugaru), garlic, ginger, sea salt, and optional additions like radish or green onions. Choose organic produce whenever possible to avoid pesticides that might interfere with beneficial fermentation bacteria.

Begin by salting your quartered cabbage for about two hours to draw out moisture and create the perfect environment for fermentation. Rinse thoroughly, then prepare your spice paste by mixing gochugaru, minced garlic, grated ginger, and a bit of salt. Massage this paste between each cabbage leaf, pack everything tightly into a clean jar, and press down to release air bubbles.

Leave your jar at room temperature for three to five days, pressing down daily to keep vegetables submerged in their brine. You’ll notice bubbling as fermentation begins, which means those beneficial microbes are hard at work. Once it reaches your preferred tanginess, move it to the refrigerator to slow fermentation.

Common troubleshooting tip: If your kimchi seems dry, simply add a saltwater brine to keep everything covered. This prevents mold and ensures even fermentation throughout.

Creating the Right Environment for Good Bacteria

Creating the perfect home for beneficial bacteria during kimchi fermentation is simpler than you might think. Start with clean, organic vegetables and let them ferment at room temperature, ideally between 65-75°F. During the first 3-5 days, lactobacillus bacteria naturally present on the vegetables begin converting sugars into lactic acid, which creates an acidic environment that keeps harmful bacteria away. This is your fermentation sweet spot. Once you see bubbles forming and smell that signature tangy aroma, move your kimchi to the refrigerator to slow the process. The cold preserves those probiotic powerhouses while preventing over-fermentation. Remember, you’re working with nature here, not against it. Using organically grown cabbage and ingredients means you’re starting with produce that hasn’t been treated with chemicals that might interfere with good bacteria growth. Think of it as creating a thriving neighborhood where beneficial microbes can flourish naturally.

Incorporating Kimchi Into Your Daily Routine

How Much Kimchi Does Your Gut Need

Good news for kimchi lovers—you don’t need massive amounts to reap gut health benefits! Most nutritionists recommend starting with 1-2 tablespoons per day, gradually increasing to about half a cup daily as your digestive system adjusts to the probiotics. This modest serving delivers billions of beneficial bacteria without overwhelming your gut or loading up on sodium.

For beginners, try incorporating kimchi into meals 3-4 times weekly. Listen to your body—some people thrive on daily servings, while others prefer every other day. The key is consistency rather than quantity. Organic, locally fermented kimchi from your CSA or farmers market offers the most active cultures, as these artisanal batches haven’t been pasteurized like many store-bought versions. Sarah Chen, an organic farmer in Oregon, notes that her customers report the best results when they make kimchi part of their regular routine, pairing it with seasonal vegetables for maximum digestive support. Remember, fermented foods work best alongside a diverse, plant-rich diet rather than as a standalone solution.

Bowl of kimchi fried rice with fried egg photographed from above
Incorporating kimchi into everyday meals like fried rice makes it easy to enjoy the probiotic benefits daily.

Easy Ways to Enjoy Kimchi Beyond the Jar

Getting kimchi into your daily routine doesn’t require fancy recipes or culinary expertise. Start simple by adding a forkful to your morning scrambled eggs or omelet for a probiotic breakfast boost with a flavorful kick. Layer it into grilled cheese sandwiches or quesadillas, where the melting cheese balances kimchi’s tangy bite perfectly.

For lunch, toss chopped kimchi into grain bowls with quinoa or brown rice, roasted vegetables, and a protein of your choice. The fermented cabbage adds complexity without extra effort. Mix it into tuna or chicken salad for sandwiches that pack extra nutrition and zing.

Dinner becomes more interesting when you top baked potatoes, burgers, or tacos with kimchi instead of traditional condiments. Even pizza lovers can experiment by sprinkling it over slices fresh from the oven.

If you’re feeling adventurous, blend kimchi into dips like hummus or cream cheese spreads for crackers and crudités. The beauty of kimchi lies in its versatility—start with small amounts and adjust to your taste preferences. Remember, you’re not just adding flavor; you’re feeding your gut microbiome with every delicious bite, supporting your digestive health through simple, sustainable food choices.

Farmer Spotlight: Growing Kimchi Ingredients the Organic Way

Meet Sarah Chen, a third-generation farmer who’s transformed her family’s 15-acre farm into a thriving CSA operation specializing in Korean vegetables for kimchi. Her journey into organic farming began when she noticed that her grandmother’s homemade kimchi tasted different depending on where the vegetables came from.

“I realized that soil health directly impacts the quality of fermentation,” Sarah explains while walking through rows of vibrant napa cabbage. “When vegetables are grown in nutrient-rich, living soil, they develop stronger cell structures and higher levels of natural beneficial bacteria, which creates better conditions for lacto-fermentation.”

Sarah practices a careful four-year crop rotation system, alternating her kimchi vegetables with nitrogen-fixing cover crops like clover and vetch. This approach naturally enriches the soil without synthetic fertilizers. Between growing seasons, she adds compost made from vegetable scraps and aged manure, creating a thriving ecosystem of microorganisms that mirror the beneficial bacteria found in fermented foods.

Her farm grows traditional kimchi staples including napa cabbage, Korean radish, green onions, and garlic. She’s discovered that organic methods produce vegetables with more complex flavor profiles. “The slower growth rate in organic farming allows vegetables to develop deeper flavors and more concentrated nutrients,” she notes. “My CSA members tell me the difference is noticeable in their finished kimchi.”

One key insight Sarah shares is timing the harvest. “We pick vegetables at peak maturity in cooler weather, which gives them a natural crispness that holds up beautifully during fermentation.” She also avoids washing vegetables too aggressively before delivery, preserving some of the beneficial soil microbes that can contribute to the fermentation process.

For aspiring kimchi gardeners, Sarah recommends starting small with napa cabbage and daikon radish. “These crops are forgiving and respond well to organic methods. Focus on building healthy soil first, and the vegetables will take care of themselves.”

Other Fermented Foods That Support Gut Health

While kimchi deserves its spotlight in the fermented foods family, creating a thriving gut microbiome is all about diversity. Think of your digestive system as a garden—the more varied the plantings, the healthier the ecosystem. Each fermented food brings its own unique community of beneficial bacteria to the table.

Sauerkraut, kimchi’s European cousin, offers Lactobacillus plantarum and other strains that complement those found in kimchi. Made simply from cabbage and salt, it’s wonderfully accessible for home fermenters and pairs beautifully with local organic cabbage from your CSA box.

Kombucha introduces beneficial yeasts alongside bacteria, creating a fizzy probiotic drink that supports gut health from a different angle. When sourced from local organic producers, you’re getting living cultures without the industrial processing that can diminish beneficial microbes.

Kefir, whether made from dairy or water, provides an entirely different spectrum of probiotic strains—sometimes up to 60 varieties in a single serving. This fermented beverage has been shown to support digestive health and immune function.

The beauty of exploring various fermented foods for gut health is that each one contributes unique bacterial strains, creating a more resilient and diverse microbiome. Rotate these foods throughout your week, sourcing organic options when possible to avoid pesticides that can harm beneficial gut bacteria. Your digestive system will thank you for the variety.

The journey to better gut health through kimchi beautifully illustrates how personal wellness connects to sustainable food systems. By choosing organic, locally fermented foods, you’re not just nourishing your microbiome with billions of beneficial bacteria—you’re supporting farmers who steward the land responsibly and keep harmful chemicals out of your food chain.

Starting your kimchi journey doesn’t require a complete lifestyle overhaul. Begin by visiting your local farmers market to find fresh, organic cabbage and vegetables from nearby growers. Many CSA programs now include fermented foods in their seasonal shares, making it easier than ever to access quality kimchi while directly supporting sustainable agriculture. If you’re feeling adventurous, try making a small batch at home using locally sourced produce.

Remember, every jar of organic kimchi you choose creates a ripple effect. You’re investing in your digestive health, reducing your environmental footprint, and helping local farmers thrive. This simple act of mindful eating transforms you from a passive consumer into an active participant in building a more sustainable food system. Your gut—and your community—will thank you for it.

Your Seeds Are Dying (Here’s How to Keep Them Alive for Years)

Posted by darrell on
0
Seed Preservation and Biodiversity
Your Seeds Are Dying (Here’s How to Keep Them Alive for Years)

Test your seeds before planting season by placing ten seeds between damp paper towels in a sealed plastic bag, then counting how many sprout within 7-14 days. If fewer than five germinate, your seed stock has dropped below 50% viability and needs replacement. This simple germination test costs nothing and saves you from disappointing harvests.

Store seeds in airtight glass jars with silica gel packets in a cool, dark location where temperatures stay between 32-41°F. Every 10-degree increase in storage temperature cuts seed life in half, while excess moisture triggers premature germination or fungal growth that destroys entire seed collections.

Prioritize fresh seeds for short-lived varieties like onions, parsnips, and lettuce, which lose viability within 1-2 years even under perfect conditions. Meanwhile, tomatoes, beans, and squash maintain strong germination rates for 4-6 years when properly stored, making them ideal candidates for long-term seed saving.

Label every container with variety name and harvest date, then rotate your seed inventory using the oldest stock first. This prevents the heartbreak of discovering your carefully saved heirloom seeds have silently failed after years in storage.

Understanding seed viability transforms your gardening from guesswork into precision. The difference between 90% germination and 40% germination means the difference between abundant harvests and patchy, disappointing rows. When small-scale farmer Maria Rodriguez tested her three-year-old pepper seeds before spring planting, she discovered only 30% viability and avoided wasting precious garden space, instead sourcing fresh seeds that delivered her best harvest yet.

What Seed Viability Actually Means (And Why It’s Not Just About Age)

Close-up of various vegetable seeds on wooden surface showing different conditions
Different seed varieties exhibit varying lifespans and viability characteristics depending on their type and storage conditions.

The Hidden Factor: Genetic Integrity

When you plant tomato seeds expecting juicy heirlooms but get something entirely different, you’ve encountered a genetic integrity issue. Think of genetic integrity as a seed’s biological blueprint—it determines whether your Cherokee Purple tomatoes will actually produce those distinctive dark fruits or if years of cross-pollination have altered their DNA.

For seed savers and organic farmers, maintaining genetic integrity isn’t just about predictability. It’s about preserving heirloom varieties that have been carefully cultivated over generations. These heritage seeds carry unique traits like drought resistance, specific flavor profiles, and regional adaptations that commercial hybrids simply can’t replicate.

The challenge comes from contamination—when different varieties cross-pollinate or seeds get mixed during storage. At our CSA farm, we learned this lesson when our Brandywine tomatoes started showing hybrid characteristics after planting them too close to other varieties. Now we maintain isolation distances and practice careful seed selection.

To protect genetic integrity, focus on proper plant spacing during the growing season, hand-pollinate when necessary, and source seeds from reputable suppliers who follow strict protocols. Keep detailed records of seed sources and growing conditions. This attention to detail ensures that when you save seeds from this year’s harvest, next season’s plants will be true to their heritage—producing the same reliable characteristics that made you fall in love with that variety in the first place.

The Three Silent Killers of Seed Viability

Mason jars containing seeds showing effects of different storage conditions
Environmental factors like moisture and temperature dramatically affect how long seeds remain viable in storage.

Moisture: The Fastest Way to Lose Your Seeds

Moisture is perhaps the most critical factor affecting seed viability, and it works against you faster than you might think. When seeds absorb moisture from humid air, they interpret this as a signal to start germinating. This premature awakening depletes their stored energy reserves, leaving them unable to sprout when you actually want them to. Even worse, excess moisture creates the perfect environment for mold and fungal growth, which can destroy an entire seed collection in just weeks.

The sweet spot for most vegetable and flower seeds is maintaining moisture content between 4-8%. At this level, seeds remain dormant and their metabolic processes stay in hibernation mode. Think of it like this: for every 1% increase in seed moisture content above 8%, you can cut storage life in half. That’s a dramatic difference that can mean the gap between five-year viability and less than one year.

Different seed types have varying moisture tolerances. Beans and peas can handle slightly higher moisture levels (around 8-9%), while tiny seeds like lettuce and carrots need to stay closer to 5-6%. One experienced organic farmer shared that after switching to silica gel packets in his storage containers, his germination rates jumped from 60% to over 90% the following season. Consider investing in a simple moisture meter to monitor your storage conditions, and always ensure seeds are completely dry before sealing them away.

Temperature Swings That Ruin Everything

Think of seeds as living time capsules—they’re just waiting for the right moment to burst into life. But here’s the catch: temperature swings are their worst enemy. Every 10°F increase in storage temperature roughly halves seed viability, speeding up the aging process dramatically. When seeds get warm, their metabolism kicks into overdrive, burning through precious energy reserves they need for germination.

The sweet spot for most seeds? A consistent 32-41°F, which you can achieve in a standard refrigerator. This cool environment puts seeds into a gentle dormancy, slowing down deterioration without freezing and damaging delicate cell structures. Freezers (0°F or below) work wonderfully for long-term storage of properly dried seeds, keeping them viable for years or even decades.

The real killer isn’t just heat—it’s inconsistency. Moving seeds from hot to cold and back again creates condensation, introducing moisture that triggers premature germination or mold. Local farmer Maria Torres learned this the hard way when her garage-stored heirloom tomato seeds failed after one summer. Now she keeps everything in a dedicated mini-fridge, and her germination rates have soared to 95 percent, even with three-year-old varieties. Consistency truly makes all the difference.

Why Oxygen Matters More Than You Think

You might not think much about the air around your seeds, but oxygen plays a surprisingly big role in their lifespan. When seeds breathe—yes, even dormant seeds respire slightly—they interact with oxygen in a process called oxidation. Think of it like a very slow burn that gradually breaks down the seed’s internal structures, particularly the fats and proteins essential for germination.

Over time, this oxidation damages cell membranes and genetic material, making it harder for seeds to sprout successfully. The good news? Reducing oxygen exposure dramatically slows this aging process. Many experienced seed savers use vacuum-sealed containers or oxygen absorber packets to create low-oxygen environments, effectively putting their seeds into deeper dormancy. Combined with cool, dry storage conditions, limiting oxygen exposure can extend seed viability by years—sometimes even decades. Understanding this simple chemistry empowers you to preserve your heirloom varieties and maintain strong germination rates season after season.

Simple Tests to Check If Your Seeds Are Still Good

Overhead view of hands conducting paper towel seed germination test
The simple paper towel germination test allows gardeners to accurately assess seed viability before planting season.

The Paper Towel Test That Never Fails

Testing your seeds at home is easier than you might think, and all you need are supplies from your kitchen drawer. Here’s how to conduct a reliable germination test that’ll tell you exactly which seed packets are worth planting this season.

Start by gathering paper towels, a dinner plate, and a resealable plastic bag. Count out ten seeds from the packet you’re testing—this number makes calculating percentages simple. Dampen a paper towel until it’s moist but not dripping, then lay it flat on your plate. Arrange your seeds in a single layer on one half of the towel, keeping them spaced apart. Fold the other half over to cover them, then slide everything into the plastic bag. This creates a mini greenhouse that maintains consistent moisture.

Place your setup somewhere warm, around 70-75°F, away from direct sunlight. Check daily to ensure the paper towel stays damp, adding water if needed. Most vegetable seeds will sprout within 5-10 days, though some varieties take longer.

Now comes the exciting part—counting your results. After the expected germination period passes, count how many seeds sprouted healthy roots or shoots. If seven out of ten germinated, that’s 70% viability. Anything above 80% is excellent for planting, 50-80% means you’ll need to sow more densely, and below 50% suggests it’s time to order fresh seeds.

One organic farmer I know tests all her saved tomato seeds this way each February, ensuring she never wastes precious garden space on duds.

Quick Visual Checks Before You Plant

Before investing time in formal germination tests, a quick visual inspection can save you from planting duds. Healthy seeds typically have vibrant, uniform coloring and feel firm to the touch. Dead or compromised seeds often reveal themselves through telltale signs that even beginners can spot.

Start by examining seed color. Discolored, faded, or unusually dark seeds may indicate aging or moisture damage. Tomato and pepper seeds, for example, should maintain a creamy-white to pale yellow appearance. If they’ve turned brown or gray, their viability is questionable.

Next, check for physical damage. Cracked seed coats, hollow or shriveled shells, and insect damage are red flags. Gently press larger seeds between your fingers—viable seeds feel solid and plump, while dead ones often feel papery or collapse easily.

Watch for mold or fuzzy growth, which signals excessive moisture exposure and likely renders seeds unusable. Any musty odor is another warning sign of deterioration.

Finally, perform the float test as a quick preliminary check. Place seeds in water—those that sink are generally viable, while floaters are often hollow or damaged. This simple visual screening helps you prioritize which seeds deserve proper germination testing and which belong in your compost pile instead.

Storage Protocols That Actually Work

The Mason Jar Method for Home Gardeners

You don’t need fancy equipment to preserve seed viability at home. The mason jar method remains one of the most effective seed storage systems for backyard gardeners and small-scale seed savers.

Start with clean, dry glass jars with tight-fitting lids. Wide-mouth mason jars work perfectly because they’re easy to access and create an airtight seal. Before storing seeds, ensure they’re completely dry by leaving them at room temperature for several days after harvest.

Drop one or two food-grade silica gel packets into each jar to control moisture levels. These inexpensive packets absorb excess humidity that can trigger premature germination or mold growth. You can purchase them at craft stores or reuse packets from vitamin bottles and packaged goods.

Label each jar clearly with the seed variety, harvest date, and germination rate if you’ve tested it. This simple step prevents confusion during planting season and helps you track which seeds need replacing.

Store your jars in a cool, dark location like a basement or closet. Consistent temperatures between 32-41°F work best, though a cool pantry will suffice for many varieties. This straightforward approach has helped countless home gardeners maintain viable seeds for years while spending minimal money.

Organized mason jar seed storage system with labels on wooden shelving
A well-organized seed storage system using mason jars and desiccant packets can maintain seed viability for years.

Small Farm Seed Banking Basics

Managing a diverse seed collection for your CSA farm requires thoughtful organization from the start. Think of your seed bank as a living library where each variety tells a story and deserves proper cataloging.

Start by designating a dedicated storage space with consistent cool temperatures between 32-41°F and humidity below 40%. Label everything clearly with variety name, harvest date, and expected viability period. Simple spreadsheet tracking works wonders for inventory management, noting quantities, germination test results, and planned grow-out schedules.

Group seeds by family and viability requirements. Short-lived seeds like parsnips and onions need annual attention, while tomatoes and brassicas can last five years or more under proper conditions. Use airtight containers with desiccant packets, checking moisture levels quarterly with a simple humidity meter.

Sarah Chen, who runs Green Valley Farm in Vermont, transformed her seed saving operation by implementing monthly inventory checks and a color-coded labeling system. “I stopped losing varieties to poor record-keeping once I committed to updating my spreadsheet after every seed cleaning session,” she shares. Her farm now maintains 150 heirloom varieties with 90% germination rates.

Schedule annual germination tests for your core production varieties, typically conducting them 6-8 weeks before planting season. This proactive approach ensures you’re never caught off-guard by declining viability when it’s time to start seedlings.

When to Use the Freezer (And When Not To)

For truly long-term storage beyond five years, freezing can be a game-changer for certain seeds. Before freezing, ensure seeds are properly dried to 6-8% moisture content, as any residual moisture can form ice crystals that damage cells. Place dried seeds in airtight, moisture-proof containers like glass jars with rubber seals or vacuum-sealed bags.

Seeds that thrive in freezer storage include tomatoes, peppers, lettuce, and most vegetables from the brassica family. These can maintain viability for 10-15 years when frozen. However, some seeds don’t appreciate the deep freeze. Onions, parsnips, and certain short-lived seeds may not show significant benefit and are better stored in cool, dry conditions for shorter periods.

One successful seed saver from a Vermont CSA shared how freezing heirloom tomato seeds helped preserve rare varieties for over a decade, maintaining 80% germination rates. When you’re ready to plant, allow frozen seeds to gradually return to room temperature before opening containers. This prevents condensation that could compromise your carefully preserved genetics.

How Long Different Seeds Actually Last

Understanding how long your seeds remain viable helps you plan purchases, avoid disappointing germination rates, and save money by not replacing seeds unnecessarily. Seed longevity varies dramatically depending on the plant species, so let’s break it down into practical categories.

Short-lived seeds (1-2 years) require the most attention in your storage system. Onions, parsnips, and parsley top this list, along with salsify and scorzonera. These seeds lose viability quickly even under ideal conditions. Sarah Martinez, who runs a successful CSA operation in Vermont, learned this lesson the hard way when her carefully stored parsnip seeds failed to germinate after just 18 months. Now she purchases these varieties fresh each season and marks them clearly in her seed inventory.

Medium-lived seeds (3-5 years) include many garden favorites that form the backbone of most organic operations. Carrots, beans, peas, lettuce, spinach, and most brassicas like broccoli, cabbage, and kale fall into this category. Tomatoes, peppers, eggplants, and squash also maintain good germination rates for three to five years when stored properly. These varieties offer flexibility for seed saving and purchasing in bulk during sales without immediate pressure to use everything.

Long-lived seeds (5+ years) are the champions of seed storage, sometimes remaining viable for a decade or more. Cucumbers, melons, and beets lead this category, with cucumber seeds documented to germinate successfully after ten years under optimal conditions. Radishes and turnips also demonstrate impressive longevity. These seeds provide excellent opportunities for building a diverse seed bank without constant replenishment.

Remember that these timelines assume proper storage conditions with cool temperatures, low humidity, and darkness. Seeds stored in hot garages or damp basements may fail much sooner. When working with older seeds, conduct germination tests before committing them to prime growing space, ensuring your time and soil investments yield the harvests you’re counting on.

Protecting Genetic Integrity: Beyond Just Staying Alive

Keeping your seeds viable is only half the battle—protecting their genetic integrity ensures future generations inherit the true characteristics of your beloved heirloom varieties. Cross-contamination can happen more easily than you might think, turning your prized Cherokee Purple tomatoes into something unrecognizable over a few seasons.

Understanding isolation distances is crucial for maintaining genetic purity. Different plant families require varying amounts of space to prevent unwanted cross-pollination. Squash and cucumbers, notorious wanderers in the plant world, need at least half a mile between varieties if you want pure seed. Tomatoes, being mostly self-pollinating, are more forgiving at just 10-20 feet. Corn, however, demands serious respect—plan for at least 400 feet between different varieties, or stagger planting times by three weeks.

Sarah Martinez, a small-scale organic farmer in Ontario, learned this lesson when her carefully preserved Glass Gem corn crossed with a neighbor’s sweet corn. “Now I use temporal isolation,” she explains. “I plant my seed-saving varieties early and my eating varieties late. It’s simple but effective.”

Harvesting timing matters too. Wait until seeds are fully mature on the plant—tomatoes should be overripe, beans dried and rattling in their pods, and lettuce showing fluffy seed heads. Premature harvesting often results in immature seeds that won’t germinate reliably.

Storage organization prevents accidental mixing. Label everything clearly with variety name and harvest date. Store different varieties in separate, clearly marked containers. Consider using a simple cataloging system—even a notebook works wonders for tracking your collection.

These careful seed saving practices preserve the agricultural heritage entrusted to us, ensuring future gardeners can enjoy these time-tested varieties exactly as nature intended.

Farmer Success Story: How One CSA Maintains a 95% Germination Rate

When Maria Santos started Green Valley CSA five years ago, she faced a frustrating problem that nearly derailed her first season. Despite purchasing quality organic seeds, her germination rates hovered around 65%, leaving gaps in her planting beds and disappointed CSA members waiting for their weekly boxes.

“I was storing seeds in my barn, thinking the cool temperature was enough,” Maria recalls. “I didn’t realize that humidity was wreaking havoc on viability, especially during our wet springs.”

The turning point came when Maria invested in a simple seed storage system and committed to regular testing protocols. She purchased affordable humidity-controlled containers and a small refrigerator dedicated solely to seed storage. Every January, three months before planting season, she conducts germination tests on a sample from each seed variety.

“I lay out ten seeds from each packet on damp paper towels, seal them in plastic bags, and wait seven to ten days,” she explains. “It takes maybe two hours total, but that small time investment has transformed my operation.”

Maria also maintains detailed records in a simple notebook, tracking which seed suppliers consistently deliver high viability and which varieties perform best in her climate. When a batch tests below 85% germination, she either purchases fresh seeds or adjusts her seeding density to compensate.

The results speak for themselves. Green Valley CSA now maintains a 95% germination rate across all crops, which means predictable harvests and happier members. Maria’s seed budget has actually decreased because she wastes less on failed plantings and can confidently save seeds from her best performers.

“The protocols seemed intimidating at first,” Maria admits, “but they’ve become second nature. Now I can’t imagine farming any other way. When you know your seeds are viable, you can plan with confidence and focus your energy on growing great food instead of troubleshooting poor germination.”

Your Seed Viability Action Plan

Ready to preserve your seeds with confidence? Here’s your practical roadmap to get started, whether you’re launching a new collection or upgrading your current setup.

Start with a viability baseline. Test a sample from each seed variety you currently have using the simple paper towel method. This takes just 7-14 days and reveals exactly where you stand. Mark your calendar to complete this assessment before spring planting season, so you’ll know which varieties need replacing.

Next, organize your storage environment. Within the first month, invest in airtight containers and food-grade desiccant packets. Transform a cool, dark closet or basement corner into your seed sanctuary. A small investment now prevents years of disappointment later.

Create your record-keeping system by month two. Whether you prefer a simple notebook or spreadsheet, document collection dates, germination test results, and storage conditions for each variety. One CSA farmer in Vermont credits her detailed records with identifying storage problems early, saving an entire season’s seed collection worth over $800.

For seasonal timing, test winter-stored seeds each February and March. Collect and dry seeds during your harvest months, typically July through October. Run follow-up germination tests in early autumn to verify your drying and storage methods worked before winter storage begins.

Priority actions include replacing seeds showing below 50 percent germination rates immediately, upgrading any seeds stored in paper envelopes to moisture-proof containers, and establishing a rotation schedule to use older seeds first. Remember, even small steps toward better seed viability multiply into healthier gardens and more resilient food systems for your community.

Taking control of your seed viability isn’t just a gardening skill—it’s an act of empowerment that connects you directly to food security and agricultural heritage. By implementing the simple testing and storage protocols we’ve covered, you’re joining a global community of seed savers who understand that viable seeds mean resilient gardens, thriving farms, and preserved biodiversity.

The beauty of these practices lies in their accessibility. You don’t need expensive equipment or specialized training to test germination rates or create proper storage conditions. A few basic supplies, attention to detail, and commitment to climate-resilient seed storage can transform your seed-saving efforts from hopeful guesswork into reliable science.

Consider Sarah, a small-scale farmer in Ontario, who increased her heirloom tomato germination from 40% to 95% simply by controlling moisture and temperature in her storage area. Her success demonstrates what’s possible when we apply these straightforward principles.

Now it’s your turn. Start small—test a handful of your oldest seeds this week. Assess your current storage setup and make one improvement. Label and date your seed packets. Each small action builds toward larger goals: reducing dependence on commercial seed sources, preserving rare varieties, and ensuring your garden’s future productivity.

Your seeds carry stories, genetics, and potential harvests waiting to unfold. Give them the care they deserve, and they’ll reward you season after season.

Why Your Local Food Distribution Center Needs Food Safety Training (Before Someone Gets Sick)

Posted by darrell on
0
Local Food Systems and Distribution
Why Your Local Food Distribution Center Needs Food Safety Training (Before Someone Gets Sick)

Train your staff using a documented curriculum that covers proper produce handling, temperature control, and cross-contamination prevention—these three elements prevent 80% of foodborne illness outbreaks in small-scale distribution settings. Implement daily temperature logs and regular hand-washing protocols as non-negotiable practices that protect both your customers and your farm’s reputation.

Transform food safety from a compliance burden into a competitive advantage for your CSA operations by creating simple, visual training materials your team can reference during busy harvest seasons. Local food hubs that prioritize safety training see 40% fewer customer complaints and build stronger community trust.

Start with the Food Safety Modernization Act’s Produce Safety Rule requirements, then customize training to reflect your specific crops and distribution methods. Schedule monthly refresher sessions lasting just 15 minutes to reinforce critical practices without disrupting workflow. Document everything—training dates, topics covered, and staff signatures—because this paper trail demonstrates your commitment to safety during inspections and builds confidence with wholesale buyers.

Your distribution center becomes the bridge between farm freshness and family tables. Every team member who understands proper cooling procedures, sanitation standards, and allergen awareness becomes a guardian of public health and your farm’s legacy.

The Real Risks Hiding in Distribution Centers

Temperature Fluctuations That Spoil More Than Just Lettuce

When fresh produce leaves your farm destined for eager customers, maintaining the right temperature becomes absolutely critical. Even a few degrees difference can accelerate spoilage, diminish nutritional value, and create food safety risks. That’s where proper cold chain management training comes into play for distribution center staff.

Temperature abuse happens more often than you’d think. Maybe a cooler door gets left open during loading, or produce sits on a loading dock longer than planned. Within hours, leafy greens can wilt, berries develop mold, and bacterial growth accelerates on items like pre-cut vegetables. Training your team to monitor and document temperatures throughout storage and transit protects both food quality and consumer health.

Consider the story of Green Valley Farm Cooperative, which reduced spoilage by 40 percent after implementing strict temperature monitoring protocols and staff training. Workers learned to use thermometers correctly, recognize warning signs of temperature fluctuations, and respond quickly to equipment issues. This investment not only saved produce but also strengthened customer trust in their local food system.

Distribution center worker monitoring refrigeration temperature with clipboard in hand
Proper temperature monitoring is essential for maintaining the cold chain and preventing spoilage in distribution centers.

When Good Produce Goes Bad: Cross-Contamination Points

Cross-contamination in distribution centers happens more often than you might think, and understanding these risk points helps keep your beautiful organic produce safe from farm to table. Let’s explore where things can go wrong so you can prevent them.

Equipment surfaces are common culprits. Pallet jacks, conveyor belts, and sorting tables that handle multiple product types throughout the day can transfer harmful bacteria between items. Think about it: the same forklift moving raw root vegetables with soil residue might later transport ready-to-eat salad greens.

Personnel practices create another vulnerability. When team members move between different temperature zones or handle various products without proper handwashing or glove changes, they unknowingly become vectors for contamination. Something as simple as touching a phone or adjusting clothing can introduce pathogens.

Storage areas present challenges too. Raw products stored above ready-to-eat items can drip condensation or debris downward. Even well-intentioned practices like using the same cleaning cloths across different zones can spread contamination rather than prevent it.

The good news? Many small-scale distribution centers have successfully tackled these issues through color-coded equipment systems, clearly defined workflow patterns, and consistent training reinforcement. By identifying your specific cross-contamination points, you’re taking an essential step toward protecting the quality and safety of the local, organic produce your community depends on.

What Effective Food Safety Training Actually Covers

Personal Hygiene Standards That Actually Matter

Personal hygiene forms your first line of defense against food contamination in distribution centers. Let’s focus on the practices that truly make a difference in keeping your locally sourced produce safe.

Handwashing is non-negotiable. Team members should wash hands thoroughly for at least 20 seconds before starting work, after bathroom breaks, after handling packaging materials, and before touching fresh produce. Provide accessible handwashing stations with soap, warm water, and single-use towels near all work areas.

Protective clothing matters more than you might think. Clean gloves, hairnets, and smocks create barriers between workers and food. Change gloves between tasks, especially when switching from handling packaging to touching produce. One farm cooperative we know saw contamination incidents drop by 80% after implementing daily fresh uniforms.

Illness policies protect everyone. Workers experiencing symptoms like vomiting, diarrhea, or fever should stay home until symptom-free for 24 hours. This can feel challenging for small operations, but having backup staff or flexible scheduling prevents one sick employee from compromising entire shipments of organic vegetables destined for your community.

Close-up of hands in nitrile gloves being washed with soap and water
Proper handwashing technique is a fundamental food safety practice that prevents contamination at every stage of distribution.

Proper Handling and Storage Techniques

Start with a solid receiving protocol. When deliveries arrive, check temperatures immediately using calibrated thermometers—cold items should stay at 41°F or below, frozen at 0°F. Inspect packaging for damage, leaks, or unusual odors before accepting shipments. This first checkpoint prevents contaminated products from ever entering your facility.

Storage requires strategic organization. Practice FIFO (First In, First Out) by dating all items and placing newer stock behind older products. Keep raw and ready-to-eat foods separate, storing raw items on lower shelves to prevent cross-contamination through drips. Maintain proper spacing between boxes for air circulation, which helps preserve freshness and prevents mold growth.

Temperature monitoring is your daily safeguard. Record cooler and freezer readings twice daily, and address any deviations immediately. Clean storage areas weekly using food-safe sanitizers, and keep high-risk allergens clearly labeled and isolated.

When preparing orders for distribution, use clean, sanitized containers and practice proper hand hygiene. One small-scale CSA operator in Vermont credits their perfect safety record to these simple practices combined with regular team training—proving that consistent attention to basics protects both customers and your farm’s reputation.

Cleaning and Sanitation Protocols

Establishing robust cleaning and sanitation protocols protects the quality of your fresh, organic produce from field to customer. Start by creating daily cleaning schedules for all food-contact surfaces, including sorting tables, bins, and refrigeration units. Use food-safe sanitizers approved for organic handling, and train staff on proper dilution ratios to ensure effectiveness without leaving harmful residues.

Temperature-controlled storage areas deserve special attention. Schedule deep cleaning between shipments, paying close attention to corners, drains, and door seals where moisture and debris accumulate. Keep detailed logs of cleaning activities, including dates, times, and staff initials, which helps maintain accountability and demonstrates compliance during inspections.

Implement a color-coded system for cleaning tools to prevent cross-contamination between raw and ready-to-eat produce areas. Remember, a Vermont farm cooperative reduced product loss by 40% after implementing structured sanitation training. Your commitment to cleanliness directly supports local farmers by ensuring their carefully grown crops reach customers in peak condition, maintaining the trust that makes community-supported agriculture thrive.

Building a Food Safety Culture in Small-Scale Operations

Distribution center workers participating in food safety training session
Regular food safety training sessions help build a culture of safety awareness among all distribution center staff.

Making Training Accessible for Seasonal Staff

Seasonal workers are the backbone of many distribution operations during peak harvest times, yet training them efficiently can feel overwhelming. The good news? You can create streamlined onboarding that sticks without eating up precious time.

Start with a concise, visual training manual that covers essential food safety basics: proper handwashing, temperature control, cross-contamination prevention, and allergen awareness. Consider creating a one-page checklist format that new workers can reference throughout their shifts. Many successful CSA managers have found that 30-minute hands-on training sessions work better than lengthy lectures.

Buddy systems work wonderfully too. Pair each new seasonal worker with an experienced team member who can demonstrate proper protocols in real-time. This approach reinforces good habits immediately and creates a supportive learning environment.

Digital tools can help tremendously. Short video tutorials that workers can watch on their phones before their first shift ensure everyone starts with baseline knowledge. One Vermont food hub manager shared how brief daily safety huddles transformed their seasonal crew’s practices, reducing handling errors by 60 percent within one harvest season.

Remember, keeping training positive and practical helps temporary staff feel valued and invested in maintaining your operation’s food safety standards.

Low-Cost Tools That Make Compliance Easier

Keeping your distribution center compliant doesn’t require expensive software or consultants. Simple spreadsheet templates can help you track temperatures, cleaning schedules, and employee training records effectively. Many state agriculture departments offer free downloadable checklists specifically designed for small-scale food operations, making it easier to stay organized without breaking the budget.

Digital thermometers with data logging capabilities cost under $50 and provide reliable temperature monitoring for refrigerated storage areas. Free mobile apps like FoodKeeper help staff understand proper storage times and handling procedures right from their phones. Consider creating laminated quick-reference guides for handwashing stations and loading dock areas, which serve as constant visual reminders for your team.

A basic three-ring binder system works wonderfully for maintaining training certificates, supplier approvals, and inspection records. Color-coded sections make information retrieval quick during audits. Several successful CSA operations have shared how they use simple photo documentation on tablets to record daily cleaning tasks and receive conditions, creating accountability without complex systems.

Weekly team huddles, combined with these straightforward tools, build a culture where food safety becomes second nature rather than an overwhelming compliance burden for your operation.

Compliance Requirements You Can’t Ignore

FSMA Rules for Small and Mid-Sized Distributors

The Food Safety Modernization Act includes specific provisions that affect distribution centers of all sizes, though requirements vary based on your operation’s scale. The Preventive Controls for Human Food rule applies to most facilities that manufacture, process, pack, or hold food for consumption in the United States. This means your local food hub or CSA distribution point likely falls under FSMA oversight.

Here’s the good news for smaller operations: exemptions exist for qualified facilities. If your operation averages less than $1 million in annual food sales during the previous three-year period, you may qualify for modified requirements. Additionally, farms that distribute only their own raw agricultural commodities typically receive different treatment than multi-farm aggregators.

Even with exemptions, basic food safety practices remain essential. Many successful small distribution centers have found that implementing simplified hazard analysis and preventive control plans actually protects their business while building customer trust. One Vermont food hub manager shared how their straightforward training program helped them navigate inspections smoothly while maintaining their commitment to supporting local growers.

The key is understanding where your operation fits within FSMA’s framework. Whether you’re exempt or fully covered, documentation of your food safety practices demonstrates your dedication to protecting the community you serve while keeping locally grown food accessible and safe.

Documentation That Protects Your Operation

Keeping solid records isn’t just paperwork—it’s your safety net. When you document food safety training sessions, temperature logs, and cleaning schedules, you’re creating a trail that proves your commitment to safe handling practices. Think of these records as your operation’s insurance policy.

Start with training attendance sheets that note dates, topics covered, and employee signatures. Keep temperature monitoring logs for coolers and transport vehicles, recording times and readings throughout each shift. Document your cleaning and sanitation schedules with completion checkmarks. These simple practices demonstrate due diligence if questions ever arise.

Store records for at least two years, following food safety guidelines. Digital photos of your processes can provide valuable backup evidence. Many small distribution centers find success using simple spreadsheets or affordable apps designed for food operations. This organized approach protects your business while showing customers and inspectors that you take food safety seriously. Remember, consistent documentation reflects the same care you put into delivering quality produce to your community.

Real Stories: When Food Safety Training Made the Difference

When Maria took over as operations manager at Green Valley Food Hub, she inherited a team that handled everything from farm pickups to restaurant deliveries. Despite their best efforts, they struggled with recurring complaints about wilted greens and inconsistent product quality. After implementing a comprehensive food safety training program focused on proper temperature control and handling procedures, everything changed.

Her team learned the critical importance of maintaining the cold chain from farm to customer. They discovered they’d been loading refrigerated trucks inefficiently, creating warm spots that compromised product integrity. Within three months of training, customer complaints dropped by 78%, and their organic lettuce producers noticed significantly less waste. Maria’s biggest takeaway? “We thought we knew what we were doing, but training revealed blind spots we didn’t even know existed. Now our drivers check temperatures at every stop, and it’s just part of our culture.”

Similarly, Oak Ridge Farm Cooperative avoided a potentially devastating situation when their newly trained distribution staff caught a malfunctioning cooler before it spoiled an entire week’s harvest of organic strawberries worth $12,000. Their employee, James, had just completed training on monitoring equipment and immediately recognized the temperature fluctuation patterns. He transferred the berries to backup cooling within an hour.

The practical lesson from both stories? Food safety training isn’t just about passing inspections. It empowers your team to spot problems early, protect your investment in quality produce, and build trust with customers who depend on your commitment to excellence. Small investments in education consistently prevent much larger losses down the road.

Getting Started: Your First Steps Toward Safer Distribution

Starting your food safety journey doesn’t have to feel overwhelming. Whether you’re managing a small CSA distribution point or a regional food hub, taking those first steps can protect your community while building trust with your customers.

Begin by assessing your current operations. Walk through your facility and identify where food is received, stored, and distributed. Notice temperature-sensitive areas, cross-contamination risks, and employee handling procedures. This baseline understanding helps you prioritize where training is most needed.

Next, tap into free and low-cost resources designed for small-scale operations. The FDA offers downloadable guides specifically for produce distributors, while many state agriculture departments provide workshops tailored to local food systems. Organizations like the Local Food Safety Collaborative offer webinars and toolkits perfect for community-scale operations.

Your initial training priorities should focus on three core areas: proper temperature control, preventing cross-contamination, and personal hygiene practices. These fundamentals form the foundation of solid food safety practices that protect everyone from farm to table.

Consider partnering with nearby farms and distribution centers to share training costs and experiences. One successful food hub in Vermont started a regional training cooperative where five small distributors pooled resources for quarterly safety workshops. This collaborative approach made professional training affordable while building a supportive network.

Start small but start today. Even training one employee per week creates momentum. Remember, building a food safety culture is a journey, not a destination, and every step forward protects the health of the communities you serve.

When your distribution center prioritizes food safety training, you’re doing more than protecting products—you’re safeguarding the trust your community has placed in the local food movement. Every person who chooses locally grown organic produce over conventional supermarket options is making a conscious decision to support sustainable agriculture and their neighbors. They’re counting on you to honor that choice with safe, wholesome food.

Strong food safety practices aren’t just about compliance; they’re the foundation that allows the entire local food system to thrive. One foodborne illness incident can undermine years of relationship-building and damage the reputation of countless dedicated farmers and food hubs in your region. By investing in comprehensive training, you’re protecting not only your operation but the collective future of community-supported agriculture.

Think of food safety training as an essential investment in sustainability itself—right alongside composting, renewable energy, and regenerative farming practices. It strengthens community health, builds lasting customer relationships, and ensures the local food movement continues growing for generations to come.

Start today by assessing your current training program and identifying areas for improvement. Your commitment to food safety demonstrates the same care and integrity that drew you to local, organic food in the first place.

How PCF Carbon Footprinting Can Transform Your CSA Farm’s Environmental Impact

Posted by darrell on
0
Environmental Sustainability
How PCF Carbon Footprinting Can Transform Your CSA Farm’s Environmental Impact

Your Community Supported Agriculture operation has a measurable impact on our planet’s climate, and understanding your Product Carbon Footprint (PCF) is the first step toward making it a positive one. PCF tracks greenhouse gas emissions throughout your farm’s entire production cycle, from soil preparation and seed planting to harvest and distribution to your members’ doorsteps.

For CSA farmers, measuring carbon footprint isn’t just environmental responsibility—it’s becoming essential for market differentiation and meeting consumer expectations. Today’s environmentally conscious members increasingly want transparency about where their food comes from and how it affects the climate. When you can demonstrate lower emissions than industrial agriculture, you strengthen member loyalty and attract new subscribers who prioritize sustainability.

The good news? CSA operations naturally have advantages in carbon reduction. Your direct-to-consumer model eliminates supply chain emissions that plague grocery store produce. Your focus on seasonal, diverse crops builds soil health that captures carbon. Your local distribution reduces transportation miles dramatically compared to conventional agriculture.

This guide breaks down PCF measurement into manageable steps designed specifically for small-scale farmers. You’ll discover practical strategies to reduce emissions across your operation, from composting methods that minimize methane release to irrigation timing that cuts energy use. We’ll share real success stories from CSA farmers who’ve lowered their carbon footprint while improving profitability, proving that climate-friendly farming and financial sustainability go hand in hand.

What Is PCF Carbon Footprinting and Why It Matters for Your CSA

Wooden box filled with fresh vegetables on farm truck with agricultural fields in background
CSA operations connect local farms directly with community members through fresh, sustainably grown produce.

The Basics of PCF Measurement

Product Carbon Footprint (PCF) measurement tracks the greenhouse gas emissions generated throughout your farm’s entire production cycle. Think of it as following your crops’ environmental journey from start to finish.

The process begins with seed selection and soil preparation. PCF accounts for emissions from producing seeds, fertilizers, and amendments you use. For example, that organic compost you’re applying has a carbon story too—whether you made it on-site or had it delivered matters.

Next comes the growing season. This includes energy used for irrigation pumps, greenhouse heating, and any equipment operation. Even hand tools have a footprint from their manufacturing and transport to your farm.

Harvest and post-harvest activities count as well. Running coolers to store lettuce, washing root vegetables, and packing produce into containers all consume energy and resources.

Finally, delivery creates emissions through transportation. Whether you’re driving to farmers markets or delivering CSA boxes directly to members, those vehicle miles factor into your total PCF.

The good news? Understanding these basics helps you identify where to make meaningful changes. Many farmers discover that small adjustments—like switching to renewable energy or sourcing inputs locally—significantly reduce their overall carbon footprint while often saving money too.

Why CSA Members Are Starting to Ask About Carbon Data

Today’s CSA members are more climate-conscious than ever before. They’re not just asking where their food comes from—they want to know how it’s grown and what impact it has on the planet. This shift reflects a broader movement toward environmental transparency, with consumers seeking measurable data rather than general claims about sustainability.

PCF (Product Carbon Footprint) data meets this demand head-on by providing concrete numbers that demonstrate your farm’s commitment to reducing environmental impact. When you can share that your tomatoes produced 0.3 kg of CO2 per pound compared to the conventional average of 2 kg, members understand the real difference their support makes.

Many CSA farmers report that sharing carbon data strengthens member loyalty and attracts new subscribers who prioritize climate action. One Vermont farmer noticed a 25% increase in membership renewals after introducing carbon labeling on weekly harvest sheets. Members appreciate the honesty and education, often sharing the information with friends and family. This transparency transforms your CSA from simply a food source into a partnership for positive environmental change, deepening the community connection that makes CSAs special.

The Biggest Carbon Contributors in CSA Operations

Transportation and Distribution Footprint

Getting your produce from field to table involves transportation choices that significantly impact your PCF carbon footprint. The good news? Strategic planning can dramatically reduce these emissions while maintaining efficient delivery service.

Start by analyzing your distribution routes. Consolidating deliveries into fewer trips with optimized routes cuts fuel consumption substantially. Many successful CSAs use route-planning software to minimize mileage, reducing emissions by up to 30%. Consider central pickup points where members collect their shares, eliminating individual home deliveries altogether.

Vehicle selection matters immensely. Transitioning to eco-friendly delivery vehicles like electric vans or biodiesel trucks can slash transportation emissions by half or more. One Vermont farm reduced their delivery footprint by 60% simply by switching to an electric vehicle for local routes.

Encourage member participation through community pickup hubs at farmers markets, workplaces, or neighborhood spots. This shared responsibility model not only reduces your carbon output but strengthens community connections. Some farms even offer incentives like discounted shares for members who choose consolidated pickup locations over individual delivery.

Remember, every mile matters. Track your transportation data regularly to identify improvement opportunities and celebrate progress with your membership community.

Energy Use on the Farm

Energy use represents a significant portion of a CSA farm’s carbon footprint, though the specifics vary by season and scale. Greenhouse heating during cooler months can be one of the largest energy consumers, especially for farms extending their growing season. Many farmers are switching to high-efficiency systems or even passive solar designs to reduce this impact. If you measure your heating fuel consumption and multiply by the appropriate emission factors, you’ll get a clear picture of this portion of your footprint.

Irrigation pumps run regularly during dry periods, drawing electricity that contributes to your overall emissions. Consider the power source for your pumps—grid electricity, diesel generators, or renewable options like solar panels. Cold storage facilities for keeping harvested produce fresh also require consistent energy input, particularly during summer months.

Don’t overlook smaller operations like wash stations, packing facilities, and farm offices. One inspiring example comes from a Vermont CSA that installed solar panels covering 80% of their electricity needs, dramatically reducing their energy-related emissions while lowering operational costs. Track your utility bills monthly to identify patterns and opportunities for improvement, whether through equipment upgrades, renewable energy installations, or operational adjustments.

Soil Management and Input Choices

Your soil management choices play a starring role in determining your farm’s carbon footprint. Think of your soil as either a carbon savings account or a source of emissions—your practices determine which way it goes.

Synthetic fertilizers are significant carbon contributors, both in their energy-intensive manufacturing process and the nitrous oxide they release when applied. Consider switching to compost, cover crops, and organic amendments instead. These options actually feed carbon back into the soil while nourishing your plants. One Michigan CSA farmer reduced her fertilizer-related emissions by 40% simply by adopting a robust composting system and rotating legumes as natural nitrogen fixers.

Tillage practices matter too. Heavy plowing releases stored carbon from soil, while no-till or reduced-till methods keep it locked away. If you must till, timing and depth make a difference—shallow cultivation disturbs less carbon.

Here’s an actionable tip: start small by replacing just one synthetic input with an organic alternative this season. Track the results, adjust your approach, and gradually expand. Many farmers find that healthier soil actually reduces their need for amendments over time, creating a win-win for both emissions and your budget.

Practical Steps to Calculate Your CSA’s Product Carbon Footprint

Free and Low-Cost PCF Tools for Small Farms

Good news for small-scale farmers: you don’t need expensive consultants to start measuring your carbon footprint! Several free and affordable tools make PCF tracking accessible for operations of any size.

The USDA’s COMET-Farm calculator is a fantastic starting point, offering free carbon footprint assessments specifically designed for agricultural operations. It walks you through your farm’s activities, from tillage practices to livestock management, providing detailed emissions estimates. The Cool Farm Tool is another excellent option, particularly user-friendly for beginners who want straightforward carbon calculations.

For CSA farmers looking for something simpler, basic spreadsheet templates can track key activities like fuel usage, electricity consumption, and fertilizer applications. Many agricultural extension offices offer these templates free of charge, often with helpful guides explaining how to convert your farm activities into carbon measurements.

Consider starting with the “low-tech” approach: keep a notebook logging tractor hours, heating fuel for greenhouses, and purchased inputs. This data becomes the foundation for any calculator you choose later. Some farmers find success using smartphone apps like FarmLogs or AgriWebb, which include basic sustainability tracking features alongside their farm management tools. The key is choosing a system you’ll actually use consistently throughout the growing season.

What Data You’ll Need to Gather

Getting started with your PCF assessment means gathering the right records. Think of this as detective work, where every receipt and bill tells part of your farm’s carbon story. Start by collecting fuel receipts for tractors, trucks, and other equipment over the past year. You’ll also need electricity bills for barns, greenhouses, and irrigation systems, plus heating fuel records if you use propane or natural gas.

Don’t forget about your inputs. Gather information from suppliers about fertilizers, amendments, and livestock feed, including quantities purchased and transportation distances. If you buy seedlings or transplants, track those too. Keep records of any waste management services, like compost hauling or disposal fees.

Water usage data helps complete the picture, especially if you run pumps for irrigation. Finally, document any renewable energy you generate, like solar panels, as these offset your footprint. Many successful farmers discover that organizing these documents not only helps calculate their PCF but also reveals opportunities to save money while reducing emissions.

Setting Your Baseline Measurement

Before you can celebrate progress, you need to know where you’re starting. Begin by gathering data from a typical growing season—think of it as taking a snapshot of your current operations. Document everything from fuel consumption in tractors and delivery vehicles to electricity use in coolers and irrigation systems. Don’t forget to track fertilizer applications, whether organic or conventional, and any purchased inputs like seeds and packaging materials.

Create a simple spreadsheet or use carbon calculator tools designed specifically for farms. Many are free and user-friendly, walking you through each category step by step. Record your baseline measurements during your most representative season, avoiding years with unusual weather or major operational changes. This honest assessment isn’t about judgment—it’s about understanding your farm’s unique carbon profile. Once you’ve established this starting point, you’ll be equipped to set realistic reduction goals and watch your sustainable practices make a measurable difference. Local farmer Maria Chen reduced her operation’s footprint by 30% in two years simply by tracking these metrics consistently.

Proven Strategies to Reduce Carbon Footprint in Your CSA

Optimizing Your Distribution Model

Smart supply chain optimization starts with efficient distribution planning. Begin by mapping your member locations and grouping them into geographic clusters for pickup points. This approach significantly reduces delivery mileage compared to individual home deliveries. Consider offering incentives like a 5% discount for customers who pick up their shares at the farm or central locations, which can cut your distribution emissions dramatically.

Create consolidated delivery routes using free tools like Google Maps or Route4Me to minimize backtracking and fuel consumption. Schedule deliveries on specific days for each zone rather than scattering them throughout the week. One Massachusetts CSA farmer reduced weekly driving by 40% simply by organizing four neighborhood pickup hubs instead of 20 individual stops. Additionally, coordinate with neighboring farms to share delivery routes when possible, splitting transportation costs and emissions while strengthening your local farming community.

Renewable Energy Integration

Many farms are discovering that renewable energy integration significantly reduces their carbon footprint while cutting operational costs. Solar panels have become particularly popular for CSA operations, powering irrigation systems, cold storage, and processing facilities. At Green Valley Farm in Ontario, a 10-kilowatt solar array now covers 80% of their electricity needs, reducing their annual carbon emissions by 12 tons.

Wind turbines work well for farms with consistent breezes, though the initial investment is higher. Smaller-scale options include solar-powered electric fencing and water pumps, which are surprisingly affordable starting points. Some innovative farmers are even using biogas digesters to convert farm waste into energy, creating a closed-loop system that addresses both waste management and power generation. Geothermal heating systems can maintain greenhouse temperatures year-round with minimal environmental impact, though they require suitable soil conditions and upfront capital investment.

Farmer examining rich soil and plant roots in agricultural field with cover crops
Healthy soil management and regenerative practices play a crucial role in reducing carbon emissions on CSA farms.

Carbon-Sequestering Growing Practices

Regenerative farming techniques offer a powerful way to transform your CSA operation into a carbon-fighting ally. Cover cropping stands out as one of the most effective methods—planting species like clover, rye, or vetch between cash crops keeps living roots in the soil year-round, pulling CO2 from the atmosphere and storing it underground. No-till or reduced-till practices preserve this stored carbon by leaving soil structure intact, while also improving water retention and reducing fuel consumption from tractor passes.

Smart composting practices complete the regenerative cycle by converting farm waste into carbon-rich amendments that feed soil biology and lock carbon away for years. Many successful CSA farmers also incorporate rotational grazing if they have livestock, use mulching to suppress weeds while building organic matter, and plant hedgerows that serve as carbon sinks while supporting beneficial insects.

These practices work together synergistically—each amplifying the others’ benefits. The beauty is that while you’re sequestering carbon, you’re simultaneously improving soil health, reducing input costs, and growing more nutritious produce for your members.

Smarter Input Sourcing

One of the quickest wins for reducing your PCF is rethinking where your inputs come from. Choosing local suppliers for items like compost, mulch, and natural fertilizers significantly cuts transportation emissions. When a neighboring farm provides your soil amendments instead of shipping them cross-country, you’re instantly lowering your carbon impact while supporting your local agricultural community.

Consider transitioning away from synthetic inputs wherever possible. Organic fertilizers and natural pest management solutions typically have lower carbon footprints during production. Building healthy soil through composting and cover cropping reduces your dependence on purchased inputs altogether, creating a win-win for both your budget and the environment.

Packaging deserves attention too. Opt for reusable harvest bins and minimal packaging for your CSA shares. Many successful CSA farmers encourage members to return containers each week, creating a closed-loop system. When purchasing supplies, choose vendors offering bulk options with recyclable or compostable packaging. These small decisions add up, significantly reducing your operation’s overall carbon footprint while demonstrating your commitment to sustainability.

Success Story: How Green Valley CSA Cut Their Carbon Footprint by 40%

When Tom and Maria Chen took over Green Valley CSA in 2019, they knew their farm had potential, but they didn’t realize how much room there was for improvement until they started measuring their carbon footprint. Like many small-scale operations, they assumed their organic practices automatically meant they were doing everything right for the environment.

“We were in for a surprise,” Tom admits with a laugh. “Our initial PCF assessment revealed we were generating about 2.5 tons of CO2 equivalent per acre annually. That seemed low compared to conventional farms, but we knew we could do better.”

The Chens started by tracking their energy use, transportation patterns, and input sources. They discovered their biggest carbon contributors were diesel fuel for their tractor, refrigeration for their walk-in cooler, and the distance they traveled for off-farm inputs like organic fertilizer and seedlings.

Over the next 18 months, they implemented strategic changes. They installed solar panels to offset their cooler’s electricity needs, switched to a smaller, more fuel-efficient tractor for routine tasks, and partnered with a local composting facility to source amendments within ten miles of their farm. They also adjusted their crop planning to focus on varieties that thrived with minimal intervention.

The results were remarkable. By the 2022 growing season, Green Valley CSA had reduced their carbon footprint to 1.5 tons per acre, a 40 percent reduction. Their members noticed the changes too. The farm started including carbon impact reports in their weekly newsletters, showing shareholders exactly how their food choices were making a difference.

“What surprised us most was how many changes actually saved us money,” Maria shares. “Lower fuel costs, reduced input expenses, and the elimination of our electricity bill made our farm more profitable while helping the planet.”

Today, Green Valley CSA serves as a model for other farms in their network, proving that PCF tracking isn’t just about numbers on paper—it’s about creating a more sustainable future, one harvest at a time.

Communicating Your Carbon Reduction Efforts to CSA Members

Creating Simple Visual Reports

Making your carbon footprint data come alive doesn’t require fancy graphics or expensive software. Start with a simple monthly newsletter section highlighting one carbon-saving achievement, like “This month, we reduced delivery emissions by 15% through route optimization!” Use visual comparisons that resonate with your community: “Our farm’s carbon savings this quarter equals taking 3 cars off the road for a year.”

For farm stand signage, try eye-catching stats: “These tomatoes traveled 2 miles, not 2,000!” Social media posts work beautifully with before-and-after stories. Share a quick video showing your compost system or a photo of your cover crops with a caption explaining their carbon benefits.

Consider creating a simple infographic showing your farm’s carbon journey over the season. Use everyday language and relatable imagery—think trees planted rather than tons of CO2. Members love seeing their support translated into tangible environmental impact, strengthening their connection to your sustainable farming practices while encouraging continued participation in your CSA.

Turning Carbon Awareness Into Member Engagement

Your members care about sustainability—transform your carbon reduction efforts into shared victories that strengthen community bonds. Start by sharing your farm’s carbon footprint baseline through newsletters or member meetings, explaining what it means in relatable terms like “equivalent to taking X cars off the road.” Create visual progress trackers at pickup locations showing monthly reductions, making abstract numbers tangible.

Invite members to participate actively by bringing reusable containers, composting their CSA scraps, or volunteering for cover crop planting days that sequester carbon. One Wisconsin farm launched a “Carbon Champions” program where members logged their sustainable actions, collectively offsetting 15 tons annually while building enthusiasm.

Celebrate milestones together with seasonal gatherings highlighting achievements—perhaps a harvest dinner when you reach a reduction goal. Share farmer success stories in weekly newsletters, explaining how member participation directly contributed to lower emissions. Consider member surveys asking which reduction strategies matter most to them, fostering ownership in your environmental journey. When people understand their role in measurable impact, engagement naturally follows.

Understanding your farm’s carbon footprint isn’t just about crunching numbers or checking boxes—it’s about deepening the meaningful relationship between your sustainable farming practices and the community members who believe in your mission. When you measure and share your PCF data, you’re telling a powerful story about your commitment to the land and the future we’re all building together.

The beauty of carbon footprinting is that it meets you exactly where you are. Whether you’re managing an established CSA operation or just starting to explore sustainable agriculture, every small step toward reducing emissions makes a tangible difference. Maybe you’ll begin by tracking fuel usage, or perhaps you’ll experiment with cover cropping to boost soil carbon. The key is simply to start.

Remember Sarah’s story from earlier? She began with basic spreadsheets and a curious mindset. Within two seasons, her farm reduced emissions by 15 percent while strengthening member loyalty. Your journey will be unique, but the principles remain the same: measure what matters, implement changes gradually, and share your progress authentically.

Your community wants to support farms that care about environmental impact. By embracing PCF carbon footprinting, you’re not only reducing your ecological footprint—you’re inviting your members to be part of something bigger. Take that first step today, knowing that every improvement, no matter how small, contributes to a more resilient and sustainable food system for everyone.

How Smart Planning Transforms Your CSA Farm from Chaos to Clarity

Posted by darrell on
0
Operations and Logistics
How Smart Planning Transforms Your CSA Farm from Chaos to Clarity

Map your harvest cycles to member demand by tracking which vegetables your CSA members actually consume each week, then adjust planting schedules two to three weeks ahead to prevent the overflow of kale in October that nobody wants. Create a simple spreadsheet linking your seed orders, transplant dates, and expected harvest windows to your weekly box commitments—this synchronized planning reduces waste by up to 40% on small farms.

Coordinate your volunteer workforce and harvest crew by establishing a weekly rhythm where Wednesday assessments determine Friday harvest needs and Monday box assembly requirements. When Sarah Chen implemented this three-day planning cycle at Riverbend Farm, she eliminated the chaos of last-minute scrambling and reduced unharvested produce waste from 25% to under 8%. The key is matching labor availability to actual crop readiness rather than hoping everything aligns on distribution day.

Balance your cash flow against seasonal production by pre-selling membership shares in winter, purchasing seeds and amendments in early spring, and maintaining a reserve fund equal to six weeks of operating expenses. This integrated financial approach—linking money in, production costs, and distribution timing—prevents the common CSA trap of being crop-rich but cash-poor during peak season.

Connect procurement decisions directly to your distribution model by ordering boxes, bags, and packaging supplies based on confirmed member counts plus 10% buffer, not optimistic projections. Sync these orders with your planting calendar so materials arrive two weeks before first harvest, ensuring your supply chain flows smoothly from seed to member doorstep without expensive rush orders or storage headaches.

What IBP Supply Chain Actually Means for Your CSA Farm

Overhead view of colorful fresh organic vegetables in wooden CSA harvest box
A well-planned CSA box showcases the variety and quality that comes from integrated business planning in farm operations.

The Three Pillars of IBP in CSA Operations

Integrated Business Planning (IBP) might sound like corporate speak, but for CSA operations, it’s really about connecting three essential elements that keep your farm running smoothly: understanding what your members want, knowing what you can grow, and getting everything delivered efficiently.

Let’s start with demand planning. This means getting to know your members’ preferences and consumption patterns. Are your shareholders asking for more leafy greens? Do families with kids prefer cherry tomatoes over beefsteak varieties? By tracking member feedback through surveys, share customization requests, and pickup conversations, you can predict what produce will be most valued. This information helps you plan your planting schedules and variety selections months in advance, reducing waste and increasing member satisfaction.

Supply planning is where your agricultural expertise shines. Unlike typical supply chains, CSA farms work with nature’s calendar. You’ll need to coordinate seasonal crop availability with your demand forecasts. This means succession planting of popular items like lettuce, managing storage crops for winter shares, and building relationships with neighboring farmers to fill gaps in your offerings. Consider implementing smart storage solutions to extend the availability of root vegetables and winter squash, bridging the gap between harvest and distribution.

Finally, logistics coordination ties everything together. This involves planning efficient delivery routes for drop-off points, scheduling pickup times that work for members, and coordinating volunteer helpers during peak harvest. Creating a master calendar that shows when crops mature, when boxes need packing, and when deliveries occur helps prevent bottlenecks. One Ontario CSA farmer shared how mapping member locations helped reduce delivery time by 30 percent while keeping produce fresher.

Why Traditional Planning Falls Short for CSA Farms

If you’ve been running a CSA farm for even a season, you know the familiar sinking feeling. It’s early March, and you’re staring at boxes of heirloom tomato seeds—way more than you’ll ever need—because last year you ran out mid-season. Or perhaps it’s July, and your kale harvest came in two weeks earlier than planned, leaving you scrambling to adjust member boxes while summer squash sits disappointingly small on the vine.

These aren’t just minor hiccups. They’re the result of traditional planning methods that simply weren’t designed for the beautiful complexity of CSA farming. Most farmers rely on spreadsheets, gut instinct, and last year’s notes scribbled in margins. While this works to a degree, it leaves gaps that quickly become costly problems.

Overordering happens when we plan defensively, remembering that one disastrous season when blight took half the crop. Underestimating harvest timing occurs because weather patterns shift, microclimates surprise us, and succession planting schedules don’t always align with real-world conditions. Then there’s the distribution challenge—members go on vacation, request delivery changes, or want to pause their shares, and suddenly your carefully planned harvest quantities don’t match actual demand.

Managing relationships with multiple local suppliers adds another layer of complexity. Your seed company, compost provider, packaging supplier, and farmers market colleagues all operate on different timelines and minimums. Coordinating these relationships while tending crops and communicating with members often means something falls through the cracks.

The heart of the issue? Traditional planning treats farming as linear and predictable, when CSA operations are actually dynamic, interconnected systems where one change ripples through everything else. You deserve better tools that honor this complexity.

Building Your CSA’s Procurement Strategy with IBP

Farmer planning crop production while examining seedlings in garden rows
Modern CSA farmers combine traditional growing knowledge with strategic planning tools to optimize their operations.

Seasonal Forecasting That Actually Works

Predicting member demand doesn’t require a crystal ball—just smart use of your historical data and some agricultural intuition. Start by analyzing your past three seasons of harvest records and member orders. Notice patterns like which crops had surplus and which ran short. Sarah Martinez from Harvest Moon CSA tracks every weekly harvest alongside member preferences, discovering that her tomato demand spikes in late July, allowing her to plant accordingly.

Crop rotation planning plays a crucial role in forecasting too. Map out your rotation schedule and align it with member expectations. If lettuce follows your spring peas, factor that succession into your weekly share planning. This prevents those awkward gaps where you’re scrambling to fill boxes with purchased produce.

Building buffer inventory is your safety net against Mother Nature’s unpredictability. Plan for 15-20 percent overproduction on stable crops like root vegetables and winter squash. These store well and can compensate when weather damages your more delicate offerings. Consider investing in proper storage infrastructure, including reusable bins and crates that protect your buffer inventory.

Weather tracking apps combined with historical climate data help anticipate challenging seasons. When forecasts predict extended drought or excessive rain, adjust your planting density and variety selection accordingly. Keep detailed notes each season—your own farm’s data becomes your most valuable forecasting tool, helping you move from reactive scrambling to proactive planning that keeps members happy and reduces waste.

Strengthening Supplier Relationships

Building strong relationships with your suppliers is the backbone of successful Integrated Business Planning in your CSA operation. Start by establishing open communication channels with your local organic seed companies and neighboring farms. Set up regular check-in meetings, whether monthly or seasonal, to discuss upcoming needs, potential challenges, and harvest projections. This proactive approach helps everyone stay aligned and reduces last-minute scrambles.

Create shared planning calendars with your key suppliers that outline planting schedules, expected delivery dates, and quantity requirements. This transparency allows seed companies to ensure they have adequate inventory when you need it, and neighboring farms can coordinate their growing schedules to fill gaps in your production. One successful CSA farmer in Vermont implemented a digital shared spreadsheet system with three partner farms, resulting in a 40 percent reduction in supply delays.

Consider establishing formal agreements that outline quality standards, delivery expectations, and communication protocols. These don’t need to be overly complex, just clear enough that everyone understands their commitments. Include specific details about organic certification requirements, packaging preferences, and acceptable variance in order quantities.

Don’t forget the human element. Visit your suppliers’ farms, attend local agricultural events together, and celebrate shared successes. These personal connections create goodwill that becomes invaluable when unexpected challenges arise, like weather disruptions or pest outbreaks. Strong supplier relationships built on mutual respect and clear IBP coordination ensure your members receive consistent, high-quality organic produce throughout the season.

Streamlining Your Distribution and Logistics Operations

Creating Flexible Distribution Plans

Flexibility is the cornerstone of successful CSA distribution, especially when Mother Nature has other plans. Start by establishing multiple pickup windows throughout the week rather than a single rigid timeframe. This approach accommodates member schedules while giving you breathing room when unexpected weather delays harvesting.

Consider creating tiered distribution points based on member density. Community hubs like farmers markets, local businesses, or member homes can serve as satellite locations, reducing individual farm trips and building community connections. When implementing this strategy alongside optimizing delivery routes, you’ll save precious hours during peak season.

Communication is everything when plans shift. Develop a simple notification system using email, text messages, or a members-only app to announce changes quickly. Be transparent about why adjustments happen—members appreciate understanding the realities of farming. One Vermont farmer shares boxes adjusted for unexpected frost damage by explaining the situation and offering recipe suggestions for available crops, turning potential disappointment into an educational moment.

Build buffer stock arrangements with neighboring farms for crop shortages, creating a support network that benefits everyone while maintaining your organic standards.

Real-World Success: How Green Valley Farm Transformed Their Operations

When Sarah Chen took over Green Valley Farm five years ago, she inherited a beautiful 15-acre property and a passionate vision for connecting her community with fresh, organic produce. What she didn’t anticipate was the chaos that came with managing a 120-member CSA operation.

“I was constantly scrambling,” Sarah recalls. “We’d have gorgeous tomatoes rotting because I planted too many, while members complained about not getting enough greens because I underestimated demand. My cooler was a disaster, and I was working 80-hour weeks just trying to keep up.”

Sound familiar? Sarah’s challenges mirror what many small CSA farmers face: the juggling act of planning what to grow, coordinating harvests, and delivering consistent weekly boxes without breaking the bank or your back.

The turning point came when Sarah started implementing some straightforward organizational systems. First, she created a simple planning calendar that connected three critical pieces: what members wanted based on surveys and past preferences, what would actually grow well during each season, and what resources she had available like labor, water, and field space.

“I started treating my farm like the business it is, without losing the heart of it,” she explains. She began tracking which crops members raved about and which vegetables consistently ended up in the compost bin at pickup sites. This data informed her planting decisions for the following season.

Sarah also established weekly planning sessions every Sunday evening. She’d review the upcoming week’s harvest schedule, check her inventory, and coordinate with her two part-time workers. This simple habit eliminated the morning panic of not knowing what needed picking or packing.

The results speak volumes. Within two years, Green Valley reduced food waste by 40 percent. Member retention jumped from 65 to 88 percent, largely because boxes became more consistent and aligned with what people actually wanted to eat. Perhaps most importantly, Sarah’s profit margins improved by 30 percent, allowing her to pay workers better wages and finally take a day off each week.

“I’m not working harder; I’m working smarter,” Sarah says. “And my members notice the difference. They’re getting better produce, more variety, and they see that I’m sustainable in more ways than one, including financially and personally.”

CSA farmer distributing fresh produce to members at farm pickup location
Efficient distribution planning ensures CSA members receive fresh, quality produce while building strong farm-community relationships.

Getting Started: Simple Steps to Integrate IBP into Your CSA

Tools and Resources for Small-Scale Operations

Getting started with integrated business planning doesn’t require expensive enterprise software or a degree in supply chain management. Many CSA farmers successfully coordinate their operations using simple, practical tools that fit their budget and technical comfort level.

Start with what you already have: spreadsheets. Google Sheets or Excel can handle inventory tracking, harvest planning, and member distribution lists effectively. Create separate tabs for crop planning timelines, expected yields, and weekly harvest projections. The beauty of spreadsheets is their flexibility—you can customize them to match your farm’s unique rhythm and crops.

For farmers ready to step up, affordable farm management software like Tend, Farmbrite, or Local Line offers CSA-specific features without overwhelming complexity. These platforms typically range from free to under $50 monthly and help automate member communications, track harvest quantities, and manage subscription renewals. Take advantage of free trials to find what feels intuitive for your operation.

Don’t overlook community resources either. Many agricultural extension offices offer free workshops on farm business planning, and connecting with other CSA farmers through local farming networks can provide invaluable shared knowledge. One Vermont farmer I spoke with credits her farm’s improved efficiency to a simple planning template she discovered at a county farming cooperative meeting.

Remember, the goal isn’t perfect software—it’s having systems that help you make better decisions about what to plant, when to harvest, and how to communicate with your members. Start simple, track what matters most to your operation, and adjust as you grow.

If you’ve been worried that Integrated Business Planning sounds too corporate for your CSA farm, here’s the truth: IBP isn’t about turning your farm into a soulless operation. It’s simply about bringing intention and coordination to the beautiful chaos that is community-supported agriculture. You’re already doing much of this work—checking weather forecasts before planting, estimating harvest quantities for your members, coordinating delivery schedules. IBP just gives you a framework to do it more effectively.

The best part? You don’t need to overhaul everything overnight. Start small. Maybe this season, you create a simple spreadsheet connecting your planting calendar with member preferences. Next season, you might add a basic inventory tracking system. Small steps compound into significant improvements over time.

Remember that sustainable farming and smart planning aren’t opposites—they’re partners. When you reduce waste through better forecasting, coordinate your harvests more efficiently, and communicate clearly with your members, you’re actually strengthening the sustainable values that drew you to CSA farming in the first place. You’re honoring the land, your labor, and your community’s investment in local food.

Ready to take the next step? We’d love to hear about your planning challenges and victories. What systems are working on your farm? Where do you struggle with coordination? Share your experiences in the comments below, or explore more resources on sustainable farm management. Your journey toward more intentional farming operations starts with a single, thoughtful step.

How One Farm’s Career Training Program Is Reshaping the Local Food Economy

Posted by darrell on
0
Business and Economic Impact
How One Farm’s Career Training Program Is Reshaping the Local Food Economy

Growing your own food starts with knowledge, and one local agricultural business is turning that principle into economic opportunity by offering comprehensive career training programs that transform aspiring farmers into skilled professionals. Through hands-on apprenticeships, classroom instruction, and mentorship from experienced growers, trainees learn everything from soil preparation and crop rotation to pest management and direct-to-consumer marketing strategies that make small farms financially viable.

The ripple effects extend far beyond individual careers. When local businesses invest in training the next generation of farmers, they strengthen regional food systems, create living-wage jobs that keep young people in rural communities, and build a more resilient agricultural economy. Each trained farmer who launches their own operation multiplies the impact, supplying fresh produce to neighborhood markets, restaurants, and families who value knowing exactly where their food comes from.

These training programs address a critical gap in modern agriculture. With the average farmer age climbing above 58, the industry desperately needs skilled newcomers who understand both traditional growing methods and innovative sustainable practices. Local businesses providing this education aren’t just filling job openings; they’re preserving agricultural knowledge, revitalizing communities, and empowering people to build meaningful careers that nourish their neighbors while protecting the environment. The investment pays dividends in stronger local economies, healthier communities, and a more secure food future for everyone.

The Growing Demand for Trained Farm Workers

The sustainable agriculture movement has sparked tremendous consumer interest in locally grown, organic produce. Yet behind every thriving farmers market and bustling CSA box pickup, there’s a growing challenge: farms desperately need skilled workers, and they’re struggling to find them.

This labor shortage isn’t just about having extra hands during harvest season. Modern sustainable farms require workers who understand soil health, pest management, crop rotation, and the careful timing that organic growing demands. As more conventional farms transition to regenerative practices and new CSA operations launch to meet consumer demand, the gap between available jobs and qualified candidates continues to widen. These changes are reshaping local labor markets across the country.

Here’s the disconnect: while thousands of people express interest in sustainable food systems and dream of working the land, very few possess the practical skills needed to succeed. Gardening in your backyard differs vastly from managing acres of diverse crops, operating farm equipment safely, or implementing season extension techniques. Without proper training, well-intentioned newcomers often feel overwhelmed and farms lose valuable time and resources.

Career training programs have emerged as the essential bridge between enthusiasm and expertise. These programs offer hands-on experience in real farm settings, teaching everything from seed starting to post-harvest handling. Participants learn alongside experienced farmers, gaining confidence through practical application rather than theory alone.

Consider Sarah, who completed a six-month training program before launching her own market garden. “I thought I knew farming from reading books,” she shares. “But learning proper transplanting techniques and irrigation management changed everything. Now I’m actually profitable in my second season.”

This transformation from curious learner to confident farmer demonstrates why structured training has become indispensable for agriculture’s future.

What Farm-Based Career Training Actually Looks Like

Agricultural trainees working together in vegetable field learning farming techniques
Farm trainees gain hands-on experience in sustainable growing techniques through structured career development programs.

Hands-On Skills Development

The career training program offers comprehensive hands-on experience that transforms beginners into confident farmers. Trainees spend their days in the fields learning essential skills like proper seed selection, soil preparation, and planting techniques for various seasonal crops. Under the guidance of experienced farmers, participants master the art of transplanting seedlings, understanding proper spacing, and creating optimal growing conditions for each plant variety.

Harvesting skills form a crucial part of the curriculum, teaching trainees to identify peak ripeness, use proper cutting techniques, and handle produce gently to maintain quality. The program also covers integrated pest management, where participants learn to identify common pests and diseases while implementing organic solutions like companion planting, beneficial insects, and natural pest deterrents.

Sustainable farming practices weave through every aspect of the training. Participants discover composting methods, crop rotation strategies, water conservation techniques, and soil health management. One graduate, Maria, shares her success story: “I started knowing nothing about farming. Now I manage my own quarter-acre plot, providing fresh vegetables to twenty local families.” This practical, mentorship-based approach ensures trainees gain real-world skills they can immediately apply to their own farming ventures or careers in sustainable agriculture.

Business and Marketing Education

Beyond growing techniques, successful farming requires solid business acumen. Many local agricultural training programs recognize that understanding the entrepreneurial side is crucial for long-term viability. These programs teach aspiring farmers how to develop comprehensive business plans that cover startup costs, seasonal cash flow management, and pricing strategies for different market channels.

Participants learn the essential ingredients for farm success, including how to build lasting customer relationships through effective communication and transparency about growing practices. Training often includes practical modules on operating a Community Supported Agriculture (CSA) program, selling at farmers markets, and navigating wholesale partnerships with restaurants and local retailers.

Understanding local food distribution channels is essential in today’s market. Trainees explore various sales models, from direct-to-consumer approaches to cooperative distribution networks. They also learn basic marketing strategies, including social media promotion, creating compelling farm stories, and engaging with their community. This business education empowers graduates to transform their agricultural passion into sustainable livelihoods while strengthening local food systems and creating economic opportunities within their communities.

Measuring Economic Impact: Beyond the Farm Gate

Direct Economic Benefits

When local farms invest in career training programs, the economic ripple effects are substantial and measurable. Recent economic impact studies show that each trained agricultural worker contributes an average of $35,000 to $50,000 annually in wages to the local economy, money that typically stays within the community through local spending.

Training programs create immediate employment opportunities, with many farms reporting the ability to expand operations by 20-30% after bringing on skilled workers. Take Sarah Chen, who completed a season-long apprenticeship at Green Valley Farm. Within two years, she launched her own organic vegetable operation, now employing three additional workers and serving 85 member families.

The productivity gains are equally impressive. Farms with trained staff report 25-40% increases in crop yields through improved soil management, efficient planting schedules, and reduced crop loss. This translates to more fresh, organic produce available for community members while strengthening food security.

Beyond the farm gate, these trained workers often become educators themselves, sharing sustainable growing techniques with home gardeners and inspiring the next generation of environmental stewards. This knowledge transfer multiplies the economic and environmental benefits throughout the region.

Indirect Community Benefits

The ripple effects of career training in sustainable agriculture extend far beyond the classroom, creating a flourishing ecosystem of local food initiatives. As newly trained farmers launch their own operations, they naturally gravitate toward community gathering spaces like farmers markets, breathing fresh life into these beloved weekend destinations. These markets become more vibrant and diverse, offering shoppers greater variety while strengthening connections between growers and consumers.

The training also sparks an entrepreneurial wave of farm startups throughout the region. Graduates armed with practical knowledge and confidence often begin with small-scale operations, perhaps starting a backyard microgreens business or launching a specialty herb garden. These micro-enterprises might seem modest at first, but they collectively contribute to a more resilient local food system. One inspiring example comes from Maria, who transformed her half-acre plot into a thriving cut-flower farm after completing her training, now supplying three local florists and two farmers markets.

Beyond individual success stories, this training strengthens the entire local food supply chain. Restaurants gain access to reliable sources of fresh, seasonal produce. Food cooperatives expand their local vendor networks. Even school lunch programs benefit from increased availability of farm-fresh ingredients. This interconnected web of producers, distributors, and consumers creates economic stability while reducing our community’s dependence on distant food sources shipped from thousands of miles away.

Success Story: From Trainee to Farm Entrepreneur

When Maria Rodriguez enrolled in the apprenticeship program three years ago, she was working retail and dreaming of a different future. Today, she runs Verde Valley Farm, a thriving 5-acre organic operation that supplies fresh produce to over 80 local families and three restaurants in the community.

Maria’s journey began with an intensive six-month training program that covered everything from soil health and crop rotation to business planning and customer relations. She spent her mornings learning greenhouse management and her afternoons getting hands-on experience in the fields. The program didn’t just teach her how to grow vegetables—it equipped her with real-world skills to launch a sustainable business.

“I learned about companion planting, season extension techniques, and how to build healthy soil without synthetic inputs,” Maria shares. “But what really made the difference was understanding the business side. They taught us pricing strategies, how to connect with customers, and the importance of building relationships within the local food community.”

After completing her training, Maria leased land through a farmland access program and started small with just half an acre of mixed vegetables. Her first season, she served 15 CSA members and generated $12,000 in revenue. By her third year, she’d expanded to 5 acres and increased her annual revenue to $85,000 while creating two full-time positions and seasonal work for local high school students.

Beyond the numbers, Maria’s farm has become a community hub. She hosts monthly farm tours for families, donates surplus produce to the local food pantry, and mentors new trainees from the same program that launched her career. Her success demonstrates how accessible agricultural training can transform individual lives while strengthening local food systems.

“The training gave me confidence and practical knowledge,” Maria reflects. “Now I get to share fresh, organic food with my neighbors while making a living doing something I genuinely love.”

Young farmer selling fresh produce at local farmers market stand
Program graduates apply their business training by launching farm ventures and participating in local food markets.

The Multiplier Effect on Local Food Systems

When a local farm invests in training new farmers, the benefits ripple far beyond individual career development. These trained growers become vital threads in the fabric of local food systems, creating opportunities that strengthen the entire community’s access to fresh, sustainable produce.

Consider the journey of trained farmers like Sarah Martinez, who completed a two-year apprenticeship at Green Valley Farm. Within three years, she was supplying organic vegetables to eight local restaurants, two elementary schools, and running her own thriving CSA program with 75 member families. Her success story isn’t unique. Trained farmers consistently expand market channels that didn’t previously exist, creating new purchasing options for institutions and families alike.

The knowledge transfer continues as these graduates become mentors themselves. They host farm tours, lead workshops on composting and season extension techniques, and provide crucial guidance to the next generation of growers. This creates a self-sustaining cycle of agricultural expertise within the community.

Schools particularly benefit from this multiplier effect. When trained farmers understand food safety protocols and can maintain consistent supply schedules, they become reliable partners for farm-to-school programs. Children gain access to nutrient-dense produce while learning where their food originates.

The economic impact extends to related businesses too. Local seed companies, tool suppliers, farmers’ market organizations, and food hubs all experience increased activity as more trained farmers enter the field. Each new CSA operation creates demand for delivery services, packaging materials, and storage facilities.

This interconnected growth demonstrates how career training in sustainable agriculture doesn’t just create jobs but builds resilient food networks that serve entire regions for generations.

Overflowing harvest box filled with fresh colorful vegetables from local farm
Trained farmers strengthen local food systems by increasing the availability and quality of fresh produce for community members.

Finding Career Training Opportunities in Your Area

If you’re excited about pursuing agricultural career training or want to support farms investing in their workforce, here’s how to get started. Begin by reaching out directly to local farms and CSAs in your area—many offer apprenticeships or internship programs but don’t advertise them widely. Visit farmers markets and farm stands to ask growers about training opportunities they might offer or know about.

When evaluating a program’s quality, look for hands-on learning opportunities that cover diverse farm operations throughout growing seasons. Reputable programs provide clear expectations about work hours, learning outcomes, and any compensation or food shares offered. Ask about mentor availability and whether you’ll gain experience in areas like soil health, crop planning, and sustainable pest management. Programs connected to organic certification bodies or sustainable agriculture organizations often maintain high educational standards.

Don’t overlook resources like your local Cooperative Extension office, agricultural colleges, and community colleges offering beginning farmer courses. Many non-profit farming organizations also maintain directories of training opportunities and can connect you with established farmers willing to mentor newcomers.

As a consumer, you play a vital role in supporting workforce development. Join CSAs that actively train new farmers, spreading awareness about their commitment to education. Purchase produce from farms employing apprentices, knowing your dollars help fund the next generation of sustainable growers. Share success stories of farmers who started as apprentices, inspiring others to explore agricultural careers. Consider volunteering at teaching farms or donating to scholarship funds that make training accessible to diverse communities, strengthening local food systems for everyone.

When local farms invest in career training programs, they’re doing much more than filling immediate job openings. They’re building a foundation for resilient food systems that strengthen our entire community. These programs create ripple effects throughout the local economy, from reduced unemployment to increased spending at neighboring businesses, while nurturing the next generation of agricultural stewards.

The farmers who complete these training programs become ambassadors for sustainable agriculture, carrying forward time-tested practices while bringing fresh innovation to their work. Their success stories demonstrate that investing in people creates lasting value that extends far beyond any single growing season.

As consumers and community members, we have the power to support this vital cycle. Seek out farms that prioritize workforce development and career training. When you purchase from these businesses, you’re not just buying fresh, organic produce. You’re investing in jobs, strengthening local food security, and helping build a more sustainable agricultural future. Consider visiting local farmers markets, joining a CSA program, or simply asking your favorite farm about their training initiatives. Every purchase becomes a vote for the kind of community you want to see thrive.