Yearly Archives

71 Articles

These 7 HACCP Principles Keep Your Harvest Safe from Farm to Table

Posted by darrell on
0
CSA Finder & Directory
These 7 HACCP Principles Keep Your Harvest Safe from Farm to Table

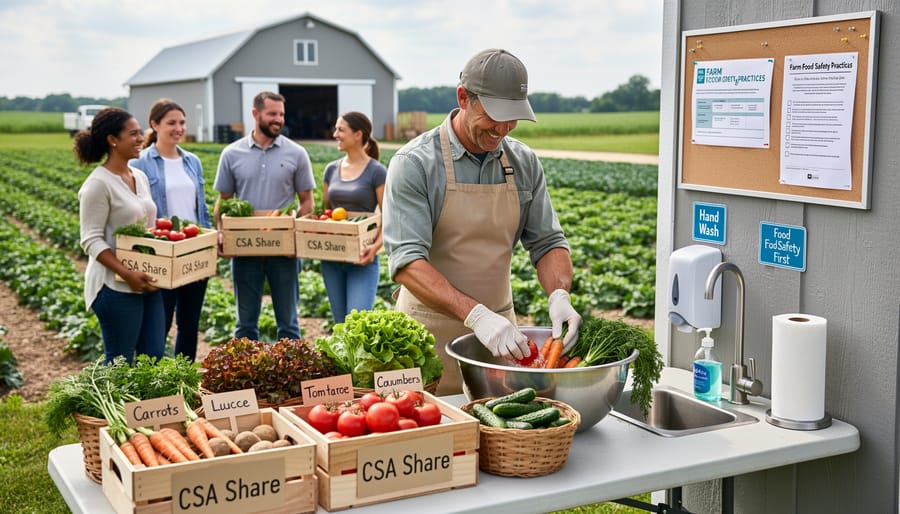
Food safety isn’t just for big processing plants—it belongs on your farm too. Whether you’re washing lettuce for your CSA boxes, storing tomatoes for market day, or preparing value-added products in your farm kitchen, the same principles that protect consumers at industrial facilities can safeguard your customers and your reputation. The Hazard Analysis and Critical Control Points (HACCP) system might sound intimidating, but it’s simply a logical, step-by-step approach to identifying where food safety risks exist in your operation and controlling them before they become problems.

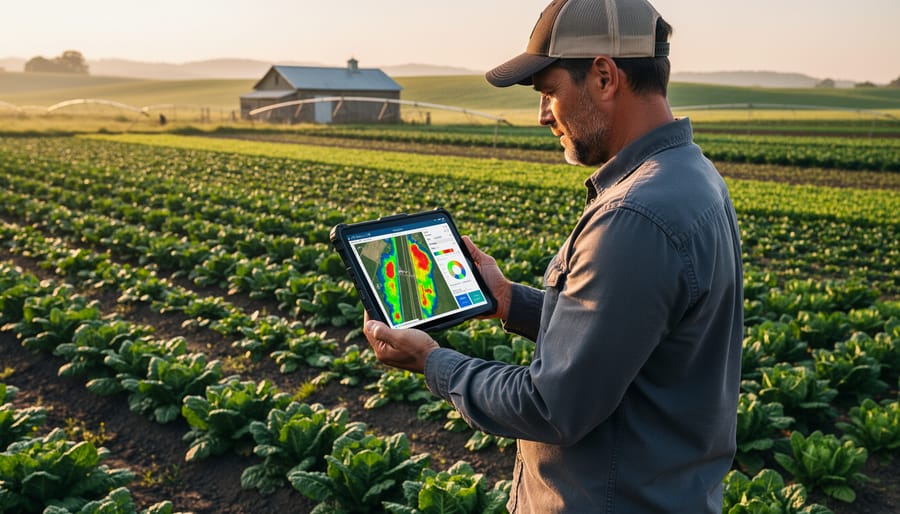
For small-scale farmers and market gardeners, implementing HACCP doesn’t require fancy equipment or extensive documentation. It means understanding your workflow—from soil to sale—and recognizing critical moments where contamination could occur. Think of it as creating a safety net woven throughout your entire farm operation, complementing your existing post-harvest handling standards with systematic hazard prevention.

The seven HACCP principles follow a natural sequence that builds a complete food safety system. Master these in order, and you’ll transform how you think about producing safe food. You’ll identify potential hazards before they affect your harvest, establish control points that actually matter, and create simple records that demonstrate your commitment to quality. This practical framework adapts beautifully to farm-scale operations, protecting both the customers who trust your produce and the farming business you’ve worked hard to build.

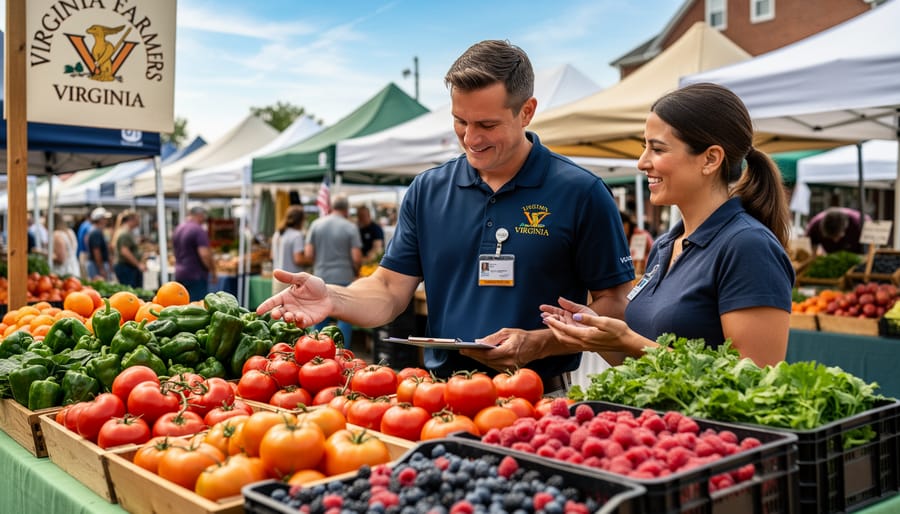
Why HACCP Matters for Small Farms and CSA Operations

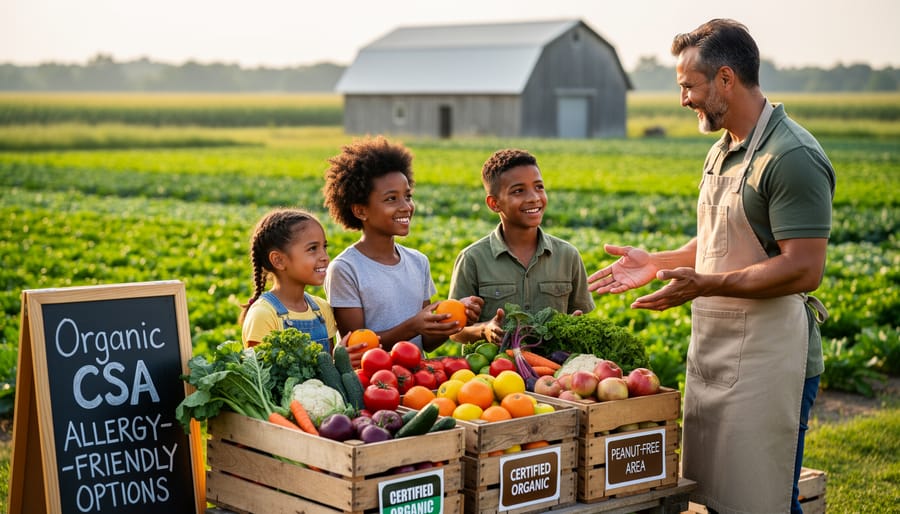
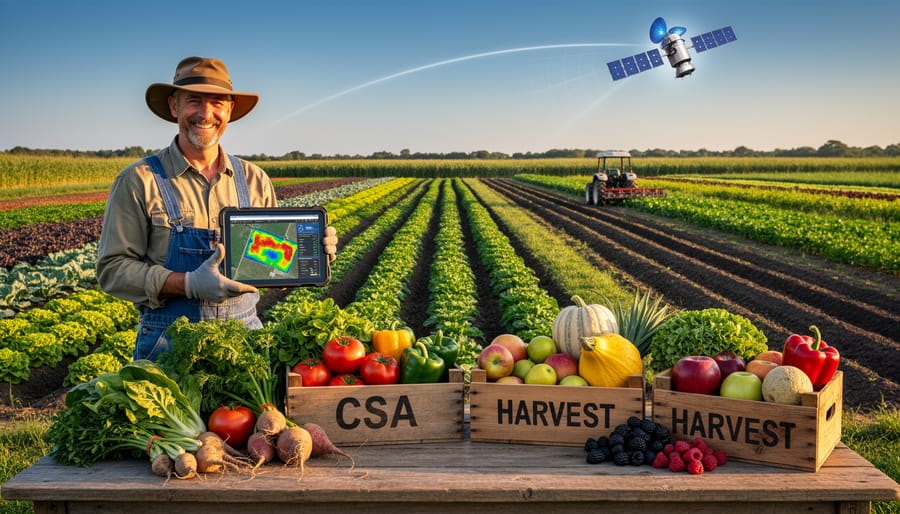
When you’re running a small farm or CSA operation, food safety might seem like something only big food companies need to worry about. But the reality is that farm reputation and customer wellbeing depend heavily on the care you take from harvest to delivery. HACCP (Hazard Analysis and Critical Control Points) provides a straightforward framework that helps protect both your customers and your business.

Fresh produce carries real risks when handling practices fall short. Contamination from soil, water, equipment, or human contact can introduce harmful bacteria like E. coli, Salmonella, and Listeria into leafy greens, tomatoes, melons, and other crops. According to the CDC, produce is responsible for nearly half of all foodborne illnesses in the United States. For small farms engaged in direct-to-consumer agriculture, one food safety incident can devastate years of relationship-building and trust.

Note: Even if you’re farming just a few acres, implementing HACCP principles demonstrates your commitment to food safety and helps build lasting consumer confidence in your products.

The good news is that HACCP doesn’t require expensive equipment or complicated processes. The FDA’s HACCP Principles & Application Guidelines outline a methodical way of identifying where problems could occur in your post-harvest handling and putting safeguards in place. Whether you’re washing lettuce, packing tomatoes, or storing root vegetables, HACCP helps you think through potential hazards and create simple, effective controls. For example, a Vermont CSA farmer discovered that implementing basic HACCP steps, like monitoring wash water temperature and tracking cooling times, actually streamlined her packing process while giving members peace of mind about the safety of their weekly shares. This practical approach to food safety strengthens your operation without compromising the personal touch that makes small farms special.

Principle 1: Conduct a Hazard Analysis

The first HACCP principle lays the foundation for your entire food safety plan by systematically identifying potential dangers that could affect your fresh produce. Think of it as putting on detective glasses to spot anything that might compromise the safety of your harvest before it reaches your CSA members’ tables.

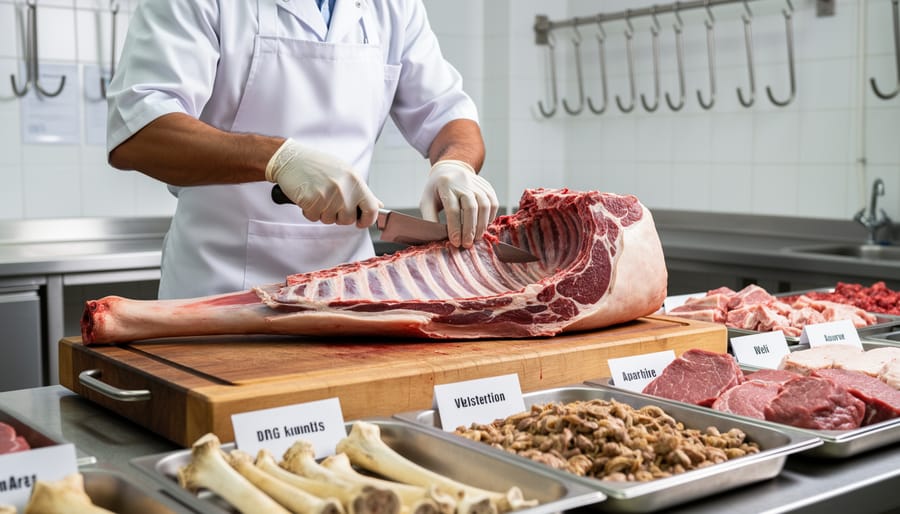
Hazards fall into three main categories. Biological hazards include harmful bacteria like E. coli or Salmonella that can contaminate produce through manure-amended soil, wildlife intrusion, or unsanitary handling practices. Chemical hazards might involve pesticide residue from neighboring conventional farms, cleaning solutions used improperly, or fuel contamination from farm equipment. Physical hazards are tangible objects like stones, glass fragments, jewelry pieces, or bits of packaging material that could accidentally end up in your harvest bins.

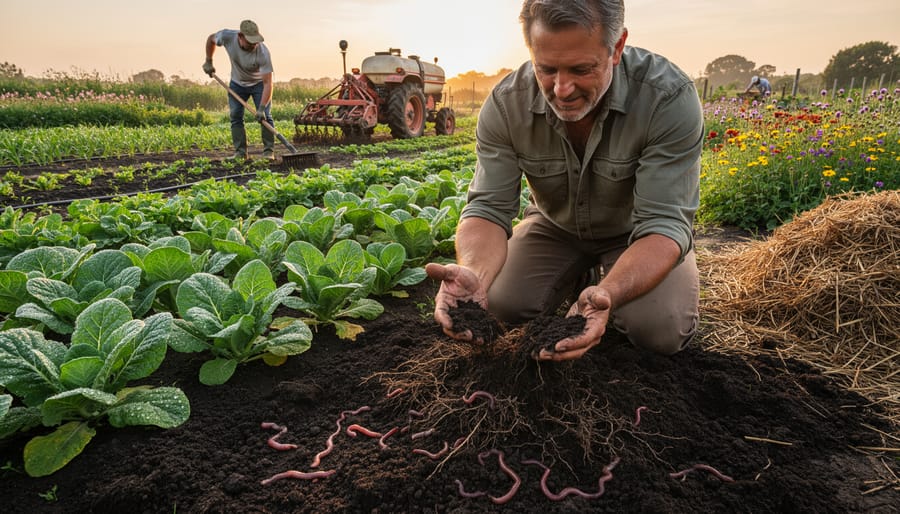
To conduct your hazard analysis effectively, walk through your entire operation step by step. Start at the field where irrigation water quality matters tremendously. Is your water source tested regularly? Move to harvest activities where unwashed hands or dirty tools could introduce contamination. Consider your washing and packing stations where contaminated wash water can actually spread pathogens from one batch to another if not properly managed.

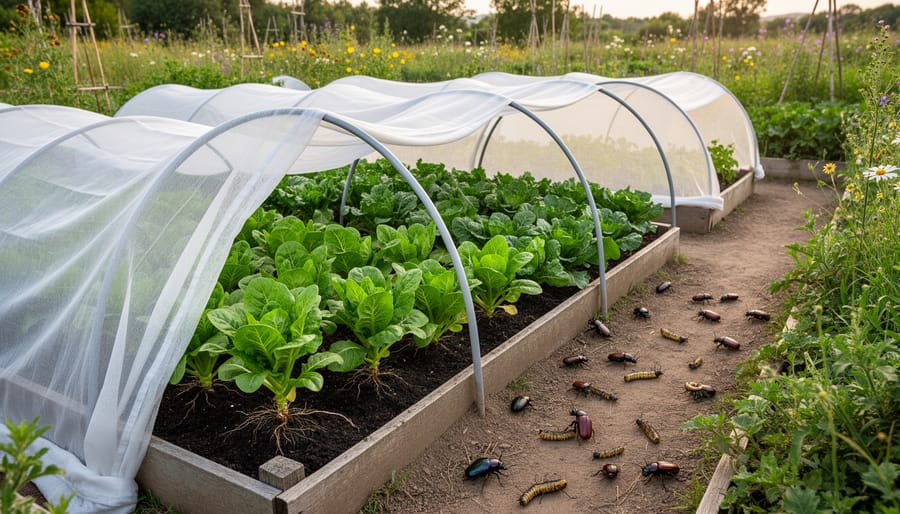
One inspiring example comes from Green Valley Farm in Ontario, where farmer Sarah discovered through her hazard analysis that birds roosting above her packing area posed a contamination risk. She installed simple netting and repositioned her work stations, dramatically reducing potential hazards without expensive renovations.

Document everything you identify, rating each hazard’s likelihood and severity. This creates your roadmap for the remaining HACCP principles and shows your commitment to delivering safe, wholesome food to your community.

Principle 2: Identify Critical Control Points (CCPs)

Once you’ve mapped out your entire harvest-to-storage process, the next step is identifying your Critical Control Points, or CCPs. Think of these as the make-or-break moments in your operation where a food safety hazard could develop if something goes wrong. A critical control point is defined as a step at which control can be applied and is essential to prevent or eliminate a food safety hazard or reduce it to acceptable levels.

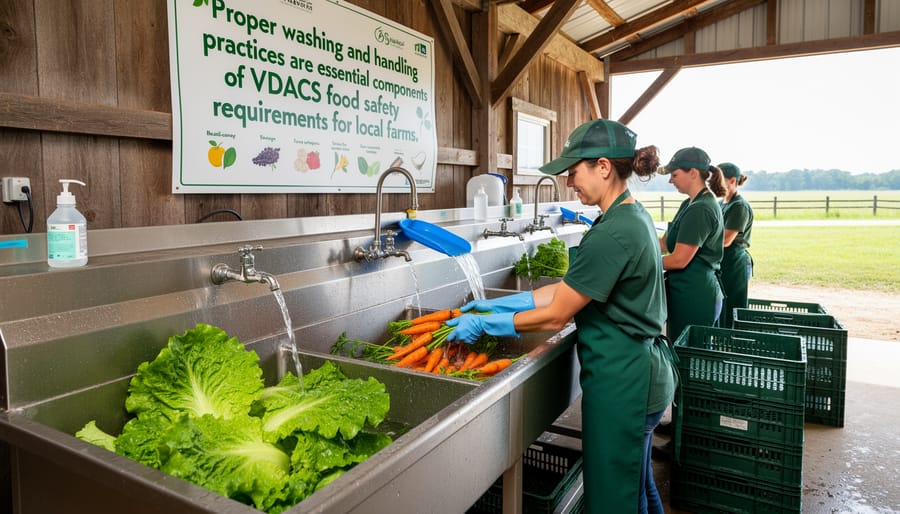
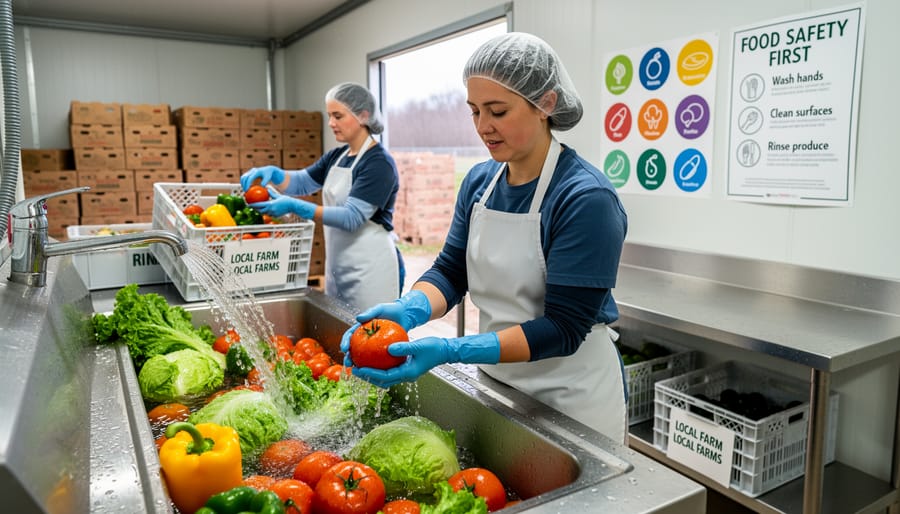
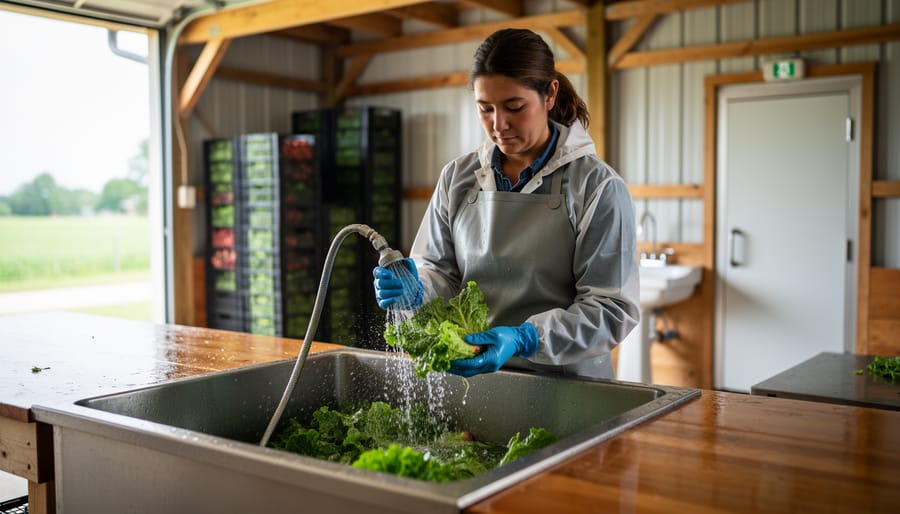
Critical Control Points differ from regular control points because they’re essential for food safety. For example, while trimming damaged leaves from lettuce is a good practice, it’s not a CCP. However, your final wash station where you remove dirt and potential pathogens is definitely a CCP that requires careful monitoring.

So how do you identify these critical points on your farm? Ask yourself: If this step fails, could it directly lead to a food safety problem? Is this my last chance to prevent or eliminate a hazard before the product reaches customers? If you answer yes, you’ve likely found a CCP.

Common CCPs in farm operations include washing stations where produce gets its final cleaning, cooling processes that reduce temperatures quickly to prevent bacterial growth, and cold storage areas that maintain safe temperatures. For Ready Farms, a small lettuce operation outside Portland, identifying their refrigerated cooler as a CCP transformed their food safety approach. Owner Maria Chen shared that simply recognizing this critical point led them to install an alarm system that alerts them if temperatures rise above safe levels.

Remember, different farms will have different CCPs based on what they grow and how they handle it. A berry farm’s CCPs might look completely different from a root vegetable operation.

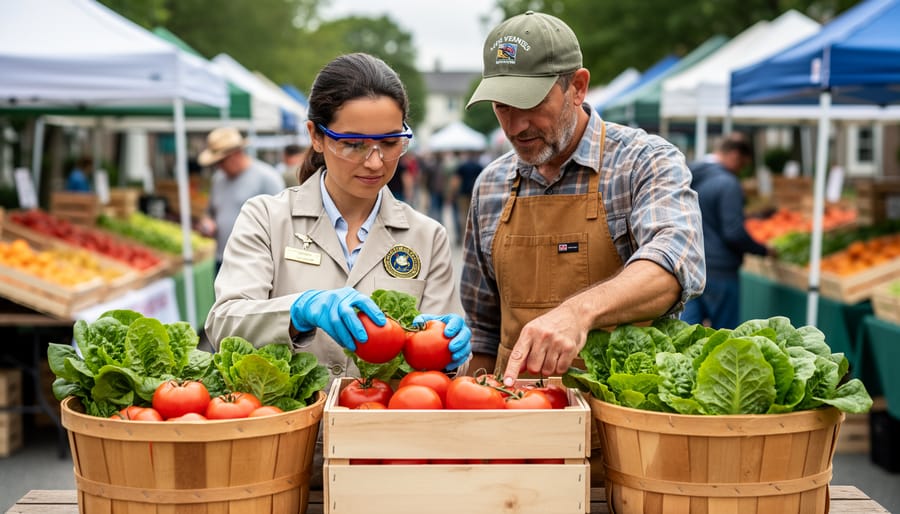
Proper washing stations are critical control points where farmers can prevent contamination and ensure food safety.

Principle 3: Establish Critical Limits

Once you’ve identified your Critical Control Points, the next step is setting measurable standards that tell you when things are safe and when they’re not. Think of critical limits as your safety boundaries—concrete numbers or conditions that separate acceptable from unacceptable.

For small-scale vegetable operations, these limits need to be specific and easy to monitor. Instead of saying “keep produce cold,” you’d specify “maintain cooler temperature between 34-38°F.” This precision removes guesswork and makes it clear when corrective action is needed.

According to food safety experts, critical limits must specify measurable parameters that can be consistently monitored and verified.

Here are common critical limits that work well for farm-scale operations:

Critical Control Point Critical Limit Why It Matters
Wash water temperature 50°F or below Prevents bacteria from entering produce
Cooling time after harvest Within 2 hours Slows bacterial growth
Cold storage temperature 34-38°F Maintains freshness and safety
Sanitizer concentration Per manufacturer specs Ensures effective cleaning

These standards should be based on scientific evidence or regulatory guidance. For wash water, the temperature matters because water warmer than your vegetables can actually pull bacteria inside through the pores. For leafy greens, that two-hour cooling window is critical for quality retention.

One Michigan farmer shared how implementing specific temperature limits transformed her CSA operation. By installing simple thermometers in her wash station and cooler, she could demonstrate to customers that safety wasn’t just a priority—it was measured and verified. The investment was minimal, but the confidence it built was invaluable. Your critical limits should be realistic for your operation while never compromising safety.

Principle 4: Establish Monitoring Procedures

Once you’ve identified your critical control points, the next step is keeping a watchful eye on them through consistent monitoring. Think of this as taking your farm’s vital signs—simple checks that help you catch potential issues before they become problems.

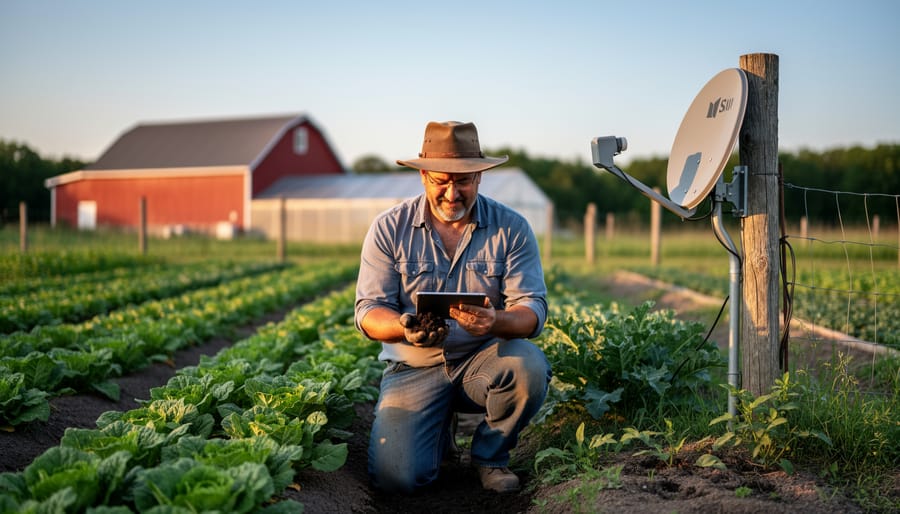
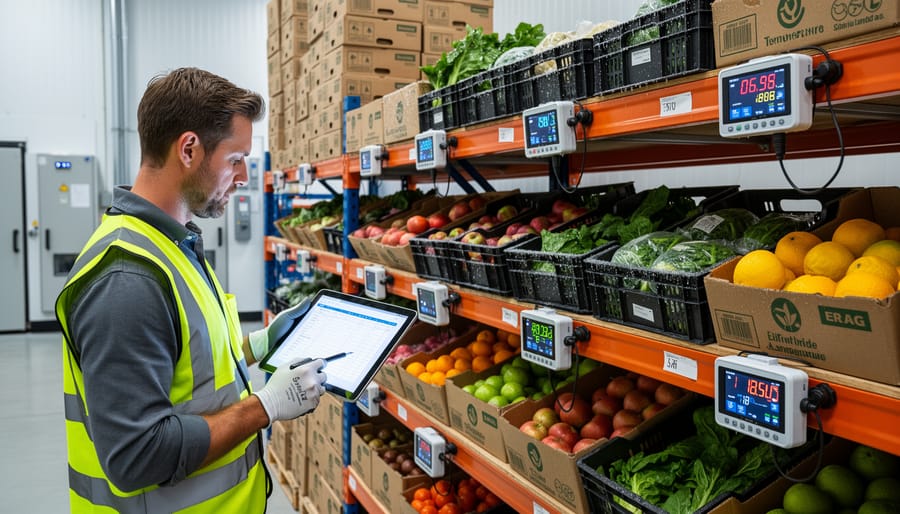
For small farm operations, monitoring doesn’t require expensive equipment or complicated systems. Start with temperature logs for your refrigeration units and wash water. A basic notebook with date, time, and temperature readings works perfectly. Check these at least twice daily, and you’ll quickly notice patterns or equipment issues that need attention.

Visual inspections are equally valuable and completely free. Train yourself and your team to spot signs of pest activity, equipment wear, or contamination risks during daily routines. Create a simple checklist that covers your packing area cleanliness, water clarity, and produce quality before distribution.

Water testing deserves special attention since it touches so much of your operation. Schedule regular testing based on your water source—well water might need monthly bacterial testing, while municipal supplies require less frequent monitoring. Keep a dedicated binder with all test results and inspection records.

Here’s a tip from successful farmer Maria Rodriguez, who runs a thriving CSA in Vermont: “I use my smartphone to take quick photos of temperature gauges and my packing area setup. It creates a visual record without extra paperwork, and I can easily share updates with my food safety team.”

The key is consistency over complexity. Choose monitoring methods you’ll actually maintain throughout the growing season. Document everything in a way that makes sense for your operation—whether that’s traditional paper logs, spreadsheets, or mobile apps designed for farm management.

Digital thermometer monitoring temperature of stored vegetables in farm cooler
Regular temperature monitoring ensures produce stays within safe ranges throughout storage and distribution.

Principle 5: Establish Corrective Actions

Even with the best monitoring systems in place, things can go wrong on a farm. Principle 5 is all about having a clear game plan for when critical limits aren’t met. Think of corrective actions as your emergency response protocol—a set of predetermined steps that protect food safety and get operations back on track quickly.

Warning: Corrective action plans must be established before problems occur, not scrambled together during a crisis when food safety is already at risk.

When monitoring reveals a deviation, your corrective action plan should address three key areas: what to do with the affected product, how to fix the immediate problem, and how to prevent it from happening again.

Let’s look at practical farm scenarios. If your walk-in cooler temperature rises above 40°F, your corrective actions might include: moving produce to a backup cooler immediately, checking the cooling unit for malfunctions, and evaluating whether the affected produce is still safe to distribute or needs to be discarded. If wash water testing shows contamination, you’d stop washing operations, drain and sanitize the system, verify water quality before resuming, and investigate the contamination source.

When freshly harvested greens sit too long before reaching cold storage, corrective actions could include implementing a harvest scheduling adjustment, adding interim cooling stations in the field, or reassigning staff to speed up the post-harvest workflow.

Documentation is critical here. Record what went wrong, when it happened, what actions you took, and how you verified the problem was resolved. Sarah Martinez, who runs a certified organic vegetable CSA in Vermont, keeps a simple corrective action log in her pack shed. “It’s saved us multiple times,” she shares. “We can spot patterns and fix recurring issues before they become serious problems.”

Principle 6: Establish Verification Procedures

Think of verification as stepping back to check the big picture of your food safety system. While monitoring is your day-to-day watch (like checking temperatures during harvesting), verification confirms that your entire HACCP plan actually works as intended.

Verification involves several activities that happen less frequently but are equally important. First, review your HACCP plan regularly—at least annually or whenever you introduce new crops, change processes, or experience a food safety issue. Sarah Chen, who runs a small vegetable CSA in Oregon, schedules her reviews every six months during her slower seasons, ensuring her procedures still make sense for her operation.

Equipment calibration is another key verification step. Your thermometers, pH meters, and scales need regular testing to ensure accuracy. A thermometer that reads incorrectly could mean you’re storing produce at unsafe temperatures without knowing it. Most small farms calibrate equipment monthly using simple ice-water tests or calibration solutions.

Testing procedures provide scientific confirmation that your system works. This might include periodic water testing from your irrigation source or swab tests on your washing station surfaces. While this sounds technical, many county extension offices offer affordable testing services specifically for small farms.

Finally, conduct periodic audits—even informal ones. Walk through your entire process with fresh eyes, or better yet, invite a fellow farmer or food safety expert to review your practices. These audits often reveal small improvements that make big differences in food safety.

Documentation of all verification activities keeps your system accountable and helps you spot patterns or problems over time.

Principle 7: Establish Record-Keeping and Documentation

The final principle brings everything together by creating a paper trail that demonstrates your farm’s commitment to food safety. Think of documentation as your farm’s food safety story—it shows what you’re doing, when you’re doing it, and how you’re keeping your produce safe for the families you serve.

Start with the essentials. You’ll want to maintain temperature logs if you’re storing produce in coolers, cleaning and sanitizing schedules for your wash stations and equipment, records of any corrective actions when something goes wrong, and notes from staff training sessions. Keep supplier information for inputs like organic fertilizers or seeds, along with any certifications you receive. These records prove you’re following your food safety plan consistently.

Key Takeaway: Essential farm records include temperature monitoring logs, cleaning schedules, corrective action documentation, employee training records, and supplier verification information. Maintain these records for at least two years to demonstrate your ongoing commitment to food safety.

For small farms, simplicity works best. A dedicated three-ring binder kept in a clean, dry location can serve as your documentation hub. Use plastic sheet protectors to shield records from dirt and moisture—farm environments can be tough on paperwork. Create simple checklists and forms that take just minutes to complete daily.

Digital options work wonderfully too. Free apps or basic spreadsheet templates on a tablet let you record information quickly while working. Many farmers photograph their paper logs weekly and store them in cloud folders as backup.

The magic number for retention is two years minimum, though keeping records longer provides valuable patterns about your growing seasons and operations. One organic farmer in Vermont shares that reviewing her three years of harvest logs helped identify the perfect timing for her tomato plantings, improving both yield and quality.

Remember, good documentation isn’t about creating mountains of paperwork—it’s about having simple, practical records that protect your customers and your farm’s reputation.

Farmer documenting food safety procedures in logbook at farm packing station
Maintaining detailed records of food safety practices protects both consumers and farm operations.

Putting It All Together: A Day in the Life of HACCP on Your Farm

Let’s follow Sarah, a small-scale organic farmer, through her Wednesday harvest. Before dawn, she reviews her Hazard Analysis (Principle 1) notes—wildlife near the lettuce patch means extra vigilance today. At her Critical Control Points (Principle 2), she checks the wash water temperature: 34°F, perfectly within her Critical Limits (Principle 3) of 32-38°F to prevent bacterial growth.

As workers arrive, Sarah implements her Monitoring Procedures (Principle 4). She records the water temperature every 30 minutes and watches her team follow proper handwashing protocols. When the thermometer reads 40°F mid-morning, her Corrective Actions (Principle 5) kick in immediately—she adds ice to bring temperatures back down and sets aside those greens for rewashing.

Throughout the day, her Verification Procedures (Principle 6) ensure everything runs smoothly. She spot-checks sanitizer concentration and reviews yesterday’s temperature logs. Every observation goes into her Record-Keeping system (Principle 7)—a simple binder with daily checklists and temperature sheets.

By afternoon, Sarah’s produce is properly cooled and packed for the farmers market or CSA pickup. Her HACCP system works quietly in the background, protecting her customers while giving her peace of mind. What once seemed overwhelming now feels like second nature—just part of growing food safely and responsibly.

Implementing the seven HACCP principles might seem overwhelming at first, but here’s the truth: these food safety practices are absolutely achievable for farms of all sizes. Whether you’re running a small backyard CSA or managing several acres, protecting your customers through proper food safety isn’t just good practice—it’s essential for building trust and safeguarding your farm’s reputation.

The beauty of HACCP is that you don’t need to tackle everything at once. Start small. Maybe begin by identifying your critical control points during harvest, then gradually build your monitoring and record-keeping systems as you grow more comfortable. Sarah Jenkins, a small-scale organic farmer in Vermont, started with simple handwritten logs and now has a streamlined system that takes just minutes each day to maintain.

Numerous resources are available to help you on this journey, from cooperative extension offices to online food safety courses designed specifically for small farms. The peace of mind that comes with knowing you’re doing everything possible to keep your customers safe is invaluable.

Your farm’s commitment to food safety reflects your dedication to quality and customer care. Take that first step today—review your current practices, identify one area to improve, and begin building your HACCP plan. Your customers, your community, and your farm’s future will thank you.

Why Whole Animal Butchery Connects You to Real Food (And Where to Experience It)

Posted by darrell on
0
Farm-to-Table Experiences
Why Whole Animal Butchery Connects You to Real Food (And Where to Experience It)

Whole animal butchery transforms your relationship with meat by connecting you directly to where your food comes from and honoring every part of the animal. When you participate in a farm-to-table butchery experience, you’re learning an ancient craft that reduces waste, supports local farmers, and ensures no protein goes unused—from premium cuts to organ meats and bone broth ingredients.

These hands-on workshops teach you to break down a whole pig, lamb, or beef into recognizable cuts while understanding muscle groups, proper knife techniques, and storage methods. You’ll leave with knowledge about which cuts work best for different cooking methods, how to save money by buying directly from farms, and the confidence to request custom cuts from your local butcher.

The sustainability impact is significant. Industrial meat processing often discards 30-40% of each animal, while whole animal butchery utilizes nearly everything. This approach supports farmers who raise livestock humanely on pasture, creating a transparent supply chain where you know exactly how your meat was raised, what the animals ate, and how they were processed.

Beyond the practical skills, these experiences build community connections. You’ll meet farmers who prioritize animal welfare, fellow food enthusiasts committed to ethical eating, and educators passionate about reviving traditional food crafts. Many participants discover that understanding the full process—though sometimes challenging emotionally—deepens their gratitude and mindfulness around meat consumption, leading to more intentional choices about quality over quantity.

What Whole Animal Butchery Really Means

Whole animal butchery represents a return to traditional meat processing methods where skilled craftspeople break down entire animals into various cuts, using virtually every part from nose to tail. Unlike conventional meat processing, which typically involves centralized facilities that reduce animals to standardized, plastic-wrapped portions, whole animal butchery happens on a smaller scale with deep attention to the unique qualities of each animal. This approach requires extensive knowledge of anatomy, blade skills, and an understanding of how different muscles and parts can be transformed into everything from premium steaks to flavorful sausages, bone broths, and rendered fats.

The philosophy behind this practice centers on honoring the animal’s life by ensuring nothing goes to waste. When a farmer raises livestock humanely on pasture and a butcher commits to utilizing the entire animal, it creates a circle of respect and responsibility. Organs become pâtés, bones turn into nutrient-rich stock, trim becomes ground meat or charcuterie, and even fat serves valuable culinary purposes.

Note: Whole animal butchery embodies a zero-waste philosophy that honors the animal’s sacrifice by using every possible part, transforming what conventional systems might discard into nourishing food.

This practice connects directly to sustainable agriculture principles by supporting small-scale farmers who prioritize animal welfare and environmental stewardship. When you purchase a quarter or half animal from a local farm, you’re participating in a food system that values quality over quantity and relationship over anonymity. The butcher becomes an educator, helping consumers understand different cuts and cooking methods, while farmers can receive fair compensation for their careful work.

Learning whole animal butchery takes time and dedication. Many passionate individuals now seek apprenticeships at local butcher shops or attend hands-on workshops at farms, discovering skills that were once passed down through generations. This revival strengthens local food systems and helps communities reconnect with where their meat truly comes from.

Butcher's hands skillfully breaking down beef on wooden butcher block in farm setting
Whole animal butchery requires skilled hands and deep knowledge of anatomy to properly break down and utilize every part of the animal.

The Farm-to-Table Connection: Why It Matters

Supporting Local Farmers and Economies

When you purchase a whole animal directly from a local farm, you’re making a meaningful investment in your community’s agricultural economy. Unlike conventional meat purchasing where farmers receive only a fraction of retail prices, whole-animal buying ensures producers receive fair compensation for their work. This direct relationship means farmers can sustain their operations, invest in sustainable livestock practices, and continue providing quality meat to their communities.

Consider Sarah Chen, a small-scale rancher in Ontario who nearly closed her operation five years ago. By partnering with local butchers to offer whole-animal purchases, she now serves 40 families annually, earning enough to expand her pasture-raised herd while implementing rotational grazing techniques that improve soil health.

This purchasing model also reduces financial pressure on farmers to maximize production at the expense of animal welfare. With guaranteed sales and fair prices, producers can focus on quality over quantity, raising animals humanely on pasture and avoiding factory farming shortcuts. Your decision to buy whole animals creates a ripple effect, strengthening local food systems and encouraging more farmers to adopt ethical, environmentally responsible practices.

Environmental Impact You Can Feel Good About

When you choose whole animal butchery from local farms, you’re making a choice that ripples positively through the environment. Unlike conventional meat that travels thousands of miles through multiple facilities, locally raised and processed animals dramatically reduce transportation emissions. Research confirms that local production offers environmental benefits across multiple measures.

Pastured animals play a surprisingly beneficial role in ecosystem health. As they graze, their hooves naturally aerate soil, while their manure returns vital nutrients to the earth. This creates a regenerative cycle that builds topsoil rather than depleting it. Well-managed grazing operations also support biodiversity by maintaining diverse plant communities and providing habitat for native species.

Small-scale farms practicing whole animal butchery typically embrace rotational grazing and responsible land stewardship. These farmers view their animals as partners in soil health rather than commodities to maximize. The result is healthier pastures, reduced erosion, and farmland that actually captures carbon rather than releasing it. By supporting these farms, you’re investing in agricultural practices that leave the land better than they found it.

What to Expect at a Whole-Animal Butchery Experience

Stepping into a whole-animal butchery workshop offers a transformative journey that connects you directly with the source of your food. These intimate, hands-on sessions typically take place in working farm settings or dedicated teaching facilities, where small groups gather around a carefully prepared workspace. The atmosphere strikes a balance between educational and reverent, acknowledging both the skill involved and the animal that made the learning possible.

Most workshops begin with introductions and a discussion about the animal’s life, the farm’s practices, and the philosophy behind nose-to-tail butchery. Instructors—often experienced farmers, butchers, or chefs—create a welcoming environment where questions are encouraged and no prior experience is assumed. The space itself usually features proper equipment, refrigeration, and safety gear, ensuring participants can focus on learning rather than logistics.

A typical session unfolds through these stages:

  1. Welcome and safety briefing covering proper knife handling, workspace organization, and hygiene protocols
  2. Educational overview explaining anatomy, muscle groups, and how different cuts suit various cooking methods
  3. Demonstration by the instructor breaking down primary sections and revealing the animal’s structure
  4. Hands-on practice where participants work individually or in pairs to separate specific cuts under guidance
  5. Discussion about utilizing every part, from organ meats to bones for stock
  6. Packaging session where participants prepare their portions to take home, often receiving recipe suggestions

Throughout the experience, instructors share stories about their farming journey, seasonal challenges, and why they’ve committed to sustainable practices. These personal narratives add depth to the technical skills being taught, helping participants understand the broader context of ethical meat production.

The learning process moves at a comfortable pace, with plenty of time for observation before attempting techniques yourself. Expect moments of uncertainty mixed with genuine accomplishment as you master new skills. Many participants describe feeling more connected to their food choices afterward, understanding the work and respect involved in bringing meat to their tables.

These workshops complement other farm tours and experiences, offering deeper engagement with sustainable agriculture. You’ll leave with practical knowledge, properly butchered cuts, and often newfound appreciation for the farmers and butchers who do this work daily.

Workshop participants learning butchery techniques from instructor at farm classroom table
Hands-on butchery workshops bring participants together to learn traditional skills while connecting with sustainable food practices.

Skills You’ll Learn and Cuts You’ll Discover

A whole-animal butchery workshop transforms your relationship with meat, teaching you skills that go far beyond what you’d find in a supermarket aisle. These immersive sessions guide participants through the complete breakdown of an animal, revealing the craftsmanship behind every cut and helping you understand exactly where your food comes from.

You’ll learn fundamental knife skills, including proper sharpening techniques and the essential cuts needed to navigate bone, muscle, and connective tissue safely and efficiently. Instructors demonstrate how to identify different muscle groups and explain why certain cuts suit specific cooking methods. Through these hands-on cooking skills, you’ll gain confidence working with whole cuts and develop an intuitive understanding of meat quality.

The real treasure lies in discovering cuts you’ve probably never seen packaged at the grocery store. Many workshops introduce participants to bavette steak, a flavorful cut from the flank that rivals expensive options when prepared correctly. You’ll encounter the teres major, often called the shoulder tender, which delivers exceptional taste at a fraction of premium prices. Collar cuts, cheeks, and various organ meats each offer unique flavors and textures that add diversity to your cooking repertoire.

Learning to utilize lesser-known cuts means less waste and better value. Workshop participants often share success stories about transforming tough cuts like shanks into rich, tender braises or making their own ground meat blends tailored to specific recipes. You’ll discover how to prepare stocks from bones, render fat for cooking, and cure simple charcuterie at home.

This knowledge empowers you to communicate confidently with local farmers and butchers, requesting specific cuts and understanding fair pricing. Rather than feeling limited by pre-packaged options, you’ll approach meat purchasing with creativity and purpose, making choices that honor both the animal and your commitment to sustainable, transparent food systems.

Assortment of various meat cuts arranged on wooden cutting board with fresh herbs
Understanding diverse cuts from whole animal butchery empowers consumers to use every part and discover flavorful options beyond standard supermarket selections.

Finding Farm-to-Table Butchery Experiences Near You

Finding local whole animal butchery experiences has become easier as more farms and food artisans recognize the growing interest in hands-on meat education. Your journey to discovering these unique opportunities starts closer to home than you might expect.

Community Supported Agriculture (CSA) farms often lead the way in offering educational programs beyond weekly vegetable boxes. Many CSAs that raise livestock host seasonal butchery workshops where members can learn traditional cutting techniques while gaining appreciation for every part of the animal. These intimate farm experiences create meaningful connections between eaters and their food sources, transforming abstract concepts of sustainability into tangible skills.

Specialty butcher shops in your area may offer weekend classes covering everything from basic knife skills to advanced charcuterie. These urban and suburban learning spaces make whole animal butchery accessible even if you don’t have direct farm access. Call ahead to ask about their educational calendar, as many shops schedule workshops around seasonal meat availability.

To locate these valuable experiences in your region, try exploring:

  • Local farmers markets where you can speak directly with livestock farmers about upcoming demonstrations
  • County agricultural extension offices that maintain directories of farm education programs
  • Online platforms dedicated to farm experiences and sustainable food workshops
  • Social media groups focused on homesteading and local food systems in your area

Don’t overlook the power of direct conversation. Many small-scale farmers who practice whole animal butchery host private workshops but don’t advertise widely. Strike up conversations at markets, join farm tours, and let farmers know you’re interested. These personal connections often lead to the most rewarding educational experiences, where you’ll learn not just techniques but the stories and philosophy behind ethical meat production.

Success Stories: Farmers and Butchers Making It Happen

Across North America, passionate farmers and butchers are revolutionizing how we think about meat by bringing whole-animal butchery back to local communities. These farmers’ stories showcase diverse approaches united by a common commitment to sustainability and education.

In Vermont’s Green Mountains, Sarah Chen transformed her family’s sheep farm into a hands-on learning destination. After struggling to find processors who valued every cut, she became a certified butcher herself. Now she hosts quarterly workshops where participants learn to break down whole lambs while discovering how nose-to-tail eating reduces waste. “People leave understanding that a lamb is more than just chops,” Sarah explains. “They take home cuts they’ve never tried and recipes that honor the whole animal.” Her waiting list extends six months, and her community has seen three new farm-to-table restaurants emerge from workshop alumni.

Meanwhile, in rural Oregon, fourth-generation rancher Miguel Rodriguez partners with a traveling butcher collective that serves multiple small farms. Together, they offer mobile butchery demonstrations at farmers markets, turning education into entertainment. Miguel raises heritage-breed cattle on rotational pastures and believes transparency builds trust. “When customers see the skill and respect involved in butchery, they understand why whole-animal purchases support better farming,” he notes. His model has inspired neighboring farms to coordinate community meat shares, making whole-animal buying more accessible.

In Ontario, Emma and James Foster run educational farm stays where guests participate in ethical livestock management and butchery basics. Their approach emphasizes the connection between pasture health, animal welfare, and meat quality. Visitors return home as ambassadors for sustainable agriculture, often starting their own buying clubs.

These innovators prove that whole-animal butchery creates ripple effects beyond individual farms, building food-literate communities invested in sustainable agriculture.

Making the Most of Your Whole Animal Purchase

Attending a whole animal butchery workshop often inspires people to take the leap and purchase directly from local farms. But before you commit to a whole or half animal, there’s some practical groundwork to cover. Let’s walk through what you need to know to make this sustainable choice work beautifully for your household.

First, assess your freezer situation. A quarter beef requires approximately 4 cubic feet of freezer space, while a half needs around 8 cubic feet, and a whole animal demands 16 cubic feet or more. If you don’t have a chest freezer, consider it a worthwhile investment—many farmers say it’s the single best purchase they made for their sustainable eating journey. Alternatively, split your order with friends, family, or neighbors who share your values about ethical meat sourcing. This creates community connections while making the financial commitment more manageable.

Note: Buying in bulk typically saves $2-4 per pound compared to retail prices, and splitting a half animal between two families often provides the perfect variety without overwhelming your freezer.

Speaking of variety, you’ll receive cuts you might not normally purchase—from premium steaks to ground meat, roasts, organ meats, and soup bones. This diversity is actually a gift that encourages culinary creativity and nose-to-tail eating. Start meal planning around your cuts rather than shopping for specific recipes. Dedicate time to learning new cooking methods for unfamiliar cuts—slow-braising tougher cuts yields incredibly flavorful meals, while organ meats pack exceptional nutrition. Many farmers provide cut sheets explaining each piece and cooking recommendations, turning your freezer into an adventure in sustainable gastronomy.

Embracing whole animal butchery experiences offers far more than just learning to cut meat—it creates a profound shift in how we relate to our food. These hands-on opportunities transform us into conscious consumers who understand the true value of every cut, the effort behind sustainable farming, and the responsibility that comes with eating meat. By participating in these workshops, you’re directly supporting farmers who prioritize animal welfare and environmental stewardship, helping build a more resilient local food system.

The journey from whole animal to table reconnects us with traditions nearly lost in our modern convenience culture. You’ll gain practical skills, deepen your appreciation for quality ingredients, and join a growing community committed to transparency in food production. Whether you’re already shopping at farmers markets or just beginning to explore sustainable options, seeking out butchery classes near you is a powerful next step.

Start by reaching out to local farms, culinary schools, or meat CSAs in your area. Ask questions, get your hands dirty, and don’t be intimidated by the learning curve. Every expert butcher started exactly where you are now. This investment in knowledge pays dividends through better meals, reduced waste, and meaningful connections with the people growing your food.

The Three Pesticide Types Every Organic Gardener Should Understand

Posted by darrell on
0
Agroecology and Ecosystem Practices
The Three Pesticide Types Every Organic Gardener Should Understand

Identify your pest problem before reaching for any solution—even organic pesticides work best when you know exactly what you’re fighting and can time applications to target vulnerable life stages. Natural pesticides fall into three distinct categories that every sustainable grower should understand: biological controls using living organisms like beneficial nematodes or Bacillus thuringiensis bacteria, botanical pesticides derived from plants such as neem oil or pyrethrin, and mineral-based options like diatomaceous earth or copper sprays.

Start with the least disruptive option first. Biological pesticides target specific pests without harming beneficial insects, making them ideal for maintaining garden ecosystem balance. When Sarah Chen introduced parasitic wasps to her quarter-acre market garden in Vermont, she eliminated cabbage worm damage by 90% without spraying anything at all. Botanical pesticides offer broader action when problems escalate, though they require careful timing since many break down quickly in sunlight. Apply neem oil in early morning or evening to maximize effectiveness and protect pollinators during their active hours.

Reserve mineral pesticides for persistent problems or preventative protection against fungal diseases. These options often have longer residual effects but can impact soil chemistry with repeated use, so rotate your approaches seasonally. Understanding these three categories empowers you to create an integrated pest management strategy that protects your crops while nurturing the complex web of life that makes organic growing successful. The goal isn’t eliminating every pest—it’s maintaining balance where your plants thrive alongside the beneficial organisms that support them naturally.

What Makes a Pesticide ‘Agroecological’?

When most people hear “pesticide,” they picture chemical sprays that eliminate every bug in sight. But in agroecological farming, pesticides serve a fundamentally different purpose. Rather than waging war against nature, agroecological pest management works in harmony with it, treating challenges as opportunities to strengthen your farm’s natural defenses.

The key difference lies in philosophy and approach. Conventional pest control typically relies on synthetic chemicals designed to quickly kill target pests, often disrupting entire ecosystems in the process. Agroecological methods, on the other hand, focus on ecosystem management, building biodiversity and resilience so your farm can naturally regulate pest populations. Think of it as supporting your immune system rather than constantly taking antibiotics.

Note: In agroecological systems, the goal isn’t to eliminate all pests, but to manage them at levels where beneficial insects, birds, and other natural predators keep populations in balance.

This approach requires rethinking what we mean by “pesticide.” In organic and agroecological contexts, these products come from natural sources like plants, minerals, or beneficial microorganisms. They work more gently, targeting specific problems while preserving the helpful insects and soil organisms that keep your garden thriving.

Sarah Martinez, who runs a successful CSA operation in Ontario, describes her shift in thinking: “I stopped asking ‘How do I kill this pest?’ and started asking ‘Why is this pest here, and what’s out of balance?’ Once I focused on building healthy soil and attracting beneficial insects, my pest problems practically solved themselves.”

This holistic perspective means that agroecological pesticides are always used as part of a broader strategy, never as standalone solutions. They’re the safety net, not the foundation.

Close-up of biological pesticide application on cabbage leaf with caterpillar pest
Biological pesticides like Bacillus thuringiensis target specific pests while preserving beneficial insects in the garden ecosystem.

Type 1: Biological Pesticides (Biopesticides)

Microbial Pesticides

Nature has its own pest control army, and microbial pesticides harness these tiny warriors to protect your crops. These living organisms—bacteria, fungi, and viruses—work like precision tools, targeting specific pests while leaving beneficial insects, pollinators, and other garden helpers completely unharmed.

The star player in this category is Bacillus thuringiensis, commonly called Bt. This naturally occurring soil bacterium produces proteins that are toxic to caterpillars but harmless to humans, pets, and beneficial insects. When caterpillars ingest Bt-treated plants, the proteins disrupt their digestive system, stopping them from feeding within hours. It’s particularly effective against cabbage worms, tomato hornworms, and other leaf-munching larvae. Apply Bt in the early morning or evening when caterpillars are actively feeding, and reapply after rain.

Another effective option is Beauveria bassiana, a fungus that naturally infects soft-bodied insects like aphids, whiteflies, and thrips. The fungal spores attach to the pest’s body, penetrate its outer shell, and grow inside, eventually killing it. This works best in humid conditions and may take several days to show results.

Ontario farmer Maria Chen shares her success: “After switching to Bt for my organic brassicas, I finally conquered cabbage worms without harming the ladybugs and lacewings that patrol my garden. It’s been a game-changer for maintaining my organic certification while keeping plants healthy.”

These microbial pesticides work best as preventive measures or when pest populations are young and small.

Plant-Derived Pesticides

Nature provides some of the most effective pest control solutions right in our gardens and forests. Plant-derived pesticides, also called botanical insecticides, harness the protective compounds that plants have evolved over millions of years to defend themselves against pests.

Neem oil, extracted from the neem tree native to India, stands out as a versatile organic pest fighter. It works by disrupting insect hormones, preventing larvae from maturing while also acting as a feeding deterrent. Many organic farmers swear by weekly neem applications during growing season to manage aphids, whiteflies, and spider mites. The beauty of neem is its gentle impact on beneficial insects like bees and ladybugs when applied correctly.

Pyrethrum, derived from chrysanthemum flowers, delivers quick knockdown action against a broad spectrum of insects. It attacks the nervous systems of pests rapidly, making it ideal for immediate infestations. However, its fast breakdown in sunlight means you’ll need to time applications for early morning or evening.

Essential oils from rosemary, peppermint, and clove offer another botanical approach. These work primarily as repellents and contact killers, perfect for smaller garden areas or greenhouse settings.

Within integrated pest management strategies, these plant-derived options shine brightest when combined with other practices. Sarah Chen, an Oregon vegetable grower, rotates neem treatments with beneficial insect releases and has reduced pest damage by 80 percent. She emphasizes patience: “Botanical pesticides work with nature’s timeline, not against it.” The key is consistency, proper timing, and remembering that these tools work best as part of a holistic approach rather than standalone solutions.

Real Farm Success: Maria’s Vineyard Story

Maria Rodriguez transformed her five-acre California vineyard after persistent pest issues pushed her to rethink her approach. “I was spending over $3,000 annually on synthetic pesticides, and the grape leafhoppers kept coming back stronger,” she shares.

Three years ago, Maria made the switch to biological pesticides, starting with Bacillus thuringiensis for caterpillar control and introducing beneficial nematodes for soil-dwelling pests. The transition wasn’t without hurdles. “The first season was rough,” Maria admits. “I had to learn patience and accept that biological control works differently—it’s about balance, not elimination.”

She now uses pheromone traps for monitoring and releases lacewings to manage aphid populations naturally. Her biggest challenge was adjusting her expectations around pest damage thresholds. “I learned that a few chewed leaves don’t mean crop failure.”

The results speak for themselves: Maria’s input costs dropped by 40%, her soil health improved dramatically, and she achieved organic certification. “My wines actually taste better now,” she says with pride. “Customers tell me they can taste the difference when grapes grow in truly healthy soil.”

Best Practices for Using Biopesticides

Getting the most from biopesticides requires thoughtful timing and application. Apply them early in the morning or late evening when beneficial insects are less active and conditions are cooler. Since many biopesticides contain living organisms, they work best when temperatures are moderate and humidity is present.

Store biopesticides properly in cool, dry locations away from direct sunlight, and always check expiration dates since their active ingredients can lose potency over time. Mix only what you’ll use immediately, as prepared solutions often don’t keep well.

Combine biopesticides with other sustainable practices for better results. Rotate different biopesticide types to prevent pest resistance, and integrate them with companion planting, crop rotation, and habitat creation for beneficial insects. One Michigan CSA farmer shared how pairing Bt applications with strategic marigold borders reduced her pest problems by 70% while creating a haven for pollinators.

Remember that biopesticides work preventatively and may take longer than synthetic options. Monitor your crops regularly, apply at the first sign of pests, and be patient. You’re building a balanced ecosystem, not just eliminating problems.

Type 2: Botanical and Mineral-Based Pesticides

Mineral Pesticides in Action

Mineral-based pesticides have been protecting crops for centuries, and they remain valuable tools in organic farming today. Unlike synthetic chemicals, these naturally occurring substances offer effective pest management while fitting perfectly into sustainable growing systems.

Sulfur stands as one of the oldest fungicides still in use. When applied as a fine dust or wettable powder, sulfur particles disrupt fungal spores, preventing diseases like powdery mildew, rust, and black spot from taking hold. Many organic orchardists swear by sulfur sprays during humid spring weather when fungal pressure peaks. The key limitation? Sulfur can harm beneficial insects if overused, and it becomes less effective in temperatures above 90 degrees Fahrenheit, sometimes even causing leaf burn in extreme heat.

Copper compounds work wonders against bacterial diseases such as fire blight and bacterial spot. These minerals create an inhospitable surface environment where bacteria simply cannot thrive. Small-scale vegetable growers often apply copper sprays preventatively during wet periods when bacterial infections spread most rapidly.

Mineral Type Target Issues Best Application Timing Organic Certified
Sulfur Fungal diseases Early morning, cool weather Yes
Copper Bacterial problems Before rain events Yes
Diatomaceous Earth Soft-bodied insects Dry conditions Yes

Diatomaceous earth takes a completely different approach. These microscopic fossilized algae create sharp edges that pierce insect exoskeletons, causing dehydration. It works brilliantly against slugs, beetles, and aphids when applied as a barrier around plant bases.

The main consideration with mineral pesticides is persistence. Copper can accumulate in soil over time, potentially affecting soil health. The sustainable approach means using these tools strategically and sparingly, rotating with biological controls, and always monitoring for actual pest pressure rather than spraying preventatively out of habit.

Macro view of diatomaceous earth mineral pesticide on soil with insect pests
Mineral-based pesticides like diatomaceous earth work through physical action rather than chemical toxicity.

Soap and Oil Sprays

Soap and oil sprays represent some of the gentlest yet effective pest control methods available to organic gardeners. These low-impact solutions work by suffocating soft-bodied insects like aphids, whiteflies, spider mites, and mealybugs, making them perfect for anyone committed to sustainable growing practices.

Insecticidal soaps use potassium salts of fatty acids to break down insect cell membranes on contact. You can purchase ready-made products like Safer Brand Insect Killing Soap, or create your own by mixing 1-2 tablespoons of pure liquid castile soap with one quart of water. Just avoid dish detergents, as they often contain degreasers and additives that can harm plants.

Horticultural oils, including neem oil and dormant oils, coat insects and their eggs, disrupting their life cycles. These work especially well during dormant seasons when you can apply heavier concentrations without damaging foliage. During the growing season, lightweight summer oils protect delicate leaves while still controlling pests.

Sarah Chen, an organic farmer in Vermont, swears by her weekly neem oil routine. “I spray early morning or evening when beneficial insects are less active,” she shares. “It’s kept my tomatoes pest-free for three seasons without harsh chemicals.”

Application timing matters tremendously. Always test on a small plant area first, spray during cooler parts of the day to prevent leaf burn, and reapply after rain. Remember, direct contact is essential since these sprays don’t have residual effects. With consistent application and proper timing, soap and oil sprays become powerful allies in your organic pest management toolkit.

Environmental Considerations

Here’s the truth many gardeners don’t realize: just because a pesticide is natural or organic doesn’t mean it’s completely harmless. Even botanical pesticides like neem oil can harm beneficial insects if applied carelessly, and products containing copper can accumulate in soil over time, affecting microbial communities essential for soil health.

Note: Always apply pesticides during early morning or evening hours to minimize contact with bees and other protecting pollinators during their active foraging times.

Responsible use means following label instructions precisely, targeting applications only where needed, and timing treatments to protect beneficial species. Consider your farm’s watershed too—runoff from any pesticide can impact nearby water systems. The goal isn’t perfection but mindful stewardship, using the least toxic option at the right time and always prioritizing prevention through healthy soil and biodiversity first.

Type 3: Behavioral and Physical Control Pesticides

Pheromone Traps and Mating Disruptors

These clever pest management tools work like nature’s version of mixed signals. Pheromone traps use synthetic versions of insects’ natural chemical messengers to lure male pests into traps, while mating disruptors saturate your garden with these same scents, making it impossible for males to locate females. The beauty? Beneficial insects like ladybugs and bees aren’t affected since each pheromone is species-specific.

Codling moth pheromone traps are garden heroes for apple and pear growers, capturing males before they can mate and reducing the next generation’s numbers. For vegetable gardens, tomato pinworm disruptors work wonders by preventing reproduction without harming pollinators or predatory insects. Oriental fruit moth dispensers help stone fruit enthusiasts protect their peaches and plums organically.

Sarah, an organic orchardist in Washington, shares her success: “After switching to pheromone disruption three years ago, my codling moth damage dropped from 30% to just 5%, and my beneficial insect populations have thrived.”

These methods require patience since they prevent future generations rather than eliminating current pests immediately. However, they’re incredibly effective as part of an integrated approach, especially when combined with physical barriers and careful monitoring of your crops throughout the growing season.

Row covers protecting vegetable garden beds as physical pest barrier
Physical barriers like row covers prevent pest access without any chemical intervention, representing the most ecologically gentle approach.

Physical Barriers and Deterrents

Sometimes the best pest control doesn’t involve sprays at all. Physical barriers create a protective shield between your crops and hungry pests, offering immediate protection without any environmental concerns.

Row covers are garden workhorses, lightweight fabric sheets that float over plants to exclude insects while allowing sunlight and water through. They’re particularly effective against flea beetles, cabbage moths, and cucumber beetles. Just remember to remove them when plants need pollination.

For slug and snail problems, copper tape works like magic. These pests won’t cross copper barriers due to a natural chemical reaction with their slime. Apply tape around raised beds or individual pots for season-long protection.

Reflective mulches confuse aphids and whiteflies by disrupting their ability to locate host plants. Silver or aluminum-coated plastic mulches work especially well for squash and tomatoes during early growth stages.

Sticky traps capture flying insects before they can cause damage. Yellow attracts whiteflies and aphids, while blue draws thrips. Position them at plant canopy height for best results.

Maria, an organic farmer in Vermont, combines row covers with beneficial insect releases. “The covers protect young plants during their vulnerable stage, then I remove them and let my ladybugs take over,” she explains. This integrated approach maximizes protection while minimizing labor and supporting natural ecosystem balance.

Creating Your Integrated Approach

The real magic happens when you weave these three pesticide types together into a customized pest management plan. Think of it as creating layers of defense that work in harmony with nature rather than against it.

Start by observing your garden or farm regularly. Walk your rows each morning with coffee in hand, checking for pest activity and beneficial insect populations. This behavioral control forms your foundation. Remove affected plant parts, adjust watering schedules, and practice crop rotation to discourage pests before they become problematic.

Next, invite biological allies into your space. Plant flowering borders to attract parasitic wasps and ladybugs. Consider purchasing beneficial nematodes for soil-dwelling pests. When problems arise despite these efforts, reach for your botanical options as targeted interventions rather than blanket solutions.

One small-scale farmer in Oregon shared how this approach reduced her pest losses by 60% while actually increasing biodiversity on her three-acre plot. She scouts daily, releases lacewings bi-weekly during peak season, and keeps neem oil as her backup plan.

Remember, successful integrated pest management means accepting some crop damage as part of a healthy ecosystem. Your goal isn’t perfection but balance, creating a resilient growing system that sustains itself season after season while producing abundant, chemical-free harvests.

Choosing the Right Pesticide Type for Your Garden

Making smart pesticide choices starts with understanding that the goal isn’t perfection—it’s balance. The most successful gardeners and farmers approach pest management like a ladder, always starting at the bottom with the gentlest options and climbing only when necessary.

Your decision-making process should follow a strategic assessment:

  1. Identify the pest accurately and research its life cycle to determine vulnerable stages
  2. Evaluate the actual damage level—minor cosmetic issues rarely justify intervention
  3. Consider your crop type and harvest timeline, as edible crops require extra caution
  4. Check weather conditions and pest pressure intensity in your specific microclimate
  5. Start with biological controls or physical barriers before moving to other options
  6. Reserve botanical pesticides for moderate pressure when monitoring shows escalating issues
  7. Use mineral-based solutions only when facing severe infestations that threaten crop viability

Remember that timing matters tremendously. Sarah Martinez, an organic berry farmer in Oregon, shares her philosophy: “I watch my plants daily during peak season. Catching aphids early means a strong spray of water works wonders. Wait too long, and I’m reaching for neem oil.”

Your ecological goals should guide every choice. If you’re cultivating habitat for pollinators and beneficial insects, prioritize targeted biological controls over broad-spectrum botanicals. Container gardeners often find that combining preventive practices—crop rotation, companion planting, healthy soil—reduces their need for any pesticides dramatically. The least disruptive option that effectively manages your specific problem is always the right choice.

Effective pest management in agroecological systems isn’t about finding the one perfect pesticide solution. Instead, it’s about understanding all three types—biological, botanical, and mineral-based—and knowing when and how to use each one thoughtfully. The real magic happens when these tools become part of a broader ecosystem management strategy that includes crop rotation, companion planting, habitat diversity, and soil health.

Think of pesticides as just one instrument in your sustainable farming orchestra. Sarah, a third-generation farmer who transitioned to organic methods five years ago, puts it perfectly: “I used to think going organic meant choosing between pests or chemicals. Now I realize it’s about creating a system where healthy soil and beneficial insects do most of the work, and these gentler pesticides are my backup plan, not my first line of defense.”

Whether you’re tending a backyard vegetable garden or planning your own small-scale farming venture, start by observing your ecosystem. Notice which beneficial insects are already present. Test your soil. Build relationships with plants that attract natural predators. When pest pressure does require intervention, you’ll be equipped to choose the right biological, botanical, or mineral option for that specific situation.

Ready to see these principles in action? Connect with local CSA farms in your area. Many offer farm tours, workshops, and volunteer opportunities where you can witness integrated pest management firsthand and learn from experienced growers who’ve perfected the balance.

Your CSA Food Donations Could Save You Thousands (Here’s How)

Posted by darrell on
0
Policy, Law & Certification
Your CSA Food Donations Could Save You Thousands (Here’s How)

Yes, food donations are tax deductible, and as a farmer or CSA operator, you may qualify for enhanced deductions that go beyond the standard write-offs most donors receive. The IRS allows you to deduct up to 15% of your taxable income when donating food to qualified charitable organizations, and in many cases, you can claim deductions based on the fair market value of your produce rather than just your production costs.

The process starts with understanding your protection under the Bill Emerson Good Samaritan Food Donation Act, which shields you from liability when donating food in good faith to nonprofit organizations. This federal protection means you can confidently donate surplus crops, slightly imperfect produce, or end-of-season harvests without fear of legal repercussions if someone claims the food caused harm.

For CSA farmers, this creates a meaningful opportunity to reduce food waste while lowering your tax burden. Calculate your potential deduction by documenting the fair market value of donated items—essentially what you would charge customers at your farm stand or through your CSA shares. Keep detailed records including dates, quantities, descriptions of produce donated, and acknowledgment letters from receiving organizations.

The enhanced deduction provision particularly benefits farmers operating as C corporations, allowing deductions of up to 25% of taxable income. Many small-scale and CSA farmers successfully partner with local food banks, homeless shelters, and community kitchens, creating relationships that serve their communities while providing substantial tax benefits. Documentation requirements are straightforward, making this an accessible strategy for farms of any size.

Understanding Food Donation Tax Deductions for CSA Farms

Fresh organic vegetables in wooden crates at food bank distribution center
CSA farms can donate surplus produce to food banks and qualified nonprofits while receiving valuable tax deductions.

What Makes a Food Donation Tax Deductible?

Good news for generous farmers and food donors: yes, food donations are generally tax deductible when you follow IRS guidelines! Understanding what qualifies can help your farm maximize tax benefits while supporting your community.

For donations to count, you must give to qualified tax-exempt organizations. These include food banks, soup kitchens, homeless shelters, and 501(c)(3) nonprofit organizations that serve people in need. Religious organizations with feeding programs and community meal services also qualify. The key is ensuring your recipient has proper tax-exempt status, which you can verify through the IRS Tax Exempt Organization Search tool.

The food itself must meet certain standards. Fresh produce from organic CSA operations, excess harvest, or slightly imperfect items that don’t meet retail standards but remain wholesome all qualify. The IRS requires donated food to be suitable for human consumption at the time of donation. You can’t claim rotten or unsafe produce, but cosmetically imperfect vegetables and surplus yields work perfectly.

For CSA farms, the basic requirement is maintaining proper documentation. You’ll need written acknowledgment from recipient organizations for donations over 250 dollars, describing what you gave and when. Keep detailed records of quantities, fair market values, and dates. Many successful farmers share that simple spreadsheets tracking weekly donations make tax time straightforward.

Remember, the organization receiving your donation cannot provide goods or services in return for your deduction to remain valid. Pure generosity gets rewarded!

The Enhanced Deduction for CSA Farmers

Here’s some great news if you’re a CSA farmer looking to donate your harvest: you may qualify for an enhanced tax deduction that goes beyond what typical donors receive. While most individuals can only deduct the cost basis of donated food (essentially what they paid for it), qualifying farmers can deduct up to 50% of the fair market value of their donated products.

This enhanced deduction recognizes the unique position of agricultural producers who grow food for income. For a CSA farmer who donates fresh tomatoes worth $500 at market price, with a growing cost of $150, the regular deduction would be limited to that $150. However, under the enhanced deduction, you could potentially deduct $250, calculated as the cost basis plus half the appreciation in value.

To qualify, you must donate to eligible organizations like food banks or soup kitchens that serve those in need. The donated items must be wholesome food inventory that would otherwise be sold in your regular CSA operation. This provision helps bridge the gap between farm surplus and community hunger while rewarding farmers for their generosity. Keep detailed records of your costs, market values, and recipient organization information to support your enhanced deduction claim at tax time.

Navigating Food Donation Liability Protection

The Good Samaritan Act: Your Safety Net

One of the biggest concerns for CSA farmers considering food donations is liability. What if someone gets sick from donated produce? The good news is that federal law has your back. The Bill Emerson Good Samaritan Food Donation Act, passed in 1996, protects food donors from civil and criminal liability when donating to nonprofit organizations in good faith.

This protection applies to both direct donations and gleaning programs, covering you whether you’re donating surplus kale to a food bank or inviting volunteers to harvest excess tomatoes from your fields. The law shields you from lawsuits as long as the food donated appears wholesome and safe at the time of donation, even if it’s past its peak freshness.

There’s an important exception: the protection doesn’t apply in cases of gross negligence or intentional misconduct. Simply put, don’t donate food you know is contaminated or unsafe. But that slightly bruised apple or the perfectly edible carrots that don’t meet your CSA box aesthetic standards? Those are completely protected.

Many farmers who’ve embraced donation programs share that this legal protection removed their primary hesitation. It transforms what once felt risky into a safe, rewarding practice that reduces waste while serving your community.

What About Food Safety Standards?

Good news: the Bill Emerson Good Samaritan Food Donation Act protects you from liability when donating food in good faith. This federal law shields farmers and food donors from civil and criminal prosecution, provided the food meets basic safety standards at donation time.

For CSA farmers, this means following the same food safety standards you already practice. Keep donated produce properly stored, handle it with clean hands and equipment, and avoid donating anything you wouldn’t feel comfortable serving your own family. Simple practices like washing produce, maintaining proper temperatures, and documenting donation dates go a long way.

Many farmers worry about FSMA compliance requirements, but the same protocols protecting your CSA members also protect your donations. Document your safety procedures, and you’re covered both legally and for tax purposes.

How to Calculate Your Tax Deduction

Cost Basis Method for Most CSA Farms

Most small CSA farms will use the cost basis method, which is straightforward and perfectly suited to farming operations. Here’s the good news: you can deduct the actual expenses you invested in growing the donated food.

This includes your costs for seeds, seedlings, soil amendments, compost, fertilizer, water, and other growing inputs. You’ll also factor in calculating labor costs if you paid employees to help grow, harvest, or prepare the donated produce. Don’t forget to include fuel for tractors, irrigation system expenses, and even a proportional share of land use costs.

For example, if you donated 50 pounds of tomatoes and your total cost to grow them was $75 in seeds, compost, and labor, that’s your deductible amount. Keep detailed records of all these expenses throughout the growing season, which also helps with overall tax compliance for CSA farms.

The beauty of this method is its simplicity. You’re already tracking these expenses for farm management purposes, making tax time much easier when donation season arrives.

Fair Market Value Method (For Qualifying Farms)

Here’s the exciting part: if your CSA operation has grown into a qualified farm business, you might be eligible for significantly higher deductions using the fair market value method. Instead of deducting just your cost basis, you could deduct the full retail value of your donated produce.

To qualify for this enhanced deduction, your farm must meet specific IRS criteria. You need to be a C corporation or, more commonly for CSA farms, a qualified farmer with ordinary income from your farming business. The donated food must go to qualified charitable organizations that serve people who are ill, needy, or infants, and the charity must use the food solely for these purposes.

The deduction can reach up to 15% of your net farm income for sole proprietors and partnerships, or 25% for C corporations. For example, if you donate $5,000 worth of tomatoes and lettuce that cost you $2,000 to grow, you could potentially deduct the full $5,000 rather than just your $2,000 cost basis.

This method requires careful documentation and working with a tax professional familiar with agricultural businesses. Many successful CSA farmers have found these enhanced deductions make their donation programs not only community-minded but financially sustainable too.

Essential Documentation and Record-Keeping

Farmer documenting harvest records with clipboard beside fresh produce basket
Proper documentation of donated produce is essential for claiming tax deductions and maintaining IRS compliance.

Required Forms and Receipts

Proper documentation transforms your generous food donations into valuable tax deductions. When donating surplus produce from your farm or garden, you’ll need to keep detailed records to satisfy IRS requirements.

For donations exceeding $250, you must obtain a written acknowledgment from the recipient organization. This letter should include the organization’s name, donation date, description of items donated, and a statement confirming whether you received any goods or services in return. Request this acknowledgment promptly after each donation, as many food banks and community organizations are happy to provide them.

If your total noncash donations exceed $500 for the year, you’ll need to complete IRS Form 8283 and attach it to your tax return. This form requires information about each recipient organization, donation dates, and how you acquired the donated items. For food you grew yourself, note the date you harvested it.

Keep your own records too. Document what you donated, estimated fair market values (based on local farmers market prices), dates, and recipient details. Photographs of your donations can provide helpful backup documentation. One Pennsylvania farm couple maintains a simple spreadsheet tracking their weekly food bank contributions, making tax time much easier while supporting their community throughout the growing season.

Simple Record-Keeping Systems for Busy Farmers

Good news: you don’t need fancy software or complicated spreadsheets to track your donations. A simple three-ring binder or smartphone app works perfectly for busy farmers juggling multiple tasks.

Consider keeping a donation log at your packing shed or cooler. Each time you set aside produce for donation, jot down the date, item, quantity, and estimated value based on your regular CSA prices. Many farmers find success using their phone’s notes app or a free spreadsheet on their tablet that syncs across devices.

Take quick photos of donations before delivery. These visual records supplement your written logs and provide excellent backup documentation if questions arise later. Some farmers create a dedicated folder on their phone labeled “Donation Records” for easy year-end access.

For a streamlined approach, batch your record-keeping. Instead of logging individual carrots or tomatoes, note “10 pounds mixed produce” with a total value. The IRS accepts reasonable estimates for perishable goods.

Meet Sarah from Willow Creek Farm who uses a simple pocket notebook she keeps in her harvest tote. “I spend maybe five minutes per donation,” she shares. “When tax season arrives, I just total the pages and hand everything to my accountant.”

The key is consistency, not perfection. Choose one method that fits naturally into your existing workflow and stick with it throughout the growing season.

CSA farmer standing confidently in thriving vegetable garden at sunset
Successful CSA farmers are discovering how food donation programs create both tax savings and meaningful community impact.

Real-World Benefits: A CSA Farmer’s Success Story

Meet Sarah Chen, who runs Green Valley CSA in Vermont, where she grows organic vegetables for 120 member families. Three years ago, Sarah faced a common challenge: perfectly good produce that didn’t meet her members’ aesthetic expectations or exceeded weekly harvest needs. Rather than composting 15-20% of her harvest, she decided to establish a donation program with her local food bank.

The results transformed both her farm’s bottom line and her community. In her first year, Sarah donated 3,200 pounds of organic produce valued at $9,600. Because she qualified for the enhanced deduction as a farmer donating to a qualified organization, she could deduct the full fair market value rather than just her production costs. This resulted in tax savings of approximately $2,880, effectively recovering about 30% of her potential lost revenue.

“I was amazed at how straightforward the process was,” Sarah explains. “I kept simple records of what I donated each week, got quarterly receipts from the food bank, and my accountant handled the rest during tax season.”

Beyond the financial benefits, the program created unexpected positive ripples. Local media covered her donations, attracting fifteen new CSA members who specifically mentioned her community involvement. Sarah also connected with the food bank’s nutrition educator, who now visits her farm for seasonal workshops, strengthening relationships between CSA members and the broader community.

The program reduced her composting needs, saved disposal time, and gave purpose to crops affected by minor cosmetic issues. Most importantly, Sarah’s donations provided fresh organic vegetables to over 200 families facing food insecurity, demonstrating how smart tax planning can multiply good outcomes for everyone involved.

Common Mistakes CSA Farmers Make (And How to Avoid Them)

Even experienced CSA farmers sometimes stumble when it comes to claiming food donation deductions. One of the most common mistakes is failing to obtain proper documentation from recipient organizations. Without a written acknowledgment from the food bank or nonprofit that includes your farm’s name, the date, and a description of what you donated, the IRS may disallow your deduction entirely. Always request receipts immediately, even for smaller donations throughout the season.

Another frequent error involves overvaluing donated produce. While it’s tempting to use retail prices, remember that the IRS expects fair market value based on wholesale pricing for similar quality items. Keep records of what you typically sell your produce for at farmers markets or through your CSA shares to establish reasonable valuations. Consider checking local wholesale market reports to support your pricing.

Many farmers also miss out on enhanced deductions by not understanding eligibility requirements. If your farm operates as a C corporation or you meet specific gross receipts thresholds, you might qualify for deductions up to twice your cost basis. Review your business structure annually with a tax professional who understands agricultural operations.

Lastly, don’t mix personal and business motivations without proper documentation. If you’re donating excess produce that didn’t meet CSA quality standards, maintain detailed records showing the food was still wholesome and marketable. One successful organic farmer in Vermont keeps a simple log with photos, which has proven invaluable during tax preparation and provides peace of mind.

Getting Started: Your Action Plan for Food Donations

Ready to transform your surplus harvest into tax savings while feeding your community? Here’s your straightforward action plan to launch a compliant food donation program.

Start by identifying qualified recipient organizations in your area. Food banks, soup kitchens, homeless shelters, and churches with feeding programs typically hold 501(c)(3) status, making them eligible recipients. Call your local food bank first—they often coordinate with smaller pantries and can become your primary distribution partner. Many have established pickup routes and refrigerated trucks, making logistics surprisingly simple.

Next, establish your documentation system before making your first donation. Create a simple log sheet with columns for date, recipient organization, description of items donated, quantity, and fair market value. Keep it on a clipboard near your packing area so recording becomes routine. Take photos of donated items occasionally to support your records.

Connect with a tax professional familiar with agricultural businesses. They’ll help you determine whether you qualify for the enhanced deduction (available to farmers with gross receipts under $500,000) and ensure you’re calculating values correctly. This initial investment in professional guidance pays dividends during tax season.

Consider Sarah, a Vermont CSA farmer who started small by donating excess lettuce to her town’s food pantry. She kept a simple notebook, documented everything, and saved nearly $2,000 in taxes her first year while feeding 50 families weekly. “I wish I’d started sooner,” she says.

Begin with one reliable recipient organization and one donation per week. As you refine your process, you can expand. The key is building habits that make documentation second nature, turning your generous impulses into systematic community support with financial benefits.

Donating surplus food from your CSA farm creates a beautiful win-win situation. You’re not only reducing waste and supporting neighbors facing food insecurity, but you’re also unlocking valuable tax deductions that can strengthen your farm’s financial health. As we’ve explored, the enhanced deduction available to farmers can significantly boost your bottom line while making a real difference in your community.

Remember, navigating tax law can feel overwhelming, especially when you’re juggling planting schedules, harvest logistics, and customer communications. That’s why consulting with a qualified tax professional who understands agricultural operations is essential. They’ll help you maximize your deductions while ensuring compliance with IRS requirements.

Food donations align perfectly with the core values of sustainable agriculture: nothing wasted, everyone fed, communities strengthened. Many successful CSA farmers have discovered that donation programs actually enhance their reputation and customer loyalty. When your members see their farm actively supporting local food banks, it reinforces their commitment to your mission.

This season, take that first step. Reach out to a nearby food bank, start documenting your donations, and discover how rewarding it feels to turn surplus into support. Your community is waiting, and your farm will thrive in ways you might not expect.

These 9 Common Foods Trigger Most Allergies—But Organic Might Change Everything

Posted by darrell on
0
Consumer Health and Nutrition
These 9 Common Foods Trigger Most Allergies—But Organic Might Change Everything

Food allergies affect approximately 32 million Americans, with nine specific foods responsible for 90% of all allergic reactions. Understanding these allergens isn’t just about avoiding danger—it’s about making informed choices that support your health and well-being.

The Big Nine allergens include milk, eggs, fish, shellfish, tree nuts, peanuts, wheat, soybeans, and sesame. Each triggers immune responses ranging from mild hives to life-threatening anaphylaxis, making awareness essential for anyone preparing meals or shopping for groceries.

Here’s what makes this knowledge particularly relevant for organic food enthusiasts: how these foods are grown, processed, and handled significantly impacts allergenic potential. Conventional farming practices often introduce additional proteins and chemical residues that can complicate allergic responses, while organic farming methods prioritize purity and transparency.

Whether you’re managing allergies yourself, cooking for family members with sensitivities, or simply want to understand what goes into your body, recognizing these nine foods empowers better decisions. Local organic farmers and CSA programs offer unique advantages—direct communication about growing practices, reduced cross-contamination risks, and produce free from synthetic pesticides that might intensify allergic reactions.

This guide explores each allergenic food in detail, examining why they trigger immune responses, how organic cultivation affects allergen levels, and practical strategies for safely navigating your food choices. You’ll discover that managing food allergies doesn’t mean sacrificing flavor, nutrition, or the joy of eating—it means choosing wisely and sourcing thoughtfully.

Why These 9 Foods Account for 90% of Allergic Reactions

Food allergies affect millions of people worldwide, but here’s something fascinating: about 90% of all allergic reactions come from just nine specific foods. So what makes these particular foods such common triggers?

The answer lies in their protein structures. Each of these foods contains specific proteins that our immune systems can sometimes mistake as threats. When this happens, the body launches a defensive response, releasing chemicals like histamine that cause everything from mild itching to severe reactions.

Think of these proteins as unique molecular fingerprints. The proteins in milk differ completely from those in peanuts, which is why someone allergic to dairy might enjoy peanut butter without issue. These particular nine foods share something in common though: their proteins are especially stable and resistant to breakdown during digestion and cooking, giving our immune systems more opportunity to react.

Understanding which foods cause most allergic reactions helps us make informed choices, whether we’re growing food, shopping at farmers markets, or planning meals for our families. The good news? Knowing what to watch for puts you in control of managing allergens effectively while still enjoying wholesome, nutritious foods.

Overhead view of nine bowls containing common allergenic foods including milk, eggs, nuts, fish, wheat, soy, sesame, and corn
The nine major allergenic foods account for 90% of all food allergy reactions worldwide, making identification crucial for families managing sensitivities.

The Big Nine: Breaking Down Each Allergenic Food

Milk and Dairy Products

It’s important to distinguish between lactose intolerance and milk protein allergy. Lactose intolerance involves difficulty digesting milk sugar, while a true milk allergy triggers an immune response to proteins in dairy products. This distinction matters when exploring dairy alternatives.

Choosing organic dairy makes a meaningful difference. Organic farmers raise cows without synthetic hormones or routine antibiotics, resulting in cleaner milk production. These practices align with sustainable farming principles that protect both animal welfare and environmental health. Grass-fed organic dairy takes it further—cows grazing on pasture produce milk with higher omega-3 fatty acids and beneficial nutrients. Many local organic farmers have found success by transitioning their herds to pasture-based systems, creating products that resonate with health-conscious consumers. The organic dairy benefits extend beyond allergen concerns, supporting your overall wellness and local farming communities simultaneously.

Eggs

Egg allergies typically stem from proteins found in egg whites, though some people react to yolk proteins as well. Here’s where things get interesting: what chickens eat directly impacts the nutritional profile of their eggs. Conventionally raised hens often consume grain-based feeds that may contain pesticides and antibiotics, which can affect egg composition. Pasture-raised organic chickens, on the other hand, forage on diverse grasses, insects, and seeds while enjoying chemical-free feed supplements. This natural diet produces eggs with higher omega-3 fatty acids and lower inflammatory markers. Many local organic farmers have observed that customers with mild egg sensitivities sometimes tolerate pasture-raised organic eggs better than conventional varieties. While this doesn’t mean they’re safe for everyone with egg allergies, the difference in production methods matters for overall inflammation levels in your body. Supporting small-scale egg producers at farmers markets means you’ll know exactly what those chickens ate and how they lived.

Peanuts

Peanut allergies rank among the most severe food allergies, potentially triggering life-threatening anaphylaxis even from tiny exposures. Beyond the allergenic proteins themselves, conventionally grown peanuts present additional concerns. These legumes grow underground where they’re susceptible to mold contamination, particularly aflatoxins—naturally occurring toxins that can persist even after processing. Conventional peanut farming also relies heavily on pesticides to combat soil-borne pests and diseases. Organic peanuts offer a cleaner alternative, grown without synthetic pesticides and subject to stricter aflatoxin testing standards. Many small-scale organic farmers use crop rotation and careful soil management to minimize contamination risks naturally. While organic peanuts won’t eliminate allergic reactions for those with sensitivities, they reduce exposure to additional chemical residues and toxins. If you’re managing peanut allergies in your household, choosing organic varieties from local farms means you can often speak directly with growers about their testing protocols and farming practices—something impossible with conventional grocery store options.

Tree Nuts

Tree nuts—including almonds, walnuts, cashews, pecans, and pistachios—rank among the most common food allergens, affecting millions of people worldwide. Unlike some childhood allergies, tree nut sensitivities typically persist throughout life and can trigger severe reactions. Cross-contamination poses a significant challenge, as these nuts are often processed in shared facilities. What many don’t realize is that conventional farming practices may compound the problem. Pesticide residues on tree nuts can potentially intensify allergic responses in sensitive individuals. This is where organic farming shines. By eliminating synthetic pesticides and following strict organic protocols, farmers like Sarah Martinez from Green Valley Organics have created safer options for allergy-prone consumers. Her family-run organic walnut and almond orchard has become a trusted source for local families managing nut allergies. When sourcing tree nuts, choosing organic varieties from local farms through Community Supported Agriculture programs ensures you’re getting products with minimal chemical residues, giving you one less variable to worry about when managing these tricky allergens.

Fish and Shellfish

Seafood allergies affect millions, with reactions ranging from mild hives to severe anaphylaxis. While both fish and shellfish can trigger responses, they’re distinct allergens—many people react to one but not the other. The quality and sourcing of your seafood matters significantly. Fish raised in crowded, chemical-treated farms may contain higher histamine levels due to stress and poor water conditions, potentially intensifying allergic reactions. This is where sustainable, clean-water sourcing becomes crucial. Wild-caught fish from pristine waters and responsibly farmed options raised without antibiotics or synthetic chemicals tend to be fresher and lower in histamine. Consider connecting with local fisheries that practice regenerative ocean farming or support CSA programs offering traceable seafood. One coastal farmer shares how their clean-water oyster beds produce shellfish with remarkable freshness, reducing histamine buildup that occurs in seafood from questionable sources. When managing seafood allergies, knowing your source isn’t just about sustainability—it’s about safety.

Wheat and Gluten

Wheat triggers reactions in many people, but it’s important to understand the difference between celiac disease—an autoimmune condition requiring strict gluten avoidance—and wheat sensitivity, which causes digestive discomfort without intestinal damage. Modern wheat varieties have been bred for higher gluten content and pest resistance, which some researchers believe may contribute to increased sensitivity. Additionally, conventional wheat is often treated with glyphosate before harvest, and residues may worsen reactions in sensitive individuals. Many people who struggle with commercial wheat discover they can tolerate organic heritage grains like spelt, einkorn, or kamut, which contain different gluten structures and are grown without synthetic pesticides. These ancient varieties also offer superior nutritional profiles with higher mineral content. Several organic farmers in our community have successfully reintroduced heritage wheat cultivation, finding strong demand from health-conscious consumers who appreciate both the gentler digestibility and the commitment to preserving agricultural biodiversity.

Soy

Soy allergies affect roughly 0.4% of children, with reactions ranging from mild hives to severe anaphylaxis. The culprit is soy protein, found in countless processed foods, making label-reading essential for those with sensitivities. Many people also worry about genetically modified organisms in conventional soy products. Here’s good news: organic, non-GMO soy offers a cleaner alternative for those managing allergies or seeking to minimize exposure to pesticides and genetic modification. Local organic farmers are increasingly growing heritage soy varieties specifically for health-conscious consumers. These traditionally cultivated soybeans provide the same nutritional benefits—complete protein, healthy fats, and essential minerals—without the genetic tampering concerns. When sourcing soy products like tofu, tempeh, or edamame, choosing certified organic options from your CSA or farmers market ensures you’re getting pure, sustainably grown legumes that support both your health and local agricultural communities.

Sesame

Sesame became the ninth major food allergen officially recognized by the FDA in 2021, requiring labeling on packaged foods sold after January 2023. This tiny seed packs a powerful allergenic punch, affecting an estimated 1.6 million Americans with reactions ranging from mild hives to severe anaphylaxis. You’ll find sesame hiding in unexpected places—burger buns, crackers, hummus, salad dressings, and even some cosmetics—making it particularly tricky to avoid.

Here’s where organic sourcing makes a real difference: choosing certified organic products means clearer ingredient transparency and fewer mysterious additives that might contain hidden sesame derivatives. Many small-scale organic farmers are now growing sesame locally, giving you direct access to pure, traceable ingredients. When you know your farmer and can ask exactly what goes into your food, managing sesame allergies becomes significantly easier. Consider connecting with local CSA programs that emphasize allergen-aware growing practices, where farmers understand cross-contamination risks and maintain separate processing areas for allergenic crops.

Corn

While corn isn’t among the top eight allergens, sensitivities to this grain are increasingly common, and understanding why can help you make better food choices. Most conventional corn in North America is genetically modified and heavily treated with pesticides like glyphosate, which can trigger reactions in sensitive individuals even when the corn protein itself isn’t the culprit.

Many people who struggle with conventional corn products find they tolerate organic, non-GMO varieties much better. This suggests that the issue often lies not with corn itself, but with how it’s grown. Organic farmers use traditional seed varieties and avoid synthetic pesticides, resulting in cleaner, more naturally grown produce.

If you suspect corn sensitivity, consider sourcing from local organic farms where you can learn about growing practices firsthand. Small-scale farmers often grow heirloom corn varieties that haven’t been modified, and many report that their customers experience fewer digestive issues with these heritage grains. Supporting these growers through farmers markets or CSA programs gives you access to corn you can trust while helping preserve traditional farming methods.

How Organic Farming Practices May Reduce Allergy Triggers

Growing evidence suggests that the connection between organic produce and allergies goes deeper than many realize. While organic farming won’t eliminate food allergies entirely, it may help reduce additional triggers that compound allergic responses.

The most compelling factor involves pesticide residues. Conventional farming relies on synthetic pesticides that can remain on produce even after washing. Research indicates these chemical residues may irritate an already sensitive immune system, potentially intensifying allergic reactions. Organic practices eliminate this additional burden, giving your body one less thing to process.

Soil health plays a surprising role too. Organic farms build nutrient-rich soil through composting, crop rotation, and natural amendments rather than synthetic fertilizers. This living soil produces crops with higher levels of beneficial compounds like antioxidants and polyphenols. These nutrients support immune function and may help your body better regulate inflammatory responses associated with allergies.

Take the story of Sarah Chen, an Ontario organic farmer who switched from conventional methods five years ago. She noticed her own seasonal allergies improved significantly after working daily with organic soil and produce. “I didn’t expect it, but reducing my exposure to farm chemicals made a real difference,” she shares. While anecdotal, her experience mirrors emerging research on chemical load and immune health.

Scientists are now exploring how the diverse microbial communities in organic soil might transfer to produce, potentially supporting gut health. Since gut bacteria influence immune responses, this connection could explain why some people report fewer allergy symptoms when eating organic foods.

The reduced chemical load matters especially for children and those with existing sensitivities. Dr. Maria Rodriguez, an immunologist studying environmental triggers, notes that “minimizing unnecessary chemical exposure allows the immune system to function more efficiently, which benefits everyone but especially those managing allergies.”

While more research is needed, choosing organic options represents a practical step toward reducing potential triggers while supporting farms that prioritize soil and environmental health.

Farmer holding basket of fresh organic vegetables in farm field during golden hour
Organic farming practices eliminate synthetic pesticides and prioritize soil health, potentially reducing chemical triggers that may compound allergic responses.

Real Stories: Families Finding Relief Through Organic CSA Programs

When the Martinez family’s eight-year-old daughter began experiencing mysterious digestive issues and skin reactions, they spent months eliminating different foods from her diet. Traditional grocery store produce seemed to trigger flare-ups, even items labeled as healthy options. That’s when they discovered Green Valley CSA, a local organic farm just twenty minutes from their home.

“Within three weeks of switching to their CSA box, we noticed Emma’s symptoms improving,” shares Maria Martinez. “The farmer explained how their soil management and crop rotation naturally reduce cross-contamination risks. No synthetic pesticides meant fewer chemical residues that might have been aggravating her sensitivities.” The family appreciated knowing exactly where their food came from and could speak directly with the growers about their practices. This transparency gave them confidence they couldn’t find in supermarket aisles.

Across town, farmer Tom Richardson witnessed the impact firsthand when he transitioned his family farm to certified organic methods five years ago. “We started our CSA program because we wanted to connect with families facing similar struggles my own son had with food sensitivities,” he explains. Tom now serves forty-five member families, many of whom joined specifically seeking cleaner produce options for managing allergies and intolerances.

His CSA members frequently report that the freshness factor makes a difference too. Produce harvested within 24 hours of delivery retains more nutrients and hasn’t been exposed to the extended transportation and storage conditions that can introduce contaminants. The community aspect creates a support network where families share recipes and tips for navigating dietary restrictions together, transforming what once felt isolating into a shared journey toward better health.

Family shopping for organic produce at local farmers market CSA stand
Local CSA programs connect families directly with organic farmers who understand allergy concerns and growing practices.

Practical Steps for Managing Food Allergies with Organic Options

Managing food allergies while embracing organic options doesn’t have to feel overwhelming. Start by gradually transitioning to organic versions of the allergenic foods you’re monitoring. When introducing allergens to children or testing your own tolerance, organic choices reduce exposure to pesticides and potentially inflammatory substances that might complicate reactions.

Reading labels becomes your superpower. Look for certified organic seals and familiarize yourself with terms like “Non-GMO Project Verified” and “USDA Organic.” Remember that organic products still require careful allergen label reading, as cross-contamination can occur during processing.

Connecting with local Community Supported Agriculture (CSA) farms offers tremendous benefits. Sarah Martinez, a member of Green Valley Farm’s CSA, shares how direct communication with her farmer helped her family navigate multiple food allergies: “Our farmer grows allergen-free produce and knows exactly what’s in the soil. That transparency gives us peace of mind.” Many CSA farms offer allergen-friendly options and can answer questions about growing practices directly.

Work closely with healthcare providers, including allergists and nutritionists familiar with organic foods. Bring samples or descriptions of your CSA box contents to appointments. Keep a detailed food diary tracking both conventional and organic versions of allergenic foods to identify any differences in reactions.

Consider visiting farmers markets where you can ask growers directly about their practices. Building relationships with local organic farmers creates a support network that understands your needs while providing the freshest, cleanest options for managing food allergies safely.

Finding Your Local Organic Sources for Allergen-Friendly Foods

Finding safe, allergen-friendly organic foods starts right in your own community. Community Supported Agriculture (CSA) directories like LocalHarvest.org help you discover nearby farms offering fresh, organic produce that can serve as wholesome alternatives to processed foods containing common allergens. Many organic farmers grow their fruits and vegetables without the pesticides that some research suggests may increase allergy sensitivity.

Your local farmers market is a treasure trove for connecting with growers who understand allergy concerns. Don’t hesitate to ask farmers about their growing practices, crop rotation methods, and whether they avoid cross-contamination with allergen-heavy crops. You’ll find many small-scale farmers are incredibly knowledgeable and passionate about food safety.

Building relationships with local producers creates a support network that goes beyond transactions. Share your allergy concerns openly—farmers often accommodate specific needs and can recommend varieties naturally lower in certain proteins. One CSA member, Sarah, discovered her farmer grew a heritage tomato variety that didn’t trigger her son’s sensitivities like commercial varieties did.

Regular market visits and farm pickups transform shopping into community connection, where you’ll meet others navigating similar allergy challenges while supporting sustainable agriculture that benefits everyone’s health.

Managing the nine major food allergens doesn’t have to feel overwhelming. While these allergies are certainly serious and require careful attention, making informed choices about where your food comes from can truly make a difference in your family’s wellbeing. Organic farming practices often result in produce with fewer chemical residues and potentially lower allergenic loads, giving you one more tool in your allergy management toolkit.

Connecting with your local Community Supported Agriculture program opens doors to fresh, organic produce grown by farmers who care deeply about their craft and their community. These farmers often welcome questions about their growing practices and can share insights about seasonal varieties that might work well for your dietary needs. Take Sarah Martinez, a CSA farmer in Oregon, who transformed her small plot into a thriving allergen-aware operation after her own daughter developed food sensitivities. Her story reminds us that behind every organic tomato and pesticide-free apple stands someone committed to growing food with intention and care.

Ready to explore organic options in your area? Reach out to local farmers markets, search for nearby CSA programs, or visit organic farms during their open house days. Your journey toward better allergy management through thoughtful food choices starts with a simple conversation.

The Seed Starting Mix That Actually Protects Your Heirloom Varieties

Posted by darrell on
0
Organic Farming and Cultivation
The Seed Starting Mix That Actually Protects Your Heirloom Varieties

Choose a seed starting mix with OMRI certification to guarantee genuine organic ingredients free from synthetic fertilizers and chemical treatments. This certification ensures your seedlings develop strong root systems in clean, uncontaminated soil from day one.

Mix your own blend using equal parts coconut coir, perlite, and compost to create the perfect balance of moisture retention and drainage while saving money. This homemade recipe provides excellent aeration and nutrients without the mystery ingredients found in some commercial products.

Look for mixes containing mycorrhizal fungi, which colonize seedling roots and improve nutrient uptake by up to 40 percent. These beneficial organisms create a living soil ecosystem that supports vigorous growth and disease resistance throughout your plants’ entire lifecycle.

Your choice of seed starting medium directly impacts germination rates and seedling health, making it one of the most crucial decisions in organic gardening. While conventional mixes might produce quick results using synthetic additives, organic options build genuine soil biology that strengthens plants naturally. This foundation becomes especially important when you’re committed to organic seed preservation and growing heirloom varieties that rely on healthy soil ecosystems rather than chemical inputs.

The best organic seed starting mixes share key characteristics: they’re lightweight enough for delicate roots to penetrate easily, sterile to prevent damping-off disease, and rich in slow-release nutrients that feed seedlings without burning tender growth. Whether you purchase a premium blend or create your own custom mix, understanding these principles helps you make informed decisions that align with sustainable growing practices and support thriving gardens season after season.

Why Your Seed Starting Mix Matters for Seed Preservation

The foundation you choose for starting seeds reaches far beyond just getting seedlings to sprout. When you’re committed to preserving heirloom varieties or saving seeds from your best plants, your seed starting mix becomes a crucial factor in maintaining genetic integrity and seed viability for future generations.

Organic, chemical-free mixes support healthy seedling development by working with nature rather than against it. Synthetic fertilizers and chemical additives can create artificially strong seedlings that look impressive initially but may lack the natural resilience needed for long-term seed production. These chemicals can also alter plant metabolism in ways that affect seed formation, potentially reducing germination rates in subsequent generations.

Consider Sarah, an organic farmer from Ontario, who noticed her saved tomato seeds showed declining germination rates over three years. After switching from conventional to organic seed starting mix, her seed viability improved dramatically. The key difference? Her plants developed naturally, building robust root systems and balanced growth patterns that translated into healthier, more viable seeds.

Chemical residues from synthetic inputs can accumulate in plant tissues, potentially affecting reproductive processes and seed development. While one generation might not show obvious problems, these subtle changes can compound over time, weakening your seed stock. Organic mixes rely on natural nutrients that release slowly, encouraging plants to develop strong root systems and natural disease resistance. These qualities become encoded in the seeds they produce, ensuring your future plantings start from the strongest possible genetic foundation. When you’re investing time in seed preservation, starting clean with organic materials protects your efforts and maintains the genetic heritage of your favorite varieties.

What Makes a Seed Starting Mix Truly Organic

Close-up of hands holding organic seed starting mix showing texture and ingredients
Quality organic seed starting mix contains visible components like coconut coir, perlite, and worm castings that support healthy seedling development.

Key Organic Ingredients to Look For

When selecting the best organic seed starting mix, understanding the key ingredients helps you create the perfect environment for seedling success. Each component plays a specific role in supporting healthy root development and early growth.

Coconut coir has become a popular peat moss alternative, offering excellent water retention while remaining sustainably harvested from coconut husks. This renewable resource provides a fluffy texture that roots love to explore. Unlike peat, coir is pH-neutral and environmentally friendly, making it an ideal base for your organic growing medium.

Worm castings bring concentrated nutrients and beneficial microorganisms to your mix. These natural fertilizers release nutrients slowly, feeding seedlings without burning delicate roots. Many organic farmers swear by adding a small percentage of castings to boost germination rates and early vigor.

Perlite and vermiculite serve crucial but different purposes. Perlite, those white volcanic rock pieces, improves drainage and prevents compaction. Vermiculite holds moisture and nutrients, releasing them gradually to thirsty seedlings. Together, they create balanced air and water flow throughout the mix.

Quality compost adds beneficial bacteria and fungi that protect seedlings from disease while providing gentle nutrition. Look for well-aged, screened compost specifically designed for seed starting, as fresh compost can be too hot for tender sprouts.

The best mixes combine these ingredients thoughtfully, creating an environment where seeds can germinate reliably and seedlings develop strong root systems before transplanting to your garden.

Certifications That Matter

When shopping for seed starting mix, look for products with OMRI (Organic Materials Review Institute) listing on the label. This certification verifies that ingredients meet strict organic standards approved for certified organic production. OMRI-listed products have been thoroughly reviewed to ensure they contain no synthetic fertilizers, chemical pesticides, or genetically modified materials.

Beyond OMRI, you might encounter other organic certifications like USDA Organic or CDFA (California Department of Food and Agriculture) approval. These designations guarantee the mix supports true organic growing practices from the very beginning of your plants’ lives. For home gardeners and small-scale farmers, choosing certified mixes protects your seedlings and aligns with sustainable agriculture values. While certified products may cost slightly more, they ensure your organic garden starts on the right foundation, free from harmful additives that could compromise your harvest or soil health.

Top Commercial Organic Seed Starting Mixes

Premium Options for Serious Seed Savers

For gardeners committed to preserving heirloom varieties and conducting seed improvement work, investing in premium organic seed starting mixes can make a significant difference in germination rates and seedling vigor. These specialized products are formulated with precise attention to drainage, air porosity, and mineral content that benefits genetic preservation projects.

Coast of Maine Sprout Island Organic Seed Starter stands out with its blend of lobster compost, peat moss, and perlite. This unique formula provides consistent moisture retention while preventing damping-off, a critical concern when working with irreplaceable heritage seeds. The balanced pH of 5.5-6.5 creates optimal conditions for diverse seed types, from tomatoes to rare medicinal herbs.

Vermont Compost Company Fort Vee offers another excellent choice for serious seed savers. This OMRI-listed mix contains composted food residuals and a proprietary blend of trace minerals that support strong root development. Small-scale farmer Maria Rodriguez from Ontario reports 95 percent germination success with her Cherokee Purple tomato seeds using this mix, compared to 70 percent with standard products.

For those prioritizing sustainability in every aspect, FoxFarm Organic Seed Starter provides a peat-free alternative using composted forest humus and earthworm castings. While slightly more expensive at approximately 25 dollars for eight quarts, it eliminates concerns about peat bog depletion while delivering professional-grade results.

These premium mixes typically cost two to three times more than basic options, but the investment pays dividends when propagating valuable genetics or conducting multi-year seed improvement projects. The consistent quality reduces variables, making it easier to track true genetic performance rather than wondering if growing medium affected your results.

Budget-Friendly Organic Choices

Starting your seeds organically doesn’t mean breaking the bank. Several companies offer excellent organic seed starting mixes that deliver quality results without the premium price tag, making sustainable gardening accessible to everyone.

One standout option is Burpee Organic Premium Seed Starting Mix, which typically costs about half the price of specialty brands while maintaining OMRI certification. This coconut coir-based blend provides excellent moisture retention and drainage, giving your seedlings the ideal environment they need to thrive. Many community gardeners in our network swear by this mix, particularly when starting large quantities of seeds for their CSA shares.

Another budget-conscious choice is Espoma Organic Seed Starter Mix. This peat-based option includes myco-tone, a proprietary blend of beneficial microorganisms that support healthy root development from day one. At around $8 for a large bag, it offers exceptional value for gardeners managing multiple seed trays.

For those willing to stretch their budget slightly, consider mixing a premium organic blend with your own additions. Purchase a smaller bag of high-quality organic mix and extend it by adding vermiculite or perlite you already have on hand. This approach gives you the benefits of proven formulations while making your investment go further.

Here’s a practical tip from Sarah, a small-scale farmer in Vermont: “I buy one bag of quality organic mix and blend it with screened compost from my own pile at a 70-30 ratio. My germination rates stay strong, and I cut my costs by nearly 40 percent.”

Remember, the cheapest option isn’t always the most economical if your germination rates suffer. Focus on finding that sweet spot where affordability meets reliability, ensuring every seed has the best possible start.

Making Your Own Organic Seed Starting Mix

Overhead view of multiple seed trays with young heirloom seedlings growing in organic starting mix
Diverse heirloom seedlings thriving in organic seed starting mix demonstrate the importance of quality growing medium for genetic preservation work.

Basic Recipe for Beginners

Getting started with your own organic seed starting mix doesn’t require a complicated recipe or expensive ingredients. This beginner-friendly formula combines just three simple components that you can find at most garden centers or online retailers.

Mix together equal parts of coconut coir, perlite, and vermiculite. The coconut coir provides excellent moisture retention and creates an ideal environment for tender roots to develop. Perlite adds crucial drainage and air pockets, preventing your seedlings from becoming waterlogged and developing damping-off disease. Vermiculite helps maintain consistent moisture levels while also contributing trace minerals that support early growth.

To prepare, simply combine one part of each ingredient in a large bucket or wheelbarrow. Add water gradually while mixing with your hands or a trowel until the mixture feels like a wrung-out sponge. This blend stays loose enough for delicate roots to penetrate easily while holding enough moisture to keep seeds consistently hydrated during germination.

This tried-and-true combination works wonderfully for most vegetables, herbs, and flowers. Many successful CSA farmers we’ve spoken with started their journeys using variations of this exact recipe before experimenting with more specialized blends for particular crops.

Advanced Mix for Heirloom Varieties

Heirloom varieties often carry precious genetic traits passed down through generations, but they can be notoriously picky about their growing conditions right from the start. If you’re working with rare tomato varieties or that special melon your grandmother grew, this advanced mix gives them the gentle yet nutrient-rich environment they crave.

Start with a base of 2 parts finely screened coconut coir and 2 parts high-quality aged compost (aged at least 6 months for mellower nutrients). Add 1 part perlite for drainage and 1 part vermiculite to help regulate moisture—critical for those seeds that need consistent dampness without waterlogging. Here’s where it gets specialized: incorporate 1/4 part worm castings for slow-release nutrients and beneficial microbes that heirlooms particularly appreciate.

The secret ingredient? A handful of mycorrhizal fungi inoculant per gallon of mix. These beneficial fungi form symbiotic relationships with plant roots, helping seedlings access nutrients more efficiently—a game-changer for varieties that evolved without modern fertilizers.

Local farmer Maria Torres from Sunset Valley CSA swears by this blend for her Cherokee Purple tomatoes and Moon and Stars watermelons. “Since switching to this recipe three seasons ago, my germination rates jumped from 60% to 95%,” she shares. “Those first true leaves come in stronger and greener.”

Mix everything thoroughly and moisten before filling your seed trays. The extra effort pays off when you’re preserving irreplaceable varieties for future generations.

Best Practices for Using Seed Starting Mix in Preservation Work

Getting the most from your organic seed starting mix requires attention to a few key practices that can make the difference between seedling success and disappointment. These techniques are especially important when you’re working to preserve heirloom varieties or save seeds from your best plants.

Start with proper sterilization. Even high-quality organic mixes can harbor pathogens that threaten delicate seedlings. Before using, you can pasteurize your mix by spreading it in a thin layer on baking sheets and heating it in your oven at 180°F for 30 minutes. This eliminates harmful organisms while preserving beneficial microbes. Let it cool completely before use. If you’re reusing containers, wash them thoroughly with a diluted vinegar solution to prevent disease carryover.

Moisture management is perhaps the trickiest aspect of seed starting. Your mix should feel like a wrung-out sponge – moist but not waterlogged. Overwatering is the number one killer of seedlings, causing damping-off disease and root rot. Bottom watering works wonderfully because it encourages roots to grow downward while keeping the surface drier, which discourages fungal growth. Fill your tray with water and let the containers absorb moisture from below, then drain any excess after 20-30 minutes.

When preserving heirloom varieties, preventing cross-contamination between different seed types is crucial. Label everything immediately – trust me, those varieties all look the same as seedlings! Use separate trays for different plant families, and clean your hands and tools between handling varieties. This is especially important if you’re saving seeds from specific plants with desired traits.

One organic farmer I know swears by the “pencil test” for moisture checking. Simply poke your finger or a pencil into the mix about an inch deep. If it comes out clean and dry, it’s time to water. If soil clings to it, hold off another day. This simple technique has helped countless gardeners avoid the overwatering trap while ensuring their precious seeds get the moisture they need to thrive.

Real Seed Savers Share Their Mix Secrets

Maria Chen, who runs a small CSA operation in Vermont, swears by her custom blend of coconut coir, aged compost, and vermiculite. “I spent years buying commercial mixes before realizing I could create something better suited to my heirloom tomatoes and peppers,” she shares. Her biggest lesson? Don’t skimp on the compost quality. “I make sure mine is fully aged for at least six months. Young compost can introduce pathogens that wipe out tender seedlings.”

Over in Oregon, fourth-generation seed saver Tom Bradley has refined his approach through decades of trial and error. He adds a surprising ingredient to his mix: ground oyster shells. “The slow calcium release helps prevent damping-off disease, and my seedlings develop stronger stems,” he explains. Tom emphasizes the importance of moisture consistency. “More seedlings die from overwatering than anything else. I learned to use my finger to check soil moisture rather than following a schedule.”

Meanwhile, Keisha Thompson transformed her urban rooftop in Chicago into a thriving seed-starting operation. She champions peat-free alternatives after seeing the environmental impact firsthand. “Switching to sustainably sourced coconut coir was a game-changer for my conscience and my germination rates,” she notes. Her advice for beginners is refreshingly simple: start with a basic three-ingredient mix and adjust based on what you observe.

These growers agree on one fundamental principle: keep detailed notes about what works. Track your germination rates, seedling vigor, and any problems you encounter. Your future self will thank you when it’s time to start next season’s seeds.

Farmer mixing homemade organic seed starting mix ingredients in bowl at outdoor potting station
Experienced seed savers often create their own custom organic seed starting mixes tailored to their specific heirloom varieties and growing conditions.

Choosing the right organic seed starting mix sets the foundation for thriving seedlings and supports your long-term goals of preserving heirloom varieties and improving seed quality year after year. Whether you opt for a trusted commercial blend or create your own custom mix, the organic approach ensures your plants develop strong root systems without synthetic chemicals that can compromise seed vitality.

Remember, there’s no one-size-fits-all solution. Your perfect seed starting mix depends on the specific varieties you’re growing and your local climate conditions. Don’t be afraid to experiment with different ratios of compost, peat alternatives, and drainage materials until you discover what works best in your garden. Keep notes on what succeeds with each crop so you can refine your approach over time.

Ready to dive deeper into organic growing? Connect with your local CSA farms for invaluable sourcing tips and firsthand insights from farmers who’ve mastered seed starting in your region. Many CSA growers are passionate about sharing their knowledge and can point you toward reliable suppliers or even trade seeds from their own collections. Your journey toward better seedlings and sustainable growing practices starts with that first scoop of quality organic mix.

How Virginia’s Food Safety Program Protects Your Local Farm Produce

Posted by darrell on
0
Local Food Systems and Distribution
How Virginia’s Food Safety Program Protects Your Local Farm Produce

Every time you pick up vegetables at your farmers market or collect your weekly harvest box, the Virginia Department of Agriculture and Consumer Services (VDACS) food safety program works behind the scenes to protect your family. This state-level initiative ensures that the tomatoes, leafy greens, and fresh herbs you purchase from local farms meet rigorous safety standards—making your commitment to local eating both delicious and secure.

VDACS operates a comprehensive food safety framework that oversees everything from produce handling at small family farms to processing facilities that create your favorite jams and pickles. The program conducts regular inspections, provides hands-on education to farmers, and enforces science-based guidelines that prevent contamination. For consumers choosing CSA programs and farmers market vendors, this means the growers you trust are also accountable to professional safety protocols.

Understanding how VDACS supports Virginia’s local food system empowers you to make confident purchasing decisions. The program doesn’t just regulate—it partners with farmers to build sustainable safety practices that protect public health without compromising the authentic, farm-fresh quality you seek. Whether you’re a longtime local food advocate or just beginning to explore community-supported agriculture, knowing how VDACS safeguards your food supply adds another layer of trust to every purchase. This article explores how the program functions, what it means for your favorite farms, and why Virginia’s approach to food safety strengthens rather than hinders the local food movement.

What is the VDACS Food Safety Program?

The Virginia Department of Agriculture and Consumer Services (VDACS) serves as the primary regulatory agency ensuring the safety and quality of food produced and sold within the Commonwealth. Their mission centers on protecting consumers while supporting the growth of Virginia’s vibrant agricultural community. For anyone who loves picking up fresh tomatoes at the farmers market or subscribing to a local CSA, VDACS works behind the scenes to make those transactions safer and more reliable.

The VDACS Food Safety Program operates differently from federal oversight. While the U.S. Food and Drug Administration (FDA) regulates large-scale commercial operations and interstate food distribution, VDACS focuses on intrastate activities. This means they oversee food that’s grown, processed, and sold within Virginia’s borders. Think of your neighborhood farm stand, that small-batch jam maker at the weekend market, or the organic vegetable grower who supplies local restaurants.

Under VDACS jurisdiction, you’ll find a diverse range of operations. Small and mid-sized farms selling directly to consumers fall under their watch, along with food processing facilities, produce packinghouses, and food warehouses operating within the state. The program pays special attention to fresh produce farms, particularly those growing leafy greens, tomatoes, and other crops eaten raw. They also regulate value-added producers who transform farm products into items like pickles, sauces, or baked goods.

This state-level approach allows VDACS to tailor their inspections and educational programs specifically to Virginia’s agricultural landscape. They understand the unique challenges facing small farmers and work collaboratively rather than punitively. For consumers passionate about supporting local agriculture, this means the farms you trust are receiving guidance and oversight designed to maintain high safety standards while keeping small operations viable and thriving.

VDACS food safety inspector examining fresh produce at Virginia farm stand
VDACS inspectors regularly visit local farms and farmers markets to ensure produce meets Virginia’s food safety standards.

Key Components of VDACS Food Safety Inspections

Produce Safety Standards

VDACS helps ensure the fresh fruits and vegetables you pick up at your farmers market are grown with safety in mind. The program works closely with Virginia farms to implement food safety standards that protect both growers and consumers.

One of the key areas of focus is water quality. VDACS requires farms to regularly test their irrigation water for harmful bacteria, ensuring that the water nourishing your tomatoes and lettuce is clean and safe. Soil amendments also receive careful attention. Whether farmers use compost or manure to enrich their soil, VDACS provides guidance on proper aging and application methods to prevent contamination.

Handling practices matter too. From harvest to your shopping bag, produce should be touched with clean hands and tools. VDACS educates farmers on proper washing, storage, and transportation techniques that maintain freshness while preventing contamination.

These standards aren’t about creating burdensome red tape. They’re designed to support small-scale farmers in protecting their customers while maintaining the quality and integrity of locally grown food. Many farmers find that implementing these practices actually improves their operations, leading to better yields and happier customers who trust where their food comes from.

Farmer washing fresh vegetables in commercial sink following food safety protocols
Proper washing and handling practices are essential components of VDACS food safety requirements for local farms.

Processing and Packaging Requirements

If you’re a local farmer creating value-added products like strawberry jam, artisan bread, or pickled vegetables for farmers markets, VDACS has specific requirements to ensure these items are safe for your customers. Value-added products require more attention than fresh produce because processing creates additional food safety considerations.

For products like jams and jellies, you’ll need to follow proper acidification and canning procedures to prevent harmful bacteria growth. VDACS provides guidance on pH testing, thermal processing times, and safe ingredient combinations. Baked goods require sanitary preparation areas, proper temperature controls, and careful allergen labeling—especially important since many customers have gluten or nut sensitivities.

Packaging is equally crucial. All labels must include product names, ingredient lists in descending order by weight, allergen information, net weight, and your business contact details. Many successful farmers have found that investing in a commercial kitchen or using shared processing facilities helps them meet these standards while expanding their product offerings.

VDACS offers workshops and one-on-one consultations to help you navigate these requirements. Sarah Thompson, who runs a small farm in Albemarle County, credits VDACS training with helping her launch a successful line of fruit preserves. The program ensures your delicious creations reach customers safely while protecting your business from liability issues.

Storage and Transportation Guidelines

VDACS requires participating farms to maintain strict temperature control throughout the entire journey from harvest to your kitchen table. Farmers must monitor and document storage temperatures for perishable items, ensuring leafy greens stay crisp and berries remain fresh. Transportation vehicles need proper refrigeration systems, with many small farms investing in insulated coolers and refrigerated trucks to meet program standards.

During deliveries to CSA pickup locations and farmers markets, VDACS guidelines mandate that produce stays within safe temperature ranges. This means your salad greens are kept cold even on hot summer market days. Farmers learn best practices through VDACS training sessions, discovering clever solutions like using shade structures and ice packs for outdoor venues. These requirements protect food quality while giving you confidence that your local produce arrives as fresh and safe as possible.

How VDACS Supports Small Farms and CSAs

VDACS recognizes that small farms and community-supported agriculture (CSA) operations face unique challenges when navigating food safety requirements. Rather than taking a one-size-fits-all enforcement approach, the agency prioritizes education and partnership to help these small-scale producers succeed.

The program offers comprehensive training sessions designed specifically for small farmers. These workshops cover everything from proper produce handling and storage to record-keeping essentials, all presented in plain language that makes compliance manageable rather than overwhelming. Many sessions are held at convenient times and locations throughout Virginia, with some available online for farmers with tight schedules.

One of the most valuable resources is VDACS’s technical assistance program, where experienced specialists work directly with farmers to develop customized food safety plans. These consultants understand the realities of small-scale operations and help create practical solutions that fit within limited budgets and resources. They’re not there to catch farmers doing something wrong, but rather to prevent problems before they start.

Take the story of Sarah Martinez, who launched her organic CSA in Albemarle County three years ago. Initially intimidated by food safety regulations, she connected with a VDACS specialist who helped her implement simple but effective safety protocols. “They walked me through everything step by step,” Sarah shares. “Now I’m confident that my members are getting the safest produce possible, and I have systems in place that actually make my operation run more smoothly.”

VDACS also provides free educational materials, including easy-to-follow guides, checklists, and templates that small farmers can adapt to their specific operations. These resources help demystify food safety requirements and show farmers that good practices don’t require expensive equipment or complicated procedures.

The agency understands that supporting small farms strengthens Virginia’s local food system, benefiting both producers and consumers who value knowing where their food comes from and how it’s grown.

What This Means for CSA Members and Farmers Market Shoppers

When you’re shopping at your local farmers market or considering a CSA membership, VDACS certification provides an extra layer of confidence in your food choices. Farms participating in the VDACS food safety program demonstrate their commitment to producing safe, quality produce through voluntary compliance with established guidelines.

So what should you look for? Start by asking farms directly about their food safety practices. Most farmers market vendors and CSA operators are proud to discuss their growing methods and safety protocols. Don’t be shy—questions show you’re an engaged consumer who cares about where your food comes from.

Here are some helpful questions to ask: Does the farm follow VDACS food safety guidelines? How do they handle water quality testing? What training have their workers received? How do they clean and store harvested produce? Farmers who participate in VDACS programs will happily share these details because they’ve invested time and resources into doing things right.

Look for signs of good practices when visiting farms. Clean harvest containers, proper handwashing stations, and organized storage areas all indicate attention to food safety. Many VDACS-compliant farms display their certification or mention their participation in promotional materials.

Remember, VDACS certification isn’t mandatory for all farms, especially smaller operations. A farm without formal certification can still maintain excellent safety standards. The key is open communication. Farmers passionate about their work welcome conversations about their practices and enjoy educating customers about sustainable agriculture.

By choosing farms that prioritize food safety—whether through VDACS programs or their own rigorous standards—you’re supporting responsible agriculture while protecting your family’s health. This creates a win-win situation that strengthens our local food system.

Customers shopping for fresh produce at Virginia farmers market with vendor assistance
VDACS compliance helps build consumer confidence when shopping at local farmers markets and choosing CSA memberships.

Real Stories: Virginia Farmers Working with VDACS

When Sarah Thompson started her small vegetable farm in Albemarle County, she knew quality produce was just the beginning. Working with VDACS to implement their food safety program transformed how she operates. “I thought the paperwork would be overwhelming, but the VDACS team walked me through everything,” Sarah shares. She learned proper water testing procedures, improved her harvest handling practices, and created simple documentation systems. The result? Her CSA membership doubled within a year as customers appreciated her commitment to verified safety standards. “Parents tell me they feel confident giving my greens to their kids. That trust is priceless.”

Over in Loudoun County, the Martinez family runs a certified organic berry farm that supplies several farmers markets. When they decided to pursue VDACS certification three years ago, they worried it might conflict with their organic practices. “We discovered the programs actually complement each other beautifully,” explains Miguel Martinez. The food safety training helped them refine their composting timeline and improve their cooling systems, all while maintaining organic certification. Their investment paid off when a regional grocery chain approached them for a supply contract, specifically citing their dual certifications as deciding factors.

Small-scale farmer James Reed initially hesitated about joining the VDACS program for his heritage tomato operation. “I’m just one guy with two acres,” he laughs. But after attending a free VDACS workshop, he realized the principles scaled to any size operation. The simple changes he implemented, like designated harvest containers and improved handwashing stations, gave him confidence to expand into value-added products like tomato sauces. His products now carry the VDACS-approved label, opening doors to specialty food stores throughout the Shenandoah Valley.

Beyond Virginia: Food Safety in Local Food Systems

While Virginia’s VDACS program sets a strong example, most states have similar resources to help consumers navigate local food safety. State departments of agriculture across the country typically oversee farmers market inspections, cottage food laws, and farm certifications. For instance, California has its Direct Marketing Program, while North Carolina offers robust support through its Growing Together initiative.

If you’re outside Virginia, start by visiting your state’s Department of Agriculture website and searching for “local food,” “direct marketing,” or “farmers market” sections. Many states also maintain directories of licensed food producers and inspected markets. Don’t hesitate to ask your favorite farmers about their certifications and inspection schedules—transparent growers are usually happy to share their food safety practices.

The VDACS model teaches us that good food safety programs balance regulation with education. Look for states offering training workshops for small-scale producers, as these demonstrate commitment to helping local farmers succeed while protecting consumers. Connect with your local cooperative extension office too; they’re treasure troves of region-specific food safety information and can point you toward verified local food sources. Remember, informed consumers and educated farmers create the safest, most vibrant local food communities.

Food safety programs like VDACS serve a dual purpose that benefits everyone in the local food community. They protect consumers by ensuring the produce you purchase meets rigorous safety standards, while simultaneously supporting farmers through education and resources that help them succeed. When you buy from VDACS-compliant farms and CSAs, you’re choosing products backed by science-based safety protocols without sacrificing the freshness and sustainability you value.

Don’t hesitate to ask questions when shopping at farmers markets or joining a CSA. Reputable farmers are proud to discuss their food safety practices and certifications. This transparency builds trust and strengthens the connection between growers and consumers.

Ready to find VDACS-compliant sources near you? Start by visiting the Virginia Department of Agriculture and Consumer Services website, where you’ll find directories of registered farms and producers. Check with your local farmers markets about vendor compliance, or ask CSA coordinators directly about their food safety certifications. Many farms also display their VDACS registration proudly on websites and at market stands. By supporting these compliant local sources, you’re investing in both your family’s health and your community’s agricultural future.

Why Carbon Sequestration Powers Healthy Ecosystems (And Your Farm)

Posted by darrell on
0
Regenerative Agriculture Insights
Why Carbon Sequestration Powers Healthy Ecosystems (And Your Farm)

Carbon sequestration stands as one of nature’s most powerful regulating services—a behind-the-scenes process where ecosystems absorb carbon dioxide from the atmosphere and store it in soil, plants, and ocean waters. Think of it as Earth’s natural climate control system, working constantly to balance greenhouse gases that would otherwise accumulate and accelerate global warming.

Regulating services are the benefits we receive from natural processes that moderate our environment, including pollination, water purification, flood control, and yes, carbon storage. Unlike provisioning services that give us tangible products like food and timber, regulating services operate as invisible guardians, maintaining conditions that make life possible. Carbon sequestration fits squarely in this category because healthy soils, forests, and grasslands actively remove carbon from the air and lock it away, reducing atmospheric CO2 concentrations without human intervention.

For farmers and gardeners embracing sustainable practices, understanding this connection transforms how you view soil health. Every time you add compost, plant cover crops, minimize tillage, or maintain perennial plantings, you’re enhancing your land’s capacity to capture and store carbon. Small-scale farms practicing regenerative methods can sequester impressive amounts of carbon annually—turning agricultural land from a carbon source into a carbon sink. This natural service doesn’t just benefit global climate; it builds soil fertility, increases water retention, and creates more resilient growing systems that produce better yields over time.

What Are Ecosystem Regulating Services?

Think of nature as having an incredible maintenance crew working 24/7 to keep our planet healthy and livable. These hardworking processes are what ecologists call ecosystem regulating services—and they’re absolutely essential to our survival, even though we rarely notice them happening.

Regulating services are the natural processes that maintain environmental balance and protect us from extremes. They work quietly in the background, filtering pollution from our air and water, controlling pests and diseases, moderating extreme weather, and keeping our climate stable. Unlike provisioning services that give us tangible products like food or timber, regulating services are all about the invisible work that keeps everything running smoothly.

Here’s how it plays out in everyday life: Wetlands act as natural sponges, absorbing excess rainwater and preventing flooding in nearby communities. Forests purify the air we breathe by absorbing pollutants and releasing oxygen. Healthy soils break down waste and filter water before it reaches our groundwater supplies. Pollinators like bees regulate plant reproduction, ensuring we have diverse crops and wild plants. Even soil microorganisms regulate nutrient cycling, making sure plants can access the minerals they need to thrive.

For those of us passionate about sustainable farming and organic gardening, understanding regulating services changes how we view our land. When you build healthy soil on your farm or garden, you’re not just growing better tomatoes—you’re supporting an entire ecosystem service that filters water, stores carbon, and maintains biodiversity. These natural processes are the foundation that makes regenerative agriculture work, turning our farms into powerful allies in environmental protection rather than just production sites.

Carbon Sequestration as a Regulating Service

Farmer's hands holding rich dark soil with visible organic matter and earthworms
Healthy soil acts as nature’s carbon storage system, capturing atmospheric CO2 and supporting vibrant ecosystems.

How Soil Acts as Earth’s Carbon Bank

Think of soil as nature’s savings account for carbon. Through photosynthesis, plants pull carbon dioxide from the atmosphere and transform it into sugars and starches that fuel their growth. Here’s where it gets interesting: as plants grow, they send some of those carbon-rich compounds down into their roots. These roots don’t just anchor the plant—they’re constantly releasing substances into the surrounding soil, feeding beneficial microorganisms and contributing to a thriving underground ecosystem.

When plant material dies and decomposes, or when roots shed organic matter, all that carbon becomes part of the soil itself. Microorganisms break it down, and over time, it transforms into stable organic matter that can remain stored for decades or even centuries. This process is exactly how farms store carbon naturally, turning agricultural land into valuable carbon sinks.

The deeper and more extensive a plant’s root system, the more carbon it can deposit into the soil. Perennial crops and cover crops are particularly effective because their roots penetrate deeply and remain active year-round, continuously feeding this natural carbon banking system.

The Climate Regulation Connection

Carbon sequestration acts as nature’s climate control system by pulling excess CO2 from the atmosphere and locking it away in soil, plants, and roots. Think of it as a natural thermostat that helps keep our planet’s temperature in check. When carbon dioxide accumulates in the atmosphere, it traps heat like a blanket, leading to rising global temperatures. By capturing and storing this carbon, healthy soils actively counteract this warming effect.

This process directly regulates climate patterns in several ways. First, reducing atmospheric CO2 concentration helps stabilize global temperatures. Second, carbon-rich soils retain more moisture, which influences local rainfall patterns and reduces drought severity. Third, vegetation supported by carbon-dense soil releases water vapor through transpiration, creating cooling effects in surrounding areas.

For farmers practicing regenerative agriculture, this means every acre of well-managed soil becomes a climate warrior. Cover crops, minimal tillage, and composting all boost the soil’s carbon storage capacity. One inspiring example comes from a Midwest farmer who increased his soil organic matter from 2% to 5% over eight years, sequestering roughly 20 tons of CO2 per acre while simultaneously improving crop yields and resilience to extreme weather events.

Regenerative Agriculture: Supercharging Nature’s Carbon Service

Cover Cropping and No-Till Farming

Cover cropping and no-till farming are two powerful practices that work hand-in-hand to maximize carbon storage in your soil. Cover crops like clover, rye, or vetch blanket the ground during off-seasons, keeping soil protected from erosion while their roots actively pump carbon deep into the earth. When these crops die back naturally, they add organic matter that feeds beneficial soil microbes, which help lock carbon in place for the long term.

No-till farming takes this a step further by eliminating plowing and digging. When soil remains undisturbed, the carbon stored there stays put rather than being released into the atmosphere. Think of it like keeping a lid on a jar—the less you shake things up, the better everything stays contained. Traditional tillage can release decades worth of stored carbon in a single season, but no-till methods preserve those carbon reserves.

Many farmers practicing these techniques report healthier, more productive soil within just a few seasons. The combination creates a living soil ecosystem where carbon sequestration happens naturally and continuously, turning your farm or garden into an active climate solution while improving yields and soil fertility.

Diverse cover crop field with flowering plants in regenerative agriculture setting
Cover crops and diverse plantings maximize carbon sequestration while improving soil health and biodiversity on regenerative farms.

Composting and Organic Matter Addition

Adding compost and organic matter to your soil is like feeding a bustling underground city. Every time you incorporate kitchen scraps, cover crops, or well-aged manure, you’re providing fuel for billions of microorganisms that transform these materials into stable, carbon-rich humus. This dark, crumbly substance acts like a sponge, holding both carbon and water in the soil for years or even decades.

Think of it as nature’s savings account for carbon. Farmers at successful regenerative operations have documented soil organic matter increases of 1-2% over just a few growing seasons through consistent composting practices. This translates directly into carbon pulled from the atmosphere and locked underground.

Here’s a practical tip: start small with a backyard compost bin using vegetable scraps, grass clippings, and leaves. Layer brown materials (carbon-rich) with green materials (nitrogen-rich) in a 3:1 ratio. As this mixture breaks down, you’re creating the same carbon-storing humus that makes regenerative farms so effective at climate regulation while simultaneously improving your garden’s fertility and water retention.

Rotational Grazing and Diverse Plantings

Strategic livestock management and plant diversity work together beautifully to enhance carbon storage in soils. When farmers implement regenerative grazing practices, moving animals regularly across pastures, they mimic natural grazing patterns that stimulate deeper root growth and prevent soil compaction. This movement allows plants time to recover and photosynthesize more carbon back into the ground.

Combining diverse plantings with rotational grazing creates a powerful carbon-building system. Different plant species—grasses, legumes, and forbs—root at varying depths, capturing carbon throughout the soil profile. Similarly, crop rotation techniques in cultivated areas introduce biodiversity that feeds soil microbes and increases organic matter.

Many farmers have discovered that integrating livestock with diverse cover crops dramatically improves soil health within just a few seasons. The animals deposit nutrients while grazing, and their hoof action gently presses seeds and organic matter into the soil, accelerating the natural cycle of carbon capture and storage.

Cattle grazing on rotational pasture with farmer managing portable fencing
Rotational grazing practices build soil carbon while supporting livestock health and pasture vitality.

Real Benefits Beyond Carbon Storage

When we embrace carbon sequestration as a regulating service through regenerative farming practices, we unlock a treasure chest of environmental benefits that extend far beyond storing carbon in the soil. Think of it as nature’s domino effect—one positive action triggers a cascade of improvements across the entire farm ecosystem.

First, let’s talk about water. Healthy, carbon-rich soils act like sponges, leading to improved water retention during dry spells and better drainage during heavy rains. This means farms become more resilient to weather extremes, which is increasingly important as climate patterns shift. The organic matter that stores carbon also holds up to 20 times its weight in water, reducing irrigation needs and helping crops weather drought conditions.

Soil fertility gets a remarkable boost too. As carbon accumulates through composting, cover cropping, and reduced tillage, it creates a thriving underground city of microorganisms. These tiny workers break down nutrients and make them available to plants, reducing the need for synthetic fertilizers. One farmer in Ontario shared how her transition to carbon-focused practices cut her fertilizer costs by half within three years while her yields actually increased.

Biodiversity flourishes when we manage soil as a living carbon bank. From earthworms that aerate the ground to beneficial insects that pollinate crops and control pests, a carbon-rich farm becomes a haven for life above and below the surface. This diversity creates natural pest management systems, reducing reliance on chemical interventions.

Perhaps most importantly, these co-benefits work together to create crop resilience. Plants growing in nutrient-dense, well-structured soil with balanced moisture develop stronger root systems and better disease resistance. They’re simply healthier and more productive, which means better harvests and more nutritious food for your table.

Success Story: A Regenerative Farm Making a Difference

Meet Sarah Chen, a third-generation farmer who transformed her family’s struggling 40-acre conventional farm in Vermont into a thriving regenerative operation that now sequesters an estimated 80 tons of carbon annually. Five years ago, Sarah made a bold decision to transition away from tilling and synthetic inputs, instead embracing practices that work with nature’s rhythms.

Her approach focuses on keeping living roots in the soil year-round through cover cropping, integrating livestock using rotational grazing, and maintaining permanent pastures with diverse plant species. The results speak for themselves. Soil organic matter has increased from 2.8% to 5.3%, water infiltration rates have doubled, and crop yields have remained steady while input costs dropped by 40%.

Sarah’s farm now supplies 150 CSA members with vegetables, pasture-raised eggs, and grass-fed beef. She measures her progress using simple soil tests twice yearly and has noticed earthworm populations exploding, a sign of healthy, carbon-rich soil.

Her top advice for aspiring regenerative farmers? Start small and observe. Sarah began by converting just two acres to no-till methods while maintaining her existing operations. This allowed her to learn without risking the entire farm. She also emphasizes building community connections, noting that her CSA members became invested partners in the journey, appreciating both the environmental mission and superior produce quality.

The most surprising lesson? Carbon sequestration and profitability aren’t opposing goals. By reducing tillage and synthetic inputs while improving soil health, Sarah discovered that stewarding this vital regulating service actually enhanced her bottom line while creating resilience against droughts and extreme weather events.

So, is carbon sequestration a regulating service? Absolutely. This natural process stands as one of nature’s most powerful tools for maintaining atmospheric balance and mitigating climate change. Through regenerative agriculture, farmers actively harness this ecosystem service, transforming their fields into carbon sinks that benefit both the environment and food production. Every cover crop planted, every tillage practice reduced, and every compost application made contributes to pulling carbon from the atmosphere and storing it safely in the soil.

The beauty of carbon sequestration is that it doesn’t just fight climate change—it creates healthier, more productive farmland that yields nutrient-dense food for our communities. When you support local farms practicing regenerative methods, you’re directly investing in this vital regulating service. Even in your home garden, simple techniques like adding compost, planting diverse species, and keeping living roots in the soil year-round can make a meaningful difference.

Consider visiting nearby farms that embrace these practices, ask questions about their soil health strategies, and bring their carbon-sequestering produce to your table. Together, we’re not just growing food—we’re actively healing our planet, one handful of rich, living soil at a time.

How Organic Farms Become Thriving Ecosystems (Not Just Gardens)

Posted by darrell on
0
Regenerative Agriculture Insights
How Organic Farms Become Thriving Ecosystems (Not Just Gardens)

Picture a thriving organic farm where honeybees dance between wildflower borders, beneficial insects patrol vegetable rows hunting pests, and songbirds nest in hedgerows while earthworms enrich the soil below. This isn’t a distant agricultural fantasy—it’s the everyday reality of organic farms that embrace regenerative agriculture practices designed to nurture biodiversity.

While conventional farms often become biological deserts, organic farms function as vibrant ecological sanctuaries supporting 30% more species on average. The connection is straightforward: by eliminating synthetic pesticides and fertilizers, rotating diverse crops, maintaining natural habitats, and building healthy soil, organic farmers create welcoming environments where countless organisms can flourish. Each earthworm, pollinator, and soil microbe plays a vital role in creating resilient food systems that benefit everyone—from the farmer managing healthier crops with fewer inputs to the consumer enjoying nutrient-dense produce grown in living soil.

Understanding this biodiversity advantage matters whether you’re deciding which vegetables to buy at the farmers market, planning your backyard garden, or dreaming of starting your own farm. The organisms thriving on organic farms aren’t just nice to have—they’re essential workers providing free pest control, pollination services, nutrient cycling, and climate resilience. When you support biodiverse organic farms, you’re investing in ecosystems that actively restore nature while producing food, proving that agriculture can heal rather than harm our planet’s precious web of life.

What Biodiversity Really Means on an Organic Farm

When you visit an organic farm, biodiversity isn’t just an abstract environmental concept. It’s the buzzing symphony of different pollinators visiting heirloom tomato flowers, the variety of cover crops enriching the soil between planting seasons, and the beneficial insects keeping pest populations naturally balanced.

Biodiversity operates on three interconnected levels that make organic farms thrive. Genetic diversity means growing multiple varieties of the same crop rather than relying on a single type. Sarah Chen, who runs a certified organic vegetable operation in Oregon, plants five different lettuce varieties each season. “When late blight hit our region, some varieties struggled while others flourished,” she explains. “That genetic variety saved our harvest.”

Species diversity is what most people picture: the range of different plants, animals, insects, and microorganisms sharing the farm ecosystem. On a biodiverse organic farm, you’ll find heritage wheat growing alongside nitrogen-fixing clover, with beneficial wasps and ladybugs patrolling for aphids, while earthworms work tirelessly below ground. This variety creates natural pest control and eliminates the need for synthetic chemicals.

Ecosystem diversity takes the widest view, encompassing different habitats within the farm landscape. Marcus Williams transformed his Tennessee organic farm by preserving woodland edges, maintaining wetland areas, and creating hedgerows between fields. “These diverse ecosystems became home to dozens of bird species that control insect pests better than any spray ever could,” he shares.

Together, these three levels create resilient farming systems that produce nutrient-dense food while supporting wildlife. Understanding this framework helps you recognize truly biodiverse farms when shopping at farmers markets or choosing where to source your organic produce. It’s nature’s insurance policy and productivity booster rolled into one.

The Living Web: How Diverse Farms Feed Themselves

Underground Allies: The Soil Food Web

Beneath every thriving organic farm lies a hidden world teeming with life. The soil food web is nature’s ultimate recycling system, where billions of microscopic workers transform organic matter into plant-available nutrients. Think of it as an underground city where everyone has a job to do.

Bacteria and fungi are the primary decomposers, breaking down crop residues, cover crops, and compost into nutrients that plants can absorb. Mycorrhizal fungi form partnerships with plant roots, extending thread-like networks that act like nature’s internet, helping plants access water and nutrients from greater distances. In return, plants share sugars they’ve made through photosynthesis, creating healthy soil ecosystems that thrive without synthetic fertilizers.

Earthworms are the engineers of this underground world, creating tunnels that improve drainage and aeration while their castings provide rich, slow-release nutrients. A single acre of healthy organic soil can contain over a million earthworms, each one working tirelessly to build soil structure.

Ontario farmer Maria Chen discovered this firsthand when she transitioned to organic methods. “After three years without chemicals, our earthworm population exploded,” she shares. “The soil became so rich and crumbly that our crops needed less water and showed better disease resistance.”

This living soil approach eliminates the need for synthetic inputs while building long-term soil fertility, creating a self-sustaining system that gets better with time.

Close-up cross-section of healthy organic soil showing earthworms and root systems
Healthy organic soil contains a thriving ecosystem of bacteria, fungi, earthworms, and microorganisms that naturally feed plants.

Above Ground Partners: Pollinators and Predators

When you walk through an organic farm bursting with diverse plantings, you’re witnessing nature’s pest control team at work. The variety of flowering plants, cover crops, and hedgerows creates a welcoming habitat for beneficial insects that become the farmer’s best allies.

Pollinators like native bees, butterflies, and hoverflies are drawn to farms with diverse flowering plants throughout the growing season. These insects don’t just pollinate crops—many are also predators in their larval stages. Hoverfly larvae, for example, can devour up to 400 aphids before reaching adulthood. By planting a succession of blooming species, farmers ensure these helpful insects stick around all season long.

Predatory insects like ladybugs, lacewings, and ground beetles thrive where there’s plant diversity because it provides shelter, alternative food sources, and overwintering sites. When pest populations spike, these beneficial insects are already established and ready to respond. This natural balance dramatically reduces the need for any interventions, even organic-approved ones.

Michigan farmer Sarah Chen noticed this firsthand after establishing wildflower strips around her vegetable fields. “Within two seasons, I saw a huge increase in ladybugs and parasitic wasps,” she shares. “My aphid problems practically disappeared, and I’m spending less time managing pests and more time harvesting.”

For home gardeners, the principle applies equally well. Plant a variety of herbs, flowers, and vegetables together to create your own pollinator paradise. Leaving some areas a bit wild—with native plants and minimal disturbance—gives beneficial insects the diverse habitat they need to flourish.

Practical Strategies Organic Farmers Use to Build Biodiversity

Crop Rotation and Polycultures

Crop rotation stands as one of organic farming’s most powerful biodiversity boosters. By changing what grows in each field from season to season, farmers create diverse habitats that support different beneficial insects, soil microorganisms, and wildlife throughout the year. This practice naturally disrupts pest and disease cycles since many harmful organisms are plant-specific and can’t survive when their preferred host isn’t available.

Polycultures take this diversity even further by growing multiple crop species together in the same space. Think of a traditional corn-beans-squash combination where tall corn provides support for climbing beans, while broad squash leaves shade the soil and suppress weeds. This companion planting mimics nature’s diversity, attracting varied pollinators and beneficial predators that keep pest populations in check.

Sarah Chen, an Ontario organic farmer, shares her success: “Since implementing seven-year rotations with cover crop polycultures, I’ve seen monarch butterflies return and haven’t needed any pest interventions for three seasons.”

For home gardeners, try rotating vegetable families annually and pairing tomatoes with basil or carrots with onions to create your own biodiverse mini-ecosystem.

Hedgerows, Wildflower Strips, and Field Margins

Field edges become vibrant ribbons of life on organic farms when farmers intentionally create hedgerows, wildflower strips, and protected margins. These features transform what might be barren borders into thriving corridors that shelter beneficial insects, birds, and small mammals throughout the seasons.

Hedgerows serve as nature’s highways, allowing wildlife to move safely between habitats while providing nesting sites and winter protection. Native shrubs and trees like hawthorn, elderberry, and wild rose offer berries and seeds that sustain birds and pollinators year-round.

Wildflower strips planted alongside crop fields create spectacular displays while serving a practical purpose. These colorful bands attract predatory insects like ladybugs and lacewings that naturally control crop pests, reducing the need for any interventions. They also support native bees and butterflies essential for pollination.

Mary Chen, an organic vegetable grower in Vermont, shares her experience: “After establishing wildflower margins three years ago, I noticed aphid problems decreased significantly. The beneficial insects now do the pest management for me, and customers love visiting during peak bloom season.”

For home gardeners, even a small unmowed strip along your garden’s edge can make a difference, providing similar benefits on a smaller scale.

Wildflower border strip with bees and butterflies along organic farm field edge
Wildflower strips at field margins provide essential habitat and food sources for pollinators and beneficial insects that support organic crop production.

Cover Cropping and Green Manures

Between main crop seasons, organic farmers plant cover crops like clover, rye, and vetch to keep fields productive and alive. These hardworking plants create a protective blanket that prevents soil erosion while their roots feed an incredible underground ecosystem of bacteria, fungi, and earthworms.

When turned back into the soil as green manure, cover crops deliver nutrients naturally without synthetic fertilizers. Different cover crop species attract unique beneficial insects and pollinators, adding layers of diversity to the farm. Crimson clover, for example, feeds early-season bees while fixing nitrogen for future crops.

Sarah Chen, who runs a five-acre organic vegetable operation in Ontario, shares her experience: “Since switching to diverse cover crop mixes, I’ve noticed healthier soil structure and fewer pest problems. My earthworm population has tripled, and that tells me everything about my soil’s vitality.”

For home gardeners, try planting buckwheat or field peas in empty beds between seasons to mimic these farm-scale benefits.

Integrated Livestock Systems

When livestock and crops work together, farms truly come alive. Integrated livestock systems bring chickens, sheep, cattle, or pigs into crop rotation areas, where they perform multiple beneficial functions. As animals graze cover crops or crop residues, they naturally fertilize the soil with nutrient-rich manure, reducing the need for external inputs. Their foraging behaviors help control weeds and pests while their hooves gently aerate compacted soil.

This practice creates diverse habitats that attract beneficial insects, ground-nesting birds, and small mammals. Ontario farmer Sarah Mitchell rotates her laying hens through vegetable beds between seasons, noting that the chickens control pests while adding fertility. The result? Healthier soil teeming with earthworms and microorganisms, plus a more resilient ecosystem. For home gardeners, even a small backyard chicken flock can provide similar benefits, turning your garden into a miniature biodiversity hub while producing fresh eggs.

Organic farmer holding basket of freshly harvested vegetables in biodiverse farm garden
Organic farmers who embrace biodiversity practices often see improved crop health, natural pest control, and abundant harvests from thriving farm ecosystems.

Real Results: A Farmer’s Success Story

When Sarah Mitchell purchased her 40-acre farm in Vermont five years ago, the land was exhausted. Years of monoculture corn production had left the soil compacted, pest populations out of control, and yields declining steadily. Today, her thriving organic farm tells a completely different story, one where biodiversity became the key to transformation.

Sarah started small, dedicating just five acres to her biodiversity experiment. She planted hedgerows along field margins, established wildflower strips between crop rows, and created three small pollinator meadows. Within the first season, she noticed beneficial insects appearing in numbers she’d never seen before. Ladybugs and lacewings began naturally controlling aphid populations that previously required intervention.

The challenges weren’t insignificant. Sarah admits the first two years tested her patience. Converting depleted land takes time, and her initial yields dipped slightly as the ecosystem rebalanced itself. Neighbors questioned her unconventional approach, wondering why she’d “waste” productive land on flowers and shrubs.

But the results spoke for themselves. By year three, Sarah’s soil organic matter increased from 2.1% to 4.3%, measured through annual testing. Earthworm populations tripled, creating natural aeration that eliminated her need for mechanical tillage. Her vegetable yields matched and then exceeded her pre-conversion numbers, while pest damage dropped by 60%.

Perhaps most impressive was her bottom line. With reduced input costs and premium prices for her certified organic produce, Sarah’s profit margins improved by 35%. She now grows over twenty crop varieties, rotating them strategically to maximize both soil health and market opportunities.

Today, Sarah hosts regular farm tours, sharing her biodiversity journey with aspiring farmers and curious consumers. Her message is clear: working with nature rather than against it isn’t just environmentally sound, it’s economically smart. What started as a leap of faith became proof that biodiversity and productivity can flourish together.

What This Means for Your Plate (And Your CSA Box)

When you choose produce from a biodiverse organic farm, you’re getting more than just pesticide-free vegetables. Research consistently shows that crops grown in biologically rich soil systems contain higher levels of essential nutrients, including vitamins, minerals, and antioxidants. The complex web of soil microorganisms helps plants access and absorb nutrients more effectively than simplified farming systems.

You’ll also notice the difference in taste. That heirloom tomato from your CSA box bursts with flavor because the plant had access to diverse soil biology and wasn’t bred solely for shipping durability. The varied growing conditions on biodiverse farms allow crops to develop their full flavor profiles naturally.

From a food safety perspective, biodiverse farms tend to have fewer pest and disease problems because the ecosystem naturally regulates itself. When beneficial insects, birds, and microorganisms are present in healthy populations, they keep potential crop threats in check without chemical interventions.

When selecting an organic farm or CSA membership, ask questions that reveal their biodiversity practices. Do they maintain hedgerows, pollinator gardens, or wildlife corridors? How many crop varieties do they grow each season? Do they use cover crops and crop rotation? Farmers genuinely committed to biodiversity love talking about these practices.

Look for farms that describe themselves as regenerative or agroecological, terms that signal a deeper commitment to ecosystem health beyond basic organic certification. Visit the farm if possible. You should see flowering plants throughout the growing season, observe butterflies and bees, and notice diverse plantings rather than monoculture rows.

Take Sarah Chen’s approach at Meadowbrook Farm, where CSA members receive a weekly newsletter explaining which beneficial insects they’ve spotted and how companion plantings are protecting their crops. This transparency demonstrates both knowledge and commitment to working with nature rather than against it.

Starting Small: Biodiversity Tips for Home Gardens

You don’t need acres of land to support biodiversity—your backyard or balcony can become a thriving mini-ecosystem with a few thoughtful changes. Start by choosing native plants and flowers that naturally attract local pollinators like bees, butterflies, and hummingbirds. These plants have evolved alongside native wildlife and require less water and maintenance than exotic varieties.

Ditch the synthetic pesticides and fertilizers, even in small spaces. These chemicals eliminate beneficial insects along with pests, disrupting the natural balance your garden needs. Instead, welcome helpful predators like ladybugs and lacewings that naturally control aphids and other nuisances. A healthy garden finds its own equilibrium when you give nature a chance.

Create simple habitat features that invite wildlife to stay. Leave a small pile of logs or rocks in a corner for ground beetles and salamanders. Install a shallow water dish for birds and beneficial insects. Let a section of your lawn grow a bit wild—those “weeds” often provide crucial food sources for pollinators during different seasons.

Compost your kitchen scraps and yard waste to build rich, living soil teeming with microorganisms. This mirrors what organic farmers do on larger scales and reduces your waste while feeding your plants naturally.

Even a windowsill herb garden grown without chemicals contributes to a healthier local environment. Every small action creates ripples, connecting your space to the broader movement toward sustainable, biodiverse landscapes. Your garden becomes part of the solution, demonstrating that supporting biodiversity starts right where you are.

Organic farming exemplifies regenerative agriculture in its purest form—not just sustaining the land, but actively healing it while producing nourishing food. Every biodiverse organic farm becomes a sanctuary where pollinators thrive, soil organisms flourish, and natural systems regain their balance. This isn’t just agriculture; it’s ecosystem restoration happening one season at a time.

You can champion this vital work with your everyday choices. Join a Community Supported Agriculture (CSA) program to connect directly with biodiverse organic farms in your region. Shop at farmers markets where you can meet growers who prioritize wildlife habitat alongside crop production. Ask farmers about their practices—many love sharing how they nurture beneficial insects or protect hedgerows.

Consider this: when you support an organic farm, you’re investing in far more than your weekly vegetables. You’re backing ecosystem stewards who understand that healthy farms must work with nature, not against it. These farmers cultivate abundance for countless species while feeding their communities.

The future of our food system depends on recognizing farms as living ecosystems deserving our protection and support. Every purchase from a biodiverse organic farm casts a vote for a healthier planet—one where agriculture restores rather than depletes the natural world around us.

How NC State’s Land-Grant Mission Helps CSA Farmers Secure and Afford Farmland

Posted by darrell on
0
Business and Economic Impact
How NC State’s Land-Grant Mission Helps CSA Farmers Secure and Afford Farmland

Access affordable farmland through NC State’s land-grant programs designed specifically to help beginning farmers and CSA operators overcome one of agriculture’s biggest barriers. NC State University, established in 1887 under the Morrill Act, exists with a clear mission: making agricultural knowledge, resources, and opportunities accessible to everyone in North Carolina, regardless of background or experience level.

If you’re dreaming of starting a CSA but feeling overwhelmed by land costs and tenure insecurity, you’re not alone. Farmland prices have soared 40% in the past decade, pushing sustainable agriculture out of reach for many aspiring growers. The good news? NC State’s land-grant system offers concrete solutions through research-backed programs, expert guidance, and connections to farmland access resources that most people don’t know exist.

The Cooperative Extension Service provides free one-on-one consultations with agricultural agents who understand local land markets and can guide you through lease agreements, farm transition programs, and alternative land tenure models. Their Small Farm Unit specifically supports beginning farmers with business planning, soil health assessments, and connections to landowners seeking responsible stewards.

Beyond advice, NC State connects you to incubator farms, land-linking databases, and financing programs tailored for sustainable operations. Real farmers have transformed these resources into thriving CSAs, proving that the land-grant promise still works. Whether you’re searching for your first acre or trying to secure long-term tenure, understanding how to navigate NC State’s land-grant resources could be the difference between dreaming about farming and actually feeding your community.

What NC State’s Land-Grant Status Actually Means for Farmers

Back in 1862, when President Lincoln signed the Morrill Act, something remarkable happened for American agriculture. This legislation created land-grant universities with a clear mission: bring practical education and research to everyday people, not just the wealthy elite. North Carolina State University earned its land-grant status in 1887, joining this national network dedicated to serving farmers and rural communities.

So what does this mean for you as a farmer or aspiring grower? Essentially, NC State exists to be your partner in agricultural success. The university’s three-part mission makes this happen through research, teaching, and extension services.

The research component means NC State scientists are constantly working on real-world farming challenges. They’re developing disease-resistant crop varieties, testing organic pest management strategies, and finding ways to improve soil health. This isn’t theoretical work locked in ivory towers—it’s practical science designed to help you grow better food more sustainably.

Extension services bring that knowledge directly to your farm gate. Through NC Cooperative Extension, you get free access to agricultural experts, educational workshops, and research-based resources. County extension agents become your personal consultants, helping troubleshoot problems and implement new techniques.

Consider Sarah Martinez, who transformed her struggling vegetable operation into a thriving organic CSA after attending extension workshops on season extension and soil management. She credits the personalized guidance from her local agent with saving her farm.

This land-grant commitment means NC State’s resources aren’t reserved for large-scale operations. Whether you’re managing two acres or two hundred, whether you’re just starting or expanding, these taxpayer-supported services exist specifically to help you succeed in feeding your community sustainably.

Young farmer tending vegetable rows on CSA farm with barn in background
CSA farmers in North Carolina face unique challenges in securing long-term farmland to build sustainable operations.

The Land Access Crisis Facing CSA Farmers Today

Why Land Tenure Matters for Your CSA

Secure land tenure is the foundation of a thriving CSA farm. When you have long-term access to your land—whether through ownership, extended leases, or land grants—you can invest confidently in soil health improvements that take years to yield results. Building organic matter, establishing perennial systems, and creating infrastructure like hoop houses or irrigation all require the certainty that you’ll be farming the same ground next season and beyond.

This stability directly impacts your members too. Building lasting CSA relationships depends on consistency and quality. When farmers face uncertain land tenure, they often hesitate to make improvements or may need to relocate suddenly, disrupting member trust and crop planning. Conversely, secure tenure allows you to develop signature varieties, perfect your growing systems, and create the dependable, high-quality harvests that keep members renewing their shares.

NC State’s land-grant programs recognize this reality, offering resources that help CSA farmers establish stable land access. Whether you’re exploring lease agreements, seeking affordable farmland, or navigating land purchase options, understanding your tenure options protects both your farm’s future and your community’s food security.

The Real Numbers Behind Farmland Costs

North Carolina farmland prices have climbed steadily over the past decade, with average costs ranging from $4,000 to $7,000 per acre depending on location and soil quality. Prime agricultural land near urban centers like Raleigh-Durham commands premium prices, sometimes exceeding $10,000 per acre, while rural counties in the eastern and western regions offer more affordable options starting around $3,000 per acre.

For aspiring CSA operators, these numbers can feel daunting. However, securing farmland affordably is possible with creative approaches. Many successful farmers start small, leasing rather than purchasing land initially. Average lease rates in North Carolina hover between $50 and $150 per acre annually for cropland, making this an accessible entry point.

The good news? NC State’s land-grant resources help bridge this gap through conservation easements, beginning farmer programs, and connections to landowners seeking agricultural partnerships. Understanding these real numbers empowers you to make informed decisions and explore alternatives that align with your budget and farming vision.

How NC State Extension Supports CSA Land Access

Free Educational Programs and Workshops

NC State’s Cooperative Extension offers a wealth of free educational programs designed to help aspiring farmers turn their agricultural dreams into reality. Through their comprehensive workshop series, you’ll discover practical guidance on farm business planning, financial management, and strategies for securing farmland. These sessions cover everything from developing business plans and understanding lease agreements to navigating the complexities of land acquisition and farm succession planning.

The university regularly hosts webinars that connect you with experienced farmers and agricultural professionals who share real-world insights. Topics range from soil health management to marketing strategies for CSA operations. Many programs feature farmer success stories that demonstrate how proper planning and education laid the foundation for thriving agricultural businesses.

Extension agents also offer one-on-one consultations to address your specific farming challenges. Whether you’re exploring beginning farmer programs or seeking to understand the essential ingredients for farm success, these resources provide invaluable support. Virtual and in-person options make it easy to participate regardless of your location. Visit your local Extension office or check their online calendar to find upcoming workshops, webinars, and training opportunities tailored to new and expanding farm operations.

One-on-One Extension Agent Support

Finding the right land and navigating purchase agreements can feel overwhelming, especially for new farmers launching a CSA. That’s where NC State’s local extension agents become invaluable allies in your farming journey. These knowledgeable professionals offer personalized, one-on-one consultations tailored to your specific situation and goals.

Extension agents help aspiring farmers understand the complexities of land leasing agreements, including fair pricing, contract terms, and renewal options. They can review potential land purchases with you, discussing soil quality assessments, water rights, and zoning regulations that might impact your CSA operation. When negotiating with landowners, they provide guidance on structuring favorable tenure arrangements that give you the stability needed to invest in soil improvements and infrastructure.

Take Sarah Martinez, who started a thriving organic CSA in Chatham County. Her local extension agent helped her negotiate a ten-year lease with an option to purchase, giving her confidence to build high tunnels and develop a loyal member base. The agent also connected her with legal resources to ensure her contract protected both parties.

These services are completely free and available throughout North Carolina. Your extension agent becomes a trusted partner who understands local land markets and can help turn your CSA dreams into reality.

Research-Backed Solutions for Affordable Farmland

Land-Link Programs That Actually Work

Finding farmland is one of the biggest hurdles for new CSA operators, but NC State’s land-link initiatives are creating real pathways to agricultural success. These programs connect retiring farmers who want to see their land continue in production with energetic newcomers ready to grow fresh, organic food for their communities.

The FarmLink program stands out as a practical matchmaking service. Through online listings and in-person consultations, Extension agents help retiring landowners find compatible beginning farmers. Many arrangements start as lease-to-own agreements, giving new operators time to build their customer base before committing to purchase.

Take Sarah Mitchell’s story. After working on established farms for three years, she connected with a retiring tobacco farmer through the program. He mentored her through her first season while she launched a 30-member CSA. Within four years, Sarah purchased the 15-acre property and now serves 85 families with certified organic vegetables.

Another success involves the Rodriguez family, who discovered available land in Chatham County through Extension workshops. The retiring owners appreciated their commitment to sustainable practices and offered favorable lease terms. Today, their thriving CSA employs two additional farmhands and supplies three local restaurants.

These programs work because they build relationships, not just transactions, creating agricultural legacies that benefit entire communities.

Creative Leasing Arrangements for CSA Success

Getting access to land doesn’t always mean taking out a hefty mortgage. Research from NC State Extension has highlighted several creative leasing arrangements that make CSA farming more achievable, especially for those just starting out.

Share agreements are gaining popularity among new farmers. Under this model, you work established farmland and share a percentage of your harvest or profits with the landowner. This reduces your upfront costs while giving landowners a stake in your success. The arrangement works particularly well when pairing experienced landowners with enthusiastic new growers.

Long-term leases with purchase options offer another pathway to farm ownership. These agreements let you lease land for five to ten years with the option to buy later, allowing you to build your CSA business while working toward ownership. You’re investing in infrastructure and soil health knowing you’ll eventually own the fruits of your labor.

Cooperative land ownership is also emerging as a viable solution. Multiple farmers pool resources to purchase land together, sharing costs and responsibilities. This model builds community while making land ownership accessible to those who couldn’t afford it alone.

NC State’s research shows these alternative arrangements significantly improve farmer retention rates. They reduce financial barriers while providing the stability needed to develop successful CSA operations. Consider exploring which model aligns best with your goals and financial situation.

Extension agent consulting with farmer at edge of agricultural field
NC State Cooperative Extension agents provide personalized guidance to help CSA farmers navigate land access challenges.

Success Stories: NC CSA Farmers Who Found Their Land

Nothing tells the story better than real farmers who’ve walked the path. Take Emma Garrison, who launched Piedmont Harvest CSA in Orange County after connecting with NC State’s Extension program. Facing the common struggle of finding affordable land, Emma participated in a farm transfer workshop where Extension agents introduced her to the state’s Beginning Farmer programs. Through NC State’s network, she connected with a retiring farmer looking to lease acreage at below-market rates. Five years later, Emma serves 120 member families and has become a mentor herself, showing other aspiring farmers how NC State resources can open doors.

Over in Chatham County, brothers Marcus and David Chen transformed their dream of sustainable farming into reality through NC Cooperative Extension’s farm business planning assistance. The Chens had farming experience but lacked capital for land purchase. Extension specialists helped them craft a business plan that secured FSA loans and connected them with land-access programs specifically designed for beginning farmers. Today, Green Valley Farm operates on 15 acres, with a waiting list for their popular vegetable and herb CSA shares. Their success demonstrates the tangible CSA economic impact in their community, employing three local residents and supplying restaurants year-round.

Meanwhile, Jasmine Rodriguez found her path through NC State’s Small Farm Unit programs. After attending workshops on organic certification and season extension techniques, she discovered farmland through the state’s AgLink matching service, which pairs landowners with farmers. Her Asheville-area operation, Mountain Roots CSA, now flourishes on leased land, serving 80 families with certified organic produce. Jasmine credits NC State’s ongoing technical support and networking opportunities for helping her navigate everything from soil health to member retention.

These farmers share one thing in common: they didn’t navigate alone. NC State’s land-grant mission created the pathways they needed to succeed.

Your Action Plan for Securing CSA Farmland

Ready to tap into NC State’s resources for your CSA venture? Here’s your roadmap to getting started.

First, connect with NC State’s Cooperative Extension offices in your county. These local experts offer free consultations on land evaluation, soil testing, and crop planning specific to North Carolina’s climate zones. Schedule a visit to discuss your CSA goals and get personalized recommendations for your region.

Next, explore NC State’s online land tenure resources through their Center for Environmental Farming Systems. They offer downloadable lease agreement templates, land access guides, and budgeting tools designed specifically for beginning farmers. Take advantage of their webinar series on farmland financing options, including conservation easements and Farm Service Agency loan programs.

Consider attending NC State’s annual farm tours and field days, where you can meet successful CSA farmers who’ve navigated similar challenges. Sarah Chen, who started her Durham County CSA in 2019, credits an Extension agent’s guidance with helping her secure a favorable long-term lease on previously idle farmland. She learned to evaluate properties for water access, soil quality, and proximity to customer bases.

Reach out to NC State’s Small Farm Unit for their Beginning Farmer and Rancher Development Program. This initiative provides mentorship connections and workshops on business planning, land searching strategies, and building relationships with landowners.

Don’t overlook the university’s research station network. Many stations host demonstration plots where you can observe organic growing techniques and variety trials before committing to your own land investment.

Finally, join NC State’s online farming community forums to network with other CSA operators. These connections often lead to land-sharing opportunities, equipment loans, and invaluable peer support as you launch your sustainable farming journey.

Farmers shaking hands in front of established CSA farm with greenhouse structures
Land-link programs successfully connect retiring farmers with new CSA operators, creating opportunities for the next generation.

NC State’s land-grant mission remains as vital today as it was over a century ago, continually adapting to support the evolving needs of modern farmers, especially those building community-supported agriculture operations. Whether you’re just dreaming about starting your own CSA or already managing acres of organic vegetables, the university’s commitment to accessible agricultural education and practical support is a resource you can count on.

The beauty of this land-grant legacy is that it’s designed for you, the people growing food in North Carolina communities. Extension agents understand the unique challenges CSA farmers face, from securing affordable land to building loyal customer bases. They’ve helped countless farmers transform ideas into thriving operations through personalized guidance, research-backed insights, and connections to funding opportunities.

Take advantage of what’s available. Your local Cooperative Extension office is staffed with experts eager to help you succeed, offering everything from soil testing to business planning workshops. Many farmers have discovered that a simple conversation with an extension agent opened doors they didn’t know existed, leading to land access programs, grant opportunities, and mentorship connections.

Don’t navigate your farming journey alone. Reach out to your county extension office today and discover how NC State’s land-grant resources can help you grow not just crops, but a sustainable agricultural future for your community.