Why Your Preserved Foods Might Be Unsafe (And How to Fix It)
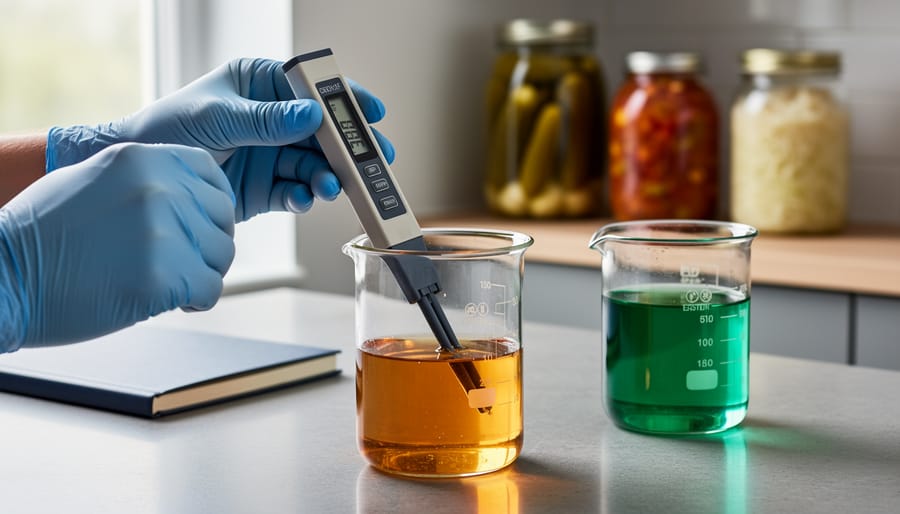
Calibrate your pH meter before every batch of pickles, krauts, or fermented vegetables using two buffer solutions—typically pH 4.0 and pH 7.0—to ensure your preserved foods reach the safe acidity level of 4.6 or below. Remove the protective cap, rinse the probe with distilled water, and immerse it fully in the pH 7.0 buffer solution first, waiting until the reading stabilizes before adjusting to match the buffer’s exact value. Repeat this process with the pH 4.0 buffer to establish a two-point calibration that accounts for accuracy across your typical preservation range. Store buffer solutions in their original containers away from light and heat, replacing them every three months or when contamination occurs, as degraded buffers compromise your entire calibration.
Just as thermometers require ice bath and boiling water verification, pH meters demand this same rigorous attention to maintain food safety standards in your home preservation projects. A miscalibrated meter reading 4.8 when the actual pH is 5.2 puts your family at risk for botulism in low-acid preserves. Keep calibration records with dates and buffer lot numbers in a preservation journal, creating an accountability system that professional food safety inspectors would recognize. Clean the probe gently with a soft cloth after each use, never touching the delicate glass bulb with your fingers, and store it in pH storage solution or a diluted buffer—never tap water—to prevent the probe from drying out and losing sensitivity. This simple routine transforms your pH meter from an uncertain gadget into a trusted guardian of your harvest preservation efforts.
Understanding pH and Why It Matters in Food Preservation
Understanding pH might seem technical at first, but it’s actually quite simple—and essential knowledge if you’re preserving your garden harvest or CSA bounty. Think of pH as a measurement of how acidic or alkaline a food is, measured on a scale from 0 to 14. Pure lemon juice rates around 2 (highly acidic), while baking soda dissolved in water sits near 9 (alkaline). Right in the middle at 7, you’ll find neutral water.
Here’s where it gets crucial for food safety: that pH number determines whether dangerous bacteria like Clostridium botulinum—the organism responsible for potentially fatal botulism—can survive in your preserved foods. This bacteria thrives in low-acid environments but cannot grow in high-acid conditions. The magic number to remember is 4.6. Foods with a pH below 4.6 are considered high-acid and can be safely preserved using boiling water bath canning. These include most fruits, pickles, and tomatoes with added acid.
Foods above 4.6 on the pH scale are low-acid and require pressure canning to reach temperatures high enough to destroy botulism spores. This category includes vegetables, meats, and most soups. Many aspiring home preservers have learned this lesson from experienced farmers at CSAs who’ve been safely canning for generations.
Just as you wouldn’t guess the doneness of meat without a properly calibrated thermometer, you shouldn’t assume your tomato sauce is acidic enough without testing. A calibrated pH meter takes the guesswork out of preservation, ensuring your hard-earned harvest stays both delicious and safe throughout the winter months.
The Connection Between Thermometer and pH Meter Calibration
Whether you’re preserving your garden’s harvest or preparing homemade pickles from your CSA bounty, accuracy matters tremendously. Just like thermometers, pH meters are precision instruments that drift over time and need regular calibration to maintain accuracy. Both tools follow remarkably similar calibration principles, and manufacturers typically provide detailed procedures in downloadable PDF format for easy reference in your kitchen or workshop.
The connection between these instruments goes deeper than you might think. Temperature directly affects pH readings because the electrical conductivity of solutions changes with heat. That’s why professional pH meters include automatic temperature compensation features, and why you’ll often need both instruments during food preservation. For instance, when you’re canning tomatoes from your summer garden, you need precise pH measurements to ensure safe acidity levels, but those readings must be taken at the correct temperature to be reliable.
Think of calibration as preventive maintenance for your food safety toolkit. Sarah Chen, a small-scale pickle producer who sources from local organic farms, learned this lesson when a batch failed safety testing. “I assumed my pH meter was fine because it looked accurate,” she explains. “Now I calibrate before every canning session using buffer solutions, just like checking a thermometer against ice water. It takes five minutes but protects weeks of work.”
Both instruments require standard reference points: thermometers use ice baths and boiling water, while pH meters use calibrated buffer solutions at known values. This regular verification ensures your preserved foods remain safe for your family throughout the year.
How pH Meters Work and When You Need One
Just like thermometers measure temperature with precision, pH meters measure acidity levels in your preservation projects—and both require proper calibration to keep your preserved foods safe. Understanding when you need a pH meter versus simple pH strips can save you money while ensuring food safety.
pH meters work by using an electronic probe that measures hydrogen ion concentration in liquids, displaying results on a digital screen. They’re more accurate than pH strips, typically reading to two decimal places. For home preservers working with your CSA harvest bounty, pH strips often suffice for basic projects. However, investing in a quality pH meter becomes critical when you’re developing new recipes or working with low-acid foods.
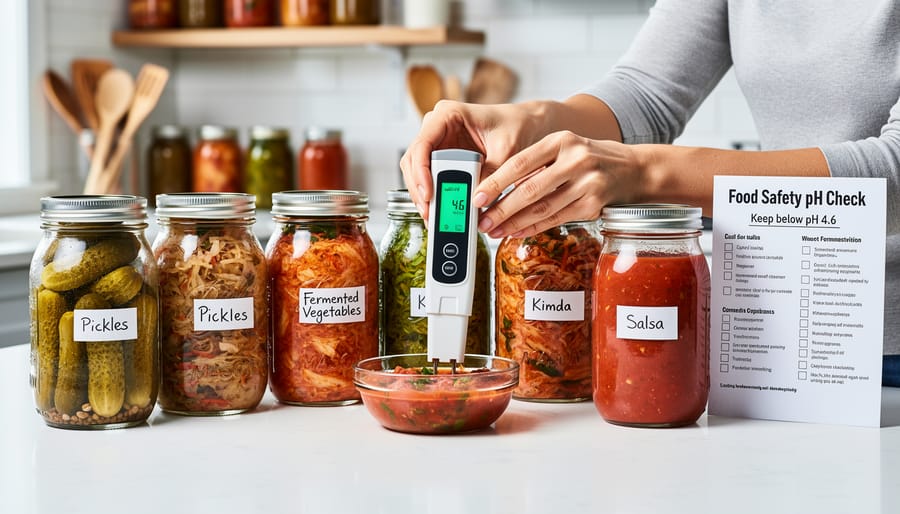
Salsa canning is where pH meters truly shine. The combination of vegetables, peppers, and tomatoes creates varying acidity levels that determine safe processing times. You need readings below 4.6 pH to prevent botulism risk, and strips simply aren’t precise enough for this critical threshold. Similarly, when pickling vegetables from your garden, a pH meter confirms your brine achieved proper acidity, especially important with quick pickle recipes or when you’ve adjusted traditional recipes.
Fermentation monitoring represents another essential use. Watching your sauerkraut or kimchi drop to ideal pH levels (typically 3.0-4.0) ensures beneficial bacteria thrive while harmful ones can’t survive. One successful organic farmer I know tests her fermented hot sauce batches twice daily, ensuring consistent quality that’s made her product a farmers market favorite. That investment in a reliable pH meter paid for itself within her first season.
Step-by-Step pH Meter Calibration Procedure
Gather Your Calibration Supplies
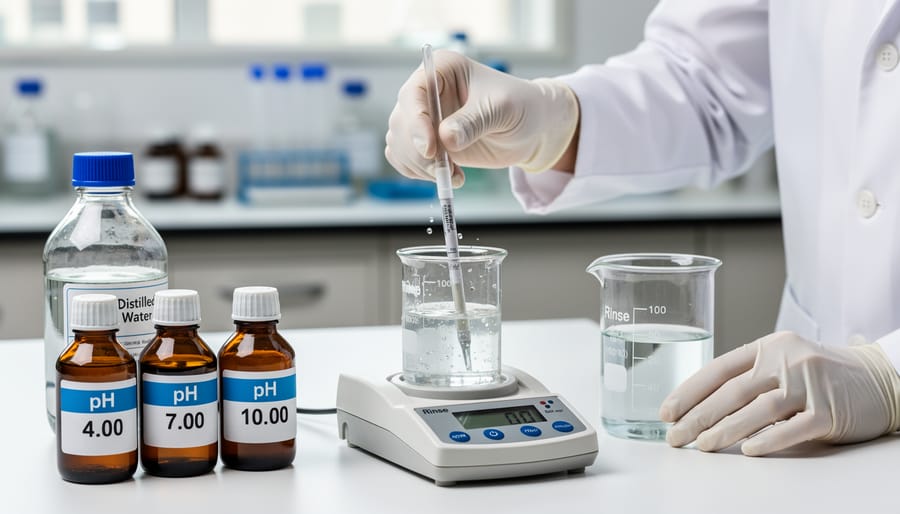
Before you begin calibrating your pH meter—essential for safely preserving your garden’s harvest—gather these simple supplies. You’ll need pH buffer solutions, which are specially formulated liquids with precise pH values used to calibrate your meter. For home food preservation, you’ll typically use pH 4.0 and pH 7.0 buffer solutions. Think of buffer solutions as the “reference standards” that teach your pH meter to read accurately, much like checking a ruler against a known measurement.
You can purchase buffer solutions at garden supply stores, brewing supply shops, or online retailers. Look for fresh solutions in sealed packets or bottles, as they maintain accuracy longer. You’ll also need distilled water for rinsing your pH probe between calibrations, two or three clean small containers (shot glasses work perfectly), and soft lint-free tissues or lens cloths for gently drying the probe.
Many successful farmers and home preservers keep calibration supplies handy during peak harvest season. Sarah from Willow Creek Farm shares, “I calibrate before every pickling session—it’s become as routine as washing my hands, and it gives me confidence my preserved foods are safe for my CSA members.”
The Calibration Process
Calibrating your pH meter is simpler than you might think, and mastering this process ensures your preserved foods stay safe throughout the year. Let’s walk through each step together.
Start by rinsing your pH probe thoroughly with distilled water and gently patting it dry with a lint-free cloth. This removes any residue from previous testing. Next, immerse the probe into your first buffer solution, typically pH 7.0 (neutral), making sure the sensor is completely submerged. Allow the reading to stabilize for about 30 seconds. Most digital meters have a calibration button you’ll press to lock in this standard value.
Here’s where precision matters: if your meter shows a reading different from 7.0, use the adjustment dial or calibration button to set it correctly. Your meter’s manual will guide you through the specific steps for your model.
After completing the first calibration point, rinse your probe again with distilled water and dry it carefully. This prevents cross-contamination between solutions. Now immerse the probe into your second buffer solution, usually pH 4.0 for acidic preserves like pickles and salsas. Wait for the reading to stabilize, then adjust if needed.
Document your calibration results in a log with the date, buffer values used, and any adjustments made. This creates a helpful reference for future calibrations and helps track your meter’s performance over time.
If your meter won’t calibrate properly, first check that your buffer solutions aren’t expired and haven’t been contaminated. Clean the probe thoroughly with warm water and try again. Sometimes, older probes simply need replacing after months of faithful service in your preservation projects.
How Often Should You Calibrate?
For home preservers and small-scale farmers, calibration frequency depends on how actively you’re putting up your harvest. If you’re seriously preserving—think weekly canning sessions during peak tomato season or making regular batches of fermented vegetables—calibrate your pH meter before each preservation session. This ensures every jar is safely acidified and shelf-stable.
For occasional users who pickle or ferment monthly, weekly calibration checks work well. Simply test your meter against a standard solution and adjust if needed.
Watch for these telltale signs your meter needs immediate recalibration: sluggish response times when measuring, inconsistent readings from the same sample, or visible damage to the probe. Sarah, a community-supported agriculture member who preserves her weekly veggie box, learned this lesson after noticing her meter took longer than usual to stabilize—recalibration revealed it was off by 0.4 pH units.
Keep a simple calibration log in your preservation notebook. Jot down the date, calibration solutions used, and any adjustments made. This practice helps you spot patterns, like seasonal humidity affecting accuracy, and provides peace of mind that your preserved goods are consistently safe. Many experienced preservers find this record-keeping habit as essential as their recipe cards.
Using Your Calibrated pH Meter for Safe Food Preservation
Now that your pH meter is calibrated and ready, let’s put it to work ensuring your preserved harvest is both delicious and safe. Just as a properly calibrated thermometer protects you during canning, your pH meter becomes your guardian against harmful bacteria in pickles, salsas, and fermented foods.
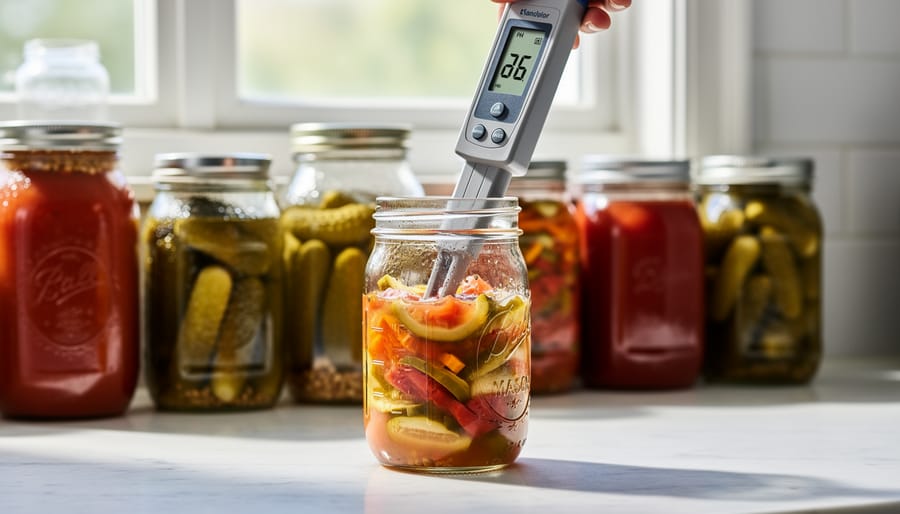
When testing your preserves, timing matters. During recipe development, test at multiple stages to understand how ingredients affect acidity. For fermented vegetables, measure every few days to track the pH drop. Once you’ve perfected a recipe, test the final product before sealing jars. This confirms your creation falls within the safe zone—below 4.6 pH for shelf-stable foods.
Temperature significantly impacts pH readings. Always test your preserves at room temperature, ideally between 68-77°F. Hot liquids can damage your probe and give inaccurate readings. If you’ve just finished cooking salsa or pickles, let them cool before testing. Simply dip your rinsed probe into the mixture, ensuring it’s fully submerged, and wait for the reading to stabilize.
Meet Sarah, a CSA member who started making fermented hot sauce from her pepper harvest. By tracking pH levels, she learned exactly when her sauce reached peak flavor and safety—usually around 3.8 pH after five days. Her confidence in food preservation techniques grew tremendously, and she now shares her creations at local farmers markets.
Remember to rinse your probe with distilled water between different batches to prevent cross-contamination and maintain accuracy throughout your preserving sessions.
Caring for Your pH Meter Between Uses
Just like your trusty kitchen thermometer, your pH meter needs proper care to deliver accurate readings season after season. When you’re finished testing your pickles or ferments, rinse the electrode gently with distilled water and pat it dry with a lint-free cloth. Never wipe aggressively, as this can damage the sensitive glass bulb.
Storage is crucial for electrode longevity. Keep your probe in its storage solution (usually a potassium chloride mixture) rather than tap water, which can actually harm the electrode. Think of it like conditioning a cast iron skillet—the right environment maintains its effectiveness.
Avoid these common mistakes that many home preservers make: letting the electrode dry out completely, storing it in distilled water, or touching the glass bulb with your fingers. These habits will shorten your probe’s lifespan significantly.
Replace your electrode when you notice sluggish response times or difficulty calibrating, typically every 12-18 months with regular use. Sarah, a Vermont farmer who preserves hundreds of jars annually, keeps a backup probe on hand during peak canning season to avoid interruptions. She treats her pH meter with the same respect as her pressure canner—essential tools for safe, sustainable food preservation deserve proper maintenance.
Just as you wouldn’t dream of canning without a properly calibrated thermometer, treating your pH meter with the same calibration care is essential for safe home preservation. For CSA members and gardeners blessed with abundant harvests, accurate pH readings protect your family from foodborne illness risks. Consider creating your own calibration procedure document—a simple checklist keeps you accountable and ensures consistency across canning seasons. Sarah, a community garden coordinator, laminated her pH calibration steps and keeps them posted in her preservation workspace alongside her thermometer guidelines. By mastering both tools, you’re empowered to confidently transform your farm-fresh bounty into safely preserving farm-fresh produce that nourishes your family year-round.