How to Create a Soil Management Plan for Year-Round Farm Success
A soil management plan is a written strategy that outlines how you’ll maintain and improve your soil’s health throughout the growing season and beyond. It works by helping you schedule amendments, track nutrient levels, prevent erosion, and build organic matter systematically rather than reacting to problems as they arise. Most farms and gardens can implement a basic plan in just a few hours using soil tests, observation, and seasonal planning calendars.
Creating your plan doesn’t require expensive consultants or complicated software. You need current soil test results, an understanding of your crops’ nutrient demands, and a realistic timeline for applying amendments and cover crops. The payoff shows up quickly. Sarah Chen, who runs a two-acre CSA operation in Oregon, saw her tomato yields jump 40% in the second season after implementing a simple soil plan that focused on fall cover cropping and spring compost applications timed to her planting schedule.
The process adapts to any scale. Whether you’re managing a quarter-acre backyard garden or a 50-acre farm, the same core principles apply: test your soil, know what you’re growing, match amendments to actual needs rather than guessing, and verify results through observation and follow-up testing. This systematic approach transforms soil management from guesswork into a repeatable system that gets better each year as you refine what works on your specific land.
Tools and Materials You’ll Need
Setting up a successful soil management plan doesn’t require expensive equipment, but having the right tools makes the process smoother and more accurate. Start with soil testing equipment, you’ll need a reliable soil pH meter (around $20-40 for a decent probe-style meter) and a soil auger or probe for collecting samples from various depths. Many CSA farmers find that a simple stainless steel soil probe works perfectly for routine checks.
For your baseline assessment and ongoing monitoring, invest in a comprehensive soil test kit or plan to send samples to your local extension office. Home test kits ($15-30) work for quick checks, but professional lab analysis ($20-50 per sample) gives you the detailed nutrient breakdown you need for planning amendments.
Beyond testing, you’ll need tools organized by purpose:
- Testing equipment: digital or analog pH meter, soil thermometer, penetrometer for compaction testing, sample bags and labels
- Documentation tools: waterproof field notebook, smartphone with notes app or dedicated farm management software, camera for visual records, clipboard
- Amendment application: wheelbarrow or garden cart, broadcast spreader for larger areas, measuring buckets or scoops for accuracy
- Planning materials: large wall calendar or planner, graph paper or digital mapping tool for field layouts, weather tracking system
Don’t overlook a good garden spade and trowel for digging test pits to examine soil structure and root depth. A rain gauge helps you track moisture alongside your soil observations. For record-keeping, some farmers swear by simple spreadsheets, while others prefer apps like FarmLogs or even a dedicated three-ring binder with printed templates. Choose whatever system you’ll actually use consistently, the best documentation method is the one that fits your workflow and gets updated regularly throughout the season.
Safety Considerations and Best Practices
While soil management is generally low-risk work, a few thoughtful precautions will protect both you and your land. Understanding proper handling and environmental impacts ensures your soil-building efforts enhance rather than harm your farm ecosystem.
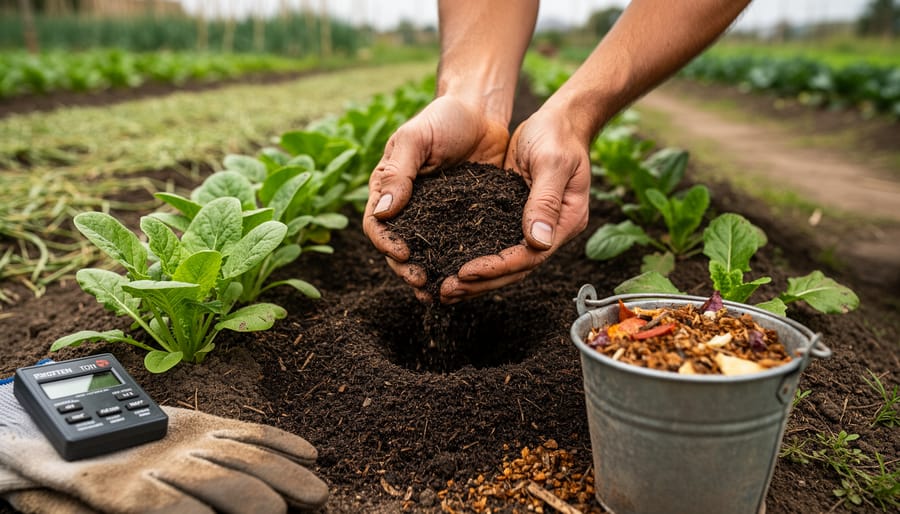
When working with organic amendments like manure, compost, or blood meal, wear gloves to prevent skin irritation and potential pathogen exposure. Fresh manure requires extra care, always wash hands thoroughly after handling, and keep uncomposted manure away from areas where you’ll harvest crops within 120 days. Store amendments in covered containers to prevent moisture infiltration and nutrient leaching.
Soil testing equipment poses minimal hazards, but augers and probes can cause hand strain if you’re sampling compacted ground. Take breaks, use proper posture, and consider pre-moistening hard soil to ease penetration. If you’re using pH meters or electrical conductivity tools, follow manufacturer guidelines for calibration fluids and battery disposal.
Environmental precautions matter too. Avoid applying amendments before heavy rain, which can wash nutrients into waterways. Time your interventions for dry, calm days to prevent windborne dust from disturbing neighbors or getting into your lungs. When spreading amendments by hand or equipment, a simple dust mask provides extra respiratory protection. These straightforward practices keep soil management safe, effective, and respectful of the broader environment your farm inhabits.
Step-by-Step: Building Your Soil Management Plan
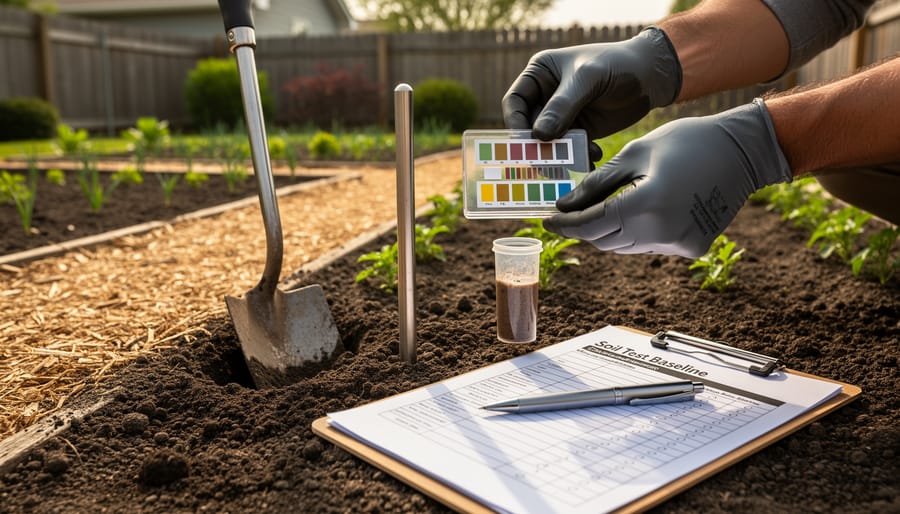
Step 1: Conduct Your Baseline Soil Assessment
Your soil management plan needs a solid foundation, and that starts with knowing exactly what you’re working with. Think of this baseline assessment as taking your soil’s vital signs, you can’t improve what you haven’t measured.
Start by dividing your growing area into zones based on how you use the space. A tomato bed that gets full sun needs separate testing from a shaded herb garden. For each zone, collect soil samples from 6-8 spots, digging down about 6 inches where roots actively feed. Mix these samples together in a clean bucket to get a representative sample for that area.
Send your samples to your state’s cooperative extension lab or a reputable soil testing service. Request a complete analysis that includes pH, nitrogen, phosphorus, potassium, organic matter percentage, and micronutrients. Some labs also test for soil texture and cation exchange capacity, both valuable for understanding your soil’s structure.
While waiting for results, walk your zones and document what you see. Note drainage patterns after rain, compaction from foot traffic, earthworm activity, and how easily a shovel penetrates the ground. Take photos. These observations, paired with your lab results, create the complete baseline picture you’ll reference throughout the growing year.
Step 2: Set Your Soil Health Goals
With your baseline assessment in hand, it’s time to translate those numbers into concrete, achievable targets. Effective soil health goals are specific, measurable, and tailored to what you’re actually growing.
Start by identifying your priority crops and their specific soil requirements. If you’re planning tomatoes and peppers, aim for a pH between 6.0-6.8. For blueberries, you’ll need much lower, around 4.5-5.5. Don’t try to fix everything at once. Pick two or three key metrics that will have the biggest impact on your main crops.
Make your goals seasonal and incremental. Rather than “improve soil health,” set a target like “raise pH from 5.8 to 6.2 by spring planting” or “increase organic matter from 3% to 4% over the next growing season.” These timelines align with your planting cycles and give you clear checkpoints.
Consider your climate constraints too. If you farm in a region with heavy spring rains, prioritizing drainage and structure improvements might matter more than nutrient levels. Goals should reflect both what your crops need and what your environment allows you to achieve realistically.
Step 3: Map Your Seasonal Interventions
With your goals and baseline data in hand, the next step is translating them into a seasonal roadmap. Think of this as dividing your year into four distinct phases, each with specific soil-building tasks that align with your farm’s natural rhythm.
Spring is your soil preparation window. This is when you incorporate amendments identified in your testing, adding compost to raise organic matter, applying lime if pH is low, or working in rock phosphate for phosphorus deficiency. Schedule these activities two to four weeks before planting to give amendments time to integrate. Spring is also when you terminate winter cover crops, either by mowing and incorporating them or using the roll-crimp method for no-till systems.
Summer focuses on maintenance. Your soil is working hard during peak production, so plan for mulching to conserve moisture and suppress weeds. Schedule compost tea applications or side-dressing with organic fertilizers for heavy feeders like tomatoes. If you rotate quick crops, note when to add compost between plantings.
Fall is amendment season again. After harvest, test soil in beds that performed poorly and apply targeted corrections. This is your prime time to spread compost, manure, or mineral amendments because they’ll break down over winter. Plan which beds will receive cover crops increase soil organic matter and protect against erosion.
Winter means cover crops are doing the work. Map out which species go where, crimson clover for nitrogen, tillage radish for compaction, or winter rye for biomass. A seasonal diagram tool helps visualize these rotations and prevents scheduling conflicts. Mark your calendar for when to seed (typically six to eight weeks before first frost) and when you’ll terminate them in spring.
Step 4: Choose Your Amendments and Practices
Now that you’ve mapped your seasonal timeline, it’s time to select the specific amendments and practices that’ll actually improve your soil. Start with your soil test results, they’re your shopping list. If your pH is low, you’ll need lime; if phosphorus is lacking, bone meal or rock phosphate fits the bill. For nitrogen deficiencies, consider aged compost, blood meal, or well-rotted manure.
Match amendments to your timeline. Spring applications work best for quick-acting amendments like compost tea or fish emulsion. Fall is ideal for slower materials like rock minerals and green manures that break down over winter.
Cover crops deserve special attention in your plan. Legumes like clover and vetch add nitrogen, while grasses like rye build organic matter and prevent erosion. Choose varieties that fit your climate and the gap between cash crops, winter rye protects bare soil, while summer buckwheat suppresses weeds between plantings.
Integrate your amendments with your crop rotation blueprint and organic crop rotations. Heavy feeders like tomatoes benefit from compost applications before planting, while nitrogen-fixing cover crops prepare beds for subsequent crops.
Don’t forget management practices beyond amendments, reduced tillage, mulching, and maintaining permanent pathways all contribute to long-term soil health without requiring purchased inputs.
Step 5: Create Your Implementation Schedule
With your goals and interventions mapped out, you need a timeline that actually works with your farm’s rhythm. Start by pulling out your CSA planning checklist or planting calendar, your soil activities should weave around these commitments, not compete with them.
Block out your busiest weeks first: spring planting, peak harvest, market days. These are non-negotiable periods when complex soil tasks won’t happen. Schedule major activities like compost spreading or cover crop seeding during your slower windows, late fall after harvest wraps up, or early spring before the planting rush.
Break large tasks into smaller chunks. Instead of “spread compost on all beds in April,” plan “compost beds 1-5 on April 10, beds 6-10 on April 17.” This approach keeps you from getting overwhelmed during busy periods and ensures soil work actually gets done.
Include buffer time for weather delays and unexpected farm emergencies. If you need to plant cover crops by October 15, schedule them for October 1. Real farming rarely goes exactly as planned, and your soil management timeline should acknowledge that reality rather than pretend perfect conditions will materialize.
Step 6: Document Your Plan
A good soil management plan lives in a format you’ll actually use. Create a simple one-page calendar showing monthly tasks, or use a spreadsheet with tabs for soil tests, amendment schedules, and observations. Keep it accessible in your barn or phone. Leave space for notes after each activity, what worked, what didn’t, weather conditions, unexpected issues. This running record becomes invaluable when planning next year’s approach and spotting patterns over time.
Verifying Your Plan Is Working
A soil management plan isn’t finished once you write it down, verification keeps you on track and helps you catch problems before they hurt your harvest. Regular monitoring lets you see what’s working, what needs tweaking, and when to celebrate those wins that come from healthier soil.
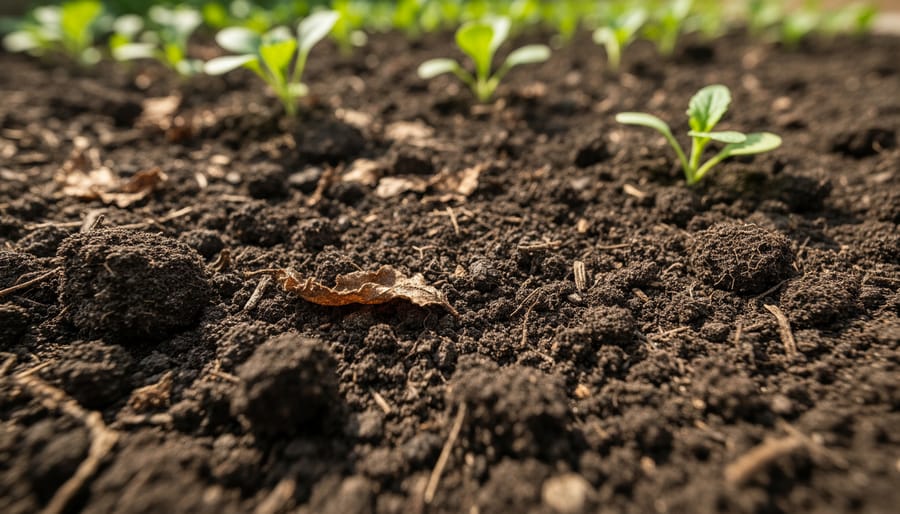
Start with visual check-ins every three to four weeks during the growing season. Walk your beds or fields with a notepad and look closely at plant growth patterns, leaf color, and overall vigor. Dig down six inches in different spots to examine soil structure, does it crumble nicely in your hand, or is it still compacted? These quick observations often reveal trends before a formal test does.
Schedule follow-up soil tests at strategic points: mid-season (around 8-10 weeks after spring planting) and again in fall after harvest. Compare these results to your baseline assessment from step one. You’re looking for movement in the right direction, pH creeping toward your target range, organic matter ticking upward, nutrient levels stabilizing where your crops need them.
Watch for these key indicators that signal improvement:
- Soil crumbles easily and holds together when lightly squeezed, showing better structure
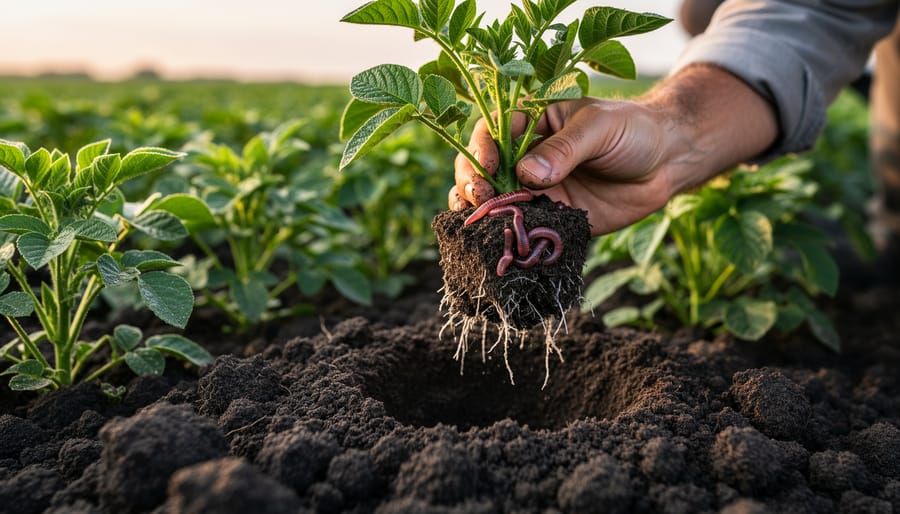
- Earthworms appear in greater numbers when you dig, aim for 10+ per shovel scoop
- Plants show vigorous growth with deep green leaves and strong stems
- Soil retains moisture longer between waterings without becoming waterlogged
- Nutrient test results trend upward or stabilize within optimal ranges over consecutive seasons
If your soil holds moisture better after adding compost, you might integrate water-saving techniques to maximize that improvement and reduce irrigation needs even further.
When verification shows something isn’t working, maybe phosphorus levels haven’t budged despite amendments, or compaction persists in certain beds, adjust your plan immediately. Add that problem area to next season’s intervention schedule with a different approach, whether that means switching amendment types, timing applications differently, or trying a different cover crop mix.
Keep notes on everything you observe. A simple notebook entry like “July 15: peppers in bed 3 showing better color than last year, soil feels looser” gives you data to reference when planning next year’s strategies.
Real Success: How Valley View Farm Transformed Their Soil
When Sarah Martinez took over Valley View Farm’s three-acre CSA operation in 2024, she inherited compacted soil with a pH of 5.2 and organic matter barely reaching 2%. Her first-year yields disappointed members, and crop disease pressure was constant.
Rather than continuing the struggle, Sarah committed to a structured soil management plan that winter. Her baseline assessment revealed severe calcium deficiency and poor drainage in two main growing zones. She set clear goals: raise pH to 6.5, double organic matter within two years, and improve water infiltration.
Her seasonal approach started simple. Spring 2025 brought targeted lime applications based on zone-specific needs. She planted buckwheat and clover as summer cover crops in rotation, then added composted manure each fall. Winter rye protected bare beds. Sarah tested quarterly and documented every change in a simple notebook.
By fall 2026, the transformation was measurable. Soil tests showed pH at 6.3, organic matter at 3.8%, and calcium levels in optimal range. But the real proof came in her harvest reports. Tomato yields increased 40%, and she cut disease-related crop losses by half. Members noticed too, her waiting list grew from twelve to forty-seven families.
Sarah’s advice? “Start with one practice and build from there. I didn’t transform everything overnight, but having a plan meant every action moved me forward.”
Common Questions About Soil Management Plans
Creating your first soil management plan can feel overwhelming, and that’s completely natural. These questions come up regularly in our CSA community, so you’re not alone in wondering about the practical realities of soil planning.
How often should I update my soil management plan?
Review and adjust your plan each season based on soil test results and crop performance observations. A complete rewrite isn’t necessary, most farmers make minor tweaks quarterly and conduct full soil retesting annually or every other year.
What does a soil management plan typically cost?
Initial costs range from $50 to $300 depending on testing thoroughness and farm size. Ongoing expenses for amendments and testing average $100 to $500 annually for small CSA operations, though many costs are offset by improved yields and reduced input waste.
How much time does maintaining a plan require?
Expect to spend 2-4 hours creating your initial plan, then 30-60 minutes monthly for record-keeping and monitoring. Seasonal implementation tasks blend naturally into your regular farm work rather than adding separate time blocks.
Do small home gardens really need a formal plan?
Even a simple one-page plan helps backyard gardeners track what works and avoid repeating mistakes. The formality matters less than having written goals and basic records you can reference year to year.
When will I see actual results from my soil management efforts?
Some improvements like better water retention appear within one growing season. Significant organic matter increases and structural changes typically become noticeable after two to three years of consistent management.
The beauty of soil management planning is its flexibility. Start simple with basic soil tests and a few seasonal goals, then expand your plan as you gain confidence and observe what your specific land needs. Many successful CSA farmers admit their first plans were rough sketches on notebook paper, refined through seasons of hands-on learning. The act of intentional planning itself makes you a better soil steward, regardless of how polished your documentation looks.
Creating a soil management plan doesn’t have to be overwhelming. Start simple: test your soil, set one or two realistic goals, and map out basic seasonal activities. You can always add complexity as you learn what works for your specific conditions.
The real power of a soil management plan lies in how it connects everything together. Your soil test results inform which amendments to apply. Your seasonal calendar determines when to add compost or plant cover crops. Your monitoring reveals what’s working and what needs adjustment. Instead of reacting to problems as they arise, you’re building soil health intentionally throughout the year.
Whether you’re managing a small backyard garden or a full CSA operation, treating your soil as a living system that requires thoughtful care pays dividends. Healthier soil means more resilient crops, better yields, and less dependence on external inputs. Your plan becomes a living document that evolves with your understanding and your land’s needs.
The best time to start planning is now. Your soil will thank you, and so will your future harvests.