Why Chlorinated Water Is Quietly Harming Your Garden — and How a Carbon Block Filter Can Fix It
Every time you fill a watering can from the tap, you’re doing more than hydrating your plants — you’re delivering a low dose of disinfectant chemistry straight to their roots. Municipal water treatment plants add chlorine (or the longer-lasting chloramine) to kill bacteria and keep drinking water safe. It’s a public health triumph. But the same properties that make chlorine an effective germ-killer make it a quiet stressor for the living ecosystem in your garden soil and the plants growing in it.
Chlorine Doesn’t Know the Difference Between “Bad” Bacteria and “Good” Ones
Soil isn’t just dirt — it’s a dense, living network of bacteria, fungi, and microorganisms that break down organic matter, cycle nutrients, and form symbiotic relationships with plant roots. Mycorrhizal fungi, for example, extend a plant’s root system dramatically, helping it absorb water and phosphorus that it couldn’t reach on its own.
Chlorine is non-selective. When chlorinated water is poured onto soil, it doesn’t just pass through — it kills off a portion of the microorganisms living there, much like it’s designed to kill pathogens in a water treatment plant. According to Colorado State University Extension’s PlantTalk program, the effect is real but limited under typical drinking-water chlorine levels: chlorine tends to bind to surface soil particles, so most of the microbial die-off is confined to the top half-inch of soil, and populations rebound quickly once watering stops. That’s reassuring for established lawns and garden beds, but it’s a different story anywhere the whole point is to keep a fresh microbial population intact right at the surface — freshly applied compost tea, seed-starting mix, potting soil for houseplants, or containers where roots never get the buffering depth of open ground. In those settings, repeated chlorinated watering can undercut the benefit before the microbes even get a chance to establish.
Which Plants Actually Show the Damage?
Some plants tolerate chlorinated tap water without much visible complaint. Others are far more sensitive, and gardeners who grow them often notice a pattern of symptoms without realizing the water is the culprit:
Spider plants (Chlorophytum comosum) are notorious among houseplant growers for developing brown, crispy leaf tips — a classic sign of chlorine and fluoride sensitivity.
Peace lilies (Spathiphyllum) often show yellowing edges and stunted new growth when watered exclusively with chlorinated tap water over time.
Boston ferns and other true ferns are shallow-rooted and highly sensitive to chemical buildup, frequently reacting with browning frond tips and slowed growth.
Dracaena species are so reliably affected by chlorine and fluoride that leaf-tip burn on Dracaena is a standard diagnostic photo in houseplant care guides.
Orchids, particularly Phalaenopsis, are sensitive to chemical residues on their exposed roots, which lack the protective bark covering found on terrestrial roots.
Seedlings and young transplants across nearly every species are more vulnerable than mature plants, since their root hairs and emerging microbiomes are less developed and less resilient to chemical stress.
None of this means chlorinated tap water will kill a garden overnight. The effect is usually cumulative — slightly reduced vigor, tip burn, slower germination rates, and a soil biology that never quite reaches its full potential.
It’s Not Just Chlorine
Municipal water can also contain trihalomethanes (THMs) and other disinfection byproducts formed when chlorine reacts with organic material in the water supply, as well as trace volatile organic compounds (VOCs) from industrial and agricultural runoff. In some regions, PFAS — the so-called “forever chemicals” used for decades in water- and stain-resistant products — are also present in tap water. These compounds don’t break down naturally, and while research on their specific effects on ornamental and food-crop plants is still developing, none of them are things a gardener wants concentrating in soil that’s meant to grow food.
The Fix: Filtering Your Garden Water at the Source
The good news is that this is one of the easier gardening problems to solve. A quality coconut carbon block filter removes free chlorine and chloramine, along with a meaningful percentage of VOCs and PFAS, before the water ever reaches your plants or your soil.
Not all carbon filters perform equally, though. Standard coconut shell carbon is naturally hydrophobic — it repels water, which limits how much contact time the water actually spends interacting with the carbon’s pore structure. Filters built with hydrophilic carbon, by contrast, are engineered so water is drawn into and held within the carbon’s pores, dramatically increasing contact time and improving contaminant reduction across the board. Combined with a high iodine value (a measure of the carbon’s adsorption capacity) and a binder process designed to resist premature clogging, a well-built carbon block cartridge can filter garden water at a high flow rate without bottlenecking your watering routine.
One option built specifically around this hydrophilic approach is the Aquarenaissance premium carbon block filter cartridge. Made from 100% premium coconut shell carbon with a 1200 iodine value, the PCB line is engineered to reduce chlorine, VOCs, and PFAS while resisting the premature clogging that shortens the life of lower-quality filters. For gardeners dealing with cysts like Giardia or Cryptosporidium in their water source, the sub-micron PCB10SM model adds a 0.5-micron rating on top of the same chlorine and chemical reduction, making it a solid fit for anyone filtering water for edible crops or sensitive propagation work.
What Dechlorinated Water Does for Growth
Once chlorine and other disinfection byproducts are filtered out, the benefits show up in a few concrete ways:
Healthier root systems. Roots aren’t fighting off a mild chemical irritant with every watering, so they can devote more energy to growth and nutrient uptake.
A more active soil microbiome. Beneficial bacteria and mycorrhizal fungi are free to establish and multiply, improving long-term nutrient cycling.
Better results from compost tea and biological amendments. Living microbial inoculants survive contact with water rather than being knocked back immediately.
Improved germination rates. Seedlings, which are the most chemically sensitive stage of a plant’s life, tend to establish more reliably in filtered water.
Less visible leaf damage on chlorine-sensitive species like spider plants, ferns, Dracaena, and orchids — fewer brown tips, more consistent new growth.
A Simple Upgrade for a Complex System
Gardening is already an exercise in managing dozens of variables — light, nutrients, pests, timing. Water quality is one variable that’s easy to overlook because chlorine is invisible and its effects are gradual rather than dramatic. But for anyone growing sensitive houseplants, raising seedlings, or trying to build genuinely living, biologically active soil, running irrigation water through a hydrophilic coconut carbon block filter is a small, one-time upgrade that pays off in the compounding form of healthier roots, more resilient plants, and better yields season after season.
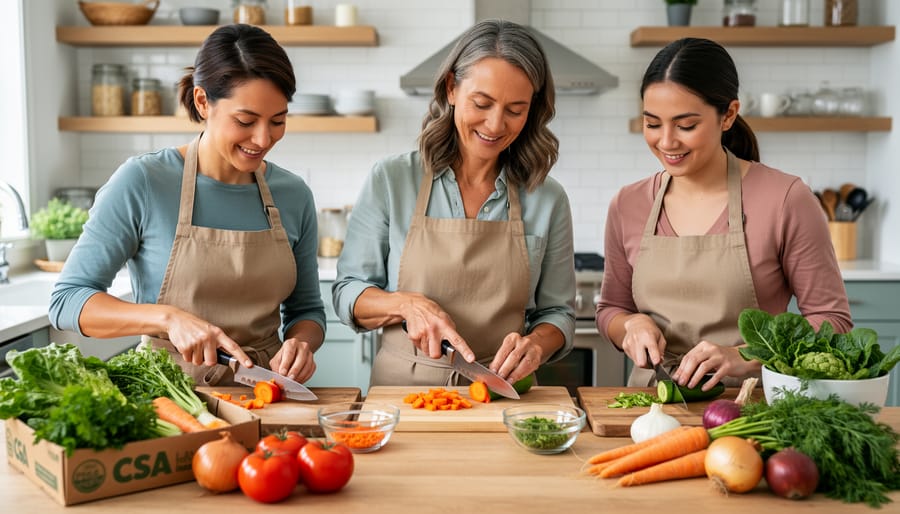
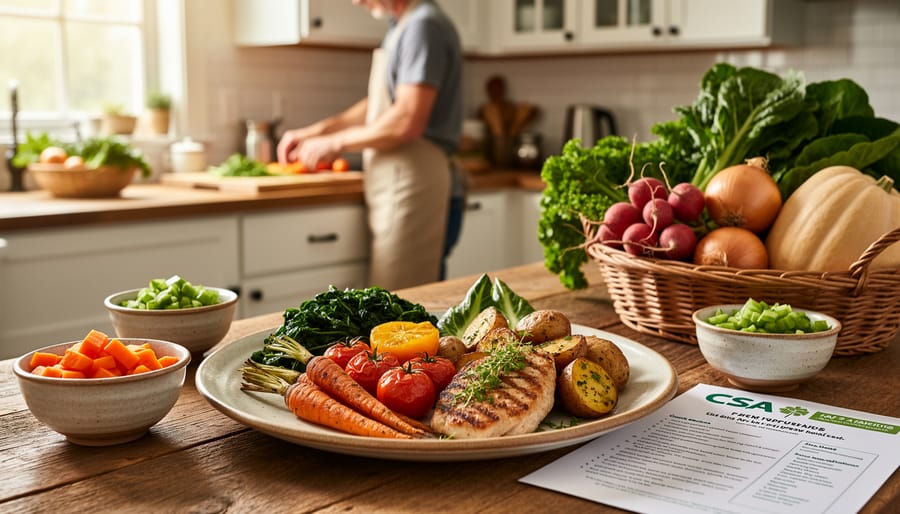
Food preservation technologies give you the power to keep fresh produce edible for months instead of days, using methods that range from vacuum sealing and freeze-drying to controlled-atmosphere storage and modern dehydration systems. Whether you’re dealing with a bumper crop from your backyard garden or want to make the most of your CSA box, these technologies transform perishable foods into stable ingredients that retain most of their nutrients, flavor, and texture.
Key Takeaway: Food waste contributes roughly 8-10% of global greenhouse gas emissions. By preserving surplus produce with these technologies, you’re not just saving money but actively reducing your carbon footprint while supporting local, seasonal eating year-round.
The gap between harvest and spoilage is where most food loss happens. A tomato picked at peak ripeness has perhaps five days before it turns mushy. Berries fare even worse. But run those same fruits through a freeze-dryer or vacuum-seal system, and you’re looking at shelf life measured in years, not days.
Modern preservation equipment has become surprisingly accessible for home use. What once required industrial facilities now fits on a kitchen counter. The real shift happened when manufacturers started designing for small-batch processing, making it practical to preserve 10 pounds of strawberries instead of 100.
This guide walks you through the essential technologies available in 2026, from setup and safety protocols to step-by-step processes for each method. You’ll learn which eco-conservative methods work best for different foods, how to verify your results, and what equipment delivers the best return on investment for home preservers and small-scale farmers alike.
Essential Equipment and Materials for Eco-Friendly Food Preservation
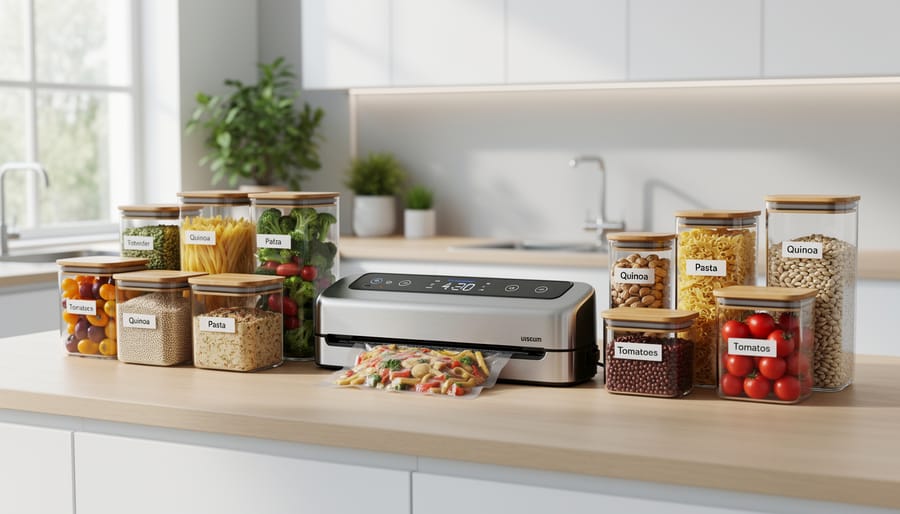
A modern home setup with vacuum sealing and reusable glass containers demonstrates how eco-conscious preservation can be organized efficiently.
Starting with the right equipment sets you up for successful eco-friendly preservation without wasting energy or materials. Your specific needs will vary based on which methods you choose, but investing in quality, energy-efficient tools pays off through years of reliable use and lower environmental impact.
For dehydration, you have two main paths: solar-powered models that harness free sunlight or electric dehydrators with efficient heating elements. Solar dehydrators work beautifully in sunny climates and cost nothing to run, though they depend on weather conditions. Electric models offer consistent results regardless of season, and 2026’s newer units use 30-40% less power than older designs while maintaining precise temperature control. Look for models with stackable trays and adjustable thermostats between 95-165°F.
Vacuum sealing equipment has evolved beyond single-use plastic bags. Modern chamber vacuum sealers work with reusable silicone bags and glass containers fitted with valve lids, eliminating the constant need for disposable materials. These systems remove air more completely than external sealers, extending storage time while helping you slash cooking energy by preserving batch-cooked meals efficiently.
Here’s a practical breakdown of essential equipment organized by method:
Dehydration: solar drying boxes or 600W electric dehydrators with 4-9 trays, food-grade mesh screens
Vacuum sealing: chamber sealer or handheld model, reusable silicone bags, glass containers with vacuum-seal lids
Freeze-drying: home freeze dryer (for serious preservers), silicone or Mylar storage bags, oxygen absorbers
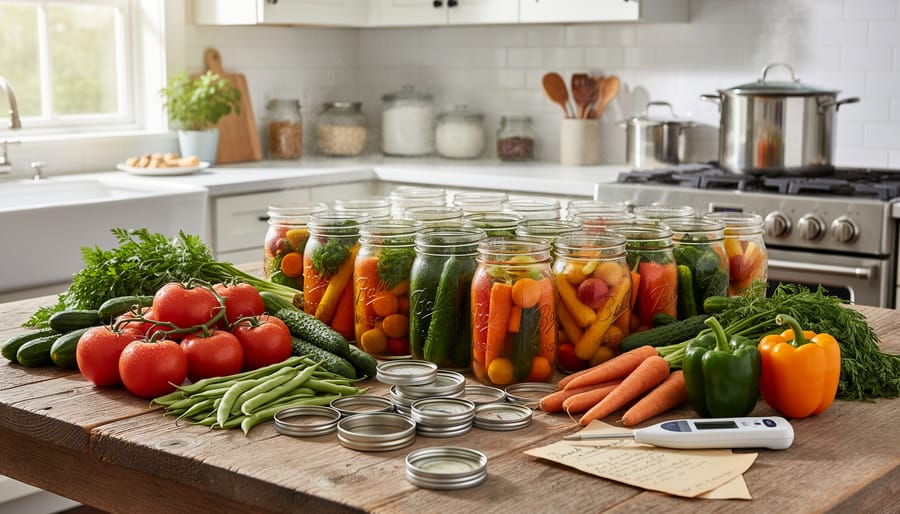
General supplies: wide-mouth glass jars (pint to half-gallon), stainless steel utensils, digital thermometer
Container materials matter significantly for both sustainability and food safety. Glass jars and ceramic crocks last decades and don’t leach chemicals, making them ideal for fermentation and storage. When plastic is necessary, choose BPA-free, food-grade options rated for your specific preservation method’s temperatures. Reusable silicone bags have emerged as a practical middle ground, withstanding freezing and moderate heat while reducing single-use waste.
Fermentation crocks with built-in water moats or modern airlock systems prevent oxygen exposure while allowing carbon dioxide to escape, creating ideal conditions for healthy bacteria. The water seal is remarkably simple yet effective technology that has preserved foods for centuries.
Safety Considerations and Precautions
Checking pH and handling fermentation equipment carefully supports safe results and reduces contamination risk.
Before you begin preserving food at home, understanding safety fundamentals will protect your family from serious foodborne illness. Modern preservation technologies offer convenience, but each method carries specific risks if not executed properly.
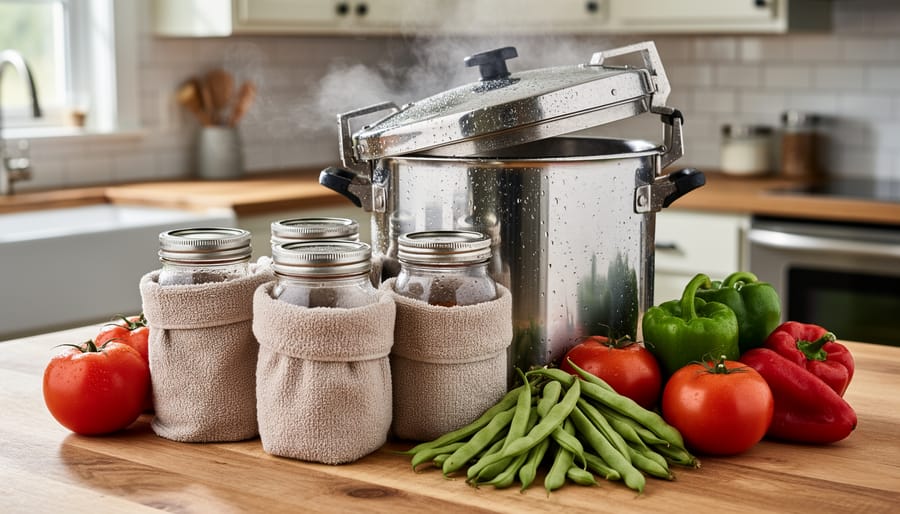
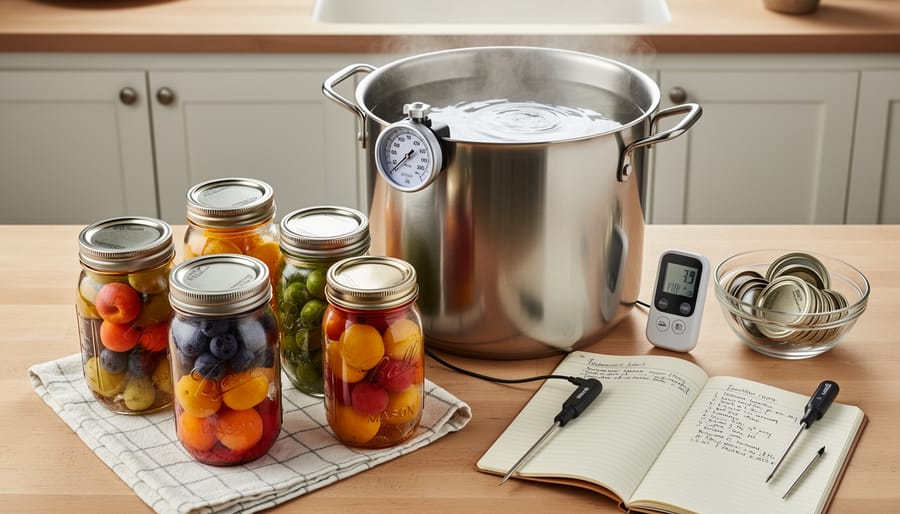
Temperature control is your first line of defense against bacterial growth. Dehydrators should maintain 135-145°F for vegetables and herbs, while meats require 155-165°F to eliminate pathogens. Freeze dryers must reach -40°F during the freezing phase to prevent ice crystal damage and microbial survival. For pressure canning (though primarily a traditional method, some newer preservation systems incorporate it), low-acid foods need 240-250°F to destroy Clostridium botulinum spores, which thrive in oxygen-free environments like sealed jars and vacuum-sealed bags.
pH levels matter critically for fermentation and certain preservation methods. Successful lacto-fermentation requires a starting pH below 4.6, with most vegetables reaching 3.0-4.0 after proper fermentation. Always use pH strips or a digital meter to verify acidity before storing fermented foods long-term. High-acid foods like pickled vegetables are safer than low-acid items, which demand pressure processing rather than simple vacuum sealing for shelf-stable storage.
Warning: Never vacuum-seal raw mushrooms, fresh garlic in oil, or soft cheeses at room temperature, these create anaerobic conditions perfect for botulism growth. Always refrigerate or freeze vacuum-sealed low-acid foods.
Equipment maintenance prevents contamination between batches. Clean dehydrator trays, vacuum sealer channels, and fermenting crocks with hot soapy water after each use, and sanitize fermenting vessels with a diluted bleach solution (one tablespoon per gallon of water) or boiling water. Inspect vacuum sealer gaskets monthly for wear and replace when cracked. Check airlock water levels in fermenting crocks every few days to maintain the oxygen barrier.
Discard preserved foods immediately if you notice bulging vacuum-sealed bags, off odors, slimy textures, mold growth beyond surface kahm yeast in ferments, or any discoloration inconsistent with the original food. When rehydrating dried foods, if they develop an unusual smell or fail to soften properly after adequate soaking, composting them is the safest choice.
Step-by-Step Preservation Methods Using Modern Technologies
Dehydration: Solar and Electric Methods
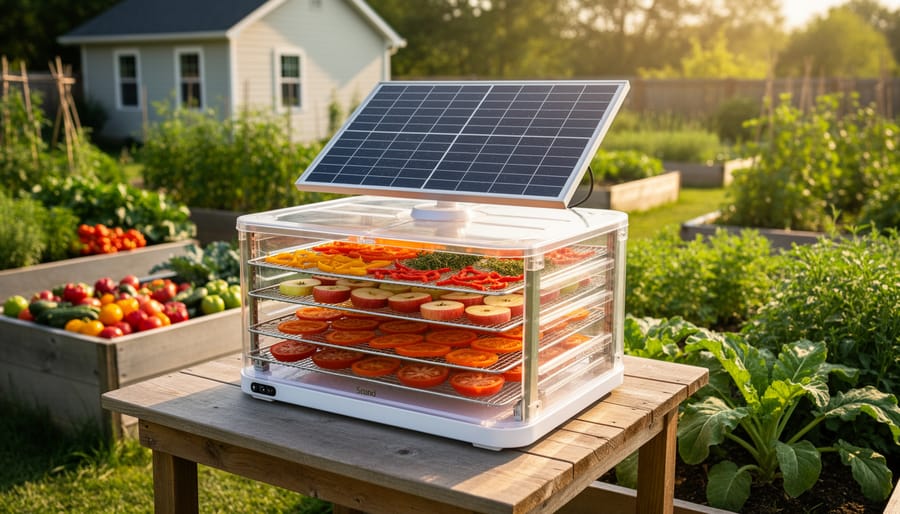
Sun-powered dehydration turns garden harvests into shelf-stable snacks with minimal energy use when conditions allow.
Dehydration removes moisture that bacteria and mold need to thrive, making it one of the most energy-efficient food preservation technologies for home use. Solar dehydrators harness free energy from the sun, while modern electric models consume 75% less power than older designs thanks to improved insulation and airflow engineering.
Start by washing and slicing your produce uniformly, aim for ¼-inch thickness for vegetables and ⅛-inch for fruits. Thinner slices dry faster and more evenly. Pat everything completely dry with clean towels since surface moisture extends drying time.
Arrange prepared food in a single layer on trays, leaving space between pieces for air circulation. Overlapping slows the process and risks uneven drying.
For electric dehydrators, set the temperature based on food type: 135°F for vegetables and herbs, 125°F for fruits, and 145°F for meat jerky. Solar units typically reach 130-150°F on sunny days.
Run the dehydrator for 6-12 hours for most fruits and vegetables, checking every 2 hours after the halfway point. Tomatoes might finish in 8 hours while apple slices often need 10-12.
Test doneness by removing a piece, letting it cool for 5 minutes, then bending it. Vegetables should be brittle and snap cleanly. Fruits are ready when leathery with no moisture beads when squeezed.
Condition dried foods by storing them in glass jars for 7-10 days, shaking daily to redistribute any remaining moisture. If condensation appears, return the batch to the dehydrator for another hour.
Solar dehydrators work best during peak sunshine (10 AM to 4 PM) and may require two days for dense foods. Position your unit where it’ll catch direct sun and won’t be shaded by trees or buildings. Electric models offer consistent results regardless of weather, making them reliable for year-round preservation when paired with renewable energy sources like home solar panels.
Vacuum Sealing for Extended Freshness
Vacuum sealing offers one of the most effective ways to fight food waste while preserving nutrients and freshness in your CSA haul and garden harvest. This method removes air that causes oxidation and bacterial growth, extending refrigerated produce life by 2-3 weeks and freezer storage by 2-3 years compared to conventional storage.
Wash and thoroughly dry your produce. Any moisture left on food surfaces can interfere with the seal and promote ice crystal formation in the freezer.
Choose bag size appropriately, leaving 3-4 inches of space beyond your food. BPA-free, reusable bags work best for sustainability and can handle multiple vacuum-seal cycles.
Pre-freeze delicate items like berries or soft vegetables for 2 hours. This prevents crushing during the vacuum process.
Place food in the bag, smooth out wrinkles, and position the open end in the sealer’s vacuum channel.
Activate the vacuum cycle and watch for the bag to collapse tightly around the contents. Most machines automatically switch to sealing mode when air removal completes.
Check the seal by running your fingers along the sealed edge, it should feel rigid and uniform without any soft spots or gaps.
Label each package with contents and date, then store in your freezer’s coldest section (typically the back or bottom). For prepared meals, cool completely before sealing to prevent condensation. Vacuum-sealed dry goods like grains or dehydrated vegetables can be stored at room temperature in a cool, dark pantry, maintaining quality for 6-12 months.
Lacto-Fermentation Using Modern Crocks and Airlocks
Lacto-fermentation transforms fresh vegetables into probiotic-rich preserved foods using nothing but salt, water, and beneficial bacteria already present on the produce. This ancient technique has seen a modern revival with specialized fermentation crocks featuring water-sealed airlock channels that allow carbon dioxide to escape while preventing oxygen and contaminants from entering.
Start by preparing a brine using non-iodized sea salt (avoid table salt, as iodine can inhibit fermentation). For most vegetables, dissolve 2 tablespoons of salt per quart of filtered water. Chlorinated tap water can kill beneficial bacteria, so use filtered or boiled-then-cooled water instead.
Prep your vegetables by washing thoroughly and cutting into uniform pieces. Pack them tightly into your fermentation crock, leaving at least two inches of headspace. Pour the brine over the vegetables until they’re completely submerged, then place a weight on top to keep everything below the liquid surface. Fill the airlock channel with water according to your crock’s instructions.
Day 1-2: Place the crock in a cool spot (65-75°F) away from direct sunlight. Check that the airlock channel stays filled with water.
Day 3-5: You’ll see bubbles and clouding in the brine as fermentation accelerates. Taste after day 3 to monitor tanginess.
Day 6-7: Continue tasting daily. Most vegetables reach ideal flavor between days 5-10, depending on temperature and personal preference.
Day 8-14: Once fermented to your liking, transfer to clean jars and refrigerate to slow fermentation.
This preservation method requires zero energy beyond maintaining room temperature, produces no plastic waste when using glass or ceramic crocks, and creates nutrient-dense foods with enhanced digestibility. The fermentation process actually increases certain vitamins while making minerals more bioavailable.
Freeze-Drying for Long-Term Storage
Home freeze-drying transforms fresh produce into shelf-stable foods that retain 97% of their nutrients while lasting 20-25 years when stored properly. Modern 2026 models consume 40% less energy than earlier versions through improved insulation and smart cycling technology, making this once-industrial process viable for eco-conscious home food preservation.
Start by selecting foods at peak ripeness. Berries, herbs, diced vegetables, and cooked meals freeze-dry exceptionally well, while high-fat items like avocados don’t preserve effectively with this method. Cut produce into uniform pieces no thicker than one inch to ensure even processing.
Pre-freeze your prepared foods in a standard freezer for 8-12 hours. This step reduces the initial load on your freeze-dryer and cuts total processing time by several hours. Arrange frozen items on the machine’s trays in a single layer, leaving space between pieces for sublimation to occur.
Load the trays and seal the chamber. Most home units run automatically once started, but check your model’s specifications. The freeze-drying cycle typically takes 20-40 hours depending on food moisture content and batch size. The machine removes moisture through sublimation, converting ice directly to vapor without passing through a liquid phase.
When the cycle completes, test a cooled piece by breaking it in half. Properly freeze-dried food should snap cleanly with no moisture visible in the center. If you see ice crystals or moisture, run an additional drying cycle.
Immediately transfer dried foods to airtight containers or Mylar bags with oxygen absorbers. Condition for 7-10 days by shaking containers daily to redistribute any remaining moisture, then repackage for long-term storage in a cool, dark location.
Testing Results and Quality Verification
After investing effort in preserving your harvest using food preservation technologies, verifying that your work achieved safe, high-quality results protects both your health and your efforts to save money and planet. Each preservation method requires specific quality checks.
For dehydrated foods, bend a piece: properly dried vegetables should snap rather than bend, while fruits should be pliable but not sticky. No moisture should appear when you squeeze a handful in your palm. Rehydrate a small sample in warm water for 15 minutes; it should plump up and look close to its original state without off-odors.
Vacuum-sealed packages must maintain their tight seal with no air pockets. Run your fingers along all seams to feel for any wrinkles or gaps where air might have entered. The package should remain completely flat against the food with no cushioning when you press down. Any puffiness after storage indicates seal failure or bacterial growth, both requiring immediate disposal.
Test fermented foods by checking pH with strips: properly fermented vegetables should register between 3.0 and 4.6, which inhibits harmful bacteria. The brine should remain cloudy but not moldy, with bubbles during active fermentation normal. Taste a small amount; it should be pleasantly tangy and crisp, never slimy or musty.
Use this quick verification checklist for each technology:
Dehydrated: snaps when bent, no visible moisture, successful rehydration
Vacuum-sealed: completely flat package, intact seams, no air infiltration
Fermented: pH 3.0-4.6, cloudy brine, tangy smell and taste
Freeze-dried: bone-dry texture, crumbles easily, rapid rehydration in under 5 minutes
Label everything with the preservation date and contents. Discard any preserved food showing mold, unusual discoloration, foul odors, or texture changes that seem off. Trust your senses: when in doubt, throw it out.
Next Steps: Integrating Preservation into Your CSA and Garden Harvest
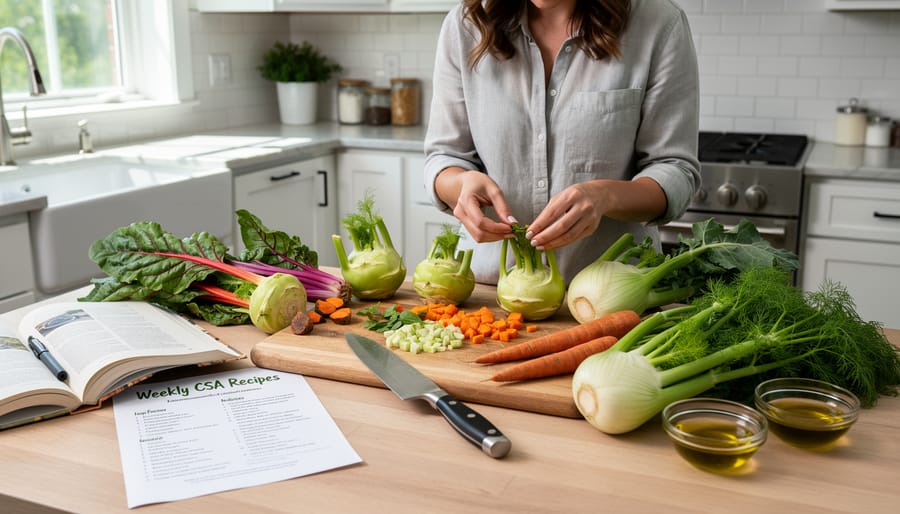
Once you’ve mastered these food preservation technologies, the real magic happens when you sync them with your CSA deliveries and garden harvest cycles. Plan your preservation sessions around peak harvest times rather than trying to preserve everything at once. When your CSA box arrives loaded with summer tomatoes or your garden’s zucchini plants go into overdrive, that’s your signal to fire up the dehydrator or break out the vacuum sealer.
Create a simple preservation calendar that tracks what produce peaks when in your region. June strawberries? Perfect for freeze-drying. August cucumbers? Ideal for lacto-fermentation. This approach prevents the overwhelm of trying to preserve 20 pounds of green beans on a Tuesday night after work. Instead, dedicate a few hours each weekend during growing season to batch processing whatever’s abundant. You’ll build a diverse pantry of preserved foods that carries you through winter while supporting local farmers year-round.
How long can I store CSA produce using these preservation methods?
Properly vacuum-sealed and frozen vegetables last 12-18 months, dehydrated foods stay good for 6-12 months in airtight containers, fermented vegetables keep 4-6 months refrigerated, and freeze-dried items remain viable for up to 25 years when stored correctly.
Should I adjust my garden plantings based on preservation capacity?
Absolutely. If you have limited freezer space but own a dehydrator, plant more tomatoes, peppers, and herbs that dry beautifully rather than water-heavy crops like lettuce that don’t preserve well.
Can I preserve my entire CSA share each week?
Not everything needs preserving. Eat fresh greens and delicate produce within days, then focus preservation efforts on surplus items and crops that store well using the technologies you have available.
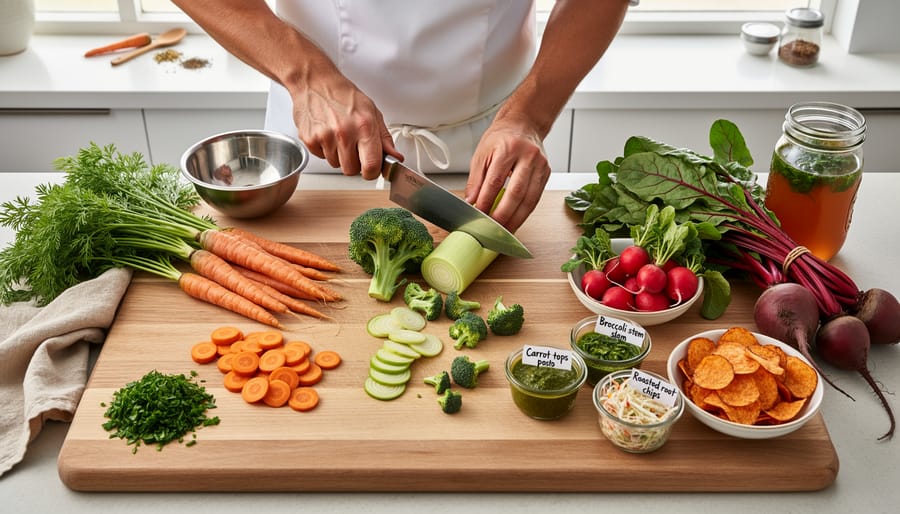
Talk with your CSA farmer about your preservation goals. Many farms offer bulk quantities of single crops at reduced prices specifically for members who preserve, and they appreciate knowing their produce won’t go to waste. Apply waste reduction tips from professional kitchens by preserving vegetable scraps (dehydrate for soup powder), fermenting stems and cores, and vacuum-sealing herb bundles with oil in ice cube trays for winter cooking.
THCA pre-rolls from organic hemp farm CSAs bring the convenience of ready-to-use flower directly from regenerative farms committed to soil health, biodiversity, and transparent growing practices. When you join a local CSA that includes hemp products, you’re securing a seasonal supply of pre-rolls crafted from certified organic flower, often at 15-30% below retail prices while supporting farmers who prioritize living soil amendments, integrated pest management, and hand-trimmed quality over industrial shortcuts.
The CSA model works beautifully for hemp consumers seeking predictable access to fresh, lab-tested products. Rather than navigating dispensary shelves or online marketplaces, members receive monthly or quarterly allotments of pre-rolls from strains the farm actually cultivated that season. You’ll know exactly which fields your flower came from, what amendments fed the soil, and how the harvest was cured.
This guide walks you through what separates exceptional organic THCA pre-rolls from mediocre options, how to evaluate farms before committing to a share, and which CSA structures deliver the best value for your consumption patterns. Whether you’re drawn to the environmental benefits of regenerative hemp agriculture or simply want clean, potent flower without the markup, understanding how to choose and partner with the right farm will transform both your experience and the landscapes these growers steward.
Key Takeaway: CSA hemp farms offer verified organic growing practices, direct farmer relationships, and diverse strain selections (indica, sativa, balanced hybrids in 1G and 1.5G formats) while keeping your dollars in the local farming community instead of corporate retail chains.
What Makes CSA Hemp Farm THCA Pre-Rolls Different
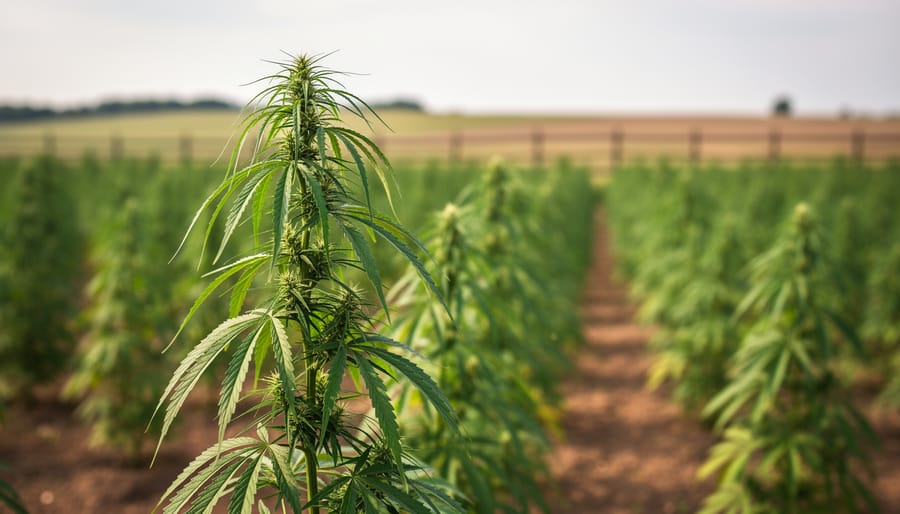
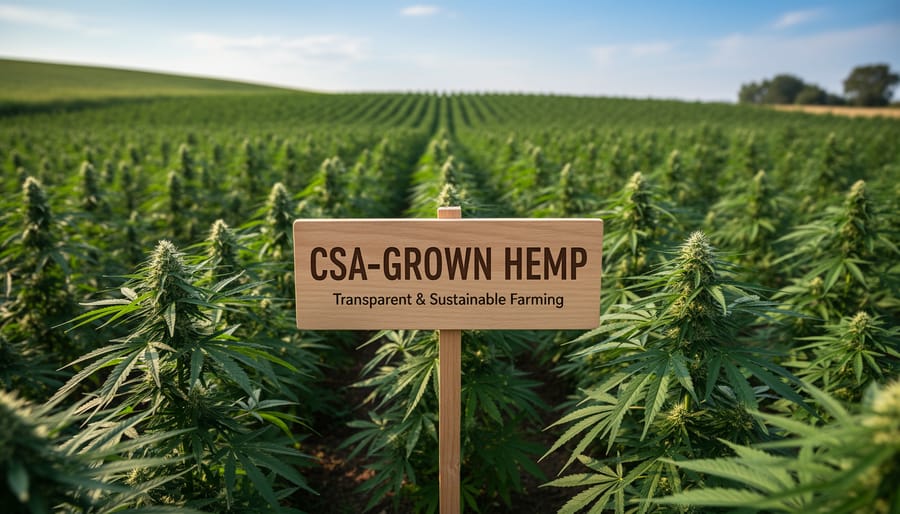
A lush organic hemp field sets the stage for understanding why CSA-grown hemp can be transparent and sustainability-focused.
When you buy THCA pre-rolls through a Community Supported Agriculture program at an organic hemp farm, you’re getting something fundamentally different from a retail dispensary product. CSA hemp farms give you direct access to the grower, you know who cultivated your cannabis, where the plants grew, and exactly what went into the soil. This transparency matters because you can verify organic practices firsthand rather than trusting labels alone, and you’re supporting a farmer who follows organic farming benefits like regenerative soil health and chemical-free cultivation.
The strain selection tells another part of the story. Unlike mass-market retailers limited to whatever distributors stock, CSA farms often grow multiple cultivars from Health Canada’s approved list for the 2026 growing season, giving you access to indica, sativa, and balanced hybrid options tailored to different needs. Since pre-rolls became the top revenue category in Canada’s cannabis market by mid-2025 and the 1-gram limit lifted in March 2026, CSA farms now offer both 1G and 1.5G formats to match your consumption preferences.
Community support creates the biggest distinction. Your CSA membership payment funds a local organic farmer’s season before harvest, sharing both risk and reward. You’re not a transaction at a counter; you’re a partner in sustainable agriculture who gets seasonal updates, farm visit invitations, and input on which strains the farm grows next year. That relationship builds accountability no retail shelf can match.
Understanding THCA Pre-Roll Strains and Formats
THCA pre-rolls from organic hemp CSAs typically fall into three main strain categories that affect your experience: indica, sativa, and balanced hybrids. Each type offers distinct characteristics that align with different times of day, activities, and personal preferences.
Indica strains tend to produce relaxing, body-centered sensations. Many CSA members choose indica THCA pre-rolls for evening use or winding down after farm work. These cultivars often feature earthy, musky aromas and may help with physical relaxation without the psychoactive effects of traditional THC.
Sativa strains generally deliver more uplifting, energizing qualities. Organic hemp farmers often grow sativa varieties that maintain mental clarity while providing the full entourage effect of cannabinoids and terpenes. Users report these work well for daytime activities, creative projects, or social gatherings.
Balanced hybrids blend indica and sativa genetics to create middle-ground effects. For first-time CSA members exploring THCA pre-rolls, balanced strains offer versatility without leaning too heavily in either direction. Many sustainable farms prioritize hybrid cultivars that thrive in their specific climate while delivering consistent experiences.
Strain Type
Typical Characteristics
Best Use Scenarios
Recommended For
Indica
Relaxing, body-focused, earthy aroma profile
Evening relaxation, physical recovery, rest periods
Experienced users seeking deep relaxation
Sativa
Uplifting, energizing, mentally clarifying
Daytime activities, creative work, social settings
Active consumers and daytime users
Balanced Hybrid
Moderate effects, versatile terpene combinations
Any time of day, varied activities, exploring preferences
First-time CSA members and flexibility seekers
Format options matter as much as strain selection. Since March 2026, Canadian regulations no longer cap pre-rolled dried cannabis at one gram, giving organic farms more flexibility. CSA members can now choose between 1G and 1.5G sizes based on consumption habits and budget.
The 1G format suits occasional users, those managing tight budgets, or anyone who prefers variety across multiple strains rather than larger quantities of one cultivar. A 1G pre-roll typically provides one to two sessions for most consumers.
The 1.5G option delivers better value for regular users and ensures you won’t run short between CSA pickups. Larger formats also reduce packaging waste per gram consumed, which aligns with the sustainability values many organic farm CSA members prioritize. When selecting your share, consider how frequently you consume and whether you want consistency or variety across your harvest allocation.
Key Factors When Choosing Your THCA Pre-Rolls
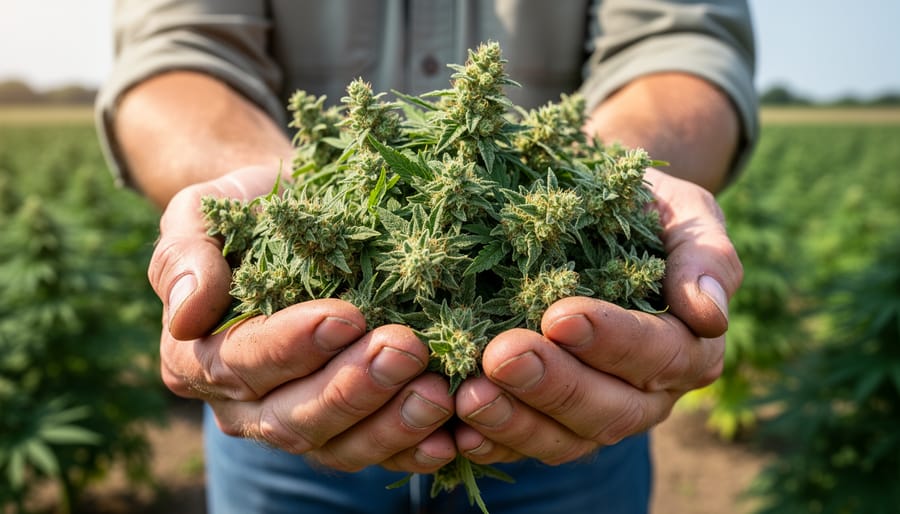
Freshly harvested hemp buds in a farmer’s hands highlight farm-to-consumer transparency behind CSA products.
Organic Certification and Growing Practices
When evaluating a hemp farm’s organic credentials, start by asking to see their certification documents directly. Legitimate organic operations hold certificates from recognized bodies and renew them annually, request to view the current year’s paperwork, not last season’s. If a farm uses terms like “naturally grown” or “pesticide-free” without formal certification, understand they’re not legally organic, though their practices may still be sound.
Beyond the certificate, dig into their actual growing methods during a farm visit or detailed conversation. Ask what they use for pest management, soil amendments, and weed control. Organic hemp growers typically rely on crop rotation, companion planting, and compost rather than synthetic inputs. A farmer who can walk you through their integrated pest management strategy and explain their soil-building practices demonstrates genuine commitment to organic principles, not just paperwork compliance.
Pay attention to transparency around their entire operation. Trustworthy farms willingly discuss their cultivar choices from Health Canada’s 2026 approved list, show you their fields, and explain harvest timing. They’ll also clarify whether their certification covers all acres or just portions of their land. If a farm dodges these questions or can’t produce documentation, that’s your signal to keep looking for a more open operation in your region.
Approved Cultivars and Compliance
When purchasing THCA pre-rolls through a CSA hemp farm, verify that the operation grows only licensed varieties. Health Canada maintains an approved cultivars list for industrial hemp, updated each growing season, and farms must hold proper licences to cultivate these specific strains legally for 2026. Ask your CSA farmer which cultivars they’re growing this season and confirm they appear on Health Canada’s current list.
A compliant farm will happily share its licence details and explain why they selected particular cultivars for their THCA pre-roll program. Some varieties produce higher cannabinoid levels while others offer disease resistance or better flavor profiles, so understanding their selection criteria helps you gauge the farm’s expertise. If a grower hesitates to discuss their cultivar choices or can’t name the specific varieties they planted, consider that a warning sign. Legitimate organic hemp CSA operations embrace transparency about compliance because it protects both their business and their members from legal complications down the line.
CSA Membership Models for Hemp Products
CSA farms structure THCA pre-roll offerings through several membership models, each suited to different consumption patterns and commitment levels. Weekly share programs deliver a fixed quantity, typically two to four 1G or 1.5G pre-rolls, throughout the growing season, ideal for regular users who want consistent access to rotating strains as harvests come in. Monthly shares offer larger quantities less frequently, working well for consumers who prefer stocking up or sharing with friends. Some farms also run one-time harvest boxes that let you try CSA share models without a season-long commitment, though these typically cost more per pre-roll than subscription options.
Consider your actual consumption rate before signing up: a weekly share delivering four pre-rolls means sixteen per month, which can overwhelm occasional users while leaving daily consumers wanting more. Ask farms about flexibility, some allow you to pause deliveries during travel or swap strain preferences mid-season, while others require full upfront payment with no modifications.
Finding and Vetting Organic Hemp CSA Farms
Finding local organic hemp farms with CSA programs takes detective work, but the effort pays off in quality products and community connection. Start with Canada’s provincial organic farming directories and CSA networks, where some hemp operations now list alongside vegetable farms. Search terms like “organic hemp CSA [your region]” plus “industrial hemp growers” narrow results quickly. Farmers markets, cannabis industry events and local sustainability groups often know which operations offer direct-to-consumer programs.
Once you’ve identified potential farms, ask pointed questions before joining. Confirm their organic certification body and certificate number, which you can verify through the Canadian Food Inspection Agency database. Request their approved cultivar list for 2026 and ask how they source seeds, legitimate operations grow only Health Canada approved varieties under proper licensing. Find out what their CSA share includes: how many pre-rolls, which strains, what sizes (1G versus 1.5G), and delivery frequency. Ask about their growing practices beyond organic requirements, do they use cover crops, companion planting or biological pest controls?
Tip: Visit the farm before committing to a full-season share, observe soil health, ask to see cultivation areas, and check whether their operation matches what they describe online.
During farm visits, watch for healthy plants, clean processing areas and transparent record-keeping. Farmers who eagerly explain their methods and invite questions typically run solid operations. Red flags include vague answers about certification, reluctance to share cultivar names, no visible growing infrastructure or pressure to pay upfront without clear terms.
Building lasting relationships means showing up, attend farm events, provide feedback on products and refer others when you’re satisfied. Most hemp farmers juggle cultivation with CSA logistics, so patience during harvest delays and understanding about strain availability goes far. Treat your CSA farmer as a neighbour, not just a vendor, and you’ll get better communication, first access to new strains and insider knowledge about upcoming harvests.
Close-up product photography shows the craftsmanship and materials of hemp pre-rolls sourced from farm-grown flower.
Recommendations for Different User Needs
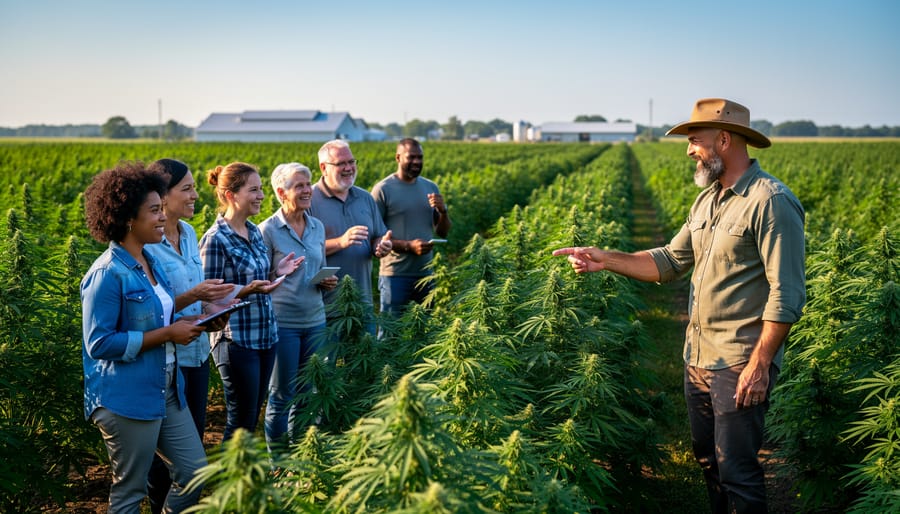
Farm visitors touring hemp rows illustrates the CSA vetting experience and encourages questions before committing.
Choosing the right organic hemp farm CSA THCA pre-rolls depends on your experience level, goals, and values. Here’s how to match products and share structures to your specific needs.
For First-Time CSA Members
Start with a half-season or quarter-share commitment to test the model without overcommitting. Request balanced hybrid strains in 1G format, they offer a middle ground between indica and sativa effects while the smaller size lets you sample without waste. Ask your chosen farm about trial memberships or smaller introductory shares. Many operations designed around community engagement offer flexible entry points for newcomers unsure about long-term commitments.
For Experienced Cannabis Consumers
If you already know your preferred strain profiles, target farms growing specific approved cultivars that match your taste. Request full-season shares with strain variety options so you receive rotating selections of indica, sativa, and hybrid pre-rolls throughout the harvest cycle. The 1.5G format delivers better value for regular users. Ask farmers which cultivars from Health Canada’s 2026 approved list they’re planting, then research those varieties’ terpene profiles and effects.
For Therapeutic and Budget-Conscious Buyers
Those seeking specific therapeutic applications should discuss cannabinoid profiles directly with growers, some farms specialize in high-THCA strains suited to particular needs. Budget-conscious consumers benefit most from full-season shares paid upfront, which typically offer the lowest per-gram cost. Pooling a share with a friend or family member splits the commitment while maintaining CSA pricing advantages over retail purchases.
For Sustainability-Focused Consumers
Prioritize farms with certified organic credentials and regenerative agriculture practices. Visit the operation before joining to observe composting systems, water conservation methods, and biodiversity initiatives. Full-season shares with pick-up options (rather than delivery) further reduce your environmental footprint while strengthening your connection to the land producing your pre-rolls.
Common Mistakes to Avoid
Joining a hemp CSA sounds simple, sign up, get your pre-rolls, support local agriculture. But many first-time members stumble over preventable missteps that leave them disappointed with their experience or their product quality.
The most common errors include:
Signing up without visiting the farm or verifying organic certification credentials
Misunderstanding CSA commitment terms and getting locked into a share size that doesn’t match consumption habits
Ignoring strain profiles and ending up with effects that don’t align with personal preferences
Failing to ask how farmers handle post-harvest drying and curing processes
Overlooking proper storage requirements and letting pre-rolls degrade after pickup
The verification mistake happens when enthusiasm overrides due diligence. Some farms use “organic practices” language without holding actual certification, or they grow approved 2026 cultivars but skip rigorous testing protocols. Always ask to see certification documents and confirm they’re growing from Health Canada’s approved industrial hemp list for the current season.
Wrong share sizes plague buyers who underestimate or overestimate their needs. A 12-pre-roll monthly commitment might sound reasonable until you realize you only consume on weekends. Most farms won’t refund unused portions mid-season, so start conservative. You can always increase next cycle.
Harvest timing confusion is subtler but frustrating. Hemp follows seasonal cycles, meaning your CSA deliveries arrive when the farm harvests, not necessarily when you joined. If you sign up in late summer expecting immediate pickup, you might wait months for the next harvest window. Ask farmers upfront about their growing calendar and delivery schedule.
Recovery is possible for most mistakes. If you’ve overcommitted, see whether your farm allows share transfers to friends or splitting your portion. For verification concerns after joining, request a farm visit and documentation review. Most legitimate organic operations welcome transparency and will gladly show you their practices.
Supporting Your Local Hemp Farming Community
When you support a local organic hemp CSA, you’re doing more than purchasing pre-rolls, you’re investing in regenerative agriculture that rebuilds soil health with every growing season. Hemp’s deep taproots break up compacted earth, while its dense canopy suppresses weeds without herbicides, creating ecosystems where beneficial insects thrive and carbon gets sequestered back into the ground.
Take Green Valley Hemp Farm in southern Ontario, where third-generation farmer Sarah Chen converted her family’s conventional operation to organic hemp cultivation in 2024. “Our CSA members aren’t just customers, they’re partners in our mission,” Sarah explains. Her 40-member CSA provides predictable income that lets her invest in cover cropping and no-till practices, while members receive monthly pre-roll shares featuring approved 2026 cultivars like Grandi and Anka. The upfront payments help Sarah cover spring planting costs without debt, and members pay 30% less than retail prices while knowing exactly how their THCA pre-rolls were grown.
Your purchasing decisions create ripple effects through your local economy. Every dollar spent at a regional hemp farm generates roughly three dollars in additional economic activity, equipment repairs at the local shop, seeds from nearby suppliers, wages for harvest workers who spend earnings in your community. You’re also preserving farmland that might otherwise face development pressure.
Make the most of your CSA membership by learning to store CSA products properly, attending farm events to connect with growers, and sharing your experience with neighbours who might join next season.
Frequently Asked Questions
Community Supported Agriculture programs for organic hemp products are still a developing model in Canada, and many consumers have practical questions about how THCA pre-rolls from local farms differ from retail cannabis purchases. Understanding the legal framework, quality considerations, and CSA-specific details helps you make informed decisions when connecting with hemp farmers in your region.
Are THCA pre-rolls legal in Canada?
Canada permits adult recreational and medical cannabis use under federal law. THCA pre-rolls fall under this framework when sourced from licensed producers, and organic hemp farms participating in CSA models must hold appropriate cultivation licences from Health Canada, which maintains an approved industrial hemp cultivars list for each growing season.
How long do CSA pre-rolls stay fresh?
Properly stored organic pre-rolls maintain quality for three to six months when kept in airtight containers away from light, heat, and moisture. Many CSA farms provide harvest dates on packaging, and the farm-direct model means you’re receiving fresher products than retail options that may sit on shelves for months.
Can I visit the farm where my pre-rolls are grown?
Most organic hemp CSA operations welcome farm visits as part of their community-building philosophy. Connecting with your farmer allows you to see growing practices firsthand, ask questions about strain selection and cultivation methods, and build trust in your product source.
How does CSA pricing work for hemp products?
CSA pricing typically involves upfront share purchases that cover a season’s allocation of pre-rolls, often at 15-25% below retail prices. You’re paying for the harvest ahead of time, which gives farmers operating capital while you benefit from cost savings and guaranteed access to organic products in both 1G and 1.5G formats.
Another common question involves the difference between hemp-derived and cannabis-derived THCA products. From a botanical standpoint, hemp and cannabis are the same plant species, distinguished only by THC concentration thresholds in regulatory definitions. When you purchase from an organic hemp farm with proper licensing, you’re supporting sustainable agriculture practices while accessing quality pre-rolls that meet the same standards as commercial cannabis products, with the added benefit of knowing your farmer and their growing methods.
Main Options Compared
When selecting organic hemp farm CSA THCA pre-rolls, your decision centres on three core variables: strain category, pre-roll size, and CSA membership structure.
Strain categories break into indica-dominant options (producing relaxing, body-focused effects), sativa-leaning varieties (offering energizing, cerebral experiences), and balanced hybrids (combining both profiles). Indica strains suit evening unwinding, sativas work well for daytime use, and hybrids provide versatility across occasions. Your choice depends on desired effect and tolerance level.
Format sizes now include both 1G and 1.5G pre-rolls following Canada’s March 2026 regulatory change removing the one-gram limit. The 1G format suits occasional users and those sampling multiple strains, while 1.5G options appeal to experienced consumers and offer better value per gram through reduced packaging waste.
CSA models vary by farm commitment level. Weekly share programs provide continuous supply with fresh harvests, bi-weekly options balance variety and storage capacity, and bulk seasonal shares deliver the lowest per-unit cost for consumers with proper storage. Some farms offer flexible shares allowing strain rotation, while others feature curated boxes showcasing their full cultivar range from Health Canada’s approved list.
Matching these three elements to your consumption patterns, budget, and sustainability priorities determines which organic hemp CSA option serves you best.
Choosing organic hemp farm CSA THCA pre-rolls connects you with quality products while supporting the sustainable agriculture movement happening right in your community. When you buy directly from local organic hemp farms through CSA models, you’re getting transparent access to cultivation practices, approved cultivars, and farming methods that prioritize soil health and environmental stewardship over mass production shortcuts.
The selection criteria covered in this guide, verifying organic credentials, confirming approved cultivar compliance for 2026, understanding strain differences between indica, sativa, and balanced hybrids, and choosing the right CSA share structure, help you make informed decisions that align with your values. Whether you’re drawn to the 1G format for variety or the 1.5G size for value, purchasing through a CSA means you know exactly where your pre-rolls come from and how they were grown.
Beyond the product itself, your CSA membership directly supports farmers committed to regenerative practices and local food systems. Take the time to visit farms in your region, ask questions about their growing methods, and build relationships with the people cultivating your hemp. These connections strengthen local economies, reduce environmental impact, and create a community around shared values. Your choice to support organic hemp CSA farms today helps build a more sustainable agricultural future for everyone.
Agroforestry is sustainable when designed and managed to regenerate soil, conserve water, and provide long-term yields without degrading the land or ecosystem. By intentionally combining trees, crops, and often livestock in the same space, these systems build resilience against drought, erosion, and pest pressure while delivering food, timber, and income year after year.
The question isn’t whether agroforestry can be sustainable in theory. It’s whether farmers can make it work on real ground, with real budgets and timelines. The answer depends on choosing the right combination of plants for your climate, understanding how trees and crops interact as they mature, and committing to a timeframe that extends beyond a single growing season. Unlike monoculture systems that extract nutrients faster than they return, well-designed agroforestry creates a feedback loop where organic matter accumulates, beneficial insects thrive, and the land becomes more productive over time.
Across organic farms and community-supported agriculture (CSA) operations in 2026, agroforestry has moved from experimental plots to core production strategies. Farmers are integrating fruit and nut trees into vegetable beds, planting nitrogen-fixing shrubs along field edges, and using fast-growing timber species to shelter sensitive crops. These aren’t abstract environmental benefits. They translate to lower input costs, diversified revenue streams, and farms that weather climate extremes better than their conventional neighbors.
This article breaks down exactly how agroforestry systems function, which types suit different landscapes and goals, and what makes them viable for the long haul.
Key Takeaway: Agroforestry delivers five critical ecosystem services, carbon storage, water regulation, pollinator support, soil conservation, and biodiversity, that directly reduce input costs, protect yields from climate extremes, and create new revenue streams through improved ecosystem health.
What Agroforestry Sustainability Really Means
Sustainability in agroforestry means building farming systems that endure across generations without depleting the resources they depend on. It’s not just about avoiding harm, it’s about actively regenerating soil, water, and ecosystems while keeping farms profitable and communities thriving. When farmers ask if agroforestry is sustainable, they’re really asking whether these practices can deliver reliable results year after year without requiring costly external inputs or degrading the land.
The answer rests on what are known as the three pillars of sustainability: environmental health, economic viability, and social well-being. All three must work together. A system that protects the environment but bankrupts the farmer isn’t sustainable. Neither is one that turns a profit while eroding topsoil or exploiting workers.
Agroforestry
The intentional integration of trees, crops, and sometimes livestock within the same farming system to create mutually beneficial relationships.
Ecosystem Services
The benefits nature provides, such as pollination, water filtration, carbon storage, and soil fertility, that support both farm productivity and broader environmental health.
Environmental Pillar
Maintaining or improving natural resources like soil, water, and biodiversity so they remain functional for future generations.
Economic Pillar
Ensuring farms generate enough income to support the people who run them, covering costs and providing a livable return on investment.
Social Pillar
Supporting fair labor practices, strong communities, and knowledge-sharing that keeps farming culture alive and resilient.
Conventional monoculture farming typically prioritizes short-term yields, relying on synthetic fertilizers and pesticides to compensate for simplified ecosystems. Agroforestry takes the opposite approach. By diversifying plants and animals across the landscape, it builds complexity that self-regulates over time. Trees fix nitrogen, create windbreaks, and store carbon. Crops benefit from improved microclimates. Livestock graze beneath tree canopies, spreading fertility as they move. This layered design reduces dependency on external inputs while strengthening the farm’s ability to weather droughts, market shifts, and pest pressures.
How Agroforestry Systems Work
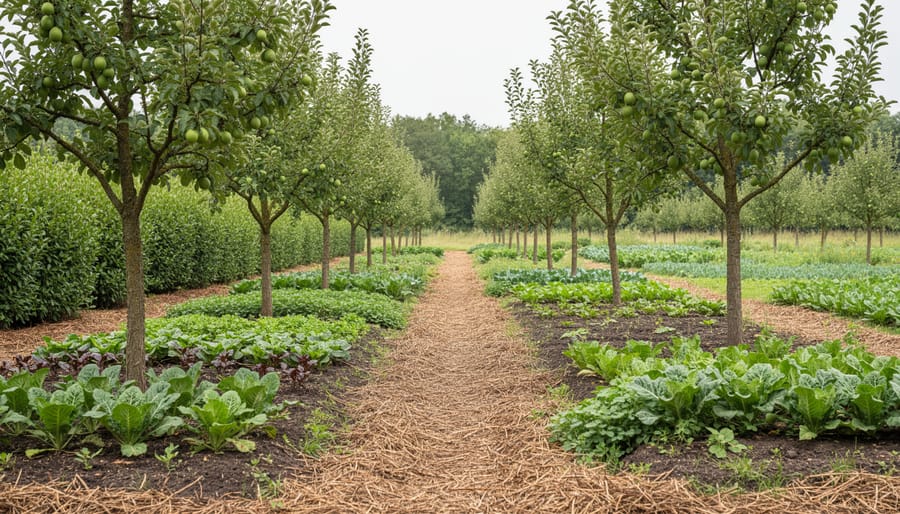
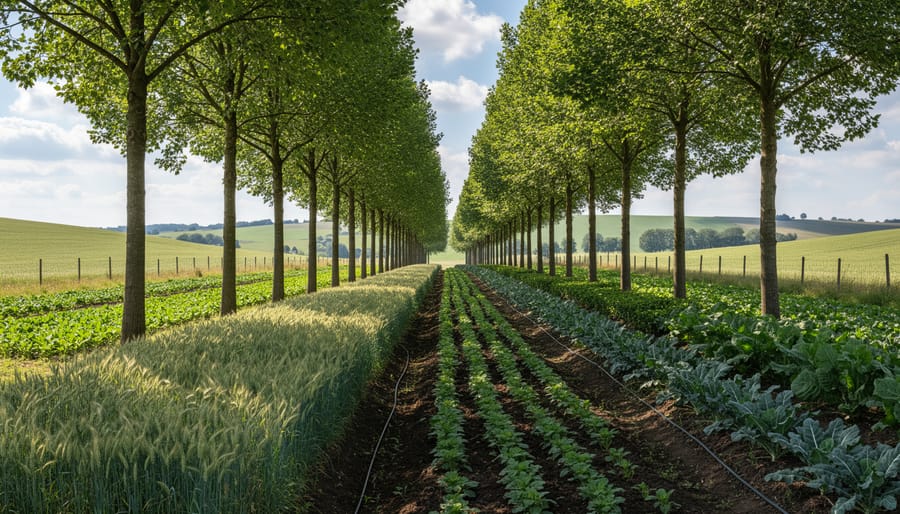
A mature agroforestry alley-cropping system shows trees and crops growing together in the same managed space.
The Role of Trees in the System
Trees function as the structural backbone of agroforestry systems, delivering multiple functions simultaneously. Their deep roots break up compacted soil layers, creating channels for water infiltration and pulling nutrients from depths annual crops can’t reach. When leaves drop and roots die back, this organic matter enriches the topsoil with nitrogen, phosphorus, and carbon, building fertility year after year.
The carbon benefits are substantial. Research shows that agroforestry stores more carbon than traditional row cropping because trees lock up carbon in both above-ground biomass and root systems. A mature tree can sequester hundreds of pounds of CO₂ annually while sheltering crops below.
Tree canopies also alter the farm’s microclimate. They reduce wind speeds by up to 50%, protecting delicate plants and preventing topsoil erosion. Shade from strategically placed trees lowers ground temperatures in summer, reducing water stress for crops and livestock. In winter, windbreaks trap snow, creating insulating layers and boosting soil moisture when the thaw arrives.
For water cycles, tree roots act like sponges, absorbing heavy rains and releasing moisture slowly. This stabilizes groundwater levels and reduces runoff. Meanwhile, the canopy becomes habitat for birds, beneficial insects, and pollinators that support the entire farm ecosystem.
Integration with Crops and Livestock
Farmers layer crops and livestock beneath and around trees by matching each element’s light, nutrient, and space requirements. Annual vegetables like squash or beans grow in the sunny alleys during spring and summer, while the tree canopy is still light. Shade-tolerant perennials such as ramps, ginger, or berry bushes occupy the transition zones where dappled light prevails as trees mature.
Livestock, often sheep, goats, or chickens, graze the understory, eating weeds and fertilizing the soil with manure. Rotational timing matters: animals move through paddocks after crops are harvested or before new plantings emerge, preventing trampling and overgrazing. Tree roots mine deep nutrients and bring them to the surface through leaf drop, which decomposes and feeds shallow-rooted crops.
Spacing determines success. Wide alleys (20 to 40 feet) allow enough sunlight for full-sun crops even as trees grow. Closer spacing suits shade crops or livestock systems where forage quality improves under partial canopy. Farmers adjust planting dates and pruning schedules to keep light levels balanced, ensuring every layer contributes without competing destructively. This stacked use of vertical and horizontal space turns a single acre into multiple productive zones.
Main Types of Agroforestry Practices
Alley Cropping
Alley cropping arranges trees in parallel rows with wide spaces, the alleys, where you grow annual or perennial crops. The tree rows might be fruit or nut species, nitrogen-fixing legumes, or timber trees, depending on your farm goals and climate. Crops in the alleys benefit from windbreak effects, improved soil moisture retention, and gradual nutrient inputs as tree leaves decompose. This setup spreads income across multiple harvests: you sell grain, vegetables, or hay from the alleys while trees mature into longer-term products like apples, pecans, or lumber. Because trees and crops occupy different vertical and root zones, competition stays manageable with proper spacing, and the diversified system buffers against single-crop failures or market swings.
Silvopasture
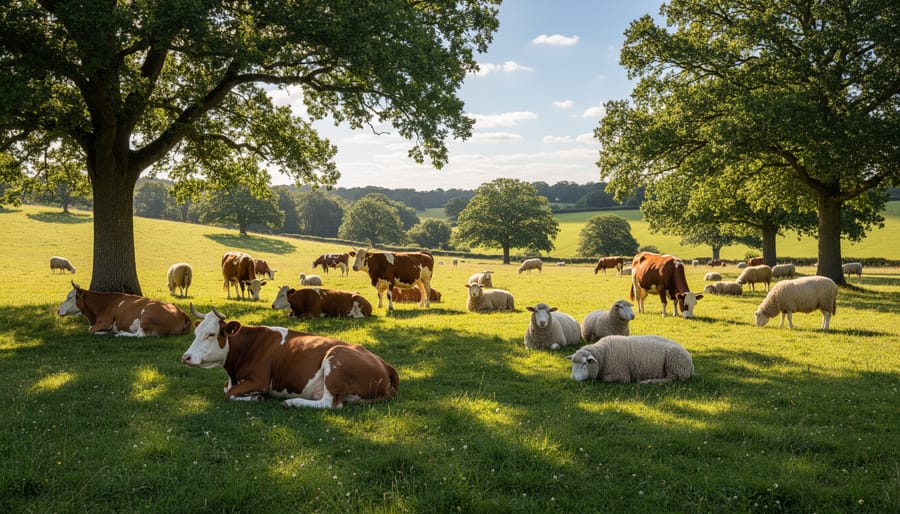
Livestock can be integrated with tree cover to improve pasture comfort and support healthier farm ecosystems.
Silvopasture integrates trees, forage plants, and grazing livestock in a single managed system. Farmers plant scattered trees or tree rows across pastures where cattle, sheep, goats, or poultry graze. The trees provide shade that reduces heat stress in animals, especially during summer months, improving weight gain and milk production. Tree roots reach deeper soil layers than pasture grasses, pulling up nutrients that eventually cycle back through leaf drop and manure decomposition.
This arrangement improves forage quality because shaded grasses stay greener longer and contain higher protein levels than sun-scorched pasture. The trees sequester significant carbon in wood and soil while livestock continue generating income during the years trees mature. Farmers often select nut or fruit trees to add a second revenue stream, walnuts, chestnuts, or apples, alongside meat or dairy production. Silvopasture works well on organic farms seeking diversified income without expanding acreage.
Forest Farming
Forest farming transforms existing woodlands into productive growing spaces by cultivating specialty crops beneath the tree canopy. Instead of clearing trees, farmers work with the forest’s natural shade and humidity to grow high-value products like shiitake mushrooms on logs, ginseng in leaf litter, or shade-loving berries and medicinal herbs.
This practice suits organic growers targeting niche markets where customers pay premium prices for forest-grown goods. The overhead canopy regulates temperature and moisture while leaf fall builds soil organic matter naturally. Forest farming requires minimal external inputs since the ecosystem largely manages itself, making it exceptionally sustainable for farmers with wooded acreage who want to generate income without disrupting established tree cover or converting land to open fields.
Windbreaks and Riparian Buffers
Windbreaks consist of single or multiple rows of trees planted perpendicular to prevailing winds, reducing wind speed across fields by up to 50% within a protected zone that extends 10 to 20 times the tree height. This protection prevents topsoil loss, reduces crop moisture stress, and creates microclimates that can boost yields in adjacent rows by 10 to 20%.
Riparian buffers are tree and shrub plantings along streams, ponds, or drainage ditches. They filter runoff before it enters waterways, trapping sediment and agricultural nutrients that would otherwise degrade water quality. These buffers also stabilize stream banks, reduce flooding risk, and create wildlife corridors connecting habitat patches across the farm landscape. Both practices deliver measurable ecosystem services while requiring minimal land, typically just a few rows or a 15- to 30-foot buffer strip.
Ecosystem Services Delivered by Agroforestry
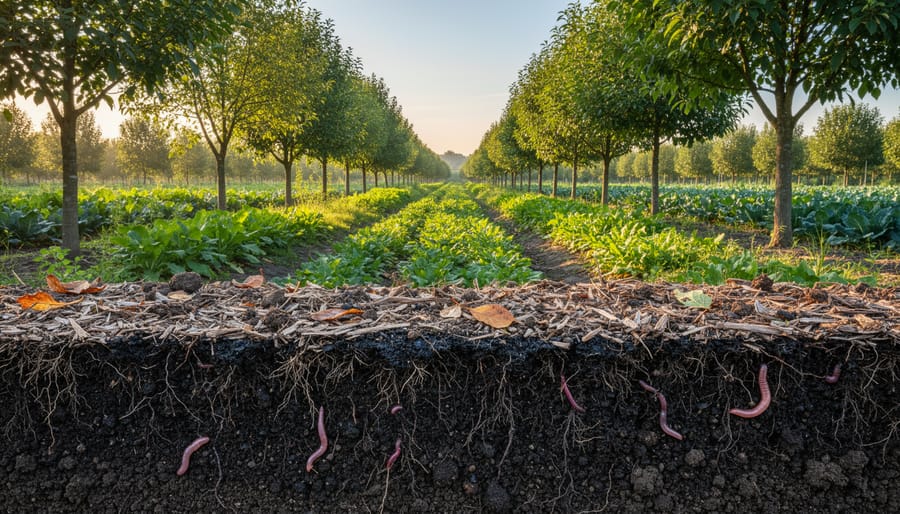
Healthy, living soil is a key sign that agroforestry practices can strengthen long-term environmental resilience.
Agroforestry systems function as working ecosystems that deliver measurable benefits far beyond crop yields. These ecosystem services, the natural processes that support life and productivity, explain why agroforestry stands out as a sustainable farming approach. When you integrate trees with crops and livestock, you activate a suite of ecological functions that strengthen your farm’s resilience while supporting the wider community.
Carbon storage ranks among the most valuable services agroforestry provides. Trees sequester atmospheric carbon dioxide in their woody biomass and root systems, while also pumping carbon into the soil through leaf litter and root exudates. A well-designed silvopasture or alley cropping system can store several tons of carbon per hectare annually, helping offset farm emissions and potentially qualifying for carbon credit programs that generate income.
Water regulation improves dramatically when trees enter the landscape. Deep tree roots break up compacted soil layers, increasing infiltration during heavy rains and reducing runoff that carries topsoil and nutrients off-site. During dry periods, those same roots access deeper moisture and create humid microclimates that reduce crop water stress. Riparian buffers along streams filter agricultural runoff, protecting water quality for downstream communities while maintaining habitat corridors.
The creation of pollinator habitat transforms farm productivity. Trees and hedgerows provide season-long forage, nesting sites, and shelter for bees, butterflies, and other beneficial insects. This translates to better fruit set, increased yields in pollinator-dependent crops, and reduced reliance on rented honeybee hives, a cost savings that shows up immediately in your operating budget.
Soil conservation happens naturally as tree canopies intercept rainfall, roots bind soil particles, and leaf litter builds organic matter. Erosion rates drop measurably compared to bare annual cropping systems, preserving your farm’s most valuable asset. Healthier soil structure also improves nutrient cycling, reducing fertilizer needs.
Biodiversity flourishes in agroforestry environments. The structural complexity of mixed tree-crop systems supports everything from soil microbes to songbirds, creating a balanced ecosystem where pest populations stay in check and beneficial organisms thrive. This biological diversity acts as insurance against disease outbreaks and climate variability, stabilizing production across seasons.
How Agroforestry Is Used on Organic and CSA Farms
On organic and CSA farms, agroforestry offers practical ways to diversify income while building resilience into the farm’s ecology and business model. Many CSA operators integrate nut trees like hazelnuts or chestnuts along field edges, providing members with unique seasonal shares that stand out from conventional produce boxes. These perennials require minimal annual input once established, making them ideal for certified organic operations that prioritize low-intervention management.
Fruit trees planted in alley cropping systems between vegetable rows create layered production. A farm might harvest strawberries and lettuce in spring, then apples and pears later in the season from the same acreage. This staggered harvest spreads labor demands and extends the CSA delivery calendar, keeping members engaged longer and reducing the feast-or-famine cash flow common in vegetable-only operations.
Some farms venture into value-added products like jams, syrups, or specialty mushrooms cultivated under forest canopies. These items command premium prices at farmers’ markets and bolster CSA share value without requiring additional tillable land. Timber species like black walnut can serve as a long-term savings account, maturing over decades while providing shade and wildlife habitat in the interim.
Agroforestry also enhances the farm’s visual appeal, a crucial asset for agritourism. Tree-dotted landscapes invite farm tours, school visits, and u-pick events that generate revenue and deepen community ties. While city farming models face space constraints, rural CSA farms with room to experiment find that agroforestry systems create the diversified, attractive, ecologically sound operations that members actively want to support.
Measuring Long-Term Sustainability in Agroforestry
Judging whether agroforestry truly delivers on sustainability requires more than anecdotes. Farmers and researchers track specific indicators over years or decades to see if these systems maintain productivity, protect resources, and stay economically viable. Soil health metrics form the foundation: regular testing for organic matter percentage, nutrient levels, and water infiltration rates reveals whether the soil is improving or degrading. A thriving agroforestry system typically shows rising organic matter and faster water absorption compared to conventional tillage, signaling better structure and fertility.
Carbon accounting has become another critical measure. Trees sequester carbon in their trunks, branches, and roots, while healthier soil stores more carbon underground. Some farmers now use farm tech solutions like soil carbon sensors and remote mapping to quantify these gains and qualify for carbon credit programs. Biodiversity indices track the variety and abundance of species on the farm, from soil microbes to pollinators and birds. More diverse ecosystems tend to be more resilient to pests, disease, and climate swings.
Economic return on investment matters just as much as environmental outcomes. Farmers monitor profit per acre over time, factoring in upfront establishment costs, delayed yields from trees, and eventual income from timber, nuts, fruit, or livestock. Key indicators include:
Soil organic matter percentage and trend over five-year intervals
Water infiltration rates measured before and after tree integration
Species diversity counts for plants, insects, birds, and soil organisms
Profit per acre tracked annually, including diversified revenue streams
Carbon credits potential based on verified sequestration rates
When these indicators hold steady or improve across a decade or more, the system proves its sustainability. If yields drop, soil degrades, or income stagnates, adjustments are needed. Long-term monitoring separates hopeful claims from real-world performance.
Common Questions About Agroforestry Sustainability
Farmers and gardeners considering agroforestry often wonder whether the investment of time and money will pay off. The upfront costs vary widely depending on the scale and type of system you choose. A simple windbreak or alley cropping setup might require just a few hundred dollars for tree stock and fencing, while a full silvopasture conversion on several acres could run into the thousands. Most organic farms spread the expense over multiple seasons, starting with one practice on a portion of their land before expanding.
Timing is another common concern. Unlike annual crops that produce within months, agroforestry systems need patience. Tree crops typically take three to seven years to mature enough for harvest, though you’ll see ecosystem benefits, improved soil, windbreaks, pollinator habitat, within the first two growing seasons. Many CSA farmers diversify income during this establishment phase by continuing annual vegetable production between young tree rows or by raising livestock under the canopy.
Does agroforestry require more labor?
Initial setup demands hands-on work for planting, mulching, and establishing trees. Once mature, though, perennial systems often need less intensive management than annual crops.
Can I get organic certification for agroforestry?
Yes. Certified organic standards cover tree crops, forest farming, and integrated livestock systems, provided you follow approved practices for pest management and soil amendments without prohibited substances.
Does it work in dry climates?
Absolutely. Drought-tolerant tree species and strategic water harvesting make agroforestry viable in arid regions, where trees actually help conserve moisture and reduce evaporation from the soil.
What about pest management?
Agroforestry systems create habitat for beneficial insects and natural predators, reducing reliance on interventions, though understanding organic pest types still helps when challenges arise.
Climate compatibility is real, not a barrier. From temperate zones to subtropical regions, farmers adapt agroforestry to local conditions by selecting appropriate tree species and matching them to existing crops and livestock. Biodiversity flourishes in these systems, supporting pollinators naturally rather than relying on artificial pollination solutions. Start by observing what trees already thrive on your land and consulting with local extension services or experienced agroforestry practitioners in your region.
Agroforestry stands out as a genuinely sustainable farming approach because it addresses all three pillars at once: environmental health, economic viability, and social well-being. The systems we’ve explored deliver real ecosystem services that compound over time, from carbon storage and soil regeneration to water quality improvement and habitat creation. These aren’t theoretical benefits. They show up in healthier crops, more resilient land, and diversified income streams that buffer farms against market volatility and climate extremes.
That said, agroforestry isn’t a quick fix. Trees take years to mature, and the learning curve can feel steep when you’re integrating multiple elements on the same piece of land. You’ll need patience, careful observation, and a willingness to adapt as your system develops. But the payoff extends far beyond your own farm boundaries. Agroforestry strengthens entire communities by supporting pollinators, filtering runoff before it reaches waterways, and creating landscapes that people want to visit and protect.
If you’re curious about getting started, reach out to agroforestry farmers in your region. Many are happy to share lessons learned, and seeing a mature system in person makes the concepts click faster than any article can. Start with one practice that matches your land and goals, maybe a windbreak along your northern edge or a few rows of nut trees in an underused pasture. Small experiments teach you what works without overwhelming your operation, and they set the foundation for a farming system that truly lasts.
Growing a CSA membership base through your existing members works because people trust recommendations from friends and neighbors far more than any advertisement you could buy. The most successful CSA farms in 2026 are turning satisfied members into active ambassadors through structured referral programs that offer tangible rewards, clear expectations, and simple sharing tools.
The beauty of member-driven growth is its authenticity. When a CSA member raves about their weekly harvest box to a coworker, they’re sharing a genuine experience, not a sales pitch. That personal endorsement carries weight no social media campaign can match. But here’s the reality: most members won’t naturally think to recruit others unless you give them a reason and a framework to do so.
Small-scale farms often shy away from formal referral programs, assuming they require complex tracking systems or expensive incentives. The truth is simpler. A well-designed program can be as straightforward as offering a free week of produce for every new member someone brings in, paired with shareable referral cards members can hand out at farmers markets or neighborhood gatherings.
The farms that grow their membership year after year aren’t necessarily the ones with the fanciest websites or biggest advertising budgets. They’re the ones who’ve figured out how to activate their existing community, turning happy customers into enthusiastic advocates. What follows are the exact frameworks, real farmer examples, and practical implementation steps you need to build a referral and ambassador program that fits your farm’s scale and style.
Why CSA Members Make Your Most Credible Advocates
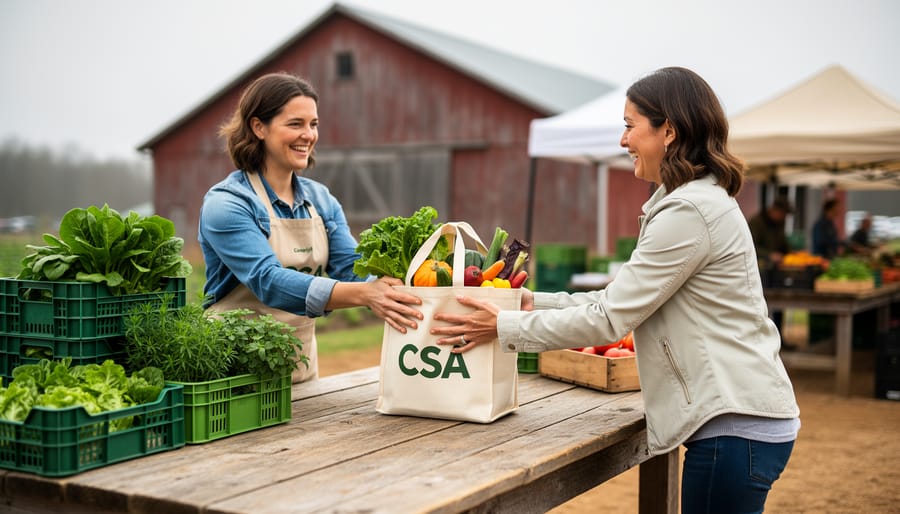
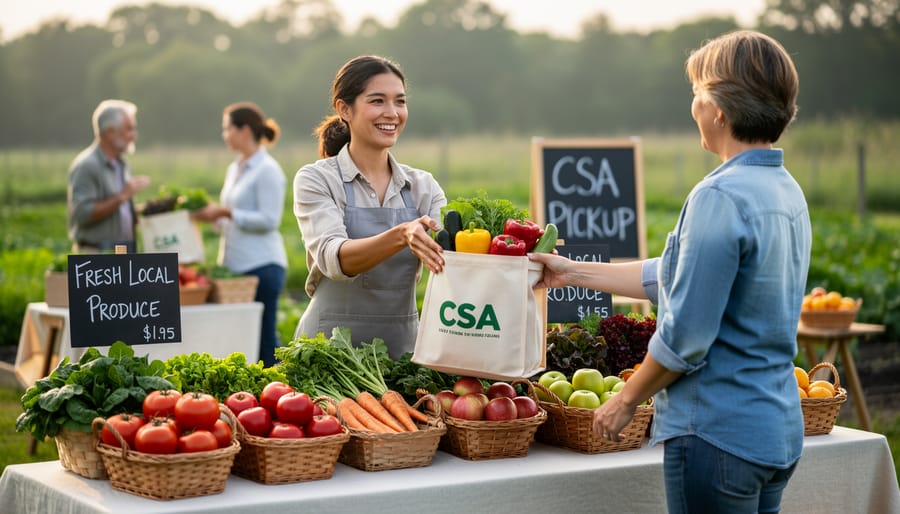
A CSA member shares fresh produce at a pickup table, illustrating how personal interactions build trust and word-of-mouth.
When a CSA member tells their neighbor about your farm, something powerful happens that no Facebook ad or farmers market banner can replicate. The conversation carries weight because it comes from someone who has skin in the game, someone who’s actually opened your boxes, cooked your vegetables, and experienced your farming practices firsthand.
Research shows that word of mouth outperforms traditional marketing channels significantly, particularly for products where quality and trust matter. CSA memberships check both boxes. Unlike a one-time purchase at a market, joining a CSA requires commitment and trust. Prospective members aren’t just buying tomatoes, they’re investing in a season-long relationship with a farm they’ve likely never visited.
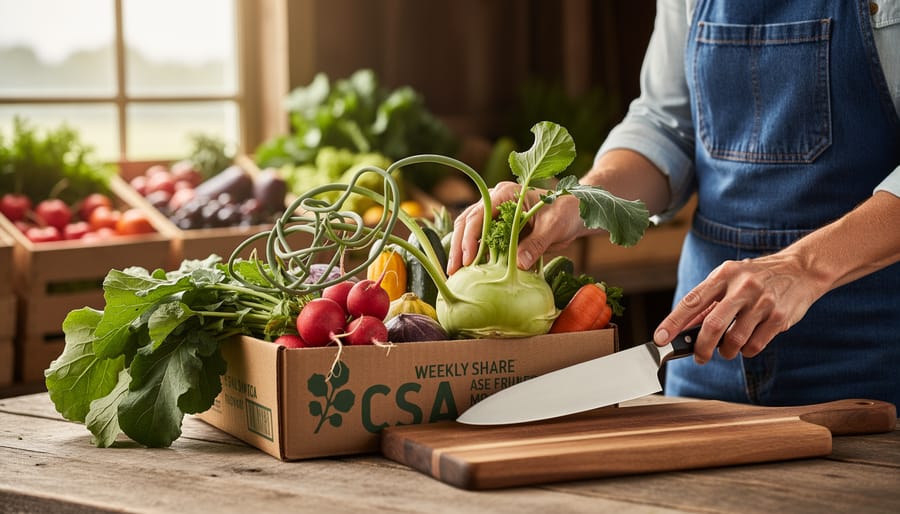
This is where your current members become invaluable. They’ve weathered the learning curve of storing greens properly, figuring out what to do with kohlrabi, and adjusting their meal planning around what’s in season. When they recommend your farm, they’re not just vouching for your produce quality. They’re saying “I trust these farmers with my food budget” and “this is worth the commitment.”
The community aspect amplifies this effect. CSA members often view their participation as something bigger than a transaction, it’s supporting local agriculture, eating seasonally, and connecting to where their food comes from. When they invite friends to join, they’re extending an invitation into a community and a values-aligned choice, not just selling vegetables.
This authentic enthusiasm can’t be manufactured through marketing copy, no matter how well-written. It emerges naturally from positive experiences, and smart farms create systems to channel that enthusiasm into growth.
Building a CSA Member Referral Program That Actually Works
Choosing the Right Incentives for Your Farm
The incentive you offer can make or break your referral program. Too stingy, and members won’t bother. Too generous, and you’ll undercut your margins. The sweet spot depends on your farm’s size, profit margins, and what genuinely excites your members.
Start by thinking about what costs you least while delivering real value to members. A $20 share credit might feel generous to a member, but if your margins are tight, that same value delivered as extra produce from a bumper harvest week costs you far less. Similarly, value-added products you make on-farm (jams, pickles, bouquets) often work as high-perceived-value incentives with relatively low production costs.
Incentive Type
Member Appeal
Farm Cost
Best Fit
$15-25 share credit
High flexibility
Direct revenue loss
Established farms with healthy margins
Free add-ons (eggs, flowers, preserves)
Tangible immediate reward
Low if farm-produced
Diversified farms with multiple products
Extra weekly produce
More of what they love
Variable by season
Farms with reliable surpluses
10-15% renewal discount
Long-term savings
Deferred, predictable
Farms prioritizing retention
Consider offering tiered rewards. One successful referral might earn a jar of your farm’s tomato sauce, while three referrals unlocks a half-share credit. This approach encourages ongoing advocacy without requiring you to give away your most valuable incentives for a single sign-up.
Match your incentive to your operation’s rhythm. If you’re a veggie-only farm, partnering with a neighboring farm for eggs or honey as referral rewards creates appeal without stretching your production. Startup farms with tighter budgets often find success with experiential rewards like invitations to exclusive farm dinners or u-pick events, which build community while keeping hard costs low.
Making Referrals Easy and Trackable
The easier you make the referral process, the more members will actually use it. A complicated system helps nobody, so design your mechanics around simplicity first.
Digital referral codes work well if you have a basic online signup form. Give each member a unique code, their last name plus a number works fine, that new members enter when joining. Track these in a simple spreadsheet with columns for referring member, new member name, signup date, and reward status. No fancy software needed.
For farms without digital infrastructure, physical referral cards are incredibly effective. Print simple business-card-sized cards with your farm info and a line for the referring member’s name. Members hand these to friends, who bring them to pickup or mail them with their signup. File the cards in a folder and record them weekly.
A dedicated referral signup link makes sharing even easier. Services like Google Forms or Typeform let you create a free form where new signups can enter who referred them. Share one link with all members rather than individual codes, just add a “Who referred you?” field.
Track everything in one place, whether that’s a notebook, spreadsheet, or your member database. Note the referring member, new member, date, and when you issued the reward. Review it monthly to catch any referrals you might have missed and to send thank-you notes.
The key is choosing a method you’ll actually maintain. A simple system you use consistently beats a sophisticated one you abandon after two months.
Setting Clear Program Guidelines
A referral program falls apart when members feel confused about how it works or, worse, when they think they’ve earned something they haven’t. Setting clear guidelines upfront prevents frustration and keeps the program running smoothly season after season.
Warning: Nothing damages trust faster than unclear reward terms, put your program rules in writing and share them with every participant from day one.
Spell out exactly when rewards kick in. Most farms trigger incentives when the new member completes their first payment, not just when they sign up. This protects you from rewarding referrals that never convert while giving referring members a clear milestone to track.
Set reasonable limits per member. Some farms cap referrals at three to five per season to keep the program sustainable, while others leave it unlimited but adjust the reward value after the first few. Whatever you choose, state it clearly so members know what to expect.
Decide when you’ll deliver rewards. Options include applying credits immediately to the next share pickup, adding them to the following season’s account, or distributing them at mid-season or year-end. Just be consistent and communicate the timing in advance.
Include your program terms everywhere members might look: in your welcome packet, on referral cards, in email confirmations, and on any sign-up page. Cover the basics in simple language, what members get, when they get it, how tracking works, and any expiration dates. When everyone understands the rules, your program becomes a trust-builder instead of a headache.
Creating a CSA Ambassador Program
Members visiting the farm with fresh produce capture the ambassador spirit, sharing the experience and inviting others in.
Identifying Your Ideal Ambassadors
The best ambassadors are already promoting your farm, you just need to recognize them. Look for members who consistently engage: they comment on your social media posts, bring friends to farm events, ask thoughtful questions at pickup, and share photos of your produce. These are the people who genuinely love what you’re doing.
Key qualities include natural enthusiasm (they light up talking about the farm), strong local networks (they’re involved in community groups, schools, or workplaces), and reliability (they show up to events and communicate well). Members who’ve been with you for at least one full season understand your farm’s rhythm and values, making them more credible advocates.
Pay attention during pickup days. Who’s chatting with other members about recipes? Who’s already telling newcomers how the share works? Watch your social media tags, members who regularly post about their weekly haul are showing you exactly who they are.
When inviting someone to be an ambassador, make it personal. A quick conversation at pickup works well: “I’ve noticed how much you enjoy sharing about the farm with others. We’re looking for a few members to help spread the word more formally. Would you be interested in learning more?” Follow up with a simple email outlining what’s involved.
Keep your initial ambassador group small, three to five members. You can always expand once you’ve refined the program.
Ambassador Roles and Responsibilities
Successful ambassador programs work when expectations are clear and manageable. Most farm ambassadors can realistically commit to two or three activities per season, not a constant stream of promotion.
Start with the lowest-effort options. Social media sharing, posting farm photos, tagging the CSA in stories, or writing brief reviews, takes minutes but reaches personal networks organically. Bringing friends to pickup days or open farm events leverages occasions already on their calendar. These activities require enthusiasm, not extra time.
Mid-level involvement includes hosting small farm tours for their social circles. An ambassador might invite neighbors over for a farm visit, introducing four or five potential members in a relaxed setting. Some members enjoy staffing your table at farmers markets for an hour, answering questions from shoppers who trust peer recommendations over farm marketing.
The highest commitment comes from content creation, writing blog posts about favorite recipes, filming cooking videos with your produce, or maintaining a farm share diary. Offer this option but never require it. These ambassadors are rare gems who genuinely love creating content.
Make participation flexible. Provide a menu of options and let ambassadors choose what fits their lifestyle. A busy parent might only share on Instagram, while a retired teacher could lead monthly farm tours. Track contributions loosely, you’re building relationships, not managing employees. The goal is sustained, authentic advocacy that feels rewarding rather than obligatory.
Supporting and Rewarding Your Ambassadors
Your ambassadors invest time and energy promoting your farm, so thoughtful recognition keeps them motivated without breaking your budget.
Compensation structures that work: Many farms offer a 10-20% discount on shares or provide one free week per month of active promotion. Some give ambassadors first pick at premium items like heritage tomatoes or specialty cuts. Match your reward to the effort, someone hosting tours deserves more than someone who simply posts occasionally.
Experiential rewards build deeper connection. Invite ambassadors to exclusive harvest dinners, behind-the-scenes farm tours, or early strawberry picking before the public. These experiences cost you little but create memorable moments ambassadors naturally share with their networks.
Recognition matters as much as tangible rewards. Feature ambassadors in your newsletter with their photo and story. Create a “farm family” page on your website. Thank them publicly at member events. A handwritten note after a particularly helpful referral goes surprisingly far.
Keep it simple to sustain long-term. Track contributions in a basic spreadsheet and check in quarterly. Send a small seasonal gift, a jar of jam, bouquet, or farm store credit. The goal is making ambassadors feel valued, not creating administrative burden that prevents you from farming.
When compensation feels fair and personal, ambassadors remain enthusiastic advocates year after year.
Promoting Your Referral and Ambassador Programs
The best referral program in the world won’t work if your members don’t know it exists. Many farms launch these programs quietly, mention them once in a newsletter, then wonder why participation stays low. Successful promotion requires multiple touchpoints throughout the season, meeting members where they already engage with your farm.
Start by weaving the program into your existing communication channels rather than treating it as a separate announcement. Your weekly newsletter is prime real estate, include a brief referral reminder in the footer or as a P.S. after your farm updates. At pickup locations, place attractive signs near the distribution area where members naturally pause. A simple “Love your CSA? Share it! Ask us about our referral program” catches attention without feeling pushy.
Here’s a practical timeline for introducing and maintaining visibility:
Week 1-2 of season: Launch announcement in newsletter and welcome packet for new members
Week 4-6: Reminder at pickup with printed referral cards members can take
Mid-season farm event: Brief mention during announcements, answer questions in person
Week 12-14: Social media post featuring a member who successfully referred friends
Late season (Week 18-20): Final push in newsletter highlighting year-end deadline
Renewal period: Thank participants and showcase program results in annual recap
Face-to-face moments matter most. Train whoever staffs your pickup to mention the program casually when members express enthusiasm. A simple “So glad you’re enjoying it! We have a referral program if you know anyone who’d love fresh vegetables” plants the seed naturally.
Your welcome packet for new members should include referral details from day one. They’re experiencing peak excitement about joining, making it the perfect time to explain how they can share that with friends. Include a few physical referral cards they can hand out immediately.
Social media works best when you share real stories rather than generic program details. Post photos of referring members with their friends at pickup, or create simple graphics showing what rewards look like. Keep it visual and personal.
Real Success: How Small Farms Grew Their Membership Through Referrals
When Sarah launched Meadowlark Farm in Vermont with just 25 CSA shares in her first season, she knew she couldn’t afford traditional advertising. She decided to offer each founding member one free week of produce for every new member they referred who completed the season. By mid-summer, eight of her original members had brought in friends or family. She ended the season with 38 shares and rolled that momentum into year two, where she started with 52 members, more than double her initial goal.
Sarah’s key lesson: make the ask specific and timely. She sent a mid-season email thanking members for their support and explicitly asking if they knew anyone who might enjoy the farm for next year. She included a simple referral card members could hand to friends. The tangible card, she found, worked better than forwarding emails because it felt more personal and didn’t get lost in inboxes.
Contrast that with Green Valley Farm, a fifteen-year operation in North Carolina with 180 established members. Farm manager Marcus noticed their growth had plateaued despite a waiting list in previous years. He introduced a tiered referral program: one successful referral earned members $25 off their renewal, three referrals meant a free add-on subscription (eggs or flowers), and five referrals earned a complimentary half-share for a friend or family member.
The program brought in 34 new members in the first year, a 19% increase. More importantly, Marcus discovered that his most active referrers were second and third-year members, not the longest-standing ones. These members were still in the enthusiastic phase of CSA membership and had social circles who hadn’t yet joined. He adjusted his outreach to focus more attention on this sweet spot of engaged recent members rather than assuming veterans would be his best advocates.
Both farms learned that authentic enthusiasm, not elaborate incentives, drives referrals.
Common Pitfalls and How to Avoid Them
A handshake at a farm gathering symbolizes appreciation and long-term relationships that keep referral programs thriving.
Even the best-intentioned referral program can stumble if you’re not watching for these common traps.
The biggest mistake? Making the program too complicated. When members need to remember codes, fill out forms, or jump through multiple hoops, they simply won’t bother. Keep it simple enough that you can explain it in one sentence. If your program requires more than two steps for members to participate, simplify it.
Warning: Offering rewards you can’t sustain long-term will force you to either cut the program abruptly or strain your farm’s finances, both damage member trust.
Many farms launch generous incentive programs without calculating the actual cost per new member. Run the numbers before you commit. A $50 credit might sound reasonable until you realize it costs you more than that in margin when five members each refer three friends in one month.
Poor tracking derails even simple programs. You forget who referred whom, rewards get missed, and members feel ignored. A basic spreadsheet noting the referrer, new member, date, and reward status prevents most problems. Update it weekly, not whenever you remember.
Farms also commonly fail to promote their programs beyond an initial announcement. Members forget details within weeks. Mention your referral program in every newsletter, post reminders at pickup, and include cards in share bags monthly. Repetition without annoyance is the goal.
Finally, many farmers overlook thanking participants beyond sending the reward. A personal note, public shout-out in your newsletter, or quick conversation at pickup acknowledging their support strengthens the relationship. Recognition costs nothing but makes members feel genuinely valued, encouraging continued advocacy.
The most successful CSA growth doesn’t come from flashy marketing campaigns or aggressive sales tactics. It comes from the genuine enthusiasm of people who love what you’re doing and want their friends to experience it too.
Start small with your referral or ambassador program. Choose one simple incentive, create a straightforward way to track it, and tell your members about it. You can always expand and refine based on what works for your farm and your community.
Remember that these programs do more than just increase member numbers. They deepen the relationships you already have. When members actively participate in growing your farm, they become more invested in its success. They show up more reliably, engage more thoughtfully with what you’re growing, and stick around longer.
Your current members already believe in your farm. Give them an easy way to share that belief with others, recognize their efforts, and watch your community grow organically. The farmers who’ve built lasting CSAs through referrals all say the same thing: the connections matter more than the conversions, and ironically, that’s exactly what makes the conversions happen.
Sustainable fine dining merges exceptional culinary artistry with rigorous environmental stewardship, transforming luxury restaurants into laboratories for zero-waste systems, regenerative agriculture partnerships, and carbon-neutral operations. The movement has grown from a handful of pioneering chefs in the early 2020s to a defining standard across top-tier establishments, where sourcing decisions carry as much weight as plating aesthetics.
At its core, this approach redefines what it means to eat well. Restaurants now build entire menus around what nearby farms harvest each week, composting every scrap, filtering and reusing water, and calculating the carbon footprint of each dish. Some have gone further, planting their own gardens, raising heritage livestock, and fermenting ingredients that would otherwise spoil.
For diners, the experience offers more than a meal. It’s a window into what’s possible when food systems prioritize soil health, biodiversity, and fair labor practices without sacrificing flavor or creativity. The same principles that guide a Michelin-starred kitchen, like understanding seasonal rhythms and building relationships with growers, translate directly to home cooking and community-supported agriculture.
This shift matters because fine dining has always influenced broader food culture. When celebrated chefs champion local organic farmers and prove that sustainability enhances rather than limits culinary excellence, the ripple effects reach farmers’ markets, grocery stores, and backyard gardens. The techniques being refined in these kitchens, from root-to-stem cooking to natural fermentation, offer practical lessons for anyone committed to eating responsibly while supporting their local food economy.
What Makes Fine Dining Sustainable?
Sustainable fine dining reimagines luxury through the lens of environmental responsibility. Rather than showcasing rare ingredients flown in from distant continents, these restaurants demonstrate excellence by working within ecological boundaries. The approach marks a fundamental shift from the traditional fine dining model, where opulence often meant abundance and waste.
At its core, sustainable fine dining operates on a simple philosophy: exceptional food shouldn’t cost the earth. This means rethinking every aspect of how a restaurant sources, prepares, and serves meals. The goal isn’t just to reduce harm, it’s to create dining experiences that actively support healthy food systems and local communities.
The movement relies on several interconnected practices that set it apart from conventional luxury dining:
Farm-to-table fine dining
Direct relationships between chefs and local farms, eliminating middlemen and ensuring ingredients travel minimal distances from harvest to plate. This approach guarantees peak freshness while supporting regional agriculture.
Nose-to-tail cooking
Using every part of an animal or vegetable, turning what conventional kitchens discard into celebrated dishes. This practice honors the ingredient while dramatically reducing waste.
Hyper-local sourcing
Prioritizing ingredients grown or produced within a tight geographic radius, often just miles from the restaurant. This radical commitment to place reduces transportation emissions and celebrates regional flavors.
Zero-waste kitchens
Comprehensive systems that divert food scraps to compost, repurpose by-products, and eliminate single-use packaging. These operations aim for literally nothing entering the landfill.
Seasonal menus form the backbone of this approach. Instead of offering tomatoes year-round, sustainable restaurants celebrate what’s actually growing now. This constraint pushes chefs toward creativity rather than limiting them. Spring might feature tender peas and ramps, while autumn showcases squash and root vegetables.
Ethical ingredient selection extends beyond organic certification. These restaurants ask deeper questions: Were workers paid fairly? Does this seafood come from healthy fish populations? Can we source this locally instead of importing it? The answers shape every menu decision, proving that luxury and responsibility aren’t opposites, they’re partners in creating truly exceptional food.
The Farm-to-Fine-Dining Connection
Why Chefs Are Choosing CSA Partnerships
Fine dining chefs are increasingly drawn to CSA partnerships because these relationships solve problems that traditional supply chains can’t. When a chef receives a box of produce harvested that morning, they’re working with ingredients at peak flavor and nutritional value, something that matters tremendously when every element on a plate needs to shine. That 24-hour difference between harvest and kitchen transforms how vegetables taste and perform.
Beyond freshness, CSA farms offer access to varieties you won’t find through conventional distributors. Heirloom tomatoes in twelve different colors, obscure greens with complex flavor profiles, or fingerling potatoes in unusual shapes, these ingredients become signature elements that distinguish one restaurant from another. A chef might discover a purple cauliflower or lemon cucumbers that spark an entirely new dish concept.
The seasonal constraint actually fuels creativity rather than limiting it. When a farm delivers whatever is ready that week, chefs must adapt and innovate. This pushes culinary teams to develop techniques and combinations they might never have explored with year-round access to the same ingredients. One week might bring an abundance of zucchini blossoms, the next an unexpected surplus of kohlrabi. That variability keeps menus dynamic and forces chefs to stay sharp.
CSA partnerships also eliminate the middleman markup while ensuring farmers receive fair compensation. For restaurants operating on thin margins despite high menu prices, this direct relationship makes financial sense while supporting the local food economy they want to champion.
A harvest basket of mixed seasonal produce represents the farm-to-dining link that supports freshness and creativity on high-end menus.
How These Partnerships Support Local Agriculture
When fine dining restaurants commit to sourcing from local organic farms, they create a lifeline for small-scale agriculture. These partnerships provide farmers with predictable, year-round income through regular wholesale orders, a stark contrast to the uncertainty of farmers’ markets where sales fluctuate with weather and foot traffic.
The financial advantages extend beyond stable revenue. Direct farm-to-restaurant relationships eliminate middlemen, meaning farmers keep more of each dollar while restaurants gain fresher ingredients. For small operations running on tight margins, this difference can determine whether a farm survives or folds.
These collaborations also boost farm visibility in ways traditional distribution channels never could. When a respected chef highlights a specific farm on their menu or social media, it introduces that producer to an audience of food enthusiasts who might become CSA members or market customers. That word-of-mouth marketing proves invaluable for farms without advertising budgets.
Perhaps most importantly, these partnerships validate sustainable farming practices. When top-tier restaurants publicly choose organic, regenerative methods, they signal to the broader food industry that environmental stewardship and quality aren’t just compatible, they’re inseparable.
Root-to-stem cooking emphasizes using the entire ingredient, turning overlooked parts into standout flavors.
Innovative Sustainable Practices in High-End Kitchens
Walk into the kitchen of a top sustainable restaurant and you will see something different from the usual high-end operation. Beyond the precision and artistry, there is a deliberate system where nothing goes to waste and every resource is carefully managed. These kitchens prove that environmental responsibility and culinary excellence are not just compatible but mutually reinforcing.
Composting has moved far beyond simply tossing scraps into a bin. Leading restaurants now separate organic waste into multiple streams, creating closed-loop systems where vegetable trimmings become compost for their own herb gardens or partner farms. Some establishments track waste by weight and ingredient type, using data to refine purchasing decisions and reduce food waste emissions over time. What cannot be composted often finds another purpose entirely.
The creative use of by-products separates sustainable kitchens from conventional ones. Carrot tops become vibrant pestos. Fish bones and vegetable scraps transform into rich stocks. Stale bread gets ground into breadcrumbs or turned into croutons rather than discarded. This root-to-stem philosophy extends the value of every ingredient while reducing the volume heading to landfills. When restaurants save surplus food through preservation techniques like pickling, fermenting, and curing, they create signature items that define their menus.
Root-to-stem cooking that uses entire vegetables, from beet greens to broccoli stalks
House-made preserves and ferments that transform seasonal surplus into year-round ingredients
On-site kitchen gardens and rooftop farms that supply fresh herbs and microgreens
Renewable energy systems including solar panels and energy-recovery ventilation
Zero-packaging sourcing arrangements where ingredients arrive in reusable containers
Energy efficiency matters tremendously in kitchens that run twelve-plus hours daily. High-end sustainable restaurants invest in induction cooktops that heat faster while using less electricity, combi ovens that combine multiple cooking methods in one appliance, and LED lighting throughout. Smart ventilation systems adjust airflow based on actual cooking activity rather than running at full capacity constantly. These upgrades slash cooking energy consumption by thirty to fifty percent compared to traditional setups.
Water conservation takes multiple forms. Low-flow pre-rinse spray valves at dish stations use a fraction of the water without sacrificing cleaning power. Some restaurants install systems that capture and filter water from ice machines and steamers for reuse in non-food applications. Others work with suppliers who practice water-conscious agriculture, recognizing that sustainability extends backward through the entire supply chain. The result is kitchens that operate with remarkable efficiency while producing food that rivals any conventional fine dining establishment.
The composting corner in a high-end kitchen shows how sustainability practices can be integrated without sacrificing refinement.
Seasonal Menus: The Heart of Sustainable Fine Dining
Walk into a truly sustainable fine dining restaurant in July, and you’ll find a menu celebrating summer tomatoes and zucchini blossoms. Return in November, and those same chefs will be crafting dishes around root vegetables and winter squash. This isn’t just culinary whimsy, seasonal menus form the backbone of sustainable restaurant operations.
When restaurants commit to seasonal eating, they drastically cut their carbon footprint. A tomato shipped from halfway around the world in January carries an enormous environmental cost compared to one harvested from a nearby farm at peak ripeness. By aligning menus with local harvest cycles, fine dining establishments eliminate the need for long-haul transportation and energy-intensive greenhouse production. The ingredients arrive fresher, often within hours of harvest, which means better flavor and higher nutritional value on the plate.
This approach also changes how chefs think about their craft. Rather than ordering whatever ingredients they want year-round, seasonal constraints push culinary teams toward creativity. They must ask: What can we do with an abundance of snap peas right now? How do we make Brussels sprouts exciting for the third month running? These limitations spark innovation, leading to unique preparations and flavor combinations that wouldn’t exist in a kitchen with unlimited global access.
Many sustainable restaurants take this further by learning to preserve seasonally extending summer’s harvest into winter months through fermentation, pickling, and canning. A jar of preserved stone fruit becomes a January dessert component. Pickled ramps from spring appear as a garnish in fall dishes. This mirrors what home cooks and farmers have done for generations, connecting modern fine dining to traditional foodways.
The beauty of seasonal menus lies in their honesty. They tell the truth about where you are and what the land can provide right now, turning each meal into a reflection of place and time.
A seasonal tasting menu highlights how fine dining can feel luxurious while staying grounded in local harvests and careful sourcing.
What Everyday Diners Can Learn from Sustainable Fine Dining
You don’t need a Michelin star budget to eat more sustainably. The same principles that guide fine dining kitchens, thoughtful sourcing, minimal waste, seasonal eating, work beautifully in home cooking and everyday restaurant choices. What changes is the scale, not the philosophy.
Start by rethinking your relationship with ingredients. Fine dining chefs obsess over provenance because quality and sustainability go hand in hand. You can do the same by choosing local, organic produce when possible. It’s fresher, supports nearby farms, and typically requires less energy to reach your table. Even one farmers market trip per week shifts your eating habits toward seasonal rhythms.
Waste reduction translates directly from restaurant kitchens to home. Professional chefs use every part of an ingredient, carrot tops become pesto, chicken bones turn into stock, stale bread becomes croutons. Apply energy-efficient cooking techniques and plan meals around what you already have rather than impulse shopping. Store produce properly using eco-preservation methods to extend shelf life. These habits save money while reducing your environmental footprint.
Here’s how to incorporate fine dining sustainability principles into your daily routine:
Shop at farmers markets or join a CSA to access seasonal, locally grown ingredients while supporting small-scale organic agriculture.
Plan weekly menus around what’s in season rather than forcing out-of-season ingredients that require long-distance shipping.
Reduce food waste by using scraps creatively, composting what you can’t use, and storing perishables properly.
Support local restaurants that prioritize sustainable practices, even if they’re not fine dining establishments.
Cook at home more often using whole ingredients, which gives you control over sourcing and reduces packaging waste.
The beauty of these practices is their flexibility. You won’t execute them perfectly every time, and that’s fine. Even small shifts matter. Choosing one seasonal vegetable over an imported option, saving vegetable scraps for stock, or asking a restaurant about their sourcing practices all contribute to a more sustainable food system.
Fine dining proves that environmental responsibility and exceptional quality aren’t opposing forces. They enhance each other. The same holds true whether you’re cooking Tuesday dinner or choosing where to celebrate an anniversary. Better ingredients, less waste, stronger connections to local food producers, these principles work at every price point and skill level.
Finding Sustainable Restaurants in Your Area
Finding restaurants that share your commitment to sustainability doesn’t require a hefty budget or inside connections. Start with the menu itself, which often reveals a restaurant’s priorities before you even step inside. Look for specific farm names rather than generic sourcing language. A menu that lists “tomatoes from Green Valley Farm” or “greens from Thompson Family CSA” signals direct relationships with local producers. Restaurants genuinely committed to sustainability typically highlight seasonal availability, sometimes noting when certain dishes will rotate off as ingredients change.
Certifications provide helpful shortcuts in your search. The Green Restaurant Association certification, LEED credentials for the building, and local sustainability seals indicate verified eco-friendly practices. Organic certification for ingredients, Fair Trade partnerships, and membership in organizations like the Sustainable Restaurant Association also matter. Don’t hesitate to ask your server direct questions about sourcing practices, composting programs, or seasonal menu changes. Staff at truly sustainable establishments usually welcome these conversations and can explain their restaurant’s specific commitments.
Online research extends your options significantly. Check restaurant websites for sustainability statements or farm partnership pages. Many now share their composting tonnage, energy reduction goals, or links to their ingredient suppliers. Search local food blogs and sustainability directories, which often maintain curated lists of eco-conscious establishments. Social media accounts frequently showcase chef visits to partner farms or highlight seasonal ingredient arrivals.
Remember that sustainable dining exists across price ranges. A neighborhood café buying from the farmers market and composting scraps lives these values just as authentically as upscale establishments with elaborate zero-waste programs. Your support matters regardless of where you choose to eat.
Sustainable fine dining proves that luxury and environmental stewardship aren’t opposing forces, they’re natural partners. These restaurants show us that the pursuit of excellence actually demands respect for ingredients, producers, and the planet. When a chef treats a carrot with the same reverence as a truffle, sourcing it from a local organic farm and using every part creatively, that’s not compromise. That’s craft at its highest level.
You don’t need a reservation at a Michelin-starred restaurant to embrace these principles. Every time you choose seasonal produce from your farmers market, support a CSA farm, or plan meals that minimize waste, you’re participating in the same movement. The real power of sustainable fine dining lies in its ripple effect, inspiring chefs at neighborhood bistros, home cooks rethinking their grocery habits, and eaters everywhere demanding better practices.
As more restaurants adopt these values and more diners vote with their wallets, we’re building a food system where quality, community, and sustainability reinforce each other. That future is already taking shape, one thoughtfully sourced meal at a time.
Cooking basics classes offered through Community Supported Agriculture programs teach CSA members how to prepare unfamiliar seasonal vegetables and transform their weekly produce boxes into practical, delicious meals. These hands-on workshops typically run 60 to 90 minutes and cover knife skills, vegetable preparation techniques, and simple recipes designed around what’s actually in season at your farm.
If you’ve ever stared at a kohlrabi or a bundle of garlic scapes wondering what to do next, you’re exactly who these classes serve. CSA farms across North America have discovered that educational programming doesn’t just help members use their shares more fully. It dramatically reduces turnover, builds community connections, and turns nervous novice cooks into confident advocates who renew year after year.
The concept is straightforward but powerful. Rather than generic cooking instruction, these classes focus on the vegetables members receive in their boxes each week. A June class might tackle spring greens and radishes, while August sessions dive into tomato preservation and summer squash creativity. Many farms bring the instruction right to pickup sites, making it convenient for members to attend before grabbing their CSA meals for the week.
Farmers benefit from reduced waste and stronger member relationships. Members gain practical skills that make their CSA investment more valuable. Whether you’re a farm considering adding classes or a consumer researching which CSA offers the best support, understanding how these programs work helps you make informed decisions about your local food journey.
A CSA member explores the weekly share and prepares to cook, turning unfamiliar produce into something manageable.
Why CSA Members Need Cooking Basics Classes
Picture this: you’ve just picked up your CSA box, brimming with vibrant greens, oddly-shaped root vegetables, and a bunch of herbs you can’t quite identify. You’re excited about supporting local agriculture, but as you stand in your kitchen staring at three pounds of chard and something labeled “kohlrabi,” a familiar anxiety sets in. You’re not alone. Thousands of well-intentioned CSA members face this weekly dilemma, caught between their commitment to sustainable eating and the practical reality of cooking with unfamiliar, seasonal ingredients.
The challenges stack up quickly:
What do I do with kohlrabi, and why does it look like an alien vegetable?
How to use a whole bunch of kale before it wilts into a soggy mess
Cooking for two when you receive enough produce for six people
Making dinner after work when every vegetable needs washing, trimming, and figuring out
Avoiding the guilt of throwing away expensive organic produce you couldn’t get to in time
This disconnect costs farms members. When subscribers repeatedly waste produce or feel overwhelmed, they don’t renew. Research shows that knowledge shapes household waste patterns, meaning the gap isn’t commitment but capability. Most CSA dropouts genuinely wanted to continue, they just didn’t know how to turn their weekly shares into actual meals their families would eat.
That’s where cooking workshops change everything. When farms teach practical skills aligned with what’s currently in the box, cooking techniques improve engagement and retention rates. Members gain confidence, waste drops, and the investment in organic produce finally feels manageable rather than stressful. The box transforms from a weekly puzzle into something you actually look forward to unpacking.
What Makes CSA-Based Cooking Workshops Different
CSA cooking workshops aren’t your typical cooking class where you follow a predetermined menu from a glossy cookbook. These sessions respond directly to what’s ripe right now, what’s packed in your share this week, and what’s growing just steps away from the kitchen. That connection creates an entirely different learning experience.
When you walk into a CSA workshop, you’re often handling vegetables harvested that morning. The instructor might point to the field where your rainbow chard came from or explain why this week’s tomatoes taste different from last week’s. This farm-to-table immediacy means the skills you learn apply instantly to the produce sitting in your fridge at home. There’s no wondering whether you can find the ingredients or whether they’ll be as fresh.
The seasonal focus distinguishes these classes from generic cooking instruction. Instead of learning to prepare asparagus in November, you’re mastering what to do with an abundance of summer zucchini or late-fall Brussels sprouts. The curriculum follows nature’s schedule, building your confidence with each season’s unique challenges. You’ll learn preservation when tomatoes flood your box in August, not as an abstract skill but as an immediate solution to the thirty pounds of sauce tomatoes you just brought home.
Perhaps most importantly, you’re learning alongside fellow CSA members who share your specific questions and frustrations. Everyone in the room received the same mysterious kohlrabi or overflowing bunch of kale. This shared experience creates genuine community, transforming isolated home cooks into a supportive network that continues exchanging tips and recipes long after the workshop ends. You’re not just taking a class; you’re joining a community that’s figuring out seasonal eating together.
Essential Skills Covered in CSA Cooking Basics Classes
Hands-on cooking instruction helps CSA members build confidence with basic prep and techniques for whatever arrives in their boxes.
Knife Skills and Vegetable Prep
Most CSA cooking workshops start with the knife work that intimidates people most: turning a knobby kohlrabi or dense butternut squash into dinner-ready pieces without losing a fingernger or spending 20 minutes wrestling with produce.
Instructors typically begin with proper grip and a stable cutting board, then move quickly to the vegetables members actually struggle with. You’ll learn the peeler trick for kohlrabi’s thick skin, how to safely halve winter squash (microwave it for 90 seconds first), and the fastest way to strip kale leaves from their tough stems. These aren’t restaurant techniques, they’re shortcuts that get food on the table faster.
The real value comes from handling vegetables you’ve never cooked before while someone experienced guides you. When your CSA box arrives with celeriac or romanesco, you’ll remember exactly how to break it down instead of shoving it to the back of the fridge. Workshops often provide cheap Y-peelers and basic chef’s knives so members can practice with decent tools, and many farmers send participants home with technique cards showing the vegetables they’re most likely to encounter in upcoming shares.
Preservation Techniques for Abundant Harvests
When your CSA box overflows with greens or delivers a dozen summer squash at once, knowing simple preservation tricks becomes essential. Most CSA cooking classes dedicate time to quick techniques that make produce last without requiring elaborate equipment or hours of work.
Blanching and freezing greens takes minutes: briefly dunk kale or chard in boiling water, shock in ice water, squeeze dry, and freeze flat in bags. You’ll have ready-to-use greens for soups and sautés all winter. Quick pickling transforms surplus cucumbers, radishes, or green beans into crunchy additions, just pack vegetables in jars with hot vinegar, salt, and spices. They’re fridge-ready within hours.
Herb pastes preserve summer’s bounty beautifully. Blend basil, cilantro, or parsley with olive oil and freeze in ice cube trays for instant flavor bombs. For members who want to go deeper, workshops often introduce basic canning methods like water-bath processing for tomatoes and jams.
Simple storage wisdom matters too: keeping carrots in damp sand, storing potatoes in darkness, wrapping greens in damp towels. These aren’t complex skills, they’re confidence-builders that prevent the heartbreak of wasted organic produce.
Building Flavor Without Complicated Recipes
The real transformation in CSA cooking classes happens when members stop following recipes line-by-line and start understanding flavor principles. Most workshops dedicate time to building confidence with simple seasoning frameworks that work no matter what vegetables arrive in your box.
The teaching starts with salt, acid, fat, and heat as foundational elements rather than mysterious chef secrets. A drizzle of olive oil, a squeeze of lemon, and a pinch of flaky salt can elevate roasted turnips or sautéed greens equally well. Instructors demonstrate this principle with whatever produce is abundant that week, showing how the same technique transforms completely different vegetables.
Many farms teach what they call “formula cooking” rather than rigid recipes. A basic stir-fry formula works for bok choy, snap peas, or sliced kohlrabi: hot pan plus oil plus aromatics plus vegetables plus finishing sauce. Members learn to swap vegetables freely while keeping the method constant, which builds genuine cooking confidence.
Simple sauce templates become game-changers for nervous cooks. A tahini-lemon dressing, a quick garlic-butter finish, or a honey-vinegar glaze each have three ingredients but transform anything from roasted carrots to steamed kale. Workshops often send members home with a handful of these foundational formulas written on cards, creating a toolkit rather than a collection of single-use recipes.
The focus stays relentlessly practical: get dinner on the table using what you have, not what a cookbook assumes you have.
How CSA Farms Structure Their Cooking Workshops
CSA farms have developed diverse workshop models to fit their resources, member needs, and seasonal rhythms. The key is finding a format sustainable for the farm while genuinely helpful to members navigating their weekly shares.
On-farm workshops create the strongest connection between food and place. Members gather in a farm kitchen, barn, or outdoor pavilion while the farmer or guest instructor demonstrates techniques using that week’s harvest. These typically run 90 minutes to two hours, often on weekends when members pick up shares. Equipment and ingredients come from the farm, though participants might bring their own knives or storage containers to practice with tools they’ll actually use at home. The hands-on environment builds community naturally as people chop alongside neighbors.
Virtual demonstrations exploded during 2020 and stuck around because they solve real problems: commute time, childcare conflicts, and weather uncertainties. A farmer can stream a 30-minute demo from their kitchen, showing members how to tackle the week’s challenging vegetable while answering questions in real time. Production quality doesn’t need to be fancy. Members care more about seeing actual techniques than perfect lighting. Recordings stay available for members who couldn’t attend live, extending the workshop’s value.
Seasonal series work well for farms wanting structured programming without weekly commitment. Four sessions timed to spring greens, summer abundance, fall roots, and winter storage crops give members a framework for the entire year. This model allows farms to bring in professional chefs or nutritionists for specific sessions, spreading costs across committed participants who pay upfront for the series.
Format
Best For
Typical Cost
Time Commitment
On-Farm Classes
Building community, hands-on learners
$25-45 per session
2 hours plus travel
Virtual Demos
Busy members, recorded access
Free-$15 per session
30-45 minutes
Seasonal Series
Committed learners, deeper skills
$80-150 for 4 sessions
6-8 hours over season
Drop-In Sessions
Flexible schedules, low barrier
Free or donation-based
45-60 minutes
Drop-in sessions offer the lowest barrier to entry. Farms schedule informal cooking demos during regular pickup times, perhaps the first Saturday of each month. Members stop by if interested, watch for a bit, grab a recipe card, and continue with their day. No registration, no separate trip required. While engagement runs shallower than dedicated workshops, these casual sessions reach members who wouldn’t commit to a formal class but still need guidance.
Most farms bundle workshop costs into share prices or keep fees minimal, viewing education as member retention rather than profit center. Equipment stays simple: farms provide cutting boards, bowls, and basic tools, but participants bring their own knives to practice with familiar equipment.
Success Stories: Farms Making It Work
Three farms across North America show how cooking workshops transform CSA operations from delivery services into thriving food communities.
Willow Creek Farm: Monthly Potluck Model
Sarah Chen runs a 40-member CSA outside Portland and started hosting monthly potluck cooking sessions in her barn three years ago. Members bring one dish made from their shares while Sarah demonstrates a seasonal technique, like roasting root vegetables or quick-pickling summer squash. “I spend maybe two hours prepping, and members handle the rest,” Sarah explains. Her renewal rate jumped from 62% to 89% after introducing the potlucks. The secret? Members now know each other by name and share recipes via text between sessions. Several have become her farm volunteers during harvest crunch times.
Green Valley Farm: Professional Chef Partnership
This 200-member operation in Vermont partners with a local culinary instructor who leads quarterly hands-on workshops in a rented commercial kitchen. Members pay $25 per class, which covers ingredients and take-home recipe cards. Farm manager Tom Rodriguez initially worried about the logistics but found the investment worthwhile. “We calculated that keeping just eight more members each season pays for the entire workshop program,” he notes. The classes also became unexpected marketing, as participants often bring friends who later join the CSA. The farm-to-table CSA model strengthens when members see exactly how restaurant-quality meals come from their weekly boxes.
Midwest Growers Cooperative: Pooled Resources
Five small farms formed a cooperative that rotates hosting biweekly cooking demos at their farmers market booth. Each farm contributes one session per month, featuring their specialty crops. This shared approach lets tiny operations offer consistent programming without overwhelming any single farmer. Member retention across all five farms improved by an average of 23% in the first year, and the cooperative gained visibility that helped recruit 40 new members collectively.
A home-cooked dish made from farm-fresh ingredients shows how CSA workshops turn weekly produce into satisfying meals.
Finding or Starting a CSA Cooking Workshop
Most CSA farms don’t advertise cooking workshops on their main websites, so your first step is simply asking. Email or call your farmer during the off-season when they’re less buried in harvest work. Frame it as member feedback: “I’d love to use more of my share but need help preparing unfamiliar vegetables. Would you consider hosting cooking demonstrations?”
If your farm already runs workshops, ask about frequency, cost, and whether they’re included in membership fees or offered as add-ons. Some farms bundle classes with premium share tiers, while others charge per session to cover instructor costs.
For CSA members wanting to start something new, gauge interest through your farm’s Facebook group or member newsletter. A simple poll asking “Would you attend monthly cooking sessions if offered?” gives farmers concrete data. When half a dozen members express interest, you’ve made a compelling case.
Farmers considering this addition should start small. Partner with a member who’s already a confident cook for an informal harvest potluck where everyone prepares one dish from that week’s box. This tests interest without major investment. Local extension offices and culinary schools often connect farms with instructors seeking teaching experience, sometimes at reduced rates or through grant-funded programs.
The National Sustainable Agriculture Information Service offers planning templates specifically for farm-based educational programming. Your state’s organic farming association likely lists farms successfully running workshops who’ll share their approach.
Cooking basics classes transform the CSA experience from a weekly challenge into a genuine partnership between farm and table. When members gain confidence with their produce, they stop viewing unusual vegetables as intimidating obstacles and start seeing them as exciting possibilities. This shift matters profoundly for both individual households and the broader local food movement.
The ripple effects extend beyond individual kitchens. Members who understand how to use their shares waste less food, support their farmers more enthusiastically, and often renew their memberships year after year. They become ambassadors for seasonal eating, sharing techniques with friends and family who might then join a CSA themselves.
Whether you’re already part of a farm share or considering joining one, cooking workshops deserve attention. Ask your farmer about existing classes or express interest in starting them. For those between CSA seasons, local extension offices and farm cooperatives often know which operations offer this support.
These classes represent sustainable living in action: reducing waste, strengthening local agriculture, building community skills, and celebrating the honest work of growing good food. That’s a recipe worth following.
Heat preservation canned food temperature refers to the precise thermal thresholds required to safely eliminate harmful bacteria while locking in nutrients during the canning process, typically between 212°F for high-acid foods and 240°F for low-acid varieties.
Getting temperature right isn’t just a food safety checkbox. It’s the difference between jars that nourish your family through winter and those that spoil within weeks or, worse, harbor invisible dangers like botulism. For CSA members and home gardeners drowning in August’s tomato glut or September’s bean harvest, understanding these temperature principles transforms peak-season abundance into year-round eating security.
The science is straightforward but unforgiving. Each food type demands specific heat levels held for exact durations to destroy pathogens without cooking away the vitamins, minerals, and flavors you grew so carefully. Water bath canning works beautifully for acidic foods like pickles and jams, while pressure canning becomes non-negotiable for vegetables, meats, and anything with a pH above 4.6.
This guide breaks down the temperature requirements that keep your preserved food safe, explains how different preservation methods generate and maintain heat, and walks through practical techniques used by successful small-scale farmers who’ve built thriving value-added businesses around their canning operations. You’ll discover which foods need which temperatures, how to verify your equipment maintains those levels, and common pitfalls that compromise both safety and nutrition. Whether you’re putting up your first dozen jars or scaling to a commercial kitchen, mastering heat preservation means your hard-won harvest feeds you properly all year long.
What Is Heat Preservation in Canned Food Temperature?
Heat preservation in canned food temperature refers to the controlled application and maintenance of specific heat levels throughout the canning process to destroy harmful microorganisms while protecting the nutritional value of preserved foods. This scientific principle hinges on reaching and sustaining temperatures high enough to eliminate pathogens like Clostridium botulinum, which can thrive in the low-oxygen environment inside sealed jars, yet not so extreme that they strip away the vitamins and minerals that make your CSA produce valuable in the first place.
The process works through thermal energy transfer: heat penetrates the jar’s contents, raising the internal temperature to a safe threshold that halts bacterial growth and enzyme activity. For home canners working with seasonal farm share bounty, understanding this temperature relationship transforms preservation from guesswork into reliable food safety. When you process tomatoes at 212°F in a water bath or green beans at 240°F in a pressure canner, you’re not just heating food arbitrarily, you’re executing a precise scientific method that balances microbial destruction against nutrient retention.
Heat Preservation
The sustained application of thermal energy during canning to eliminate spoilage organisms while maintaining food quality and nutritional content.
Headspace Temperature
The temperature of the air gap between the food and the jar lid, which affects vacuum seal formation and heat distribution during processing.
Thermal Processing
The phase where jars are exposed to controlled heat for a specified duration, ensuring the food’s center reaches pathogen-killing temperatures.
Cooling Curves
The rate at which canned foods decrease in temperature after processing, influencing seal integrity and continued enzyme inactivation.
What sets heat preservation apart from simple cooking is its dual purpose: immediate sterilization through high temperature exposure, followed by the creation of anaerobic conditions that prevent recontamination. The vacuum seal formed during cooling keeps new bacteria out, while the initial heat treatment has already neutralized what was inside. This combination gives properly canned CSA vegetables and fruits their remarkable shelf stability, letting you enjoy August’s tomatoes in February without refrigeration.
How Heat Preservation Temperature Control Works
A clear look at a home canning station shows how temperature control tools fit into day-to-day preserving. The jars and water bath create a practical visual anchor for heat preservation concepts.
The Thermal Processing Phase
The thermal processing phase kicks off when you place sealed jars into boiling water or a pressure canner. Within minutes, the internal temperature of your CSA vegetables begins climbing toward the target range needed for safe preservation. This rapid heating doesn’t just warm the food, it initiates a crucial transformation that makes home canning possible.
As temperatures rise above 140°F, harmful microorganisms start to weaken. The real magic happens between 212°F and 250°F, depending on your canning method. At these temperatures, the destruction of bacteria by heat becomes highly effective, neutralizing pathogens like Clostridium botulinum that could otherwise thrive in your sealed jars. The sustained heat penetrates to the jar’s center, reaching every bean, tomato slice, or corn kernel from your farm share.
What’s remarkable is that this same heat treatment preserves most vitamins and minerals when done correctly. Water-soluble vitamins like vitamin C experience some loss, but overall nutritional value remains high, far better than letting fresh produce spoil unused in your fridge.
Temperature Maintenance and Cooling
After the initial heat treatment destroys harmful bacteria, the cooling phase becomes equally critical for preserving your CSA vegetables’ nutritional value. Rapid temperature drops can cause nutrient loss, particularly water-soluble vitamins like C and B-complex that leach out when condensation forms inside jars.
The ideal cooling process maintains gradual temperature reduction, typically dropping from processing heat to room temperature over 12 to 24 hours. This controlled descent allows the jar contents to contract slowly, creating the vacuum seal that prevents recontamination. When you rush cooling by placing hot jars in cold water or drafty areas, you risk thermal shock that cracks jars and incomplete seals that let spoilage organisms back in.
During cooling, the lid’s sealing compound softens from residual heat, then firms as it cools, bonding to the jar rim. You’ll hear that satisfying “ping” as each lid pulls down and seals. This process works best when jars cool undisturbed on towels or racks away from temperature extremes.
For your farm share produce, patient cooling means those summer tomatoes and green beans retain more of their original vitamin content months later.
Types of Heat Preservation Methods for Canned Foods
Water Bath Canning
Water bath canning operates at 212°F, the temperature at which water boils at sea level. This approach works for high-acid foods (pH below 4.6) because the acidic environment naturally inhibits bacterial growth, making the lower temperature sufficient for safety. When your CSA box arrives loaded with tomatoes, berries, peaches, or cucumbers for pickling, these are perfect candidates for boiling-water processing for high-acid foods.
The process requires submerging filled jars in boiling water for a specific duration based on jar size and altitude. At this temperature, yeasts, molds, and most bacteria die off, while the heat drives air from the jar to create a vacuum seal during cooling. Processing times range from ten minutes for small jars of jam to forty-five minutes for quart jars of whole tomatoes.
These time-tested canning methods preserve vitamin C and antioxidants reasonably well in your farm-fresh produce. Tomatoes, pickled vegetables, fruit preserves, salsas, and chutneys all thrive with water bath canning. The key is maintaining that rolling boil throughout processing and adjusting time upward if you live above 1,000 feet elevation, where water boils at lower temperatures.
Pressure Canning
Pressure canning uses higher temperatures than water bath methods, making it essential for preserving low-acid foods like green beans, corn, carrots, and other vegetables commonly found in your CSA delivery. While water bath canning reaches 212°F, pressure canners achieve temperatures of 240 to 250°F for low-acid foods by creating a pressurized environment. This elevated heat is necessary to destroy Clostridium botulinum spores, which can survive at boiling temperature but are eliminated at these higher ranges.
The pressure canner’s sealed environment traps steam, building pressure that raises the boiling point of water. At 10 to 15 pounds of pressure (depending on your altitude and canner type), you create the conditions needed to safely preserve proteins and low-acid vegetables. This method allows CSA members to make produce last longer while retaining valuable nutrients like vitamin C and B vitamins that might otherwise deteriorate with improper processing. The key is maintaining steady pressure throughout the recommended processing time, ensuring every jar reaches the target temperature at its center.
Steam Canning
Steam canning has gained traction among CSA members as a faster, more energy-efficient alternative to traditional water bath methods for high-acid foods. This technique uses atmospheric steam rather than boiling water to achieve the necessary 212°F processing temperature.
The method works by heating a small amount of water in the base of a specialized steam canner. As steam rises and surrounds the jars, it transfers heat directly through convection. Most CSA vegetables and fruits suitable for water bath canning, including tomatoes, pickles, jams, and chutneys, process well with steam, completing in roughly the same time.
Steam canning offers practical advantages when you’re facing a bumper crop from your farm share. The canner uses only 1-2 quarts of water versus the 7-8 gallons a water bath requires, reducing both heating time and kitchen humidity during summer preservation sessions. The lightweight equipment makes it easier to handle multiple batches.
However, steam canning isn’t suitable for low-acid foods requiring pressure processing, and you’ll need an approved steam canner with a temperature indicator to ensure safe processing. Always verify that your specific produce and recipe are approved for steam canning before proceeding.
Temperature Ranges and Their Impact on Nutrition
Different nutrients respond to heat in distinct ways, which is why understanding temperature ranges helps you stop nutrient loss from your CSA harvest. Water-soluble vitamins like vitamin C and several B vitamins start degrading around 180°F, while fat-soluble vitamins A and E tolerate higher temperatures better. The sweet spot for most home canning falls between 212°F for water bath methods and 240°F for pressure canning, hot enough to destroy pathogens but not so extreme that it obliterates nutritional value.
Processing time matters just as much as peak temperature. Those gorgeous heirloom tomatoes from your farm share retain about 90% of their lycopene when processed at 212°F for the minimum safe time, but holding them at that temperature for twice as long drops retention to around 70%. Minerals like calcium, iron, and potassium stay stable across all canning temperatures, which is good news for preserving leafy greens and beans.
Here’s what happens to specific nutrients at different temperature points:
Vitamin C degrades rapidly above 180°F; process berries and peppers at minimum safe times to preserve it
Folate in green beans and spinach retains best at 240°F for shorter durations rather than lower temperatures for longer periods
Beta-carotene in carrots and squash actually becomes more bioavailable with heat processing between 212-240°F
Polyphenol antioxidants in stone fruits survive best when canned immediately after harvest, regardless of temperature method
Your freshest CSA produce preserves best because enzymes haven’t had time to degrade nutrients before canning begins. Blanching vegetables from your farm box for 2-3 minutes at 212°F before packing jars deactivates enzymes that would otherwise continue breaking down vitamins during storage. This pre-treatment step, combined with quick processing at the correct temperature for your food’s acid level, locks in the nutritional benefits you’re counting on for winter meals.
Fresh CSA produce ready for canning sets the stage for why heat preservation temperature matters. It reinforces the connection between peak-season nutrition and correct thermal processing.
Practical Uses for CSA Members
Managing Your Weekly Farm Share
When your CSA box arrives each week, resist the urge to can everything at once. Instead, group items by their acidity and required processing method. High-acid tomatoes, cucumbers, and berries can go straight into water bath canning at 212°F, while low-acid vegetables like green beans and carrots need pressure canning at higher temperatures.
Sort produce immediately: refrigerate what you’ll eat fresh within three days, and prioritize canning anything showing soft spots within 24 hours to lock in nutrients before they degrade. Check your month-by-month produce calendar to anticipate peak abundance weeks when you’ll need extended canning sessions.
Set aside three-hour blocks for pressure canning sessions since the warm-up and cool-down phases can’t be rushed without compromising safety. Water bath canning fits smaller time windows, you can process a batch of pickles or jam in under 90 minutes. Pack jars the night before if needed, but never start heating them until you’re ready to complete the full process that same day.
Success Story: Sarah’s Summer Tomato Preservation
Sarah Martinez joined Valley View CSA in 2020, overwhelmed by 40 pounds of peak-season tomatoes arriving every August. “They’d ripen faster than I could use them,” she recalls. After attending a local canning workshop, she learned that maintaining 212°F for 45 minutes in water bath canning preserved both safety and nutrients, vitamin C retention exceeded 85% compared to refrigeration alone.
She now dedicates two Saturdays each August to processing tomatoes at proper temperatures, tracking her thermometer religiously. “I discovered that rushing the warm-up phase compromised texture, while holding steady heat created restaurant-quality sauce,” Sarah explains. Her pantry now holds 60 jars annually, supplying her family with farm-fresh nutrition through winter.
Sarah’s system extends beyond tomatoes. She adapted temperature timing for peppers, green beans, and pickles using seasonal canning recipes as guides. Her advice? “Invest in a reliable thermometer and never rush the process. Proper heat preservation means my family eats genuinely local food year-round, not just during growing season.”
Common Temperature Mistakes to Avoid
Home canners eager to preserve their CSA haul often make preventable temperature mistakes that undermine safety or nutrition. Recognizing these errors helps you protect your investment in local, organic produce.
The most dangerous mistake is failing to reach and maintain required processing temperatures. Pressure canners must reach 240°F for low-acid foods like green beans and corn. Stopping early or assuming “close enough” creates conditions where botulinum spores survive. Always use a tested recipe and verify your pressure gauge accuracy yearly.
Rushing the cooling process ranks second among common errors. Opening the canner lid immediately or running cold water over jars causes rapid temperature drops that compromise seals and can crack jars. Natural cooling also allows time for heat to penetrate the jar center fully. Let pressure canners return to zero pressure naturally, then wait ten minutes before opening.
Underestimating the impact of jar size on processing creates hidden risks. A quart jar of tomato sauce requires longer processing than a pint because heat travels more slowly through greater mass. Using the wrong time for your jar size leaves cool spots where bacteria thrive.
Temperature inconsistency during processing happens when canners reduce heat too much mid-process to prevent vigorous boiling. This drops internal temperatures below the safety threshold. Maintain steady heat throughout the recommended time, gentle boiling is normal and necessary.
Starting with cold jars in hot water or hot jars in cold water creates thermal shock that cracks glass and wastes hours of work. Match jar temperature to water temperature before processing, and your carefully preserved CSA bounty will remain intact.
A sealed jar cooling/finished on a table conveys successful heat preservation without relying on diagrams. It helps readers connect proper temperature control to reliable sealing and confident storage.
Frequently Asked Questions
CSA members who start preserving their farm share often have specific questions about temperature control. These answers address the most common concerns about heat preservation in home canning.
What temperature should I maintain for water bath canning my CSA tomatoes?
Water bath canning requires maintaining a rolling boil at 212°F (100°C) at sea level for the duration of your processing time. High-acid foods like tomatoes, pickles, and fruit preserves need this consistent temperature to eliminate harmful microorganisms while preserving nutrients.
Do I need to adjust temperatures if I live at high altitude?
Temperature remains the same, but processing time increases with altitude because water boils at lower temperatures above sea level. Add 5 minutes for every 3,000 feet above sea level for water bath canning, or adjust pressure for pressure canning according to USDA guidelines.
Can I reprocess jars that didn’t seal properly?
You can reprocess within 24 hours using the same temperature and time requirements, though you’ll lose some additional nutrients with the second heat exposure. After 24 hours, it’s safer to refrigerate and consume the food within a week rather than reprocess.
How much nutrition do I lose through heat preservation?
Properly temperature-controlled canning typically retains 60-80% of heat-sensitive vitamins like vitamin C, while minerals and fiber remain largely intact. This compares favorably to fresh produce stored for weeks, which can lose 50% or more of certain nutrients.
The key to successful canning lies in following tested temperature guidelines rather than experimenting. Your local extension office can provide altitude-specific charts and answer questions about unusual CSA items you want to preserve. Many CSA farms also host canning workshops where experienced members share their temperature control techniques and troubleshooting strategies for common crops in your area.
Types or components
Understanding the key elements that work together during canning helps CSA members control temperature effectively and preserve their harvest safely.
Heat Source: Your burner or heating element must deliver consistent, measurable heat. Gas stoves offer quick temperature adjustments, while electric coils provide steady output once calibrated. For pressure canning those low-acid CSA vegetables, reliability matters more than speed.
Thermal Mass: The water or steam surrounding your jars acts as a thermal battery, distributing heat evenly and maintaining target temperatures throughout processing. Insufficient water creates hot spots that compromise preservation.
Sealed Container: Mason jars with two-piece lids form an airtight barrier once processed. The vacuum seal that forms during cooling prevents recontamination and locks in the nutritional benefits you’re working to preserve.
Temperature Monitoring: Accurate thermometers and pressure gauges aren’t optional, they’re your safety net. Guessing temperatures risks both nutrition loss and dangerous bacterial survival.
Insulation: Your canner’s design, including lid fit and material thickness, determines how efficiently it maintains processing temperatures without constant fuel input, especially during those longer processing times required for root vegetables from your farm share.
Mastering heat preservation temperature isn’t just about food safety, it’s about honoring the work your farmers put into growing nutrient-dense produce. When you control temperature precisely during canning, you’re locking in the vitamins, minerals, and antioxidants that make your CSA share so valuable. Those peak-season tomatoes, peppers, and green beans retain their nutritional punch months after harvest, giving your family real food security.
Start small if you’re new to temperature-controlled canning. Pick one or two favorite CSA items and practice getting the temperatures right. Use a reliable thermometer, follow tested processing times, and don’t rush the cooling phase. You’ll quickly develop confidence as you see those perfectly sealed jars lining your pantry shelves.
The beauty of understanding heat preservation is that it transforms your relationship with seasonal abundance. Instead of feeling overwhelmed when thirty pounds of beets arrive in your farm share, you’ll see opportunity. You’re not just preserving food; you’re preserving the connection to your local food system, supporting sustainable agriculture, and ensuring your household enjoys farm-fresh nutrition year-round.
Your farmers grew it with care. You can preserve it with the same intention.

 darrell on