How Crop Rotation Heals Your Soil (And Boosts Your Harvest)
Rotate heavy feeders like tomatoes and corn with nitrogen-fixing legumes such as peas and clover to naturally replenish soil nutrients without synthetic fertilizers. Follow deep-rooted crops like carrots with shallow-rooted lettuce to access different soil layers and prevent nutrient depletion in any single zone.
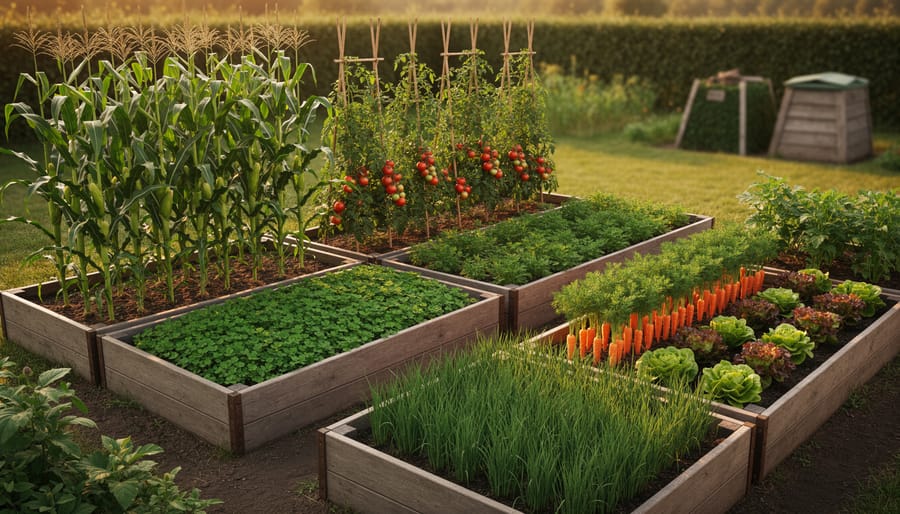
Break pest and disease cycles by never planting the same plant family in the same spot for at least three years—this simple practice dramatically reduces soil-borne pathogens and insect populations that target specific crops. Map your garden beds by family groups (nightshades, brassicas, legumes, and cucurbits) and shift each group clockwise through your space annually.
Build soil structure progressively by alternating between crops that add organic matter and those that break up compaction. Plant cover crops like winter rye or crimson clover during off-seasons to protect bare soil, suppress weeds, and pump living roots into the ground year-round. When you turn these covers under, they become green manure that feeds soil microbes and increases water retention.
This regenerative approach transforms your growing space from a resource we extract from into a living system that becomes healthier and more productive with each passing season, creating resilient soil that supports abundant harvests while requiring fewer external inputs.
What Makes Crop Rotation ‘Regenerative’?
Traditional crop rotation is certainly beneficial—it helps prevent disease buildup and stops nutrients from becoming depleted. But regenerative crop rotation? That’s where the magic happens. The key difference lies in intention and outcome: regenerative practices don’t just maintain soil health, they actively improve it year after year.
Think of basic rotation as paying your bills on time—you’re staying afloat. Regenerative rotation is like investing for the future, building wealth that compounds over time. Instead of simply alternating crops to avoid problems, regenerative farmers strategically select plants that work together to heal and enrich the soil.
Here’s how it works: regenerative rotations incorporate deep-rooted plants that break up compacted soil layers, legumes that fix nitrogen naturally, and cover crops that blanket the earth during off-seasons. This approach promotes carbon sequestration by keeping living roots in the soil throughout the year, pulling carbon from the atmosphere and storing it underground where it belongs.
The biodiversity benefits are remarkable too. By planting diverse crop families in succession, you create habitats for beneficial insects, soil microbes, and pollinators. These organisms form a living network that naturally suppresses pests, cycles nutrients, and builds resilience against drought and disease.
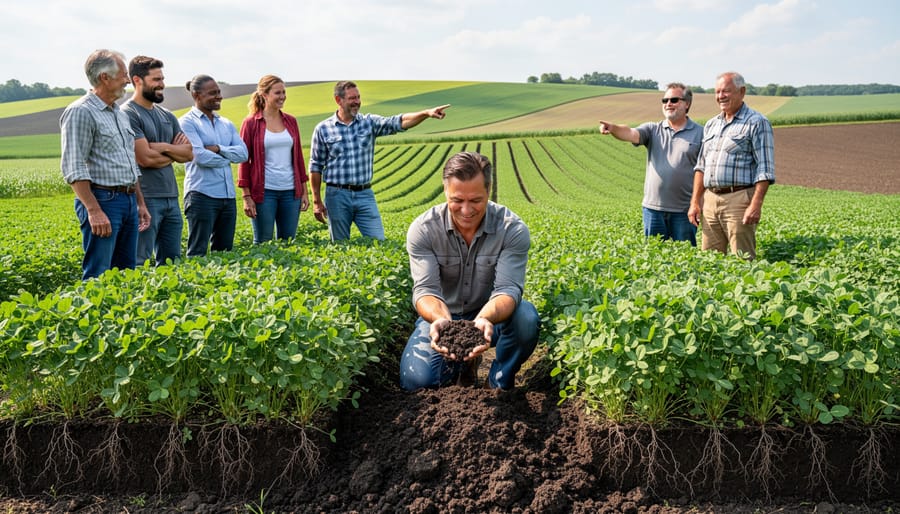
Take Sarah Chen, a small-scale organic farmer in Ontario, who transformed depleted land using regenerative rotation. Within three years, her soil organic matter doubled, and she reduced external inputs by 60%. “The soil literally came back to life,” she shares. “Now it works for me, not against me.”
The bottom line? Regenerative rotation creates self-sustaining ecosystems that require fewer inputs while producing more nutritious food—a true win-win for farmers and the environment.
The Science Behind Soil Healing
How Different Crops Feed Your Soil
Different crops contribute unique benefits to your soil, each playing a specific role in building fertility and structure. Understanding these contributions helps you design a rotation that truly regenerates your land.
Legumes like clover, peas, and beans are nature’s fertilizer factories. Through their partnership with beneficial bacteria, these plants pull nitrogen from the air and store it in root nodules, enriching the soil for future crops. The legume rotation benefits extend beyond nitrogen, as their residues decompose quickly, feeding soil microorganisms and improving overall fertility.
Deep-rooted plants such as daikon radish, alfalfa, and sunflowers act as natural tillers. Their powerful roots break through compacted layers, creating channels that improve water infiltration and allow future crops to access nutrients from deeper soil horizons. When these roots decompose, they leave behind organic matter throughout the soil profile, not just at the surface.
Cover crops work year-round to protect and nourish your soil. Winter rye prevents erosion during dormant months, while buckwheat suppresses weeds in summer. These hardworking plants prevent nutrient leaching, add organic matter, and provide habitat for beneficial insects.
Sarah Chen, a third-generation organic farmer in British Columbia, shares her experience: “After incorporating a diverse rotation with legumes and deep-rooted covers, our soil went from hard clay to crumbly perfection in just three seasons. Our yields increased without adding any external fertilizers.”
Breaking Pest and Disease Cycles Naturally
One of the most powerful benefits of crop rotation is its ability to naturally interrupt pest and disease cycles, helping you reduce or eliminate the need for chemical interventions. When you plant the same crop family in the same spot year after year, you’re essentially setting up a buffet for pests and pathogens that specialize in attacking those plants. They overwinter in the soil, multiply, and wait for their favorite meal to return.
By rotating plant families, you break this cycle. For example, tomato hornworms and early blight thrive when tomatoes, peppers, and eggplants (all nightshade family members) occupy the same beds season after season. Move your nightshades to a different location, and those pests find themselves without their preferred host plants. Many simply die off or relocate.
The same principle applies to soil-borne diseases. Clubroot in brassicas and fusarium wilt in tomatoes can persist in soil for years, but rotating to unrelated plant families starves these pathogens and reduces their populations naturally over time.
Sarah Martinez, an organic farmer in Oregon, shares her success: “After implementing a four-year rotation, our fungal disease pressure dropped by about 70 percent. We went from spraying organic fungicides weekly to maybe twice a season.”
The key is understanding plant families and planning rotations that give soil at least two to three years before the same family returns. This simple practice transforms your garden or farm into a naturally resilient ecosystem where beneficial organisms can flourish while harmful ones struggle to establish themselves.
Planning Your Regenerative Rotation
The Four-Year Rotation Framework
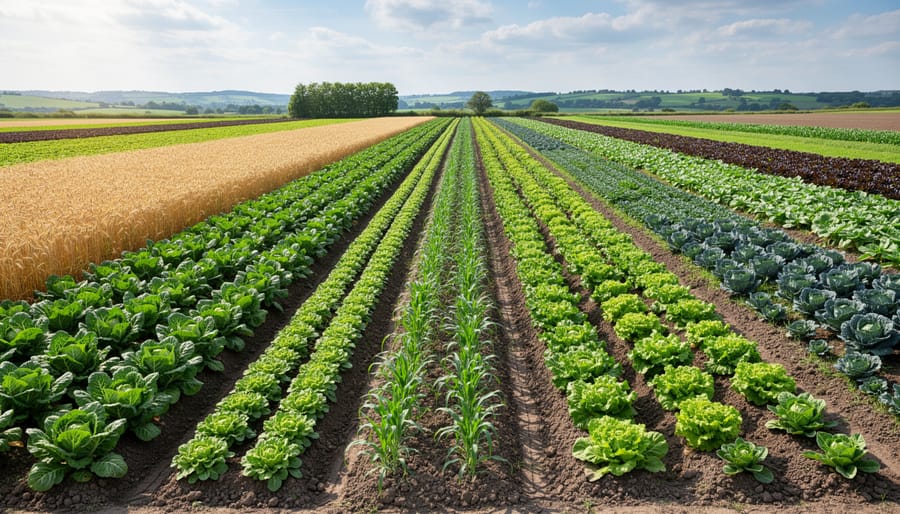
One of the most accessible and effective approaches to building soil health is the four-year rotation framework. This time-tested pattern works by strategically grouping plants based on their nutrient needs and contributions to the soil, creating a natural cycle that keeps your land productive year after year.
The rotation follows this simple sequence: heavy feeders, light feeders, legumes, and soil builders. Each category plays a distinct role in maintaining balance.
Heavy feeders kick off the cycle in Year One. These are your nutrient-hungry crops like tomatoes, corn, squash, and brassicas such as broccoli and cabbage. They thrive in rich soil and consume significant nitrogen and other nutrients. Since you’re starting with well-nourished soil from the previous rotation’s completion, these demanding plants get exactly what they need.
Year Two introduces light feeders, which include root vegetables like carrots, beets, and radishes, along with alliums such as onions and garlic. These crops require fewer nutrients and help prevent soil depletion after the heavy feeders have taken their share.
Legumes take center stage in Year Three. Peas, beans, and clover are nitrogen-fixers that actually replenish the soil through their relationship with beneficial bacteria. They essentially create fertilizer naturally, setting the stage for the next cycle.
Year Four focuses on soil builders like cover crops, including buckwheat or winter rye. These crops add organic matter, prevent erosion, and improve soil structure.
Sarah, an organic farmer in Vermont, credits this rotation with transforming her depleted farmland into thriving gardens within just two cycles. Her tomato yields doubled, and she eliminated the need for purchased fertilizers entirely, proving that working with nature’s rhythms creates abundance while building soil health for future generations.
Adapting Rotation to Your Climate and Space
Successful crop rotation isn’t one-size-fits-all. Your climate, growing season length, and available space all play crucial roles in designing a rotation plan that actually works for you.
If you’re gardening in a region with short growing seasons, focus on quick-maturing varieties and consider succession planting within each rotation phase. Cold-climate gardeners might rotate cool-season crops like lettuce and peas with hardy brassicas, maximizing the productive months available. Conversely, warm-climate growers can extend rotations year-round, incorporating multiple successions of heat-loving crops like tomatoes and peppers alongside winter vegetables.
Space constraints don’t mean you can’t rotate effectively. Small garden enthusiasts can divide their plot into just three or four sections, rotating crop families annually. Try vertical growing for vining crops to maximize space, and incorporate container gardens into your rotation strategy. Even a 10×10 foot garden can support a simple legume-leafy green-root vegetable rotation that builds soil health over time.
For larger operations, consider your equipment and irrigation systems when planning rotations. Farmer Maria Gonzalez from Oregon successfully adapted her five-acre farm by creating rotation zones based on water access, placing water-intensive crops near established irrigation lines while rotating drought-tolerant varieties in drier sections.
Regional pest and disease pressures also matter. Research common issues in your area and lengthen rotation cycles for particularly problematic crops. If tomato blight is prevalent in your region, extend the time before nightshades return to the same bed from three to four or even five years.
Remember, observation is your best tool. Keep notes on what thrives where, adjust your plan seasonally, and don’t hesitate to modify rotations based on what your soil and crops tell you. Flexibility paired with fundamental rotation principles creates resilient, productive growing spaces.
Cover Crops: The Secret Weapon
If you’re ready to take your crop rotation to the next level, cover crops are about to become your new best friend. Think of them as nature’s multitaskers, working overtime between your main growing seasons to build soil health, crowd out weeds, and even add nutrients back into the ground.
Let’s start with nitrogen fixers, the workhorses of cover cropping. Legumes like crimson clover, hairy vetch, and field peas have a special relationship with soil bacteria that captures atmospheric nitrogen and converts it into plant-available forms. Plant these before heavy feeders like tomatoes or corn, and you’ll slash your fertilizer needs dramatically. Sarah Chen, who runs a three-acre market garden in Oregon, swears by her winter-planted crimson clover. “It’s like getting free fertilizer,” she says. “Plus, the bees go crazy for those gorgeous red blooms.”
For weed suppression, you want aggressive growers that create thick, light-blocking canopies. Winter rye and buckwheat excel here, smothering potential weed seeds before they can establish. Buckwheat grows so quickly it can fill a gap between spring and fall crops in just 30 to 40 days, and it’s a pollinator magnet to boot.
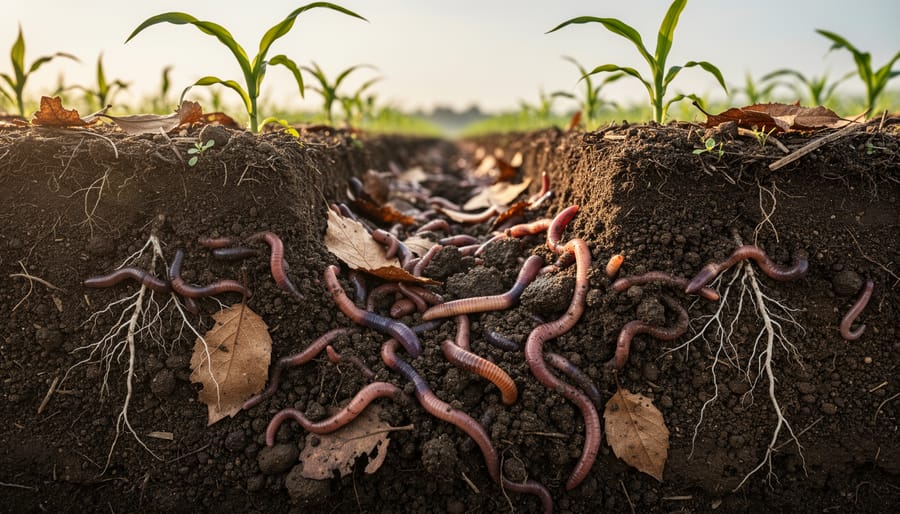
Got compacted soil? Enter the deep-rooted champions. Daikon radishes, also called tillage radishes, drill down up to three feet, creating natural channels that break up hardpan and improve drainage. When they decompose, those channels become highways for your next crop’s roots and earthworm activity.
Timing matters tremendously. Plant cool-season covers like cereal rye in fall for spring termination, or warm-season options like sudangrass after spring harvests. The key is matching your cover crop’s growth cycle with your main crop schedule, ensuring you’re building soil without sacrificing productive growing time.
Remember, cover crops aren’t just gap fillers. They’re actively regenerating your soil while your main crops rest, creating a healthier, more resilient growing system season after season.
Real Farmers, Real Results
Meet Sarah Chen, who transformed her struggling 5-acre farm in Ontario into a thriving ecosystem through strategic crop rotation. When she took over the property in 2018, her soil was compacted and depleted from years of monoculture corn. “I couldn’t push a shovel more than three inches into the ground,” she recalls. By implementing a four-year rotation of legumes, brassicas, root vegetables, and cover crops, Sarah witnessed remarkable changes. Within two seasons, her soil organic matter increased from 2.1% to 3.8%, and earthworm populations tripled. Her tomato yields jumped 40%, and customer retention at her CSA improved dramatically as produce quality soared.
Across the country in Manitoba, the Rodriguez family faced different challenges on their 80-acre operation. Persistent pest pressure and declining wheat yields had them questioning their future in farming. After attending a workshop on regenerative farming practices, they redesigned their entire system around a seven-year rotation incorporating perennial pasture, grains, and market vegetables. “The first year was financially tight,” admits Miguel Rodriguez, “but by year three, our input costs dropped 35% as soil health improved.” Their farm now supports 120 CSA members and hosts regular educational tours.
Even small-scale operations see impressive results. James Wilson gardens on just half an acre in Nova Scotia, supplying weekly vegetable boxes to 25 families. His challenge was limited space for effective rotation. His solution involved dividing his plot into twelve beds with staggered plantings throughout the season. “I never grow the same crop family in a bed more than once per year,” he explains. This intensive rotation strategy reduced his disease problems by 60% and eliminated his need for any pest interventions.
What unites these farmers is their commitment to observation and adaptation. They all emphasize keeping detailed records, testing soil regularly, and adjusting rotations based on what the land tells them. Their success proves that whether you’re managing five acres or fifty, thoughtful crop rotation delivers measurable improvements in both soil vitality and farm profitability.
Getting Started This Season
Ready to begin your crop rotation journey? The good news is that you don’t need to overhaul your entire farm or garden overnight. Start by assessing where you are right now. Take a walk through your growing space and note what you’ve planted in each area over the past few seasons. Even rough notes scratched in a notebook count as your first rotation record.
For simple record-keeping, grab a notebook or create a basic spreadsheet with columns for plot location, crops grown, planting dates, and observations about plant health and yield. You can also snap photos with your phone and organize them by season. This historical view becomes invaluable for planning future rotations.
If you’re completely new to rotation, begin with a straightforward three-year pattern. Divide your space into three sections and rotate between heavy feeders like tomatoes and squash, nitrogen-fixing legumes such as beans and peas, and light feeders including root vegetables and herbs. This basic approach fits beautifully into broader regenerative agriculture systems that restore soil vitality.
Before planting, assess your soil condition. Squeeze a handful of moist soil. Does it clump into a ball or fall apart? Observe the earthworm population when you dig. Check for crusting or compaction. These simple observations tell you plenty about soil structure and biological activity.
Remember Sarah, a community garden member in Ontario, who started with just one raised bed rotation? Within two seasons, she noticed healthier plants and reduced pest problems. Her success inspired neighboring gardeners to follow suit.
Small steps create meaningful change. Even rotating just two crop families instead of planting the same vegetables in identical spots makes a difference. Your soil will thank you, and your harvests will reflect your care.
Embracing regenerative crop rotation isn’t just about this season’s harvest—it’s about investing in the future health and productivity of your land. Whether you’re managing acres of farmland or a backyard garden, these time-tested practices work with nature to build resilient soil that gets better with each passing year.
The beauty of crop rotation is that it’s accessible to everyone. You don’t need specialized equipment or a degree in soil science to start. Begin with simple rotations between plant families, pay attention to what your soil tells you, and adjust as you learn.
Want to see these principles in action? Connect with your local CSA farms and ask about their rotation practices. Many farmers love sharing their approaches and the visible improvements they’ve witnessed. Farmer Maria Chen from Green Valley Farm notes, “When people visit during harvest season, they can literally see the difference between our rotated fields and neighboring plots—the soil structure, plant vigor, and biodiversity speak for themselves.”
Remember, every small step toward regenerative practices contributes to healthier food systems and a more sustainable future. Your soil improvement journey can start today.