darrell


Embrace a Greener Lifestyle: Eco-Friendly Alternatives You Can Try Today

Posted by darrell on
Environmental Sustainability
Embrace a Greener Lifestyle: Eco-Friendly Alternatives You Can Try Today

Choose organic compost to enrich your garden soil, enhancing plant growth while minimizing chemical runoff. Opt for natural pest control methods like introducing beneficial insects or using homemade sprays to protect your crops and reduce environmental impact. Plant diverse crop varieties to boost resilience against pests and diseases, supporting a balanced ecosystem in your garden or farm. Implement companion planting strategies to maximize space, improve yields, and naturally deter unwanted insects.

Eco-Friendly Cooking and Recipes

Array of fresh, organic vegetables and herbs displayed at a local farmer's market
A selection of organic vegetables and herbs at a local farmer’s market

Sustainable Ingredients Sourcing

Choosing organic and locally-sourced ingredients is a significant step towards sustainable living. By embracing farm to table processes, we reduce our carbon footprint and support local economies. Organic farming practices often avoid synthetic pesticides, promoting biodiversity and healthier soil. When you source ingredients locally, you’re not only ensuring fresher produce but also cutting down on transportation emissions which contribute significantly to pollution.

Moreover, buying from local producers supports community resilience. Many small-scale farmers share inspiring stories of returning to traditional farming methods, which not only preserve the environment but also enhance food quality. Implementing these practices at home can be just as rewarding. Consider starting a small garden or joining a community-supported agriculture (CSA) program to receive fresh produce regularly. These actions not only offer health benefits but also foster a deeper connection with nature. Embrace these eco-friendly alternatives and take active steps towards a more sustainable lifestyle.

Kitchen Practices to Reduce Waste

Incorporating eco-friendly practices in your kitchen is a rewarding way to contribute to sustainability. Begin by tackling food waste, which can be greatly minimized with a bit of creativity and planning. Turn leftovers into a culinary adventure by experimenting with new dishes such as soups, stews, or casseroles. For instance, bread on the brink of staleness can transform into delicious breadcrumbs or bread pudding.

Another effective approach is composting kitchen scraps, which enriches the soil for your home garden and reduces landfill waste. Start a small compost bin for vegetable peels, coffee grounds, and eggshells—it’s easier than you might think! Not only will this practice keep your kitchen waste down, but it will also provide sustainable nourishment for growing your own organic produce. Additionally, planning meals ahead of time and sticking to a shopping list can help in purchasing only what you need, further curtailing waste. Embrace these small changes, and you’ll find that every step toward an eco-friendly kitchen contributes to a healthier planet.

Eco-Friendly Recipes

Embrace sustainability in your kitchen with these eco-friendly recipes that champion local and organic ingredients. Start with a refreshing salad using heirloom tomatoes, fresh basil, and homemade vinaigrette made from locally sourced olive oil and apple cider vinegar. This dish not only delights the palate but also supports small farmers who prioritize sustainable farming practices. For a hearty meal, try a veggie stir-fry featuring seasonal produce like zucchini, bell peppers, and snap peas. Cook using a carbon-neutral stove, if possible, and finish with soy sauce or tamari from a nearby producer. By choosing these staples, you’re not just creating delicious meals but also fostering a more sustainable food system.

Innovations in Eco-Friendly Agriculture

View of an organic farm implementing eco-friendly and sustainable practices
An organic farm using modern, sustainable agricultural practices

Organic Farming Techniques

Delving into organic farming techniques opens a window to a vibrant world where sustainability meets innovation. Innovative organic farming methods, like crop rotation and cover cropping, enrich the soil naturally and help maintain its fertility without synthetic fertilizers. Companion planting is another fascinating practice that can not only boost crop yields but also control pests by attracting beneficial insects.

For aspiring farmers or gardening enthusiasts, understanding the importance of soil health is crucial. Techniques like composting and vermiculture transform food scraps into nutrient-rich fertilizers, reducing waste while enhancing plant growth. Hydroponics and aquaponics represent the future of organic farming, allowing for sustainable food production even in limited spaces without soil, using mineral solutions or water ecosystems.

Farmer success stories often highlight the shift toward organic practices. These methods not only protect the planet but also yield flavorful, nutritious produce. By embracing such sustainable techniques, you contribute to preserving biodiversity and fostering a healthier planet, one crop at a time.

Success Stories from Farmers

Nestled in the heart of Iowa, farmer Emily Thompson turned her 20-acre plot into a model of sustainability. By integrating crop rotation and polyculture, Emily has not only enriched her soil but also increased her vegetable yield by 30%. Her success doesn’t end there—her community-supported agriculture program has flourished, offering locals an abundant supply of fresh, organic produce.

In California, Luis Ramirez found success with cover cropping and vermicomposting. By planting legumes during the off-season, he enriched his fields naturally, reducing the need for chemical fertilizers. Partnering with local restaurants, Luis offers farm tours, inspiring chefs and consumers alike to appreciate the journey from farm to fork.

Up in Vermont, the Jenkins family has embraced permaculture principles. Having swapped synthetic pesticides for natural pest control methods, they now boast a thriving apple orchard. Their sustainable practices have drawn attention to their farm stand, making it a beloved destination for eco-conscious shoppers eager to support organic farming. These farmers’ stories illustrate the rewarding potential of eco-friendly alternatives for a sustainable future.

Impact on Local Communities

Eco-friendly farming practices yield significant benefits for local communities and their economies. By promoting organic techniques and reducing chemical use, these methods enhance soil health and preserve local biodiversity, creating a thriving environment for plants, animals, and people. This approach empowers farmers by lowering production costs and increasing demand for local, sustainably grown produce. Communities often experience economic boosts as farmers tap into new markets, while consumers enjoy fresher and healthier food options. Additionally, sustainable agriculture fosters stronger community ties through farmers’ markets and local cooperatives, encouraging people to connect over shared environmental goals and contribute to a healthier planet.

Eco-Friendly Gardening Tips

Sustainable Garden Design

Planning a sustainable garden begins with the choice of native plants, which are naturally adapted to local conditions, reducing the need for excessive watering and chemical fertilizers. Embracing biodiversity is crucial, as a diverse ecosystem strengthens the health of your garden while supporting local wildlife, such as pollinators crucial for plant reproduction. Consider planting a variety of species that flower at different times to ensure year-round nourishment for beneficial insects. Additionally, incorporating companion planting techniques can naturally deter pests, eliminating the need for harmful pesticides. Opt for organic compost to enhance soil fertility, creating a rich environment that supports healthy plant growth. Sustainable gardens also benefit from rainwater harvesting systems, which help conserve water and reduce your ecological footprint. By choosing these eco-friendly practices, you’re not only nurturing a lush, vibrant garden but also contributing positively to the environment. This approach offers a rewarding path for gardening enthusiasts eager to merge their passion with sustainable living ideals.

Eco-friendly home garden showcasing water conservation techniques
Home garden with a variety of plants and water conservation systems

Water Conservation Techniques

Discover the joy of conserving water in your garden with simple yet effective techniques. Start by collecting rainwater; it’s not only the best water for plants, but it also reduces dependency on city supplies. With a rain barrel, you can harvest enough to nourish your plants during dry spells. Complement this with efficient irrigation systems like drip irrigation, which delivers water directly to the roots, minimizing waste. Mulching is another excellent practice; it helps retain soil moisture, saving you from frequent watering while enriching soil fertility. These techniques not only preserve precious resources but also promote vibrant, healthy gardens.

Natural Pest Control Methods

Embrace nature’s own solutions for keeping pests at bay in your gardens and farms. Introduce beneficial insects, like ladybugs and lacewings, that naturally prey on harmful pests. Companion planting is another effective strategy; pairing plants like marigolds or basil with vegetables can deter unwanted bugs. Homemade sprays using neem oil or garlic can also work wonders without harming the environment. Remember the success story of John, a local farmer who switched to these methods and saw healthier, more productive crops. By implementing these eco-friendly techniques, you support biodiversity and cultivate a thriving, organic garden that aligns with sustainable living ideals.

Conclusion

Embracing eco-friendly alternatives in cooking, agriculture, and gardening holds tremendous promise for both individuals and the planet. By choosing locally grown organic produce, not only are you supporting small farmers but you also enjoy the freshest flavors free from synthetic pesticides. These choices contribute to a healthier lifestyle while fostering sustainable farming communities. Aspiring farmers can draw inspiration from success stories that demonstrate the viability of sustainable practices. Whether it’s incorporating crop rotation to naturally enrich the soil or using composting as a natural fertilizer, these techniques enhance both yield and environmental health. In gardening, eco-friendly approaches such as rainwater harvesting and native plant selection promote biodiversity and reduce resource consumption. These small changes collectively lead to significant positive impacts, creating a more resilient food system. Importantly, adopting these sustainable practices isn’t just about environmental benefits; it also brings a deep sense of connection to the land and community. For gardening enthusiasts and eco-conscious consumers, every meal becomes an opportunity to make a difference. As you integrate these methods into your daily routine, you join a growing movement that values sustainability and nurtures a healthier planet for future generations. Remember, each step towards eco-friendly living creates a ripple effect of change.

Organic Growth in Action: Inspiring Examples from Farm to Table

Posted by darrell on
Organic Farming and Cultivation
Organic Growth in Action: Inspiring Examples from Farm to Table

Implement crop rotation to enrich soil biodiversity and reduce pest infestations naturally. Focus on planting diverse crops sequentially, such as legumes to fix nitrogen, followed by leafy greens. Embrace companion planting by pairing crops like tomatoes with basil to enhance growth and repel harmful insects. Establish a composting system using kitchen scraps to create nutrient-rich, organic fertilizer that boosts plant health and yields. Prioritize native and heirloom seeds to cultivate resilient plants that thrive in local conditions, supporting sustainable agriculture.

Organic Growth in Agriculture

Community Supported Agriculture (CSA) Success Stories

In the heart of Vermont, Green Meadows Farm has transformed from a modest vegetable patch into a thriving organic powerhouse, proving that sustainable practices can yield substantial rewards. Farmer Sarah Jennings took the leap to organic methods five years ago, initially facing the challenges of soil health and pest control without synthetic aids. With persistence and community support, she mastered crop rotation and natural pest deterrents, resulting in healthier harvests and a growing subscriber list for her CSA. This transformation not only boosted her yields but also strengthened her bonds with local families, as they reaped the benefits of farm-to-table freshness.

Across the country in California, Sun Valley Farms embraced organic principles and saw a remarkable increase in customer trust and satisfaction. Farmer Luis Ortiz, inspired by the sustainability movement, converted his entire operation to organic, focusing on water conservation and biodiversity. By integrating companion planting and organic mulching, Luis has enhanced soil fertility and ecosystem health, leading to bountiful crops that attract health-conscious consumers eager for weekly CSA deliveries. His commitment to transparency and education has turned customers into passionate advocates, further cementing the farm’s reputation in the community.

These stories highlight how embracing organic growth not only nourishes the land but also cultivates lasting relationships, offering a promising path for aspiring farmers and environmentally conscious consumers alike.

Community members collecting fresh produce from an organic CSA farm
A vibrant CSA farm showcasing fresh organic produce and community members

Innovations in Soil Health and Crop Rotations

Enhancing soil health and developing effective crop rotation strategies are cornerstones of thriving organic agriculture. Healthy soil teems with life, providing essential nutrients to plants while fostering a sustainable ecosystem. One promising technique to boost soil health is the use of cover crops like clover and rye. These plants enrich the soil with nitrogen and organic matter, preventing erosion and boosting fertility. By keeping the soil covered year-round, they help retain moisture and suppress weeds, reducing the need for synthetic inputs.

Crop rotation takes this a step further by varying the type of crops grown in each field over time. This practice disrupts pest and disease cycles naturally, diminishing the need for chemical interventions. A classic example is rotating legumes with grains. Legumes, such as beans and peas, fix atmospheric nitrogen into the soil, which benefits subsequent grain crops. As a vibrant expression of innovation, some farmers have reported remarkable boosts in yield after adopting these rotations. For instance, a farmer in Ohio noted a 20% increase in corn production by incorporating and rotating cover crops into their system.

By working with nature, these methods not only enhance soil vitality but also pave the way for resilient farming systems. Aspiring gardeners and eco-conscious consumers can take inspiration from these practices to cultivate their own gardens or support local farmers committed to sustainable agriculture. These strategies demonstrate that organic growth isn’t just about what we grow but how we nurture the earth beneath our feet.

Organic Growth in Gardening

Creating Sustainable Home Gardens

Cultivating a sustainable home garden means embracing practices that work harmoniously with nature to yield fresh, nutritious produce while minimizing environmental impact. One effective method is to start by enriching your soil with compost, which can be easily made at home using kitchen scraps like fruit peels and vegetable waste. This natural fertilizer improves soil health, encouraging thriving plant growth. For those new to organic gardening, consider reviewing some basic Gardening Tips to help you get started.

Choosing heirloom or native seeds not only preserves biodiversity but often results in plants better adapted to local conditions, requiring less water and fewer resources. Incorporate companion planting by pairing plants that naturally support each other, such as tomatoes with basil, to enhance growth and repel pests. To conserve water, install a rain barrel to collect rainfall for irrigation. Mulching around plants is another sustainable practice that retains moisture, suppresses weeds, and enriches the soil as it breaks down.

Finally, drawing inspiration from success stories of families turning small plots into bountiful spaces, remember that each step towards sustainability is a positive change. Celebrate your progress in creating a greener footprint and enjoy the organic bounty your garden provides.

Sustainable home garden with various organic plants and a compost bin
A home garden with diverse plants and sustainable gardening practices

Community Gardening and Local Initiatives

Community gardening offers a vibrant example of organic growth, bringing people together to cultivate not only plants but also a sense of community and sustainability. Across towns and cities, these green havens empower individuals to connect with nature and produce food that nurtures both the earth and its inhabitants. Projects like neighborhood urban gardens and school-based initiatives demonstrate how organic practices can flourish within community settings. These efforts often rely on sustainable methods such as composting, crop rotation, and permaculture design to maintain soil health and boost productivity without chemical interventions.

Inspiring success stories abound within these initiatives. Take, for example, the transformation of once-vacant lots into thriving community gardens, where neighbors share not only heirloom seeds but also valuable gardening knowledge. These spaces often feature workshops on organic techniques, allowing newcomers to learn from seasoned gardeners. Many communities also organize “harvest shares” that allow participants to distribute fresh produce among families, promoting not only healthy eating but also a spirit of generosity and collaboration.

For those looking to embrace sustainable living, community gardens offer practical tips and firsthand experiences. They present a grassroots approach to change, demonstrating how simple actions can lead to significant environmental impact. By fostering local organic growth, these initiatives build resilient communities committed to nurturing our planet for future generations.

Organic Growth in Cooking and Recipes

Chef in a kitchen preparing a meal with organic ingredients from a farm-to-table collaboration
A chef preparing a dish using fresh organic ingredients sourced directly from a farm

Farm-to-Table Cooking: Chef Collaborations

Collaborations between organic farmers and chefs are burgeoning, creating authentic Farm-to-Table experiences that delight the senses and promote sustainable living. These partnerships are fueled by a shared passion for fresh, locally grown produce that speaks to the heart of culinary innovation. By working closely with farmers, chefs craft seasonal menus that highlight the unique flavors and textures of organic produce, transforming humble ingredients into gastronomic masterpieces.

One inspiring example is the partnership between Farmer Jane and Chef Alex, who have harnessed the power of the farmer’s market to offer pop-up dinners that draw food enthusiasts from all over. Farmer Jane’s heirloom tomatoes and tender greens are at the center of these creations, offering diners a chance to savor food that’s been recently harvested. These efforts not only support local agriculture but also educate consumers on the benefits of choosing organic.

Such collaborations are prime examples of organic growth in the culinary world, reflecting a growing trend towards sustainability and community support. By engaging in these Farm-to-Table endeavors, both farmers and chefs are paving the way for a more conscious and delicious future.

Featured Recipes Using Organic Ingredients

Discover the deliciousness of organic cooking with our curated recipes that celebrate the vibrant flavors and rich nutrition of locally grown produce. Start your culinary journey with a zesty organic tomato and basil bruschetta, showcasing the luscious taste of sun-ripened tomatoes combined with fragrant fresh basil. Enhance your meals with a colorful organic quinoa salad, brimming with crunchy vegetables and a hint of citrus, perfect for a nutrient-packed lunch.

For heartier fare, try our classic ratatouille, a delightful blend of organic zucchini, eggplants, and bell peppers simmered to perfection with aromatic herbs. This dish not only bursts with taste but also adds a delightful array of vitamins to your diet. And when it’s time for dessert, indulge in an organic apple and cinnamon crumble. Made with locally sourced apples, this dessert offers a comforting sweetness with every bite.

These recipes not only highlight the wholesome goodness of organic ingredients but also support sustainable agriculture, encouraging a healthier planet and community.

Conclusion

In conclusion, embracing organic growth brings a wealth of benefits across diverse domains, offering a more sustainable and enriching approach to agriculture, gardening, and cooking. This article highlighted the inspiring success stories of local farmers who have transformed their lands into thriving ecosystems, underscoring the potential of organic farming practices to enhance biodiversity and soil health. Aspiring farmers and gardening enthusiasts gain insights into how small-scale organic operations not only provide fresher, healthier produce but also support local communities and boost economies.

The shift towards organic is catalyzing innovative practices that restore the balance between human activity and the natural world. This includes composting techniques, crop rotation, and the use of natural pest control, all of which play a pivotal role in reducing the carbon footprint and safeguarding our environment for future generations. By incorporating these methods, environmentally conscious consumers can also engage in more sustainable living, benefiting both themselves and the planet.

Notably, cooking with organic produce opens a new world of flavors and nutritional goodness, making it an attractive choice for individuals passionate about wholesome food. Encouragingly, the rise of organic markets and community-supported agriculture ensures that organic produce is more accessible than ever.

Overall, whether you’re a seasoned farmer, a budding gardener, or a conscientious consumer, the shift to organic growth presents a practical and rewarding path forward. It’s not just about growing food; it’s about growing a better future for all. Embracing organic practices enables a harmonious relationship with nature, setting a positive, transformative example for generations to come.

From Wilted to Wow: The Art of Spray Painting Dead Plants

Posted by darrell on
Projects
From Wilted to Wow: The Art of Spray Painting Dead Plants

Spray painting dead plants is a quirky trend and the concept might seem a bit odd initially. The transformation of brown relics into brilliant sculptures can add an unexpected pop of color and character to any space. But not all plants will hold up well to being painted. Thicker plants tend to handle the paint better, while delicate plants might not sustain the weight of the paint. You must know how to handle spray paint safely, especially when it comes to accidental skin contact. Knowing how to get spray paint off the skin is crucial. Typically, a combination of oil (like cooking oil or baby oil) and a gentle scrubbing agent (like sugar or salt) can help remove paint from the skin effectively. Always use protective gloves and long sleeves when handling spray paint to minimize skin exposure.

Now, let’s dive into how to turn your wilted greens into a gallery of color!

Choose the Right Spray Paint

Select a spray paint that is suitable for the material of your plant and the location where it will be displayed. For outdoor display, use a paint that is labeled as weather-resistant to prevent fading and water damage. For indoor use, almost any spray paint, even vegetable paint, will work, but consider using one with low fume emissions for better indoor air quality. Metallic and bright colors can add a dramatic effect, while pastels offer a softer appearance.

Prepare the Plant

Before you start painting, clean the plant thoroughly to remove any dirt, debris, or insects. If the plant is brittle or fragile, handle it gently to avoid breaking it further. Let the plant dry completely if you’ve had to wash it.

Set Up Your Painting Area

Choose a well-ventilated area to work in, ideally outside or in a space like a garage with doors or windows open. Lay down newspapers, a drop cloth, or plastic sheeting to protect the surrounding area from paint. If it’s windy, secure the sheets with weights or tape to keep them from moving.

Apply the Paint

Shake the spray paint can for a minute or two to mix the paint thoroughly. Hold the can approximately 6-12 inches away from the plant. Start spraying with a side-to-side motion, beginning and ending the spray off the plant to prevent excessive build-up of paint in one area. Apply a light coat first, allowing it to dry for at least 10-15 minutes before applying a second coat. Multiple light coats are better than one thick coat as they prevent drips and help achieve an even finish.

Add Finishing Touches

Once the plant is fully painted and dry, you can add embellishments if desired. This could include glitter spray, a clear protective coat for extra durability, or even painting specific parts in different colors for a more dynamic effect.

Let It Dry

Allow the plant to cure for at least 24 hours in a dry, well-ventilated area. Once cured, you can place it in a pot or directly integrate it into your decor. If kept outdoors, make sure it’s in a spot sheltered from extreme elements to prolong the life of the paint.

Maintenance Tips

Spray-painted plants might eventually chip or fade, especially if exposed to harsh weather. You can retouch them as needed by cleaning the surface and following the same painting process. Avoid using harsh chemicals or scrubbers on the painted surface to keep the paint intact.

Gardening Jeopardy: Trivia Questions and Answers

Posted by darrell on
Gardening for Beginners
Gardening Jeopardy: Trivia Questions and Answers

Welcome to Gardening Jeopardy, where your green thumb knowledge can earn you big points! Dive into various categories all about gardening, from common plants to garden pests and famous gardens around the world. Each category is divided into five levels based on difficulty, with point values increasing from $200 to $1000. Test your skills or challenge others to see who is the ultimate gardening guru! If you’re looking to engage your students in a fun and interactive way to review class content, consider using a Jeopardy review game template to create a customized game tailored to your curriculum.

Category 1: Common Plants

$200 Question

It is a common name for plants in the genus Narcissus, and it is known for its early spring bloom.

Answer: What are daffodils?

$400 Question

This low-maintenance plant, known for surviving in minimal soil and needing occasional soaking, might droop when thirsty.

Answer: What is an air plant?

$600 Question

This plant, also known as Lavandula, is famous for its calming scent and purple flowers.

Answer: What is lavender?

$800 Question

This common houseplant is known as Ficus elastica and is celebrated for its large, glossy leaves.

Answer: What is the rubber plant?

$1000 Question

Identify this perennial herb, Artemisia dracunculus, known for its use in French cuisine.

Answer: What is tarragon?

Category 2: Garden Pests

$200 Question

This slimy creature is known for eating leaves and leaving a silvery trail behind.

Answer: What is a slug?

$400 Question

This insect in larval stage is known for voraciously consuming plant leaves, especially in vegetable gardens.

Answer: What is a caterpillar?

$600 Question

Identify the small, sap-sucking insect that often forms large colonies on the undersides of leaves.

Answer: What are aphids?

$800 Question

This pest, often found in damp areas, can roll into a ball when disturbed.

Answer: What is a pill bug?

$1000 Question

Name the burrowing rodent that can cause damage to gardens by creating extensive underground tunnels.

Answer: What is a mole?

Category 3: Famous Gardens

$200 Question

This iconic garden, located in France, is known for its geometric hedge mazes and fountains.

Answer: What are the Gardens of Versailles?

$400 Question

A garden in England famous for its rock garden and large collection of water lilies.

Answer: What is the Royal Botanic Gardens, Kew?

$600 Question

Identify the historic garden in Italy, known for its Renaissance design and panoramic views of Florence.

Answer: What are the Boboli Gardens?

$800 Question

This garden in Japan is celebrated for its traditional design and stunning cherry blossoms in spring.

Answer: What is Kenroku-en?

$1000 Question

Name the garden in Canada that transforms into a winter wonderland of lights during the holiday season.

Answer: What are the Butchart Gardens?

Category 4: Gardening Techniques

$200 Question

The term for the method of growing plants in a water-based solution without soil.

Answer: What is hydroponics?

$400 Question

This technique involves cutting away parts of a plant to improve its shape or productivity.

Answer: What is pruning?

$600 Question

The term for the practice of growing plants in vertical layers to save space.

Answer: What is vertical gardening?

$800 Question

This ancient Japanese technique involves sculpting trees into artistic shapes.

Answer: What is bonsai?

$1000 Question

Identify the method of propagating new plants from a ‘mother’ plant’s leaf, stem, or root cuttings.

Answer:  What is cloning?

Category 5: Soil & Compost

$200 Question

This type of soil is ideal for gardening due to its balanced mixture of sand, silt, and clay.

Answer: What is loam?

$400 Question

The term for the decomposition process of organic matter to create a nutrient-rich soil amendment.

Answer: What is composting?

$600 Question

Identify the measure used to describe how acidic or alkaline soil is.

Answer: What is pH?

$800 Question

This organic material, derived from sphagnum moss, is used to improve soil moisture retention.

Answer: What is peat moss?

$1000 Question

Name the process of turning over the upper layer of soil to mix in organic matter and nutrients.

Answer: What is tilling?

Category 6: Historical Gardens

$200 Question

This ancient garden, one of the Seven Wonders of the Ancient World, was said to be located in the city-state of Babylon.

Answer: What are the Hanging Gardens of Babylon?

$400 Question

A medieval garden, often enclosed by walls, was dedicated to growing medicinal herbs and plants.

Answer: What is a physic garden?

$600 Question

Identify the famous garden designed by André Le Nôtre, featuring an iconic symmetrical layout, located in France.

Answer: What are the Gardens of Versailles?

$800 Question

This garden, associated with an iconic English playwright, is located in Stratford-upon-Avon.

Answer: What is Shakespeare’s Garden?

$1000 Question

Name the Mughal garden in India, known for its Persian-inspired design and location near the Taj Mahal.

Answer: What is the Mehtab Bagh?

Brushed vs Brushless Lawn Mower

Posted by darrell on
Gardening Tools
Brushed vs Brushless Lawn Mower

The main difference between a brushed and brushless lawn mower lies in the type of motor they use, which affects their efficiency, durability, maintenance requirements, and performance. Brushless lawn mowers offer improved efficiency, durability, and performance at a higher upfront cost, while brushed lawn mowers are more affordable but come with higher maintenance and lower efficiency.

Brushed Lawn Mowers

Motor Design

Brushed motors operate with carbon brushes that maintain physical contact with the motor’s commutator to facilitate electrical conductivity. This traditional motor design is simpler and has been used in various electrical devices for decades, providing a proven but somewhat less efficient method of power transmission.

Efficiency

The efficiency of brushed motors is generally lower compared to their brushless counterparts. The friction generated by the brushes against the commutator results in energy loss, primarily through heat. This not only reduces the motor’s overall efficiency but can also lead to faster depletion of the power source, particularly in battery-operated lawn mowers.

Durability

The physical contact between the brushes and the commutator leads to wear and tear over time. As the brushes degrade, their performance diminishes, which can result in the motor running less smoothly and eventually requiring maintenance or replacement of the brushes to maintain performance.

Cost

Brushed motors are less expensive to manufacture due to their simpler design and the established production processes. This cost advantage is often passed on to the consumer, making brushed lawn mowers a more budget-friendly option for those who prioritize initial cost savings over long-term efficiency and maintenance.

Heat and Noise

The friction between the brushes and the commutator not only reduces efficiency in your mowing practices but also generates heat and mechanical noise. This can make brushed lawn mowers noisier and potentially overheat during prolonged use, which might be a consideration for user comfort and the longevity of the mower.

Brushless Lawn Mowers

Motor Design

A brushless lawn mower has a motor that eliminates the need for physical brushes by using an electronic controller to switch the current within the motor. This advanced design allows for more precise control of the motor’s power and speed, leading to enhanced performance and efficiency.

Efficiency

Without the friction and energy loss associated with brushes, brushless motors operate more efficiently. This translates to less heat generation, lower energy consumption, and the ability to provide more power to the cutting blades when needed, making them ideal for varying lawn conditions.

Durability

The absence of brushes in these motors means there’s no wear and tear from brush friction, significantly extending the lifespan of the motor. Brushless motors are known for their reliability and reduced maintenance needs, making them a worthwhile investment for those looking for longevity in their lawn care equipment.

Cost

The technology behind brushless motors is more sophisticated, leading to higher production costs. These costs are reflected in the price of brushless lawn mowers, which are typically higher than their brushed counterparts. However, the increased upfront cost can be offset by the motor’s longer lifespan and lower maintenance requirements.

Performance

Brushless motors can adjust their power output based on the resistance they encounter, such as when cutting through thick grass. This adaptive power delivery not only conserves energy when the load is light but also provides extra power when needed, ensuring efficient and effective mowing under various conditions.

Comparison Chart

This comparison chart that outlines the differences and similarities between brushed and brushless lawn mowers:

FeatureBrushed Lawn MowersBrushless Lawn Mowers
Motor DesignUtilize carbon brushes for electrical conductivity, simpler design.Use an electronic controller for current switching, more complex and efficient design.
EfficiencyLower due to friction and energy loss from brushes.Higher as there's no brush friction, leading to better energy use and less heat generation.
DurabilityLower because brushes wear out over time, requiring maintenance or replacement.Higher as there are no brushes to wear out, leading to less maintenance.
CostGenerally cheaper due to simpler design and established manufacturing processes.More expensive upfront due to advanced technology and manufacturing costs.
Heat and NoiseTend to generate more heat and noise due to brush friction.Typically run cooler and quieter as there's no brush friction.
PerformanceConsistent power output but may struggle under heavy load due to efficiency losses.Can adapt power output to the task, providing more power when needed and conserving energy when not.
MaintenanceRequires periodic maintenance to replace worn brushes.Minimal maintenance needed, mainly for cleaning and blade care.
LongevityGenerally shorter lifespan due to brush wear.Longer lifespan due to lack of mechanical wear in the motor.

Commonalities

Functionality: Both types are designed to cut grass effectively, with options available in various sizes and power outputs to suit different lawn care needs.

Power Source: Both brushed and brushless lawn mowers can be powered by electricity (corded) or batteries (cordless), offering flexibility in how they are used.

User Interface: Typically, both types will offer similar user interfaces, with controls for power, blade height adjustment, and safety features.

In summary, the choice between brushed and brushless lawn mowers involves considering the balance between initial cost and long-term benefits such as efficiency, durability, and performance. Brushless mowers offer significant advantages in these areas, making them a preferred choice for those willing to invest in higher quality and performance.

How to Clean a Sprinkler Head

Posted by darrell on
Gardening Tools
How to Clean a Sprinkler Head

Sprinkler heads, regardless of the sprinkler head types you have, can become clogged over time due to dirt, debris, and mineral build-up. To ensure your sprinkler head is functioning properly, regular cleaning is essential. Here’s a straightforward guide to help you with the cleaning process, even if you have never done it before.

Tools You Need

Before you start, gather the necessary tools. This will help you perform the task efficiently.

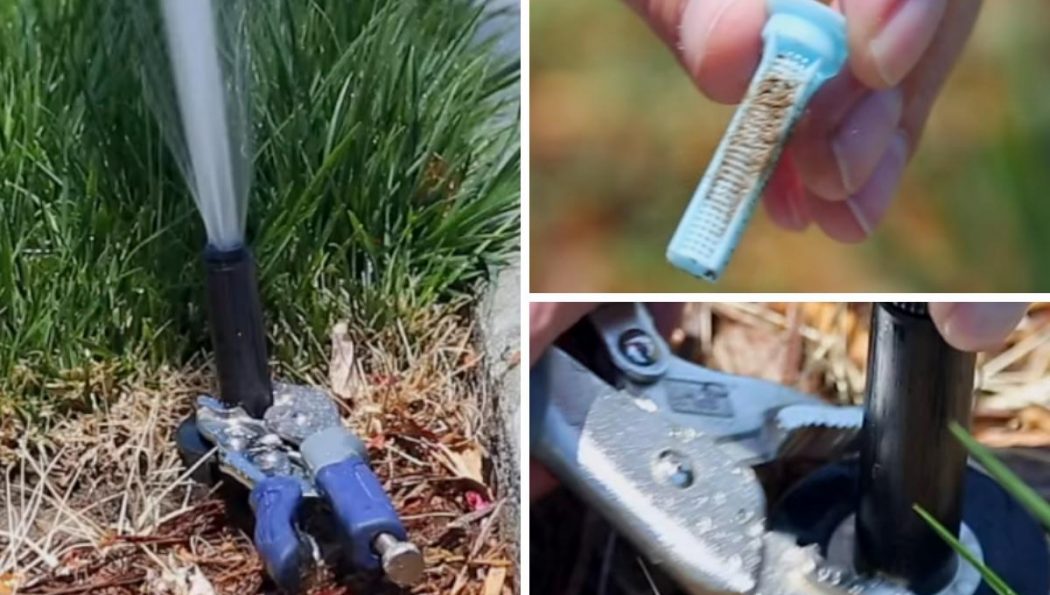
  1. Needle nose pliers: To grab and hold the filter inside the sprinkler head
  2. Adjustable vise-grips: To clamp onto the sprinkler riser
  3. Soft cloth: To clean any dirt that is stuck inside the filter.

Remove the Filter

The filter is often where most of the debris accumulates. Pull up the top of the sprinkler head and pull the sprinkler tip up. Clamp on the vise-grip to hold up the sprinkler. Twist and lift the head counterclockwise. Some sprinkler heads may simply pop off, while others might need to be unscrewed. Inside the sprinkler head, you’ll find the filter in the filter line. It’s usually a small mesh or plastic piece. Gently remove this filter, being careful not to damage it. Take the cloth to remove dirt and other debris. Let it soak it in some warm water if needed.

Purge the Line

Purging the line helps to remove any remaining debris that might be trapped inside the sprinkler system. Turn on the sprinkler system briefly. This will force water through the lines and push out any lingering debris. Allow the water to run for a few seconds, and then turn it off. You should notice dirt and other particles coming out. Discarding this water will ensure that the debris is completely removed from the system.

Reassemble the Sprinkler

Once the filter and the line are clean, it’s time to put the sprinkler head back together. Begin by placing the filter back inside the sprinkler head. Ensure it fits snugly and is positioned correctly. Then, reattach the sprinkler head to its base. Twist it in a clockwise direction until it’s secure. Make sure it’s tightened properly, but avoid over-tightening, as that might damage the threads. Finally, test the sprinkler to make sure it’s working correctly. Turn on the system briefly and check that the water is running smoothly. If everything looks good, you’ve successfully cleaned your sprinkler head!

How Often Should You Be Cleaning Sprinkler Heads?

It is very normal that, over time, a sprinkler head gets clogged. Dirt, grass, and other minerals build up. This affects its performance. To keep the sprinkler head working well, regular cleaning is necessary. The environment and water quality determine cleaning frequency. However, a good rule is to clean the sprinkler head at least once a season. This ensures optimal water flow. It also extends the life of your sprinkler system. Regular maintenance saves water and keeps your green spaces vibrant. By regularly cleaning your sprinkler heads, you can ensure they function efficiently, saving you water and keeping your lawn and garden healthy. It’s a simple maintenance task that can make a big difference in the long run.

Why Does My Lawn Mower Backfire When I Try to Start It?

Posted by darrell on
Gardening Tools
Why Does My Lawn Mower Backfire When I Try to Start It?

Ever tried starting your lawn mower only to have it sputter, cough, and backfire in protest? Frustrating, right? You are ready to finish your yard work, and your mower has other plans. No, you are probably stuck in a rut asking: Why does my lawn mower backfire when I try to start it? Don’t worry; we’ve got you covered. To care for your lawn organically without issues, ensure you read this to the end. We’ll walk you through the possible reasons your mower is backfiring and the steps you can take to get it running smoothly again.

Common Causes of Lawn Mower Backfiring on Start-Up

When your lawn mower backfires and sputters when you try to start it, it can be frustrating and mess with your gardening plans. But don’t worry; the problem is usually an easy fix. Here are the most common causes of lawn mower backfiring and what you can do about them:

Dirty or Clogged Air Filter

The air filter cleans the air before it enters the lawn mower engine. Not enough air can get in if it’s clogged with dirt and debris. Replace your air filter once a season or every 25 hours of use.

Old or Bad Gasoline

Gasoline starts to break down after just 30 days, and it releases volatile compounds that ignite too early. So, drain your mower’s fuel tank and refill it with fresh, high-octane gas. You may also need to clean the carburetor.

Spark Plug Issues

Faulty or fouled spark plugs won’t ignite the fuel-air mixture properly. In such a case, remove and inspect your spark plug. Clean or replace it if the electrode is worn down or coated in carbon buildup. Ensure the spark plug gap is set to the recommended distance for your mower’s engine.

Carburetor Problems

If your carburetor is stuck, clogged, or out of adjustment, it won’t supply the right fuel-air mixture to the engine. In fact, it may cause too much air or insufficient air. Consequently, you may need to clean or rebuild the carburetor. Check your mower’s manual for the proper carburetor settings and adjustment procedures.

Troubles With Combustion Chamber

If lawnmower engines backfire when you try to start it, it might indicate a disturbance in the normal operation of the engine. Most times, it’s linked to the combustion chamber. The combustion chamber is where the air-fuel mixture ignites to produce power. The balance of this mixture is critical. Hence, an incorrect ratio causes the engine to behave erratically.

Check Exhaust System

When the combustion process is interrupted or doesn’t complete correctly, unburned fuel can make its way into the exhaust system. Given the high temperatures within this system, this fuel can spontaneously ignite. When this occurs, it results in a loud pop or bang – the characteristic sound of a backfire.

Fuel-Related Issues Leading to Backfiring Lawn Mowers

If your lawn mower is backfiring when you try to start it, it is likely fuel-related. Check these common culprits:

Incorrect Fuel-to-air Ratio

The carburetor mixes fuel and air to power lawn mower engines. If the mixture is off, it leads to backfiring. First, check that your air filter is clean and unobstructed. A clogged filter reduces airflow and leans out the mixture. You may also need to adjust the carburetor settings – consult your owner’s manual for the proper procedure.

Vacuum leak

If there’s an air leak in the fuel system, extra air gets mixed into the fuel-air mixture and causes backfiring. Check that all fuel lines, gaskets, and seals are intact and securely connected. Tighten or replace damaged components as needed.

By draining old fuel, ensuring the proper fuel-to-air ratio, and fixing any vacuum leaks, you should be able to get your lawn mower started without the backfire. If issues continue, it’s best to have your mower serviced by a certified technician to check for additional carburetor or ignition problems before further damage occurs.

Ignition System Problems Causing Backfiring

Weak Magneto or Ignition Coil

The magneto and ignition coil produce the spark plug’s electrical current. If either part fails, it won’t generate a robust enough charge. You can test the magneto and ignition coil to determine if it is a replacement.

Incorrect Spark Plug Gap

The spark plug gap refers to the space between the center and side electrodes on the spark plug. The spark may be too weak to ignite the fuel properly if the gap is too wide or narrow. Check your owner’s manual for your lawn mower model’s correct spark plug gap. Carefully adjust the gap or install a new pre-gapped spark plug.

Faulty Ignition Timing

The ignition timing controls when the spark plug fires to ignite the fuel in the engine. If the lawnmower engine timing is off, the spark may fire at the wrong time, leading to backfiring and trouble starting. Have your lawn mower serviced to check and adjust the ignition timing. The technician can also test other ignition system components to diagnose and repair the issue.

How to Troubleshoot a Backfiring Lawn Mower

A man checking a lawn mower

If your lawn mower is backfiring when you try to start it, it likely means there’s an issue with the carburetor or ignition system. The good news is that basic tools and troubleshooting can fix many of these problems at home.

Check the Air Filter

A clogged air filter prevents enough air from getting into the carburetor, causing the engine to run rich in fuel. Replace or clean your mower’s air filter—this is an easy fix and could solve your backfiring problem.

Clean the Carburetor

Over time, gunk and debris build up in the carburetor, disrupting the air-fuel mixture. Remove the carburetor bowl and main jet, then clean them out with carburetor cleaner or solvent and compressed air. Be sure all holes and passages are clear before reassembling the carburetor. Cleaning the carburetor is one of the most effective ways to remedy a backfiring engine and get your mower running smoothly again.

Inspect the Spark Plug

A faulty spark plug won’t ignite the air-fuel mixture properly, causing the engine to backfire. Remove your mower’s spark plug and check that the electrode gap is set correctly, usually around 0.030 inches. The spark plug should also be clean and undamaged. So, replace the spark plug if needed.

Check for Vacuum Leaks

An air leak in the intake manifold or vacuum hoses upsets the air-fuel ratio, often leading to backfiring. Inspect all hoses and the intake manifold for cracks or holes and replace damaged components. And ensure you seal all connections tightly and properly.

Review the Engine Speed

Also, the rapid deceleration causes backfiring. If your mower is prone to backfiring when shutting down, gradually reduce the engine speed before turning it off.

Consider Engine Tune-Up

If the above steps don’t solve the problem, servicing the mower by a small engine mechanic is a good idea. They can perform an engine tune-up to replace additional parts like the ignition coil, magneto, or engine valves. Plus, they will ensure everything is properly adjusted to prevent backfiring and keep your mower running well.

Final Thoughts

Your lawn mower engine requires maximum care- the same goes for other parts. This is especially crucial when wondering why does my lawn mower backfires when I try to start it. Now, you can troubleshoot the issue, determine the culprit, and get your mower running smoothly again to get back to making your garden look pristine or attractive to hedgehogs.

Remember, it could be something simple like old gas, a clogged air filter or spark plug, or an issue with the carburetor. With some basic mechanical skills and the correct replacement parts, you’ll be back to mowing in no time. And when your mower starts on the first pull, you’ll feel a surge of satisfaction knowing you solved the problem yourself. Happy mowing!

Overwatered vs Underwatered Christmas Cactus: Identifying the Signs

Posted by darrell on
Gardening Tips
Overwatered vs Underwatered Christmas Cactus: Identifying the Signs

Taking care of a Christmas cactus plant is not difficult, but knowing signs when you’ve overwatered or underwatered your plant can be tricky. When your Christmas cactus leaves are limp, it can be a sign that you are overwatering your plant, while drooping leaves can be a sign of an underwatered cactus. However, there are more signs we want to discuss.

Signs of an Underwatered Christmas Cactus Plant

Underwatering a Christmas cactus plant can cause the plant to become severely stressed and show signs of dehydration. This type of stress often leads to stunted growth, brown and wilting leaves, and brown stems.

Some signs that your Christmas cactus may be underwatered include:

Dry Soil

The first sign of underwatering is usually dry soil. To test your soil’s moisture level, stick your finger in the soil. If it feels dry to the touch, it’s a sign that you must water your Christmas cactus.

Wilting Leaves

Wilting or drooping leaves can occur when the plant has gone too long without water, and its roots cannot absorb enough moisture from the air around them. When you notice this symptom, water your Christmas cactus to regain strength.

Shriveled Stem

If the stems look shriveled, you may be under-watering your cactus.

Signs of an Overwatered Christmas Cactus Plant

Overwatering a Christmas cactus can lead to root rot, nutrient deficiencies, and eventually, death of the overwatered plant if not corrected.

Here are some common signs your Christmas cacti have too much moisture:

Soggy Soil

If the potting soil feels overly wet or the cactus sits in standing water, it’s a sign that you are overwatering your Christmas cactus and need to adjust how often you water it.

Limp Leaves

Another sign of overwatering is limp leaves. This happens when too much water has been applied to the plant, and its roots cannot absorb so much. As soon as you notice this symptom, reduce watering for your Christmas cactus so it can remain healthy and vibrant.

Mushy Stems & Roots

Suppose your Christmas cactus isn’t receiving enough air circulation or has been consistently overwatered. In that case, it may show signs of mushy stems and roots, eventually leading to root rot if not corrected immediately. It’s important to monitor closely how often you water your cacti and ensure that they’re getting enough air circulation.

Watering a Christmas Cactus

woman sprays green christmas cactus leaves

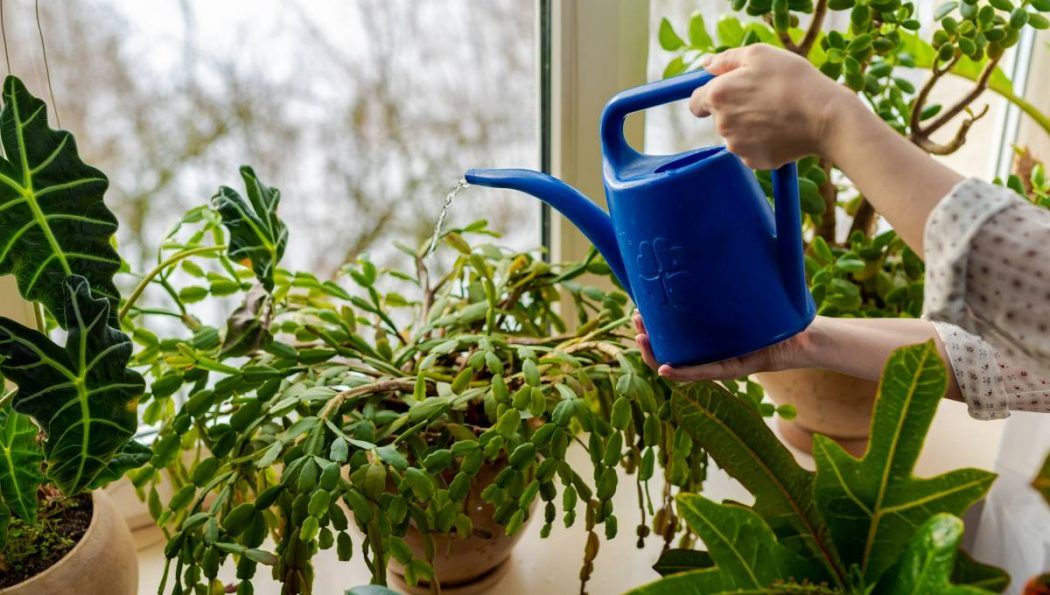
To keep your Christmas cactus happy, mist the leaves of your cactus with a spray bottle daily. When the soil is completely dry, water the base of the plant (every two weeks). When watering a Christmas Cactus, water from the bottom up. Put the pot in a dish or tray filled with just enough water so that when the soil absorbs moisture from the bottom, it comes out of the drainage holes at the pot’s base. Leave for about 20 minutes, then remove any excess moisture in the tray so your cactus is not left in wet soil. Do not let your cactus sit in standing water. Overly wet soil, especially in the colder months, could lead to root rot.

Revive an Overwatered or Underwatered Christmas Cactus

To revive an overwatered Christmas cactus, you should first let the soil dry out before watering again – avoid repotting until dryness has been achieved. Reduce the watering frequency and use only lukewarm water when watering again; also, make sure that your pot has good drainage holes so that excess water can escape more easily.

To revive an underwatered Christmas cactus, slowly increase its water intake, but don’t overdo it all at once – start with small doses of water every other day until your plant looks revived and green again. You should also ensure adequate humidity for your plant – misting with a spray bottle every other day helps! Additionally, if the plant is underwatered for too long, repotting into fresh soil may be necessary to give your holiday cactus a second chance at life.

How to Revive an Air Plant

Posted by darrell on
Gardening Tips
How to Revive an Air Plant

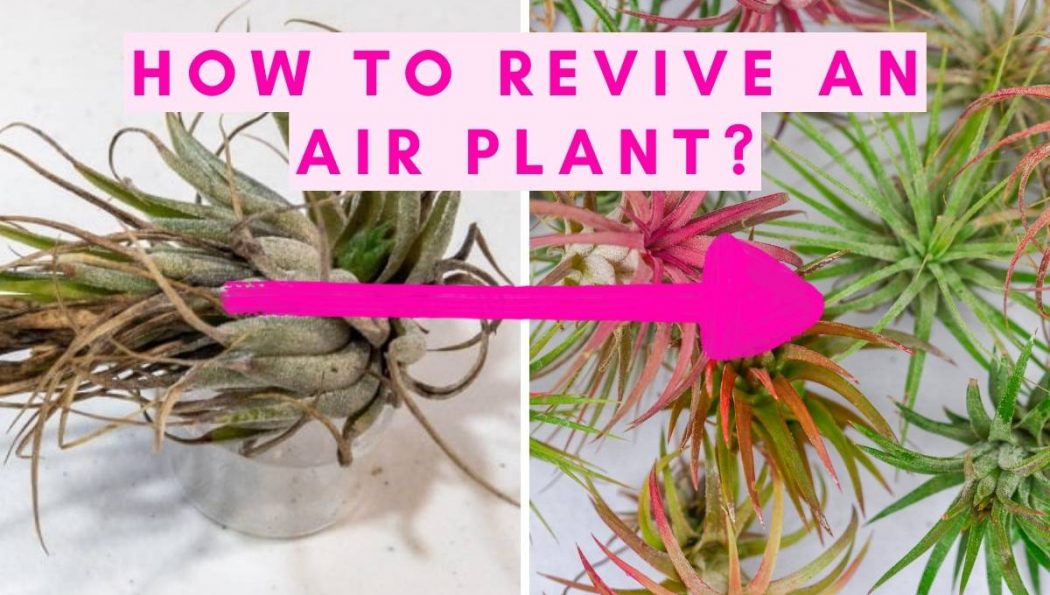
If you are looking for a way to revive your dying air plant, follow quick solutions like soaking the plant in clean water and trimming off the dead and affected parts.

Air plants (also called Tillandsia) are special plants that can grow anywhere. These epiphytic plants are from another planet and require no soil to grow. The air plants absorb water and moisture through their leaves and require a moderate quantity of water to survive.

Caring for these plants may not require much, but sometimes they start looking sickly (limp, droopy, shriveled, or brown). What will you do in such a condition? This write-up will teach you how to pump life into dying indoor air plants.

How to Revive Dying Air Plants

Knowing the real reason for air plants’ sickness is very important. For instance, when an air plant needs water, it turns brown or limp. You can easily revive an air plant by taking the following actions.

Overnight soak

When an air plant lacks water, its leaf ends will start turning brown or curling. Also, air plants show a yellow/brown color when they are too exposed to sunlight. You can revive your air plant in such a condition by immersing it overnight in clean water. This gives them enough time to absorb the nutrients and moisture they need. You can start by filling a bowl with lukewarm water and soaking the air plant entirely.

Cut off brown or dead leaves

Removing dead parts allow air plants to absorb more sunshine, look beautiful and regenerate. The brown and dead leaves are easy to come off, so gently tug at the leaves until fresher leaves are left. With this, your air plant will gently and naturally pump back to life.

When the healthier leaves come to the surface, it’s easier for the plant to get moisture and nutrient from the atmosphere. Removing the dead parts also keep the pest at bay, as most pests are attracted to dead leaves.

Get rid of pests

One of the main causes of your dying air plants may be pests. The mealybug is one of the major dangers to air plants. So, you must keep insects and pests away from the plants to prevent them from dying.

Separate the affected plants from the healthy ones first. After that, spray them with a disinfectant solution like neem oil, dish soap, or baking soda. By doing so, you can keep the plant healthy and eliminate most pests, which will help it recover.

Provide air circulation and sunlight

An air plant needs good air circulation, as important as sunshine and water. Compared to most home plant decorations, air plants have tiny fuzzy white fibers on the leaves known as trichomes, allowing them to grow without soil. It helps them absorb water and airborne minerals and also regulates their temperature.

This means bad air regulation around your Tillandsia plant reduces its growth and causes its cores to rot or die. However, you can avoid this by checking your air plant regularly or ensuring they get excess moisture. Also, bright light exposure helps healthy air plants bloom. But leaving them under direct sunlight for too long makes them dry or die.

Remove excess water

Your air plants must be watered to survive, but too much water will damage the green leaves and roots. Hence, try to avoid running much tap water on the air plant and keep them dry. You can use a dry paper towel to carefully wipe away any excess water from the plant. You must be careful not to harm the leaves and roots when you drain the water.

Air Plant (Tillandsia) Care

Air plants can go for a long period without much attention. They might be small by nature, but they make stunning standalone houseplants.

Here is air plant care guides you should know.

Temperature

The best temperature to keep Tillandsia healthy and happy is between 50 to 900F and about 100F cooler at night. Air plants are sensitive to extreme cold and can survive a short freeze. However, once the temperature drops below 350F, they will require protection.

Air condition

Bad air circulation reduces growth in air plants and mostly rots their cores.  So when taking care of the air plant, remember that it requires good air, moderate sunshine, and water. Check your plant from time to time to ensure that they are getting adequate nutrients and moisture. Also, avoid putting air plants in a closed container or spots near fans or vents.

Light exposure

Light exposure plays a major role in air plants to look healthy and bloom. Leaving them under direct sunlight for too long may lead to burns and death. Your Tillandsia container should be placed under bright indirect light. Ideally, 7 am to 11 am is the best time ever.

Water needs

Care for air plants includes knowing how to water them to keep them healthy and happy properly. Directly watering your plant can be tricky. It’s advisable to water air plants deeply at least twice a week. You can mist them with spray bottles or soak them in water for an hour. You can also combine the two methods by soaking for 20 to 60 minutes daily with a supplemental misting, depending on the current climate and time of the year.

Regardless of your chosen method, always place the plant on top of a paper towel and allow it to air dry for a few hours before placing it gently in its containers. This is to protect them from rotting. Additionally, it is best to always look at your air plant’s tips to check its condition.

Feeding

Fertilizing air plants is not really for them to look their best, but it is an ideal way to encourage them to bloom and produce offsets. Use liquid fertilizer for the plants, especially natural/organic fertilizer.

It is easy to feed air plants by adding low-nitrogen bromeliad fertilizer or regular water solution houseplant fertilizer. The recommended strength is preferably a spray bottle, making it possible to feed and water your air plant at the same time.

Air plants naturally absorb enough moisture from high humidity and rain. But due to the dryness in most homes, indoor air plants require frequent watering. So, it’s best to monitor your air plants, water them as required, add fertilizer, monitor their exposure to light, etc. You don’t want them dried and dead over time.

FAQs

How long should I soak my air plant?

It’s best to soak your air plant overnight for 6 to 7 hours. After soaking, ensure you dry it before placing it in a container.

How do you revive air plants turning brown?

An air plant turning brown majorly signifies dryness. By watering your air plant deeply, you can revive it.

What type of water should be used for air plants?

You should use fresh and clean water to soak your air plant.

What causes dead air plants?

Causes of death are plants’ lack of light, too much sunlight, lack of water, poor air circulation, and too much water.

What Kind of Water Is Best for Your Plants?

Posted by darrell on
Gardening Tips
What Kind of Water Is Best for Your Plants?

One of the most fundamental aspects of caring for a plant is ensuring it gets enough water. What many people don’t realize, however, is that the type of water that you feed to your plants can have a huge impact on their health. While tap water has been chemically treated to be safe for human consumption, the purification methods leave traces of chemicals like fluoride and chlorine, which can harm your plants, killing good bacteria on their roots. A simple way to circumvent this is to use a water filter to remove contaminants. This way, you can ensure that you are providing your plants with the purest kind of water, encouraging them to thrive.

The Characteristics of Water

Differences in the makeup of your water depend largely on the region you live in, mostly due to the type of rock at your water source.

Soft Water

When rain falls from the sky, it is naturally soft. However, if it meets a porous material like chalk or limestone when it reaches the ground, it soaks up minerals such as calcium and magnesium, making it ‘hard.’

So that these minerals don’t build up in our plumbing systems, most water is treated with water softeners, which work by replacing existing minerals with potassium or sodium ions.

The problem is that the elevated sodium content can trick your plants and lawn and disrupt their water balance. In a worst-case scenario, your plants will die of thirst, and the salt build-up in the soil will also prevent future plants from growing.

Hard Water

As you now know, the most prevalent minerals found within hard water are dissolved calcium and magnesium, which are responsible for limescale deposits and blockages in pipes, heating systems, and appliances.

Whilst you might be forgiven for thinking extra minerals can only benefit your plants, there can be too much of a good thing. Over time, these minerals can accumulate, reducing the presence of other essential nutrients and altering the pH levels in the soil.

Choosing the Right Water for Your Plants

Tap Water

Whilst many houseplants can survive on a diet of tap water, some more sensitive plants can suffer or even die. This is because of the trace chemicals left in treated water, most typically fluoride and chlorine. If you must use tap water to feed your plants, naturally dissipate the chlorine by leaving it in a container to sit (uncovered) for a day or so.

Rainwater

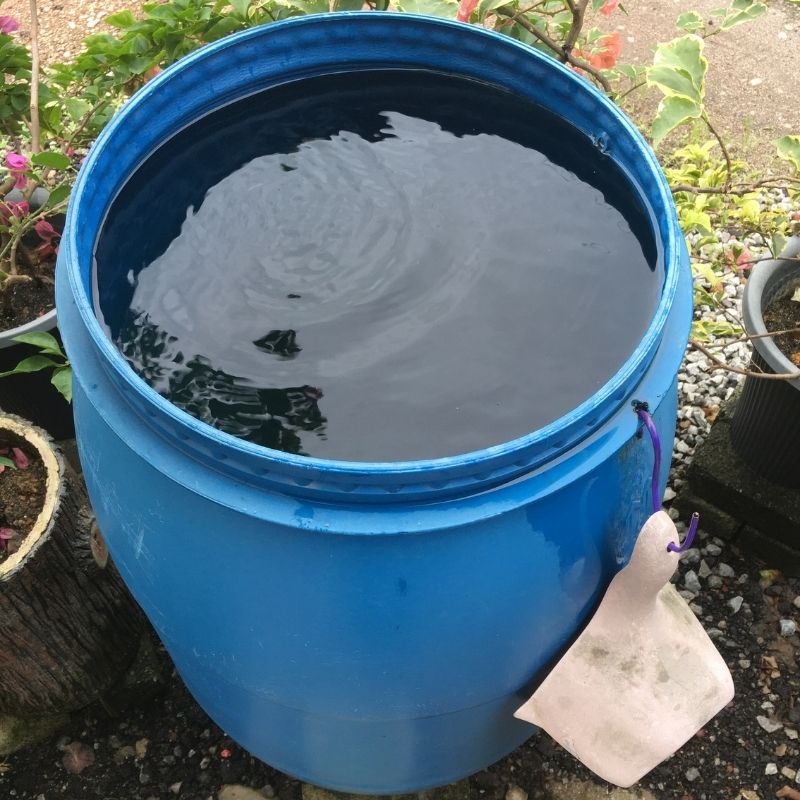
rainwater for plants

Rainwater is great for your plants as it is naturally soft. However, there are some cons to consider, such as difficulty collecting sufficient quantities and pollution, and high acidity if you live in the city or an industrial area.

Bottled Water

Bottled water can contain useful nutrients and minerals that encourage healthy plant growth; however, we would not recommend this method due to the serious environmental impact of plastic waste.

Filtered Water

Installing a water filter at home is easy and effective. You can remove dangerous viruses, bacteria, compounds, and toxins responsible for causing illness not just in plants but also in humans. Pre-filtering your water will not just boost growth in your leafy companions but improve the quality of your drinking water as well.

To help your plants live their best life, filtered water is your safest bet. You can be confident that any contaminants and nasty chemicals have been removed, and your plant’s roots can absorb all the hydrating water they need, free of impurities.