Category Archives

21 Articles

When to Implement TSP Seasonal Strategy: Timing Your CSA’s Post-Harvest Cold Chain

Posted by darrell on
Seasonal Planning and Management
When to Implement TSP Seasonal Strategy: Timing Your CSA’s Post-Harvest Cold Chain

Start temperature-staged processing (TSP) protocols within hours of harvest, especially for high-respiration crops like leafy greens and berries. In most temperate regions, the best window is late spring through early fall, peak CSA seasons when warmth accelerates post-harvest changes, and quality can vanish quickly. Adjust your TSP timing based on crop type, daily temperature swings, and where your produce is headed next. The tighter your harvest-to-cooling turnaround, the longer your veggies stay crisp, flavorful, and CSA-ready. For root crops or fall storage vegetables, you might delay or modify TSP steps, but never skip them entirely. Each crop and season brings its own timing twist, shaped by weather shifts, distribution demands, and your farm’s rhythm. Mastering seasonal TSP means ongoing attention, not one-off fixes, but the payoff is clear: sturdier crops, happier members, and less waste at the finish line.

Key Takeaway: Activate TSP protocols for spring greens in April-May, shift to full-temperature management during June-August peak harvests, and extend staging into September-October for storage crops. The critical windows align with the specific cooling needs and shelf-life goals of each crop season.

The Quick Answer: When TSP Strategy Matters Most
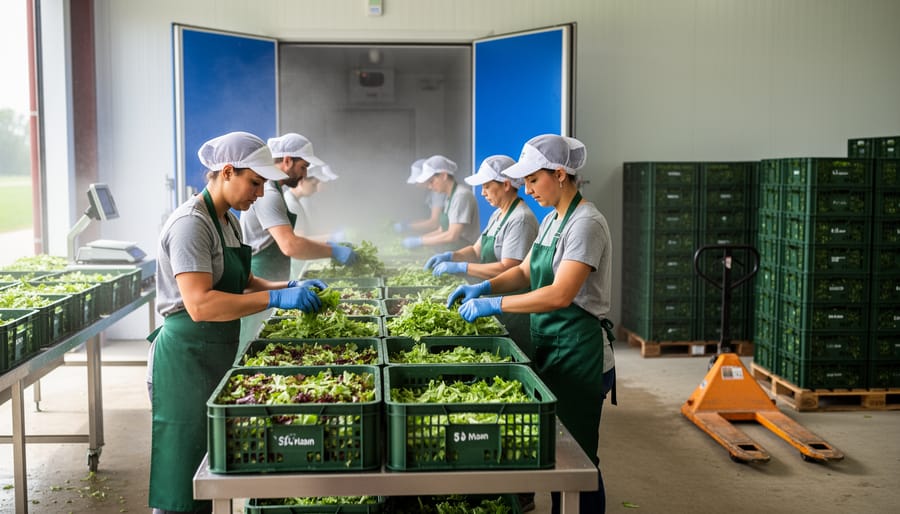
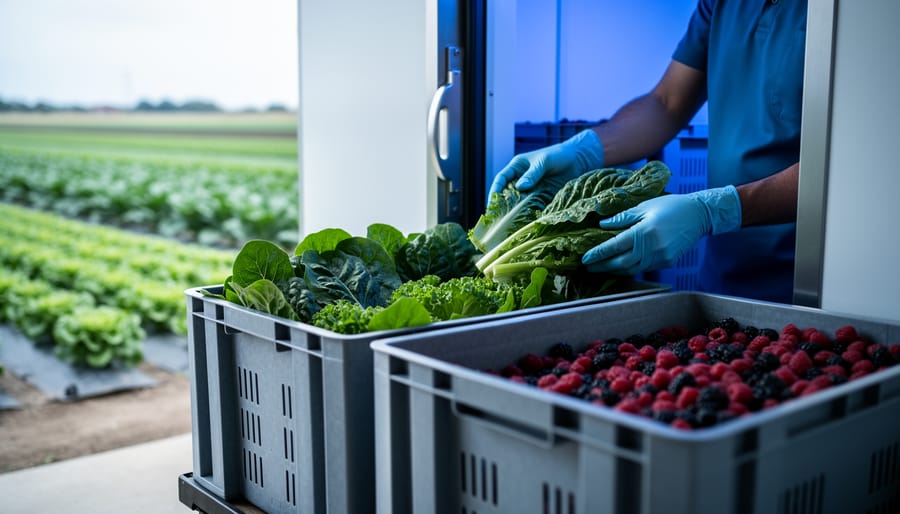
CSA workers loading harvested leafy greens into insulated crates beside a walk-in cooler entrance
Farm staff prepare harvested greens for rapid cold-chain handling right at the cooler entrance.

The essential timing for tsp seasonal strategy falls directly in line with every farm’s main production rhythm. For most CSA operations, the need to implement temperature-staged processing ramps up at three distinct points: first with early greens like lettuce, spinach, and peas harvested from April into May, which demand fast post-harvest cooling.

From June through August, as crops like tomatoes, squash, cucumbers, and berries flood the pack shed, TSP’s importance broadens. Each of these crops has unique cooling thresholds and holding temperatures, so activating a tailored TSP protocol during this period minimizes spoilage and supports frequent CSA share pickups.

Come September and October, the focus shifts again as root vegetables, winter squash, and storage onions roll in. Here, it’s not just about rapid cooling, but maintaining specific temperatures for weeks or even months to sustain quality through fall and early winter distributions. CSA farms in warmer regions may need to start TSP even earlier than those in cooler climates, while northern growers often extend cold chain management later to handle storage crops. Timing TSP to these seasonal shifts is fundamental to maximizing both crop value and member satisfaction.

Understanding TSP Timing Windows Throughout the Season

Spring: Early Season Greens and Cool-Weather Crops
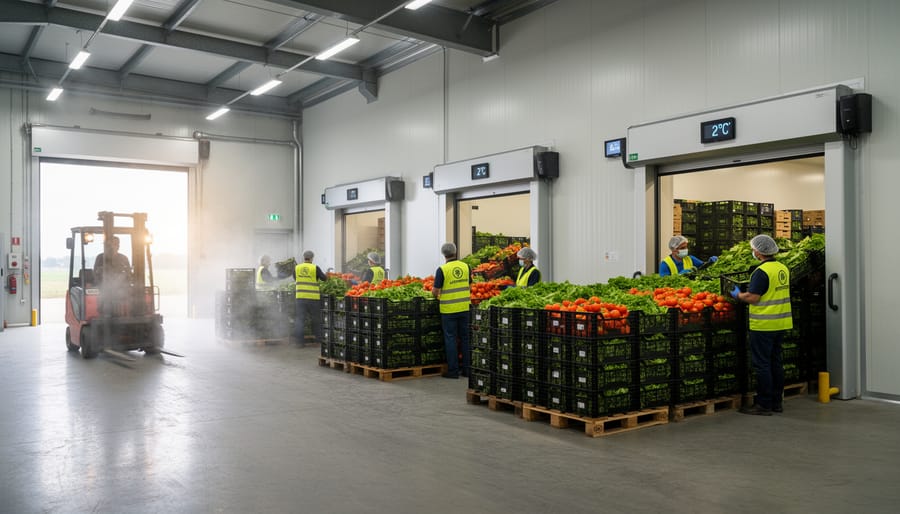
Condensation on insulated bins and stainless cooler shelves with staged produce inside a walk-in cooler
A chilled storage setup shows how quickly produce is moved into controlled temperature environments during peak harvest periods.

Early season greens like lettuce, spinach, and peas hit their stride in spring, demanding immediate action to preserve flavor and shelf life. As soon as these cool-weather crops are harvested, getting them into rapid cooling, ideally within 30 minutes, is critical. Targeting a storage temperature of 35-40°F stops deterioration and keeps textures crisp, especially for delicate leaves and brassicas.

Spring mornings often provide a cooler harvest window, but don’t rely on outdoor temps alone. Even a mild day can lead to greens wilting quickly if they’re left in bins or unshaded. For a practical breakdown of how different spring crops come on throughout the season, check out this helpful month-by-month produce overview.

Plan your TSP activation around your earliest harvest, set up washing stations and chillers in advance. Monitor field and storage temperatures daily, adjusting as needed for unexpected warm spells. If you’re prepping for your first CSA distributions, tighten your schedule so spring greens go from harvest to cold storage with no lag, reinforcing your quality commitment early in the season.

Summer: Peak Volume and Diverse Temperature Needs
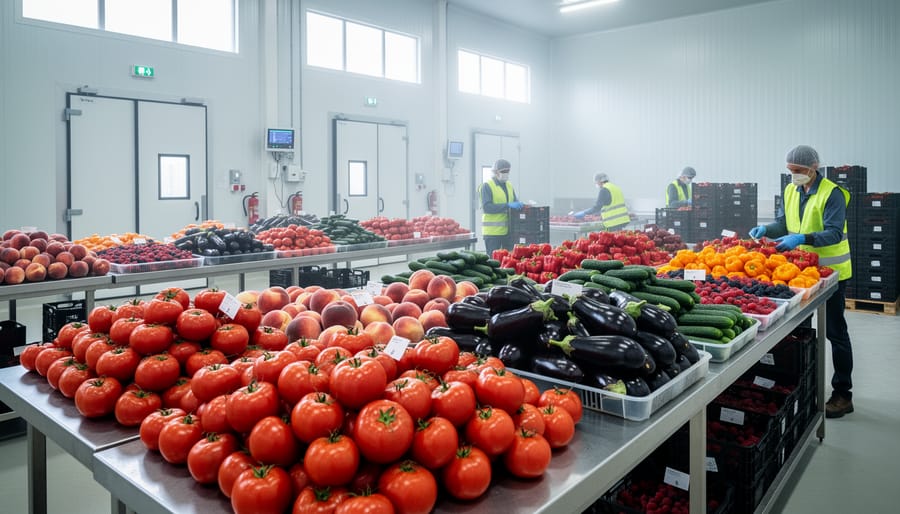
Worker holding mixed summer vegetables near shaded cooling area with greenhouse plants in the background
Mixed warm-season produce is gathered and staged for temperature-controlled handling during high-volume summer harvest.

Summer brings not only the biggest harvest surge for a CSA but also the most complex demands on your TSP seasonal strategy. With tomatoes, cucumbers, summer squash, green beans, and berries all reaching maturity within weeks of each other, post-harvest handling becomes a race against the clock. Crops differ in their optimal storage and chilling needs: tomatoes, for instance, hold best at 50-55°F to preserve texture and flavor, while cukes and summer squash keep well at 45-50°F. Berries require near-immediate rapid cooling to around 34°F for maximum shelf life and quality.

In this peak season, timing is everything. Plan your daily TSP protocols to match harvest order and crop sensitivity. Start by harvesting berries and leafy veg early in the morning, moving them into cold storage within 30 minutes. Reserve a slightly warmer holding space for tomatoes and cucurbits harvested later, shifting them to their respective zones as soon as possible. It’s essential to avoid mixing crops with different temperature needs, as a too-cold zone can damage produce like tomatoes, while a too-warm space will shorten berry life.

Don’t overlook airflow and humidity. High-volume cooling rooms fill fast, and overloaded bins slow down chilling rates. Rotate inventory and ensure that harvested produce never sits in the sun or lingers at ambient temperature. Summer’s bounty is only as good as your ability to keep every variety crisp, flavorful, and market-ready with precise, crop-appropriate cooling protocols.

Fall: Storage Crops and Extended Cold Chain
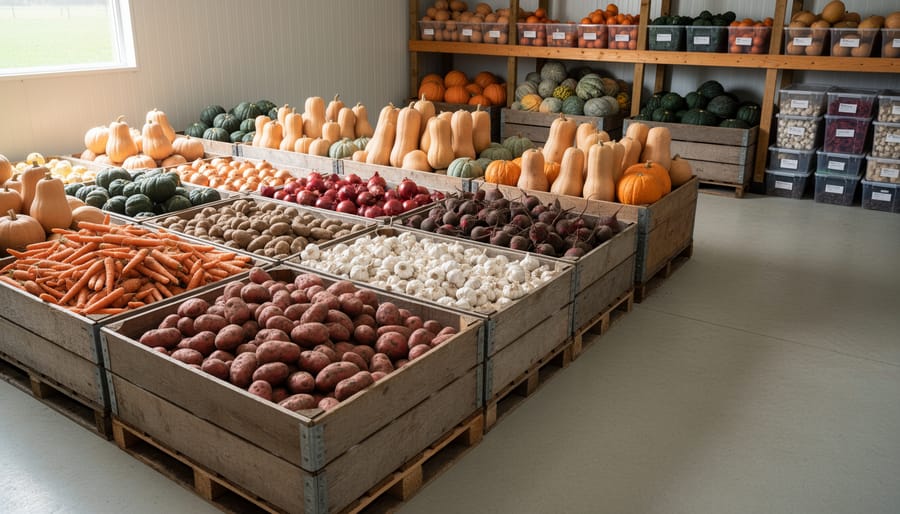
Winter squash and root vegetables arranged on ventilated racks in a cool farm storage room
Root crops and winter squash appear ready for extended cold storage in a CSA’s fall season routine.

Once fall arrives, the focus of your tsp seasonal strategy shifts to crops built for long-term storage and extended distribution through winter CSA shares. This is when timing becomes crucial, as crops like carrots, beets, potatoes, winter squash, and cabbage can quickly lose quality if cooling protocols are delayed or inconsistent. For root vegetables, activate your lowest temperature stage (typically 32-38°F, with high humidity) immediately after harvest to stop respiration and preserve texture. Hold winter squash and garlic in moderately cool, dry conditions (around 50-55°F), as premature chilling may cause rot.

The challenge of fall is overlapping harvests with varied cold chain requirements. Plan your workflow to sort and pre-cool each crop type promptly before bulk storage. For members receiving winter boxes, maintain tight temperature and humidity control in storage areas, checking conditions at least weekly. This approach keeps your CSA offerings crisp, flavorful, and marketable well beyond the main harvest, supporting both your farm’s bottom line and your members’ winter pantries.

Key Factors That Shift Your TSP Timeline

Climate and Weather Variability

Sudden heatwaves or unseasonably warm nights can push crops to ripen faster or increase the risk of post-harvest spoilage, meaning you may need to activate TSP protocols sooner than your standard schedule. On the flip side, unexpected cold snaps can delay harvest readiness and give you a wider opening before the cold chain becomes urgent. Humidity spikes, especially following late-summer storms, demand extra attention, as elevated moisture can accelerate decay in everything from leafy greens to tomatoes.

Staying flexible with TSP timing keeps your CSA shares fresher, but it can be hard to know how early is early enough. This is where integrating CSA forecasting tools with your post-harvest workflow pays off. Tracking local weather patterns and humidity trends helps you fine-tune cold chain activation day by day instead of relying only on the calendar. Adaptable farmers often start prepping coolers and field packs several days ahead when a heatwave looms. Planning for these climate-driven shifts prevents quality loss and helps keep your CSA flexible in the face of unpredictable weather.

Farm Infrastructure and Equipment Readiness

Launching your TSP seasonal strategy at the right time depends heavily on your farm’s infrastructure and how well your equipment can handle post-harvest volumes. Before peak harvest, confirm your walk-in coolers have sufficient capacity to handle an influx of crops requiring simultaneous temperature staging. If your CSA harvest volume often exceeds cooler space during peak summer, mobile cooling units can bridge the gap, preventing delays in starting TSP protocols that would otherwise compromise quality.

Test all cooling equipment for calibration and reliability before heavy harvests begin. Having a backup power system, whether a generator or battery backup, ensures you don’t lose critical temperature control during storms or outages, a common concern in rural areas. Delay or stagger TSP processing only if your capacity is maxed out. Regular equipment checks and investing in maintenance help avoid last-minute failures that force you to abandon or improperly time temperature-staged processing, resulting in preventable losses.

CSA Distribution Schedule and Member Patterns

Timing your TSP seasonal strategy around the CSA distribution schedule ensures crops arrive fresh and at their optimal quality. The interval between harvest and delivery, plus the fluctuating storage times before members collect their shares, should drive your protocol adjustments throughout the season. Start by mapping out pickup days and delivery routes for the week, then look at which crops need rapid cooling versus those that tolerate room temperature. Crops picked closer to distribution require shorter cold staging, while those harvested earlier, maybe to accommodate long routes, may spend more time in storage, needing staggered temperature controls.

Pay attention to member patterns too. Are some shares picked up later in the day or even the next morning? If so, stage cold chain management to extend freshness for longer-held produce. Adjust your TSP timeline alongside how you plan CSA shares ensuring each step serves the actual timing from field to member. This alignment smooths out the “last mile,” ensuring food quality even when plans shift.

Implementing TSP at the Right Moment: Step-by-Step Timeline

Timing TSP activation starts with organized pre-season preparation, ensuring you’re ready well before crops hit their harvest window. Tools like a 7-step CSA checklist or a seasonal diagram tool can help anchor this process. Here’s a step-by-step approach for putting a temperature-staged processing (TSP) strategy into action just when it’s needed, maximizing produce quality and minimizing post-harvest loss.

  1. Pre-season equipment testing (2-3 weeks before first harvest): Inspect all cold storage units, mobile cooling systems, and temperature monitoring devices. Run empty dry tests to confirm power reliability, door seals, and backup systems are working. Stock any needed supplies, like temperature log sheets and digital thermometers.
  2. Temperature zone setup: Set each storage area to target temperatures for your earliest crops. For example, calibrate one cooler to 35-40°F for leafy greens and another to 45-55°F for tomatoes or summer squash. Mark each zone and post crop-specific handling instructions nearby.
  3. Harvest-day activation protocols: On harvest mornings, pre-cool empty storage areas before fieldwork begins. As each crop is picked, move it into its designated temperature zone within 30-60 minutes. This rapid transfer is crucial for quality retention with crops like spinach or berries.
  4. Daily monitoring procedures: Assign someone to check and record temperatures morning and evening. Use data loggers if available. Promptly adjust if units drift out of range, and record any cooling delays to help diagnose patterns later.
  5. Adjustment triggers: Be ready to shift TSP protocols if harvest volume spikes, weather swings, or new crops start coming in. For instance, bump cooler temperatures higher for tomatoes in late summer, or add a second cooling stage for root vegetables as fall approaches.

Getting these steps in place creates a reliable rhythm, letting your farm team respond quickly to seasonal swings and daily surprises. By triggering TSP processes ahead of major harvest surges, rather than waiting for product loss or complaints, you set the tone for a smoother, less stressful season. Coordinating TSP activation with your organized CSA distribution will help preserve flavor and shelf life, especially when the pressure of the season peaks. And integrating lessons learned, such as what worked or what missed the mark this year, into your workflow as you plan next season means your timing will only get sharper with each cycle.

Common Timing Mistakes and How to Avoid Them

Warning: The most costly mistake is waiting until wilting, yellowing, or soft spots appear in your crops before activating cold chain controls, by then, you’ve already lost quality and profit that preventive action could have saved.

One of the biggest timing missteps in TSP seasonal strategy is reacting to post-harvest problems rather than preventing them. Starting too late, especially in years with a sudden warm spell or unexpected surge in harvest volume, lets field heat and ambient moisture deteriorate sensitive crops before they’re ever cooled. Once visible signs of decline show up, even the most precise temperature-staged processing can’t fully reverse the damage.

Implementing TSP protocols too early carries risks as well. If you pre-chill your systems weeks before peak harvest, you waste energy and open your equipment to wear without product to protect. Unnecessarily cold conditions can also stress crops not ready for storage, causing chilling injury in cool-weather greens or slowing the ripening of warm-season produce.

Inconsistency is another common pitfall. Some farms will set up effective cooling routines at the start of the season, then relax or skip steps once they hit a routine, only to discover quality loss creeping back in when harvest volumes spike or temperatures swing. Slipping out of sync with your distribution schedule also means crops spend extra hours at ambient temperatures on busy pickup days, shrinking shelf life for CSA members.

To avoid these mistakes, use harvest forecasts and past records to time TSP activation a day or two before your earliest likely surge, adjust proactively for weather changes, and maintain your routines all season, not just during high visibility weeks. Frequent checks and open communication among harvest, packing, and delivery teams keep timing aligned, reducing costly surprises and helping your CSA deliver the freshest, longest-lasting shares possible.

Aftercare: Maintaining TSP Effectiveness Through Season’s End

Mid-Season Adjustments and Fine-Tuning

Adjusting your tsp seasonal strategy mid-season keeps post-harvest quality high even when conditions shift unexpectedly. Signs you need to tweak timing include produce losing crispness before delivery, slower cooling rates than usual, or increased condensation in storage areas. Use daily temperature logs and quality checks as your early warning system. If you notice frequent out-of-range temperatures or crop wilting, adjust your cooling set points or start chilling harvest bins sooner in the day. In busy peak weeks, check cold storage turnover rates and be ready to deploy extra mobile cooling units if product backs up. Regular review of performance data lets you spot trends and fine-tune your protocols before small issues become big losses. Staying observant and adapting quickly is key to keeping your CSA shares consistently fresh.

End-of-Season Review and Planning Ahead

As harvest winds down, the most effective farms don’t just pack up, they document, review, and learn. Start by noting when each crop entered and exited your TSP protocol, paying close attention to any batches with delayed cooling or shelf-life issues. Compare harvest dates, weather records, and your own notes: did you wait too long to start temperature control for any crop, or activate cold storage before it was needed? Farmers often notice that consistent, season-long record-keeping reveals patterns, like certain greens that always wilt if the TSP process starts a day late, or root crops benefitting from slower temperature ramp-downs. Use these insights to draft next year’s timeline now, planning for an earlier TSP prep and identifying any gaps in equipment or workflow. A simple review each fall makes timing improvements automatic.

Real Farm Success: How Green Valley CSA Perfected Their TSP Timing

Green Valley CSA, a diversified mid-sized farm in the Midwest, once struggled every summer with rapid product deterioration between field harvest and CSA member pickup. Even with reliable cold storage, their mixed greens and summer squash often lost color and crunch by the end of the week. Frustrated, the team looked at their post-harvest process and realized their temperature-staged processing wasn’t starting soon enough in the season. Like many growers, they waited until hot spells in July to ramp up cold chain protocols, relying on ambient shade and ice packs through cooler May and June harvests.

In 2024, they shifted course based on data from previous seasons. The farm began full TSP activation two weeks ahead of their largest spring cutting, even if the weather seemed mild. That meant setting up pre-cooling bins, calibrating walk-in coolers, and preparing ice water baths for greens as soon as the first outdoor lettuces hit market size in late May. This early start led to an immediate difference: instead of just reacting to the first episode of heat-related wilt, staff intercepted field heat from the outset, locking in freshness.

That season, Green Valley’s post-harvest loss rate for susceptible crops dropped from 14% to just over 8%. Customers raved about the crisper greens and longer-lasting root veggies, and the crew noticed easier sorting at pick-up, less trimming, less waste. Their biggest lesson: don’t let the calendar or air temperature dictate your TSP rollout. Instead, anchor your strategy to crop readiness and harvest workload. By getting ahead of the curve, they protected quality, and their reputation, through the most demanding weeks of CSA delivery.

Implement Tsp Seasonal Strategy Timing Your Csa S Terms to Know

To help you implement tsp seasonal strategy effectively for your CSA, here are the most essential terms to know:

Temperature-Staged Processing (TSP)
A post-harvest protocol that involves cooling crops through a sequence of specific temperature steps to optimize quality and shelf life.
Cold Chain
The uninterrupted refrigerated handling and storage process that preserves perishable crops from harvest to distribution.
Shock Cooling
A rapid reduction in crop temperature, usually within the first hour after harvest, to halt respiration and slow spoilage.
Hold Temperature
The ideal storage temperature for a particular crop category, maintained after initial cooling to preserve freshness until delivery.
Distribution Window
The period between harvest and CSA share pickup or delivery, critical for planning when to initiate and monitor your TSP protocols.

Knowing these key definitions gives you the foundation for precise timing and confident decision-making as you plan your TSP seasonal strategy sequence.

Frequently Asked Questions About TSP Timing

When should I start TSP for a new CSA?

Plan to activate temperature-staged processing protocols just before your first harvest, especially for crops highly sensitive to post-harvest heat like leafy greens. Setting up early ensures your cold chain is ready the moment produce comes in from the field.

Is it possible to implement TSP mid-season, or do I have to start at the beginning?

You can add or adjust TSP protocols mid-season if you notice quality losses or shifting crop profiles, but starting from day one is ideal for consistent results. Many CSAs make upgrades or changes during peak harvest when timing issues become obvious.

What should I do if I don’t have refrigerated storage yet?

If you lack on-farm refrigeration, utilize shade, evaporative cooling, or cold well water baths immediately after harvest as a temporary TSP measure. Prioritize high-risk crops and plan incremental upgrades so your system grows with your CSA.

Are there regional differences in the best timing for TSP?

Absolutely. Warmer climates typically require earlier and longer TSP activation, while cooler regions may extend spring and fall protocols. Always adjust your timeline based on local harvest weather and storage needs rather than a fixed date.

For many small and beginning CSA farms, the most common mistake is waiting until crops are already coming in before thinking about temperature management. Ideally, TSP planning starts weeks before the first planting or even as you design your CSA’s season. Integrating cold chain strategies early builds resilience for everything from leafy greens in spring to root crops in fall. Even a basic setup using shaded storage or ice-chilled water can make a difference while you work toward full-scale refrigeration. Reviewing procedures as seasons progress allows you to fine-tune timing, especially as member pickup patterns or weather conditions shift. TSP isn’t a one-time switch, it’s a season-long rhythm that keeps your harvests fresher, longer, with adjustments for both your fields and your farm’s unique set-up.

Timing is everything when it comes to getting the most from a TSP seasonal strategy. Success starts before the first harvest, with careful planning and cold chain setup well in advance of peak season. Too often, waiting for the produce to hit its stride means scrambling after the fact, by then, freshness and flavor may already be compromised. One of the most effective habits is making TSP protocols a core part of your CSA’s routine, not just a last-minute push.

Staying flexible is just as important. Each year brings its own surprises, heatwaves, cool spells, delayed rains. Farmers who watch the weather and aren’t afraid to start a week or two early consistently see better shelf life and quality for their members. As you plan for next season, schedule TSP checks into your calendar alongside planting and harvest. This early action pays off when your CSA is delivering its very best, every share, all season.

Smart Livestock Feeding: How to Optimize Livestock Nutrition With Online Feed Sources and Calculators

Posted by darrell on
Categories
Smart Livestock Feeding: How to Optimize Livestock Nutrition With Online Feed Sources and Calculators

Modern livestock producers face mounting pressure to maximize efficiency while maintaining animal health and profitability. Traditional feeding methods, reliant on guesswork and generalized rations, often result in nutrient imbalances, excessive waste, and suboptimal performance. The agriculture industry now stands at a critical juncture where digital tools can transform nutritional management entirely. Online feed sources and precision calculators offer producers unprecedented access to data-driven insights that align feed composition with specific herd requirements, fundamentally changing how nutrition strategies are developed and implemented.

The Shift Toward Smarter Livestock Nutrition Planning

Modern livestock operations face mounting pressure to balance animal health, production efficiency, and economic viability while reducing environmental impact. Traditional feeding approaches relied heavily on standardized ration formulations and generalized nutritional guidelines that often resulted in overfeeding or nutrient imbalances.

Digital transformation has introduced sophisticated tools that enable precision nutrition management. Online feed databases provide real-time nutritional composition data, while advanced calculators account for variables including animal weight, production stage, breed characteristics, and environmental conditions.

These technologies allow farmers to formulate customized rations that match specific herd requirements. The shift toward data-driven nutrition planning reduces feed waste, lowers costs, and minimizes nutrient excretion into the environment.

Producers can now make informed decisions based on accurate nutritional analysis rather than approximations, resulting in improved animal performance and profitability.

How Livestock Food Online Expands Access to Quality Feed Options

Online marketplaces have fundamentally altered how farmers source feed materials and supplements. Digital platforms now connect producers directly with specialized feed suppliers, eliminating geographical barriers that previously limited access to premium ingredients. Buying goat food online is not a burden in 2026 and beyond

Farmers in remote areas can order nutritional concentrates, mineral supplements, and specialized grains previously unavailable through local distributors.These platforms provide detailed product specifications, nutritional analyses, and ingredient transparency that traditional supply chains often lack. Producers can compare formulations, verify certifications, and read verified reviews before purchasing. Bulk ordering options and subscription services reduce costs while ensuring consistent supply.

The competitive marketplace drives suppliers to maintain higher quality standards and offer innovative products. Real-time inventory systems prevent shortages, while direct shipping reduces handling and preserves feed freshness, ultimately supporting more precise nutritional management.

Using a Feed Calculator to Match Nutrition With Animal Age and Purpose

Precision feeding requires matching nutritional inputs to specific physiological demands, which vary dramatically across growth stages, production purposes, and species.

Feed calculators enable producers to input variables like animal weight, age, breed, and intended outcome, whether for meat production, dairy, breeding, or maintenance, to generate tailored ration recommendations. These digital tools account for metabolic differences between young, growing animals requiring higher protein ratios and mature livestock needing maintenance-level nutrition.

Dairy cattle demand calcium and energy-dense formulations, while beef cattle finishing operations prioritize energy concentration for weight gain. Layer hens require distinct nutritional profiles compared to broilers. Horse feed calculators are often present in websites selling horse food.

Modern calculators integrate scientific feeding standards with real-time ingredient analysis, preventing both nutritional deficiencies and costly overfeeding. This data-driven approach maximizes feed conversion efficiency, optimizes growth rates, and reduces waste.

Balancing Protein, Energy, and Minerals for Optimal Animal Health

Why do nutritional imbalances remain a primary cause of production losses and health complications in livestock operations? The answer lies in the complex interplay between protein, energy, and minerals that must align with specific production stages.

Protein deficiencies reduce growth rates and milk production, while excess protein burdens kidney function and increases nitrogen waste. Energy imbalances directly affect body condition, insufficient energy mobilizes body reserves, whereas surplus energy leads to obesity and metabolic disorders. Mineral deficiencies create cascading health issues. Calcium and phosphorus imbalances cause skeletal problems and milk fever. Selenium deficiency triggers white muscle disease, while copper deficiency impairs immune function.

Online calculators help producers identify ideal ratios for their specific animals. These tools account for breed, age, weight, and production purpose, preventing costly nutritional errors that compromise profitability and animal welfare.

Reducing Feed Waste and Costs Through Data-Driven Feeding Decisions

Feed costs represent 50-70% of total livestock production expenses, making waste reduction an immediate opportunity for improved profitability.

Data-driven feeding systems enable producers to calculate precise ration quantities based on animal weight, production stage, and nutritional requirements, eliminating guesswork and overfeeding. Digital feed calculators analyze feed composition, nutrient availability, and animal performance metrics to optimize ingredient combinations. This targeted approach prevents nutrient excesses that animals cannot utilize, reducing both waste and environmental nitrogen output.

Real-time monitoring of feed conversion ratios identifies inefficiencies quickly, allowing immediate corrective action. Tracking feeding patterns through software reveals seasonal trends and helps predict future feed needs accurately. Producers can purchase ingredients strategically when prices are favorable, avoiding emergency purchases at premium costs.

Documentation also supports compliance with regulatory requirements while improving overall herd management decisions.

Seasonal and Production-Based Adjustments in Feeding Strategies

Livestock nutritional requirements fluctuate considerably throughout the year and across different production phases, demanding flexible feeding protocols rather than static rations.

Winter months typically necessitate increased energy supplementation to maintain body temperature, while summer heat may require dietary adjustments to compensate for reduced feed intake. Pregnant and lactating animals demand elevated protein and mineral levels compared to maintenance requirements.

Online feed calculators enable producers to modify rations efficiently based on these variables. Inputting seasonal temperatures, production stage, and current body condition scores generates precise nutritional recommendations.

Shifting cattle from backgrounding to finishing phases, for example, requires progressive grain increases while reducing forage percentages. Similarly, ewes approaching lambing need concentrated energy sources.

Digital tools eliminate guesswork, ensuring animals receive appropriate nutrients precisely when physiological demands change, optimizing both performance and feed efficiency.

Building Long-Term Herd Performance With Digital Nutrition Tools

Consistent application of digital nutrition tools creates extensive datasets that reveal patterns invisible through traditional record-keeping methods.

These accumulated records enable producers to identify which feeding strategies consistently yield superior results across different conditions and animal groups. Data-driven insights help optimize replacement heifer development, ensuring future productivity while controlling costs. Digital platforms track individual animal performance metrics, allowing early detection of nutrition-related issues before they impact herd health or production levels.

Long-term analysis reveals correlations between specific feed formulations and outcomes like reproductive efficiency, milk quality, or growth rates. This evidence-based approach eliminates guesswork from nutritional management decisions. Producers can benchmark their operations against historical performance and industry standards, identifying improvement opportunities.

Integration of multiple data sources creates predictive models that forecast nutritional needs and economic returns with increasing accuracy over time.

Finding Your Perfect CSA Share: How to Plan Around What Actually Arrives Each Week

Posted by darrell on
Seasonal Planning and Management
Finding Your Perfect CSA Share: How to Plan Around What Actually Arrives Each Week

Searching for a CSA (Community Supported Agriculture) program connects you directly with local farmers who deliver fresh, seasonal produce to your neighborhood each week. Start by visiting LocalHarvest.org or asking at your farmers market to identify farms within 20 miles of your home that offer membership shares. Contact three programs to compare their harvest schedules, pickup locations, and whether they accommodate dietary preferences or allow vacation holds.

Before committing, request a sample harvest list from each farm to understand what vegetables you’ll actually receive throughout the season. Most CSAs operate from May through October, though some extend into winter months with storage crops like squash and root vegetables. Expect to pay between $400-$700 for a standard season, which typically feeds a family of four when combined with strategic meal planning around your weekly share.

The key to CSA success lies in adjusting your cooking habits to embrace whatever arrives in your box. Members who thrive are those who view their share as a creative challenge rather than a grocery replacement, learning to preserve surplus through freezing or fermentation and swapping items they don’t use with fellow members at pickup sites.

Why Seasonal Planning Changes Everything for CSA Members

Joining a CSA requires a different mindset than typical grocery store shopping, but this shift brings remarkable benefits. Instead of expecting the same produce year-round, you’ll learn to embrace what’s actually growing in your region right now. Understanding seasonal growing cycles transforms how you plan meals and shop.

Planning ahead becomes second nature when you know what to expect each season. Many CSA farms share harvest schedules or weekly previews, allowing you to research recipes before your box arrives. This simple practice dramatically reduces food waste since you’re prepared to use everything you receive. You’ll find yourself getting creative with abundant summer tomatoes or discovering new ways to prepare root vegetables in winter.

The connection you develop with local growing patterns runs deep. You’ll notice when strawberry season peaks, understand why certain greens thrive in spring’s cool weather, and appreciate the patience required for winter squash to mature. This knowledge enriches your relationship with food beyond what any supermarket experience offers.

Sarah, a three-year CSA member from Ontario, shares her experience: “I used to throw away produce constantly because I’d buy on impulse. Now I plan my weekly meals around my CSA share, and my food waste dropped to nearly zero. Plus, I’ve discovered vegetables I never would have tried otherwise.”

This mindset shift takes a few weeks to adjust, but most members find the rhythm rewarding and surprisingly liberating once they embrace seasonal eating.

Understanding Your Local CSA’s Growing Calendar

Spring Produce Patterns (March-May)

Spring CSA boxes burst with fresh energy after winter’s dormancy. Expect an abundance of leafy greens like lettuce, arugula, spinach, and kale—sometimes in quantities that seem overwhelming at first. Crunchy radishes arrive in vibrant colors, while early herbs like cilantro and parsley add fresh flavor to every meal. Many farmers also include tender Swiss chard, green onions, and the occasional surprise of asparagus.

To prepare for this green bounty, invest in a salad spinner and dedicate fridge space for produce storage. Local farmer Maria Chen shares her wisdom: “New members often panic seeing five bunches of greens, but once they discover how quickly fresh salads disappear and learn to sauté greens as easy side dishes, they become spring share champions.”

Stock your pantry with good olive oil, lemon juice, and garlic to complement these tender vegetables. Consider batch-prepping washed greens on delivery day, making weeknight cooking effortless. Many members freeze herbs in ice cube trays with olive oil, preserving spring’s flavors for months ahead.

Overhead view of wooden CSA box filled with fresh spring vegetables including lettuce, radishes, and herbs
A typical spring CSA share features an abundance of leafy greens, radishes, and fresh herbs that require different preparation strategies than summer vegetables.

Summer Harvest Explosion (June-August)

Summer brings the most abundant CSA boxes of the year, overflowing with sun-ripened tomatoes in rainbow hues, prolific zucchini, crisp peppers, juicy stone fruits, and fragrant herbs. This bounty can feel overwhelming at first, but with simple strategies, you’ll maximize every delicious bite. Start preserving early—freeze chopped peppers and blanched zucchini for winter soups, or make simple tomato sauce in big batches. Share generously with neighbors and coworkers; trading your excess cucumbers for their berries builds community connections. Farmer Maria from Sunrise Valley Farm recommends dedicating Sunday afternoons to meal prep, roasting vegetables for easy weeknight dinners. Keep countertop bowls filled with tomatoes and stone fruits for grab-and-go snacks. Remember, even experienced members don’t use everything perfectly—composting extras feeds next season’s soil, completing the sustainable cycle that makes CSA farming so environmentally beneficial.

Fall Transition Foods (September-November)

As temperatures cool, your CSA box transforms into a celebration of hearty comfort foods. Expect sweet potatoes, beets, carrots, and turnips that store beautifully and grow sweeter with cooler nights. Winter squash varieties like butternut, acorn, and delicata become staples, offering weeks of versatile meal options. Kale, chard, and collards thrive in fall weather, becoming less bitter after the first frost. Many farmers share that autumn shares actually offer the most forgiving produce for new members—these sturdy vegetables are excellent for roasting, soups, and meal prep throughout the week.

Winter Storage Crops (December-February)

Winter CSA shares showcase the remarkable storage capabilities of cold-hardy crops. Expect boxes filled with sweet potatoes, carrots, beets, and various winter squashes that have been properly cured for long-term storage. Many farms also include hardy greens like kale, collards, and spinach that actually sweeten after frost exposure. Some innovative CSAs supplement winter shares with preserved items—think canned tomatoes, frozen berries, or fermented vegetables—prepared during peak harvest season. This is when your root vegetable roasting skills really shine! Pro tip: Store your winter roots in a cool, dark place and remove any greens immediately to prevent moisture loss.

Creating Your Seasonal Meal Planning System

The Week-by-Week Planning Method

The secret to CSA success isn’t planning your weekly menu before pickup—it’s creating a flexible framework that adapts to whatever arrives in your box. Here’s how to make it work: Pick up your share and immediately sort items by urgency. Delicate greens and herbs need attention within two days, while root vegetables can wait until week’s end. Next, identify one or two “anchor meals” based on your most abundant items. If you receive three pounds of zucchini, plan a stir-fry and a batch of zucchini bread. The remaining vegetables become supporting players in your regular rotation.

This approach works beautifully because you’re responding to what you actually have rather than trying to predict it. Local farmer Maria Chen from Green Valley CSA shares her member tip: “I keep a running list of three quick cooking methods—roasting, sautéing, and raw salads. Any vegetable fits into at least one category.” Keep staples like olive oil, garlic, grains, and eggs on hand to complement your produce. By week’s end, challenge yourself to use everything before the next pickup arrives. This rhythm becomes intuitive after just a few weeks, transforming meal planning from stressful to spontaneous.

Building Your Seasonal Recipe Collection

Creating an organized recipe collection takes the guesswork out of CSA cooking and helps you make the most of each week’s harvest. Start by setting up a simple digital or physical filing system organized by season—spring, summer, fall, and winter. Within each season, create categories for your main vegetables like leafy greens, root vegetables, tomatoes, and squash.

As you discover recipes that work well with your CSA produce, file them in the appropriate seasonal category. This way, when June brings an abundance of zucchini, you can quickly reference your summer squash section instead of scrolling through hundreds of random recipes online. Consider noting which recipes use multiple CSA items at once, as these become your go-to solutions for busy weeks.

Many successful CSA members swear by keeping a “greatest hits” list of family favorites that accommodate whatever arrives. Think flexible recipes like stir-fries, frittatas, grain bowls, and soups where you can swap ingredients based on availability. Sarah, a three-year CSA member from Oregon, shares her tip: “I keep index cards with my top ten adaptable recipes right on my fridge. When my box arrives, I can immediately see which recipe framework will work best.”

Don’t forget to include preservation recipes for peak harvest times. Knowing how to turn excess tomatoes into sauce or beets into pickles means nothing goes to waste, and you’ll enjoy your local produce well beyond the growing season.

Smart Storage Strategies That Extend Your Produce Life

Immediate Storage After Pickup

The first few hours after bringing home your CSA share are crucial for maximizing freshness and shelf life. Start by unpacking your produce as soon as possible, but resist the urge to wash everything immediately. Most vegetables store better unwashed, as excess moisture can promote spoilage and mold growth.

Instead, inspect each item and remove any damaged leaves or spots. Leafy greens should be stored in breathable produce bags or wrapped loosely in damp towels inside the crisper drawer. Root vegetables like carrots, beets, and radishes prefer high humidity, so remove their greens (which draw out moisture) and store the roots in sealed containers with a damp paper towel.

Herbs benefit from being treated like fresh flowers. Trim the stems and place them in a jar with an inch of water, then cover loosely with a plastic bag and refrigerate. Tomatoes, summer squash, and peppers should stay at room temperature until fully ripe, then move to the refrigerator if needed.

Keep delicate items like berries and mushrooms in their original containers until you’re ready to use them. A local CSA farmer, Maria, shares this tip: “Label everything with the pickup date using masking tape. It helps you rotate through items and use the oldest produce first.”

Hands washing fresh vegetables under running water at kitchen sink
Proper washing and immediate storage of CSA vegetables extends their freshness and helps prevent waste throughout the week.

Simple Preservation for Abundance Weeks

When your CSA box overflows with summer squash or leafy greens, simple preservation techniques become your best friend. Freezing works beautifully for most produce—berries, chopped peppers, and blanched greens store for months with minimal effort. Just spread items on a baking sheet to freeze individually before transferring to containers, preventing everything from clumping together.

Blanching takes just minutes and preserves color, texture, and nutrients. Boil vegetables like green beans or broccoli for two to three minutes, then plunge them into ice water before freezing. This quick process stops enzymes that cause deterioration.

Quick-pickling transforms excess cucumbers, radishes, or carrots into crunchy, tangy treats. Heat equal parts vinegar and water with salt and sugar, pour over your sliced vegetables, and refrigerate. These pickles last several weeks and require no special canning equipment.

Local farmer Sarah from Riverside CSA shares her tip: “I keep pre-mixed pickling brine in my fridge. When I get unexpected abundance, I’m ready to preserve within minutes.” With these straightforward methods, you’ll waste less produce, enjoy variety year-round, and maximize your CSA investment without complicated equipment or extensive time commitments.

Making the Most of Unfamiliar Vegetables

One of the most exciting aspects of CSA membership is discovering vegetables you’ve never cooked before. That bright purple kohlrabi or bunch of garlic scapes might seem intimidating at first, but these unfamiliar items often become household favorites with the right approach.

Start by researching your mystery vegetables as soon as you unpack your share. A quick online search for “how to cook [vegetable name]” yields dozens of recipes and preparation tips. Many CSA farms also include weekly newsletters with recipe suggestions specifically tailored to your box contents. Don’t hesitate to ask your farmer questions during pickup—they’re usually thrilled to share their favorite preparation methods.

Take an experimental approach in the kitchen. Try roasting unfamiliar vegetables with olive oil, salt, and pepper as a simple first attempt. This straightforward method brings out natural sweetness and works surprisingly well with most produce. You can also incorporate new vegetables into familiar dishes—add that mysterious bok choy to your regular stir-fry or toss those turnip greens into pasta.

Sarah Martinez from Portland discovered this firsthand when kohlrabi appeared in her first CSA box. “I had no idea what it was,” she admits. “I looked up three different recipes and chose the simplest one—just peeling and roasting it like potatoes.” Her kids devoured it, and now she requests extra kohlrabi from her farmer whenever possible. “It tastes like a mild, sweet broccoli stem. We’re completely hooked!”

Remember, not every experiment will be a winner, and that’s perfectly fine. The learning process is part of the CSA adventure, expanding your culinary skills and introducing genuine variety to your family’s diet.

Connecting with Your CSA Community for Support

One of the most valuable aspects of joining a CSA is becoming part of a supportive community of like-minded food lovers. Your fellow members are navigating the same seasonal challenges and celebrating the same harvest surprises, making them an incredible resource for inspiration and practical advice.

Start by connecting through your farm’s communication channels. Most CSAs send weekly newsletters featuring what’s in your share, storage tips, and recipe suggestions tailored to that week’s harvest. These newsletters often become your seasonal planning bible, helping you anticipate what’s coming and prepare accordingly. Save them in a dedicated folder for easy reference throughout the season.

Many farms also maintain private social media groups or online forums where members share their favorite recipes, preservation techniques, and creative solutions for using abundance. Someone always knows the perfect way to use those kohlrabi or what to do with ten pounds of tomatoes. Don’t hesitate to ask questions or share your own discoveries.

Your farmer is another invaluable resource for CSA community support. They understand the growing patterns and can offer insights about upcoming harvests, helping you plan meals weeks in advance. Some farms host member work days, potlucks, or farm tours that deepen connections and provide hands-on learning opportunities.

Consider organizing informal recipe swaps with nearby members or carpooling to pickup locations. These simple interactions transform your CSA membership from a transaction into a genuine community experience that enriches both your table and your social connections.

Multiple hands holding colorful heirloom vegetables including kohlrabi, chard, and beets
CSA communities bring together members who share knowledge, recipes, and enthusiasm for discovering new vegetables together.

Your search for a produce CSA near me marks the start of something much bigger than weekly vegetable pickups. The most successful CSA members aren’t those who try to control what appears in their boxes, but rather those who learn to dance with the seasons and develop flexible systems that adapt to nature’s rhythms.

Think of your CSA membership as an invitation to reconnect with the land that feeds you. When you embrace the abundance of tomato season and the heartiness of winter squash, you’re not just eating vegetables—you’re participating in a centuries-old relationship between people and place. The planning strategies you’ve discovered here simply provide guardrails for this journey, helping you navigate the learning curve with less waste and more joy.

As you begin your CSA adventure, remember that each week’s share tells a story about your local climate, soil, and the dedicated farmers who tend it. You’re becoming part of a community committed to sustainable agriculture and food security. Welcome the surprises, celebrate the seasons, and watch as your connection to local food deepens in ways you never expected.

Smart Forecasting Tools That Make CSA Planning Actually Work

Posted by darrell on
Seasonal Planning and Management
Smart Forecasting Tools That Make CSA Planning Actually Work

Transform your seasonal planning with modern forecasting tools that streamline your CSA planning checklist and crop management decisions. Today’s farm management software combines weather data, historical yields, and market trends to deliver precise planting schedules and harvest projections. Leading platforms like Agrivi, Croptracker, and FarmLogs now offer user-friendly interfaces that help small-scale farmers predict optimal planting times, estimate harvest volumes, and adjust for seasonal variables.

Smart forecasting tools have revolutionized how organic farmers plan their growing seasons, reducing risk and maximizing crop yields through data-driven decisions. These accessible solutions integrate seamlessly with existing farm operations, providing real-time insights without requiring extensive technical knowledge. From soil temperature monitoring to precipitation forecasts, modern planning software empowers farmers to make confident decisions about their growing seasons while maintaining sustainable farming practices.

By leveraging these digital tools, farmers can better anticipate market demands, optimize resource allocation, and ensure consistent produce quality throughout the season.

Why Digital Forecasting Changes Everything for CSA Farms

From Gut Feelings to Data-Driven Decisions

Traditional farming relied heavily on intuition and generational knowledge passed down through families. While these insights remain valuable, modern CSA operations are discovering the power of data-driven yield predictions to enhance their planning process. Today’s forecasting tools combine historical weather patterns, soil conditions, and crop performance data to create accurate predictions that complement farmers’ expertise. This shift from gut feelings to data-backed decisions helps farms reduce waste, optimize planting schedules, and better meet member expectations. Many successful CSA farmers now use both traditional wisdom and digital tools, creating a balanced approach that honors farming heritage while embracing innovative solutions for more reliable harvests.

Side-by-side comparison of handwritten farm planning notes and a digital forecasting dashboard
Split-screen comparison showing traditional paper-based planning vs modern digital planning interface

Real Benefits for Your CSA Operation

Implementing forecasting software in your CSA operation brings immediate, measurable benefits to your farm’s efficiency and bottom line. By accurately predicting crop yields and harvest times, you can better manage member expectations and delivery schedules. Farmers using these tools report up to 30% reduction in food waste and a 25% improvement in customer satisfaction rates.

The software helps you make data-driven decisions about planting schedules, reducing the guesswork in crop rotation planning. You’ll be able to better anticipate peak harvest periods and coordinate labor needs accordingly. Many CSA farmers find they can optimize their share sizes and pricing based on more accurate yield predictions.

Plus, these tools make it easier to communicate with members about upcoming harvests, helping build stronger relationships and trust within your community.

Essential Forecasting Tools for Your CSA

Crop Planning Software

Modern crop planning software has revolutionized the way farmers and gardeners maximize seasonal harvests through precise succession planting schedules. These digital tools take the guesswork out of timing by incorporating historical weather data, crop-specific growth patterns, and local climate zones to generate reliable planting and harvest forecasts.

Popular platforms like Tend, Agrivi, and Farm Lead offer intuitive interfaces where growers can input their garden beds or field layouts, select crops, and receive customized planting calendars. These tools automatically calculate optimal spacing, projected harvest dates, and even suggest companion planting combinations for better yield.

What sets these tools apart is their ability to adapt to real-time conditions. By integrating current weather data and growth tracking, they can adjust harvest predictions and alert farmers to potential schedule changes. This dynamic approach helps growers maintain consistent produce availability throughout the season.

For small-scale farmers, these platforms often include features like automated task reminders, crop rotation suggestions, and yield tracking. Some even offer mobile apps for convenient field updates and harvest logging. While the learning curve varies, most software provides tutorial resources and community support to help farmers get started.

Remember to regularly update your crop data and observations to improve the accuracy of these forecasting tools over time.

Digital crop planning software interface with calendar view and harvest forecasting charts
Screenshot of a crop planning software interface showing planting schedules and harvest predictions

Weather Integration Tools

Modern weather integration tools have revolutionized how CSA farmers plan their growing seasons by combining real-time weather data with planting schedules. These smart systems help farmers make data-driven decisions about when to plant, protect, and harvest their crops.

Popular platforms like Farmer’s Edge and Cropwise integrate local weather stations with farm management software, providing detailed forecasts alongside customizable planting calendars. These tools typically offer features like frost warnings, precipitation tracking, and growing degree day calculations – essential information for timing crucial farm operations.

Many of these platforms now include mobile apps, allowing farmers to receive instant weather alerts and update their planting schedules on the go. Some standout features include soil temperature monitoring, disease risk assessment based on weather patterns, and automated irrigation scheduling.

Success Story: Sarah Miller, an organic CSA farmer in Vermont, credits weather integration tools for helping her save an entire tomato crop last season. “The frost alert came through at just the right time, giving us several hours to protect our plants. Without that warning, we would have lost thousands of dollars worth of produce.”

For smaller operations, free options like FarmOS and Weather Underground’s agriculture APIs offer basic weather integration features that can be incredibly valuable for planning purposes. These tools help farmers maintain crop quality while reducing weather-related losses, ultimately leading to more reliable CSA shares for members.

Farmer reviewing weather forecasts and planting schedules on tablet computer in vegetable field
Farmer using tablet in field while consulting weather-integrated planning app

Member Management and Share Forecasting

Managing member shares and forecasting crop distributions is a crucial aspect of running a successful CSA program. Modern forecasting tools help farmers accurately predict harvest yields and plan share contents weeks in advance, ensuring member satisfaction and efficient resource allocation.

Popular software solutions like Harvie and Small Farm Central offer dedicated CSA management features that combine member data with crop planning. These tools allow farmers to track member preferences, dietary restrictions, and share sizes while automatically generating packing lists and delivery schedules.

Many farmers find success using customizable spreadsheet templates that integrate with their existing systems. These templates can track historical harvest data, weather patterns, and planting schedules to improve future forecasting accuracy. For example, Local Food Marketplace provides templates specifically designed for CSA operations, helping farmers maintain consistent share values throughout the season.

Smart forecasting tools can also help prevent common CSA challenges like over-or under-filling shares. By analyzing past performance data and current growing conditions, these systems suggest optimal distribution quantities for each crop. This data-driven approach helps maintain share equity while reducing waste.

For smaller operations, simple apps like Tend and Farm Log offer basic forecasting features without the complexity of larger systems. These user-friendly tools help farmers start with digital planning and scale up as their needs grow.

Making These Tools Work for Your Farm

Getting Started Without Getting Overwhelmed

Start with a single forecasting tool that addresses your most pressing need, whether that’s crop yield prediction or customer demand analysis. Many farmers find success by beginning with a basic spreadsheet template before diving into more sophisticated software.

Week 1: Familiarize yourself with your chosen tool’s basic features. Spend 30 minutes each day exploring one function, like data input or simple trend analysis. Remember, you don’t need to master everything at once.

Week 2-3: Start inputting historical data from your previous growing seasons. Focus on one crop family at a time, beginning with your main revenue generators. This methodical approach helps prevent data overwhelm while building a solid foundation.

Week 4: Create your first basic forecast. Many successful CSA farmers start with a 3-month projection for their most popular crops. As you gain confidence, gradually extend your forecasting timeline and add more varieties.

Throughout this process, connect with other local farmers using similar tools. Their experiences can provide valuable insights and shortcuts. Consider joining online farming communities where members share tips about implementing forecasting tools effectively.

Remember, accuracy improves with time and practice. Start small, be consistent with data entry, and celebrate small wins as you build your forecasting system.

Combining Tools for Maximum Impact

For maximum effectiveness in your farm planning, consider combining multiple forecasting tools to create a comprehensive planning system. Many successful CSA farmers use weather prediction software alongside crop planning tools, creating a more robust approach to seasonal forecasting. For example, you might pair a rainfall prediction app with your harvest planning software to better anticipate optimal planting windows.

Start by identifying which aspects of your operation need the most attention. You might combine a basic spreadsheet for crop rotation with specialized software for yield predictions. Many farmers find success using a weather app for daily decisions while maintaining longer-term planning in farm management software.

Think of your forecasting tools as pieces of a puzzle. Your yield calculator can inform your CSA membership predictions, while your weather forecasting tool helps determine planting dates. Together, they create a clearer picture of your farm’s potential output.

Remember to regularly sync data between your tools when possible. Some modern farming apps offer integration features, making it easier to maintain consistent information across platforms. Start with two or three compatible tools and gradually expand your toolkit as you become more comfortable with each system.

Choosing the right forecasting tools for your farm operation can transform the way you plan and manage your CSA program. From weather prediction to crop planning and yield forecasting, these software solutions offer valuable insights that can help you make more informed decisions. By implementing these tools, you’ll be better equipped to handle seasonal challenges, optimize your planting schedules, and meet your members’ expectations.

Remember, the best forecasting tool is one that aligns with your farm’s specific needs and your comfort level with technology. Start small with one or two essential features, and gradually expand your digital toolkit as you become more confident. Whether you’re just starting your CSA journey or looking to enhance your existing operation, investing in the right forecasting software can help you build a more resilient and successful farm business.

Maximize Your Garden’s Potential with Ancient Three Sisters Wisdom

Posted by darrell on
Seasonal Planning and Management
Maximize Your Garden’s Potential with Ancient Three Sisters Wisdom

Transform your garden into a thriving ecosystem with the traditional companion planting method known as Three Sisters gardening. This ancient Native American technique interplants corn, beans, and squash in a strategic layout that maximizes space while creating perfect growing conditions for each crop. Tall corn stalks provide natural trellises for climbing beans, which fix nitrogen in the soil, while sprawling squash leaves create living mulch that retains moisture and suppresses weeds. This space-efficient design produces more food per square foot than growing these crops separately, making it ideal for both small backyard gardens and larger market farms. Whether you’re a novice gardener or experienced grower, this time-tested planting system offers a sustainable solution for organic food production that honors indigenous agricultural wisdom while meeting modern growing needs.

Illustrated diagram showing corn stalks with climbing beans and squash spreading below
Diagram showing the symbiotic relationship between corn, beans, and squash in the Three Sisters planting method

The Perfect Partnership: Understanding Three Sisters Companions

Corn: The Strong Support System

In the Three Sisters garden, corn serves as the backbone of this ingenious planting system. Standing tall and sturdy, corn stalks create a natural living trellis that supports climbing beans. The strong, fibrous stems grow straight and true, typically reaching heights of 6-8 feet, providing the perfect vertical structure for bean vines to twist and climb. As the corn develops its characteristic deep root system, it anchors the entire garden setup firmly in place, preventing toppling even in moderate winds. For best results, choose traditional, tall varieties of dent or flint corn rather than modern sweet corn hybrids – these heritage varieties typically develop thicker stalks and more robust root systems. Plant your corn in blocks rather than single rows to ensure proper pollination and maximum structural support for the climbing beans that will soon join them.

Beans: The Nitrogen Fixers

Beans play a crucial role in the three sisters garden by enriching the soil through nitrogen fixation. These climbing plants form a beneficial partnership with soil bacteria, converting atmospheric nitrogen into a form that plants can use. As the beans grow, they naturally wind their way up the corn stalks, eliminating the need for separate trellising systems.

The twining vines not only support themselves but also help stabilize the corn plants during strong winds. Common varieties like pole beans and runner beans work best, as they actively climb throughout the growing season. As an added bonus, these beans provide a double harvest – tender green beans during the summer and dried beans in fall.

When the growing season ends, the bean plants decompose and release stored nitrogen, preparing the soil for next year’s garden. This natural fertilization process exemplifies the sustainable nature of three sisters gardening.

Squash: The Living Mulch

Squash plants serve as nature’s living carpet in the Three Sisters garden, spreading their broad leaves across the soil to create a protective green blanket. This natural groundcover effectively suppresses weed growth while maintaining soil moisture throughout the growing season. The large leaves also help regulate soil temperature, keeping roots cool during hot summer days and reducing water evaporation. As an added benefit, the prickly stems and leaves of squash plants naturally deter many garden pests, including raccoons and other small animals that might otherwise disturb your corn and beans. The sprawling vines create convenient pathways for pollinators while their yellow blossoms attract beneficial insects that help maintain a healthy garden ecosystem. When harvested, these nutritious fruits provide a lasting food source well into the winter months.

Planning Your Three Sisters Garden

Small Space Layout (10×10 ft)

Even with limited space, you can create a thriving Three Sisters garden in a 10×10 foot plot through careful garden layout planning. Start by dividing your plot into four 5×5 foot squares, using three for planting and leaving one for access paths.

In each planting square, create four corn mounds spaced about 2 feet apart. Plant 4-5 corn seeds in each mound, eventually thinning to the strongest 2-3 plants. Once the corn reaches 6 inches tall, plant four pole bean seeds around each corn stalk, spacing them evenly.

Two weeks later, add squash or pumpkin seeds between the mounds, limiting to two plants per square to prevent overcrowding. Choose compact squash varieties like bush acorn or small sugar pumpkins that won’t overwhelm your space.

This layout typically yields enough corn for fresh eating, beans for both fresh consumption and drying, and 4-6 squash or pumpkins. While smaller than traditional plantings, this design maintains the companion planting benefits while fitting perfectly in an urban or suburban yard.

Bird's eye view diagram of a small Three Sisters garden showing planting mounds and spacing
Overhead view of a 10×10 ft Three Sisters garden layout with measurements and spacing

CSA-Scale Implementation

When scaling up the Three Sisters garden for Community Supported Agriculture (CSA) or small farm operations, careful planning becomes essential. A successful large-scale implementation typically starts with dividing the growing area into multiple plots of 20×20 feet or larger, allowing for efficient crop rotation and maintenance.

For CSA operations serving 20-30 members, consider dedicating at least 1000 square feet to the Three Sisters system. Create wide rows with 5-foot spacing between mounds to accommodate small machinery for initial soil preparation and end-of-season cleanup. Each mound should be approximately 4 feet in diameter, with 4-5 corn plants, 3-4 pole bean plants, and 2-3 squash plants.

Many successful CSA farmers incorporate irrigation systems, using drip lines along the rows to ensure consistent moisture. Some farmers have found success with laying black plastic mulch between rows to suppress weeds and retain soil moisture, significantly reducing maintenance time.

To maximize yield and extend the harvest season, consider staggered planting dates across different plots. This approach not only helps manage workload but also provides CSA members with a steady supply of fresh produce throughout the season.

Sarah Miller, a CSA farmer in Vermont, shares: “We plant our Three Sisters in four successive plots, two weeks apart. This gives us manageable harvesting windows and ensures our members get fresh corn and beans for several weeks instead of all at once.”

Remember to maintain wider paths between plots for easy access with wheelbarrows and harvest bins. Some farmers also incorporate beneficial flower borders around their Three Sisters plots to attract pollinators and beneficial insects, enhancing overall garden productivity.

Four-panel image showing Three Sisters garden development from spring planting to fall harvest
Photo series showing the Three Sisters garden progression through the growing season

Seasonal Timeline and Maintenance

Spring Preparation and Planting

Begin soil preparation in early spring when the ground has warmed to at least 60°F. Start by loosening the soil to a depth of 12-15 inches, incorporating aged compost to enrich the growing medium. Create mounds approximately 4 feet in diameter and 4-6 inches high, spacing them about 4 feet apart to allow adequate room for growth.

Plant corn first, as it will serve as the natural support structure. Place 4-5 corn seeds in each mound in a small circle, about 6 inches apart and 1-2 inches deep. Wait until the corn reaches about 6 inches tall before planting the climbing beans. Position 4-6 bean seeds in a circle around each corn stalk, about 3 inches away from the stalks and 1 inch deep.

One week after planting the beans, add squash or pumpkin seeds. Plant 3-4 seeds around the outer edge of each mound, about 3 inches deep. Once seedlings emerge, thin to the strongest plants: 2-3 corn stalks, 2-3 bean plants, and 2 squash plants per mound. Water the mounds deeply but gently to avoid disturbing the seeds.

Summer Care and Monitoring

Regular monitoring and care during the summer months are essential for a thriving Three Sisters garden. Keep the soil consistently moist but not waterlogged, watering deeply at the base of the plants early in the morning. As the corn grows taller, you may notice the beans naturally winding their way up the stalks – resist the urge to manipulate them too much, as they’ll find their way naturally.

Watch for common pests like squash bugs and cucumber beetles, which can damage your growing plants. Consider using organic pest control methods such as companion planting with marigolds or applying neem oil. Mulching around the squash plants helps retain moisture and suppress weeds, while also preventing the fruits from direct soil contact.

One challenge you might face is the corn stalks leaning under the weight of the climbing beans. Support any struggling stalks with stakes if needed. Remove any yellowing or diseased leaves promptly to prevent the spread of potential issues. As the squash leaves spread, ensure they’re not smothering young bean plants by gently redirecting their growth when necessary.

Remember to harvest regularly, especially squash, to encourage continued production throughout the season.

Fall Harvest Strategy

Each sister in the three sisters garden matures at slightly different times, allowing you to maximize your harvest yield throughout the season. Begin with corn when the ears feel full and kernels release a milky substance when pierced. This typically occurs 20 days after silk appearance. Harvest pole beans once pods are swollen but before they become tough, usually 3-4 months after planting. Continue picking to encourage production. Finally, gather squash when the rinds are hard and rich in color, leaving a few inches of stem attached. For winter squash varieties, harvest before the first frost, while summer squash can be picked young and tender throughout the growing season. Remember to step carefully between plants to avoid damaging remaining crops during harvest.

The Three Sisters gardening method stands as a shining example of how ancient wisdom can address modern agricultural challenges. By implementing this time-tested companion planting system, today’s gardeners and farmers can create resilient, sustainable food production systems while honoring Indigenous agricultural practices.

The benefits of Three Sisters gardening extend far beyond its space-saving design. This method naturally improves soil health through nitrogen fixation from beans and reduces the need for synthetic fertilizers. The natural pest resistance and weed suppression offered by the complementary plantings minimize the requirement for chemical interventions, making it an excellent choice for organic growers.

For home gardeners, the Three Sisters method provides an opportunity to grow more food in limited space while creating a beautiful, productive ecosystem. Small-scale farmers find that this system reduces operational costs while increasing yield diversity, making it particularly valuable for CSA programs and market gardens.

Perhaps most importantly, Three Sisters gardening offers a practical solution for sustainable food production in an era of climate uncertainty. The built-in resilience of this polyculture system helps protect against crop failure, while its water-efficient design makes it well-suited for areas experiencing irregular rainfall patterns.

As we look to create more sustainable food systems, the Three Sisters method reminds us that sometimes the most innovative solutions are rooted in traditional practices. By embracing this ancestral growing technique and adapting it to modern contexts, we can build more resilient, productive, and environmentally friendly gardens that nourish both people and the planet.

How Eco-Gardens CSA Creates Your Perfect Home Garden Plan

Posted by darrell on
Seasonal Planning and Management
How Eco-Gardens CSA Creates Your Perfect Home Garden Plan

Transform your backyard into a thriving ecosystem by joining a collaborative CSA gardening community that combines personal growing spaces with shared resources. Local food networks are revolutionizing how we grow, share, and consume fresh produce, creating resilient neighborhood food systems that benefit both the environment and community members. By connecting home gardeners with experienced farmers, eco-gardens CSA programs provide essential mentorship, shared tools, and collective buying power while maintaining individual growing autonomy. This innovative model helps members reduce costs, minimize waste, and maximize harvests through seasonal planning, seed sharing, and collaborative problem-solving. Whether you’re a seasoned gardener or just starting out, participating in an eco-gardens CSA offers a sustainable path to food independence while building lasting connections with like-minded growers in your area.

The Eco-Gardens CSA Difference

Community-Powered Growing

Our CSA model thrives on the power of shared knowledge and collective experience. Members don’t just receive fresh produce; they gain access to a vibrant community of garden enthusiasts and experienced farmers who are eager to share their growing wisdom. Through seasonal workshops, online forums, and mentorship programs, members learn time-tested techniques for successful organic gardening.

What makes our approach unique is the reciprocal relationship between CSA members and farmers. While members benefit from expert guidance, farmers gain valuable insights from home gardeners’ experiences with different varieties and growing conditions. This exchange creates a dynamic learning environment where everyone contributes to the community’s success.

We also organize regular garden visits and skill-sharing sessions, allowing members to see various growing methods in action. Whether you’re dealing with pest management challenges or seeking advice on companion planting, our community provides the support and knowledge needed to help your garden thrive. This collaborative approach ensures that every member has the resources and confidence to cultivate their own successful garden space.

Bird's eye view of a well-organized community garden showing individual plots and communal areas
Aerial view of a thriving community garden with multiple plots and shared spaces

Expert Garden Planning Support

Our experienced garden planners work alongside you to create a thriving home garden that complements your CSA share. Whether you’re a beginner or seasoned gardener, we provide personalized consultations to assess your space, soil conditions, and growing goals. Our experts help you select the right crops that align with your CSA schedule, ensuring you have fresh produce throughout the season without overwhelming overlap.

You’ll receive detailed planting calendars, crop rotation plans, and guidance on sustainable growing practices like companion planting and natural pest management. Monthly check-ins keep you on track, while our online resource library offers solution-focused support whenever you need it. We also organize seasonal workshops where members can learn advanced techniques and troubleshoot common gardening challenges together.

This collaborative approach helps you maximize your growing space while building confidence in your gardening abilities. Many members find that this expert guidance transforms their backyard plots into productive mini-farms that perfectly complement their CSA shares.

Your Personalized Garden Blueprint

Season-by-Season Planning

Season-by-season garden planning is at the heart of our CSA’s success. Our growing calendar begins in late winter when we carefully select heirloom seeds and map out planting schedules. By early spring, we’re starting seedlings in our greenhouse while preparing outdoor beds for cool-weather crops like peas, lettuce, and radishes.

Summer brings an abundance of activity as we transition to heat-loving vegetables such as tomatoes, peppers, and cucumbers. We use companion planting techniques to maximize space and promote natural pest control. Our succession planting strategy ensures continuous harvests throughout the growing season, providing members with fresh produce every week.

As autumn approaches, we focus on fall crops including root vegetables, brassicas, and hardy greens. We also begin planting cover crops in areas that have finished producing, enriching the soil for next season. During winter, we maintain crops in our greenhouse and high tunnels, offering members fresh greens even during the coldest months.

Throughout the year, we adjust our plans based on weather patterns, soil conditions, and member feedback. This flexible approach allows us to maintain biodiversity while meeting our community’s needs. We also encourage members to align their home gardens with our planting schedule, creating a harmonious growing cycle that complements their weekly CSA shares.

Companion Planting Strategies

Companion planting is a cornerstone of our eco-friendly gardening approach, maximizing space while promoting natural pest control and improved crop yields. We carefully pair plants that support each other’s growth and create beneficial microclimates in our garden beds.

Some of our most successful combinations include planting tomatoes with basil, which enhances flavor and repels unwanted insects, and surrounding brassicas (like cabbage and broccoli) with aromatic herbs that deter cabbage moths. Tall sun-loving plants provide natural shade for heat-sensitive crops, while low-growing plants act as living mulch, preserving soil moisture and preventing weed growth.

We follow the “Three Sisters” method, an ancient Native American technique of growing corn, beans, and squash together. The corn provides support for climbing beans, which fix nitrogen in the soil, while squash spreads along the ground, suppressing weeds and retaining moisture.

Our spacing strategy incorporates vertical gardening techniques to maximize growing area. We use trellises, stakes, and natural plant supports to grow upward, leaving room for root crops and leafy greens below. This intensive planting approach not only increases yield per square foot but also creates a diverse ecosystem that attracts beneficial insects and promotes natural pollination.

For home gardeners in our CSA program, we share these companion planting maps and spacing guides, helping them replicate these successful growing combinations in their own spaces.

Illustrated garden plan demonstrating companion planting combinations and spacing
Garden planning diagram showing companion planting arrangements

Community Resources and Support

Shared Tools and Knowledge

At Eco-Gardens CSA, we believe that knowledge and resources are meant to be shared. Our robust community resource sharing program includes a tool library where members can borrow essential gardening equipment, from tillers to pruning shears. This helps reduce individual costs while promoting sustainable consumption.

Members gain access to our educational hub, featuring seasonal workshops, gardening tutorials, and hands-on training sessions led by experienced farmers. These learning opportunities cover various topics, from seed starting and composting to food preservation and seasonal cooking techniques.

Our online knowledge base houses a wealth of resources, including planting calendars, companion planting guides, and troubleshooting tips for common garden challenges. Members can also participate in our mentorship program, where seasoned gardeners share their expertise with newcomers.

Regular skill-sharing events allow members to exchange knowledge about specialized techniques like permaculture design, natural pest management, and water conservation methods. We also maintain a seed library, enabling members to preserve and exchange heritage varieties while promoting biodiversity in our gardens.

Through our mobile app, members can access real-time growing tips, connect with fellow gardeners, and schedule tool borrowing, making sustainable gardening more accessible and community-oriented than ever.

Community members learning gardening techniques during an outdoor workshop
Group of diverse community members participating in a gardening workshop

Seasonal Workshops and Events

Throughout the year, Eco-Gardens CSA hosts a vibrant calendar of hands-on workshops and community events that bring members together to learn, share, and celebrate sustainable living. Our seasonal workshops are carefully designed to align with the natural farming calendar, offering practical knowledge that members can apply to their own gardens.

In spring, we kick off with seed starting and garden planning workshops, where experienced farmers demonstrate proper techniques for getting your garden off to a strong start. Summer brings popular farm-to-table cooking demonstrations, where local chefs show members creative ways to prepare seasonal produce. Members particularly enjoy our preservation workshops in late summer, learning traditional methods of canning, fermenting, and dehydrating the harvest bounty.

Fall workshops focus on garden cleanup, soil preparation, and composting techniques, while winter sessions cover topics like garden planning, seed saving, and sustainable living practices. We also host quarterly community potlucks where members share dishes made from their CSA produce, exchange recipes, and build lasting connections.

Special events include our annual Spring Plant Sale, Summer Farm Festival, and Fall Harvest Celebration. Children’s workshops run during school breaks, teaching the next generation about organic farming through fun, hands-on activities. All events are included in CSA membership, though some specialty workshops may require a small materials fee.

Getting Started with Eco-Gardens CSA

Getting started with Eco-Gardens CSA is a straightforward process that begins with reaching out to your local chapter. First, visit their website or contact the coordinator to learn about membership availability and seasonal schedules. Most chapters offer flexible membership options, from full shares to half shares, allowing you to choose what works best for your household.

Once you’ve secured your membership, you’ll receive a welcome packet containing the season’s planting calendar and garden planning tools. This is where the unique collaborative aspect comes into play. You’ll have the opportunity to participate in garden planning sessions, where experienced farmers help you design your home garden to complement your CSA share.

Schedule a site visit with an Eco-Gardens mentor who will assess your growing space and soil conditions. They’ll help you identify the best crops for your specific environment and skill level. New members typically start with easy-to-grow vegetables like tomatoes, lettuce, and herbs before progressing to more challenging crops.

Don’t forget to attend the orientation meeting, where you’ll meet fellow members and learn about volunteer opportunities. Many members find these community connections invaluable for sharing knowledge and resources. You’ll also receive information about pickup locations, times, and any additional programs like cooking classes or preservation workshops.

Remember, successful participation relies on regular communication with your coordinator and staying engaged with the community through workshops and events.

Eco-Gardens CSA offers a unique opportunity to become part of a thriving sustainable food community while enjoying fresh, organic produce throughout the growing season. By joining, you’re not just subscribing to a weekly harvest – you’re investing in local agriculture, supporting environmentally conscious farming practices, and contributing to a healthier planet. Whether you’re a seasoned gardener or just starting your journey toward sustainable living, our collaborative CSA model provides the perfect blend of professional guidance and hands-on experience. Take the first step today by reaching out to our farming team, attending one of our open house events, or signing up for our seasonal membership. Together, we can cultivate a greener future while enjoying the incredible bounty of naturally grown, seasonal produce right in our community.

Powerful Permaculture Techniques That Transform CSA Farms

Posted by darrell on
Seasonal Planning and Management
Powerful Permaculture Techniques That Transform CSA Farms

Transform bare soil into thriving food forests by implementing proven permaculture principles that mimic natural ecosystems. Build self-sustaining gardens using strategic plant combinations like the “Three Sisters” method – growing corn, beans, and squash together to maximize space and soil nutrition. Create water-efficient landscapes through swales, rain gardens, and strategic contouring that capture and channel rainwater exactly where it’s needed. Stack functions by incorporating edible perennials, nitrogen-fixing plants, and beneficial insects into every growing space. These time-tested permaculture examples demonstrate how working with nature – rather than against it – produces abundant harvests while building healthier soil and more resilient ecosystems.

From urban backyard food forests to large-scale regenerative farms, these practical permaculture techniques help growers at any scale create productive, sustainable landscapes that improve with each passing season. By understanding and applying these ecological design principles, anyone can transform their growing space into a flourishing ecosystem that provides food, habitat, and natural resources.

Food Forest Systems: Nature’s Multi-Layer Garden

Illustrated cross-section of food forest layers showing canopy trees, understory, shrubs, herbs, ground cover, vines, and root crops
Diagram showing the seven layers of a food forest system, from tall canopy trees down to ground cover and root layers

Canopy to Ground Cover: Creating Your Seven Layers

A food forest thrives on the principle of layering, mimicking natural forest ecosystems to maximize space and productivity. Starting from the top, tall fruit and nut trees like walnuts and chestnuts form the canopy layer, providing both food and shade. Just below, smaller fruit trees such as apples and cherries create the understory, while berry bushes and shrubs occupy the middle layer.

The herbaceous layer features perennial vegetables and herbs, perfect for continuous harvesting throughout the season. Groundcovers like strawberries and creeping thyme spread horizontally, protecting soil and offering easy-to-pick treats. Underground, root crops such as potatoes and carrots maximize growing space, while climbing vines like grapes and beans connect multiple layers vertically.

Each layer serves multiple functions: providing food, creating beneficial microclimates, supporting wildlife, and building soil health. When planning your food forest, consider the mature size of plants and their sunlight requirements. Start with a few key species in each layer and gradually expand as you learn how different plants interact in your unique ecosystem.

Companion Planting Success Stories

At Sweet Valley CSA in Vermont, farmers Sarah and Mike Thompson transformed their traditional garden beds into a thriving food forest by pairing complementary plants. Their most successful combination includes tall sunflowers providing shade for heat-sensitive lettuce, while attracting beneficial pollinators that boost their tomato yields by 30%.

In California’s Central Valley, River Creek Farm demonstrates the power of the “Three Sisters” planting technique – corn, beans, and squash growing together in harmony. The corn provides natural poles for beans to climb, while beans fix nitrogen in the soil, and squash leaves create living mulch that retains moisture and suppresses weeds. This ancient companion planting method has helped them reduce water usage by 40%.

Urban farming pioneer Green City Acres in Portland showcases vertical companion planting, combining climbing nasturtiums with berry bushes. The nasturtiums act as natural pest control while providing edible flowers, and their dense growth helps maintain soil moisture. Their creative combinations have allowed them to produce 200% more food per square foot compared to conventional single-crop systems.

Water Management That Works

Swales and Berms: Natural Water Harvesting

Swales and berms are among the most effective water harvesting techniques in permaculture design. These landscape features work together to slow, spread, and sink water into the soil naturally. A swale is essentially a shallow, level-bottomed ditch that runs along the land’s contour, while a berm is the raised mound of soil on the downhill side.

When rain falls, swales capture and hold the water, allowing it to slowly seep into the ground rather than running off. This creates a natural irrigation system that can support diverse plant life. The berm, enriched with organic matter, becomes an ideal growing space for trees, shrubs, and other deep-rooted plants that benefit from the increased moisture.

Many permaculture farmers have found success by incorporating multiple swales across their slopes, creating a cascading effect that maximizes water retention. This system not only reduces erosion and conserves water but also helps rebuild groundwater supplies. For best results, plant the berms with drought-resistant perennials and fruit trees that can take advantage of the stored moisture during dry periods.

Bird's eye view of curved swales and berms designed for water harvesting on a permaculture farm
Aerial photograph of a permaculture farm showing swales and berms following land contours

Drought-Proof Your CSA

Creating a drought-resistant CSA requires smart water conservation strategies and careful plant selection. Start by choosing drought-tolerant varieties like amaranth, bush beans, and sweet potatoes that naturally require less water. Layer your plantings with deep-rooted crops alongside shallow-rooted companions to maximize soil moisture retention.

Implement water-wise techniques such as deep mulching with straw or wood chips to reduce evaporation and keep soil temperatures stable. Install drip irrigation systems beneath the mulch layer for targeted watering directly to plant roots. Creating swales and berms on contour helps capture and direct rainwater where it’s needed most.

Consider Mediterranean herbs like rosemary, sage, and oregano as companion plants – they’re not only drought-resistant but also help attract beneficial insects. Integrate nitrogen-fixing cover crops like clover between rows to improve soil structure and water retention. These combined approaches ensure your CSA remains productive even during dry spells while building long-term resilience into your growing system.

Natural Pest Management Through Biodiversity

Natural pest management through biodiversity is one of the most elegant examples of permaculture principles in action at CSA farms. Instead of relying on chemical pesticides, farmers create balanced ecosystems that naturally keep pest populations in check.

At Sweet Valley Farm in Oregon, farmer Sarah Chen interplants aromatic herbs like basil, mint, and lavender throughout her vegetable beds. These strong-smelling plants naturally repel many common garden pests while attracting beneficial insects that prey on harmful bugs. “It’s amazing to watch nature maintain its own balance,” says Chen. “The ladybugs and praying mantises do most of my pest control work for me.”

Companion planting plays a crucial role in this approach. For example, marigolds planted near tomatoes help deter nematodes, while nasturtiums act as trap crops, drawing aphids away from valuable produce. Many farmers also maintain permanent hedgerows and flower borders that provide habitat for birds, beneficial insects, and other natural predators.

Creating diverse plant communities doesn’t just control pests – it builds resilient farming systems. Different plants support each other’s growth through nutrient sharing and soil enhancement. At River Run CSA in Vermont, farmers maintain strips of clover between crop rows, which fixes nitrogen in the soil while providing food for pollinators.

Water features like small ponds also contribute to pest management by attracting frogs, dragonflies, and other insect-eating wildlife. Combined with healthy soil practices and strategic crop rotation, these biodiversity-focused techniques create farm ecosystems that largely regulate themselves, reducing both pest pressure and the need for intervention.

Remember, the key is patience – natural pest control systems take time to establish but provide long-term benefits for both the farm and the environment.

Soil Building the Permaculture Way

In permaculture, building healthy soil is like creating a thriving underground city for beneficial organisms. The process starts with observing and working with nature rather than against it. One of the core methods is sheet mulching, also known as lasagna gardening, where layers of organic materials are stacked to create rich, living soil.

Start by laying down cardboard or newspaper to suppress weeds, then alternate “green” materials (kitchen scraps, fresh grass clippings, coffee grounds) with “brown” materials (dried leaves, straw, wood chips). This mimics the natural forest floor and creates ideal conditions for earthworms and beneficial microorganisms.

Compost plays a starring role in permaculture soil building. Many successful permaculture farmers maintain multiple compost piles in different stages of decomposition. They often include dynamic accumulators – plants like comfrey and yarrow that pull nutrients from deep in the soil and concentrate them in their leaves.

Cover cropping is another essential strategy. Plants like clover, vetch, and buckwheat protect bare soil, fix nitrogen, and add organic matter when chopped and dropped. Some permaculture gardeners plant these beneficial covers right alongside their food crops in strategic patterns.

Living mulch systems, where low-growing plants carpet the soil between larger crops, help prevent erosion while building soil structure. These plants often serve multiple functions – attracting pollinators, deterring pests, and providing additional harvests.

The key is to keep soil covered and actively growing throughout the seasons. As one permaculture farmer puts it, “The soil is the foundation of everything we do. When we feed the soil, it feeds us back tenfold.”

Circular permaculture zone planning diagram showing intensity of use from zone 1 to zone 5
Concentric circle diagram showing permaculture zones 1-5 with typical elements in each zone

Zone Planning for Efficient CSA Operations

Permaculture zone planning is a strategic approach that organizes farm elements based on how frequently you need to access them. Zone 0 is your home or farm center, where you spend most of your time. Zone 1 contains elements requiring daily attention, like herb gardens and small greenhouses. For example, placing your greenhouse and tool shed near your home means less time spent walking back and forth. Zone 2 houses frequently visited areas such as composting systems and small livestock. Zone 3 is for commercial crops and larger livestock that need weekly attention. Zone 4 includes food forests and grazing areas requiring minimal maintenance, while Zone 5 is left wild for natural habitat and observation.

This efficient organization reduces unnecessary work and travel time while maximizing energy use. For example, placing your greenhouse and tool shed near your home means less time spent walking back and forth. Similarly, positioning water-hungry plants close to water sources and grouping crops with similar care requirements together streamlines daily tasks. By thoughtfully arranging these zones, you create a self-sustaining system that works with nature rather than against it.

Implementing permaculture practices in CSA farming offers tremendous benefits for farmers, consumers, and our planet. These sustainable methods create resilient food systems, reduce environmental impact, and foster stronger community connections. By working with nature rather than against it, farmers can build healthy soil, conserve water, and produce abundant harvests while minimizing inputs. The success stories from CSA farms using permaculture principles demonstrate that these methods are both practical and profitable. Whether you’re a seasoned farmer or just starting your growing journey, incorporating permaculture techniques into your operation can lead to more sustainable, productive, and fulfilling results. Take the first step today by choosing one practice to implement – your land, your community, and future generations will thank you.

Smart Irrigation Software That Saves Time and Water on Your CSA Farm

Posted by darrell on
Seasonal Planning and Management
Smart Irrigation Software That Saves Time and Water on Your CSA Farm

Transform your farm’s efficiency with modern irrigation scheduling software – the digital cornerstone of precision agriculture that’s revolutionizing how small-scale farmers manage water resources. Today’s smart irrigation systems combine real-time weather data, soil moisture sensors, and crop-specific algorithms to deliver exactly what your plants need, when they need it.

Gone are the days of guesswork watering. Forward-thinking farmers are cutting water usage by up to 30% while boosting crop yields through automated scheduling that factors in everything from soil type to growth stage. Whether you’re managing a 5-acre organic vegetable operation or a sprawling orchard, these tools provide actionable insights through user-friendly mobile apps and desktop interfaces.

For small-scale organic farmers, irrigation scheduling software offers a perfect balance of sophistication and simplicity – helping you maintain optimal soil moisture levels while saving precious time and resources. It’s not just about water conservation; it’s about growing smarter and more sustainably in an increasingly unpredictable climate.

Why Your CSA Farm Needs Digital Irrigation Management

Water Conservation Benefits

Irrigation scheduling software stands at the forefront of modern smart water-saving techniques, offering substantial benefits for farms of all sizes. By analyzing real-time soil moisture data, weather patterns, and crop requirements, these systems can reduce water consumption by 20-50% while maintaining or even improving crop yields.

The software prevents both over-watering and under-watering by delivering precise amounts of water exactly when plants need it. This precision not only conserves water but also reduces energy costs associated with pumping and distribution. Many farmers report seeing their water bills decrease by up to 30% within the first growing season of implementation.

Additionally, these systems help prevent water runoff and soil erosion, protecting valuable topsoil and reducing nutrient leaching. By maintaining optimal soil moisture levels, the software also creates healthier growing conditions that naturally suppress many common plant diseases, leading to stronger, more resilient crops.

Labor and Time Savings

Irrigation scheduling software dramatically reduces the time farmers spend monitoring and adjusting water systems. Instead of walking the fields multiple times daily to check soil moisture and plant health, farmers can view real-time data from their smartphones or computers. The software automatically tracks weather patterns, soil conditions, and crop water needs, making adjustments without constant human intervention.

Many farmers report saving 15-20 hours per week during peak growing seasons. Take Sarah Miller, an organic vegetable farmer in Colorado, who used to spend her mornings and evenings checking irrigation lines. Now, she simply reviews the software dashboard over breakfast and can focus on other important tasks like harvest planning and market preparation.

The automation also eliminates the need for midnight adjustments during extreme weather events, as the system can respond to unexpected temperature changes or rainfall automatically. This improved work-life balance has been a game-changer for small-scale farmers managing diverse crop operations.

Modern irrigation software dashboard displaying real-time monitoring data and control options
Dashboard view of an irrigation software interface showing weather data, soil moisture levels, and scheduling controls

Key Features of Modern Irrigation Software

Weather Integration

Modern irrigation scheduling software leverages real-time weather data to make smart watering decisions for your crops. These systems connect to local weather stations or online weather services to gather crucial information like rainfall, temperature, humidity, and wind speed. By analyzing this data, the software automatically adjusts your irrigation schedule to provide optimal water amounts.

For example, if unexpected rain is forecasted, the system will postpone scheduled watering to prevent overwatering. During hot, dry spells, it might increase water delivery to compensate for higher evaporation rates. This dynamic response to weather conditions helps conserve water while ensuring crops receive exactly what they need.

Many systems also track historical weather patterns and combine this with soil moisture sensors to create highly accurate watering predictions. Some advanced platforms even factor in microclimates within your growing area, recognizing that different parts of your farm might experience slightly different weather conditions.

This weather-smart approach not only saves water but also protects plants from stress caused by under or overwatering, leading to healthier crops and better yields.

Soil Moisture Monitoring

Modern soil moisture monitoring systems are the eyes and ears of effective irrigation scheduling software. These systems use strategically placed sensors throughout your growing areas to collect real-time data about soil moisture levels at different depths. The software interprets this data and presents it through user-friendly dashboards, helping you understand exactly when and how much to water your crops.

Many farmers find that integrating soil sensors with their irrigation software reduces water usage by 20-30%. The sensors measure important factors like soil moisture tension, temperature, and electrical conductivity, giving you a complete picture of your soil’s health. When the moisture levels drop below preset thresholds, the software can automatically trigger irrigation cycles or send alerts to your phone.

Sarah Wilson, a small-scale organic farmer in Vermont, shares: “Since installing soil moisture sensors, I’ve eliminated the guesswork. My plants get exactly what they need, when they need it, and my water bill has dropped significantly.”

Agricultural professional using mobile device to monitor soil moisture sensors in crop field
Farmer checking soil moisture sensors while referring to mobile app on tablet

Mobile Control and Alerts

Modern irrigation scheduling software puts control right in your pocket through user-friendly mobile apps. These apps let you manage your entire irrigation system from anywhere, whether you’re at the farmers market or taking a well-deserved break. Get real-time updates on soil moisture levels, weather conditions, and system performance through push notifications on your smartphone.

Set custom alerts for critical events like unexpected pressure drops, unusual water flow, or when soil moisture reaches specific thresholds. Many systems also send daily irrigation reports and weather forecasts to help you make informed decisions about your watering schedule.

The mobile interface typically includes an intuitive dashboard where you can adjust watering times, activate or pause zones, and view water usage statistics. Some apps even integrate with smart home systems, allowing you to control irrigation alongside other farm management tools. This connectivity ensures you’re always in tune with your crops’ needs, even when you can’t be physically present in the field.

Implementation Success Story

Green Acres CSA, a 15-acre organic farm in Vermont, transformed their irrigation practices through the implementation of smart scheduling software in 2021. Owner Sarah Mitchell had previously relied on traditional methods and intuition to manage water distribution across her diverse crop fields, but increasing weather unpredictability prompted her to seek a more precise solution.

“Before the software, we were either over-watering or scrambling to catch up during dry spells,” Sarah explains. “We needed a system that could help us make better decisions, especially with our limited labor resources.”

The farm installed soil moisture sensors across different growing zones and connected them to an irrigation management platform. The software integrates local weather data, crop-specific water requirements, and real-time soil moisture readings to generate customized watering schedules for each section of the farm.

The results were remarkable. Within the first growing season, Green Acres reduced their water usage by 30% while maintaining optimal soil moisture levels. The automated alerts helped Sarah’s team respond quickly to changing conditions, preventing both water stress and excess irrigation.

The software proved particularly valuable for their high-value crops like tomatoes and leafy greens. “We saw a 20% increase in our tomato yield,” Sarah notes. “The consistent moisture levels also improved the quality of our salad greens, which our CSA members definitely noticed.”

The system’s user-friendly interface allowed Sarah’s seasonal workers to quickly adapt to the new technology. Daily irrigation tasks that once took hours to plan now require just minutes to review and adjust. The mobile app enables the team to monitor and control irrigation from anywhere on the farm.

The investment paid for itself within two seasons through water savings, reduced labor costs, and improved crop yields. For Sarah, the peace of mind knowing her irrigation decisions are backed by data has been invaluable. “It’s like having an expert irrigation consultant available 24/7,” she says.

Data visualization showing water consumption reduction through smart irrigation implementation
Before/after comparison of water usage charts showing reduction after implementing irrigation software

Getting Started with Irrigation Software

Getting started with irrigation software doesn’t have to be overwhelming. Begin by assessing your farm’s specific needs, including the size of your growing area, types of crops, and local climate conditions. These factors will help narrow down your software options and ensure they align with your CSA planning process.

Start with a basic checklist:
1. List your must-have features (weather integration, mobile access, automated scheduling)
2. Set a realistic budget
3. Check your internet connectivity in the field
4. Consider your comfort level with technology

Many irrigation software providers offer free trials – take advantage of these to test different solutions. Begin with a small area of your farm to experiment and learn the system before scaling up. This approach helps minimize risks and allows you to build confidence with the technology.

When implementing your chosen solution:
– Take time to input accurate field data
– Map out your irrigation zones carefully
– Set up weather station connections if available
– Train any team members who’ll be using the system
– Keep backup manual schedules during the learning phase

Remember to start simple and add more advanced features as you become comfortable with the basics. Many successful farmers begin with basic scheduling functionality and gradually incorporate soil moisture sensors, weather forecasting, and automation tools.

Look for software providers offering good customer support and training resources. Having access to help when you need it makes the transition much smoother and helps you get the most value from your investment.

As we’ve explored throughout this article, irrigation scheduling software has become an invaluable tool for modern farmers and gardeners looking to optimize their water usage while maximizing crop yields. By implementing these smart solutions, growers can save time, reduce water waste, and maintain healthier plants through precise irrigation management.

The benefits are clear: reduced water bills, decreased labor costs, improved crop quality, and a smaller environmental footprint. Many farmers who have adopted this technology report seeing positive results within their first growing season, often achieving water savings of 20-30% while maintaining or improving their harvest quality.

Whether you’re managing a small market garden or a larger agricultural operation, today’s user-friendly irrigation scheduling tools make it easier than ever to embrace sustainable water management practices. With options ranging from simple smartphone apps to comprehensive farm management systems, there’s a solution for every scale and budget.

Take the first step toward smarter irrigation by exploring the various software options available and choosing one that fits your specific needs. Your plants, your wallet, and our planet will thank you for it.

Supercharge Your CSA Farm’s Productivity with Smart Organic Crop Rotations

Posted by darrell on
Seasonal Planning and Management
Supercharge Your CSA Farm’s Productivity with Smart Organic Crop Rotations

Transform your organic farm’s productivity by implementing strategic long-term rotation planning that naturally builds soil health while maximizing yields. Alternate nitrogen-fixing legumes with heavy-feeding crops like tomatoes and brassicas to create self-sustaining fertility cycles. Group crops by plant families, rotating through distinct field sections every season to break pest and disease cycles naturally. Map your rotations based on market demand, scheduling high-value crops during peak CSA distribution months while maintaining soil biology.

Growing organic isn’t just about avoiding synthetic inputs – it’s about creating resilient agricultural systems that work in harmony with nature. Through thoughtful crop rotation, farmers build living soils teeming with beneficial microorganisms, reduce pest pressure naturally, and produce nutrient-dense foods that customers can trust. Whether you’re managing a small market garden or a diverse CSA operation, strategic rotation planning forms the foundation of successful organic farming.

The Science Behind Organic Crop Rotation Success

Soil Health and Nutrient Cycling

Crop rotation plays a vital role in maintaining and improving soil health through natural nutrient cycling. Different crops interact with the soil in unique ways, creating a dynamic system that benefits future plantings. Legumes, like peas and beans, form partnerships with soil bacteria to fix nitrogen from the air, enriching the soil naturally. Deep-rooted crops such as carrots and parsnips help break up compacted soil and bring nutrients from lower layers to the surface.

Following heavy feeders like tomatoes with soil-building cover crops allows the land to recover and replenish its nutrient stores. Green manures, such as clover and buckwheat, can be tilled back into the soil, adding organic matter and improving soil structure. These practices encourage beneficial microorganisms and earthworms, which further enhance nutrient availability and soil health.

By alternating between different plant families, farmers create a more resilient soil ecosystem that’s less dependent on external inputs. This natural approach to soil fertility management helps maintain consistent yields while building long-term soil health – a cornerstone of successful organic farming.

Side-by-side comparison of rich, dark organic soil containing earthworms next to lighter, depleted soil
Split comparison photo of healthy soil with earthworms versus depleted soil

Natural Pest Management

Crop rotation serves as a powerful natural defense against pests and diseases in organic farming systems. By changing the location of crops each season, you effectively break the life cycles of many problematic insects and pathogens that tend to target specific plant families. For example, moving your tomatoes to a new bed each year helps disrupt the survival of tomato hornworms and other specialized pests.

This strategic plant shuffling also helps to prevent common plant diseases by reducing the buildup of soil-borne pathogens. When crops from different families follow each other, pest populations often decline naturally without the need for intervention.

Many successful CSA farmers incorporate “trap crops” into their rotation plans – plants that attract pests away from valuable crops. For instance, planting nasturtiums near your brassicas can draw aphids away from your marketable crops. Additionally, including aromatic herbs and flowers in your rotation can help repel certain pests while attracting beneficial insects that prey on harmful bugs.

Remember to maintain detailed records of pest issues and their locations to inform future rotation decisions. This knowledge becomes invaluable for long-term pest management success.

Planning Your CSA Rotation Calendar

Seasonal Planning Strategies

Successful organic crop rotation requires thoughtful seasonal planning that aligns with your CSA planning process. Start by mapping out your growing seasons and dividing your land into distinct sections that will host different crop families throughout the year.

For spring planning, focus on cold-hardy crops like peas, brassicas, and root vegetables. These plants establish well in cooler soil and provide early-season harvests. As you transition to summer, reserve space for heat-loving crops such as tomatoes, peppers, and squash, ensuring they follow nitrogen-fixing spring crops like peas or cover crops.

Fall planning should incorporate quick-growing crops that can be harvested before frost, while also establishing winter cover crops in previously harvested areas. Consider planting cold-tolerant varieties like kale and Brussels sprouts that actually improve in flavor after light frosts.

Winter months are ideal for soil building through cover crops and planning next year’s rotation. Use this time to review your notes from the previous seasons, identifying which crop combinations worked well and which areas might need adjustment.

Remember to maintain flexibility in your rotation schedule – weather patterns, market demands, and crop performance may require adaptations to your original plan. Keep detailed records of planting dates, yields, and soil conditions to refine your rotation strategy year after year.

Circular diagram illustrating crop rotation patterns between plant families across four seasons
Diagram showing different crop families and their rotation sequence over four seasons

Plant Family Groups

Understanding plant families is the foundation of successful crop rotation. Crops within the same family often share similar nutrient needs and are vulnerable to the same pests and diseases, making family-based rotation essential for soil health and pest management.

The main vegetable families include:

Nightshades (Solanaceae): Tomatoes, peppers, eggplants, and potatoes are heavy feeders that benefit from rich, fertile soil. These crops should only return to the same spot every 3-4 years to prevent soil-borne diseases.

Brassicas (Cruciferae): Includes cabbage, broccoli, kale, and radishes. These crops are known for their deep roots and high nutrient demands, particularly nitrogen.

Legumes (Fabaceae): Peas, beans, and other legumes are soil builders that fix nitrogen. Plant these before heavy-feeding crops to naturally enrich your soil.

Cucurbits (Cucurbitaceae): Squash, cucumbers, and melons have sprawling growth habits and moderate nutrient needs. They work well following legumes in rotation.

Alliums (Amaryllidaceae): Onions, garlic, and leeks are light feeders with shallow roots. They can follow heavy feeders in your rotation plan.

Organizing your crops by family makes it easier to plan rotations that maintain soil fertility and minimize pest problems. Keep a garden journal to track where each family grows each season, ensuring they don’t return to the same spot too soon.

Market Demand Balance

Successful CSA farming requires a delicate balance between crop diversity and member satisfaction. When planning your rotation schedule, consider surveying your members about their produce preferences and incorporating this feedback into your planting strategy. This helps ensure your rotation not only maintains soil health but also meets market demands.

Many successful CSA farmers maintain a “core crops” rotation that includes reliable favorites like tomatoes, lettuce, and carrots, while experimenting with specialty crops in smaller plots. This approach helps maximize seasonal yields while keeping members excited about their weekly shares.

Consider creating a flexible rotation plan that allows for adjustments based on member feedback. For example, if members consistently express interest in more cooking greens, you might increase your brassica rotation while reducing space allocated to less popular crops. Keep detailed records of member preferences and crop performance to fine-tune your rotation strategy each season.

Remember to communicate with your members about the benefits of crop rotation and how it affects their weekly shares. Many CSA members appreciate understanding the connection between sustainable farming practices and the variety in their boxes. This education often leads to greater acceptance of seasonal eating patterns and helps maintain member satisfaction throughout the growing season.

Advanced Rotation Techniques for CSA Success

Cover Crop Integration

Cover crops are the unsung heroes of organic crop rotation, serving as powerful allies in building soil health and maintaining farm productivity. These temporary plantings work year-round to enhance your rotation system, even when your main crops aren’t in the ground.

Consider the experience of Sarah Miller, an organic farmer in Vermont, who transformed her depleted fields using a strategic cover crop system. “Adding winter rye and hairy vetch to our rotation was a game-changer,” she shares. “Our soil structure improved dramatically within just two seasons.”

Popular cover crop choices include legumes like clover and peas, which fix nitrogen in the soil, and grasses like rye and oats that prevent erosion and add organic matter. Buckwheat, a warm-season favorite, excels at suppressing weeds and attracting beneficial insects.

To maximize cover crop benefits:
– Plant immediately after harvesting main crops
– Choose species that complement your climate and soil needs
– Consider mixing different cover crops for multiple benefits
– Time termination carefully to avoid seed setting
– Incorporate residue thoroughly before planting next crops

Beyond soil improvement, cover crops provide additional advantages:
– Natural weed suppression
– Beneficial insect habitat
– Erosion control
– Moisture retention
– Enhanced biodiversity

Many successful organic farmers use the “relay planting” technique, where cover crops are established in standing cash crops before harvest. This ensures continuous soil coverage and maximizes the growing season’s potential.

Remember that cover crops aren’t just placeholder plants – they’re active participants in your farm’s ecosystem, contributing to long-term sustainability and productivity.

Lush cover crop field of clover and rye grass being incorporated into soil
Field showing successful cover crop integration with visible green manure crops

Companion Planting in Rotation

Companion planting takes crop rotation to the next level by considering not just what crops follow each other, but also which plants grow best together during the same season. This natural approach creates beneficial relationships that can enhance your rotation strategy while maximizing space and improving overall farm health.

Consider planting nitrogen-fixing legumes like peas or beans alongside heavy-feeding crops such as tomatoes or corn. The legumes enrich the soil while the other crops benefit from the added nutrients. When rotating next season, the following crops will thrive in the nitrogen-rich soil left behind.

A popular companion planting trio known as the “Three Sisters” demonstrates this perfectly: corn provides support for climbing beans, which fix nitrogen in the soil, while squash spreads along the ground, suppressing weeds and retaining moisture. This traditional Native American planting method can be incorporated into your rotation schedule, with the plot being excellent for leafy greens the following year.

Herbs play a crucial role in companion planting rotations too. Aromatic herbs like basil, dill, and cilantro can be planted throughout your rotation blocks to attract beneficial insects and repel pests. As you plan your rotations, consider leaving permanent herb strips between beds to maintain these benefits year-round.

Success story: Sarah Miller from Green Valley Farm found that incorporating companion planting into her rotation increased her tomato yield by 30% after adding basil and marigolds to her rotation blocks. She maintains these beneficial relationships while still following her primary rotation schedule, proving that these methods can work together harmoniously.

Remember to document which companion plantings work best in your specific environment and incorporate these findings into your long-term rotation planning.

Troubleshooting Common Rotation Challenges

Even the most well-planned crop rotations can face challenges, but with the right approach, these hurdles are completely manageable. Let’s explore common rotation challenges and their practical solutions.

Timing mismatches often occur when one crop isn’t ready for harvest before it’s time to plant the next. To address this, maintain a flexible buffer zone in your growing space and consider using quick-growing cover crops to fill temporary gaps. Having backup plans for alternative planting dates can also help manage unexpected weather delays.

Nutrient depletion sometimes happens when heavy-feeding crops are accidentally scheduled too close together. Combat this by keeping detailed soil testing records and adjusting your rotation plan accordingly. Adding compost or green manure crops can help restore balance to depleted areas.

Space allocation issues are another frequent challenge, especially when transitioning between crops of different sizes. Create detailed field maps and use succession planting to maximize space efficiency. Some farmers find success by interplanting compatible crops during transition periods.

Disease and pest pressures can persist despite rotation efforts. Sarah Miller, an organic farmer in Vermont, solved this by extending her rotation length and incorporating disease-resistant varieties. She also added beneficial insect-attracting flowers between crop rows, creating natural pest management zones.

Equipment scheduling conflicts can arise when different crops need attention simultaneously. Develop a detailed calendar that accounts for equipment needs and consider cooperating with neighboring farms to share resources during peak times.

Market timing challenges occur when crop schedules don’t align with peak market demands. Work backward from your target market dates when planning rotations, and maintain season extension options like row covers or high tunnels for flexibility.

Remember that successful rotation management often requires adaptation and creative problem-solving. Keep detailed records of what works and what doesn’t, and don’t be afraid to adjust your plans based on experience and changing conditions.

Organic crop rotation stands as a cornerstone of sustainable agriculture, offering multiple benefits for soil health, pest management, and crop yields. By thoughtfully planning and implementing rotation cycles, farmers can create resilient agricultural systems that work in harmony with nature. Whether you’re managing a small garden plot or a larger CSA operation, the principles remain the same: diverse plantings, careful timing, and attention to soil needs. Start small by rotating between three or four crop families, and gradually expand your rotation plan as you gain confidence. Remember that successful organic rotation isn’t just about following a schedule – it’s about creating a living, breathing ecosystem that sustains both the land and the community it feeds. With patience and dedication, you’ll discover that organic crop rotation isn’t just good farming practice – it’s an investment in our agricultural future.

Transform Your CSA Planning with This Smart Seasonal Diagram Tool

Posted by darrell on
Seasonal Planning and Management
Transform Your CSA Planning with This Smart Seasonal Diagram Tool

Transform your farm planning with a seasonal diagram – the visual blueprint that professional CSA farmers use to maximize harvests and streamline operations. Following a proven CSA planning checklist, this powerful tool maps out planting schedules, crop rotations, and harvest windows across all four seasons. Like a farmer’s compass, it guides critical decisions from seed selection to succession planting, ensuring continuous harvests that keep CSA members delighted throughout the year. Whether you’re managing a small market garden or a diverse organic farm, mastering the seasonal diagram approach helps coordinate labor, optimize growing spaces, and deliver the abundant, varied produce that sustainable agriculture demands.

Why Digital Seasonal Diagrams Matter for CSA Success

From Paper to Pixels: The Evolution of CSA Planning

In the early days of CSA farming, seasonal planning relied heavily on paper charts, notebooks, and wall calendars. Farmers would spend hours sketching out planting schedules, crop rotations, and harvest timelines by hand. While effective, these methods were time-consuming and prone to smudges, coffee stains, and weather damage.

The digital revolution brought a welcome transformation to CSA planning. What started as simple spreadsheets evolved into sophisticated farm management software, making it easier for farmers to create, modify, and share their seasonal diagrams. Today’s digital tools offer features like automated weather tracking, yield predictions, and real-time updates that our paper-planning predecessors could only dream of.

Despite this evolution, many farmers still combine both methods, appreciating the tactile nature of paper planning while embracing the efficiency of digital tools. This hybrid approach allows them to maintain the creative, hands-on aspect of planning while leveraging technology’s organizational power.

Side-by-side comparison showing paper-based seasonal planning on left and digital planning software on right
Split-screen comparison of traditional paper planning versus modern digital CSA planning interface

Real Benefits for Your CSA Operation

Digital seasonal planning tools transform your CSA operation by streamlining complex farm management tasks. Instead of juggling multiple spreadsheets or paper calendars, you’ll have a centralized system that tracks planting schedules, harvest dates, and crop rotations effortlessly.

Many farmers report saving 5-10 hours weekly on planning tasks after implementing digital tools. With automated reminders and visual planting guides, you’re less likely to miss crucial planting windows or succession sowing dates. This improved accuracy leads to better crop timing and more consistent harvests for your CSA members.

These tools also help optimize field space utilization and resource allocation. You can easily plan crop varieties to ensure diverse weekly shares throughout the season. Plus, having historical data at your fingertips makes year-to-year planning more efficient, helping you refine your growing strategies based on past successes and challenges.

For new CSA operators, these planning tools provide valuable structure and guidance, while experienced farmers appreciate the enhanced organization and time savings.

Essential Features of Digital Seasonal Diagrams

Interactive Planting Calendars

Modern digital planting calendars have revolutionized seasonal planning for farmers and gardeners alike. These interactive tools transform traditional seasonal diagrams into dynamic, customizable guides that adapt to your specific growing zone and local climate conditions.

With just a few clicks, these smart calendars can generate personalized planting schedules, suggesting optimal times for starting seeds indoors, transplanting, and direct sowing. Many apps even integrate local weather data and frost dates, sending timely notifications for crucial gardening tasks.

Farmer Sarah Jones from Green Valley Farm shares, “Our interactive calendar syncs across devices, allowing our entire team to stay coordinated. It’s especially helpful during succession planting, ensuring we have continuous harvests throughout the season.”

Popular features include crop rotation tracking, harvest forecasting, and automated task reminders. Some advanced platforms even offer companion planting suggestions and pest management schedules. The ability to log notes and photos creates a valuable digital journal that helps improve planning year after year.

These tools have become essential for both small-scale gardeners and commercial farmers, making seasonal planning more accessible and efficient than ever before.

Digital calendar interface showing crop planting schedules with interactive elements
Interactive digital planting calendar with color-coded crops and timeline visualization

Crop Rotation Visualization

Visualizing your crop rotation strategies through seasonal diagrams helps streamline planning and maximize field productivity. These visual tools typically feature circular or grid layouts that map out crop succession throughout the growing season. Color-coding different plant families makes it easy to track rotations and maintain soil health by preventing the same crops from depleting specific nutrients year after year.

Many farmers use simple whiteboard diagrams or digital planning tools to create these visualizations. Popular options include garden planning apps that automatically generate rotation schedules based on your crop selection. These tools often include helpful features like companion planting suggestions and soil amendment reminders.

For best results, update your rotation diagrams seasonally and keep detailed notes about crop performance in each plot. This visual record-keeping system helps identify patterns and refine your rotation plan over time.

Harvest Timeline Integration

The harvest timeline integration feature transforms your seasonal diagram into a dynamic planning tool, helping you maximize harvest yields throughout the growing season. By inputting crop-specific data like germination times, growth periods, and expected harvest windows, you’ll create a visual roadmap of your farm’s production schedule. The system can send timely notifications for crucial tasks such as succession planting, allowing you to maintain a steady flow of fresh produce.

What makes this feature particularly valuable is its ability to adapt to your local climate patterns and growing conditions. You can track actual harvest dates against projected ones, helping you fine-tune future planning. The timeline also considers crop rotation requirements and companion planting opportunities, ensuring optimal use of your growing space while maintaining soil health. Many farmers find this feature especially helpful for coordinating CSA box contents and planning market appearances weeks or even months in advance.

Implementing Digital Seasonal Planning

Getting Started with Your First Digital Diagram

Creating your first digital seasonal diagram is easier than you might think! Start by choosing a user-friendly digital planning tool – popular options include Microsoft Excel, Google Sheets, or specialized farm planning software. These tools offer templates and customization options that make the process straightforward.

Begin by opening a new document and creating a basic grid structure. Label your rows with different crops or farm activities, and use columns to represent weeks or months throughout the growing season. Most digital tools allow you to color-code cells, making it easy to visualize different growing periods, harvest times, and crop rotations.

Add important dates and tasks using different colors – for example, green for planting times, yellow for maintenance periods, and red for harvest windows. Many digital tools also let you add notes or comments to cells, perfect for including specific care instructions or yield expectations.

Don’t forget to save your work regularly and consider using cloud storage for easy access across devices. As you become more comfortable with the basics, explore advanced features like formulas for calculating succession planting dates or automated reminders for recurring tasks.

Remember, your first diagram doesn’t need to be perfect. Start simple and build complexity as you gain confidence. Many farmers find that digital diagrams become more detailed and useful with each growing season as they add notes and refine their planning process.

Customizing for Your CSA’s Needs

Every CSA operation is unique, with different crops, growing seasons, and member expectations. To make your seasonal diagram truly effective, start by listing all your specific crops and their growing windows. Consider factors like your local climate, soil conditions, and market demands when customizing your planning tools.

For smaller CSAs, a simple color-coded spreadsheet might suffice, while larger operations might benefit from more sophisticated digital planning software. Add custom fields to track important details like succession planting dates, greenhouse starts, or specific varieties that perform well in your region.

Sarah Miller, a successful CSA farmer in Vermont, shares her approach: “I modified my seasonal diagram to include frost dates and storage crop planning. This helped me extend our distribution season by two months.” Consider incorporating symbols or notes for important farm activities like cover cropping, crop rotation, or season extension techniques.

Don’t forget to account for your unique distribution model. If you offer workplace CSAs, you might want to align harvesting schedules with delivery routes. For farm pickup shares, you could organize plantings to create attractive display combinations throughout the season.

Remember to build in flexibility for weather variations and adjust your diagram annually based on previous years’ experiences. Many farmers find it helpful to include notes about successful companion planting combinations or pest management strategies specific to their farm ecosystem.

Farmer standing in vegetable field using tablet device to view crop planning software
Farmer using tablet in field while consulting digital seasonal diagram

Success Stories: Digital Planning in Action

Green Valley Farm’s transformation through digital seasonal planning stands as a shining example of modern CSA success. Sarah Martinez, the farm’s owner, switched from paper-based planning to digital tools in 2019, resulting in a 40% increase in crop diversity and a 25% reduction in food waste within just one growing season.

At Rolling Hills CSA in Vermont, farmers Tom and Lisa Bennett revolutionized their operation using a digital seasonal diagram integrated with weather forecasting. This smart approach helped them adjust planting schedules based on climate patterns, leading to more consistent harvests and happier CSA members. Their success inspired neighboring farms to embrace digital planning tools.

The Urban Roots Community Farm in Seattle demonstrates how digital seasonal planning can benefit even small-scale operations. Their team uses collaborative digital tools to coordinate multiple growing spaces across the city. Program director Maya Chen reports that digital planning helped them increase their CSA membership by 60% while maintaining quality and variety in their weekly shares.

Perhaps most impressively, the Fresh Start Collective in Colorado used digital seasonal diagrams to coordinate planting schedules across five partner farms. This coordination allowed them to offer year-round CSA shares, even in their challenging mountain climate. Their member retention rate jumped from 65% to 92% after implementing digital planning tools.

In today’s digital age, seasonal planning tools have revolutionized the way we approach farming and gardening. By adopting these user-friendly digital solutions, farmers and gardeners can streamline their planning process, reduce errors, and maximize their yields throughout the growing season. The visual nature of digital seasonal diagrams makes it easier to track planting schedules, crop rotations, and harvest times, while built-in reminders ensure nothing falls through the cracks.

Whether you’re managing a small backyard garden or a large-scale CSA operation, these tools adapt to your needs and grow with your experience. They offer the perfect blend of traditional farming wisdom and modern technology, making sustainable agriculture more accessible to everyone. Take the leap into digital seasonal planning – your garden, your community, and the environment will thank you for it.