Daily Archives

2 Articles

Why Your Mushroom Compost Is the Secret to Growing Better Mushrooms (And Everything Else)

Posted by darrell on
0
Organic Farming and Cultivation
Why Your Mushroom Compost Is the Secret to Growing Better Mushrooms (And Everything Else)

Layer nitrogen-rich materials like coffee grounds, grass clippings, and vegetable scraps with carbon sources such as straw, cardboard, and dried leaves in a 1:2 ratio to create the ideal growing medium for oyster, shiitake, and button mushrooms. Maintain moisture levels at 60-70% by spritzing your compost pile daily, ensuring it feels like a wrung-out sponge when squeezed. Pasteurize your finished compost at 140-160°F for 2-3 hours to eliminate competing organisms while preserving beneficial microbes that support mushroom mycelium growth.

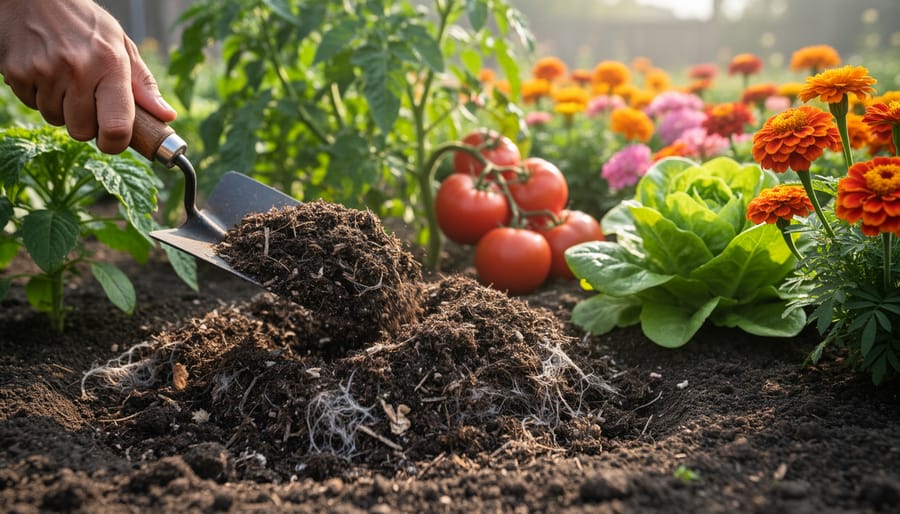
Source spent mushroom substrate from local organic farms through your regional CSA network, where this nutrient-dense byproduct costs significantly less than creating compost from scratch. This dark, crumbly material transforms garden beds by improving soil structure, increasing water retention by up to 50%, and delivering slow-release nutrients throughout the growing season. Mix spent mushroom compost at a 2:1 ratio with native soil for vegetable gardens, or use it as a top dressing around fruit trees and ornamental plants.

Connect with nearby mushroom cultivators who practice sustainable agriculture to establish a circular system where you provide raw composting materials in exchange for finished substrate. Many small-scale mushroom farmers welcome this arrangement since disposing of spent compost presents logistical challenges. Store your mushroom compost in covered bins to prevent nutrient leaching from rain, and apply it within six months for maximum effectiveness. Whether you’re growing your own gourmet mushrooms or enriching your vegetable garden, understanding both sides of mushroom composting opens doors to remarkable yields and reduced waste.

What Makes Mushroom Compost Different From Regular Compost

Close-up of dark mushroom compost with visible straw pieces held in hands
Mushroom compost combines straw, manure, and other organic materials into a nutrient-rich substrate perfect for fungal cultivation.

The Life Cycle: From Fresh Substrate to Spent Mushroom Compost

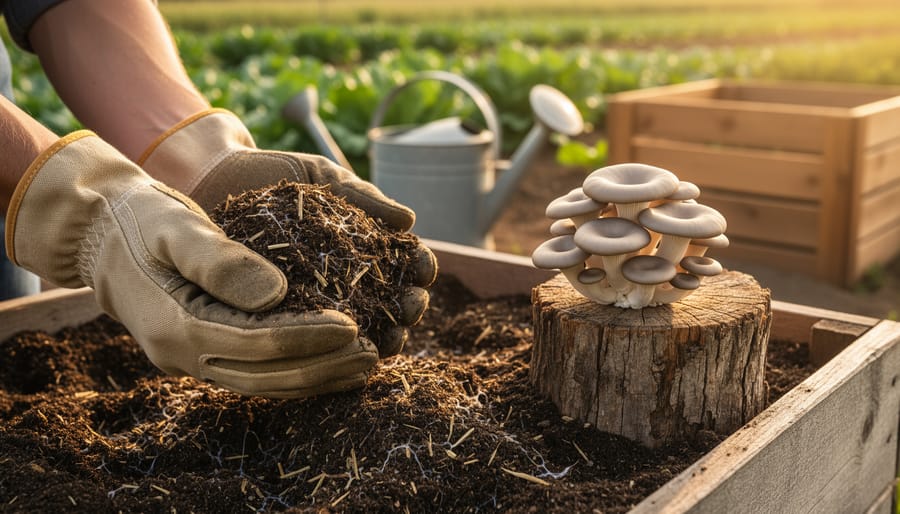
The journey of mushroom compost is a fascinating transformation story. It begins as fresh substrate, a carefully crafted mixture of organic materials like straw, hay, chicken manure, and gypsum. This nutrient-rich blend undergoes a controlled composting process, reaching temperatures that eliminate harmful pathogens while creating the perfect environment for mushroom mycelium to thrive.

During cultivation, mushroom growers maintain precise conditions of temperature, humidity, and airflow. As mushrooms grow and are harvested over several weeks, they consume a significant portion of the substrate’s nutrients. Once the growing cycle completes and production declines, what remains is called spent mushroom substrate or spent mushroom compost.

Here’s the exciting part: this “spent” material is far from worthless. While mushrooms have extracted many nutrients, the compost still retains tremendous value for gardeners. It’s rich in organic matter, contains beneficial microorganisms, and has a near-neutral pH that most plants love. The composting process has also broken down complex organic materials into forms that are more readily available to garden plants.

Many local organic farms and mushroom cultivation operations offer spent mushroom compost to gardeners at reasonable prices, creating a perfect circular economy. This practice embodies sustainable agriculture at its finest, turning what could be waste into a valuable soil amendment. For home gardeners, it’s an affordable way to improve soil structure, retain moisture, and boost plant health while supporting local farmers who practice environmentally responsible growing methods.

Building Your Own Mushroom Growing Compost at Home

Essential Ingredients and Where to Find Them Locally

Creating nutrient-rich mushroom compost starts with gathering the right organic materials, and you’ll be surprised how many you can find right in your community. The foundation begins with a nitrogen-rich base like horse manure or chicken droppings, which you can often source from local stables, equestrian centers, or small-scale poultry farmers. Many are happy to share their excess for free or a small fee.

Your local feed store is another goldmine for ingredients. Look for wheat straw, hay, or cottonseed meal, which provide the carbon structure mushrooms love. These stores often carry gypsum too, which helps maintain proper texture and pH levels in your compost pile.

Connect with nearby farms through your area’s CSA networks to find brewers grain from craft breweries or coffee grounds from local roasters. One Michigan farmer I spoke with gets spent grain weekly from three local breweries, creating compost that produces incredible oyster mushroom yields.

Don’t overlook agricultural extension offices and farmers markets as networking spots. Strike up conversations with vendors about their composting materials, and you might discover neighbors with excess organic matter perfect for mushroom cultivation.

Remember to verify that all materials come from organic or pesticide-free sources, as chemical residues can harm mushroom mycelium. Building relationships with these local suppliers not only ensures quality ingredients but also strengthens your community’s sustainable agriculture network. Many experienced growers find that their best resources come from word-of-mouth recommendations within farming circles.

The Step-by-Step Composting Process

Creating your own mushroom compost is a rewarding journey that connects you directly to the growing process. The timeline typically spans 2-4 weeks, depending on your chosen method and mushroom variety.

Start by mixing your base ingredients in layers. Combine straw or agricultural waste with nitrogen-rich materials like chicken manure or coffee grounds at a ratio of roughly 4:1 carbon to nitrogen. Add water until the mixture feels like a wrung-out sponge—moist but not dripping. This initial phase takes 1-2 days and sets the foundation for building living soil that mushrooms will thrive in.

Next comes pasteurization, crucial for eliminating competing organisms. For hot composting, turn your pile every 2-3 days, monitoring internal temperatures. You’re aiming for 140-160°F for at least 3 days. Sarah Chen, an urban mushroom grower in Vancouver, shares this tip: “Use a compost thermometer—it’s a game-changer. Once I started tracking temperatures properly, my oyster mushroom yields doubled.”

For smaller batches, pasteurize substrate by soaking it in 160°F water for 1-2 hours, then drain thoroughly. This method works beautifully for shiitake and wine cap varieties.

The conditioning phase follows, lasting 5-10 days. During this time, beneficial microorganisms colonize the substrate while ammonia levels drop. Turn the mixture occasionally and check the smell—it should transition from pungent to earthy and sweet.

Your compost is ready when it’s dark brown, crumbly, and has that pleasant forest floor aroma. Different mushroom species have preferences: oysters tolerate fresher compost, while button mushrooms prefer fully conditioned substrate. Testing with a small batch helps you perfect timing for your chosen variety.

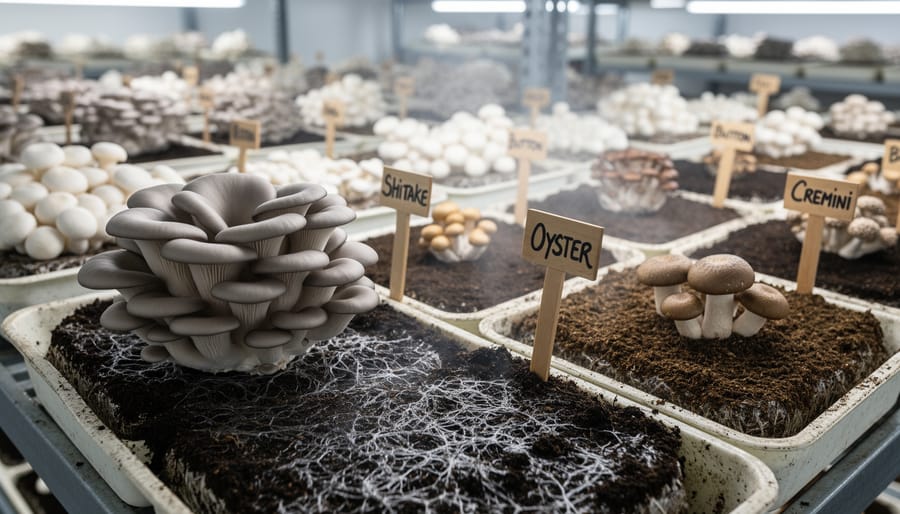
Matching Compost Recipes to Your Mushroom Variety

Not all mushrooms thrive on the same growing medium, and understanding these preferences is key to successful cultivation. Just as different vegetables need varying soil conditions, each mushroom variety has specific substrate requirements that support optimal growth and flavor development.

Oyster mushrooms are incredibly forgiving for beginners, making them a favorite among home growers. These adaptable fungi flourish on straw-based substrates. A simple recipe includes pasteurized wheat or oat straw combined with a small amount of coffee grounds (about 10-20% by weight). The straw provides structure while coffee grounds add nitrogen, creating an ideal balance. One grower in Oregon shared that she collects used coffee grounds from her local café each week, turning waste into abundant harvests of beautiful pearl and pink oyster mushrooms.

Button mushrooms (the classic white mushrooms found in grocery stores) require a more complex approach. They prefer composted horse manure mixed with straw, gypsum, and a bit of poultry manure. The traditional recipe involves a hot composting phase where temperatures reach 140-160°F, followed by pasteurization. This process creates the nutrient-rich substrate that button mushrooms love. While more involved, the results are worth the effort for those wanting to grow this popular variety.

Shiitake mushrooms need hardwood-based substrates since they naturally grow on logs in forests. For indoor cultivation, use a mixture of hardwood sawdust (oak, maple, or beech work wonderfully) supplemented with wheat bran or rice bran at about 10-20% of the total weight. The supplementation provides extra nutrition without overwhelming these wood-loving fungi. Many growers find success with pre-made shiitake sawdust blocks available from local mushroom farms.

Lion’s mane mushrooms prefer similar conditions to shiitake but benefit from slightly higher supplementation rates. A mixture of hardwood sawdust with 15-25% wheat bran creates the nutrient density these striking white mushrooms need to develop their characteristic cascading tendrils.

Start with oyster mushrooms to build confidence, then experiment with other varieties as your skills develop. Each successful harvest teaches valuable lessons about moisture, temperature, and timing that translate across different mushroom species.

Oyster mushrooms fruiting from dark compost substrate showing healthy growth
Different mushroom varieties like oyster mushrooms require specific compost formulations for optimal fruiting and yields.

From Mushroom Farm to Garden Gold: Using Spent Compost

Hands incorporating spent mushroom compost into garden soil with visible organic matter
Spent mushroom compost transforms into valuable garden amendment, enriching soil structure and providing nutrients for vegetables and flowers.

Connecting with Local Mushroom Farms for Spent Compost

Finding mushroom farms that offer spent compost is easier than you might think. Start by exploring local organic networks and CSA directories in your area, as many mushroom producers participate in these community-supported agriculture programs. Local farmers’ markets are also excellent places to connect directly with growers.

When reaching out to farms, ask about their composting process and whether they use organic substrates. Find out how often spent compost becomes available and what pickup or delivery options they offer. Most importantly, inquire about pricing—many farms provide it free or at minimal cost since it’s a byproduct.

Building lasting relationships with producers benefits everyone. Consider becoming a CSA member to support their operation while securing regular access to compost. Share your gardening results with them too. One home gardener in Ontario transformed her backyard by partnering with a local mushroom farm, creating a thriving vegetable garden that now supplies her family year-round. These connections strengthen community food systems while giving you access to premium soil amendment that would otherwise go to waste.

Troubleshooting Common Mushroom Compost Problems

Even experienced composters encounter challenges when working with mushroom compost. Let’s explore common problems and their solutions to keep your composting journey on track.

Contamination from competing fungi or mold is perhaps the most frustrating issue. Green or black mold indicates unwanted organisms have taken hold. The solution starts with prevention: sterilize your substrate properly through pasteurization at 140-160°F for several hours. If contamination appears, remove affected areas immediately and increase airflow. Sarah from Ontario learned this lesson firsthand when her first batch turned green. After implementing proper sterilization techniques aligned with organic practices, her success rate jumped to 90 percent.

Unpleasant ammonia odors signal nitrogen overload or inadequate aeration. Turn your compost pile more frequently and add carbon-rich materials like straw or shredded leaves to balance the nitrogen. Proper moisture levels matter too – your compost should feel like a wrung-out sponge, not dripping wet.

Poor mushroom yields often stem from incorrect moisture, temperature, or lighting conditions. Mushrooms need 80-95 percent humidity and specific temperature ranges depending on species. Check that your growing environment maintains consistency and adjust as needed.

Nutrient imbalances in spent mushroom compost typically show up as excessive salts affecting plant growth. Aging your spent compost for 6-12 months before garden application resolves this issue naturally. You can also blend it with other materials rather than using it alone.

When troubleshooting, remember that patience and observation are your best tools. Keep detailed notes about conditions and adjustments – this knowledge becomes invaluable for future batches and helps you develop intuition for what your compost needs.

Real Success: How One CSA Farm Transformed Their Operation with Mushroom Composting

When Sarah Martinez took over Green Valley CSA in Oregon three years ago, she faced a common challenge: what to do with the growing mountain of plant waste and how to improve her depleted soil without breaking the bank. Her solution came from an unexpected source, transforming her 5-acre operation into a thriving model of circular agriculture.

Sarah started small, converting an unused barn section into a mushroom growing area. She began with oyster mushrooms, using straw and her own farm waste as the growing substrate. Within six months, she was producing 50 pounds of gourmet mushrooms weekly for her CSA boxes. But the real game-changer was what happened next.

The spent mushroom substrate became her secret weapon. After each growing cycle, Sarah composted the nutrient-rich material and applied it throughout her vegetable beds. The results were remarkable. Her tomato yields increased by 35 percent in the first season, and soil tests showed a 40 percent improvement in organic matter content within 18 months.

The challenges were real, though. Sarah admits the learning curve was steep. Temperature control in the mushroom growing area proved tricky during summer months, and she lost two batches to contamination before mastering sterilization techniques. She invested about $3,000 initially in basic equipment and climate control systems.

Her advice for farmers considering this approach? Start with one mushroom variety and scale gradually. She emphasizes joining online mushroom growing communities for troubleshooting support and recommends keeping detailed records of substrate recipes and growing conditions.

Today, Green Valley CSA has waiting lists for both their vegetable shares and mushroom subscriptions. The composting cycle has reduced Sarah’s fertilizer costs by 60 percent while creating an additional revenue stream. She now mentors other local farmers interested in replicating her integrated system, proving that sustainable practices and profitability can grow together.

Mushroom composting opens doors to incredible sustainability benefits while saving you money and connecting you with your local food community. Whether you’re creating nutrient-rich substrate for growing your own mushrooms or enriching your garden beds with spent mushroom compost, you’re participating in a beautiful cycle that transforms waste into abundance. The environmental impact alone makes this practice worthwhile—reducing landfill waste, sequestering carbon, and building healthier soil ecosystems right in your backyard.

Start small if you’re new to this. A simple bin of spent mushroom compost mixed into your vegetable garden can show you immediate results. As you gain confidence, consider expanding to mushroom cultivation or partnering with local farmers who might share or sell their spent substrate. Many CSA programs now include mushroom growers who are eager to connect with community members interested in composting.

Your next steps are simple: visit a nearby mushroom farm to source spent compost, join a local gardening group to share knowledge and resources, or start your first small mushroom growing project at home. The learning curve is gentle, the rewards are substantial, and the connections you’ll make along the way enrich both your garden and your community. Take that first step today—your soil will thank you.

What’s Fresh Right Now: Your Month-by-Month California Produce Calendar

Posted by darrell on
0
Seasonal Planning and Management
What’s Fresh Right Now: Your Month-by-Month California Produce Calendar

California’s Mediterranean climate creates one of the longest growing seasons in the United States, delivering fresh, locally grown produce nearly year-round. Understanding what thrives in each season transforms how you shop at farmers markets, plan your garden, and connect with the rhythms of sustainable agriculture.

Visit your local farmers market during peak harvest times to access the freshest, most flavorful produce while supporting small-scale growers in your community. Summer brings abundant stone fruits, tomatoes, and peppers from June through September, while winter months offer robust citrus, leafy greens, and root vegetables that actually taste better after a light frost.

Plan your garden plantings around California’s distinct microclimates and USDA zones, which range from cool coastal regions to warm inland valleys. Cool-season crops like lettuce, broccoli, and peas thrive when planted in fall for winter harvests, while warm-season favorites including squash, melons, and beans need soil temperatures above 60°F for successful germination in spring.

Shop and cook with the seasons to reduce your environmental footprint and enjoy produce at its nutritional peak. Seasonal eating means strawberries taste like strawberries should in May, not December, and winter squash develops its characteristic sweetness only after autumn temperatures trigger natural sugar conversion.

This comprehensive guide breaks down each month’s harvest bounty and planting opportunities, helping you make informed choices whether you’re filling your shopping basket or planning your next garden bed. Embrace California’s incredible agricultural diversity and discover how seasonal eating connects you to the land and the dedicated farmers who nurture it.

Why California’s Climate Makes Us the Nation’s Garden

California’s unique position as America’s produce powerhouse isn’t just luck—it’s geography. Our state’s remarkable diversity of microclimates creates nearly perfect growing conditions for an astonishing variety of crops year-round. From the fog-kissed coastal regions to sun-drenched inland valleys and the subtropical warmth of Southern California, each area cultivates its own specialty crops.

The coastal zones, cooled by Pacific breezes, excel at growing leafy greens, artichokes, and Brussels sprouts even during summer months when inland temperatures soar. Meanwhile, the Central Valley’s hot days and cool nights create ideal conditions for stone fruits, tomatoes, and almonds. Southern California’s mild winters allow citrus groves and avocado orchards to flourish when most of the country is blanketed in snow.

What truly sets California apart is our extended growing season. Many regions enjoy 300-plus days of sunshine annually, enabling farmers to succession plant and harvest multiple crops from the same field. This means fresh strawberries can appear at farmers markets as early as January in some areas, while coastal farms still harvest summer squash well into November.

This agricultural abundance directly benefits local communities through Community Supported Agriculture programs and vibrant farmers markets. Small-scale organic farmers have mastered year-round gardening strategies that take advantage of regional microclimates, providing members with diverse weekly harvest boxes throughout every season.

Home gardeners can apply these same principles. By understanding your specific microclimate—whether you’re gardening in foggy San Francisco or sunny San Diego—you can select crops that naturally thrive in your conditions, reducing water needs and chemical inputs while maximizing harvests. This climate diversity makes California truly exceptional for both commercial farming and backyard food production.

Overhead view of diverse California produce including citrus, stone fruits, and vegetables arranged on wooden table
California’s diverse growing regions produce an incredible variety of fresh fruits and vegetables year-round.

Spring in California (March-May): The Season of Renewal

Harvest basket filled with spring produce including artichokes, asparagus, strawberries and peas in garden setting
Spring brings California’s most delicate produce including artichokes, asparagus, and the first strawberries of the season.

Early Spring Favorites

As California transitions from winter’s chill, early spring brings some of the state’s most anticipated produce to farmers’ markets and gardens. This is when you’ll find tender artichokes with their nutty, slightly sweet flavor—perfect for steaming whole and serving with lemon butter. Look for tight, heavy globes with no browning at the tips.

Asparagus spears appear in abundance, offering a fresh, grassy taste that shines when simply roasted with olive oil and sea salt. Choose firm stalks with tight tips for the best flavor. Meanwhile, strawberries reach their peak sweetness in California’s coastal regions, delivering that perfect balance of sugar and acidity that makes store-bought versions pale in comparison.

English peas and sugar snap peas bring crisp sweetness to spring meals. Shell peas make wonderful additions to risottos, while snap peas are delicious raw in salads or quickly sautéed with garlic. Leafy greens like arugula, spinach, and butter lettuce thrive in cooler spring temperatures, offering peppery or mild flavors depending on variety.

Spring onions, with their delicate flavor and edible green tops, add brightness to stir-fries and salads without the sharp bite of mature onions.

For home gardeners, early spring is ideal for direct-seeding peas and transplanting lettuce starts. Many California farmers have found success using succession planting for continuous lettuce harvests—a sustainable practice that maximizes garden space while reducing waste. Plant every two weeks for a steady supply throughout spring.

Growing Your Own Spring Crops

Spring is the perfect time to start your thriving home garden in California. With our mild climate and extended growing season, even beginners can enjoy success with the right timing and crop selection.

For early spring planting (February through March), focus on cool-season crops that can handle occasional chilly nights. Lettuce, spinach, and arugula are incredibly forgiving and produce harvests within 30-45 days. Peas thrive when planted in late winter, climbing happily up trellises as temperatures warm. Radishes are another winner for new gardeners, maturing in just 3-4 weeks and signaling when soil conditions are right for other crops.

As March rolls into April, it’s time to think about transplants. Start tomatoes, peppers, and basil indoors 6-8 weeks before your last frost date, or purchase starts from local nurseries. These warm-season favorites need soil temperatures above 60 degrees to really take off.

California gardeners should pay attention to microclimates within their own yards. Coastal regions stay cooler longer, while inland valleys warm up faster, affecting ideal planting times by several weeks. A simple soil thermometer takes the guesswork out of timing.

Start small with just a few crops to build confidence. Many successful CSA farmers began with backyard beds, learning seasonal rhythms through hands-on experience. The key is getting seeds or starts in the ground at the right moment and staying consistent with watering as spring sunshine intensifies.

Summer Abundance (June-August): Peak Harvest Season

Stone Fruits and Berries

California’s warm summers bring an incredible bounty of stone fruits and berries that make this season truly special. From late May through September, our state’s orchards produce some of the world’s finest peaches, nectarines, plums, apricots, and cherries.

The Central Valley, particularly around Fresno and the San Joaquin Valley, serves as the heart of California’s stone fruit production. Peak season runs from June through August, with apricots arriving first in late May, followed by cherries in June, and peaches and nectarines hitting their stride in July and August. For the sweetest fruit, look for those picked at peak ripeness from local farms rather than supermarket varieties harvested early for shipping.

Berries thrive in California’s coastal regions, with strawberries available nearly year-round but tastiest from April through June. Blackberries, raspberries, and blueberries peak in summer months. Watsonville and Oxnard are renowned berry-growing areas worth visiting.

Many small-scale organic farmers have found success growing heirloom stone fruit varieties that offer superior flavor but don’t ship well commercially. Visit your local farmers market to discover unique varieties like Flavor King pluots or donut peaches. For home gardeners, stone fruits need winter chill hours, so choose varieties suited to your specific microclimate for best results.

Close-up of fresh summer stone fruits including peaches, nectarines, and apricots with water droplets
Summer stone fruits reach their peak in California’s warm valleys, offering unmatched sweetness and flavor.

Summer Vegetables

California’s summer bounty brings the most beloved vegetables of the season from June through September. Heirloom tomatoes steal the spotlight—look for varieties like Brandywine, Cherokee Purple, and Early Girl at your local farmers market. These sun-ripened gems should never be refrigerated; instead, keep them stem-side down on your counter where they’ll maintain their flavor for about a week.

Bell peppers and spicy chilies thrive in summer heat, offering a rainbow of colors and flavors. Shishito peppers have become a farmers market favorite for their mild, blistery goodness. Store peppers in your crisper drawer for up to two weeks.

Zucchini and summer squash grow so abundantly that many farmers share creative recipes at market stands. Choose smaller specimens for the sweetest flavor and use them within five days. Cucumbers, perfect for refreshing salads, stay crisp when wrapped in a damp towel in the fridge.

Japanese and Italian eggplant varieties offer different textures for grilling and roasting. Sweet corn reaches peak sweetness in July—eat it within two days of purchase for the best flavor. Green beans and romano beans provide protein-rich options that last about a week when refrigerated. Many organic farms grow these vegetables without synthetic pesticides, supporting healthier soil and communities.

Heat-Loving Plants for California Gardens

California’s summer heat is perfect for growing tomatoes, peppers, eggplants, squash, and melons. These sun-worshippers thrive in warm soil, so wait until nighttime temperatures consistently stay above 50°F before transplanting. Deep, infrequent watering encourages robust root systems—check out these watering strategies for California‘s dry climate. Apply 2-3 inches of mulch around plants to retain moisture and keep roots cool. For extended harvests, succession plant heat-tolerant lettuce varieties every two weeks and choose bolt-resistant varieties. Install shade cloth during extreme heat waves to protect tender crops. Many California farmers successfully grow summer crops well into October by selecting varieties suited to their microclimate and maintaining consistent care routines.

Fall Harvest (September-November): Transition Time

Autumn’s Bounty

As California’s scorching summer heat mellows into cooler days, the landscape of available produce shifts beautifully. This transition period brings some of the most celebrated flavors of the year, with harvest season in full swing across the state.

The orchards come alive with crisp apples and juicy pears, particularly in Northern California regions where cooler temperatures help these fruits develop their signature sweetness. Wine country celebrates grape harvest, while Southern California groves offer up glossy pomegranates bursting with ruby-red seeds. Persimmons, both the astringent Hachiya and sweet Fuyu varieties, add their unique honey-like flavor to autumn markets.

Root vegetables begin their reign, with carrots, beets, and turnips thriving in the cooling soil. These hardy crops store beautifully and provide essential nutrients as we head into winter months. Winter squash varieties like butternut, acorn, and kabocha reach peak maturity, offering versatility in the kitchen and impressive shelf life for home cooks. Pumpkins arrive not just for decoration but as nutritious ingredients for soups, breads, and roasted dishes.

For home gardeners, autumn presents perfect planting conditions for cool-season crops. The soil retains summer warmth while air temperatures drop, creating ideal germination conditions. Consider this your opportunity to establish garlic, onions, and leafy greens that will reward you through winter and early spring. Many organic farmers report that fall plantings often outperform spring ones due to fewer pest pressures and consistent moisture from seasonal rains.

Fall Planting for Winter Harvests

Fall is the golden opportunity for California gardeners to plant a bounty of cool-season crops that will feed you through winter. As temperatures drop and autumn rains arrive, it’s time to shift gears from summer’s heat-lovers to cold-hardy vegetables.

Start by planting leafy greens like kale, chard, arugula, and lettuce varieties, which thrive in cooler temperatures and actually taste sweeter after a light frost. Root vegetables are also fall favorites—sow carrots, beets, turnips, and radishes directly into your garden beds. Broccoli, cauliflower, and cabbage transplants should go in the ground by mid-September to give them time to mature before winter’s chill sets in.

Succession planting is your secret weapon to maximize your harvest. Instead of planting everything at once, sow small batches of quick-growing crops like lettuce and spinach every two to three weeks through October. This ensures a continuous supply of fresh greens rather than a single overwhelming harvest.

Don’t forget about cover crops for soil health. Fava beans, crimson clover, and annual ryegrass are excellent choices that fix nitrogen, prevent erosion, and add organic matter when turned under in spring. Local farmer Maria Santos from Sonoma County swears by her fall fava bean cover crop: “It’s like giving my soil a winter spa treatment while providing early spring harvests.”

Plan your fall garden now, and you’ll enjoy fresh, homegrown produce all winter long.

Winter Plenty (December-February): California’s Secret Season

Citrus Season Peaks

California’s citrus season brings a rainbow of flavors from November through June, with peak harvests brightening winter markets when most other fruits are dormant. The state produces over 80% of the nation’s fresh citrus, thanks to diverse growing regions each contributing unique characteristics.

The warm Central Valley yields sweet navels and Valencia oranges, while coastal regions like Ventura and Ojai produce exceptional lemons year-round. Southern California’s inland valleys are famous for mandarins and grapefruits that thrive in the region’s Mediterranean climate.

Beyond conventional varieties, seek out heirloom treasures at farmers markets. Blood oranges with their crimson flesh peak in February, while Cara Cara navels offer a stunning pink interior and berry-like sweetness. Pixie tangerines, a California original developed in Ojai, arrive in early spring with their seedless, easy-to-peel perfection.

For home growers, citrus trees are incredibly rewarding. They’re relatively low-maintenance once established and can produce fruit for decades. Choose dwarf varieties for containers if space is limited, and remember that most citrus needs minimal water once mature—a sustainable choice for California’s climate. Local organic farmer Maria Rodriguez shares that her 20-year-old Meyer lemon tree still produces abundantly with just quarterly composting and occasional deep watering.

Variety of citrus fruits including oranges, mandarins, grapefruit, and lemons on branches with leaves
Winter citrus season showcases California’s unique ability to produce fresh fruit when other regions go dormant.

Winter Vegetables and Greens

California’s winter brings a bounty of hearty vegetables that thrive in cooler temperatures. This is prime season for brassicas like broccoli, cauliflower, Brussels sprouts, and several varieties of kale. You’ll also find crisp winter lettuce, aromatic fennel, and an abundance of root vegetables including carrots, turnips, and beets filling farmers market stalls.

Here’s something fascinating: many winter vegetables actually taste sweeter after a frost. When temperatures drop, plants convert their stored starches into sugars as a natural antifreeze mechanism. This process protects plant cells from freezing damage while giving vegetables like kale, Brussels sprouts, and carrots their characteristic sweet, mellow flavor. Many California farmers who practice sustainable growing methods actually wait for cooler nights before harvesting these crops to maximize their sweetness.

For home gardeners, winter vegetables are incredibly forgiving and require less water than summer crops, making them perfect for sustainable gardening practices. Plant seedlings in fall for winter harvests, and you’ll enjoy fresh, nutrient-dense greens throughout the cooler months. Local organic farmers recommend succession planting lettuce every few weeks to ensure a continuous supply of tender greens all season long.

Keeping Your Garden Productive in Winter

California’s mild winters are a gardener’s dream, offering perfect conditions for cool-season crops that struggle in harsher climates. Take advantage of December through February by planting cold-hardy varieties like kale, Swiss chard, broccoli, and lettuce. These vegetables actually sweeten after light frosts, developing richer flavors that summer crops can’t match. In coastal regions, you might not need frost protection at all, but inland gardeners should keep row covers handy for occasional cold snaps.

Local farmer Maria Rodriguez from Sonoma County shares her winter success strategy: “I plant succession crops of lettuce every two weeks and use simple hoop houses made from PVC pipe and clear plastic. This extends my harvest window and keeps my CSA members happy all winter long.”

For maximum productivity, focus on leafy greens and root vegetables like carrots, beets, and radishes. These crops thrive in cooler temperatures and actually taste better than their summer counterparts. Consider adding peas and fava beans too—they’ll fix nitrogen in your soil while providing fresh harvests through early spring.

How to Find and Use Seasonal Produce Near You

CSA Boxes and Farmers Markets

Joining a CSA program connects you directly with local farms while guaranteeing the freshest seasonal produce available. When you become a CSA member, you’ll receive weekly or bi-weekly boxes filled with whatever’s thriving on the farm that week. Expect abundant leafy greens and strawberries in spring, tomatoes and stone fruits in summer, winter squash and root vegetables in fall, and citrus and brassicas during winter months. Each box is a delicious surprise that encourages you to cook with the seasons.

To find California farmers markets near you, visit the California Federation of Certified Farmers’ Markets website or download apps like LocalHarvest. Most markets operate year-round, with peak variety during summer and fall. Arrive early for the best selection, bring reusable bags, and don’t hesitate to chat with farmers about growing practices and recipe ideas. Many growers offer tips for storing and preparing unfamiliar vegetables. Shopping at farmers markets supports small-scale agriculture while reducing your carbon footprint, and you’ll taste the difference that farm-fresh, just-harvested produce makes in your meals.

Building Relationships with Local Farmers

Meet the Rodriguez family, who’ve been running their 15-acre organic farm in Watsonville for three generations. “We plant what the season tells us,” explains Maria Rodriguez. “In spring, we focus on leafy greens and strawberries. Come summer, our fields explode with tomatoes and peppers. Fall brings squash and root vegetables, while winter is all about citrus and brassicas.” This rhythm with nature has made their CSA boxes a community favorite and reduced their water usage by 40%.

When you visit your local farmers market, don’t hesitate to chat with growers. Ask questions like “What’s just coming into season?” or “How do you handle pests organically?” Most farmers love sharing their knowledge and can offer recipe suggestions for unfamiliar vegetables.

Building these relationships helps you discover produce at peak flavor and freshness. You’ll learn which weeks bring the sweetest strawberries or when heirloom tomatoes will arrive. Many farmers even take requests for specific varieties if you ask early in the season. These conversations transform shopping from a transaction into a meaningful connection with the people growing your food and the land that sustains your community.

Eating with the seasons isn’t just about following a calendar—it’s about connecting with the natural rhythms of California’s incredible agricultural landscape. When you bite into a sun-ripened strawberry in May or savor a crisp autumn apple in October, you’re experiencing food at its peak flavor and nutritional value. You’re also supporting sustainable farming practices that work with nature rather than against it.

The beauty of seasonal eating is that it doesn’t require perfection. Start small by challenging yourself to try one new seasonal item each month. Maybe it’s romanesco in winter or stone fruit in summer. These small experiments will gradually transform how you shop, cook, and think about food.

If you’re ready to dive deeper, consider joining a Community Supported Agriculture program. CSA memberships connect you directly with local farms, delivering seasonal produce boxes right to your door or pickup location. You’ll discover vegetables you’ve never tried before and build relationships with the farmers who grow your food. Many California CSAs also offer farm visits, cooking classes, and volunteer opportunities that strengthen these connections even further.

For those with a green thumb, starting your own seasonal garden brings the farm-to-table experience to your backyard. Even a small container garden on a balcony can yield fresh herbs and tomatoes during the growing season. Gardening teaches patience, provides physical activity, and creates a deeper appreciation for the work farmers do every day.

Ultimately, seasonal eating grounds us in place. It reminds us that we’re part of a larger community—one that includes farmers, soil, sunshine, and the land itself. When we choose seasonal produce, we’re not just feeding ourselves; we’re nurturing these vital connections and investing in California’s sustainable food future.