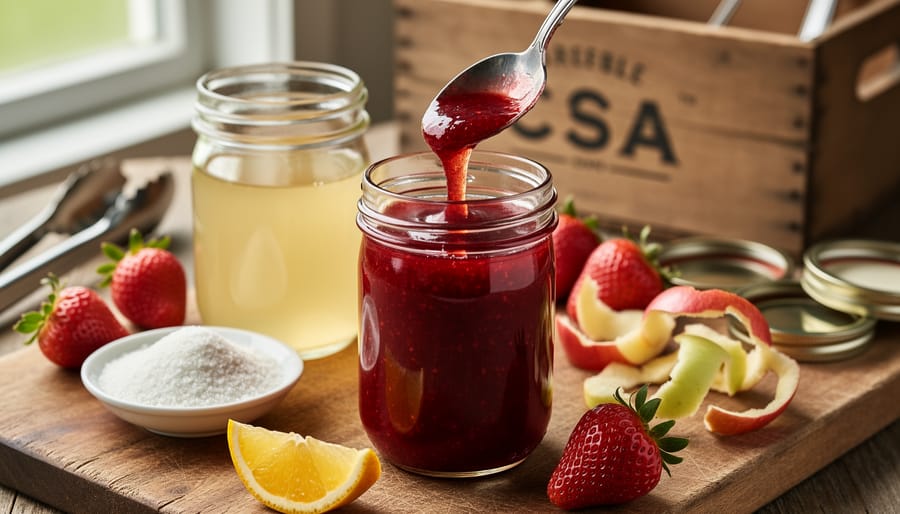
Why Your CSA Jam Won’t Set (And the Pectin Science That Fixes It)
Match your pectin type to your fruit’s natural pectin level—use regular pectin with high-pectin fruits like apples and citrus, but reach for low-sugar or no-sugar pectin when working with strawberries, peaches, or other low-pectin CSA favorites. Test your fruit’s readiness by mixing one tablespoon of rubbing alcohol with one tablespoon of raw juice; high-pectin fruit forms a solid clump, while low-pectin fruit creates small, separate pieces.
Extract homemade pectin from apple cores and peels saved throughout the season by simmering them in water for 40 minutes, straining, and freezing in measured portions—a perfect zero-waste solution that aligns with your CSA values and gives you complete control over your preserving process. This method works beautifully alongside other food storage techniques for maximizing your harvest.
Calculate pectin amounts based on your desired set firmness rather than blindly following package directions. Soft spreads need less pectin, while firm jellies require the full recommended amount. Add pectin at the right temperature—traditional pectin demands a rolling boil, while low-methoxyl pectin activates at lower temperatures with calcium water.
Understanding how pectin works transforms frustrating preserve failures into consistent successes. When you know why your strawberry jam stayed runny or your grape jelly turned rubbery, you gain the confidence to experiment with each week’s CSA fruit share. Whether you’re processing a bumper crop of raspberries or creating small-batch preserves from heirloom plums, mastering pectin science ensures your homemade jams and jellies capture the pure essence of local, organic fruit.
What Pectin Actually Does in Your Jam Jar
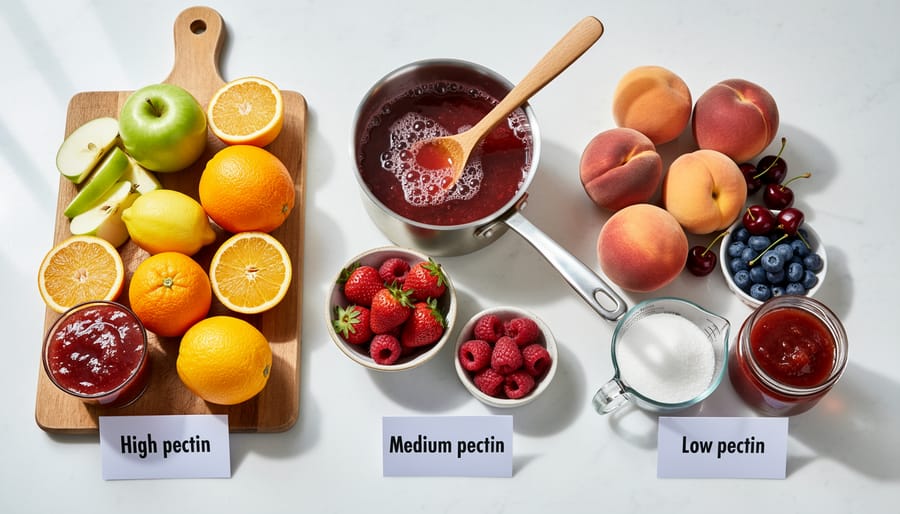
The Natural Pectin in Your CSA Fruit Box
Opening your CSA box each week is like receiving a surprise gift from nature, and understanding which fruits are naturally pectin-rich can transform your jam-making adventures. High-pectin fruits are your allies in creating perfectly set preserves without adding commercial pectin.
Apples, especially tart varieties like Granny Smith, top the list of pectin powerhouses. Their cores and peels contain the highest concentration, making them perfect for creating natural pectin stock. Cranberries, currants, and underripe plums also pack substantial pectin levels. When your CSA delivers these gems, you’re in excellent shape for firm-set jams and jellies.
Citrus fruits deserve special mention. The white pith and seeds of lemons, oranges, and grapefruits are pectin goldmines. Many jam-makers keep citrus peels specifically to boost pectin in other recipes.
On the other end of the spectrum, you’ll find low-pectin favorites like strawberries, peaches, cherries, and ripe pears. These sweet summer treasures taste amazing but need a helping hand to achieve that spreadable consistency. Blueberries and apricots fall somewhere in the middle, containing moderate pectin levels.
Here’s a practical tip from experienced preservers: combine high and low pectin fruits in your recipes. Mixing strawberries with some chopped apple creates a naturally balanced jam. This approach honors the whole-fruit philosophy many CSA members embrace while reducing waste. Understanding your fruit’s pectin personality helps you work with nature rather than fighting against it, creating delicious preserves that celebrate each season’s bounty.
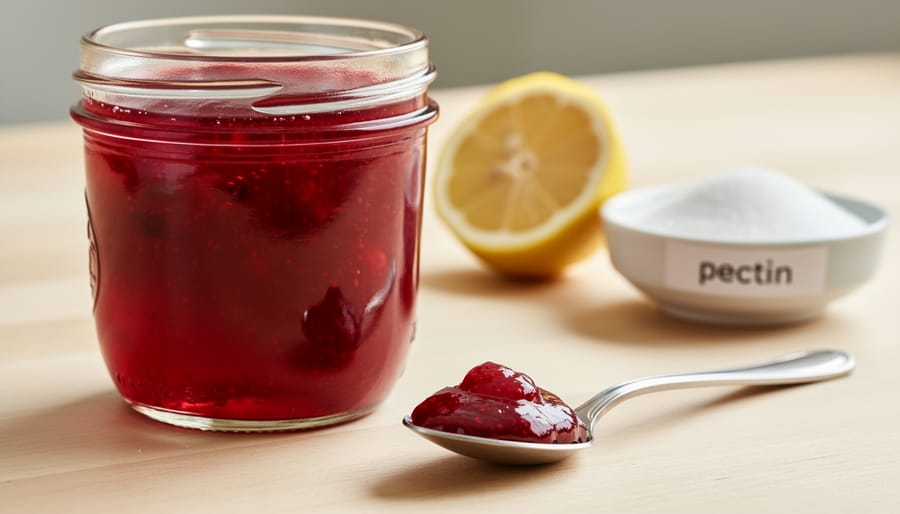
The Magic Triangle: Pectin, Sugar, and Acid
Creating perfect jam or jelly is like conducting a beautiful symphony where three key players must work in harmony: pectin, sugar, and acid. Understanding this magic triangle will help you transform your CSA fruit bounty into gorgeous preserves every time.
Think of pectin as the framework builder. These natural plant fibers need the right conditions to link together and form that satisfying gel structure. But pectin can’t do it alone. This is where sugar steps in as the essential assistant. Sugar pulls water away from pectin molecules, allowing them to bond more easily. It typically takes about 55-65% sugar content in your mixture to achieve the ideal gel. While that might sound high, this concentration is what gives your preserves their characteristic texture and helps preserve them safely.
The third player, acid, acts as the catalyst that makes everything happen. Pectin needs an acidic environment with a pH between 2.8 and 3.4 to gel properly. Without enough acid, your pectin molecules remain too negatively charged and repel each other rather than bonding. That’s why lemon juice or citric acid often appears in jam recipes, especially when working with low-acid fruits like strawberries or pears.
During cooking, heat activates this chemical dance. As your fruit mixture boils, water evaporates, concentrating the sugar and bringing all three elements into the perfect balance. The mixture reaches its gel point typically around 220°F, when the magic triangle aligns just right.
Understanding these interactions helps you troubleshoot problems. Runny jam? You might need more acid or pectin. Too stiff? Perhaps you used excess pectin or overcooked the mixture. With this knowledge, you’ll confidently preserve every precious fruit from your farm share.
Types of Pectin and When to Use Each One
Regular vs. Low-Sugar Pectin for Organic Fruit
When you’re transforming your CSA fruit haul into delicious preserves, choosing between regular and low-sugar pectin can make all the difference in your final product. Understanding these options helps you match pectin type to your taste preferences and the natural sweetness of your organic fruit.
Regular pectin, also called high-methoxyl pectin, needs substantial sugar to work its magic—typically a 1:1 fruit-to-sugar ratio. This means if you’re working with 4 cups of crushed strawberries, you’ll need about 4 to 7 cups of sugar. The chemistry behind this is fascinating: regular pectin requires both sugar and acid to create that perfect gel structure. While this produces traditional, sweet preserves with excellent shelf stability, it can sometimes mask the bright, fresh flavors of your farm-fresh organic fruit.
Low-sugar or no-sugar-needed pectin offers wonderful flexibility for CSA members who prefer less sweetness or want to highlight their produce’s natural flavors. These modified pectins work through different chemistry, using calcium rather than sugar to gel. You can use anywhere from no sugar to about half the amount required by regular pectin. This is perfect when you receive extra-sweet peaches or perfectly ripe berries that don’t need much enhancement.
Many sustainable-minded preservers appreciate low-sugar pectin for reducing overall sweetener consumption and letting organic fruit shine. However, these preserves typically have a softer set and shorter shelf life. Choose regular pectin for classic, firm jellies and low-sugar varieties when showcasing your harvest’s authentic taste.
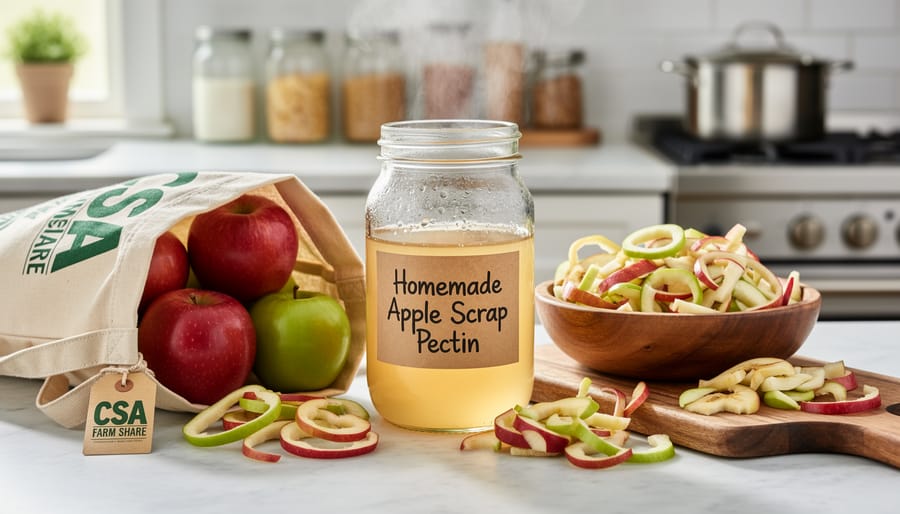
Making Your Own Pectin from Apple Scraps
If you’re part of a CSA and find yourself with an abundance of apples, don’t toss those cores and peels! Making your own pectin is a rewarding zero-waste solution that transforms scraps into liquid gold for your preserving projects.
Apple scraps are naturally high in pectin, especially when slightly underripe. Start by collecting cores, peels, and any bruised portions from about four pounds of apples. Place them in a large pot with enough water to just cover the scraps, plus two tablespoons of lemon juice to help extract the pectin. Bring to a boil, then reduce heat and simmer for about 45 minutes until the apples are soft and mushy.
Strain the mixture through a fine-mesh sieve or cheesecloth, pressing gently to extract all the liquid. You’ll end up with a cloudy, slightly thick liquid that’s your homemade pectin. To test its strength, pour a tablespoon into a small bowl and refrigerate for 20 minutes. If it gels nicely, you’ve got high-pectin extract perfect for low-sugar jams.
Store your homemade pectin in clean jars in the refrigerator for up to one week, or freeze it in ice cube trays for convenient portions that last up to six months. Each ice cube equals roughly one tablespoon, making it easy to add pectin power to small batches of jam.
When using homemade pectin, remember it’s less concentrated than commercial versions. Generally, you’ll need about one cup of homemade pectin per four cups of crushed fruit, though some experimentation helps you find your perfect gel.
Matching Pectin to Your CSA Harvest
Your CSA box arrives brimming with gorgeous fruit, and you’re ready to preserve that peak-season flavor. But which pectin approach will give you the best results? Let’s match common CSA fruits to their ideal pectin partners.
Strawberries, the quintessential early summer treat, have low natural pectin and benefit from added pectin. Use commercial low-sugar pectin if you want to showcase their delicate sweetness without excessive sugar. These beauties also pair wonderfully with a splash of lemon juice to boost both flavor and natural pectin levels.
Peaches and apricots are moderate in natural pectin but require some assistance for proper gelling. Traditional powdered pectin works beautifully here, creating those classic spreadable preserves. Since stone fruits can be quite sweet, you might experiment with reduced-sugar pectin formulas to let their natural flavor shine through.
Blueberries and blackberries contain moderate pectin levels, making them forgiving preserving partners. You can often use less commercial pectin than package directions suggest, or try combining them with high-pectin fruits like tart apples for a completely natural set. A local farmer, Maria from Riverside Farm, shared that she adds grated apple to her wild blackberry jam with stunning results and no commercial pectin needed.
Cherries need substantial pectin assistance, as they’re quite low in natural pectin. Liquid pectin added at the end of cooking helps preserve their vibrant color and prevents overcooking. Don’t skip the lemon juice with cherries, as the acidity is crucial for both safety and gelling.
Plums offer a pleasant surprise: they’re naturally high in pectin, especially when slightly underripe. You can often make plum jam with minimal or no added pectin, relying on the fruit’s natural thickening power combined with adequate cooking time.
Here’s your quick decision framework: Check your seasonal fruit against these categories. High-pectin fruits need little help. Low-pectin fruits need commercial pectin or a high-pectin companion fruit. When in doubt, start with small test batches to discover what works best for your taste preferences and the specific characteristics of your locally grown harvest.
Troubleshooting Common Pectin Problems
Even experienced preservers encounter pectin challenges, but understanding what went wrong helps you create perfect preserves next time. Here are the most common issues and their solutions.
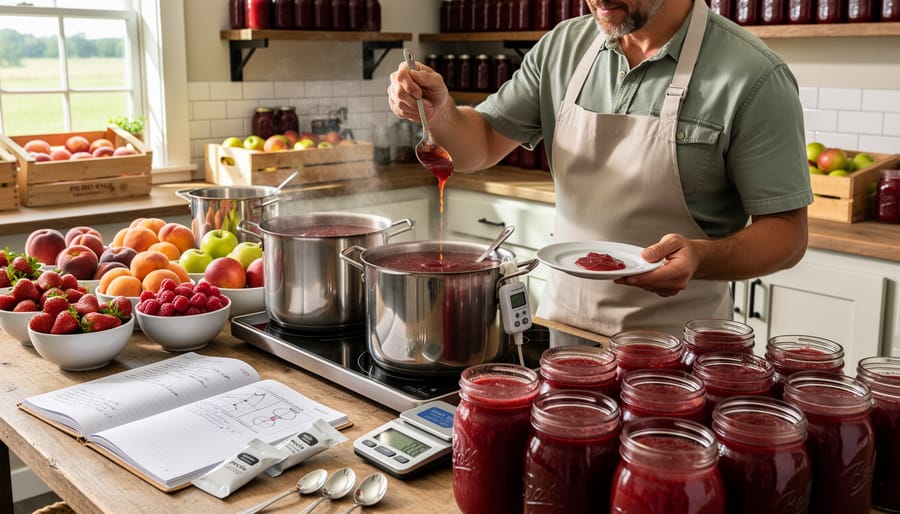
Runny jam is perhaps the most frustrating problem. This usually happens when pectin levels are too low, cooking time was insufficient, or the fruit-to-sugar ratio was off. Always test for the gel point using a cold plate test before removing your jam from heat. If you’ve already made runny jam, you can actually remake it by measuring the quantity, adding fresh pectin according to package directions, and reprocessing. For future batches, ensure you’re using ripe (not overripe) fruit and following tested recipes exactly.
Overly stiff preserves occur when there’s too much pectin or the mixture was cooked too long. This often happens with high-pectin fruits like apples or when combining commercial pectin with naturally pectin-rich ingredients. The solution is reducing cooking time or using less pectin. Some experienced preservers even skip commercial pectin entirely with high-pectin fruits, relying on natural sources instead.
Sugar crystals forming in finished jam indicate either too much sugar, insufficient acid, or crystallization during cooling. Always wipe down pan sides during cooking to remove sugar crystals, and ensure proper acid balance. Adding a tablespoon of lemon juice can prevent this issue.
Uneven setting, where some jars gel perfectly while others remain liquid, typically results from inconsistent processing or filling jars with mixture at different temperatures. Keep your preserve mixture at a consistent simmer while filling jars, and process all jars together. Mastering these food preservation techniques takes practice, but each batch teaches valuable lessons.
Remember, small variations in fruit ripeness and natural pectin content mean some adjustments are normal. Keep notes on what works with your particular fruit sources, and you’ll develop an intuitive sense for creating perfect preserves every time.
Farmer Success Story: Sarah’s Berry Farm Preserves
When Sarah Mitchell started her 50-member CSA near Guelph, Ontario, she quickly realized her abundant berry harvests were overwhelming her members. “People loved getting fresh strawberries and raspberries, but they couldn’t use them all before spoilage,” she recalls. That challenge sparked her journey into preserve-making, which eventually became her farm’s signature product line.
Sarah’s first attempts were frustrating. “I followed recipes exactly, but results were wildly inconsistent. One batch would set perfectly, the next would be syrupy.” The breakthrough came when she started testing different pectin types with her specific fruit varieties. She discovered that her early-season strawberries needed commercial pectin for reliable results, while her late-summer berries naturally contained enough pectin when combined with apple scraps from a neighboring orchard.
Her biggest lesson? Temperature matters more than most recipes admit. “I invested in a good candy thermometer and learned the gel point for each fruit type,” Sarah explains. “Strawberries hit gel at 220°F, but my low-sugar raspberry preserves needed 218°F to avoid overcooking.”
Sarah now teaches preserve-making workshops at her farm, sharing her tested formulas with CSA members. Her practical tip for beginners: start with high-pectin fruits like tart apples or currants mixed with lower-pectin berries. This natural approach gave her confidence before exploring commercial pectins and various canning methods.
“The key is keeping detailed notes,” she advises. “Write down fruit variety, ripeness, pectin type, and cooking time. After a season, you’ll have your own customized preserve recipes that work every time with your specific ingredients.”
Tips for Sustainable Jam-Making with Seasonal Fruit
Making jam with seasonal fruit from your CSA share is about more than just preserving—it’s about celebrating the full potential of your local harvest. Understanding pectin helps you transform every piece of fruit into delicious preserves, even those that aren’t picture-perfect.
Those slightly bruised peaches or oddly shaped strawberries? They’re jam gold. Simply trim away any damaged spots and use the rest. The pectin doesn’t care about cosmetic imperfections, and you’ll reduce food waste while creating something wonderful. Peak-ripeness fruit contains optimal pectin levels, so when your CSA box arrives overflowing with berries or stone fruit, jam-making preserves that perfect moment.
Consider the pectin content of different fruits when planning your preserves. High-pectin fruits like apples, currants, and citrus need less added pectin, while strawberries, peaches, and cherries benefit from supplemental pectin. You can even save citrus peels and apple cores in your freezer throughout the season—they’re packed with natural pectin perfect for making your own pectin extract.
Match your jam-making schedule to your CSA calendar. Early summer brings strawberries and rhubarb, mid-summer offers abundant berries, and fall delivers apples and grapes. This rhythm connects you to the natural growing season while building a pantry that tells the story of your local harvest. Each jar becomes a time capsule of flavor, capturing sunshine and supporting your community’s farmers with every spoonful.
You now have everything you need to turn your CSA fruit bounty into beautiful, spreadable preserves. Understanding pectin—whether it’s naturally occurring in your berries or added from a package—takes the guesswork out of jam-making and gives you confidence to experiment. Each fruit that arrives in your weekly share is an opportunity to practice your new skills.
Remember, there’s no single “right” way to make preserves. Some batches will be perfectly gelled, while others might turn out softer or firmer than expected. That’s part of the learning process, and even imperfect preserves taste delicious on morning toast or swirled into yogurt.
By mastering pectin, you’re doing more than creating pantry staples—you’re preventing food waste, preserving the peak-season flavors your local farmers worked hard to grow, and building a deeper connection to your food. Start with a simple recipe using high-pectin fruit, then branch out as your confidence grows. Your CSA box is filled with potential, and now you have the knowledge to unlock it. Happy preserving, and don’t be afraid to get creative with flavor combinations as you work through those beautiful fruit shares.