Daily Archives

3 Articles

How Homemade Kimchi Transforms Your Gut Health From the Inside Out

Posted by darrell on
0
Consumer Health and Nutrition
How Homemade Kimchi Transforms Your Gut Health From the Inside Out

Your gut contains trillions of microorganisms that influence everything from digestion to immunity, and the living bacteria in kimchi can profoundly enhance this internal ecosystem. This traditional Korean fermented food delivers powerful probiotic strains like Lactobacillus plantarum and Leuconostoc mesenteroides directly to your digestive tract, where they help crowd out harmful bacteria, strengthen your intestinal barrier, and even produce vitamins your body needs.

Unlike shelf-stable pickles or pasteurized products, genuine fermented kimchi contains billions of active cultures per serving. These beneficial microbes survive the journey through your stomach acid to colonize your intestines, supporting diverse gut flora that scientists now link to reduced inflammation, improved mental health, and stronger immune function.

The connection between fermented foods and wellness runs deeper than probiotics alone. Kimchi provides prebiotic fiber from cabbage and vegetables that feeds your existing gut bacteria, creating a synergistic effect. The fermentation process also breaks down compounds that can cause digestive discomfort while increasing nutrient bioavailability, making vitamins and minerals easier for your body to absorb.

Sourcing matters tremendously. Mass-produced kimchi often undergoes heat treatment that kills beneficial bacteria, while organic, traditionally fermented versions from local producers maintain their microbial potency. Understanding how to identify quality kimchi and incorporate it meaningfully into your daily routine can transform your digestive wellness while supporting sustainable food systems that prioritize living, nutrient-dense ingredients over industrial convenience.

What Makes Kimchi a Microbiome Powerhouse

Glass jar of fermenting kimchi with visible layers of cabbage and fermentation bubbles
Homemade kimchi fermenting in a glass jar showcases the active probiotic cultures that support gut health.

The Living Cultures Inside Every Batch

Every spoonful of traditionally fermented kimchi contains billions of beneficial bacteria working to support your digestive health. The most abundant strains include Lactobacillus plantarum, which helps break down food and produce vitamins, and Leuconostoc mesenteroides, known for creating that signature tangy flavor while strengthening your gut lining.

What makes kimchi special is the diversity of these living cultures. Unlike single-strain supplements, fermented vegetables naturally develop multiple probiotic species that work together. Lactobacillus brevis supports your immune system, while Weissella species help maintain the proper pH balance in your digestive tract. These friendly bacteria also produce short-chain fatty acids that reduce inflammation and improve nutrient absorption.

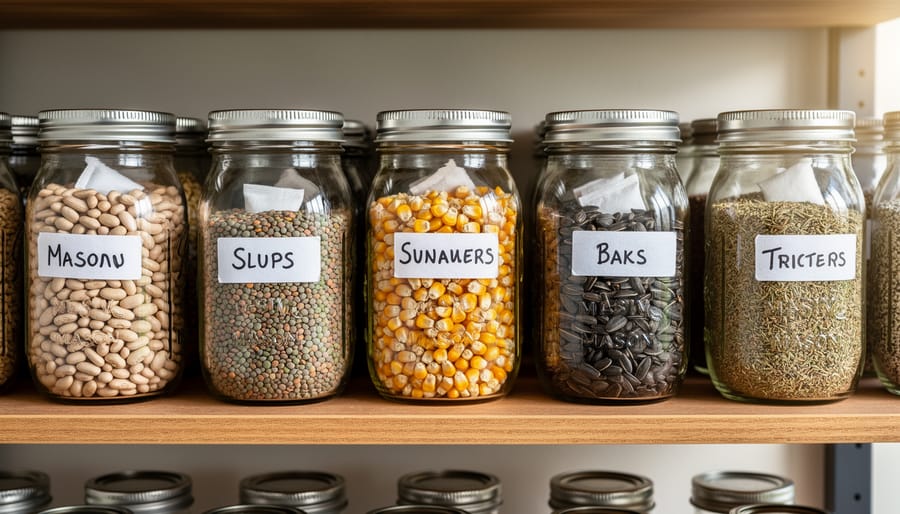
The key to getting these benefits is choosing organic, unpasteurized kimchi. Heat treatment kills the beneficial bacteria, so look for refrigerated versions from local farms or farmers’ markets. Many small-scale organic farmers are now crafting kimchi using their own cabbage and radishes, ensuring the vegetables haven’t been exposed to pesticides that could interfere with the fermentation process. When you support these local producers, you’re getting fresher, more potent probiotics while strengthening sustainable food systems in your community.

Why Organic Ingredients Make a Difference

When you choose organic ingredients for your kimchi, you’re setting the stage for a healthier fermentation process right from the start. Pesticide-free cabbages, radishes, and other organic vegetables provide a cleaner environment where beneficial bacteria can thrive without chemical interference. Research shows that pesticide residues can actually disrupt the growth of probiotic strains during fermentation, reducing the diversity of microorganisms in your final product.

Organic produce also tends to carry more naturally occurring beneficial bacteria on its surface, which contributes to a richer starter culture for fermentation. These native microbes work alongside the salt and natural sugars in your vegetables to create that complex ecosystem of probiotics that makes kimchi so powerful for gut health.

Local organic farmers often harvest vegetables at peak ripeness too, meaning higher nutrient density. When you ferment nutrient-rich ingredients, you’re creating a probiotic food that delivers both live cultures and the vitamins, minerals, and fiber your gut microbiome needs to flourish. It’s a simple choice that makes a real difference in the quality of your fermented foods.

The Science Behind Kimchi and Your Gut Microbiome

Building a Diverse Bacterial Community

When you eat kimchi, you’re introducing billions of beneficial bacteria into your digestive system, particularly strains of Lactobacillus and other lactic acid bacteria that naturally develop during fermentation. Think of it like planting a garden—these friendly microbes settle into your gut and begin to flourish, creating a thriving ecosystem that leaves less room for harmful bacteria to take hold.

This process, called competitive exclusion, is one of kimchi’s greatest gifts to your digestive health. The beneficial bacteria from kimchi actively compete for nutrients and attachment sites along your intestinal walls, effectively crowding out potentially harmful microbes. They also produce natural antimicrobial compounds that further discourage unwanted bacterial growth.

Beyond just adding good bacteria, kimchi promotes gut microbiome diversity—a key marker of digestive wellness. A diverse bacterial community is more resilient, better equipped to handle dietary changes, and more effective at supporting your immune system. The various vegetable ingredients in kimchi, especially when made with organically grown produce, also provide prebiotics—the fiber compounds that feed your beneficial bacteria and help them thrive long after you’ve enjoyed that last spicy, tangy bite.

Beyond Digestion: Whole-Body Benefits

While kimchi’s impact on digestive health is well-documented, its benefits extend far beyond your stomach. The beneficial bacteria in this fermented superfood work throughout your entire system, creating ripple effects that support overall wellness.

Your immune system gets a significant boost from regular kimchi consumption. About 70% of your immune cells actually live in your gut, so when you feed them probiotic-rich foods, you’re essentially fortifying your body’s natural defense system. The living cultures in kimchi help train these immune cells to distinguish between helpful and harmful bacteria, improving your body’s response to potential threats.

Kimchi also excels at inflammation reduction thanks to compounds found in fermented cabbage and the various organic vegetables used in traditional recipes. This anti-inflammatory action may help with everything from joint discomfort to skin health.

Another often-overlooked benefit is enhanced nutrient absorption. When your gut microbiome is balanced and healthy, your body becomes more efficient at extracting vitamins and minerals from the foods you eat. Those organic vegetables from your CSA box deliver even more nutritional value when your digestive system is functioning optimally, making kimchi a perfect companion to your farm-fresh produce.

Making Your Own Kimchi: A Farm-to-Jar Journey

Farmer holding freshly harvested organic napa cabbage in vegetable field
Organic napa cabbage grown without pesticides provides the foundation for nutrient-rich kimchi with diverse beneficial bacteria.

Sourcing Organic Vegetables for Maximum Benefits

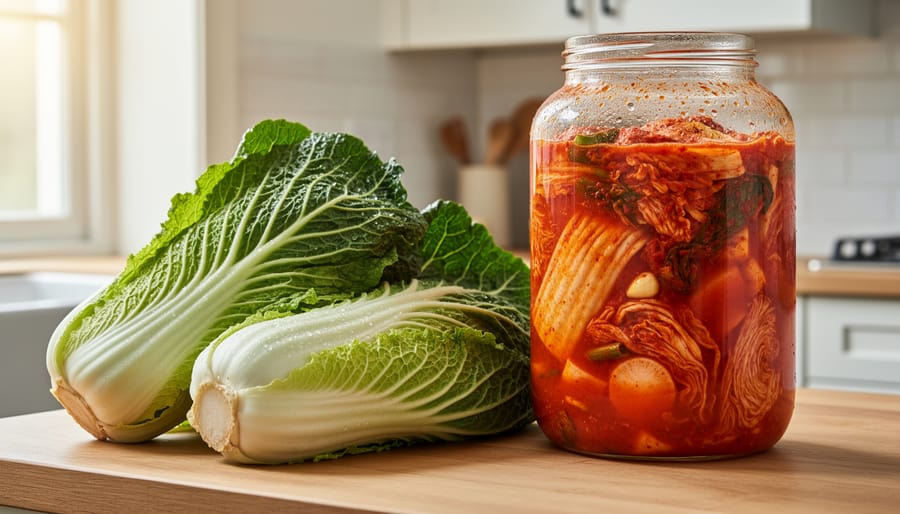
The quality of your kimchi starts with the vegetables you choose, and there’s no better source than local CSA farms or farmers markets. When shopping for kimchi ingredients, timing matters. Fall and winter napa cabbage tends to be sweeter and crisper, making it ideal for fermentation. Look for heads that feel heavy for their size with tightly packed, vibrant green outer leaves—these indicate freshness and nutrient density.

At your local farmers market, chat with growers about their practices. Organic vegetables grown in healthy, living soil contain more beneficial microbes that contribute to your kimchi’s probiotic diversity. Don’t worry about minor blemishes or irregular shapes; these are signs of chemical-free growing methods and won’t affect fermentation quality.

For daikon radishes and carrots, choose firm specimens without soft spots. Green onions should have crisp, bright green tops. Since you’ll be eating these vegetables raw and fermented, organic really matters—you’re preserving everything, including any pesticide residues from conventional farming.

Consider buying direct from farms through CSA subscriptions. Many farmers harvest vegetables the same day you pick them up, ensuring maximum freshness and microbial vitality. This farm-to-fermentation approach gives you the best possible foundation for creating gut-healthy kimchi while supporting your local agricultural community.

Simple Steps to Start Fermenting

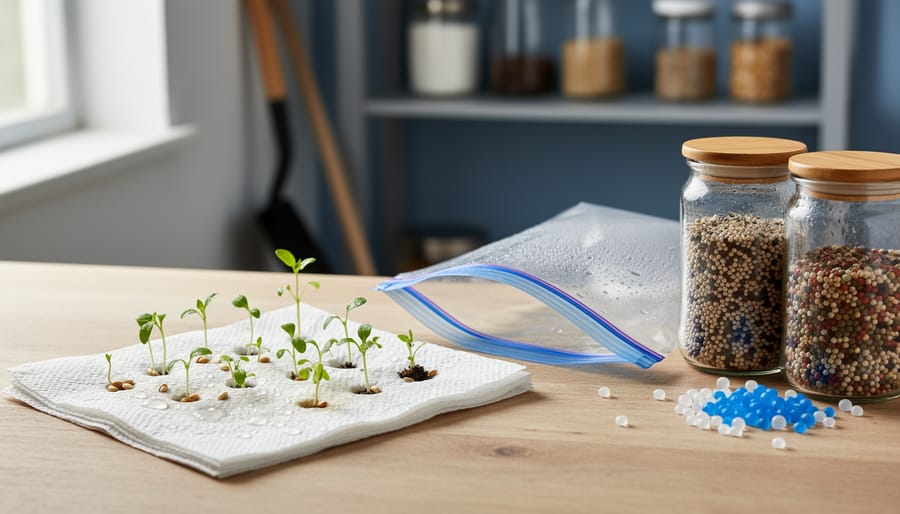
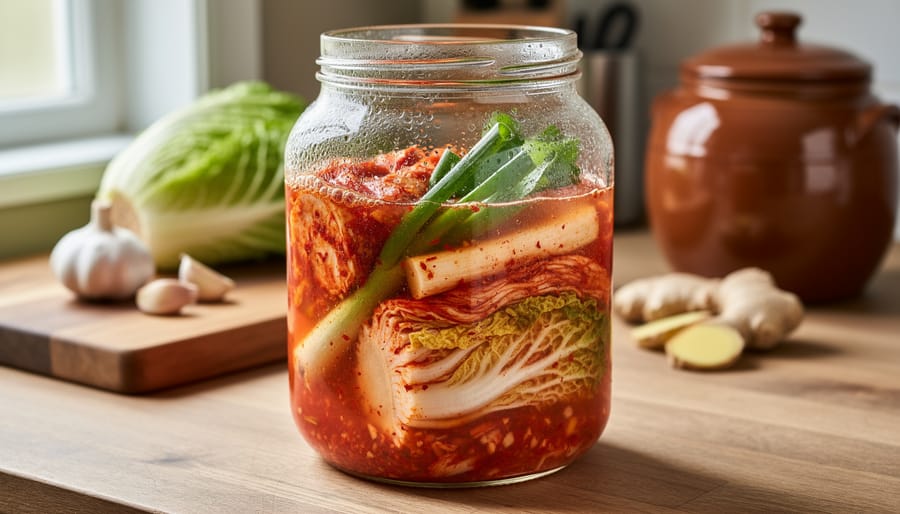
Making your own kimchi at home is surprisingly simple and incredibly rewarding. Start by gathering your ingredients: napa cabbage, Korean chili flakes (gochugaru), garlic, ginger, sea salt, and optional additions like radish or green onions. Choose organic produce whenever possible to avoid pesticides that might interfere with beneficial fermentation bacteria.

Begin by salting your quartered cabbage for about two hours to draw out moisture and create the perfect environment for fermentation. Rinse thoroughly, then prepare your spice paste by mixing gochugaru, minced garlic, grated ginger, and a bit of salt. Massage this paste between each cabbage leaf, pack everything tightly into a clean jar, and press down to release air bubbles.

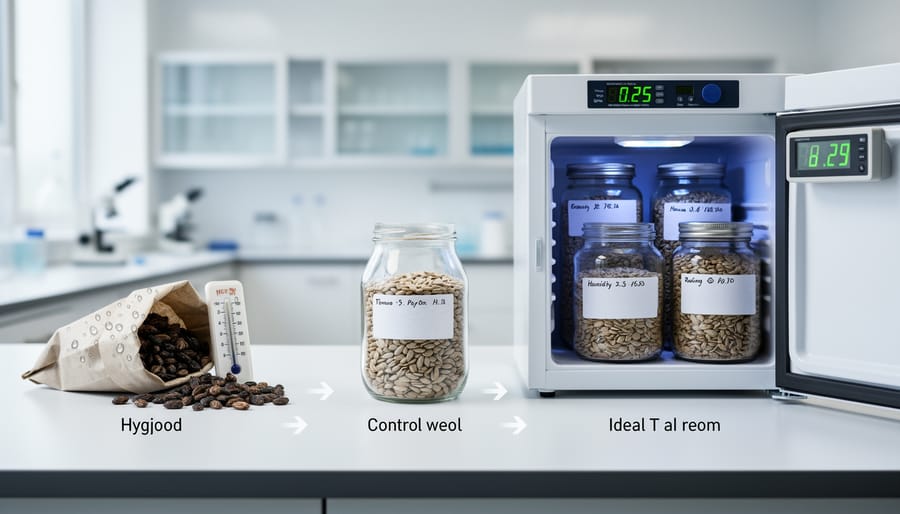
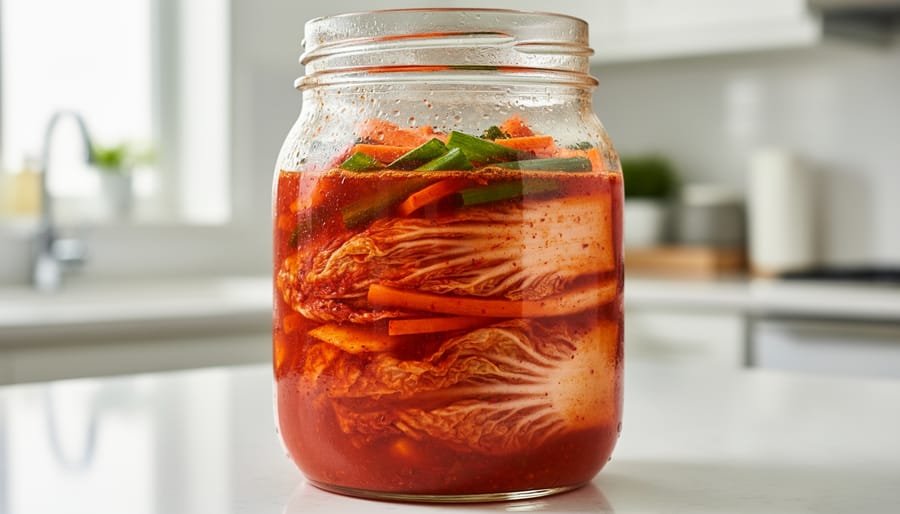
Leave your jar at room temperature for three to five days, pressing down daily to keep vegetables submerged in their brine. You’ll notice bubbling as fermentation begins, which means those beneficial microbes are hard at work. Once it reaches your preferred tanginess, move it to the refrigerator to slow fermentation.

Common troubleshooting tip: If your kimchi seems dry, simply add a saltwater brine to keep everything covered. This prevents mold and ensures even fermentation throughout.

Creating the Right Environment for Good Bacteria

Creating the perfect home for beneficial bacteria during kimchi fermentation is simpler than you might think. Start with clean, organic vegetables and let them ferment at room temperature, ideally between 65-75°F. During the first 3-5 days, lactobacillus bacteria naturally present on the vegetables begin converting sugars into lactic acid, which creates an acidic environment that keeps harmful bacteria away. This is your fermentation sweet spot. Once you see bubbles forming and smell that signature tangy aroma, move your kimchi to the refrigerator to slow the process. The cold preserves those probiotic powerhouses while preventing over-fermentation. Remember, you’re working with nature here, not against it. Using organically grown cabbage and ingredients means you’re starting with produce that hasn’t been treated with chemicals that might interfere with good bacteria growth. Think of it as creating a thriving neighborhood where beneficial microbes can flourish naturally.

Incorporating Kimchi Into Your Daily Routine

How Much Kimchi Does Your Gut Need

Good news for kimchi lovers—you don’t need massive amounts to reap gut health benefits! Most nutritionists recommend starting with 1-2 tablespoons per day, gradually increasing to about half a cup daily as your digestive system adjusts to the probiotics. This modest serving delivers billions of beneficial bacteria without overwhelming your gut or loading up on sodium.

For beginners, try incorporating kimchi into meals 3-4 times weekly. Listen to your body—some people thrive on daily servings, while others prefer every other day. The key is consistency rather than quantity. Organic, locally fermented kimchi from your CSA or farmers market offers the most active cultures, as these artisanal batches haven’t been pasteurized like many store-bought versions. Sarah Chen, an organic farmer in Oregon, notes that her customers report the best results when they make kimchi part of their regular routine, pairing it with seasonal vegetables for maximum digestive support. Remember, fermented foods work best alongside a diverse, plant-rich diet rather than as a standalone solution.

Bowl of kimchi fried rice with fried egg photographed from above
Incorporating kimchi into everyday meals like fried rice makes it easy to enjoy the probiotic benefits daily.

Easy Ways to Enjoy Kimchi Beyond the Jar

Getting kimchi into your daily routine doesn’t require fancy recipes or culinary expertise. Start simple by adding a forkful to your morning scrambled eggs or omelet for a probiotic breakfast boost with a flavorful kick. Layer it into grilled cheese sandwiches or quesadillas, where the melting cheese balances kimchi’s tangy bite perfectly.

For lunch, toss chopped kimchi into grain bowls with quinoa or brown rice, roasted vegetables, and a protein of your choice. The fermented cabbage adds complexity without extra effort. Mix it into tuna or chicken salad for sandwiches that pack extra nutrition and zing.

Dinner becomes more interesting when you top baked potatoes, burgers, or tacos with kimchi instead of traditional condiments. Even pizza lovers can experiment by sprinkling it over slices fresh from the oven.

If you’re feeling adventurous, blend kimchi into dips like hummus or cream cheese spreads for crackers and crudités. The beauty of kimchi lies in its versatility—start with small amounts and adjust to your taste preferences. Remember, you’re not just adding flavor; you’re feeding your gut microbiome with every delicious bite, supporting your digestive health through simple, sustainable food choices.

Farmer Spotlight: Growing Kimchi Ingredients the Organic Way

Meet Sarah Chen, a third-generation farmer who’s transformed her family’s 15-acre farm into a thriving CSA operation specializing in Korean vegetables for kimchi. Her journey into organic farming began when she noticed that her grandmother’s homemade kimchi tasted different depending on where the vegetables came from.

“I realized that soil health directly impacts the quality of fermentation,” Sarah explains while walking through rows of vibrant napa cabbage. “When vegetables are grown in nutrient-rich, living soil, they develop stronger cell structures and higher levels of natural beneficial bacteria, which creates better conditions for lacto-fermentation.”

Sarah practices a careful four-year crop rotation system, alternating her kimchi vegetables with nitrogen-fixing cover crops like clover and vetch. This approach naturally enriches the soil without synthetic fertilizers. Between growing seasons, she adds compost made from vegetable scraps and aged manure, creating a thriving ecosystem of microorganisms that mirror the beneficial bacteria found in fermented foods.

Her farm grows traditional kimchi staples including napa cabbage, Korean radish, green onions, and garlic. She’s discovered that organic methods produce vegetables with more complex flavor profiles. “The slower growth rate in organic farming allows vegetables to develop deeper flavors and more concentrated nutrients,” she notes. “My CSA members tell me the difference is noticeable in their finished kimchi.”

One key insight Sarah shares is timing the harvest. “We pick vegetables at peak maturity in cooler weather, which gives them a natural crispness that holds up beautifully during fermentation.” She also avoids washing vegetables too aggressively before delivery, preserving some of the beneficial soil microbes that can contribute to the fermentation process.

For aspiring kimchi gardeners, Sarah recommends starting small with napa cabbage and daikon radish. “These crops are forgiving and respond well to organic methods. Focus on building healthy soil first, and the vegetables will take care of themselves.”

Other Fermented Foods That Support Gut Health

While kimchi deserves its spotlight in the fermented foods family, creating a thriving gut microbiome is all about diversity. Think of your digestive system as a garden—the more varied the plantings, the healthier the ecosystem. Each fermented food brings its own unique community of beneficial bacteria to the table.

Sauerkraut, kimchi’s European cousin, offers Lactobacillus plantarum and other strains that complement those found in kimchi. Made simply from cabbage and salt, it’s wonderfully accessible for home fermenters and pairs beautifully with local organic cabbage from your CSA box.

Kombucha introduces beneficial yeasts alongside bacteria, creating a fizzy probiotic drink that supports gut health from a different angle. When sourced from local organic producers, you’re getting living cultures without the industrial processing that can diminish beneficial microbes.

Kefir, whether made from dairy or water, provides an entirely different spectrum of probiotic strains—sometimes up to 60 varieties in a single serving. This fermented beverage has been shown to support digestive health and immune function.

The beauty of exploring various fermented foods for gut health is that each one contributes unique bacterial strains, creating a more resilient and diverse microbiome. Rotate these foods throughout your week, sourcing organic options when possible to avoid pesticides that can harm beneficial gut bacteria. Your digestive system will thank you for the variety.

The journey to better gut health through kimchi beautifully illustrates how personal wellness connects to sustainable food systems. By choosing organic, locally fermented foods, you’re not just nourishing your microbiome with billions of beneficial bacteria—you’re supporting farmers who steward the land responsibly and keep harmful chemicals out of your food chain.

Starting your kimchi journey doesn’t require a complete lifestyle overhaul. Begin by visiting your local farmers market to find fresh, organic cabbage and vegetables from nearby growers. Many CSA programs now include fermented foods in their seasonal shares, making it easier than ever to access quality kimchi while directly supporting sustainable agriculture. If you’re feeling adventurous, try making a small batch at home using locally sourced produce.

Remember, every jar of organic kimchi you choose creates a ripple effect. You’re investing in your digestive health, reducing your environmental footprint, and helping local farmers thrive. This simple act of mindful eating transforms you from a passive consumer into an active participant in building a more sustainable food system. Your gut—and your community—will thank you for it.

Your Seeds Are Dying (Here’s How to Keep Them Alive for Years)

Posted by darrell on
0
Seed Preservation and Biodiversity
Your Seeds Are Dying (Here’s How to Keep Them Alive for Years)

Test your seeds before planting season by placing ten seeds between damp paper towels in a sealed plastic bag, then counting how many sprout within 7-14 days. If fewer than five germinate, your seed stock has dropped below 50% viability and needs replacement. This simple germination test costs nothing and saves you from disappointing harvests.

Store seeds in airtight glass jars with silica gel packets in a cool, dark location where temperatures stay between 32-41°F. Every 10-degree increase in storage temperature cuts seed life in half, while excess moisture triggers premature germination or fungal growth that destroys entire seed collections.

Prioritize fresh seeds for short-lived varieties like onions, parsnips, and lettuce, which lose viability within 1-2 years even under perfect conditions. Meanwhile, tomatoes, beans, and squash maintain strong germination rates for 4-6 years when properly stored, making them ideal candidates for long-term seed saving.

Label every container with variety name and harvest date, then rotate your seed inventory using the oldest stock first. This prevents the heartbreak of discovering your carefully saved heirloom seeds have silently failed after years in storage.

Understanding seed viability transforms your gardening from guesswork into precision. The difference between 90% germination and 40% germination means the difference between abundant harvests and patchy, disappointing rows. When small-scale farmer Maria Rodriguez tested her three-year-old pepper seeds before spring planting, she discovered only 30% viability and avoided wasting precious garden space, instead sourcing fresh seeds that delivered her best harvest yet.

What Seed Viability Actually Means (And Why It’s Not Just About Age)

Close-up of various vegetable seeds on wooden surface showing different conditions
Different seed varieties exhibit varying lifespans and viability characteristics depending on their type and storage conditions.

The Hidden Factor: Genetic Integrity

When you plant tomato seeds expecting juicy heirlooms but get something entirely different, you’ve encountered a genetic integrity issue. Think of genetic integrity as a seed’s biological blueprint—it determines whether your Cherokee Purple tomatoes will actually produce those distinctive dark fruits or if years of cross-pollination have altered their DNA.

For seed savers and organic farmers, maintaining genetic integrity isn’t just about predictability. It’s about preserving heirloom varieties that have been carefully cultivated over generations. These heritage seeds carry unique traits like drought resistance, specific flavor profiles, and regional adaptations that commercial hybrids simply can’t replicate.

The challenge comes from contamination—when different varieties cross-pollinate or seeds get mixed during storage. At our CSA farm, we learned this lesson when our Brandywine tomatoes started showing hybrid characteristics after planting them too close to other varieties. Now we maintain isolation distances and practice careful seed selection.

To protect genetic integrity, focus on proper plant spacing during the growing season, hand-pollinate when necessary, and source seeds from reputable suppliers who follow strict protocols. Keep detailed records of seed sources and growing conditions. This attention to detail ensures that when you save seeds from this year’s harvest, next season’s plants will be true to their heritage—producing the same reliable characteristics that made you fall in love with that variety in the first place.

The Three Silent Killers of Seed Viability

Mason jars containing seeds showing effects of different storage conditions
Environmental factors like moisture and temperature dramatically affect how long seeds remain viable in storage.

Moisture: The Fastest Way to Lose Your Seeds

Moisture is perhaps the most critical factor affecting seed viability, and it works against you faster than you might think. When seeds absorb moisture from humid air, they interpret this as a signal to start germinating. This premature awakening depletes their stored energy reserves, leaving them unable to sprout when you actually want them to. Even worse, excess moisture creates the perfect environment for mold and fungal growth, which can destroy an entire seed collection in just weeks.

The sweet spot for most vegetable and flower seeds is maintaining moisture content between 4-8%. At this level, seeds remain dormant and their metabolic processes stay in hibernation mode. Think of it like this: for every 1% increase in seed moisture content above 8%, you can cut storage life in half. That’s a dramatic difference that can mean the gap between five-year viability and less than one year.

Different seed types have varying moisture tolerances. Beans and peas can handle slightly higher moisture levels (around 8-9%), while tiny seeds like lettuce and carrots need to stay closer to 5-6%. One experienced organic farmer shared that after switching to silica gel packets in his storage containers, his germination rates jumped from 60% to over 90% the following season. Consider investing in a simple moisture meter to monitor your storage conditions, and always ensure seeds are completely dry before sealing them away.

Temperature Swings That Ruin Everything

Think of seeds as living time capsules—they’re just waiting for the right moment to burst into life. But here’s the catch: temperature swings are their worst enemy. Every 10°F increase in storage temperature roughly halves seed viability, speeding up the aging process dramatically. When seeds get warm, their metabolism kicks into overdrive, burning through precious energy reserves they need for germination.

The sweet spot for most seeds? A consistent 32-41°F, which you can achieve in a standard refrigerator. This cool environment puts seeds into a gentle dormancy, slowing down deterioration without freezing and damaging delicate cell structures. Freezers (0°F or below) work wonderfully for long-term storage of properly dried seeds, keeping them viable for years or even decades.

The real killer isn’t just heat—it’s inconsistency. Moving seeds from hot to cold and back again creates condensation, introducing moisture that triggers premature germination or mold. Local farmer Maria Torres learned this the hard way when her garage-stored heirloom tomato seeds failed after one summer. Now she keeps everything in a dedicated mini-fridge, and her germination rates have soared to 95 percent, even with three-year-old varieties. Consistency truly makes all the difference.

Why Oxygen Matters More Than You Think

You might not think much about the air around your seeds, but oxygen plays a surprisingly big role in their lifespan. When seeds breathe—yes, even dormant seeds respire slightly—they interact with oxygen in a process called oxidation. Think of it like a very slow burn that gradually breaks down the seed’s internal structures, particularly the fats and proteins essential for germination.

Over time, this oxidation damages cell membranes and genetic material, making it harder for seeds to sprout successfully. The good news? Reducing oxygen exposure dramatically slows this aging process. Many experienced seed savers use vacuum-sealed containers or oxygen absorber packets to create low-oxygen environments, effectively putting their seeds into deeper dormancy. Combined with cool, dry storage conditions, limiting oxygen exposure can extend seed viability by years—sometimes even decades. Understanding this simple chemistry empowers you to preserve your heirloom varieties and maintain strong germination rates season after season.

Simple Tests to Check If Your Seeds Are Still Good

Overhead view of hands conducting paper towel seed germination test
The simple paper towel germination test allows gardeners to accurately assess seed viability before planting season.

The Paper Towel Test That Never Fails

Testing your seeds at home is easier than you might think, and all you need are supplies from your kitchen drawer. Here’s how to conduct a reliable germination test that’ll tell you exactly which seed packets are worth planting this season.

Start by gathering paper towels, a dinner plate, and a resealable plastic bag. Count out ten seeds from the packet you’re testing—this number makes calculating percentages simple. Dampen a paper towel until it’s moist but not dripping, then lay it flat on your plate. Arrange your seeds in a single layer on one half of the towel, keeping them spaced apart. Fold the other half over to cover them, then slide everything into the plastic bag. This creates a mini greenhouse that maintains consistent moisture.

Place your setup somewhere warm, around 70-75°F, away from direct sunlight. Check daily to ensure the paper towel stays damp, adding water if needed. Most vegetable seeds will sprout within 5-10 days, though some varieties take longer.

Now comes the exciting part—counting your results. After the expected germination period passes, count how many seeds sprouted healthy roots or shoots. If seven out of ten germinated, that’s 70% viability. Anything above 80% is excellent for planting, 50-80% means you’ll need to sow more densely, and below 50% suggests it’s time to order fresh seeds.

One organic farmer I know tests all her saved tomato seeds this way each February, ensuring she never wastes precious garden space on duds.

Quick Visual Checks Before You Plant

Before investing time in formal germination tests, a quick visual inspection can save you from planting duds. Healthy seeds typically have vibrant, uniform coloring and feel firm to the touch. Dead or compromised seeds often reveal themselves through telltale signs that even beginners can spot.

Start by examining seed color. Discolored, faded, or unusually dark seeds may indicate aging or moisture damage. Tomato and pepper seeds, for example, should maintain a creamy-white to pale yellow appearance. If they’ve turned brown or gray, their viability is questionable.

Next, check for physical damage. Cracked seed coats, hollow or shriveled shells, and insect damage are red flags. Gently press larger seeds between your fingers—viable seeds feel solid and plump, while dead ones often feel papery or collapse easily.

Watch for mold or fuzzy growth, which signals excessive moisture exposure and likely renders seeds unusable. Any musty odor is another warning sign of deterioration.

Finally, perform the float test as a quick preliminary check. Place seeds in water—those that sink are generally viable, while floaters are often hollow or damaged. This simple visual screening helps you prioritize which seeds deserve proper germination testing and which belong in your compost pile instead.

Storage Protocols That Actually Work

The Mason Jar Method for Home Gardeners

You don’t need fancy equipment to preserve seed viability at home. The mason jar method remains one of the most effective seed storage systems for backyard gardeners and small-scale seed savers.

Start with clean, dry glass jars with tight-fitting lids. Wide-mouth mason jars work perfectly because they’re easy to access and create an airtight seal. Before storing seeds, ensure they’re completely dry by leaving them at room temperature for several days after harvest.

Drop one or two food-grade silica gel packets into each jar to control moisture levels. These inexpensive packets absorb excess humidity that can trigger premature germination or mold growth. You can purchase them at craft stores or reuse packets from vitamin bottles and packaged goods.

Label each jar clearly with the seed variety, harvest date, and germination rate if you’ve tested it. This simple step prevents confusion during planting season and helps you track which seeds need replacing.

Store your jars in a cool, dark location like a basement or closet. Consistent temperatures between 32-41°F work best, though a cool pantry will suffice for many varieties. This straightforward approach has helped countless home gardeners maintain viable seeds for years while spending minimal money.

Organized mason jar seed storage system with labels on wooden shelving
A well-organized seed storage system using mason jars and desiccant packets can maintain seed viability for years.

Small Farm Seed Banking Basics

Managing a diverse seed collection for your CSA farm requires thoughtful organization from the start. Think of your seed bank as a living library where each variety tells a story and deserves proper cataloging.

Start by designating a dedicated storage space with consistent cool temperatures between 32-41°F and humidity below 40%. Label everything clearly with variety name, harvest date, and expected viability period. Simple spreadsheet tracking works wonders for inventory management, noting quantities, germination test results, and planned grow-out schedules.

Group seeds by family and viability requirements. Short-lived seeds like parsnips and onions need annual attention, while tomatoes and brassicas can last five years or more under proper conditions. Use airtight containers with desiccant packets, checking moisture levels quarterly with a simple humidity meter.

Sarah Chen, who runs Green Valley Farm in Vermont, transformed her seed saving operation by implementing monthly inventory checks and a color-coded labeling system. “I stopped losing varieties to poor record-keeping once I committed to updating my spreadsheet after every seed cleaning session,” she shares. Her farm now maintains 150 heirloom varieties with 90% germination rates.

Schedule annual germination tests for your core production varieties, typically conducting them 6-8 weeks before planting season. This proactive approach ensures you’re never caught off-guard by declining viability when it’s time to start seedlings.

When to Use the Freezer (And When Not To)

For truly long-term storage beyond five years, freezing can be a game-changer for certain seeds. Before freezing, ensure seeds are properly dried to 6-8% moisture content, as any residual moisture can form ice crystals that damage cells. Place dried seeds in airtight, moisture-proof containers like glass jars with rubber seals or vacuum-sealed bags.

Seeds that thrive in freezer storage include tomatoes, peppers, lettuce, and most vegetables from the brassica family. These can maintain viability for 10-15 years when frozen. However, some seeds don’t appreciate the deep freeze. Onions, parsnips, and certain short-lived seeds may not show significant benefit and are better stored in cool, dry conditions for shorter periods.

One successful seed saver from a Vermont CSA shared how freezing heirloom tomato seeds helped preserve rare varieties for over a decade, maintaining 80% germination rates. When you’re ready to plant, allow frozen seeds to gradually return to room temperature before opening containers. This prevents condensation that could compromise your carefully preserved genetics.

How Long Different Seeds Actually Last

Understanding how long your seeds remain viable helps you plan purchases, avoid disappointing germination rates, and save money by not replacing seeds unnecessarily. Seed longevity varies dramatically depending on the plant species, so let’s break it down into practical categories.

Short-lived seeds (1-2 years) require the most attention in your storage system. Onions, parsnips, and parsley top this list, along with salsify and scorzonera. These seeds lose viability quickly even under ideal conditions. Sarah Martinez, who runs a successful CSA operation in Vermont, learned this lesson the hard way when her carefully stored parsnip seeds failed to germinate after just 18 months. Now she purchases these varieties fresh each season and marks them clearly in her seed inventory.

Medium-lived seeds (3-5 years) include many garden favorites that form the backbone of most organic operations. Carrots, beans, peas, lettuce, spinach, and most brassicas like broccoli, cabbage, and kale fall into this category. Tomatoes, peppers, eggplants, and squash also maintain good germination rates for three to five years when stored properly. These varieties offer flexibility for seed saving and purchasing in bulk during sales without immediate pressure to use everything.

Long-lived seeds (5+ years) are the champions of seed storage, sometimes remaining viable for a decade or more. Cucumbers, melons, and beets lead this category, with cucumber seeds documented to germinate successfully after ten years under optimal conditions. Radishes and turnips also demonstrate impressive longevity. These seeds provide excellent opportunities for building a diverse seed bank without constant replenishment.

Remember that these timelines assume proper storage conditions with cool temperatures, low humidity, and darkness. Seeds stored in hot garages or damp basements may fail much sooner. When working with older seeds, conduct germination tests before committing them to prime growing space, ensuring your time and soil investments yield the harvests you’re counting on.

Protecting Genetic Integrity: Beyond Just Staying Alive

Keeping your seeds viable is only half the battle—protecting their genetic integrity ensures future generations inherit the true characteristics of your beloved heirloom varieties. Cross-contamination can happen more easily than you might think, turning your prized Cherokee Purple tomatoes into something unrecognizable over a few seasons.

Understanding isolation distances is crucial for maintaining genetic purity. Different plant families require varying amounts of space to prevent unwanted cross-pollination. Squash and cucumbers, notorious wanderers in the plant world, need at least half a mile between varieties if you want pure seed. Tomatoes, being mostly self-pollinating, are more forgiving at just 10-20 feet. Corn, however, demands serious respect—plan for at least 400 feet between different varieties, or stagger planting times by three weeks.

Sarah Martinez, a small-scale organic farmer in Ontario, learned this lesson when her carefully preserved Glass Gem corn crossed with a neighbor’s sweet corn. “Now I use temporal isolation,” she explains. “I plant my seed-saving varieties early and my eating varieties late. It’s simple but effective.”

Harvesting timing matters too. Wait until seeds are fully mature on the plant—tomatoes should be overripe, beans dried and rattling in their pods, and lettuce showing fluffy seed heads. Premature harvesting often results in immature seeds that won’t germinate reliably.

Storage organization prevents accidental mixing. Label everything clearly with variety name and harvest date. Store different varieties in separate, clearly marked containers. Consider using a simple cataloging system—even a notebook works wonders for tracking your collection.

These careful seed saving practices preserve the agricultural heritage entrusted to us, ensuring future gardeners can enjoy these time-tested varieties exactly as nature intended.

Farmer Success Story: How One CSA Maintains a 95% Germination Rate

When Maria Santos started Green Valley CSA five years ago, she faced a frustrating problem that nearly derailed her first season. Despite purchasing quality organic seeds, her germination rates hovered around 65%, leaving gaps in her planting beds and disappointed CSA members waiting for their weekly boxes.

“I was storing seeds in my barn, thinking the cool temperature was enough,” Maria recalls. “I didn’t realize that humidity was wreaking havoc on viability, especially during our wet springs.”

The turning point came when Maria invested in a simple seed storage system and committed to regular testing protocols. She purchased affordable humidity-controlled containers and a small refrigerator dedicated solely to seed storage. Every January, three months before planting season, she conducts germination tests on a sample from each seed variety.

“I lay out ten seeds from each packet on damp paper towels, seal them in plastic bags, and wait seven to ten days,” she explains. “It takes maybe two hours total, but that small time investment has transformed my operation.”

Maria also maintains detailed records in a simple notebook, tracking which seed suppliers consistently deliver high viability and which varieties perform best in her climate. When a batch tests below 85% germination, she either purchases fresh seeds or adjusts her seeding density to compensate.

The results speak for themselves. Green Valley CSA now maintains a 95% germination rate across all crops, which means predictable harvests and happier members. Maria’s seed budget has actually decreased because she wastes less on failed plantings and can confidently save seeds from her best performers.

“The protocols seemed intimidating at first,” Maria admits, “but they’ve become second nature. Now I can’t imagine farming any other way. When you know your seeds are viable, you can plan with confidence and focus your energy on growing great food instead of troubleshooting poor germination.”

Your Seed Viability Action Plan

Ready to preserve your seeds with confidence? Here’s your practical roadmap to get started, whether you’re launching a new collection or upgrading your current setup.

Start with a viability baseline. Test a sample from each seed variety you currently have using the simple paper towel method. This takes just 7-14 days and reveals exactly where you stand. Mark your calendar to complete this assessment before spring planting season, so you’ll know which varieties need replacing.

Next, organize your storage environment. Within the first month, invest in airtight containers and food-grade desiccant packets. Transform a cool, dark closet or basement corner into your seed sanctuary. A small investment now prevents years of disappointment later.

Create your record-keeping system by month two. Whether you prefer a simple notebook or spreadsheet, document collection dates, germination test results, and storage conditions for each variety. One CSA farmer in Vermont credits her detailed records with identifying storage problems early, saving an entire season’s seed collection worth over $800.

For seasonal timing, test winter-stored seeds each February and March. Collect and dry seeds during your harvest months, typically July through October. Run follow-up germination tests in early autumn to verify your drying and storage methods worked before winter storage begins.

Priority actions include replacing seeds showing below 50 percent germination rates immediately, upgrading any seeds stored in paper envelopes to moisture-proof containers, and establishing a rotation schedule to use older seeds first. Remember, even small steps toward better seed viability multiply into healthier gardens and more resilient food systems for your community.

Taking control of your seed viability isn’t just a gardening skill—it’s an act of empowerment that connects you directly to food security and agricultural heritage. By implementing the simple testing and storage protocols we’ve covered, you’re joining a global community of seed savers who understand that viable seeds mean resilient gardens, thriving farms, and preserved biodiversity.

The beauty of these practices lies in their accessibility. You don’t need expensive equipment or specialized training to test germination rates or create proper storage conditions. A few basic supplies, attention to detail, and commitment to climate-resilient seed storage can transform your seed-saving efforts from hopeful guesswork into reliable science.

Consider Sarah, a small-scale farmer in Ontario, who increased her heirloom tomato germination from 40% to 95% simply by controlling moisture and temperature in her storage area. Her success demonstrates what’s possible when we apply these straightforward principles.

Now it’s your turn. Start small—test a handful of your oldest seeds this week. Assess your current storage setup and make one improvement. Label and date your seed packets. Each small action builds toward larger goals: reducing dependence on commercial seed sources, preserving rare varieties, and ensuring your garden’s future productivity.

Your seeds carry stories, genetics, and potential harvests waiting to unfold. Give them the care they deserve, and they’ll reward you season after season.

How a Local Farm Directory Transforms the Way Fresh Food Reaches Your Table

Posted by darrell on
0
Local Food Systems and Distribution
How a Local Farm Directory Transforms the Way Fresh Food Reaches Your Table

Finding the right local farms to partner with can transform your food business or household purchasing habits overnight. A comprehensive local farm directory serves as your direct connection to fresh, seasonal produce while solving the persistent challenges of sourcing reliability, quality consistency, and sustainable supply chains.

Local farm directories bridge the gap between growers and buyers by consolidating verified farm information, seasonal availability schedules, and delivery logistics into one accessible platform. Rather than making dozens of phone calls or driving rural routes hoping to find suppliers, you gain instant access to farms that match your specific needs—whether you’re stocking a restaurant, managing a food hub, or simply planning your family’s weekly produce box.

The real power lies in solving distribution headaches that have historically kept local food economically challenging. These directories typically include details about minimum order quantities, delivery radius, accepted payment methods, and even harvest calendars that help you plan purchases around peak freshness. Many feature direct messaging systems that eliminate communication barriers and allow you to build relationships with farmers before committing to large orders.

For retailers and food hub operators, directories reduce the time spent vetting suppliers from weeks to hours. You’ll discover farms offering everything from certified organic vegetables to pasture-raised meats, all with transparent growing practices and clear pricing structures. This efficiency makes local sourcing financially viable even for smaller operations working with tight margins, while connecting environmentally conscious consumers to the sustainable agriculture movement they want to support.

What Makes Farm-to-Retail Distribution Different From Traditional Food Logistics

Local food distribution operates on a completely different rhythm than the industrial food system most of us take for granted. While conventional supply chains move massive volumes from distant farms through centralized warehouses to retail shelves, direct farm-to-retail connections require a more nimble, relationship-based approach.

The biggest difference? Scale and timing. Small-scale farmers might harvest 50 pounds of heirloom tomatoes on Tuesday morning that need to reach customers by Wednesday afternoon, not pallets of produce shipped cross-country with week-long shelf lives. This creates a unique challenge where freshness is paramount, but quantities don’t justify dedicated delivery trucks or complex logistics networks.

Seasonal variability adds another layer of complexity. A farm directory in June might list twenty producers with strawberries, while December offerings shift entirely to root vegetables and greenhouse greens. Retailers working with local farms need to adapt their inventory planning constantly, unlike ordering year-round iceberg lettuce from industrial suppliers.

Then there’s the geography puzzle. Instead of one warehouse servicing multiple stores, retailers often coordinate pickups from several small farms scattered across a region. Each farm operates on its own schedule, with different harvest days and available pickup windows.

Traditional food logistics prioritize efficiency through standardization, but local food systems thrive on diversity and flexibility. A farm might offer three varieties of winter squash one week and surprise everyone with late-season peppers the next. This unpredictability, while challenging, is also what makes local food exciting and truly seasonal.

Successfully navigating these differences requires better communication tools, which is exactly where modern farm directories become invaluable for connecting all the moving pieces.

Farmer and grocery store worker transferring fresh produce in wooden crates at store loading dock
Direct connections between local farms and retailers create shorter supply chains and fresher produce for consumers.

The Local Farm Directory: Your Digital Bridge Between Field and Store

Connecting Retailers With Nearby Producers

Local farm directories serve as powerful matchmaking tools for retailers seeking fresh, locally sourced products. These digital platforms eliminate the guesswork by allowing grocery stores, restaurants, and food cooperatives to search for farms based on specific geographic parameters. Within minutes, a restaurant owner can identify all certified organic vegetable producers within a 50-mile radius, complete with detailed profiles showing what’s currently in season and ready for harvest.

The real magic happens when retailers can view real-time product availability calendars. Instead of making dozens of phone calls, buyers simply log into the directory to see which farms have heirloom tomatoes available this week or can supply 100 pounds of sweet corn by Friday. This transparency saves countless hours and reduces the frustration of missed connections.

Take Sarah Martinez, who manages procurement for a small grocery chain in Vermont. Before discovering her regional farm directory, she spent entire mornings coordinating with suppliers. Now, she connects directly with twelve local farms through the platform, building relationships that go beyond transactions. “I know the farmers by name, understand their growing practices, and can plan my inventory around their harvest schedules,” she shares. “It’s transformed how we operate.”

These directories often include messaging features, allowing retailers to negotiate prices, arrange delivery schedules, and ask specific questions about growing methods. This direct communication builds trust and creates partnerships that benefit both businesses, strengthening the entire local food economy while ensuring customers receive the freshest possible products.

Farmer using smartphone farm directory app while working in crop field
Modern farm directories connect producers directly with local retailers through easy-to-use digital platforms accessible right from the field.

Real-Time Inventory and Seasonal Planning Tools

Managing seasonal produce is one of the biggest challenges for retailers working with local farms. Modern farm directories have evolved beyond simple contact lists to include powerful planning features that make seasonal coordination much easier. These platforms now offer real-time harvest schedules and product availability updates, helping you know exactly what’s coming and when.

Many directories integrate modern distribution technology that sends automatic notifications when crops are ready for harvest or when availability changes due to weather conditions. This transparency eliminates guesswork and reduces waste from over-ordering or missed opportunities.

Planning tools within these directories let you visualize seasonal patterns across multiple farms, making it easier to diversify your supply chain. For example, Green Valley Market in Ontario used their directory’s planning dashboard to coordinate with three different berry farms, ensuring continuous strawberry supply from May through September rather than depending on a single source.

The best directories also include historical data, helping you anticipate next year’s availability and plan promotional campaigns around peak harvest times. This forward-thinking approach transforms seasonal fluctuations from a headache into an opportunity for featuring the freshest local produce at the right moment.

Building Trust Through Transparency

Local farm directories create transparency that helps retailers build trust with both farmers and customers. These platforms showcase detailed farming practices, from organic certifications to soil health methods, giving you the information needed to make confident sourcing decisions. When a directory lists whether a farm uses regenerative practices or holds USDA organic certification, you can quickly verify claims and match products with your values.

Many directories feature farm stories that go beyond basic listings. You’ll discover the farmer’s journey, their growing philosophy, and what makes their operation unique. This narrative depth becomes invaluable when communicating value to your customers. Instead of simply selling tomatoes, you can share the story of the third-generation farmer who uses heirloom seeds and natural pest management.

This transparency streamlines your vetting process while providing ready-made marketing content. Retailers report that sharing these authentic farm stories increases customer loyalty and justifies premium pricing, turning local sourcing from a logistical challenge into a competitive advantage.

Solving the Biggest Headaches in Local Distribution Logistics

Coordinating Multiple Pickup and Delivery Points

Managing pickups from multiple farms can quickly become a logistical puzzle, but local farm directories are stepping up to simplify the process. Modern directories incorporate smart scheduling tools that allow food hubs and retailers to coordinate collection times across various farms, reducing duplicate trips and fuel costs.

Many platforms now feature interactive maps showing farm locations alongside their harvest schedules, making route planning surprisingly straightforward. Instead of calling each farmer individually, buyers can view consolidated availability and create efficient pickup routes that minimize travel time. Some directories even integrate with mapping software to suggest the most fuel-efficient paths.

Aggregation hubs have become game-changers in this system. Directories help identify central collection points where multiple small-scale farmers can drop off their harvests, which buyers then collect in a single stop. This approach works beautifully for farmers like Maria Gonzalez, who started bringing her organic vegetables to a shared hub coordinated through her regional farm directory. She now saves three hours weekly on delivery runs while reaching more customers than ever before.

These coordination features transform what used to be a time-consuming challenge into a manageable system, making local food distribution economically viable for everyone involved while supporting sustainable farming practices.

Managing Communication Between Multiple Parties

Coordinating deliveries between farms, distributors, and buyers can quickly become overwhelming when everyone relies on scattered phone calls, text messages, and emails. Think about Sarah, a food hub manager who once juggled orders from fifteen farms using sticky notes and voicemail—mistakes were inevitable, and time was constantly wasted clarifying details.

Centralized farm directory platforms transform this chaos into smooth operations. Instead of playing phone tag, all parties access a single messaging hub where order details, delivery schedules, and product availability updates live in one searchable location. When a restaurant changes their order from twenty to thirty pounds of tomatoes, the system instantly notifies the farm and updates inventory counts automatically.

These platforms also maintain order histories and communication trails, eliminating the “he said, she said” confusion that leads to delivery mishaps. Buyers can track their requests from placement to delivery, while farmers receive organized order summaries rather than deciphering handwritten notes or unclear voicemails.

The result? Fewer wrong deliveries, happier customers, and more time for everyone to focus on what they do best—whether that’s growing exceptional produce or serving delicious meals. For small-scale operations especially, this efficiency breakthrough makes local food distribution genuinely sustainable.

Scaling Without Losing the Local Connection

As your retail business grows, maintaining those valuable farm partnerships shouldn’t mean drowning in spreadsheets and phone calls. Farm directories act as your centralized command center, allowing you to connect with dozens of producers while keeping track of seasonal availability, delivery schedules, and order histories all in one place. Think of how Sarah’s Market expanded from three farm suppliers to fifteen within a year, simply because their directory system automated the communication and ordering process that would have otherwise required hiring additional staff. The beauty of these platforms is that they scale with you, whether you’re a small grocery store adding a few farms or a regional chain building relationships across multiple counties. By partnering with local food hubs through directory systems, retailers maintain that personal touch customers love while enjoying the efficiency of modern technology, proving you can grow your business without losing your community roots.

Success Story: How One Regional Grocery Chain Cut Distribution Costs While Supporting 40 Local Farms

When Mountain Fresh Markets faced rising distribution costs and inconsistent produce supplies across their seven stores, manager Sarah Chen knew something had to change. Their traditional wholesale supplier relationships weren’t meeting customer demand for truly local products, yet coordinating directly with individual farms felt overwhelming.

Sarah discovered a regional farm directory designed specifically for distribution logistics. Within three months, the results transformed their entire operation.

The directory’s mapping feature helped Sarah identify 40 farms within a 50-mile radius of their distribution center. Instead of produce traveling hundreds of miles through multiple handlers, Mountain Fresh established direct relationships with nearby growers. The impact was immediate: distribution costs dropped 28 percent in the first year, primarily by eliminating middleman markups and reducing fuel expenses.

But the challenges weren’t insignificant. Coordinating harvest schedules, minimum order quantities, and delivery logistics with dozens of small farms initially seemed daunting. The directory’s communication tools became essential, allowing Sarah to send batch orders, track availability in real-time, and plan efficient pickup routes. Some farmers adjusted their planting schedules based on Mountain Fresh’s projected needs, creating stability for both parties.

The produce quality improvement surprised even Sarah. Tomatoes reached shelves within 24 hours of harvest instead of five days. Customer complaints about wilted greens virtually disappeared. Sales of local produce increased 45 percent as shoppers noticed the difference.

For the farmers, having a reliable retail partner meant financial security. Third-generation farmer Tom Rodriguez shared that his guaranteed orders from Mountain Fresh allowed him to hire two full-time employees and expand his organic acreage by three acres.

Sarah’s advice for other retailers? Start small with five to ten farms, build relationships gradually, and use the directory’s data to identify complementary growing seasons. The investment in direct relationships pays dividends through lower costs, better quality, and customers who become passionate advocates for your local food mission.

Group of local farmers and grocery store managers collaborating at produce delivery truck
Successful farm-to-retail partnerships built through local directories benefit farmers, retailers, and communities alike.

Getting Started: Building an Efficient Local Distribution Network

For Retailers Looking to Source Locally

Getting started with local farm directories is simpler than you might think. Begin by searching directories specific to your region, filtering results by product type, growing practices, and delivery capabilities. Look for farms certified organic or those practicing sustainable methods that align with your customers’ values.

When evaluating potential farm partners, schedule farm visits to see operations firsthand and discuss production volumes, harvest schedules, and quality standards. Ask about their experience with wholesale accounts and whether they can meet your consistency requirements. Many successful retailers find that starting with 2-3 reliable farms builds a strong foundation before expanding.

Establish clear ordering systems early on. Some farms prefer weekly order confirmations via email, while others use online portals or phone orders. Set up delivery schedules that work for both parties, whether that’s farm pickup, delivery to your location, or meeting at a food hub.

Planning for seasonal changes is essential in local sourcing. Work with farmers during winter months to understand their crop rotations and plan your product offerings accordingly. Consider preserving peak-season produce through freezing or canning partnerships. Building these relationships creates supply chain resilience while supporting your community’s agricultural economy.

For Farms Ready to Supply Retail Markets

Ready to connect with retail partners? Your directory profile is your digital handshake with potential buyers, so make it count. Start with high-quality photos of your farm and products—retailers want to see what they’re getting. Be specific about what you grow, your farming methods, and any certifications you hold.

Set realistic availability windows in your profile. Nothing damages retail relationships faster than promising produce you can’t deliver. Update your inventory weekly, especially during seasonal transitions. Include minimum order quantities and lead times to help buyers plan accordingly.

Communication is everything in retail partnerships. Respond promptly to inquiries and be upfront about your capacity. Consider Emma’s Farm in Vermont, which built lasting relationships with five local grocers by maintaining transparent communication and consistently delivering quality produce on schedule.

Coordinate deliveries efficiently by grouping orders geographically or partnering with other farms for shared transport. Many successful farms designate specific delivery days for retail accounts, reducing fuel costs and streamlining operations. Remember, reliability builds trust—and trust builds long-term partnerships that sustain your farm business through every season.

Creating Community Food Hubs as Distribution Centers

Food hubs are transforming how small farms reach consumers by serving as central collection and distribution points. By consulting local farm directories, these community hubs can identify participating farms, coordinate harvest schedules, and aggregate products from multiple growers into single deliveries. This collaborative approach makes efficient local distribution possible, reducing transportation costs and enabling smaller farms to access markets previously out of reach. Retailers benefit too, gaining access to diverse local products through one reliable source rather than managing relationships with dozens of individual farms.

Local farm directories aren’t just databases—they’re powerful tools that bring sustainable food systems to life. By connecting farmers with retailers, restaurants, and food hubs, these directories transform the complex challenge of local food distribution into something manageable and efficient. They turn good intentions about supporting local agriculture into real, actionable partnerships that benefit everyone involved.

If you haven’t explored your local farm directory yet, now’s the perfect time to start. Whether you’re a farmer looking to expand your market reach, a retailer seeking reliable local suppliers, or a food hub coordinator building distribution networks, these directories offer the connections you need to succeed. Take that first step—search for farms in your area, reach out to potential partners, and discover how straightforward farm-to-retail relationships can be.

The future of our food system depends on these local connections. When we make it easier for farmers and buyers to find each other, we build resilient communities with thriving local economies and fresh, sustainable food for everyone. Your local farm directory is the bridge that makes this vision possible.