
How to Integrate Cover Crops into Your Regenerative Agriculture System
 darrell on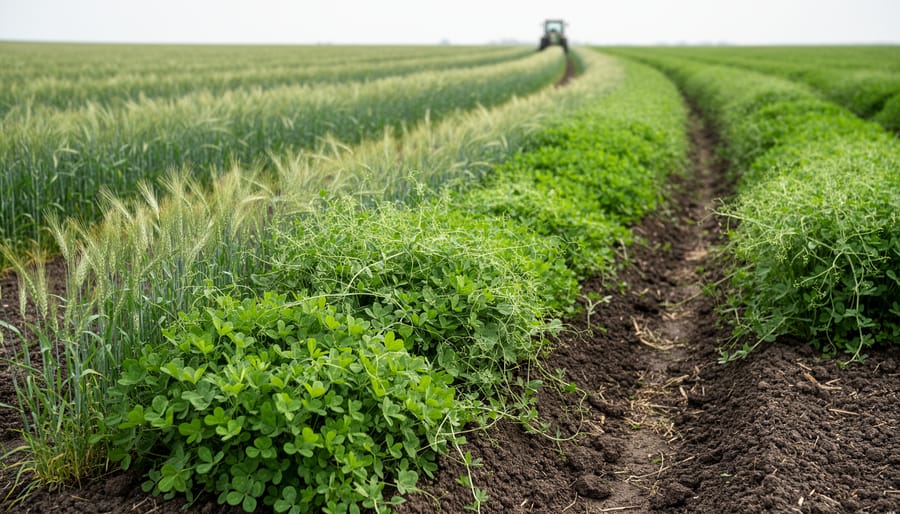
Regenerative agriculture cover crops build living soil by planting species like rye, clover, and vetch between cash crop cycles to protect and feed the earth year-round. The practice takes about two to four hours per acre to establish and typically costs $30 to $80 in seed, depending on your mix. Within one season, you’ll see measurable improvements in soil structure, water infiltration, and weed suppression, while multi-year benefits include increased organic matter, reduced erosion, and thriving microbial communities that cut fertilizer needs by up to 40%.
Unlike conventional agriculture that leaves fields bare after harvest, regenerative cover cropping mimics natural ecosystems where soil stays protected and biologically active. The method works because diverse plant roots create channels for air and water, fix atmospheric nitrogen, break up compaction, and provide habitat for beneficial insects and soil organisms. Farmers across the country report that cover crops transformed their hardpan clay into crumbly loam and slashed irrigation requirements within three years.
Getting started is simpler than most people expect. You’ll choose species based on your climate zone and soil needs, broadcast or drill seed at the right time for your region, and terminate the crop before planting your main vegetables or grains. The real power comes from selecting a diverse mix rather than a single species, stacking multiple benefits into one planting window while building resilience against weather extremes and pest pressure.
Understanding Cover Crops in Regenerative Systems
Cover crops in regenerative systems do far more than just protect bare soil between cash crops. They’re living infrastructure that actively rebuilds the soil ecosystem your farm depends on. Unlike conventional cover cropping, which often focuses on a single outcome like preventing erosion or adding nitrogen, regenerative systems use diverse cover crop cocktails to stimulate multiple ecological processes simultaneously.
In a regenerative approach, you’re not just growing plants to plow under. You’re cultivating a functional community of species that work together to cycle nutrients, feed soil microbes, break up compaction, and suppress weeds without synthetic inputs. A typical mix might include deep-rooted daikon radishes drilling through hardpan while shallow-rooted clovers fix nitrogen and broadleaf species like buckwheat attract beneficial insects. Each plant plays a specific role.
The fundamental difference lies in how you think about soil. Conventional systems treat cover crops as green manure to be tilled in, which releases a nutrient flush but destroys soil structure and kills beneficial fungi. Regenerative methods keep disturbance minimal, often terminating covers by crimping or grazing so roots remain intact, feeding microorganisms and creating the stable carbon-rich aggregates that hold water and nutrients. The process mirrors how natural grasslands build fertility.
This shift means your cover crops become partners in a longer-term strategy where each season builds on the last. You’re not just amending the soil; you’re transforming it into a living system that becomes more productive over time. That’s how crop rotation heals and strengthens your farm’s foundation, creating a regenerative cycle that compounds with each planting.
Essential Materials and Resources You’ll Need
Choosing the Right Cover Crop Species
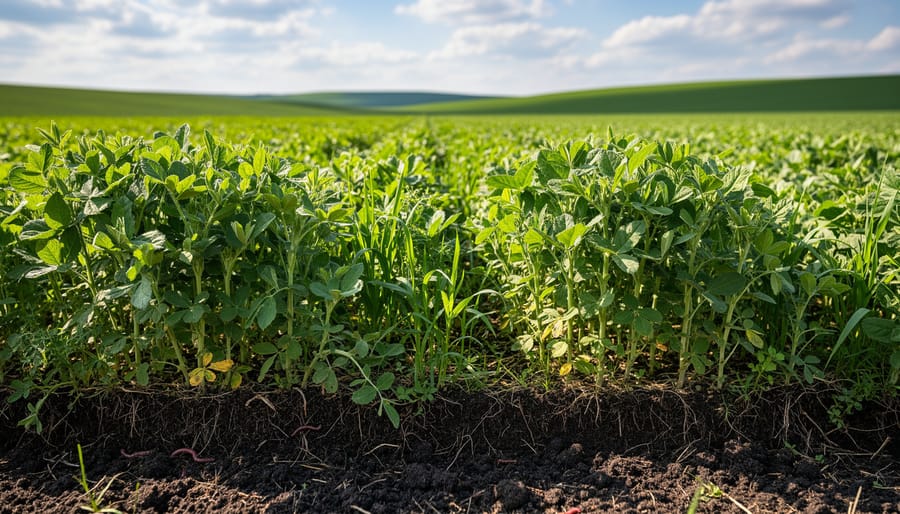
Selecting the right cover crop species starts with matching plants to your farm’s unique conditions and regenerative priorities. Begin by identifying your USDA hardiness zone and frost dates, this determines which species will germinate reliably and provide adequate growth before termination. Cool-season crops like winter rye, crimson clover, and hairy vetch thrive in fall plantings and overwinter in zones 6 and warmer, while warm-season options such as buckwheat, cowpeas, and sorghum-sudangrass need soil temperatures above 60°F to establish.
Your soil type shapes which species will perform best. Heavy clay soils benefit from deep-rooted daikon radish and tillage radish that break compaction, while sandy soils need fibrous-rooted grasses like annual ryegrass to prevent erosion and build organic matter quickly. Conduct a soil test to identify specific deficiencies, nitrogen-poor soils call for legumes like field peas or bell beans, whereas phosphorus-deficient ground responds well to buckwheat’s mineral-scavenging abilities.
Consider your cash crop rotation carefully. If you’re planting tomatoes or peppers in spring, avoid brassica cover crops that can harbor similar pests. Before corn, prioritize nitrogen-fixing legumes to reduce fertilizer needs. Most regenerative farmers blend four to seven species in a single mix, combining a grass for carbon, a legume for nitrogen, a brassica for biofumigation, and a broadleaf for diversity creates resilient soil biology that supports multiple functions simultaneously.
Important Considerations Before You Start
Before planting your first cover crop, you need to understand the potential pitfalls that can undermine your regenerative goals or even damage your operation. The most common failures happen when farmers rush into cover cropping without addressing timing, chemical history, or site-specific constraints.
Check your herbicide application records carefully. Some products persist in soil for 12-18 months and will devastate broadleaf cover crops like clovers and vetch. If you’ve used long-residual chemicals, choose grass species for your first planting or wait until the compound breaks down. Test a small patch first rather than risking an entire field.
Timing mistakes extend beyond herbicides. Planting cover crops too early can create competition with your cash crop for water and nutrients during critical growth periods. In drought-prone regions, vigorous cover crops may deplete soil moisture your main crop needs. Conversely, waiting until after harvest might give you insufficient growing days before winter, resulting in minimal biomass and root development.
Don’t overlook equipment compatibility. Some no-till drills struggle with diverse seed mixes containing different sizes, from tiny clover seeds to large peas. Broadcasting works but requires higher seeding rates and exposes seeds to predation. Factor these logistics into your budget and timeline.
Finally, resist the urge to terminate cover crops too early just because they look messy or neighbors question the approach. Peak benefits for soil structure and nutrient cycling happen in the weeks before flowering. Premature termination sacrifices the regenerative value you’re working to build.
Step-by-Step Process for Integrating Cover Crops
Step 1: Assess Your Soil and Set Goals
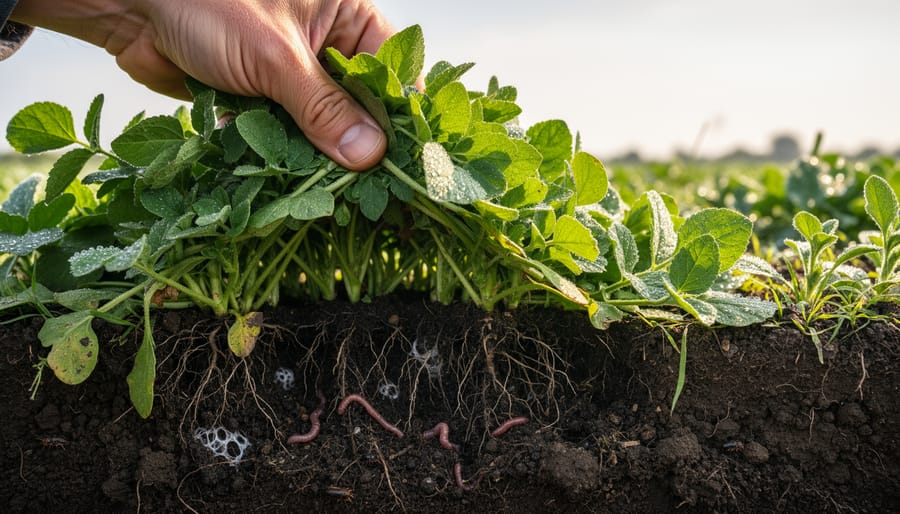
Start by taking a soil sample from multiple spots across your field, aim for at least 10-15 cores from different areas, mixed together. Send this composite sample to a lab that tests for organic matter, nutrient levels, pH, and biological activity indicators like respiration or microbial biomass. Don’t settle for a basic NPK test. You need the full picture.
While you wait for results, walk your land and note problem areas: compacted spots where water pools, eroded patches, or sections with stubborn weeds. These clues tell you what your soil needs.
When the lab report arrives, identify your top two or three deficiencies. Maybe your organic matter is below 3%, or your nitrogen is low. Write down specific, measurable goals: “Increase organic matter by 0.5% in two years” or “Add 60 pounds of nitrogen per acre through legumes.”
Your goals should match your farm’s reality. If you’re growing tomatoes, you might prioritize nitrogen fixation and weed suppression. For a pasture operation, focus on forage diversity and soil structure. Be honest about what you can manage, and start there.
Step 2: Design Your Cover Crop Mix
Start with 3-5 species that work together rather than betting everything on a single cover crop. A balanced mix should include at least one legume for nitrogen fixation, one deep-rooted plant for soil structure, and one grass for biomass.
For example: combine hairy vetch (legume), daikon radish (taproot), and cereal rye (grass). This trio delivers multiple benefits simultaneously, vetch partners well with legume rotation strategies to pump nitrogen into your soil, radish breaks up compaction while scavenging nutrients, and rye builds organic matter to naturally store carbon.
Adjust your ratios based on priority goals. Need more nitrogen? Increase legume percentage to 40-50% of your mix. Building carbon? Boost grass components. Most regenerative farmers find success with roughly 30% legumes, 40% grasses, and 30% broadleaves.
Keep seeding rates lower than conventional recommendations, about 70-80% of package rates works well. Denser isn’t better; you want plants competing just enough to develop robust root systems without choking each other out.
Step 3: Prepare and Plant Your Cover Crops
Once you’ve designed your seed mix, it’s time to get it in the ground using methods that protect the soil structure you’re working to build.
For no-till seeding, use a no-till drill that cuts narrow slots through crop residue without disturbing the entire soil profile. This preserves fungal networks and keeps carbon in place. Set your drill depth based on seed size: small seeds like clover need just a quarter-inch of soil contact, while larger legumes can go half to three-quarters of an inch deep. Make multiple passes at different angles if you’re seeding a diverse mix with varying seed sizes.
Broadcasting works well for smaller seeds and quick establishment. Spread seed by hand, with a chest-mounted broadcaster, or from an ATV spreader right after harvesting your cash crop while the soil still has moisture. Follow with light harrowing or use livestock to trample seeds into contact with soil, or time your seeding before expected rain.
Interseeding lets you establish cover crops while your cash crop is still growing, giving covers a head start. Use high-clearance equipment to broadcast seed between crop rows four to six weeks before harvest, when the canopy opens enough for light penetration but there’s still soil moisture from earlier in the season.
Step 4: Manage Growth and Termination
Monitor your cover crops weekly once they reach six inches in height. Look for flowering, which signals peak biomass and nutrient accumulation. Most cover crops perform best when terminated just before or at early flowering, maximizing carbon input while preventing unwanted reseeding.
Choose termination methods that protect soil structure and feed biology. Roller-crimping works beautifully for grains and legumes at the right stage, creating a weed-suppressing mulch that breaks down slowly. Time this carefully: rye needs to reach soft dough stage, while vetch requires 50% bloom for effective kill.
Mowing suits grasses and shorter-statured mixes, though some species may regrow and require a second pass. Set mower height at four to six inches to leave protective residue. For farms with livestock, mob grazing offers brilliant integration, trampling stems into soil contact while adding manure. Rotate animals through quickly before they overgraze or compact wet soil.
Skip tillage whenever possible. Flail mowing followed by direct planting through residue maintains soil aggregates and preserves fungal networks. If you must incorporate, wait until residue begins decomposing and use shallow cultivation only.
How to Verify Success and Plan Next Steps
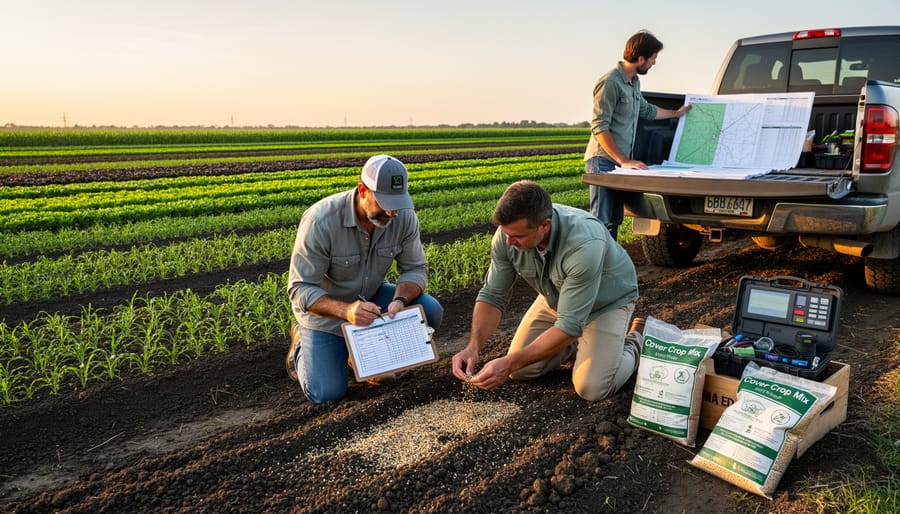
Track your cover crop success by monitoring soil health changes that reveal whether your regenerative strategy is working. Start with a simple infiltration test: pour water on bare soil versus cover-cropped areas and time how quickly it soaks in. Faster infiltration means improved soil structure and more active microbial life below the surface. Dig test pits in late spring to check root depth and density, you’re looking for a complex network that reaches 12 inches or more, breaking up compaction and feeding soil biology.
Key indicators to measure quarterly or twice per season:
- Soil aggregate stability, crumble a handful and see if it holds together without turning to dust or mud
- Earthworm activity, count worms in a one-foot cube of soil; 10 or more signals healthy biology
- Water infiltration rates, aim for one inch of water absorbed in under a minute
- Organic matter increases, annual soil tests should show gradual rises of 0.1-0.5% per year
Visual signs matter too. Look for darker soil color, a pleasant earthy smell when you dig, and fewer bare patches in spring. If your cash crops show stronger early vigor and need less supplemental fertility, your cover crops are delivering nutrients effectively. Notice whether pest pressure drops and beneficial insects increase, diverse cover crop mixes create habitat that supports natural predators.
Adjust your mix based on what you observe. If nitrogen-fixers like clover dominate too much, reduce their seeding rate next season. When grasses outcompete broadleaves, switch to a drill instead of broadcasting. Track which species thrive in your specific conditions and favor those in future blends. Many farmers expand coverage by 10-20% annually, testing new species combinations on small plots before scaling up. Link your observations to measurable outcomes like reduced erosion and enhanced carbon sequestration these prove your system is regenerating rather than just maintaining. Document everything with photos, notes and soil test records so you can refine your approach year after year.
Real Farm Success Story
When Sarah Martinez took over her family’s 15-acre CSA operation in southern Ontario three years ago, her soil was compacted, low in organic matter, and struggling to support healthy vegetable production. “I was adding compost constantly, but nothing seemed to stick,” she recalls. “The soil would go right back to being hard and lifeless within weeks.”
She started small in 2023, planting a simple mix of winter rye and crimson clover on just two acres after her fall harvest. That first season taught her the importance of timing, she waited too long to terminate the cover, and the rye competed with her early spring greens. “I lost about 30% of that first planting to slow growth,” Sarah admits. “But I learned to crimp earlier, and my second attempt was completely different.”
By 2024, Sarah expanded to a diverse seven-species blend including nitrogen-fixing legumes radishes for deep soil penetration, and buckwheat for weed suppression. She rotated this mix through different sections of her farm based on what each bed needed most. The results were measurable: soil organic matter increased from 2.1% to 3.8% in covered areas, and her tomato yields jumped 40% in beds that had hosted the winter cover crop.
“The biggest surprise was water retention,” Sarah notes. “During last summer’s drought, my cover-cropped beds stayed productive while my neighbors were irrigating twice as much.” She now dedicates nearly half her acreage to cover crops at any given time, viewing them as an essential crop rather than an afterthought.
Common Questions About Regenerative Cover Cropping
How much does it cost to start cover cropping?
Seed costs typically run $30-80 per acre depending on your mix, but you can start small with a single species like cereal rye for as little as $15-20 per acre. Many farmers find that reduced fertilizer needs in subsequent seasons offset the initial investment within two to three years.
What if my cover crops don’t establish well the first time?
Poor establishment is common in year one as you learn your timing and site conditions. Identify whether the issue was planting depth, moisture, competition from weeds, or wrong species selection, then adjust your approach rather than abandoning the practice entirely.
Can I use cover crops on just a few beds or do I need to commit my whole farm?
Start wherever makes sense for your operation, even a quarter-acre trial plot lets you learn the system and see soil benefits without overwhelming your schedule. Many CSA farmers begin with their most depleted sections or beds that won’t hold a cash crop during the off-season.
How do I time cover crops around my main planting schedule?
Plant quick-growing species like buckwheat or field peas in short windows between cash crops, and save slower biennials like clover for longer gaps. If spring planting is tight, terminate your winter cover two to three weeks early to allow residue breakdown, or use a roller-crimper to create an instant mulch you can plant directly into.
The biggest hesitation farmers express is whether cover cropping fits their current workload. The truth is that cover crops eventually reduce labor by suppressing weeds, improving soil tilth, and cutting down on fertility inputs. Your first season requires extra attention as you figure out seeding rates and termination timing, but the process becomes routine once you establish a rhythm that matches your crop rotation.
Species choice overwhelms some growers facing catalogs with dozens of options. You don’t need a ten-way mix to see results. A simple combination of one legume for nitrogen and one grass for biomass handles most regenerative goals, and you can experiment with adding brassicas or broadleaves as you gain confidence. Local farmers who’ve been cover cropping for years are often willing to share what works in your specific climate and soil type, saving you trial-and-error headaches.
Integrating cover crops into your regenerative system is more accessible than you might think, regardless of your farm’s size. Whether you’re managing two acres or two hundred, starting with a simple mix on just a portion of your land lets you learn what works for your soil and climate without overwhelming your resources or schedule.
The long-term payoff is substantial. Farmers who commit to cover cropping consistently report richer soil structure, better water retention during dry spells, and fewer pest problems within three to five years. Your soil becomes an asset that grows in value each season, building resilience against weather extremes and reducing input costs as natural fertility improves.
Don’t wait for perfect conditions or complete knowledge. Plant a trial plot this fall, observe what happens, and adjust your approach next season. The best education comes from doing.
Connect with your local CSA farms to see regenerative cover cropping in action. Many farmers welcome visitors and share their experiences freely, offering insights no textbook can match. These relationships build community knowledge and support networks that strengthen everyone’s success. Your journey toward soil regeneration starts with a single planting, and every season brings new opportunities to deepen your practice and improve your land.