Category Archives

9 Articles

Keep Your Harvest Safe: Why Packhouse Sanitation Protects Everything You Grow

Posted by darrell on
0
Operations and Logistics
Keep Your Harvest Safe: Why Packhouse Sanitation Protects Everything You Grow

Clean and sanitize all harvest containers, bins, and tools between each use with a three-step process: remove visible dirt with potable water, wash with approved food-safe detergent, then apply a sanitizing solution like diluted hydrogen peroxide or peracetic acid, allowing proper contact time before air-drying completely.

Establish dedicated zones in your packhouse to prevent cross-contamination—create separate areas for incoming dirty produce, washing and processing, and final packing, ensuring workers and equipment move in one direction only through these spaces. This simple flow pattern dramatically reduces the risk of recontaminating clean produce with field soil or pathogens.

Implement a daily vehicle cleaning schedule for any trucks or trailers transporting your harvest, focusing on removing plant debris and soil from floors, walls, and tie-down points before sanitizing surfaces that contact produce containers. Small-scale farmer Maria Chen from Vermont found that spending just 15 minutes after each delivery route cut her produce spoilage by nearly 40 percent within the first season.

Keep detailed cleaning logs for both packhouse operations and transport vehicles, recording dates, products used, and which team member completed the task. These records not only help you maintain consistency but also demonstrate your commitment to food safety when working with restaurants, farmers markets, or wholesale buyers who increasingly request documentation.

Start with one area—perhaps your harvest bins or delivery van—and master these protocols before expanding to your entire operation. Building sustainable sanitation habits takes time, but each small improvement protects your customers and strengthens your farm’s reputation for quality and reliability.

Why Sanitation Matters More Than You Think

The Farm-to-Table Risk Chain

From the moment your freshly picked lettuce leaves the field, it enters a journey where contamination risks multiply at every stop. Understanding this farm-to-table risk chain helps you protect both your customers and your farm’s reputation.

Contamination can sneak in through surprisingly simple touchpoints. Unwashed harvest bins, dirt-caked vehicle floors, or even a worker’s hands between bathroom breaks can introduce harmful bacteria. Field soil containing E. coli or Salmonella can easily transfer to clean surfaces if you’re not vigilant about your order fulfillment processes.

Your packhouse serves as the critical crossroads where produce transitions from field conditions to food-safe packaging. This is where proper washing, cooling, and sorting should happen in designated clean zones. Transport vehicles present another vulnerability point, especially if they’ve previously hauled compost, animals, or unwashed equipment.

The good news? Small-scale farmers like Maria from Green Valley Farm found that implementing simple protocols at these control points reduced contamination incidents by 90 percent. She focuses on three key areas: dedicated harvest containers that never touch the ground, daily vehicle sanitizing schedules, and clear handwashing stations at packhouse entry points. These straightforward measures create protective barriers throughout your supply chain.

What’s at Stake for CSA Farmers

For CSA farmers, the stakes around sanitation and safety extend far beyond regulatory compliance—they touch the very heart of what makes community-supported agriculture thrive. Your reputation is built on trust, and a single foodborne illness incident can undo years of relationship-building with members who’ve invested in your farm’s success.

Customer retention depends heavily on confidence in your practices. CSA members choose local farms partly because they want to know where their food comes from and how it’s handled. Demonstrating visible commitment to cleanliness in your packhouse and delivery vehicles reinforces that trust and sets you apart from conventional options.

Legal liability presents real financial risks for small operations without the insurance cushions larger farms may carry. Even unintentional contamination can result in costly recalls, medical claims, or lawsuits that could devastate a small farm’s finances. While this isn’t meant to create fear, it’s important to recognize that proper sanitation protocols protect both your customers and your livelihood.

The good news? Many CSA farmers find that implementing strong safety practices actually strengthens member loyalty. When you share your sanitation protocols through newsletters or farm tours, members appreciate the transparency and feel even more connected to their food source.

Farmer's gloved hands washing fresh leafy greens under running water in packhouse sink
Proper washing and handling of fresh produce in a clean packhouse environment is essential for food safety and customer trust.

Essential Sanitation Practices for Your Packhouse

Daily Cleaning Routines That Work

Establishing a consistent end-of-day cleaning routine protects your harvest and keeps your operation running smoothly. Start by removing all produce and debris from surfaces, then proceed with a systematic three-step process: rinse, wash, and sanitize.

Begin by rinsing surfaces and reusable bins and crates with cool water to remove soil and organic matter. Next, wash using food-safe detergents specifically approved for organic operations. Look for products certified by OMRI or similar organizations that won’t leave harmful residues on food-contact surfaces.

For sanitizing, hydrogen peroxide-based solutions or diluted vinegar work well for organic farms. Mix one tablespoon of food-grade hydrogen peroxide per gallon of water, or use a vinegar solution at 5% concentration. Apply thoroughly to all surfaces, letting it sit for the recommended contact time, usually 30 seconds to one minute.

Pay special attention to high-touch areas like door handles, scales, and tool handles. Clean and sanitize harvest knives, pruners, and sorting equipment daily, storing them in designated clean zones.

Water management matters too. Use spray bottles instead of running water when possible to conserve resources, and ensure proper drainage to prevent standing water where bacteria can multiply. Sarah from Green Valley Farm shares: “Since implementing our daily cleaning checklist, we’ve seen zero quality issues and our inspections go smoothly. It takes just 20 minutes but makes all the difference.”

Farmer cleaning stainless steel work surface in packhouse with spray bottle and cloth
Daily sanitation routines and proper cleaning practices ensure food safety standards are maintained throughout the harvest season.

Deep Cleaning Schedules

While daily cleaning tackles immediate concerns, deep cleaning routines address the buildup that happens over time in places your quick wipe-down might miss. Schedule weekly intensive cleaning sessions to scrub floors with approved sanitizers, paying special attention to corners and floor drains where organic matter loves to hide. Monthly deep cleans should extend upward to walls and ceiling areas, using extension tools to reach high corners and light fixtures where dust and debris accumulate.

Don’t forget your cooling systems and ventilation areas. These spaces can harbor mold and bacteria if neglected, potentially contaminating your carefully harvested produce. Remove and clean fan guards, inspect ductwork, and wipe down refrigeration unit interiors monthly.

Create a rotating schedule that tackles different zones each week so nothing gets overlooked. Sarah Martinez, who runs a small CSA operation in Vermont, color-codes her cleaning calendar and involves her whole team in monthly deep cleaning days. “We make it a group effort with music and snacks,” she shares. “Everyone knows which area they’re responsible for, and we’ve never had a food safety issue.” Keep detailed logs of your deep cleaning activities, noting any problem areas that need extra attention or repairs.

Personal Hygiene Standards for Workers

Your workers are your first line of defense in maintaining food safety, so establishing clear personal hygiene standards creates a foundation for clean, safe produce. Start by installing handwashing stations at strategic points—near restrooms, at packhouse entrances, and wherever workers handle fresh produce. Stock these stations with soap, clean water, paper towels, and visible signage reminding everyone when to wash their hands.

Protective clothing makes a real difference in preventing contamination. Provide clean aprons or smocks, hair nets or caps, and food-safe gloves when appropriate. Many successful small farms have found that designating specific clothing for packhouse work—kept separate from field clothes—significantly reduces dirt and debris transfer.

Your illness policy should be straightforward: anyone experiencing symptoms like vomiting, diarrhea, or open wounds shouldn’t handle produce. This isn’t about being harsh; it’s about protecting your customers and your farm’s reputation. One organic CSA operator shared how implementing a simple “stay home when sick” policy with paid sick time actually reduced overall illness among staff and prevented potential food safety issues.

Building a culture of cleanliness starts with training and leading by example. Hold brief seasonal refreshers on hygiene practices, explain the “why” behind each rule, and celebrate when your team maintains high standards. When everyone understands they’re protecting families who trust your farm, personal hygiene becomes a shared value rather than just another requirement.

Clean interior of delivery van with organized crates of fresh vegetables
Well-maintained delivery vehicles with clean interiors protect produce quality during transport to CSA members and farmers markets.

Keeping Your Delivery Vehicles Clean and Safe

Before and After Each Run

Establishing consistent cleaning routines between deliveries protects both your products and customers while maintaining the integrity of your organic operation. These quick protocols take just minutes but make a significant difference in preventing cross-contamination.

Start each delivery day by sweeping vehicle floors and cargo areas to remove dirt, debris, and plant material from previous loads. Follow with a damp wipe-down of all contact surfaces using approved sanitizing solutions. Pay special attention to door handles, tailgates, and any shelving where produce containers rest.

Between stops, conduct visual inspections of your cargo area. Check for spills, damaged produce, or accumulated moisture that could harbor bacteria. Keep a small cleaning kit in your vehicle with microfiber cloths, approved sanitizer spray, and a handheld broom for quick touch-ups. This practice becomes especially important when optimizing delivery route efficiency, as more frequent stops mean more opportunities for contamination.

After completing your route, perform a thorough end-of-day cleaning. Remove all containers, sweep thoroughly, and sanitize surfaces. Check floor mats for wear and moisture accumulation, as these can become breeding grounds for pathogens. Document your cleaning activities in a simple logbook to maintain good safety records and identify patterns that might need adjustment in your protocols.

Temperature Control and Air Quality

Clean vehicles and properly controlled temperatures work hand-in-hand when it comes to keeping produce fresh during transport. A sanitized delivery vehicle is your first line of defense, but temperature and airflow deserve equal attention.

Start by ensuring your transport vehicle’s interior surfaces are free from dirt, spills, and residues that can harbor bacteria. These contaminants not only pose safety risks but can also affect air quality inside the cargo area. Regular cleaning with food-safe sanitizers creates the foundation for maintaining produce quality.

Proper ventilation prevents moisture buildup and ethylene gas accumulation, both of which accelerate spoilage. Ethylene-sensitive crops like leafy greens and broccoli particularly benefit from good air circulation. Consider installing battery-powered fans in non-refrigerated vehicles for short hauls.

Temperature monitoring is equally crucial. Invest in simple thermometers to track conditions throughout your route. Many small-scale farmers successfully use insulated coolers with ice packs for deliveries under two hours. Sarah Chen, who runs a 5-acre organic farm in Ontario, shares this tip: “I keep frozen water bottles in my delivery van year-round. They maintain cool temperatures in summer and cost nothing to prepare.”

Remember, consistent temperatures matter more than perfect temperatures. Fluctuations stress produce and shorten shelf life, so plan efficient delivery routes that minimize exposure time.

Dealing with Spills and Organic Residue

When accidents happen during transport, quick action prevents contamination and keeps your vehicle fresh. First, remove any damaged produce immediately to prevent spreading bacteria or mold to healthy items. Keep a spill kit in your vehicle containing absorbent towels, food-safe sanitizer spray, and disposable gloves.

For liquid spills from leaking produce, blot the area thoroughly with absorbent materials, then clean with a mild soap solution followed by a food-safe sanitizing spray. Allow surfaces to air dry completely before loading new produce. Sarah, a CSA farmer in Vermont, shares her tip: “I line my crates with absorbent paper during berry season. It catches any juice before it reaches the truck bed.”

Combat odors by sprinkling baking soda on affected areas after cleaning, letting it sit for 15 minutes, then vacuuming. Between deliveries, prop doors open to promote air circulation and prevent moisture buildup that encourages bacterial growth. Regular preventive cleaning is easier than dealing with entrenched odors or contamination.

Choosing the Right Cleaning Products and Tools

Organic-Approved Sanitizing Solutions

When transitioning to organic-approved sanitizing solutions, you’ll discover several effective options that meet certification standards while keeping your produce safe. Hydrogen peroxide stands out as a powerhouse cleaner, breaking down into water and oxygen without leaving harmful residues. Many certified organic farms use food-grade hydrogen peroxide at 3-5% concentrations for sanitizing surfaces and equipment between harvest batches.

Organic acids like citric acid and acetic acid (vinegar-based solutions) offer another reliable pathway for sanitation. These natural antimicrobials effectively reduce bacterial loads on contact surfaces while remaining completely acceptable under organic protocols. Sarah Martinez, who operates a certified organic CSA in Vermont, shares that switching to citric acid solutions not only met her safety requirements but also eliminated harsh chemical odors in her packhouse, creating a more pleasant environment for her team.

Peracetic acid, though more technical sounding, is actually a combination of acetic acid and hydrogen peroxide that biodegrades quickly and works exceptionally well in cold water conditions. This makes it particularly valuable during early season harvests when water temperatures are low.

When selecting products, always verify OMRI listing or similar organic certification to ensure compliance. Remember that proper concentration and contact time matter more than product choice, so follow manufacturer guidelines carefully for maximum effectiveness.

Essential Equipment for Effective Cleaning

Having the right tools makes sanitation faster and more effective, especially when you’re managing a busy harvest season. Start with a variety of brushes—stiff-bristled scrub brushes for hard surfaces, soft brushes for delicate equipment, and bottle brushes for reaching inside containers. A quality pressure washer is worth the investment, allowing you to blast away debris from crates, bins, and vehicle beds in minutes rather than hours of manual scrubbing.

Dedicated sanitizing bins in different sizes help you organize your cleaning workflow. Use color-coded bins to prevent cross-contamination—one color for pre-wash items, another for sanitized equipment. Many small farmers swear by three-bin systems: wash, rinse, and sanitize.

Don’t overlook smaller essentials like spray bottles for spot-cleaning, microfiber cloths that won’t leave lint behind, and rubber gloves in multiple sizes for your team. A simple squeegee helps dry surfaces quickly, reducing slip hazards and preventing water spots that can harbor bacteria.

Sarah, who runs a CSA operation in Vermont, shares this tip: “I keep a cleaning caddy in both my packhouse and truck. Everything I need is portable and ready to go, making it easy to maintain standards even during hectic harvest days.”

Creating Your Sanitation Action Plan

Record-Keeping Made Simple

Good record-keeping might seem like extra paperwork, but it’s actually your best friend when it comes to protecting your farm and proving your commitment to safety. Documentation creates a clear trail of your cleaning activities, which becomes invaluable during organic certifications or food safety audits. Think of it as your farm’s safety story, showing inspectors and customers that you take hygiene seriously.

The good news? Your system doesn’t need to be complicated. Many successful farmers use simple daily checklists posted right in their packhouse, where workers can initial each cleaning task as they complete it. Marta, who runs a thriving CSA in Ontario, keeps a binder with cleaning logs for each week alongside her food traceability records. She notes the date, task completed, products used, and who did the cleaning. This five-minute daily habit saved her hours during her organic certification renewal.

Digital tools can help too. Free smartphone apps or simple spreadsheets work wonderfully for tracking sanitizing schedules and product inventory. The key is consistency—choose whatever method you’ll actually use regularly. Remember, these records aren’t just bureaucratic requirements; they’re proof of your dedication to delivering safe, clean produce to the families who trust you.

Real Stories from the Field

When Maria Santos took over her family’s 5-acre CSA operation in Vermont, she inherited outdated harvest bins and a haphazard cleaning routine. Customer complaints about wilted greens prompted her to overhaul the entire system. She invested in food-grade plastic bins, established a three-step washing protocol for all harvest containers, and designated separate areas for dirty and clean equipment. Within two months, member retention jumped from 68% to 94%. “It wasn’t just about cleaner produce,” Maria explains. “Members could see we took their health seriously, and that built incredible trust.”

Across the country in Oregon, James Chen faced a different challenge. His farmers market customers loved his organic tomatoes until a surprise health inspection revealed his delivery van doubled as his family vehicle on weekends. The wake-up call led James to purchase a used refrigerated van exclusively for farm use and implement daily sanitation checklists. He now proudly displays his inspection scores at his market booth. Sales increased 40% the following season, and he credits transparency about his improved practices.

For Katie Brewster in North Carolina, the game-changer was simply organizing her wash station. She installed separate sinks for different crop types and color-coded all cleaning tools. What seemed like a small adjustment dramatically reduced cross-contamination risks and cut her prep time by nearly half. Her restaurant clients noticed the difference immediately, with chefs commenting on consistently higher quality greens.

These farmers prove that improving sanitation doesn’t require massive budgets. Start with one area, document your progress, and share your commitment with customers. The investment in proper practices pays dividends in customer loyalty and peace of mind.

Investing in sanitation and safety isn’t just about meeting regulations—it’s about protecting the future of your farm and honoring the trust your community places in you. Every cleaning protocol you implement and every safety practice you establish contributes to the longevity of your operation and the wellbeing of those who enjoy your harvest.

The journey toward excellent sanitation doesn’t require perfection from day one. Start with small, manageable improvements: establishing a weekly cleaning schedule, organizing your washing area more efficiently, or simply documenting what you’re already doing well. These incremental steps build momentum and create lasting habits that strengthen your entire operation.

Remember, the care you put into maintaining clean packhouses and vehicles reflects the same dedication you bring to nurturing your crops from seed to harvest. Your CSA members choose local organic produce because they value knowing where their food comes from and trusting the hands that grow it. When you prioritize sanitation and safety, you’re not just protecting produce—you’re safeguarding relationships, building community confidence, and ensuring that your farm continues to thrive for seasons to come. Your commitment to these practices is an investment in both your harvest and your legacy.

How Smart Planning Transforms Your CSA Farm from Chaos to Clarity

Posted by darrell on
0
Operations and Logistics
How Smart Planning Transforms Your CSA Farm from Chaos to Clarity

Map your harvest cycles to member demand by tracking which vegetables your CSA members actually consume each week, then adjust planting schedules two to three weeks ahead to prevent the overflow of kale in October that nobody wants. Create a simple spreadsheet linking your seed orders, transplant dates, and expected harvest windows to your weekly box commitments—this synchronized planning reduces waste by up to 40% on small farms.

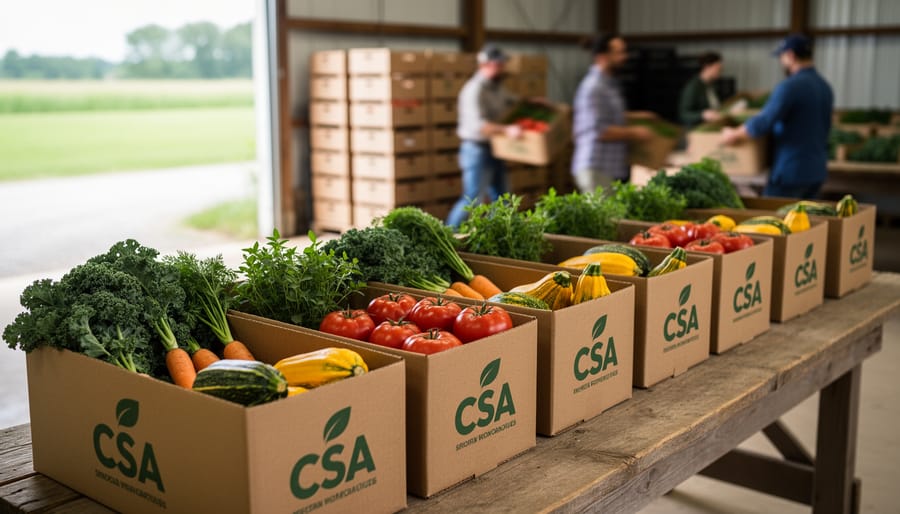
Coordinate your volunteer workforce and harvest crew by establishing a weekly rhythm where Wednesday assessments determine Friday harvest needs and Monday box assembly requirements. When Sarah Chen implemented this three-day planning cycle at Riverbend Farm, she eliminated the chaos of last-minute scrambling and reduced unharvested produce waste from 25% to under 8%. The key is matching labor availability to actual crop readiness rather than hoping everything aligns on distribution day.

Balance your cash flow against seasonal production by pre-selling membership shares in winter, purchasing seeds and amendments in early spring, and maintaining a reserve fund equal to six weeks of operating expenses. This integrated financial approach—linking money in, production costs, and distribution timing—prevents the common CSA trap of being crop-rich but cash-poor during peak season.

Connect procurement decisions directly to your distribution model by ordering boxes, bags, and packaging supplies based on confirmed member counts plus 10% buffer, not optimistic projections. Sync these orders with your planting calendar so materials arrive two weeks before first harvest, ensuring your supply chain flows smoothly from seed to member doorstep without expensive rush orders or storage headaches.

What IBP Supply Chain Actually Means for Your CSA Farm

Overhead view of colorful fresh organic vegetables in wooden CSA harvest box
A well-planned CSA box showcases the variety and quality that comes from integrated business planning in farm operations.

The Three Pillars of IBP in CSA Operations

Integrated Business Planning (IBP) might sound like corporate speak, but for CSA operations, it’s really about connecting three essential elements that keep your farm running smoothly: understanding what your members want, knowing what you can grow, and getting everything delivered efficiently.

Let’s start with demand planning. This means getting to know your members’ preferences and consumption patterns. Are your shareholders asking for more leafy greens? Do families with kids prefer cherry tomatoes over beefsteak varieties? By tracking member feedback through surveys, share customization requests, and pickup conversations, you can predict what produce will be most valued. This information helps you plan your planting schedules and variety selections months in advance, reducing waste and increasing member satisfaction.

Supply planning is where your agricultural expertise shines. Unlike typical supply chains, CSA farms work with nature’s calendar. You’ll need to coordinate seasonal crop availability with your demand forecasts. This means succession planting of popular items like lettuce, managing storage crops for winter shares, and building relationships with neighboring farmers to fill gaps in your offerings. Consider implementing smart storage solutions to extend the availability of root vegetables and winter squash, bridging the gap between harvest and distribution.

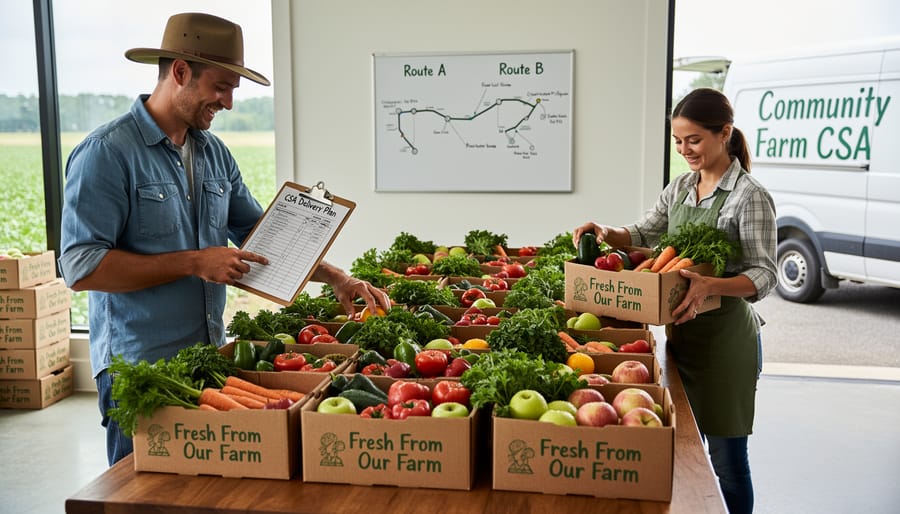
Finally, logistics coordination ties everything together. This involves planning efficient delivery routes for drop-off points, scheduling pickup times that work for members, and coordinating volunteer helpers during peak harvest. Creating a master calendar that shows when crops mature, when boxes need packing, and when deliveries occur helps prevent bottlenecks. One Ontario CSA farmer shared how mapping member locations helped reduce delivery time by 30 percent while keeping produce fresher.

Why Traditional Planning Falls Short for CSA Farms

If you’ve been running a CSA farm for even a season, you know the familiar sinking feeling. It’s early March, and you’re staring at boxes of heirloom tomato seeds—way more than you’ll ever need—because last year you ran out mid-season. Or perhaps it’s July, and your kale harvest came in two weeks earlier than planned, leaving you scrambling to adjust member boxes while summer squash sits disappointingly small on the vine.

These aren’t just minor hiccups. They’re the result of traditional planning methods that simply weren’t designed for the beautiful complexity of CSA farming. Most farmers rely on spreadsheets, gut instinct, and last year’s notes scribbled in margins. While this works to a degree, it leaves gaps that quickly become costly problems.

Overordering happens when we plan defensively, remembering that one disastrous season when blight took half the crop. Underestimating harvest timing occurs because weather patterns shift, microclimates surprise us, and succession planting schedules don’t always align with real-world conditions. Then there’s the distribution challenge—members go on vacation, request delivery changes, or want to pause their shares, and suddenly your carefully planned harvest quantities don’t match actual demand.

Managing relationships with multiple local suppliers adds another layer of complexity. Your seed company, compost provider, packaging supplier, and farmers market colleagues all operate on different timelines and minimums. Coordinating these relationships while tending crops and communicating with members often means something falls through the cracks.

The heart of the issue? Traditional planning treats farming as linear and predictable, when CSA operations are actually dynamic, interconnected systems where one change ripples through everything else. You deserve better tools that honor this complexity.

Building Your CSA’s Procurement Strategy with IBP

Farmer planning crop production while examining seedlings in garden rows
Modern CSA farmers combine traditional growing knowledge with strategic planning tools to optimize their operations.

Seasonal Forecasting That Actually Works

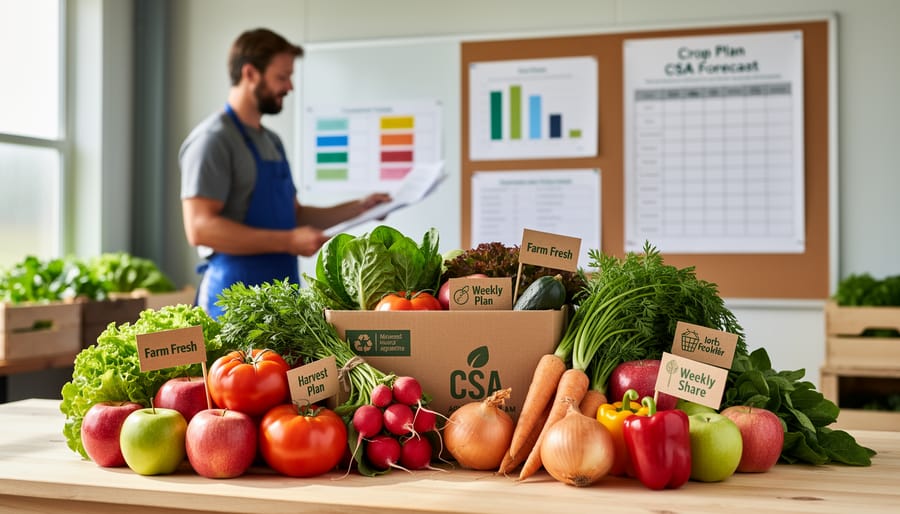
Predicting member demand doesn’t require a crystal ball—just smart use of your historical data and some agricultural intuition. Start by analyzing your past three seasons of harvest records and member orders. Notice patterns like which crops had surplus and which ran short. Sarah Martinez from Harvest Moon CSA tracks every weekly harvest alongside member preferences, discovering that her tomato demand spikes in late July, allowing her to plant accordingly.

Crop rotation planning plays a crucial role in forecasting too. Map out your rotation schedule and align it with member expectations. If lettuce follows your spring peas, factor that succession into your weekly share planning. This prevents those awkward gaps where you’re scrambling to fill boxes with purchased produce.

Building buffer inventory is your safety net against Mother Nature’s unpredictability. Plan for 15-20 percent overproduction on stable crops like root vegetables and winter squash. These store well and can compensate when weather damages your more delicate offerings. Consider investing in proper storage infrastructure, including reusable bins and crates that protect your buffer inventory.

Weather tracking apps combined with historical climate data help anticipate challenging seasons. When forecasts predict extended drought or excessive rain, adjust your planting density and variety selection accordingly. Keep detailed notes each season—your own farm’s data becomes your most valuable forecasting tool, helping you move from reactive scrambling to proactive planning that keeps members happy and reduces waste.

Strengthening Supplier Relationships

Building strong relationships with your suppliers is the backbone of successful Integrated Business Planning in your CSA operation. Start by establishing open communication channels with your local organic seed companies and neighboring farms. Set up regular check-in meetings, whether monthly or seasonal, to discuss upcoming needs, potential challenges, and harvest projections. This proactive approach helps everyone stay aligned and reduces last-minute scrambles.

Create shared planning calendars with your key suppliers that outline planting schedules, expected delivery dates, and quantity requirements. This transparency allows seed companies to ensure they have adequate inventory when you need it, and neighboring farms can coordinate their growing schedules to fill gaps in your production. One successful CSA farmer in Vermont implemented a digital shared spreadsheet system with three partner farms, resulting in a 40 percent reduction in supply delays.

Consider establishing formal agreements that outline quality standards, delivery expectations, and communication protocols. These don’t need to be overly complex, just clear enough that everyone understands their commitments. Include specific details about organic certification requirements, packaging preferences, and acceptable variance in order quantities.

Don’t forget the human element. Visit your suppliers’ farms, attend local agricultural events together, and celebrate shared successes. These personal connections create goodwill that becomes invaluable when unexpected challenges arise, like weather disruptions or pest outbreaks. Strong supplier relationships built on mutual respect and clear IBP coordination ensure your members receive consistent, high-quality organic produce throughout the season.

Streamlining Your Distribution and Logistics Operations

Creating Flexible Distribution Plans

Flexibility is the cornerstone of successful CSA distribution, especially when Mother Nature has other plans. Start by establishing multiple pickup windows throughout the week rather than a single rigid timeframe. This approach accommodates member schedules while giving you breathing room when unexpected weather delays harvesting.

Consider creating tiered distribution points based on member density. Community hubs like farmers markets, local businesses, or member homes can serve as satellite locations, reducing individual farm trips and building community connections. When implementing this strategy alongside optimizing delivery routes, you’ll save precious hours during peak season.

Communication is everything when plans shift. Develop a simple notification system using email, text messages, or a members-only app to announce changes quickly. Be transparent about why adjustments happen—members appreciate understanding the realities of farming. One Vermont farmer shares boxes adjusted for unexpected frost damage by explaining the situation and offering recipe suggestions for available crops, turning potential disappointment into an educational moment.

Build buffer stock arrangements with neighboring farms for crop shortages, creating a support network that benefits everyone while maintaining your organic standards.

Real-World Success: How Green Valley Farm Transformed Their Operations

When Sarah Chen took over Green Valley Farm five years ago, she inherited a beautiful 15-acre property and a passionate vision for connecting her community with fresh, organic produce. What she didn’t anticipate was the chaos that came with managing a 120-member CSA operation.

“I was constantly scrambling,” Sarah recalls. “We’d have gorgeous tomatoes rotting because I planted too many, while members complained about not getting enough greens because I underestimated demand. My cooler was a disaster, and I was working 80-hour weeks just trying to keep up.”

Sound familiar? Sarah’s challenges mirror what many small CSA farmers face: the juggling act of planning what to grow, coordinating harvests, and delivering consistent weekly boxes without breaking the bank or your back.

The turning point came when Sarah started implementing some straightforward organizational systems. First, she created a simple planning calendar that connected three critical pieces: what members wanted based on surveys and past preferences, what would actually grow well during each season, and what resources she had available like labor, water, and field space.

“I started treating my farm like the business it is, without losing the heart of it,” she explains. She began tracking which crops members raved about and which vegetables consistently ended up in the compost bin at pickup sites. This data informed her planting decisions for the following season.

Sarah also established weekly planning sessions every Sunday evening. She’d review the upcoming week’s harvest schedule, check her inventory, and coordinate with her two part-time workers. This simple habit eliminated the morning panic of not knowing what needed picking or packing.

The results speak volumes. Within two years, Green Valley reduced food waste by 40 percent. Member retention jumped from 65 to 88 percent, largely because boxes became more consistent and aligned with what people actually wanted to eat. Perhaps most importantly, Sarah’s profit margins improved by 30 percent, allowing her to pay workers better wages and finally take a day off each week.

“I’m not working harder; I’m working smarter,” Sarah says. “And my members notice the difference. They’re getting better produce, more variety, and they see that I’m sustainable in more ways than one, including financially and personally.”

CSA farmer distributing fresh produce to members at farm pickup location
Efficient distribution planning ensures CSA members receive fresh, quality produce while building strong farm-community relationships.

Getting Started: Simple Steps to Integrate IBP into Your CSA

Tools and Resources for Small-Scale Operations

Getting started with integrated business planning doesn’t require expensive enterprise software or a degree in supply chain management. Many CSA farmers successfully coordinate their operations using simple, practical tools that fit their budget and technical comfort level.

Start with what you already have: spreadsheets. Google Sheets or Excel can handle inventory tracking, harvest planning, and member distribution lists effectively. Create separate tabs for crop planning timelines, expected yields, and weekly harvest projections. The beauty of spreadsheets is their flexibility—you can customize them to match your farm’s unique rhythm and crops.

For farmers ready to step up, affordable farm management software like Tend, Farmbrite, or Local Line offers CSA-specific features without overwhelming complexity. These platforms typically range from free to under $50 monthly and help automate member communications, track harvest quantities, and manage subscription renewals. Take advantage of free trials to find what feels intuitive for your operation.

Don’t overlook community resources either. Many agricultural extension offices offer free workshops on farm business planning, and connecting with other CSA farmers through local farming networks can provide invaluable shared knowledge. One Vermont farmer I spoke with credits her farm’s improved efficiency to a simple planning template she discovered at a county farming cooperative meeting.

Remember, the goal isn’t perfect software—it’s having systems that help you make better decisions about what to plant, when to harvest, and how to communicate with your members. Start simple, track what matters most to your operation, and adjust as you grow.

If you’ve been worried that Integrated Business Planning sounds too corporate for your CSA farm, here’s the truth: IBP isn’t about turning your farm into a soulless operation. It’s simply about bringing intention and coordination to the beautiful chaos that is community-supported agriculture. You’re already doing much of this work—checking weather forecasts before planting, estimating harvest quantities for your members, coordinating delivery schedules. IBP just gives you a framework to do it more effectively.

The best part? You don’t need to overhaul everything overnight. Start small. Maybe this season, you create a simple spreadsheet connecting your planting calendar with member preferences. Next season, you might add a basic inventory tracking system. Small steps compound into significant improvements over time.

Remember that sustainable farming and smart planning aren’t opposites—they’re partners. When you reduce waste through better forecasting, coordinate your harvests more efficiently, and communicate clearly with your members, you’re actually strengthening the sustainable values that drew you to CSA farming in the first place. You’re honoring the land, your labor, and your community’s investment in local food.

Ready to take the next step? We’d love to hear about your planning challenges and victories. What systems are working on your farm? Where do you struggle with coordination? Share your experiences in the comments below, or explore more resources on sustainable farm management. Your journey toward more intentional farming operations starts with a single, thoughtful step.

How Food Traceability Protects Your CSA Members (And Your Farm)

Posted by darrell on
0
Operations and Logistics
How Food Traceability Protects Your CSA Members (And Your Farm)

Track every harvest from seed to delivery by recording planting dates, variety names, and field locations in a simple notebook or spreadsheet. When something goes wrong—a foodborne illness report or customer complaint—you’ll pinpoint the exact source within minutes instead of days, protecting both your members and your farm’s reputation.

Document your washing and packing procedures with timestamps and the names of everyone who handled the produce. This creates accountability and helps identify where contamination might occur. Sarah Martinez, who runs Greenfield CSA in Vermont, discovered cross-contamination in her wash station this way, preventing a potential outbreak among her 85 member families.

Label harvest containers with field codes and picking dates using waterproof markers or tags. This low-cost system lets you trace any item back to its origin without expensive software. If a member reports wilted lettuce, you’ll know immediately whether it came from the shaded north field or the sun-exposed south plot, helping you adjust future harvests.

Store your records for at least two years, even if it’s just photos of your field notes on your phone. Food safety investigators and insurance companies expect documentation, and these simple records demonstrate your commitment to transparency. For CSA operations, traceability isn’t just regulatory compliance—it’s a promise to members that you know exactly where their food comes from and can verify its safety journey from soil to their kitchen table.

This foundation of trust strengthens the farmer-member relationship that makes Community Supported Agriculture thrive, turning food safety from an obligation into a competitive advantage.

What Food Traceability Really Means for Your CSA

Farmer holding wooden crate of fresh harvested vegetables in CSA farm field
CSA farmers track vegetables from harvest to member delivery to ensure food safety and transparency.

The Journey from Field to Member

Picture this: On Monday morning, Sarah harvests crisp lettuce from Field B at sunrise, immediately logging the harvest into her simple tracking system. Each bunch gets a harvest date label before moving to the wash station, where she records the cleaning time and water source used. The lettuce then enters the cooler, tagged with its field location and pack date.

By Wednesday, those same greens arrive in your CSA box with a card showing exactly where they grew and when they were picked. If a member ever has a question or concern, Sarah can trace that specific lettuce back through every step in minutes, not days.

This journey has five critical touchpoints: planting and field records, harvest documentation, post-harvest handling, storage conditions, and distribution. At each stage, simple notes create a safety net. When small-scale farmer Miguel discovered potential irrigation issues last season, his tracking system helped him identify and notify only the affected members within hours. That’s the power of knowing your food’s story from soil to table, building trust through transparency.

Why Small Farms Need Different Solutions

Large-scale industrial operations and small CSA farms operate in completely different worlds, and their traceability needs reflect that reality. While big producers focus heavily on meeting regulatory requirements and managing complex distribution networks, CSA farms thrive on something more fundamental: direct relationships with their members.

For small farms, traceability isn’t just about documenting where food has been—it’s about strengthening the trust that already exists between farmer and consumer. When Sarah, a third-generation farmer running a 10-acre CSA in Vermont, implemented her traceability system, she found it actually deepened member engagement. “People loved seeing exactly which field their carrots came from and when they were harvested,” she shares. “It became a conversation starter at pickup, not just paperwork.”

This relationship-centered approach means CSA traceability programs can be simpler and more personal than corporate systems. Instead of scanning barcodes through multiple warehouses, you’re creating transparent records that tell your farm’s story. The goal isn’t passing audits—it’s showing your members the care and attention behind every harvest while maintaining practical food safety standards that protect everyone involved.

The Real Risks CSA Farms Face Without Traceability

When a Member Gets Sick

Picture this: One of your CSA members calls on a Tuesday morning with concerning news—they experienced food poisoning after Sunday’s dinner. Thanks to your traceability program, you can immediately trace the produce in their box back to specific harvest dates and field locations.

Within an hour, you’ve identified that their lettuce came from Field B, harvested on Friday afternoon. You quickly check your records and discover five other members received lettuce from the same batch. A prompt call to those families prevents potential illness, and you temporarily pull produce from that field while investigating the issue.

This real-world scenario shows traceability’s true value. Without detailed records, you’d face uncertainty about which members might be at risk and where the problem originated. Instead, your documentation allows swift, targeted action that protects your community while minimizing waste.

One small-scale farmer in Vermont shared how their simple tracking system—just harvest logs and member distribution lists—helped them identify contaminated washing water as the culprit when a member reported illness. They fixed the issue immediately, maintained member trust through transparency, and avoided a widespread problem. Your traceability program isn’t just paperwork; it’s your community’s safety net.

Protecting Your Farm’s Reputation

When questions arise about food safety, your traceability records become your farm’s best defense. Think of documentation as your insurance policy—it demonstrates that you’ve taken every reasonable precaution to keep your members safe and their food secure.

Imagine this scenario: A member calls concerned about potential contamination they heard about on the news. With solid traceability records, you can quickly check your sources, identify exactly which batches were delivered to whom, and provide reassuring answers within hours. This rapid response shows professionalism and builds confidence that you’re managing your operation responsibly.

Sarah Martinez, who runs a 75-member CSA in Vermont, experienced this firsthand when a regional spinach recall made headlines. “My members were understandably worried,” she recalls. “Because I could immediately trace my spinach to a completely different supplier and show them my washing and handling logs, everyone felt reassured. Several members later told me the incident actually strengthened their trust in our farm.”

Your records prove due diligence if regulatory agencies ever investigate an incident. They show you’re following best practices, maintaining proper storage temperatures, and sourcing from reliable suppliers. This documentation protects both your legal standing and your community relationships.

Beyond crisis management, transparent traceability practices demonstrate your commitment to member safety year-round. Consider sharing simplified summaries of your tracking system in newsletters or farm tours. When members understand the care behind their food, they become your strongest advocates, helping protect and enhance your farm’s reputation through word-of-mouth recommendations.

Building Your CSA Food Traceability Program Step-by-Step

Start with What You Already Track

Good news—you probably already have the foundation for a solid traceability program! Most CSA farmers keep planting records, harvest logs, and distribution lists as part of their regular operations. These simple documents are your building blocks.

Start by gathering what you’re already tracking. Your planting calendar that notes when you seeded those heirloom tomatoes? That’s traceability data. The clipboard where you jot down harvest dates and quantities? Perfect. Even basic spreadsheets listing which members received produce from specific beds can become invaluable tracking tools.

The key is organizing this information so you can connect the dots from field to member. One successful farmer I know simply started dating her harvest baskets and keeping a quick log of which beds she picked from each morning. When a member had a question about their produce, she could trace it back within minutes.

You don’t need fancy software or complicated systems right away. Begin with your current records, add a few consistent details like bed numbers or planting dates, and you’ll be surprised how much traceability you’ve already built into your daily routine.

Creating Simple Tracking Systems

Starting a traceability system doesn’t require expensive software or complicated processes. The key is finding methods that fit naturally into your farm routine and actually get used consistently.

Begin with batch numbering—a simple yet powerful tool. Assign each harvest a unique identifier, like “TOM-071524” for tomatoes picked on July 15, 2024. Write this code on your harvest board and record where the produce goes. This creates an instant connection between field and customer if questions arise later.

Harvest date labels are equally straightforward. Use waterproof markers on washable harvest bins and crates, or invest in a small label maker for professional-looking tags. Many successful CSA farmers keep a basic harvest log—just a notebook where they jot down what was picked, from which beds, and any notable observations like weather conditions.

For share box documentation, maintain a weekly record of what went into each box. A simple spreadsheet works perfectly, listing the date, box contents, and batch numbers. Some farms photograph their packed boxes as visual records—quick, easy, and surprisingly helpful.

Digital options include free apps like Google Sheets for cloud-based tracking accessible from your phone in the field, or affordable farm management software that grows with your operation. Even a dedicated email folder where you forward notes to yourself creates a searchable timeline.

The best system? The one you’ll actually use every week. Start simple, stay consistent, and add complexity only as needed.

Farmer labeling vegetable harvest bin with date and batch information
Simple labeling systems help CSA farms maintain accurate records without expensive technology.

Training Your Farm Team

Getting everyone on your farm invested in traceability doesn’t have to feel like pulling weeds on a hot day. Start by explaining the “why” behind tracking—share how one small farm avoided a costly recall because their records quickly proved their produce wasn’t involved in a regional contamination scare. Real stories resonate with people.

Make the system foolproof by keeping it simple. Provide laminated quick-reference cards that volunteers can clip to their belts, showing exactly what information to record and where. Create a central logging station with clearly labeled bins, clipboards, and harvest sheets that are hard to mess up.

Schedule a relaxed training session during a slower farm day. Walk through each step together, from field to cooler, letting team members practice with real scenarios. Consider appointing a “traceability champion” among your regular volunteers—someone enthusiastic who can answer questions and maintain consistency when you’re juggling other farm tasks.

Celebrate wins along the way. When your team completes their first month of flawless record-keeping, acknowledge their effort with a farm lunch or early harvest shares. Positive reinforcement transforms traceability from a chore into a source of pride, showing your crew they’re protecting both customers and the farm’s reputation.

Essential Records Every CSA Should Keep

Pre-Harvest Documentation

Think of pre-harvest documentation as your farm’s memory bank—it captures the story of each crop from the very beginning. Start by recording your seed sources, whether you’re purchasing certified organic seeds from trusted suppliers or saving seeds from previous harvests. Note the variety names and lot numbers when available, as this information becomes crucial if questions arise later.

Document planting dates for each bed or field section. This simple practice helps you track crop timing and connects harvest dates back to specific growing periods. Many successful CSA farmers use garden journals or simple spreadsheets to keep this information organized and accessible.

Your field location records should identify where each crop grows, using a numbering system or map that works for your farm’s layout. Even a hand-drawn map with labeled beds works perfectly for smaller operations.

Recording amendments and inputs is equally important. Track what you add to your soil—compost, cover crops, organic fertilizers—along with application dates and quantities. This creates a complete picture of your growing practices and demonstrates your commitment to organic methods. Keep receipts and product labels from any purchased inputs, as these verify your organic compliance and provide product traceability if needed.

Harvest and Post-Harvest Tracking

Once your beautiful produce is picked, the real detective work begins! Recording harvest dates isn’t just about checking boxes—it’s your safety net if questions arise down the road. At Green Meadow Farm, they discovered this firsthand when a member asked about their tomatoes’ picking date; their simple harvest log provided the answer in seconds, building trust instantly.

Start by documenting who harvested each crop and when. Include handler names throughout the process—from field to wash station to packing shed. This creates a clear chain of responsibility that protects both you and your members. Many successful CSA farmers use basic smartphones to snap photos of harvest batches with date stamps, making record-keeping effortless.

Washing procedures deserve special attention in your storage conditions documentation. Note water sources, sanitizing methods, and any cooling steps. One farmer shared how tracking her triple-wash system helped her confidently explain her food safety practices to new members, turning skeptics into loyal supporters.

Your post-harvest tracking should include temperature logs for coolers, humidity levels, and how long produce stays in storage before distribution. Finally, maintain distribution records showing which members received which harvest batches. Simple spreadsheets work perfectly—no fancy software needed! This complete trail from soil to doorstep demonstrates your commitment to transparency and quality.

Tools and Resources That Make Traceability Easier

Good news: you don’t need expensive software to run an effective traceability program! Many successful CSA farmers start with simple tools and upgrade only when their operations grow.

Spreadsheets remain the workhorse for small farms. Google Sheets or Excel can track everything from seed sources to harvest dates to member deliveries. The beauty of spreadsheets is their flexibility—you can customize them exactly to your needs. Create templates for planting records, harvest logs, and distribution sheets that link together. Plus, cloud-based options like Google Sheets let you update records from your phone right in the field.

For farms ready to step up, several affordable farm management platforms offer traceability features without breaking the bank. Tend, Farmbrite, and Farmigo range from $20-50 monthly and include harvest tracking, inventory management, and member communication tools. These platforms automatically create the connections between planting and distribution that you’d otherwise track manually.

The Green Meadow CSA in Vermont started with a simple notebook system before moving to spreadsheets in year three. “We only upgraded to farm software when we hit 75 members,” shares farmer Maria Chen. “The spreadsheets worked perfectly until then, and the transition was smooth because we’d already organized our thinking.”

Free resources matter too. The USDA offers downloadable traceability templates specifically designed for small farms. Your local extension office often provides customized forms and can help you set up systems at no cost.

The right tool depends on your farm size and comfort with technology. Farms under 30 members often thrive with spreadsheets. Between 30-100 members, affordable software starts saving significant time. Whatever you choose, consistency in using it matters far more than sophistication. Start simple, stay organized, and upgrade when the benefits clearly outweigh the learning curve.

CSA farmer handing vegetable share box to member at farm pickup location
Traceability programs strengthen trust between CSA farmers and their members while protecting both parties.

Success Story: How One CSA Farmer Turned Traceability Into a Marketing Advantage

When Sarah Mitchell started her 40-member CSA outside Portland, Oregon, she never imagined that tracking her vegetables from seed to harvest would become her farm’s biggest selling point. But that’s exactly what happened when she implemented a simple traceability program three years ago.

Sarah began by assigning lot numbers to each planting and keeping digital records of varieties, planting dates, and harvest information. She created QR codes that members could scan at the farm pickup location to learn the story behind their weekly share. Each code revealed which field grew their tomatoes, when they were planted, and even photos from different growth stages.

The response surprised her. Members started sharing the QR code information on social media, posting photos of their vegetables alongside the farm stories. Parents told Sarah their kids were more excited to eat carrots after seeing pictures of the seeds being planted. New subscribers mentioned the transparency as a key reason they chose her CSA over others.

Within one season, Sarah’s waiting list doubled. She attributes this growth directly to the trust her traceability program built. When a local news story covered concerns about produce recalls at grocery stores, several people specifically mentioned feeling safer knowing exactly where their CSA food came from.

Sarah’s program didn’t require expensive software or complicated systems. She uses a simple spreadsheet, her smartphone camera, and free QR code generators. The weekly time investment is about two hours, which she considers minimal compared to the marketing value it provides. Her advice to other farmers? Start small, stay consistent, and let your transparency speak for itself.

Common Traceability Mistakes (And How to Avoid Them)

Starting a traceability program can feel overwhelming, but avoiding a few common mistakes will save you time and frustration. Many CSA farmers initially over-complicate their systems, creating elaborate spreadsheets or purchasing expensive software they don’t actually need. Remember, your program should fit your farm’s size and operations. A simple notebook system or basic digital template often works perfectly for smaller CSAs. Start with the essentials: what you grew, where it came from, and who received it.

Inconsistent record-keeping is another frequent pitfall. Life gets busy during harvest season, and it’s tempting to tell yourself you’ll log everything later. Unfortunately, “later” often means forgotten details. Sarah Chen, who runs a 40-member CSA in Oregon, learned this the hard way during her first season. She now keeps a waterproof clipboard in her harvest bins and records information immediately. Her tip? Make it so easy you can’t skip it.

Many farmers also underestimate the importance of communicating their traceability efforts to members. Your customers value transparency, but they won’t know about your careful record-keeping unless you tell them. Share your traceability practices in newsletters, farm tours, or member orientations. Explain how you track their food from seed to share box. This builds trust and helps members appreciate the care behind their produce.

Finally, don’t let perfectionism paralyze you. An imperfect system that you actually use beats a perfect system gathering dust. Start simple, stay consistent, and adjust as you learn what works for your unique operation.

Starting a food traceability program doesn’t have to be overwhelming. Remember, you don’t need fancy software or complex systems to make a real difference. Begin with something as simple as a notebook where you record harvest dates and field locations, then build from there as your confidence grows. Many successful CSA farmers have shared that their traceability journey started with just basic record-keeping that evolved over time into more comprehensive systems.

The heart of traceability isn’t about paperwork or compliance – it’s about showing your members that you genuinely care about their safety and trust. Every record you keep, every detail you track, strengthens the connection between your farm and the families you feed. It demonstrates your commitment to transparency and quality, values that resonate deeply with your community.

Think of traceability as an investment in your farm’s future. It protects your business, builds member confidence, and positions you as a professional grower who takes food safety seriously. The benefits far outweigh the minimal time investment required.

So take that first step today. Start with one simple tracking method this week. Your members, your farm, and your peace of mind will thank you for it.

How Your CSA Farm Can Master Order Fulfillment (Without Losing Your Mind)

Posted by darrell on
0
Operations and Logistics
How Your CSA Farm Can Master Order Fulfillment (Without Losing Your Mind)

Order fulfillment in CSA farming means getting the right products into your members’ hands at the right time—whether that’s a standard veggie box, customized selections, or add-ons like eggs and honey. When Sarah Thompson of Green Valley Farm added customization options to her 50-member CSA, she discovered that managing individual preferences and add-on requests required a completely different system than packing uniform boxes. The challenge isn’t just about harvest planning anymore; it’s about tracking who wants extra tomatoes, who’s skipping this week, and ensuring the family that added a dozen eggs actually receives them. Many farmers expanding beyond basic box delivery find themselves drowning in spreadsheets and text messages, trying to remember which member requested what while racing against harvest deadlines. Understanding order fulfillment as a complete system—from how members place requests to how you pick, pack, and verify each customized order—transforms this chaos into a manageable process that actually saves time and reduces errors, letting you focus on what you do best: growing exceptional food for your community.

What Order Fulfillment Actually Means for Your CSA

For CSA farmers, order fulfillment means much more than just boxing up vegetables. It’s the complete journey that transforms what you harvest in the field into the perfect customized share that lands on your member’s doorstep.

Think of order fulfillment as everything that happens after a member places their order. Sarah from Green Valley Farm describes it perfectly: “It starts the moment someone chooses their box size and add-ons through our website, and doesn’t end until they’re unpacking fresh produce at home.” This process includes receiving and organizing orders, picking the right quantities from your cooler, customizing each box according to preferences, packing everything carefully, keeping produce fresh during transit, and coordinating delivery or pickup.

For CSAs, order fulfillment gets particularly interesting when members can customize their shares. Let’s say Jamie wants a standard box but swaps out kale for extra carrots, adds a dozen eggs, and requests no peppers. Your fulfillment process needs to track these preferences, ensure you have enough carrots and eggs set aside, and remember to skip the peppers when packing Jamie’s box.

The fulfillment cycle also includes quality control checks, communication with members about what’s in their box, managing inventory so you don’t oversell limited items, and handling the logistics of multiple pickup locations or delivery routes. When member Katie at Riverside CSA added honey and fresh-cut flowers as optional add-ons, her fulfillment process expanded to coordinate with local beekeepers and flower growers, creating a more complex but rewarding system.

Understanding this complete picture helps you identify where bottlenecks happen and where improvements can make your operation run smoother while keeping members happy.

Farmer assembling CSA produce box with fresh vegetables on packing table
Order fulfillment in CSA operations involves carefully assembling customized boxes based on each member’s preferences and add-on selections.

The Moving Parts: How Order Customization Changes Everything

When Members Want to Skip the Kale

Not every member loves every vegetable that shows up in their share, and that’s perfectly normal. When members request to skip the kale, swap out Brussels sprouts, or remove cilantro from their box, it creates an additional layer of complexity in your fulfillment process.

These customization requests mean your packing team needs clear systems to track individual preferences. One farmer in Vermont shared how member substitutions initially caused chaos in their pack shed until they implemented color-coded packing slips that flagged special requests. The key is creating a workflow that acknowledges these preferences without overwhelming your crew during peak harvest season.

Consider offering a simple substitution system rather than unlimited customization. For example, you might allow members to swap out one item per week for a comparable alternative from your harvest list. This gives members flexibility while keeping your fulfillment manageable. Some farms also maintain a “no kale” or “no spicy greens” preference list in their system that automatically adjusts boxes week after week.

Remember, accommodating these preferences strengthens member retention. People who feel heard and respected in their food choices tend to stay subscribed longer, making the extra fulfillment effort worthwhile for your farm’s sustainability.

Managing Preference Cards and Special Requests

One of the most rewarding aspects of running a CSA is getting to know your members personally, but those relationships also add an important layer to your order fulfillment process. Tracking preference cards transforms your operation from simple box packing into a personalized service that keeps members happy and reduces waste.

When members share information about food allergies, strong dislikes, or household size preferences, this data directly impacts your picking and packing workflow. For example, if a member is allergic to tomatoes, your team needs a system to flag their box during harvest season when tomatoes are abundant. Some farms use colored tags on delivery bins, while others incorporate preference alerts into their packing software.

Portion size preferences also matter significantly. A single-person household might need smaller quantities, while a family of five appreciates generous bunches. Successful farmers often create simple preference profiles for each member, making these adjustments routine rather than chaotic.

The key is building a simple, sustainable system that your packing team can follow consistently. Whether you use a digital spreadsheet, farm management software, or even laminated cards at packing stations, the goal remains the same: honoring member preferences while maintaining efficient workflow. This attention to detail builds loyalty and demonstrates that you truly value each relationship beyond the transaction.

Add-Ons: Your Farm’s Extra Revenue Stream (And Extra Work)

The Add-On Workflow Step-by-Step

Managing add-on orders doesn’t have to be overwhelming when you break it down into clear, manageable steps. Here’s how successful CSA farmers handle it from start to finish.

Start by reviewing your add-on orders as soon as your ordering window closes. This gives you time to harvest fresh items and source any products from partner farms. Create a simple spreadsheet or use your farm management software to generate a list organized by product type rather than by member. This way, you’ll know exactly how many jars of honey, bundles of herbs, or cartons of eggs you need to prepare.

Next, check your inventory levels and gather all add-on items in your packing area. Organizing your packing station with designated zones for different product categories makes the process much smoother. Keep a staging area where add-ons can be sorted by member before pickup day.

When packing day arrives, assemble your standard shares first, then add the customized items. Many farmers find it helpful to print pickup lists that clearly indicate which add-ons belong with each member’s order. Place these sheets directly on boxes or attach them to member bins.

Finally, train your pickup day volunteers or staff to double-check add-ons before members arrive. A quick verification system prevents mistakes and ensures every member gets exactly what they ordered, building trust and satisfaction in your farm’s service.

Overhead view of CSA packing station with produce boxes and add-on items including eggs, honey, and flowers
Add-on items like eggs, honey, and flowers require careful tracking and coordination to ensure each member receives exactly what they ordered.

Common Add-On Fulfillment Headaches (And Solutions)

Even the most organized CSA operations hit snags when managing add-ons. Running out of popular items like farm-fresh eggs or artisan bread is a common frustration that leaves customers disappointed and farmers scrambling. The solution? Set clear inventory limits in your ordering system and consider a first-come, first-served approach. Emily from Sunrise Valley Farm shares: “We cap our fresh pasta add-on at 30 orders weekly. It sold out in two days initially, but members appreciated knowing the limit upfront.”

Tracking who ordered what becomes tricky when you’re juggling spreadsheets during harvest season. Investing in simple farm management software designed for CSAs can automate this headache, sending you organized pick lists sorted by member.

Payment collection creates another layer of complexity. Some members prepay while others prefer pay-as-you-go for add-ons. Establish one consistent payment method, whether that’s adding charges to existing accounts or requiring upfront payment at ordering. Clear communication about your payment policy prevents confusion and ensures you’re compensated fairly for the extra effort these customizations require.

Real-World Example: A Day in Order Fulfillment at Meadowbrook Farm

Let me introduce you to Sarah Chen, who runs Meadowbrook Farm, a 15-acre CSA operation in Vermont serving 150 members. Every Thursday, Sarah and her small team tackle what she calls “fulfillment day,” transforming freshly harvested produce into customized boxes ready for Friday pickup.

Sarah’s week starts Monday when members log into their online portal to customize their weekly shares. “We offer a standard box, but about 70% of our members swap at least one item,” Sarah explains. “Someone might exchange kale for extra carrots, while another adds a dozen eggs or our homemade pesto.”

By Wednesday evening, Sarah reviews all customization requests and prints picking lists organized by crop type. Thursday morning at 6 AM, her team begins harvesting based on actual orders rather than estimates. “This reduced our food waste by nearly 40%,” she notes proudly.

The real magic happens in their pack shed. Sarah has created stations for different fulfillment steps. First, standard items get portioned into reusable boxes. Then comes the customization station, where team members swap out items according to each member’s preferences. Finally, add-ons like fresh flowers, bread from a partner bakery, and value-added products get tucked into designated boxes.

Sarah color-codes everything. Green tags mean standard boxes, yellow indicates customizations, and orange marks add-on purchases. “It sounds simple, but this system keeps us organized when we’re packing 150 unique orders in four hours,” she says.

What started as an overwhelming process has become streamlined through practice and smart organization. Sarah’s advice? “Start small with customizations. We began allowing just three swap options and gradually expanded as we learned what worked. Order fulfillment doesn’t have to be complicated, but it does require a system that fits your farm’s rhythm.”

Simple Systems That Make Fulfillment Smoother

You don’t need fancy technology to run a smooth fulfillment operation. Many successful CSA farmers start with simple, reliable systems that grow alongside their business.

Begin with the basics: a well-organized packing checklist. Create a master list for each share size that includes standard items and spaces for customizations. Sarah from Green Valley Farm laminated her checklists and uses dry-erase markers to check off items as they’re packed. This simple approach reduced her packing errors by 80% in the first season.

Physical organization matters tremendously. Designate specific zones in your packing area: one for standard items, another for add-ons, and a separate space for custom requests. Label everything clearly with large, readable signs. Color-coding works wonders too. Try using different colored bins or tags for various share sizes or special dietary modifications.

Paper order forms still work beautifully for smaller operations. Keep them organized in a binder divided by pickup day, with members listed alphabetically. This old-school method provides a reliable backup even if technology fails.

When you’re ready to go digital, start simple. Basic spreadsheet programs can track orders, create packing lists, and manage inventory without overwhelming you. Several affordable farm management software options designed specifically for CSAs offer templates that require minimal setup.

Batch similar tasks together for efficiency. Pack all standard shares first, then move to customizations, and finish with add-ons. This assembly-line approach, combined with streamlining pickup day procedures, keeps your workflow moving smoothly.

Remember, the best system is one you’ll actually use consistently. Start small, test what works for your farm, and adjust as needed. Many farmers find that combining low-tech reliability with selective technology creates the perfect balance for their operation.

Why Getting This Right Matters for Your Farm’s Success

Getting order fulfillment right isn’t just about logistics—it directly impacts your farm’s bottom line and long-term sustainability. When members consistently receive their correct customized orders on time, satisfaction soars. Happy members renew their subscriptions year after year, providing the steady income stream your farm needs to plan and grow confidently.

Think about it: every forgotten add-on or mixed-up box represents more than just an error. It’s a missed opportunity to strengthen the personal connection that makes CSA special. Members who feel heard and valued become your biggest advocates, referring friends and family to your farm.

On the flip side, fulfillment mistakes eat into profitability through wasted product, extra delivery trips, and time spent managing complaints. By streamlining your order fulfillment process—from harvest planning to delivery route efficiency—you free up hours to focus on growing great food and building community.

Consider Sarah’s small farm in Ontario: after implementing a better fulfillment system, her member retention jumped from 65% to 89% in one season. The predictable revenue allowed her to invest in season extension infrastructure, further increasing farm profitability.

Happy CSA members picking up their customized produce boxes at farm location
Efficient order fulfillment leads to satisfied CSA members and stronger farm-community relationships that sustain the business.

Starting small is your best path forward. You don’t need a perfect system on day one—just a commitment to organization and genuine care for your members. Begin with one or two simple add-ons, use basic tools like spreadsheets or clipboards, and refine your process as you grow. Remember, happy CSA members aren’t looking for perfection; they’re looking for fresh food, honest communication, and the personal touch that only a local farm can provide. When you treat each order with attention and build those relationships, your members become loyal advocates who help your farm thrive for seasons to come.

Your CSA Pickup Day Shouldn’t Feel This Chaotic (Here’s How to Fix It)

Posted by darrell on
0
Operations and Logistics
Your CSA Pickup Day Shouldn’t Feel This Chaotic (Here’s How to Fix It)

Position your CSA pickup station near adequate parking with clear signage directing members to the exact location—this single change can cut pickup time by 30% and eliminate the most common member complaint. Designate separate tables or zones for different share sizes, with pre-packed bags labeled with member names or numbers arranged alphabetically to prevent bottlenecks during peak hours. Create a simple checkout system where members initial a pickup list or scan a QR code, giving you instant data on who collected their shares and who needs reminder calls about unclaimed produce. Establish a consistent weekly pickup window of at least 2-3 hours to accommodate varying schedules, and station a friendly volunteer or staff member during the first 30 minutes to answer questions and troubleshoot issues before they escalate.

The difference between a chaotic CSA pickup that frustrates members and a smooth operation that builds community loyalty often comes down to intentional design choices made before the season even starts. Whether you’re launching your first CSA or refining an existing program, your pickup system directly impacts member retention, food waste, and your own stress levels throughout the growing season. Small farms across the country have transformed their pickup operations from weekly headaches into efficient systems that members actually look forward to—and the strategies that work have little to do with farm size and everything to do with thoughtful planning.

Why Your Pickup Site Setup Matters More Than You Think

Your CSA pickup site is more than just a distribution point—it’s the weekly touchpoint that shapes how members experience your farm. A chaotic, disorganized pickup can turn enthusiastic supporters into frustrated former members, while a smooth, welcoming setup builds loyalty that lasts for seasons.

Think about it: your members might never visit your actual farm, but they’ll judge your entire operation based on those few minutes each week at pickup. When boxes are clearly labeled, the space flows logically, and volunteers are helpful, members leave feeling good about their investment. They’re more likely to renew their membership, recommend your CSA to friends, and become advocates for local agriculture.

The numbers back this up too. Farmers who prioritize organized pickup sites report significantly higher retention rates—some seeing renewals jump by 20-30% after improving their systems. That’s because a well-run pickup signals professionalism and respect for members’ time.

On the operational side, efficient pickup sites save you precious hours each week. When everything has its place and volunteers know their roles, you’re not scrambling to solve problems or fielding frustrated texts. Instead, you’re focusing on what matters most: growing exceptional produce.

Consider Sarah, a Vermont farmer who transformed her cramped garage pickup into a streamlined outdoor setup with clear signage and designated parking. Member complaints dropped to zero, and her renewal rate climbed to 85%. Small changes to your pickup setup can create ripple effects throughout your entire CSA operation.

Organized CSA pickup station with vegetable boxes arranged on tables under canopy tent
A well-organized CSA pickup site with clearly arranged produce boxes creates a welcoming and efficient experience for members.

Choosing the Perfect Pickup Location

Essential Features of a Great Pickup Spot

Creating a successful CSA pickup spot requires careful attention to several key features that keep both your members happy and your produce in top condition.

Parking accessibility should be your first priority. Choose a location with ample parking spaces and easy entry and exit points. Your members will appreciate a spot where they can quickly pull in, grab their share, and head home without circling the block or walking long distances with heavy bags. Consider peak pickup times and ensure there’s room for multiple vehicles.

Weather protection makes a tremendous difference in member experience. Whether it’s a covered porch, tent, or indoor space, providing shelter from rain, snow, and intense sun creates a more pleasant pickup environment. This protection is equally important for keeping produce fresh during distribution hours, especially on hot summer days when leafy greens and delicate items can wilt quickly.

Refrigeration access becomes essential during warmer months. Even a few coolers with ice packs can help maintain quality between deliveries and pickups. If you’re fortunate enough to secure a location with refrigerator or walk-in cooler access, your produce quality will noticeably improve.

Space requirements depend on your CSA size, but plan for more room than you think you’ll need. You’ll need areas for organized share staging, a check-in table, optional add-ons display, and comfortable member flow. A cramped space creates confusion and slows down the pickup process, while adequate room allows for a smooth, enjoyable experience.

Central vs. Multiple Pickup Sites: What Works Best

Choosing between a central pickup location or multiple sites depends on your member base and your capacity. A single central site simplifies logistics dramatically—you make one trip, organize one setup, and build community in one place. Maple Ridge Farm in Vermont found their downtown farmers market location fostered incredible member connections and reduced their distribution time by three hours weekly.

However, multiple pickup sites can expand your reach and boost member retention. Green Valley CSA serves three neighborhoods across a 20-mile radius, which owner Sarah Chen credits with reducing member dropouts by 40%. The trade-off? More driving and coordination time. She recommends starting with one site, then adding locations only when you have 15-20 members requesting a specific area.

Consider optimizing delivery logistics by clustering members geographically before committing to new sites. Many successful farms use a hybrid approach: one main farm pickup with two strategic satellite locations at community centers or partner businesses. Survey your members annually about their preferred locations—their feedback reveals whether expansion makes sense or if consolidation would actually improve everyone’s experience.

Setting Up Your Pickup Site for Success

The Layout That Makes Pickup Flow Smoothly

Creating an efficient layout transforms pickup day from chaos into a smooth, enjoyable experience for everyone involved. Think of your pickup space as a natural flow from entry to exit, guiding members through their journey seamlessly.

Start by positioning your pickup table at least six feet from the entrance, giving members room to queue without blocking the doorway. Arrange produce boxes alphabetically by member name in clearly visible rows, using large letter signs (A-F, G-M, N-Z works well for most operations) that members can spot from several feet away. This simple system prevents bottlenecks as people search for their shares.

Place frequently swapped items like greens or herbs near the end of the pickup flow, where members can easily exchange without disrupting others. If you offer add-ons or extras, create a separate station away from the main pickup area to keep traffic moving smoothly.

Tables should be positioned at comfortable standing height, allowing members to inspect their boxes without bending awkwardly. Leave at least three feet of space between parallel tables so two people can pass comfortably with full boxes.

Consider the success story of Riverside Valley Farm, where owner Maria redesigned her barn layout after watching members navigate tight corners with overflowing boxes. By simply widening pathways and adding directional floor arrows, she cut average pickup time from eight minutes to under four.

Don’t forget adequate lighting in all areas and weatherproof signage visible from your parking area, directing members exactly where to go before they even leave their cars.

Essential Equipment and Supplies You’ll Need

Setting up an efficient CSA pickup starts with having the right supplies on hand. You’ll need reusable bins and crates for organizing shares, which are more sustainable and cost-effective than cardboard over time. If you’re working with a tight budget, consider starting with sturdy plastic totes from discount retailers.

Coolers or insulated containers are essential for maintaining freshness, especially during warm weather months. Add ice packs for items like leafy greens and herbs. For record-keeping, simple clipboards with member checklists work beautifully, though a tablet can streamline the process if you prefer digital tracking.

Don’t forget signage to direct members and display farm updates. Basic materials like markers, labels, and tape help keep everything organized. A folding table provides a convenient check-in station, and proper storage systems at your staging area ensure produce stays fresh before pickup.

Many successful farmers start small and gradually upgrade their equipment as membership grows, proving you don’t need a large investment to create a welcoming, organized pickup experience.

Creating Clear Signage and Instructions

Clear signage transforms pickup day from confusing to effortless. Start with a large welcome sign at your entrance directing members to the designated area. Use color-coded cards or labels to organize shares by member name or pickup time slot, making it easy for everyone to spot their box quickly.

Create visual instructions for first-time members showing the pickup process step-by-step. Include simple graphics demonstrating where to check in, how to identify their share, and where to return empty bins or bags. Post allergy alerts and handling tips near produce displays if you offer choice items.

Consider laminated signs highlighting what’s in the week’s harvest with brief storage suggestions. This reduces repetitive questions and helps members appreciate their vegetables. Many successful CSA farmers also post a large whiteboard with weekly announcements, recipe ideas, or upcoming farm events to build community connection. Keep text minimal and fonts large enough to read from several feet away, ensuring accessibility for all members regardless of age or vision capabilities.

CSA member receiving vegetables from farmer at pickup location with clipboard check-in
The member handoff process is an opportunity to build relationships while ensuring smooth and accurate share distribution.

Mastering the Member Handoff Process

Check-In Systems That Actually Work

A smooth check-in system keeps your CSA pickup moving and members happy. The good news? You have several options that can work beautifully depending on your farm’s size and style.

The classic paper checklist remains popular for smaller CSAs. Members simply find their name and check it off when they arrive. It’s low-tech, requires no electricity, and feels personal. The downside? Paper gets soggy in rain, and tracking no-shows requires manual record-keeping later.

Digital sign-in apps offer real-time tracking and automatic member notifications. Systems like Harvie or Local Food Marketplace let members check in via smartphone, instantly updating your database. These platforms shine for farms with 50-plus members or multiple pickup locations. The learning curve and monthly fees might feel daunting initially, but many farmers report saving hours each week once established.

A hybrid approach works well for mid-sized operations. Use a tablet at pickup with a simple spreadsheet where members tap their name. It’s more weather-resistant than paper and easier to manage than full farm software.

Whatever system you choose, test it during your first few pickups. Green Acres Farm in Vermont switched from paper to tablets after their second season, cutting check-in time by half. The key is finding what feels manageable for your volunteers while keeping the process quick for members grabbing produce after work.

Handling Substitutions, Absences, and Special Requests

Life happens, and your CSA members will occasionally need flexibility. Establishing clear policies upfront prevents confusion and keeps operations running smoothly.

Create a simple system for share pickups when members can’t attend their scheduled time. Many successful CSAs allow members to send friends or family as proxies—just require advance notice via email or text with the substitute’s name. Some farms offer a 24-hour pickup window or an alternate day each week specifically for missed pickups.

Consider implementing a share-swap board, either physical or digital, where members can coordinate trades or offer their boxes to others when they’re traveling. This reduces waste and builds community connections. One Vermont farmer shared how their member-managed swap system increased satisfaction while decreasing her administrative load.

For extended absences like vacations, offer options like donating shares to food banks, splitting them among remaining members, or crediting the value toward next season. Clear communication is essential—send reminder emails before pickup days and respond promptly to special requests.

Keep detailed records of substitutions and absences to track patterns. If certain members consistently miss pickups, reach out personally to understand their challenges and find solutions. Remember, flexible policies that respect members’ busy lives while maintaining farm efficiency create lasting loyalty and positive word-of-mouth for your CSA program.

Building Community During Pickup Time

Pickup time offers a golden opportunity to transform routine transactions into meaningful connections. Create a welcoming atmosphere with farm tours, recipe cards featuring the week’s harvest, or simple conversations about what’s growing in the fields. Consider hosting occasional meet-and-greet events where members can interact with farmers and each other, fostering a genuine community spirit. Share brief growing tips or seasonal updates during pickup to educate members about your farming practices. One successful Pennsylvania farmer found that dedicating just five extra minutes per pickup to answer questions increased member retention by 40 percent. These personal touches help members feel invested in your farm’s success while building lasting relationships that extend far beyond the weekly vegetable box exchange.

Solving Common CSA Pickup Problems

When Members Don’t Show Up

No-shows happen, and having a clear policy protects both you and your members. Most CSAs implement a 24-hour donation policy where unclaimed shares automatically go to local food banks, shelters, or community kitchens by the next morning. This prevents waste while serving your community.

Communicate your policy clearly during signup and include reminders in weekly newsletters. Some farmers send text alerts an hour before pickup closes, which significantly reduces forgotten shares.

Consider offering flexible solutions like designating pickup buddies where members authorize trusted friends to collect their box, or allowing one-time pickup location swaps when members face emergencies. Documentation is essential—use a simple sign-in sheet or digital check-in system to track patterns.

When members repeatedly miss pickups, reach out personally before assuming they’ve lost interest. Life gets busy, and a friendly conversation often reveals simple scheduling conflicts you can accommodate. One Colorado farmer found that switching Tuesday pickups to Wednesdays reduced no-shows by forty percent, simply because members had more predictable schedules midweek. Clear communication and compassionate flexibility create loyal, engaged members who value their farm connection.

Managing Peak-Time Crowding

Peak-time crowding can turn pickup day into a stressful bottleneck for everyone involved. The good news? A few smart strategies can transform this challenge into a smooth operation.

Consider extending your pickup window by an extra hour or two. This simple adjustment spreads arrivals more evenly throughout the day. Many successful farms have found that offering a four-hour window instead of two reduces congestion by nearly half.

Staggered pickup slots work wonders for larger CSAs. Assign members specific 30-minute time blocks based on their last name or membership number. Member retention actually improved at Green Valley Farm after implementing this system, as people appreciated the predictability and shorter wait times.

If space allows, create multiple pickup stations with dedicated volunteers at each. Think of it like grocery store checkout lanes – having three stations can triple your throughput capacity.

For tech-savvy operations, send reminder texts or emails the day before pickup, encouraging members to come during typically slower periods. You might even offer small incentives like bonus eggs or herbs for off-peak arrivals.

Real Stories from CSA Farmers Who Transformed Their Pickups

Meet Sarah Chen from Green Valley Farm in Vermont, who turned her chaotic Friday pickups into a smooth operation. When she started her CSA three years ago, members often waited 20 minutes while she searched through coolers. Her breakthrough came when she switched to pre-bagged shares organized alphabetically by member name. She also designated a clear pickup window from 4-7 PM instead of all afternoon. The result? Wait times dropped to under three minutes, and member retention increased by 40 percent.

Over at Harvest Moon Farm in Oregon, Jake Martinez faced a different challenge. His remote pickup location at a community center meant coordinating with another organization’s schedule. After members complained about conflicts, Jake implemented a flexible system with three different pickup spots around town on staggered days. He invested in insulated coolers that members could access with codes, allowing 24-hour pickup windows. Though it required more logistics upfront, Jake reduced no-shows by 60 percent and attracted busy professionals who couldn’t make traditional pickup times.

The biggest lesson from Emma Rodriguez at Sunrise Acres in North Carolina? Communication prevents confusion. She struggled with members forgetting pickup days until she created a simple text reminder system and posted weekly farm updates with photos of what was in shares. This personal touch transformed her CSA experience. Members felt more connected to the farm, started attending volunteer days, and even helped new members navigate the pickup process.

These farmers prove that small, thoughtful changes create significant improvements. Whether you’re dealing with long lines, scheduling conflicts, or member engagement issues, solutions exist that work for your unique situation.

Group of CSA members socializing and holding produce at community pickup location
CSA pickup times create valuable opportunities for members to connect with each other and strengthen the farm community.

A well-organized CSA pickup system creates a win-win situation for everyone involved. When farmers streamline their pickup operations, they reduce their own stress and free up precious time to focus on what they do best—growing exceptional food. Meanwhile, members enjoy a smooth, pleasant experience that reinforces their decision to support local agriculture and keeps them coming back season after season.

The beauty of improving your pickup system is that you don’t need to overhaul everything at once. Start small by implementing just one or two changes that address your biggest pain points. Perhaps it’s creating clearer signage, setting up a simple check-in table, or sending a weekly reminder email with pickup details. These modest adjustments can yield surprisingly significant results.

Remember, every CSA is unique, and what works brilliantly for one farm might need tweaking for another. Pay attention to feedback from your members, observe what’s working and what isn’t, and don’t be afraid to experiment. The farmers we’ve heard from consistently say that investing time in pickup logistics pays dividends in member retention, positive word-of-mouth, and their own peace of mind. Your pickup day can transform from a hectic scramble into a welcoming community gathering that celebrates the connection between grower and eater.

How Smart Warehousing Keeps Your CSA Box Fresh From Farm to Doorstep

Posted by darrell on
0
Operations and Logistics
How Smart Warehousing Keeps Your CSA Box Fresh From Farm to Doorstep

Transform your CSA’s warehousing approach by designating a dedicated cold storage space, even if it’s just a converted garage or basement cooler, to extend your harvest season by weeks and reduce food waste by up to 40%. Map out your weekly distribution flow from field to member pickup, identifying every touch point where produce sits idle—then eliminate unnecessary stops by consolidating washing, packing, and sorting into one efficient staging area. Create a simple inventory rotation system using harvest date labels and first-in-first-out protocols to ensure members always receive the freshest possible vegetables while you maintain clear visibility of what needs moving quickly.

Stock essential warehousing supplies like stackable plastic bins, mesh produce bags, and temperature monitoring tools that cost under $500 total but dramatically improve product quality and handling efficiency. Partner with neighboring farms to share refrigerated truck space or cooperative storage facilities, splitting costs while building the regional food network that makes small-scale agriculture viable. Install basic shelving units positioned for optimal air circulation around leafy greens and root vegetables, maintaining the specific humidity and temperature zones each crop type requires for maximum shelf life.

Understanding warehousing fundamentals transforms your CSA from a seasonal hustle into a year-round operation that serves your community reliably. Whether you’re managing a 20-member neighborhood share or coordinating logistics for multiple drop-off locations, smart warehousing practices protect your harvest investment, strengthen member satisfaction, and create the operational backbone that lets your farm thrive sustainably. The strategies that follow break down exactly how successful CSA operators design, manage, and optimize their storage and distribution systems without industrial-scale budgets or complexity.

Why CSA Farms Need Strategic Warehousing

The 48-Hour Freshness Window

For CSA farms, timing is everything. Once produce leaves the soil, the clock starts ticking. Most vegetables begin losing nutrients and flavor within hours of harvest, which is why CSA operations typically work within a 48-hour window from field to member pickup.

During this critical period, proper warehousing becomes your farm’s best friend for maintaining freshness. Leafy greens, for example, need immediate cooling to preserve their crispness, while tomatoes require room temperature storage to develop full flavor. A well-organized cold storage area with different temperature zones can mean the difference between delivering farm-fresh quality and disappointing your members.

Sarah Martinez, who runs Green Valley CSA in Ontario, transformed her operation by adding a simple walk-in cooler. “We went from 15% waste to under 3%,” she shares. “Our members immediately noticed the difference in quality.”

The key is treating those 48 hours as a sprint, not a marathon. Harvest in the morning when produce is coolest, move items quickly to appropriate storage, and maintain consistent temperatures. This focused approach ensures your members receive vegetables at peak freshness, just as nature intended.

Balancing Variety with Space Constraints

One of the most exciting yet challenging aspects of CSA warehousing is accommodating the wonderful diversity that makes these boxes special. Unlike commercial operations handling just a few standardized products, CSA farms must store everything from delicate leafy greens to sturdy root vegetables, each requiring different temperature and humidity conditions.

Take Sarah Chen’s experience at Green Valley Farm in Vermont. She quickly learned that storing tomatoes alongside lettuce was a rookie mistake—tomatoes release ethylene gas that causes greens to wilt faster. Her solution? Creating distinct storage zones within her modest 800-square-foot cooler. She designated one area for ethylene-sensitive produce, maintained her root vegetables in slightly warmer, humid conditions, and kept herbs in ventilated containers.

For small to medium farms working with limited space, vertical storage racks maximize capacity while keeping different produce types separated. Stackable crates with proper airflow help organize items by harvest date and storage requirements. Many successful CSA managers recommend the “first in, first out” approach combined with strategic placement—hardier items like cabbage and carrots near doors where temperature fluctuates slightly, while sensitive berries and greens stay in climate-stable zones.

The key is planning your storage layout around your typical harvest mix, allowing flexibility as seasons change.

Essential Components of a CSA Warehousing System

Cold Storage Solutions That Fit Your Budget

Starting with cold storage doesn’t mean breaking the bank. Many successful CSA farms begin with affordable solutions that grow alongside their operations. A basic walk-in cooler, which can cost between $5,000-$10,000 for a small unit, provides reliable temperature control for most vegetables and is often the first major investment farms make in their cold chain management system.

For tighter budgets, repurposed refrigerated shipping containers offer an innovative alternative. Green Valley Farm in Vermont converted a used 20-foot reefer container for under $3,000, creating 160 square feet of cold storage that serves 75 CSA members. These containers are energy-efficient and portable, making them perfect for growing operations.

Root cellars represent another budget-friendly option, especially for root vegetables and winter squash. Hillside CSA in Oregon built a modern root cellar for $2,500 using insulated concrete forms, maintaining consistent 35-40°F temperatures without electricity for eight months yearly.

Even simple shade structures with evaporative cooling can extend produce life by hours in warmer climates, giving you time to deliver peak-freshness harvests to members while planning your next cold storage upgrade.

Fresh vegetables in CSA boxes stored in walk-in cooler with stainless steel shelving
Walk-in cold storage maintains optimal temperature and humidity for diverse CSA produce during the critical window between harvest and delivery.

Staging and Packing Areas

Creating an efficient packing area is essential for maintaining produce quality and keeping your CSA running smoothly. Start by designating a clean, well-lit space near your cold storage where the temperature stays consistent. Arrange packing stations in a logical flow, positioning boxes or bags at one end and moving through each produce item systematically.

Using reusable bins and crates helps keep produce organized and reduces waste during the packing process. Set up clear signage showing portion sizes for each item, which helps volunteers work quickly without constant guidance. Many successful CSA farmers create laminated charts displaying the week’s share contents and quantities, hanging them at eye level above each station.

Keep quality control tools nearby, including scales, produce wipes, and extra towels for any moisture concerns. Consider setting up separate stations for delicate items like tomatoes or leafy greens to prevent bruising. Green Acres CSA in Vermont improved their packing efficiency by 40 percent simply by reorganizing their workflow and training volunteers on proper handling techniques. Remember to maintain good air circulation and keep the area clutter-free to ensure food safety standards.

Farm volunteers assembling CSA boxes at organized packing stations with fresh produce bins
Organized packing stations allow volunteers to efficiently assemble diverse CSA boxes while maintaining produce quality and freshness.

Root Cellar and Ambient Storage Spaces

Before refrigeration became widespread, farmers relied on root cellars—and many still do! These naturally cool, humid spaces provide ideal conditions for storing hardy vegetables like potatoes, carrots, beets, and winter squash. A proper root cellar maintains temperatures between 32-40°F with 85-95% humidity, extending shelf life for months.

Modern CSA operations often adapt this traditional wisdom by creating ambient storage areas in basements, converted sheds, or dedicated insulated rooms. The key is controlling three factors: temperature, humidity, and air circulation. Even a small corner of your barn can become effective storage with proper ventilation and moisture management.

Different vegetables have specific needs. Potatoes and carrots thrive in cool, moist conditions, while winter squash and onions prefer slightly warmer, drier environments around 50-60°F. Smart CSA farmers often create multiple storage zones to accommodate these preferences.

Local farmer Maria Chen shares her success: “We converted an old concrete garage into tiered storage shelves. By monitoring conditions weekly and separating crops by their needs, we reduced our cold storage costs by 40% while maintaining quality.”

Start small—even a few wooden crates in a cool basement corner can make a difference. This sustainable approach reduces energy costs while preserving the natural flavor and nutrition your members expect from their CSA share.

Managing Inventory Flow in CSA Operations

From Field to Box: Timing Your Harvest

Timing your harvest to match distribution days is like conducting an orchestra—everything needs to come together at just the right moment. The goal is simple: get produce from your field into your members’ boxes while it’s at peak freshness, with minimal time spent in storage.

Start by working backwards from your delivery day. If you distribute on Fridays, plan harvests for Thursday afternoon or Friday morning for delicate items like lettuce and herbs. Heartier vegetables such as carrots, beets, and winter squash can handle being picked a day or two earlier without losing quality.

Consider creating a harvest calendar that maps out which crops to pick on specific days. Sarah, who runs a small CSA in Vermont, reduced her storage needs by 40% simply by staggering her harvest schedule across three days before distribution. She picks greens on Thursday evening when temperatures cool, roots on Wednesday, and sturdy vegetables like peppers and tomatoes throughout the week.

Keep weather in mind too. Harvesting during cooler morning hours helps preserve freshness, especially for leafy greens. This smart scheduling means less time refrigerating produce and lower energy costs—a win for both quality and sustainability.

Simple Inventory Tracking for Small Farms

You don’t need fancy technology to keep tabs on your harvest. Many successful small farms start with a simple whiteboard in their packing shed, tracking what’s been harvested, packed, and distributed each day. This low-tech approach works beautifully for farms managing under 50 CSA shares.

A basic spreadsheet can take you even further. Create columns for harvest dates, crop varieties, quantities picked, and shares packed. This gives you historical data to spot patterns and plan better for next season. One Vermont farmer shared how her simple Excel sheet helped her realize she was consistently overplanting lettuce while running short on carrots mid-season.

For those ready to step up, free tools like Google Sheets allow real-time updates from the field using smartphones. Your crew can log harvest quantities directly, eliminating duplicate data entry and reducing errors.

If you’re managing 100-plus shares, consider affordable farm-specific software like Farmigo or Local Food Marketplace. These platforms range from $20-50 monthly and integrate inventory tracking with CSA member management. The key is choosing what matches your operation size. Start simple and grow your system as your farm expands.

Farmer using smartphone inventory tracking app in front of fresh produce harvest bins
Simple digital inventory tracking helps CSA farms monitor harvest quantities and coordinate distribution schedules efficiently.

Handling Surplus and Managing Shortages

Smart CSA farmers know that nature doesn’t always cooperate with our plans. When you’re blessed with an abundant harvest, consider transforming surplus into value-added products like jams, pickles, or dried herbs that extend shelf life and create new revenue streams. These products can fill winter shares when fresh produce is scarce, keeping members engaged year-round.

Building relationships with neighboring farms creates a safety net for everyone. When your tomatoes fail but zucchini thrives, partnering farms can help balance shares through crop exchanges. This collaborative approach ensures members receive variety even during challenging seasons.

For shortages, communicate transparently with members early. Most CSA supporters understand farming’s unpredictable nature and appreciate honesty. Consider offering substitution options, recipe ideas for unfamiliar crops, or occasional discounts during lean weeks. Some successful farms maintain a small emergency fund from surplus sales to purchase supplemental items from trusted local producers, maintaining share value while supporting the broader farming community.

Distribution Logistics That Keep Members Happy

Pickup Point Coordination

Managing multiple pickup points requires careful planning to keep your CSA members happy and your produce fresh. Start by grouping locations geographically when optimizing distribution logistics, which reduces travel time and fuel costs while maintaining product quality.

Recruit reliable site coordinators for each location—these volunteers become your eyes and ears in the community. Provide them with clear checklists covering setup times, temperature monitoring, and member communication protocols. Many successful CSA farms schedule pickups within tight two-hour windows to minimize how long produce sits out.

Cold chain maintenance is critical during distribution. Invest in insulated coolers, ice packs, and thermometers for each site. Train coordinators to monitor temperatures, especially for leafy greens and dairy products. One Oregon farm reduced spoilage by 40 percent simply by ensuring all pickup sites had shaded areas and proper cooling equipment.

Create a simple communication system using group texts or apps to alert coordinators about delivery timing changes or special handling instructions. This keeps everyone informed and prevents confusion that could compromise your harvest’s freshness.

Home Delivery Routing Strategies

Planning efficient delivery routes can save your CSA operation hours each week while reducing fuel costs and environmental impact. Start by grouping delivery locations geographically, creating logical zones that minimize backtracking. Many small farms find success using free route optimization tools like Google Maps or dedicated delivery apps that calculate the most efficient path between multiple stops.

Consider scheduling deliveries on specific days for each zone rather than covering your entire service area daily. This approach reduces total driving time and allows you to consolidate orders, making each trip more worthwhile. For example, Sarah’s Organic Farm in Vermont cut their delivery time by 40 percent simply by organizing their 50 weekly customers into three geographic zones, each served on different days.

Time management extends beyond the road. Prepare delivery boxes the night before, organizing them in your vehicle according to your route sequence. This simple practice eliminates searching through boxes at each stop and keeps you on schedule.

Track your fuel consumption and delivery times for each route to identify improvement opportunities. Some farms discovered that slight schedule adjustments to avoid rush hour traffic saved them 30 minutes per route while improving fuel efficiency by 15 percent. Remember, every minute saved on the road is another minute you can dedicate to what matters most: growing exceptional organic produce for your community.

Real CSA Farms Making Warehousing Work

Real farms across the country have found creative warehousing solutions that fit their unique needs and budgets. Their stories show that there’s no one-size-fits-all approach to managing your harvest storage and distribution.

Take Green Valley Farm in Vermont, a 15-acre operation serving 200 CSA members. They transformed an old dairy barn into a multi-zone storage facility using basic insulation and a second-hand walk-in cooler. Owner Maria Chen explains that investing $3,000 in proper shelving systems cut their packing time in half. They now use a simple color-coded bin system that helps volunteers quickly locate items during Thursday pack days.

Down in North Carolina, Sunrise Fields took a different route. This 5-acre farm couldn’t afford a permanent structure, so they purchased two used refrigerated shipping containers for $4,000 each. These mobile units sit right at the edge of their fields, reducing the distance harvested crops travel before cooling. The farm rotates one container for washing and staging while the other maintains optimal storage temperatures.

Meanwhile, Desert Bloom Farm in Arizona faced unique challenges with extreme heat. They partnered with three neighboring farms to share a climate-controlled warehouse space in town, splitting costs four ways. This cooperative model gave them access to professional-grade equipment they couldn’t afford individually, including humidity-controlled rooms for delicate greens and root vegetable storage.

Small-scale Hillside Gardens in Oregon started with just a basement root cellar and gradually expanded. They added a DIY cold frame structure made from reclaimed materials, spending under $500. As their membership grew from 30 to 80 families over five years, they reinvested profits into a proper pole barn with insulated walls.

These farmers all emphasize starting simple and scaling up as your CSA grows. They recommend assessing your climate, budget, and member base before committing to expensive infrastructure, proving that smart warehousing doesn’t require massive investment upfront.

The magic of your weekly CSA box doesn’t happen by accident. Behind every crisp head of lettuce and sun-ripened tomato lies a carefully orchestrated warehousing and logistics system that honors the farm-to-table promise. From temperature-controlled storage rooms to efficient packing stations, thoughtful warehousing keeps produce fresh while supporting the deeper mission of building community connections around local, organic food.

For CSA members, take a moment to appreciate the early morning harvest crews and the detailed systems that ensure your vegetables arrive at peak freshness. Consider visiting your farm during distribution days to witness this behind-the-scenes choreography firsthand. Your understanding and patience during occasional supply fluctuations helps sustain these small-scale operations.

Aspiring farmers, remember that your warehousing setup doesn’t need to be elaborate from day one. Start with basic infrastructure like a cool, shaded space and reliable coolers, then expand as your membership grows. Connect with established CSA farmers in your region who’ve navigated these challenges successfully. Their stories often reveal creative, budget-friendly solutions that balance efficiency with sustainability.

By investing in smart warehousing practices, CSAs strengthen both their produce quality and their community bonds, proving that good logistics and genuine relationships can flourish together.

Stop Losing Hours on Delivery Routes: How CSA Farms Cut Drive Time in Half

Posted by darrell on
0
Operations and Logistics
Stop Losing Hours on Delivery Routes: How CSA Farms Cut Drive Time in Half

Map your current delivery stops on paper or use a free tool like Google Maps to visualize where your CSA members live. Group customers by geographic clusters—north, south, east, west—rather than delivering in the order they signed up. This single change typically cuts drive time by 30-40% and saves enough fuel money to justify the planning effort within your first month.

Plan routes that flow in a logical loop rather than crisscrossing back and forth across town. Start from your farm, move through one neighborhood completely, then progress to the next adjacent area before returning home. Time your stops during windows when customers are most likely to be available, reducing failed deliveries and the need for costly return trips.

Test your new route for two weeks and track actual drive time, fuel costs, and any delivery issues. Many small-scale farmers discover they can serve the same number of members in half the time simply by reorganizing their stops strategically. Sarah Martinez, who runs a 50-member CSA in Oregon, reduced her Wednesday delivery route from five hours to just under three by implementing geographic clustering, giving her afternoon back for farm tasks that actually grow food.

Why Route Scheduling Makes or Breaks Your CSA Delivery Operation

Route scheduling in the CSA world means planning the most efficient path to deliver fresh produce to all your members each week. Think of it as creating a strategic roadmap that connects your farm to every pickup location or member’s doorstep while minimizing backtracking and wasted miles. For CSA farmers already juggling harvest schedules, packing, and farm tasks, this planning step often gets overlooked, but it’s actually one of the most critical factors determining whether your delivery operation thrives or drains your resources.

Poor route planning comes with real costs that add up fast. There’s the obvious hit to your wallet from burning extra fuel driving in circles or crisscrossing the same areas multiple times. But the hidden costs hurt even more. Extended travel time means your carefully harvested greens might wilt before reaching members, directly impacting maintaining produce freshness and member satisfaction. When deliveries run late or produce arrives in less-than-perfect condition, members notice, and retention suffers.

Sarah, who runs a 75-member CSA in Oregon, knows these challenges firsthand. “I’d leave the farm at 1 PM thinking I’d be home for dinner,” she recalls. “But I was zigzagging across town with no real plan, sometimes passing the same intersection three times. I’d roll back in at 9 PM, exhausted and frustrated, with my truck still half-full because I’d mapped it all wrong.” The physical and mental toll of inefficient routes leads directly to farmer burnout, something our agricultural community already faces at alarming rates.

The good news? Route scheduling doesn’t require fancy technology or complicated systems. Even simple planning can cut delivery time by 30-40 percent, saving fuel, preserving produce quality, and giving you back precious hours to focus on what you love: farming.

Farmer reviewing delivery schedule next to van loaded with CSA produce boxes
CSA farmers face daily decisions about delivery routes that impact fuel costs, produce quality, and customer satisfaction.

The Building Blocks: What You Need Before Planning Routes

Member Location Data That Actually Works

Your route scheduling success starts with clean, organized member data. Begin by creating a master spreadsheet with delivery addresses, contact numbers, and any specific location notes like gate codes or challenging driveways. Take time to physically verify each address, especially for rural members where GPS can be unreliable.

Group your members into geographic clusters by neighborhood or area. You might discover that Tuesday deliveries work perfectly for the west side of town, while Thursday serves the east side more efficiently. Consider creating simple zone maps using free tools like Google My Maps to visualize where your members cluster naturally.

Don’t forget to plan for the seasonal shifts that come with CSA farming. Mark which members take summer vacations or winter breaks, and note any snowbirds who change locations seasonally. Keep a running list of delivery preferences, like members who prefer morning drop-offs before work or those with flexible schedules.

Update your database weekly as changes happen. When Green Valley Farm in Vermont implemented this system, they reduced their delivery time by 30 percent simply by reorganizing their member data into five clear zones. The investment of a few hours organizing addresses can save you countless hours behind the wheel throughout the season.

Understanding Your Delivery Constraints

Before you can optimize your delivery routes, you need a clear picture of what you’re working with. Start by listing your vehicle capacity—how many boxes or totes can you safely transport per trip? Understanding this number prevents overloading and helps you determine if you’ll need multiple runs. Consider how efficient packing systems might maximize your space.

Next, identify your time windows. Some members need morning deliveries due to work schedules, while others prefer afternoon drop-offs. Document these preferences carefully—they’ll become crucial when mapping routes. Also note any special requests, like gate codes, preferred drop locations, or members who need a quick phone call upon arrival.

Take stock of your farm’s operational reality. Which days can you realistically dedicate to deliveries? How many staff members or volunteers are available? Martha from Green Valley CSA learned this lesson when she scheduled aggressive Tuesday routes, only to realize her only delivery driver worked off-farm that day. Honest assessment of your constraints now saves headaches later. List everything on paper—your delivery windows, vehicle limitations, staff availability, and member needs. This foundation makes route planning actually work for your unique situation.

Mapping Your Delivery Zones

Start by examining your current member distribution with a simple map—even a printed one with pushpins works! Look for natural clusters where several members live close together. These groups become the foundation of your delivery zones.

Consider dividing your service area based on three key factors. First, distance from your farm helps determine whether a zone is suitable for morning or afternoon delivery. Second, member density matters—you’ll want at least 5-10 members per zone to make the trip worthwhile. Third, use logical geographic boundaries like highways, rivers, or neighborhood borders to keep zones distinct and easy to navigate.

For example, Green Acres Farm in Vermont transformed their chaotic delivery system by creating four zones based on postal codes. They found that grouping 8-12 members within a 3-mile radius reduced their weekly driving by 40 miles. The key was balancing zone size with delivery efficiency—too large means excessive driving, too small creates too many delivery days.

Don’t forget to factor in traffic patterns and road conditions. A zone that looks compact on paper might take twice as long during rush hour or involve challenging rural roads that slow you down considerably.

Simple Route Scheduling Methods That Work for Small CSAs

The Paper Map Method

Sometimes the simplest tools work best, especially when you’re just getting started with route optimization. The paper map method is a tried-and-true approach that many small CSA farmers swear by, particularly those serving fewer than 50 members.

Here’s how it works: grab a large physical map of your delivery area and mount it on a wall in your packing shed or office. Use different colored pushpins to represent each delivery day – maybe red for Mondays, blue for Wednesdays, and green for Fridays. As you add new members, place a pin at their location with their member number written on a small label.

Step back and look at your map. You’ll quickly spot clusters of customers and natural route patterns that might not be obvious from a spreadsheet. This visual approach makes it easy to group nearby members together and identify the most efficient path between stops.

Sarah Martinez, who runs a 35-member CSA in Vermont, credits this method with cutting her delivery time by nearly two hours each week. She simply rearranged her routes based on what the map revealed, eliminating backtracking and unnecessary miles.

The beauty of this low-tech solution? No learning curve, no subscription fees, and you can update it instantly as your membership changes.

Overhead view of road map with colored pushpins marking CSA delivery locations on farmhouse table
Simple paper map methods help small CSA farms visualize delivery routes and group members by geographic location.

Free Digital Tools You Already Have

You don’t need expensive software to start optimizing your CSA delivery routes. Most farmers already have access to powerful free tools that can dramatically reduce drive time and fuel costs.

Google Maps is your first essential resource. Simply enter your delivery addresses in the order you think makes sense, then review the suggested route. The platform will often highlight a more efficient path you hadn’t considered. You can save multiple routes for different delivery days, making week-to-week planning faster. The traffic prediction feature also helps you avoid rush hour delays, which is especially valuable if you’re delivering to urban customers.

Google Sheets or Microsoft Excel provides another layer of organization. Create a simple spreadsheet listing customer names, addresses, delivery windows, and any special instructions. Sort by neighborhood or zip code to identify natural clusters. This visual overview helps you spot patterns, like realizing you have five customers within a two-mile radius who could be served in sequence.

For slightly more sophistication, try Google My Maps. Plot all your delivery points on a custom map using different colored pins for different days or routes. This visual representation makes geographic relationships obvious at a glance. One Oregon farmer discovered she was crisscrossing the same neighborhood twice on Wednesdays simply by seeing her pin layout.

These free tools require minimal tech skills but deliver meaningful results. Start simple, experiment with different sequences, and you’ll quickly develop an intuition for efficient routing.

Budget-Friendly Route Planning Apps

For small CSA operations just getting started with route optimization, you don’t need expensive software to see real results. Several budget-friendly apps offer the essential features you need without breaking the bank.

Look for route planning tools that handle at least 25-50 stops per route, allow manual adjustments for your specific delivery preferences, and provide turn-by-turn navigation. Many affordable options like Route4Me, Circuit, and Optimoroute offer basic plans starting around $20-40 monthly, perfect for farms managing weekly delivery rounds.

The key features to prioritize include multi-stop optimization that considers actual drive times rather than just distance, the ability to save customer addresses for repeated use, and mobile access so you can navigate while driving. Some apps even let you send automatic delivery notifications to customers, adding a professional touch to your service.

Green Valley Farm in Vermont reduced their delivery time by 40% using a simple $30 monthly route planner, saving enough on fuel costs to cover the subscription within two weeks. Start with a free trial to test whether the interface feels intuitive for your workflow. Remember, the best app is the one you’ll actually use consistently, not necessarily the one with the most features. Simple, reliable tools often outperform complex systems for small-scale operations.

Farmer using smartphone navigation app while preparing CSA deliveries
Digital route planning tools help farmers optimize delivery sequences and reduce unnecessary drive time.

Creating Your Weekly Route Schedule Step by Step

Matching Routes to Your Harvest Schedule

Your harvest schedule is the heartbeat of your delivery route planning. Start by mapping out what crops reach peak ripeness on which days, then build your routes backward from there. For example, delicate greens and herbs should be harvested the morning of delivery, while hardier root vegetables can be picked the day before. This timing strategy ensures customers receive the freshest possible produce.

Consider organizing routes so heat-sensitive items like lettuce and berries are delivered first, especially during warmer months. One successful farmer in Ontario restructured her Thursday route to prioritize urban customers with limited refrigeration, delivering to them before noon while saving rural members with basement cold storage for afternoon stops. This simple adjustment dramatically reduced waste and customer complaints.

Temperature control is crucial for keeping produce fresh throughout your route. Pack insulated coolers with ice packs for your most perishable items, and arrange boxes strategically in your vehicle to maintain cool temperatures. By syncing your harvest timing with delivery sequences, you’ll maximize freshness while minimizing the stress of last-minute packing rushes.

Sequencing Stops for Maximum Efficiency

Smart stop sequencing can slash your delivery time by 30% or more. The key is creating logical loops that flow naturally through your delivery area rather than crisscrossing back and forth.

Start by clustering your delivery addresses geographically. Group customers by neighborhood or zone, then connect these clusters in a circular pattern that brings you back toward your farm. Think of it like a cloverleaf rather than a star pattern radiating from center.

Consider traffic patterns when ordering your stops. Schedule residential neighborhoods during mid-morning when school drop-offs are done but before lunch rush. Save business district deliveries for early morning or late afternoon when parking is easier to find.

Use natural landmarks and major roads as boundaries. For example, complete all deliveries north of Main Street before crossing over, or finish the entire eastside loop before heading west. This mental mapping prevents the common mistake of “just one more stop” that sends you backtracking.

Lucy Chen, who runs Green Valley Farm in Vermont, redesigned her Thursday route using this cluster method. “I was zigzagging across town hitting 25 stops in five hours,” she explains. “Now I complete 28 stops in three and a half hours by following neighborhood loops.” That time savings means she can spend more hours in the field during peak growing season.

Building in Buffer Time That Saves Your Sanity

The reality of farm deliveries is that they rarely go exactly as planned, and that’s completely normal. When mapping your route, build in cushion time between stops to preserve your peace of mind and keep customers happy.

Start by adding 10-15 minutes at your first stop for loading reusable delivery containers and doing final quality checks. This prevents the domino effect of running late all day. Between stops, factor in an extra 5 minutes for friendly conversations with members. These connections are valuable for building community and getting feedback, but they can derail a tight schedule.

Weather, traffic, and the occasional wrong turn happen. Adding a 20-minute buffer to your total route time creates breathing room for these surprises without sending stress levels through the roof. Consider clustering your most chatty members earlier in the route so any delays don’t affect your final stops.

One successful CSA farmer shared that switching from 15-minute intervals to 20-minute windows reduced her delivery-day anxiety dramatically while only adding 45 minutes to her total route. The trade-off was absolutely worth it for maintaining sanity and ensuring every customer received the same cheerful service, whether they were first or last on the list.

Real CSA Farms Share What Works

When Sarah Martinez started her 60-member CSA outside Portland, she spent nearly eight hours every Thursday driving in circles across the city. “I’d backtrack constantly, waste gas, and still arrive late to drop-off sites,” she recalls. After implementing basic route scheduling with a free mapping tool, Sarah cut her delivery time to four hours and saved $200 monthly in fuel costs. “Those extra four hours let me actually enjoy dinner with my family on delivery nights.”

The transformation wasn’t just about time. Jake Henderson runs Green Valley Farm in Vermont with 85 CSA members spread across three counties. Before optimizing his routes, he noticed produce quality suffering during long delivery days. “Delicate greens would wilt by the afternoon stops,” he explains. By reorganizing his route to create a logical loop and investing in better coolers, Jake reduced his delivery window from nine hours to five. His members immediately noticed fresher produce, and cancellations dropped by 40 percent the following season.

For Emma Chen’s small operation in North Carolina, better route scheduling meant she could finally grow her business. With only 25 members, she thought optimization wasn’t necessary. “I was wrong,” she admits. After mapping her routes properly, she discovered she could serve 15 additional members without adding delivery time. “I was driving past potential customers while zigzagging to existing ones.”

These farmers all started with simple solutions like printing maps and grouping nearby drop-offs. The common thread? They reclaimed precious hours, reduced stress, and created sustainable businesses that didn’t demand every waking moment. As Sarah puts it, “Route scheduling gave me back my life while making my farm more profitable.”

Farmer delivering CSA produce box to member at home doorstep
Efficient route scheduling allows farmers to deliver fresh produce on time while building stronger relationships with CSA members.

Troubleshooting Common Route Scheduling Headaches

When Members Are Spread Too Far Apart

When your CSA members live scattered across a wide geographic area, efficient route scheduling becomes especially challenging. Rather than zigzagging across the countryside burning fuel and time, consider establishing central pickup points where multiple members can collect their shares. Community centers, farmers markets, or friendly local businesses often make ideal hubs.

Green Valley Farm found success by requiring a minimum of five members per neighborhood before adding that area to their delivery route. This cluster approach transformed their delivery day from a grueling 8-hour drive to a manageable 4-hour route. They communicated this policy transparently during signup, and members actually appreciated the honesty about operational realities.

Another effective strategy involves partnering with established businesses along your route. Coffee shops, yoga studios, and natural food stores often welcome the foot traffic CSA pickups bring. One farmer shared how his partnership with a local café created a win-win situation where members grabbed their produce boxes while enjoying a morning coffee, and the café owner saw increased weekday business.

Handling Last-Minute Changes and No-Shows

Life happens, and CSA delivery routes are no exception. The key to managing last-minute changes is building buffer time into your schedule from the start. Valley View Farm’s Sarah Martinez recommends adding 15-minute cushions between delivery clusters, giving you flexibility when customers text about unexpected delays or location changes.

Create a clear communication protocol that works for both you and your members. Establish a cutoff time for change requests, typically 24 hours before delivery day. For unavoidable same-day changes, consider designating a backup drop-off spot at each delivery area where shares can be safely left if members aren’t home.

No-shows deserve a straightforward policy. Many successful farms implement a “three strikes” rule where repeatedly missed pickups without notice result in switching the member to a different delivery day or pickup location. Always document these occurrences to track patterns.

Keep a cooler with ice packs in your vehicle for unexpected delays. This simple preparation protects your produce quality when routes run longer than planned. Consider using a group messaging app where members can communicate directly about schedule changes, reducing the coordination burden on you while maintaining that personal CSA connection.

Managing Multiple Drop-Off Types

Managing multiple drop-off types adds complexity, but the right approach keeps everything flowing smoothly. Start by grouping your deliveries into clear categories: home deliveries in one zone, pickup sites in another, and market booths as fixed destinations.

The key is scheduling your markets first since they’re time-sensitive commitments. Then build your home delivery routes around them, clustering customers geographically. Pickup sites work beautifully as anchor points between neighborhoods, allowing you to consolidate deliveries efficiently.

Sarah from Green Valley Farm discovered that dedicating specific days to each delivery type reduced her weekly mileage by 40%. She runs home deliveries Tuesday and Wednesday, serves three pickup sites on Thursday, and reserves Saturday for farmers markets. This separation eliminates backtracking and creates predictable patterns for customers.

Consider offering incentives for customers who switch to pickup sites, like an extra item or discount. This naturally shifts your operation toward more efficient delivery methods while maintaining customer satisfaction.

Making Route Scheduling Easier as You Grow

As your CSA grows from 20 members to 50 or beyond, your route scheduling system needs to grow with you. The good news? You don’t need to overhaul everything at once.

Start by documenting your current system, even if it’s simple. Write down your route patterns, time estimates, and any quirks specific to delivery locations. This becomes your training manual when you bring on help. Many successful farmers keep a simple route binder with maps, customer notes, and backup contact information that anyone can follow.

Consider upgrading your tools when manual methods take more than 30 minutes per week to manage. Free options like Google My Maps work well up to about 40 customers, while dedicated route planning software makes sense for larger operations. The investment typically pays for itself through fuel savings and time recovered within a few months.

Training delivery helpers doesn’t need to be complicated. Have new assistants ride along for two delivery days before going solo. Create a one-page quick reference guide with the route order, parking tips, and how to handle common situations like customers not answering their door. Sarah Chen, who runs Green Valley CSA in Ontario, prints laminated route cards showing the delivery sequence with photos of each drop-off location, making it foolproof for her three part-time drivers.

As you expand, protect produce quality by scheduling realistic delivery windows. Building in buffer time prevents rushed deliveries that lead to mistakes or damaged produce. Remember, sustainable growth means maintaining the personal touch and reliability that made your CSA successful in the first place. Add customers gradually, test new routes on slower weeks, and always keep communication open with your members about any schedule adjustments.

Better route scheduling isn’t just about saving a few minutes here and there—it’s about reclaiming your time, reducing the daily stress that comes with chaotic deliveries, and creating a smoother experience for your members. When your routes run efficiently, you have more energy to focus on what matters most: growing exceptional food and nurturing the relationships that make your CSA special.

This week, start with just one simple improvement. Maybe it’s grouping deliveries by neighborhood, or testing a free route planning tool for your busiest delivery day. Small changes add up quickly, and you’ll notice the difference almost immediately.

Remember, efficient operations aren’t just about convenience—they’re essential for sustainable farming over the long haul. When you’re not burning excess fuel or spending extra hours on the road, you’re conserving resources and protecting your own wellbeing. You didn’t get into farming to sit in traffic. With smarter route scheduling, you can spend less time behind the wheel and more time doing the work that feeds your community and sustains your land for years to come.

How Your Local CSA Keeps Produce Fresh from Farm to Fridge

Posted by darrell on
0
Operations and Logistics
How Your Local CSA Keeps Produce Fresh from Farm to Fridge

Picture this: A CSA member opens their weekly box to find crisp lettuce, firm tomatoes, and vibrant berries that taste like they were just picked—because proper cold chain management kept them that way. The cold chain is simply the unbroken series of refrigerated steps that preserve your produce from harvest to your kitchen, and it makes all the difference between wilted greens and farm-fresh quality.

For CSA farmers, mastering the cold chain means harvesting in the cool morning hours, immediately moving produce into a walk-in cooler or refrigerated space, maintaining temperatures between 32-40°F depending on the crop, and using insulated delivery vehicles or coolers packed with ice packs for distribution. This controlled temperature journey prevents the enzymatic breakdown that causes produce to lose flavor, texture, and nutritional value within hours of harvest.

The magic happens when farmers understand that different vegetables have different cold chain needs. Leafy greens and herbs demand immediate cooling and high humidity, while tomatoes and peppers prefer slightly warmer holding temperatures to maintain their flavor profiles. Even a few hours at room temperature can reduce shelf life by days.

For CSA members, recognizing strong cold chain practices helps you choose quality operations and properly store your produce at home. When farmers invest in refrigeration infrastructure and temperature-controlled logistics, they’re investing in your experience—delivering produce that stays fresh for a week or more, reducing food waste, and proving that local can absolutely mean longer-lasting. This commitment to the cold chain transforms CSA boxes from a nice idea into a genuinely superior alternative to supermarket shopping.

What Is Cold Chain Logistics (And Why CSA Farms Need It)

The Science Behind Temperature Control

Think of temperature as a time machine for your fresh produce. Just like leftovers in your fridge last longer than food left on the counter, the temperature at which you store fruits and vegetables dramatically affects how quickly they spoil.

Here’s what happens at the microscopic level: every piece of produce contains natural enzymes that continue working after harvest, slowly breaking down cell walls and converting starches to sugars. When temperatures rise, these enzymes kick into high gear, accelerating the aging process. Picture a banana ripening on your kitchen counter versus one in the refrigerator—that’s enzyme activity in action.

Temperature also controls microbial growth. Bacteria and fungi that cause decomposition multiply rapidly in warm conditions. At room temperature, these microorganisms can double their population every 20 minutes, but cold temperatures slow this growth dramatically. For most produce, keeping temperatures between 32-40°F creates an inhospitable environment for these unwanted guests.

There’s also the matter of respiration. Fresh produce continues “breathing” after harvest, consuming oxygen and releasing carbon dioxide, heat, and moisture. Higher temperatures increase respiration rates, causing produce to burn through its stored energy faster and deteriorate more quickly.

By maintaining proper cold chain temperatures from farm to table, CSA farmers can preserve that just-picked freshness you love, ensuring your weekly share arrives with maximum nutrition, flavor, and shelf life. It’s about respecting the produce’s natural biology while extending its peak quality.

Why Local CSAs Have a Cold Chain Advantage

When your salad greens travel just five miles instead of 1,500, the difference in freshness is remarkable. Local CSAs have a built-in cold chain advantage simply because of geography. While conventional grocery store produce might spend a week bouncing between refrigerated trucks, distribution centers, and storage facilities, your CSA lettuce could be harvested in the morning and in your hands by afternoon.

This shorter journey means fewer temperature fluctuations and less time for nutrients to degrade. Every hour that produce spends in transit, it loses vital vitamins and that just-picked flavor. CSA farmer Maria Rodriguez from Green Valley Farm shares her approach: “We harvest at dawn when vegetables are crisp and cool, then pack them immediately into our refrigerated space. Our members pick up within 24 hours, so there’s minimal cold chain complexity.”

The proximity factor also reduces the need for extensive refrigeration infrastructure. Many small CSAs can maintain quality with simple walk-in coolers rather than elaborate cold storage systems. This simplicity translates to lower costs and a smaller carbon footprint. For consumers, it means biting into a tomato that tastes like summer, not cardboard. That’s the power of a short, well-managed cold chain working in perfect harmony with local food systems.

The CSA Cold Chain Journey: From Field to Your Kitchen

Harvest Timing and Field Heat Removal

Ever wondered why your CSA farmer is out in the fields at dawn? There’s science behind those early morning harvests. Many successful CSA operations, like Green Valley Farm in Vermont, schedule picking during the coolest parts of the day when vegetables are naturally crisp and hydrated from overnight dew.

Here’s the challenge: the moment a tomato, lettuce head, or bunch of kale is picked, it begins losing quality. This stored energy, called “field heat,” causes produce to respire faster, burning through nutrients and moisture. Think of it like leaving your smartphone on full brightness—the battery drains quickly.

Removing field heat rapidly is essential for maintaining freshness. CSA farmers typically aim to cool produce within one to two hours of harvest. Small-scale growers use creative methods like cold water baths for leafy greens, shade structures near picking areas, and immediate refrigeration. Some even pre-cool harvest bins before heading to the fields.

The result? When you receive your CSA box, those vegetables haven’t just been picked recently—they’ve been carefully handled to preserve their just-picked vitality, flavor, and nutritional value from field to your kitchen.

Farmer's hands holding fresh leafy greens with morning dew in early light
CSA farmers harvest produce in cool morning hours to minimize field heat and preserve freshness from the moment of picking.

On-Farm Cooling Methods

For small-scale CSA farms, maintaining produce freshness starts the moment vegetables leave the field. The right on-farm cooling methods can mean the difference between crisp greens that last a week and wilted produce that disappoints members.

Walk-in coolers are the backbone of most CSA cooling operations. These refrigerated rooms allow farmers to rapidly drop the temperature of freshly harvested produce to around 35-40°F. Green Meadow Farm in Ontario installed a walk-in cooler three years ago and saw their waste drop by 30 percent. Owner Sarah Martinez shares, “We can now harvest in the morning and have everything cooled down before we start packing for our members.”

Hydrocooling offers a faster alternative for certain crops. This method uses cold water to quickly remove field heat from vegetables like carrots, radishes, and leafy greens. Valley View CSA uses a simple setup with a stock tank and recirculating cold water, cutting cooling time from hours to just 15 minutes. The produce then gets stored in reusable bins and crates that allow continued air circulation.

Forced-air cooling works wonders for berries and tender crops. By pushing cold air through stacked containers, farms can cool produce evenly in half the time of passive cooling. Sunrise Acres built their own forced-air system for under $500 using a used air conditioner and some creative ductwork.

The key is choosing methods that match your farm’s scale and crop mix while keeping energy costs reasonable.

Interior of farm walk-in cooler with crates of fresh vegetables on shelving
Walk-in coolers allow CSA farms to maintain optimal temperatures for different produce types, extending shelf life and preserving nutrients.

Packing and Sorting in Cool Environments

After harvest, the race against time continues in the packing shed, where maintaining cool temperatures is essential for preserving that just-picked freshness. Many successful CSA farms have invested in cooled packing areas, often keeping temperatures between 35-45°F depending on the produce being handled. These climate-controlled spaces slow respiration and prevent moisture loss while workers sort and pack your weekly share boxes.

The key to effective cold chain management during this stage is speed combined with organization. Farmers design workflows that minimize handling time and keep produce exposure to warmer temperatures brief. Some farms use efficient packing systems with pre-cooled containers and strategic staging areas. Greenleaf Valley Farm in Ontario, for example, reduced their pack-to-cooler time by 40% simply by reorganizing their shed layout and training their team on cold chain principles.

For smaller operations without full refrigeration, creative solutions work wonders. Early morning packing sessions, portable fans, shaded work areas, and immediate transfer to coolers all help maintain quality. The investment in proper packing infrastructure directly translates to crisper greens and longer-lasting vegetables in your CSA box.

Temperature-Controlled Storage

Maintaining the right temperature is crucial for preserving your harvest’s freshness and nutritional value. Leafy greens and herbs thrive at 32-36°F, while tomatoes prefer slightly warmer conditions around 55°F to prevent flavor loss. Root vegetables store well at 32-40°F with high humidity.

Many small CSA farms creatively manage storage challenges with limited budgets. Some farmers invest in used walk-in coolers or convert old refrigerators, while others partner with nearby farms to share cooling facilities. Dawn Creek Farm in Ontario started with just two chest freezers before upgrading to a small walk-in unit as membership grew.

Smart practices make a big difference even with basic equipment. Using proper storage containers that allow air circulation helps maintain consistent temperatures. Some farmers pre-cool produce using ice water baths before storage, extending shelf life significantly. Organizing your cooler by temperature zones maximizes efficiency, keeping cold-sensitive items separate from those needing near-freezing conditions.

Remember, even modest cold storage investments pay dividends in reduced waste and happier members receiving peak-quality produce.

The Last Mile: Distribution and Pickup

The final stretch of your cold chain journey is critical—this is where fresh produce meets eager members! For CSA farmers, investing in refrigerated delivery vehicles makes a significant difference, especially during warm months. Even a basic insulated van can maintain temperatures 15-20 degrees cooler than ambient conditions, preserving that just-picked quality your members love.

At pickup locations, strategic placement matters. Choose shaded areas and schedule pickups during cooler parts of the day when possible. Use insulated containers or coolers with ice packs for produce sitting at drop-off sites. Some successful CSA operations provide communal refrigeration at pickup locations—a shared fridge can be a game-changer for member satisfaction.

For members, bring your own cooler bags and head straight home after pickup. If you’re running errands, save the CSA pickup for last. One Vermont farmer shared how educating members about proper transport increased retention rates by 25 percent—people truly appreciate understanding how to protect their investment in fresh, local food. Remember, maintaining the cold chain right to your refrigerator ensures you enjoy maximum nutrition and flavor from your weekly harvest.

Real CSA Success Stories: Temperature Control in Action

When Green Valley Farm in Vermont noticed members complaining about wilted greens by mid-week, farmer Maria Chen knew something had to change. Her lettuce and spinach looked perfect at harvest, but the journey from field to fridge was taking its toll. The solution? A simple yet effective cold chain overhaul. Maria invested in a walk-in cooler and began pre-cooling produce within 30 minutes of harvest, dropping field heat immediately. She also switched to insulated delivery boxes with ice packs for her pickup locations. The results were remarkable: member retention jumped 40% in one season, and complaints virtually disappeared. Maria shares that the initial $3,000 investment paid for itself within eight months through reduced waste and increased membership renewals.

Meanwhile, Sunrise Community Farm in North Carolina faced a different challenge. Operating in hot, humid conditions, farmer James Mitchell struggled to maintain quality during summer distributions. His breakthrough came from observing commercial operations and adapting their methods to a smaller scale. James created a simple staging area with portable air conditioning units where packed shares could wait in 45-degree temperatures before member pickup. He also educated members about the importance of bringing coolers and getting shares home quickly. This collaborative approach transformed the experience. Member surveys showed a 65% increase in satisfaction with produce quality, and James noticed he could finally grow delicate crops like butter lettuce in summer months.

Over in Oregon, Harvest Moon Farm tackled the storage puzzle creatively. Farmer couple Sarah and Tom Rodriguez converted an old shipping container into an affordable cold storage unit using off-the-shelf refrigeration equipment and excellent insulation. This DIY approach cost them under $2,000 compared to commercial units starting at $8,000. They maintain different temperature zones for various crops, keeping root vegetables separate from leafy greens. Their innovation earned praise from members who noticed carrots staying crisp for three weeks and herbs maintaining vibrant color throughout the week. The couple now mentors other small farms on budget-friendly cold chain solutions, proving that effective temperature control doesn’t require breaking the bank.

What CSA Members Can Do to Maintain the Cold Chain

Pickup Day Best Practices

Timing is everything when it comes to protecting your fresh CSA produce. Plan to pick up your share as close to the designated time as possible, ideally during cooler morning or evening hours if you have flexibility. This minimizes the time your vegetables spend at ambient temperatures.

Bring insulated bags or a cooler with ice packs to your pickup location. Think of it as creating a mini cold chain right in your vehicle. This simple step can make a significant difference, especially during hot summer months when leafy greens and delicate items like berries are most vulnerable to heat stress.

Once you’ve collected your share, head straight home. Resist the temptation to run additional errands with fresh produce in your car. Even a quick 20-minute stop at another store can compromise the quality of temperature-sensitive items. When you arrive home, unpack immediately and store everything according to its specific needs. Your farmers have worked hard to maintain the cold chain from harvest to pickup, and these final steps ensure you enjoy peak freshness and flavor throughout the week.

Woman with insulated bag collecting fresh vegetables at CSA pickup location
CSA members play a crucial role in maintaining the cold chain by bringing insulated bags to pickup and refrigerating produce promptly at home.

Home Storage Tips for CSA Produce

Once your beautiful CSA produce arrives home, proper storage becomes your responsibility in the cold chain. Think of your refrigerator as a preservation tool that extends the farm-fresh quality you’ve been promised.

Start by organizing your fridge strategically. Keep your crisper drawers set to high humidity for leafy greens, herbs, and cruciferous vegetables like broccoli and cauliflower. These items thrive in moisture-rich environments. Set one drawer to low humidity for fruits and vegetables that prefer drier conditions, such as peppers and summer squash.

Not everything belongs in the fridge immediately. Tomatoes, winter squash, potatoes, onions, and garlic actually lose flavor and texture when refrigerated. Store these at room temperature in a cool, dark spot. Basil also prefers countertop storage in a glass of water, like a little bouquet.

Here’s a quick reference for common CSA vegetables: Lettuce and greens need high humidity and immediate refrigeration. Root vegetables like carrots and beets stay fresh longer when stored in sealed bags with humidity. Cucumbers and zucchini do well in low humidity settings. Corn tastes sweetest when refrigerated promptly, as its natural sugars convert to starch quickly.

Understanding these simple storage principles helps you honor the careful cold chain work your farmer invested in, ensuring nothing goes to waste and every meal celebrates peak freshness.

The Environmental and Quality Benefits of CSA Cold Chains

When CSA farms embrace proper cold chain practices, they’re doing more than just keeping vegetables crisp—they’re contributing to a healthier planet. Temperature-controlled storage and transport significantly reduce food waste, a major environmental concern. Studies show that up to 40% of produce can be lost without proper cold chain management, but CSA farms using these systems can cut spoilage dramatically.

Beyond waste reduction, cold chains preserve the nutritional integrity of your harvest box. Those delicate vitamins and antioxidants that make organic produce so valuable? They’re protected when temperatures stay consistent from field to fridge. This means you’re getting maximum health benefits from every carrot and leafy green.

For farmers, efficient cold chain systems support sustainable farm operations by reducing energy consumption through strategic cooling methods. Many CSAs are investing in solar-powered coolers or utilizing naturally cool spaces like root cellars, blending traditional wisdom with modern technology.

The ripple effects extend to farming practices too. When farmers know their cold chain can maintain quality for reasonable periods, they can focus on regenerative growing methods rather than rushing harvests. This supports soil health and biodiversity on the farm.

Take Green Valley Farm in Ontario—after implementing a simple walk-in cooler and insulated delivery bins, they reduced produce waste by 30% and extended their growing season offerings. Their members noticed the difference immediately: crisper greens, longer-lasting produce, and the satisfaction of supporting truly sustainable agriculture.

The next time you bite into a crisp head of lettuce or enjoy perfectly ripe strawberries from your CSA box, take a moment to appreciate the careful cold chain management that preserved that farm-fresh goodness. From the moment those vegetables leave the field to when they reach your kitchen, proper cooling practices ensure you’re getting the most nutritious, flavorful produce possible. Your local farmers work tirelessly behind the scenes, often starting their days before sunrise to harvest during the coolest hours and implementing thoughtful storage solutions to maintain quality.

Understanding cold chain logistics helps us recognize the dedication required to bring truly fresh food to our tables. If you’re already part of a CSA community, consider asking your farmer about their cooling and storage practices during your next pickup. Their story might surprise and inspire you! Not yet a CSA member? Seek out programs in your area that prioritize freshness through proper temperature management. Supporting these farmers means investing in sustainable food systems that nourish both our bodies and our communities while reducing food waste and environmental impact.

How Reusable Bins and Crates Are Transforming CSA Farm Operations

Posted by darrell on
0
Operations and Logistics
How Reusable Bins and Crates Are Transforming CSA Farm Operations

Replace disposable cardboard boxes with stackable plastic crates that last 50+ trips between your farm and CSA members. Start with 20-30 containers to test the system before investing in your full fleet—most farms need one crate per member plus 25% extras for rotation. Choose collapsible designs that fold flat for easy transport back to the farm, cutting storage space by 70% compared to rigid bins.

Set up a simple deposit system charging $5-10 per container, automatically refunded when members return clean bins at their next pickup. This approach has helped farms like Green Valley CSA achieve a 95% return rate while eliminating over $2,000 annually in packaging waste. Print your farm name and clear return instructions directly on each container to prevent mix-ups at shared pickup locations.

Track containers using a basic spreadsheet or farm management software, noting which members have bins and flagging any overdue returns with friendly reminders. The initial investment typically pays for itself within two seasons through eliminated cardboard costs and reduced labor from pre-packing vegetables into returnable containers the night before distribution. Members appreciate the commitment to sustainability, and you’ll spend less time breaking down boxes after every delivery—turning a waste problem into a competitive advantage that strengthens your farm’s environmental credentials while improving efficiency.

What Is Reusable Transport Packaging for CSAs?

Reusable transport packaging for Community Supported Agriculture programs offers a practical, eco-friendly alternative to the mountains of single-use boxes and bags that typically accompany weekly produce deliveries. Instead of disposable cardboard boxes that end up in recycling bins or landfills, CSA farms use durable containers designed for multiple trips between farm and member households.

The most common types include sturdy plastic bins with handles, similar to what you might see at farmers markets. These stackable containers resist moisture and last for years with proper care. Wooden crates provide another popular option, bringing rustic charm while offering excellent ventilation for leafy greens and delicate produce. Many farms have found success with collapsible containers that nest together when empty, making return transportation far more space-efficient. For CSAs offering dairy, meat, or items requiring temperature control, insulated coolers maintain product quality during delivery while eliminating styrofoam waste.

The key difference from single-use packaging lies in the circular system these containers create. Rather than grabbing a new cardboard box each week, members receive their produce in a clean, sanitized bin that returns to the farm for the next delivery cycle. This closed-loop approach dramatically reduces waste while often cutting packaging costs over time.

Take Green Valley Farm in Vermont, where switching to reusable bins eliminated over 2,000 cardboard boxes annually. Farmer Maria Chen shares that members appreciate the sturdier containers, which prevent crushed tomatoes and bruised peaches during transport. The containers also stack neatly in members’ garages or mudrooms between pickups, creating less clutter than flattened cardboard boxes. While implementing a return system requires planning, many CSAs find the environmental and practical benefits well worth the initial setup effort.

Stacked reusable plastic bins and wooden crates filled with fresh produce in farm packing area
Reusable bins and crates offer CSA farms a durable, sustainable alternative to disposable packaging materials.

The Real Benefits for Your CSA Farm

Cutting Costs While Going Green

Switching to reusable transport packaging requires an upfront investment, but the numbers tell an encouraging story. Take Green Valley Farm, a mid-sized CSA in Oregon that invested $2,800 in durable plastic crates and bins. Within eight months, they’d eliminated their previous $450 monthly cardboard box expense, breaking even before their first anniversary. Now in year three, they’re saving over $5,000 annually while reducing waste headed to landfills.

The math works because you’re replacing a recurring cost with a one-time purchase. Single-use packaging means paying week after week, season after season. Quality reusable containers typically last five to seven years with proper care, spreading that initial cost across hundreds of uses.

Start small if budget concerns you. Many farmers begin by purchasing enough reusable containers for their most committed members, gradually expanding as savings accumulate. Some CSAs implement a modest deposit system, where members pay $10-15 per container, refundable when they return it. This approach effectively lets your member base help finance the transition while ensuring accountability.

The environmental bonus sweetens the deal. You’ll dramatically reduce your carbon footprint while building a reputation as a sustainability leader in your community.

Fresh vegetables and leafy greens arranged in reusable plastic crate viewed from above
Sturdy reusable containers protect delicate produce during transport while maintaining freshness and professional presentation.

Keeping Produce Fresh and Protected

One of the biggest challenges for CSA farmers is getting fresh produce from field to table while maintaining peak quality. Sturdy, reusable containers make all the difference here. Unlike flimsy cardboard boxes that can collapse when damp or single-use plastic bags that offer little protection, durable plastic bins and crates provide a cushioned, stable environment for your delicate leafy greens, heirloom tomatoes, and just-picked berries.

These containers feature ventilation holes that allow air circulation, preventing moisture buildup that leads to spoilage. Their rigid structure prevents crushing during stacking and transport, which means fewer bruised apples and damaged lettuces reaching your members. Many farmers report significant reductions in produce waste after switching to reusable systems.

Take Green Valley Farm in Oregon, for example. After investing in stackable reusable bins, they cut their produce damage by 40% and noticed members commenting on how fresh everything looked at pickup. The farmer shared that the bins’ consistent sizing also made packing more efficient, allowing them to organize shares more quickly while ensuring every vegetable arrived in pristine condition. This protection translates directly to happier CSA members and less food waste for everyone involved.

How Reverse Logistics Actually Works for Small Farms

Setting Up a Simple Return System

Getting your reusable container system off the ground doesn’t have to be complicated. Start small by designating specific bins or crates for just one or two produce items, then expand as you learn what works best for your operation.

Communication is everything. Send a welcome email or newsletter explaining your new system before launch day. Let members know why you’re making the switch, what containers they’ll receive, and exactly when and where to return them. Most CSA members are thrilled to reduce waste once they understand the simple steps involved.

Set up a clearly marked return station at your pickup location. A simple table or designated corner with signage like “Clean Containers Go Here” works wonders. Include a quick visual guide showing acceptable cleanliness standards—members genuinely want to help but need clear expectations.

Create a rhythm that’s easy to remember. Many successful farms use a “return next week” policy where members bring back last week’s containers when picking up their fresh share. This keeps containers cycling smoothly without members accumulating stacks at home.

Consider a small deposit system if containers aren’t returning consistently. Even five dollars per bin encourages responsibility without feeling punitive. Valley Harvest Farm in Vermont found their return rate jumped from 60% to 95% after implementing modest deposits.

Keep backup disposable options available during the transition period. Some members will forget occasionally, and having a plan B prevents frustration on both sides while everyone adjusts to the new routine.

Keeping Track Without Getting Overwhelmed

You don’t need fancy software to keep track of your reusable containers. Many successful CSA farmers start with a simple sign-in sheet at pickup locations where members check off their names and note how many containers they’re returning. This low-tech approach works beautifully for smaller operations and costs nothing.

If you prefer digital tracking, a basic spreadsheet does the trick. Create columns for member names, containers checked out, and containers returned. You can even color-code cells to quickly spot who’s holding onto containers for too long. Some farmers use free apps like Google Forms for members to self-report their returns, which automatically updates a shared spreadsheet.

The key is choosing a system you’ll actually use consistently. Emma Rodriguez, who runs a 75-member CSA in Vermont, keeps it refreshingly simple: “I have a clipboard with member names and a tally system. Takes me two minutes at each pickup, and I haven’t lost a single container in three years.”

Consider implementing a friendly reminder system too. A quick text or email a few days before pickup asking members to bring containers prevents forgetfulness without creating confrontation. Remember, most people want to return containers but simply need gentle nudges to build the habit.

Real CSA Farms Making It Work

Real farmers are proving that reusable packaging systems work beautifully across different scales and models. Their experiences offer valuable insights for anyone considering this sustainable shift.

Green Valley Farm, a 15-acre operation in Vermont, started with just 50 members and a simple crate system. Owner Sarah Martinez invested in 200 stackable plastic bins that members exchanged weekly. The biggest challenge? Getting consistent returns during the first season. Sarah solved this by implementing a deposit system of $5 per crate and setting up clearly marked return stations at both pickup locations. “We now have a 98% return rate,” she shares. “The deposit was key, but so was making returns super convenient.” The farm has saved over $3,000 annually on packaging costs and virtually eliminated their cardboard waste.

Riverside Community Farm in Oregon takes a different approach with their 300-member CSA. They use sturdy cloth bags for greens and collapsible wooden crates for everything else. Farm manager Tom Chen admits the initial investment felt steep at $2,500, but the payback period was just 18 months. “Our members love the aesthetic and feel good about reducing waste,” he explains. The farm created a simple tracking system using numbered tags, which helped them identify patterns and reduce loss rates from 15% to just 3%.

For smaller operations, Meadowbrook Farm’s story resonates strongly. This 5-acre Michigan farm serves 30 families using repurposed restaurant delivery totes purchased secondhand. Farmer Lisa Wong keeps things manageable by doing doorstep delivery and collecting empties on the next round. “You don’t need fancy systems,” she emphasizes. “Start small, communicate clearly with members, and build from there.”

Each farm demonstrates that reusable packaging success depends less on farm size and more on clear communication, convenient return systems, and member buy-in.

Getting Members On Board With Returns

The success of any reusable packaging system hinges on one critical factor: getting your members to actually return the containers. This is often the biggest hurdle CSA farmers face, but with the right approach, you can create a smooth-running system that works for everyone.

Start with crystal-clear communication from day one. When members sign up or receive their first delivery, provide a simple one-page guide explaining exactly how the return system works. Include photos showing where to place empty containers, what condition they should be in (rinsed, no food residue), and your specific timeline expectations. Many successful CSAs find that demonstrating the process during farm tours or pickup orientations dramatically improves compliance rates.

Creating the right incentives makes a world of difference. Consider implementing a deposit system where members pay a small refundable fee for each container, encouraging timely returns. Alternatively, some farms offer bonus items like extra eggs or a jar of homemade jam to members who consistently return containers on time. One Wisconsin CSA farmer shared that offering a “sustainability star” loyalty program increased their return rate from 60% to 95% within a single season.

Make the return process ridiculously easy. Designate a clearly marked collection area at your pickup location with signs and bins. For delivery members, provide a simple bag or crate where they can leave empties at their doorstep. The fewer steps involved, the better your success rate.

Build community around the practice by regularly sharing the positive impact. Post updates about how many containers were reused and the waste diverted from landfills. When members understand they’re part of something meaningful, they become champions of the system rather than participants who occasionally forget.

Starting Small: Your First Steps Toward Reusable Packaging

Ready to make the switch but not sure where to begin? The beauty of transitioning to reusable packaging is that you don’t need to overhaul everything overnight. Start small and build momentum as you go.

Launch a pilot program with your most engaged members first. Choose 10-15 enthusiastic customers who already show commitment to sustainability, and test your system with them for 4-6 weeks. This gives you valuable feedback without overwhelming your operations. One Vermont CSA discovered through their pilot that members preferred shallow crates over deep bins because produce stayed fresher and was easier to unpack at home.

When selecting containers, prioritize durability over price. Look for stackable plastic crates or collapsible bins that can withstand years of use and fit your vehicle’s storage space. Calculate roughly 2-3 containers per member to allow for rotation while some are being cleaned and returned.

Budget realistically for your initial investment. Plan on spending between 10-15 dollars per container, plus any deposit tracking systems you might need. While this seems significant upfront, most farms recover costs within 18-24 months through eliminated packaging expenses.

Track everything during your trial period: return rates, cleaning time, member feedback, and cost savings. These metrics help you adjust your approach before scaling up. A Massachusetts farm found that sending weekly reminder texts boosted their container return rate from 65 percent to 92 percent within a month. Use what works, modify what doesn’t, and gradually expand to your full membership once you’ve refined the process.

Making the switch to reusable transport packaging isn’t just good for the planet—it’s a practical step that can strengthen your CSA operation from the ground up. Whether you start with just bins for bulk items or dive into a comprehensive container system, you’re joining a growing movement of farms proving that sustainability and profitability can go hand in hand.

Remember, there’s no one-size-fits-all approach here. A small urban CSA might thrive with collapsible crates and a simple rotation system, while a larger operation could benefit from sturdy plastic totes and a deposit program. The beauty of reusable packaging is its flexibility—you can tailor your system to match your farm’s unique needs, budget, and member base.

Start small if you need to. Test one type of container with a handful of willing members. Learn what works, adjust what doesn’t, and grow from there. Your members will likely surprise you with their enthusiasm once they understand the environmental and cost benefits. Many farmers report that their CSA community embraces reusable packaging as another way to participate in sustainable agriculture.

The first step is simply deciding to try. Your future self—and your farm—will thank you.