Category Archives

43 Articles

How Organic No-Till Farming Builds Healthier Soil (And Cuts Your Workload in Half)

Posted by darrell on
0
Organic Farming and Cultivation
How Organic No-Till Farming Builds Healthier Soil (And Cuts Your Workload in Half)

Picture this: rich, healthy soil teeming with life, bountiful harvests year after year, and not a single pass with a plow. That’s the promise of organic no-till farming, a revolutionary approach that’s transforming how we grow food while healing the earth beneath our feet.

For decades, we’ve been told that turning soil is essential for successful farming. But forward-thinking farmers across the country are proving otherwise. By keeping the soil structure intact and relying on natural processes instead of synthetic chemicals, they’re building resilience into their land while producing exceptional crops.

No-till farming protects the intricate web of microorganisms, fungi, and earthworms that create truly fertile soil. When you stop disrupting this underground ecosystem, something magical happens. The soil becomes a carbon sink rather than a carbon source, water retention improves dramatically, and your plants develop stronger, deeper root systems that can weather droughts and resist pests naturally.

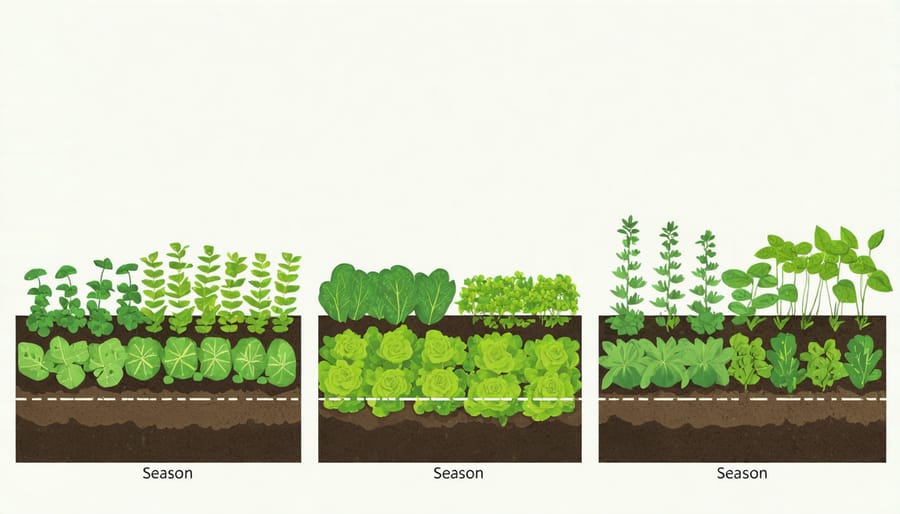
The beauty of this approach lies in its accessibility. Whether you’re managing five acres or a backyard garden, organic no-till methods can work for you. You don’t need expensive equipment or chemical inputs. Instead, you’ll rely on cover crops, mulch, and strategic planning to suppress weeds and build fertility.

The journey requires patience and a willingness to observe how nature farms itself. But the rewards go beyond healthier soil and cleaner harvests. You’ll spend less time fighting your land and more time working with it, creating a sustainable system that gets better with each passing season.

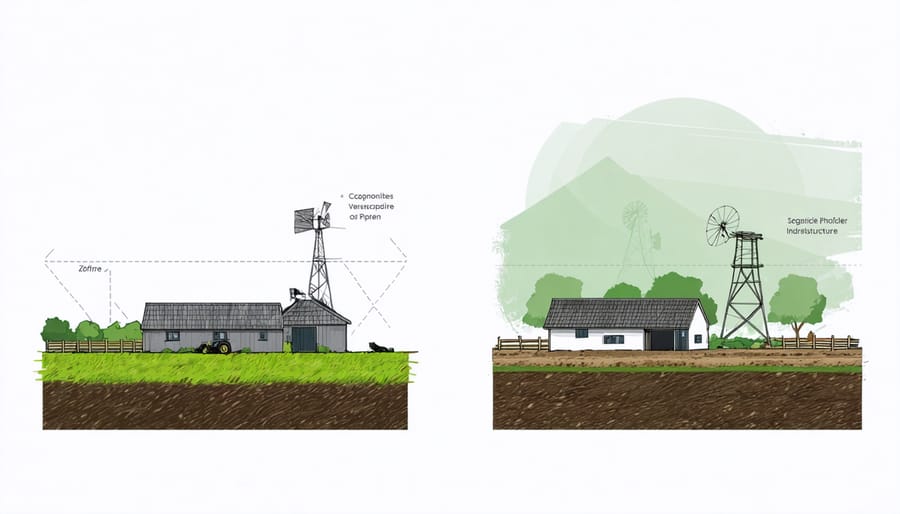
What Makes Organic No-Till Different from Traditional Farming

Traditional farming typically involves turning over the soil before each planting season using plows, discs, or tillers. This practice, while familiar to many, disrupts soil structure, exposes beneficial organisms to harsh conditions, and can accelerate erosion. Organic no-till farming takes a completely different approach by leaving the soil largely undisturbed while building health naturally.

In organic no-till systems, farmers work with nature rather than against it. Instead of breaking up the soil, they use techniques like cover cropping, mulching, and specialized equipment that creates narrow planting slots without inverting entire beds. Think of it as surgery versus demolition: you’re making precise interventions rather than tearing everything apart and starting over.

The core principles revolve around protecting soil biology and structure. Every time soil is tilled, it releases carbon, destroys fungal networks, and disrupts the intricate ecosystem of microorganisms that help plants thrive. No-till farming preserves these natural systems while still managing weeds and preparing seedbeds, all without synthetic chemicals that conventional farmers might use.

Many people assume organic farming requires tillage for weed control since herbicides aren’t an option. While some soil disturbance may occur initially, organic no-till and conservation tillage practices minimize this impact dramatically. Methods like dense cover crops, strategic mulching, and flame weeding offer effective alternatives.

Farmers are making the switch for compelling reasons: healthier soil that holds more water during droughts, reduced fuel and labor costs, improved carbon sequestration, and better long-term productivity. Take Sarah Chen, a vegetable farmer in Ontario, who reduced her tractor hours by sixty percent after transitioning to no-till methods while actually increasing her yields.

The transition requires patience and learning, but the rewards extend beyond the farm gate, creating nutrient-dense food while regenerating the land for future generations.

The Science Behind Leaving Soil Undisturbed

Close-up of dark, rich soil with visible structure held in farmer's hands
Healthy soil structure with visible aggregates and organic matter is the foundation of successful no-till farming systems.

Building the Soil Food Web

When you leave the soil undisturbed, something magical happens beneath the surface. Think of your soil as a bustling underground city where countless organisms work together to create the perfect growing environment. No-till farming protects and nurtures this complex community, known as the soil food web.

At the heart of this system are mycorrhizal fungi, which form thread-like networks that extend far beyond plant roots. These beneficial fungi act like nature’s internet, connecting plants and helping them access water and nutrients from distant soil pockets. When you till, you essentially tear apart these delicate networks, forcing plants and fungi to start over from scratch each season.

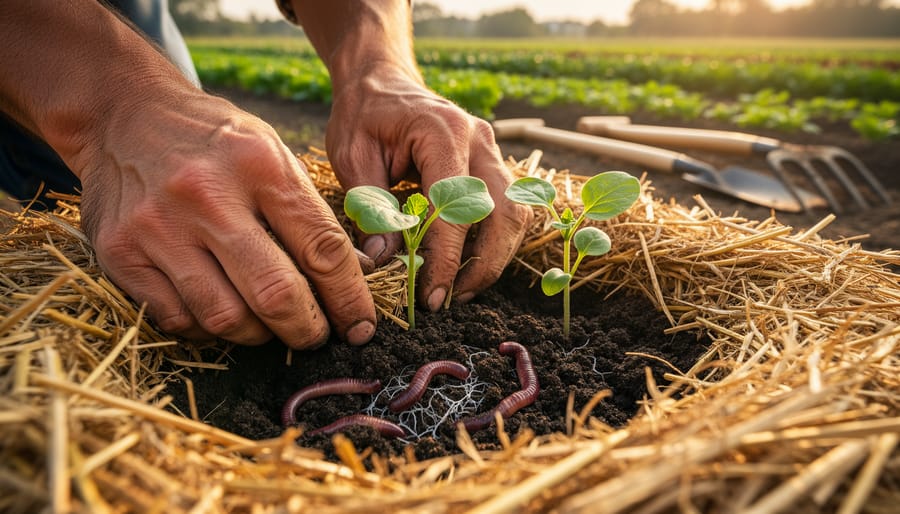
Bacteria also thrive in undisturbed soil, breaking down organic matter and releasing nutrients in forms plants can readily absorb. Earthworms create natural aeration channels while depositing nutrient-rich castings. Ground beetles, beneficial nematodes, and countless other organisms all play crucial roles in maintaining organic soil health.

The beauty of no-till is that these organisms do the heavy lifting for you. They build soil structure, suppress disease, cycle nutrients, and create resilience against drought and pests. By simply leaving the soil intact and adding organic mulches, you’re feeding this underground workforce and letting nature handle the complex chemistry of soil fertility.

Carbon Storage That Actually Works

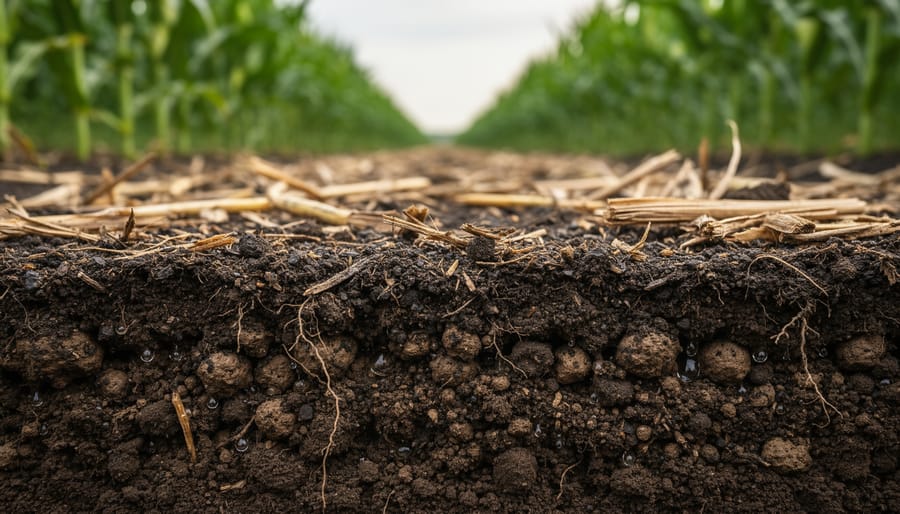
When you walk across undisturbed no-till soil, you’re standing on one of nature’s most effective carbon capture systems. Unlike tilled fields where soil structure gets destroyed and carbon escapes into the atmosphere, no-till farming keeps carbon locked safely underground where it belongs.

Here’s how it works: Living roots, decomposing plant matter, and thriving soil microorganisms create a complex underground network that traps carbon. When soil remains undisturbed, this network stays intact, continuously pulling carbon dioxide from the air and storing it in the ground. Think of it as a natural savings account that keeps growing year after year.

The benefits extend beyond climate health. Carbon-rich soil holds more water during droughts, resists erosion during heavy rains, and provides better nutrition to your crops. It’s a perfect example of how regenerative agriculture creates win-win situations for farmers and the environment.

Take Ontario farmer James Chen, who documented a 30% increase in soil organic matter over five years using no-till methods. His farm now sequesters an estimated 2 tons of carbon per acre annually while producing healthier vegetables with less irrigation. That’s productive farming that actually heals the planet, not just sustains it.

Practical Methods for Organic No-Till Farming

Cover Crops as Your Living Mulch

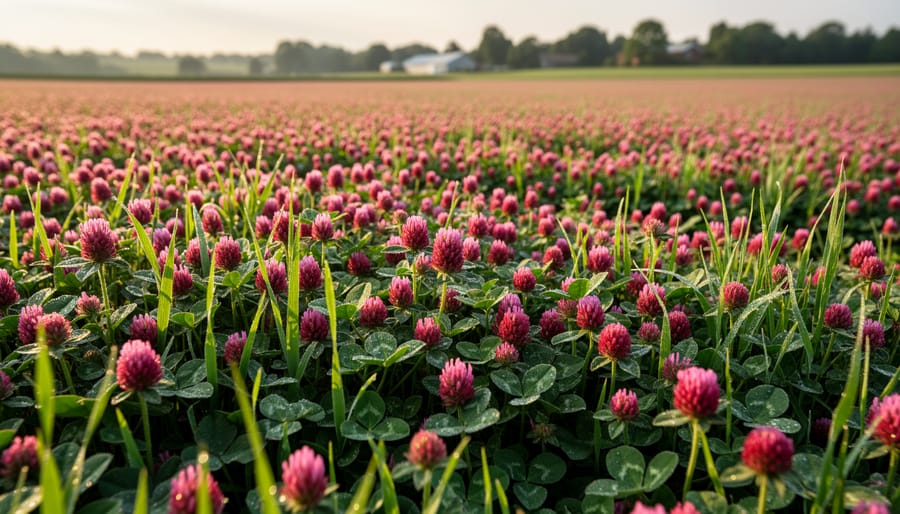
Cover crops are nature’s multitaskers in your no-till system, working as living mulch that protects and enriches your soil simultaneously. Think of them as your green army, crowding out weeds while building organic matter underground. Popular choices include crimson clover, hairy vetch, and cereal rye, each bringing unique benefits to your fields.

Selecting the right cover crop depends on your climate, planting season, and what you’re growing next. Winter-hardy varieties like rye establish quickly and suppress early spring weeds, while legumes like clover fix nitrogen for your following crops. Many successful organic farmers combine different species to maximize benefits, pairing nitrogen-fixers with deep-rooted varieties that break up compacted soil naturally.

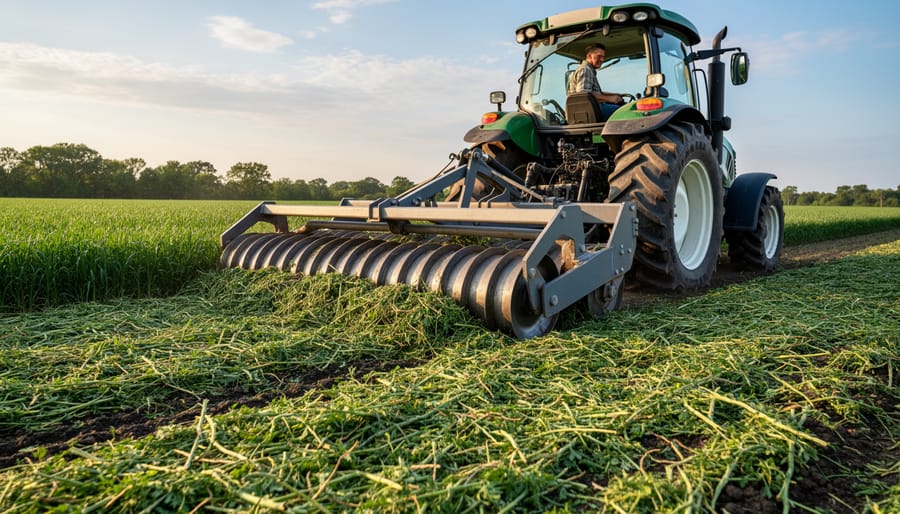
The real magic happens when you integrate cover crops with crop rotation strategies for year-round soil protection. Timing is crucial for termination without tillage. Methods include crimp-rolling at flowering stage, which kills the cover crop while creating a nutrient-rich mat, or mowing repeatedly to exhaust plant energy reserves. Some growers use tarps or heavy mulch to smother covers before planting.

Sarah Martinez, an Ohio organic farmer, shares: “Switching to crimped rye as living mulch cut my weeding time by sixty percent while my soil organic matter jumped two points in three years.”

Dense cover crop field with crimson clover and rye grass in bloom
Dense cover crops like crimson clover and rye provide natural mulch and weed suppression without the need for tillage.

Mulch Strategies That Control Weeds Naturally

Organic mulch serves as your frontline defense against weeds in no-till systems, creating a physical barrier that blocks sunlight and prevents weed seeds from germinating. Think of it as replacing the buried weeds from tillage with a protective blanket that does the same job, naturally.

Straw mulch remains a farmer favorite for vegetable gardens and row crops. Apply it 3-4 inches deep between rows after transplanting, and watch it suppress weeds while moderating soil temperature and retaining moisture. Just ensure you source weed-seed-free straw to avoid introducing new problems.

Wood chips work beautifully for perennial beds and orchard systems. They break down slowly, feeding soil biology over time while keeping weeds at bay for multiple seasons. Apply 4-6 inches initially, then top up annually as they decompose.

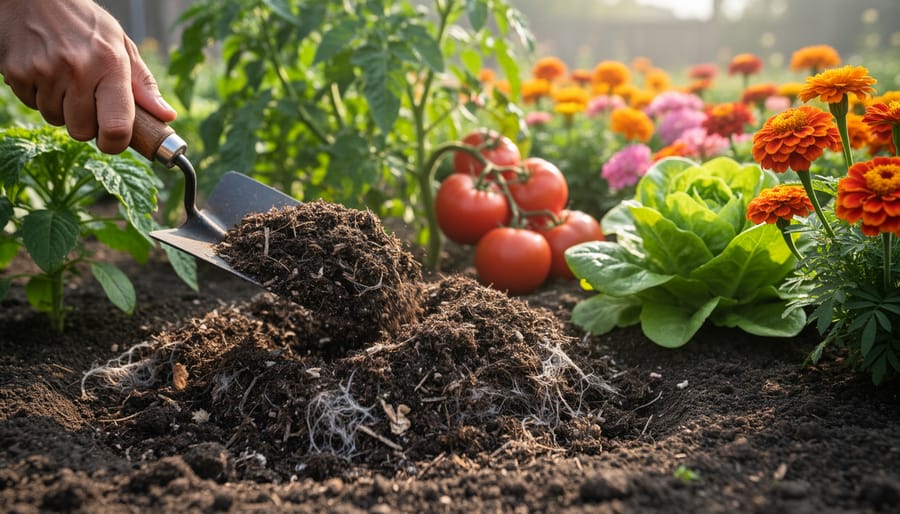
Compost serves double duty as both mulch and fertilizer. While it doesn’t suppress weeds quite as effectively as straw or wood chips, a 2-3 inch layer still provides significant weed control while directly feeding your plants and soil microorganisms.

Sarah Jenkins, an organic market gardener in Vermont, transformed her weeding routine by combining compost with straw. “I went from spending three hours daily pulling weeds to maybe 30 minutes weekly,” she shares. Her secret? Layering an inch of compost topped with three inches of straw right after planting.

Specialized Equipment and Tools

Transitioning to organic no-till farming becomes much more manageable with the right equipment, and there’s good news for farmers at every budget level. The tools you choose will depend on your farm size, crops, and financial resources, but you don’t need to invest in everything at once.

For cover crop management, a roller-crimper is essential. This tool flattens and crimps cover crops, creating that protective mulch layer while terminating the plants mechanically. Budget-conscious farmers can start with a simple homemade roller using salvaged materials and pipe, while commercial models from manufacturers like I&J Manufacturing or Rodale Institute designs offer durability and efficiency for larger operations.

No-till seeders are game-changers, allowing you to plant directly through crop residue without disturbing the soil. Options range from affordable push seeders like the Earthway precision garden seeder for small-scale growers to tractor-mounted models such as those from Great Plains or John Deere for commercial farms. The Jang seeder offers a middle-ground solution that many market gardeners swear by.

Hand tools matter too. Broadforks help aerate compacted soil without inverting layers, while hoes designed for shallow cultivation can manage weeds between crop rows. Many successful organic no-till farmers recommend starting small with basic tools and gradually upgrading as you learn what works best for your specific conditions.

Remember, farmer ingenuity often trumps expensive equipment. Many pioneers in this field began by adapting existing tools or building their own solutions before investing in specialized machinery.

Farmer using roller-crimper equipment to terminate cover crops in no-till system
Specialized equipment like roller-crimpers allows farmers to terminate cover crops and prepare planting beds without disturbing soil structure.

Overcoming Common Challenges in No-Till Systems

Managing Weeds Without the Plow

Weed management is often the biggest concern for farmers transitioning to organic no-till, but with the right approach, it’s completely manageable. The key is preventing weeds before they become a problem rather than constantly fighting them after they emerge.

Think of mulch as your frontline defense. A thick layer of organic material, typically 4-6 inches of materials like straw, wood chips, or compost, blocks sunlight and prevents most weed seeds from germinating. Combined with proper timing, you can dramatically reduce weed pressure. Plant your crops when they’re most vigorous and competitive, giving them a head start over emerging weeds.

Cover cropping becomes your strategic partner in weed suppression. Species like cereal rye and crimson clover don’t just build soil, they also outcompete weeds and create a dense mat that smothers unwanted plants. When you terminate these covers by crimping or cutting them down, they form a natural mulch barrier that continues protecting your soil throughout the growing season.

For persistent weeds that do break through, shallow cultivation tools like stirrup hoes work wonders without disturbing your soil structure. Regular monitoring and quick action when weeds are small makes the job much easier. Many farmers also integrate natural pest control methods alongside their weed management strategies for a holistic approach.

Canadian farmer Marie Chen shares her success: “Once I built up my mulch layers and got my cover crop rotations dialed in, weeding time dropped by seventy percent. It just takes patience in those first couple seasons.”

What to Expect During Your First Few Seasons

Starting your organic no-till journey requires patience and realistic expectations. The first year can be challenging as your soil biology adjusts to this gentler approach. You might see yields dip by 10-25% initially, which is completely normal. Think of it as an investment in your soil’s future health.

During the transition, your soil is essentially relearning how to function without mechanical disturbance. The first season focuses on establishing cover crops and building that precious top layer of organic matter. You’ll notice the most dramatic improvements between years two and three as beneficial microorganisms multiply and soil structure develops.

Take Sarah Martinez, a Pennsylvania farmer who documented her transition. She experienced a 20% yield decrease her first year growing organic no-till tomatoes, but by year three, she was exceeding her previous conventional yields while using fewer inputs. Her secret? Staying committed to the process and celebrating small wins, like improved soil moisture retention and earthworm populations.

By season three or four, most farmers report matching or surpassing their previous yields with significantly healthier soil. You’ll observe better water infiltration, reduced compaction, and a thriving ecosystem beneath your feet. The timeline varies based on your starting soil condition and climate, but consistency with cover cropping and compost applications accelerates progress.

Remember, you’re not just changing farming methods; you’re rebuilding an entire underground ecosystem. Give yourself grace during this learning curve.

Real Farmers Making No-Till Work

Nothing proves a concept quite like real-world results, and organic no-till farming has champions across diverse landscapes and farm scales who are making it work beautifully.

Take Singing Frogs Farm in California, where Paul and Elizabeth Kaiser transformed a half-acre plot into a highly productive vegetable operation. By eliminating tillage and building soil with compost applications, they’ve achieved remarkable yields while reducing water use by 50%. Their secret? Permanent raised beds, intensive crop rotations, and thick compost mulching that never disturbs the soil structure. Paul reports that their soil carbon levels have tripled in just five years, and earthworm populations have exploded. The lesson they emphasize most is patience during the transition period and the importance of keeping soil covered year-round.

Across the country in Pennsylvania, Jeff Moyer at the Rodale Institute has pioneered roller-crimper technology for organic grain production. His system uses cover crops like cereal rye that are rolled flat at the perfect stage to create a weed-suppressing mat, allowing soybeans or other cash crops to be planted directly through the mulch. Over two decades, this approach has maintained yields comparable to tilled organic systems while dramatically improving soil health metrics. Jeff’s biggest takeaway is timing—getting the cover crop termination just right makes or breaks the system.

Meanwhile, Gabe Brown in North Dakota started experimenting with no-till after financial hardship forced him to think differently. Though not certified organic, his principles translate directly: diverse cover crop cocktails, integrated livestock, and zero soil disturbance. He’s documented a 150% increase in organic matter and eliminated synthetic inputs entirely. His advice for beginners is to start small and learn from mistakes without judgment.

Down in Georgia, Crystal Stewart runs a small-scale market garden using tarping and mulching instead of tillage. She’s found that occultation tarps effectively prepare beds without turning soil, and her customer base has grown steadily as produce quality improved with better soil biology.

These farmers prove that organic no-till isn’t one-size-fits-all—it’s adaptable to vegetables, grains, and diverse climates. The common thread? Commitment to soil health, willingness to experiment, and understanding that building biology takes time but pays dividends.

Farmer standing proudly in healthy no-till vegetable field with straw mulch
Real farmers across diverse regions are successfully implementing no-till practices and seeing improvements in both soil health and farm efficiency.

Starting Your Own No-Till Journey

Ready to embrace no-till farming? The journey begins with a single step, and the good news is you don’t need to transform your entire operation overnight. Starting small is actually the smartest approach, allowing you to learn and adapt as you go.

Begin by designating a test plot, whether it’s a garden bed or a small field section. This manageable space becomes your learning laboratory where mistakes won’t be costly. Start by stopping all tillage immediately and apply a thick layer of organic mulch like straw, leaves, or wood chips. Aim for 4-6 inches to suppress weeds effectively while the soil biology begins its transformation beneath.

Next, focus on building your knowledge foundation. Seek out local organic farmers already practicing no-till methods and ask if you can visit their operations. Their real-world insights are invaluable. Online resources abound too, from university extension programs to farmer-led forums where practitioners share techniques and troubleshoot challenges together. Books like “The Living Soil Handbook” by Jesse Frost offer detailed guidance for beginners.

Consider investing in basic tools suited to no-till systems. A broadfork for gentle soil aeration, a wheel hoe for shallow cultivation, and quality tarps for occultation are excellent starting points that won’t break the bank.

Track your progress through photos and notes documenting soil changes, weed pressure, and crop performance. This record becomes your personalized guide for expansion. Remember, many successful no-till farmers started exactly where you are now, with curiosity and a small patch of ground. Each season brings new understanding, and before you know it, you’ll be sharing your own success story with the next generation of aspiring no-till growers.

Transitioning to organic no-till farming isn’t just about changing how you work the land—it’s about embracing a philosophy that puts soil health first while making your life easier. The dual rewards of building rich, living soil and reducing the backbreaking labor of repeated tillage make this approach incredibly worthwhile. Your soil becomes more resilient with each season, holding moisture better, feeding plants more efficiently, and requiring less intervention over time.

That said, no-till is genuinely a learning process. What works beautifully in one garden or field might need tweaking in another. You’ll discover which cover crop combinations thrive in your climate, how much compost your soil truly needs, and which mulching techniques give you the best results. This journey of observation and adjustment is part of what makes regenerative farming so rewarding.

If you’re curious to see these methods in action, connecting with local Community Supported Agriculture (CSA) farms is an excellent starting point. Many CSAs have embraced organic no-till practices and welcome visitors eager to learn. You’ll gain firsthand insights, ask questions, and often discover a community of like-minded growers willing to share their experiences.

Remember, every no-till bed you establish is an investment in the future. You’re not just growing food—you’re becoming a soil steward, participating in something much bigger than a single harvest. The microorganisms, earthworms, and beneficial fungi you nurture today will continue building fertility for years to come, creating a legacy of healthier land and more abundant harvests.

Why Your Mushroom Compost Is the Secret to Growing Better Mushrooms (And Everything Else)

Posted by darrell on
0
Organic Farming and Cultivation
Why Your Mushroom Compost Is the Secret to Growing Better Mushrooms (And Everything Else)

Layer nitrogen-rich materials like coffee grounds, grass clippings, and vegetable scraps with carbon sources such as straw, cardboard, and dried leaves in a 1:2 ratio to create the ideal growing medium for oyster, shiitake, and button mushrooms. Maintain moisture levels at 60-70% by spritzing your compost pile daily, ensuring it feels like a wrung-out sponge when squeezed. Pasteurize your finished compost at 140-160°F for 2-3 hours to eliminate competing organisms while preserving beneficial microbes that support mushroom mycelium growth.

Source spent mushroom substrate from local organic farms through your regional CSA network, where this nutrient-dense byproduct costs significantly less than creating compost from scratch. This dark, crumbly material transforms garden beds by improving soil structure, increasing water retention by up to 50%, and delivering slow-release nutrients throughout the growing season. Mix spent mushroom compost at a 2:1 ratio with native soil for vegetable gardens, or use it as a top dressing around fruit trees and ornamental plants.

Connect with nearby mushroom cultivators who practice sustainable agriculture to establish a circular system where you provide raw composting materials in exchange for finished substrate. Many small-scale mushroom farmers welcome this arrangement since disposing of spent compost presents logistical challenges. Store your mushroom compost in covered bins to prevent nutrient leaching from rain, and apply it within six months for maximum effectiveness. Whether you’re growing your own gourmet mushrooms or enriching your vegetable garden, understanding both sides of mushroom composting opens doors to remarkable yields and reduced waste.

What Makes Mushroom Compost Different From Regular Compost

Close-up of dark mushroom compost with visible straw pieces held in hands
Mushroom compost combines straw, manure, and other organic materials into a nutrient-rich substrate perfect for fungal cultivation.

The Life Cycle: From Fresh Substrate to Spent Mushroom Compost

The journey of mushroom compost is a fascinating transformation story. It begins as fresh substrate, a carefully crafted mixture of organic materials like straw, hay, chicken manure, and gypsum. This nutrient-rich blend undergoes a controlled composting process, reaching temperatures that eliminate harmful pathogens while creating the perfect environment for mushroom mycelium to thrive.

During cultivation, mushroom growers maintain precise conditions of temperature, humidity, and airflow. As mushrooms grow and are harvested over several weeks, they consume a significant portion of the substrate’s nutrients. Once the growing cycle completes and production declines, what remains is called spent mushroom substrate or spent mushroom compost.

Here’s the exciting part: this “spent” material is far from worthless. While mushrooms have extracted many nutrients, the compost still retains tremendous value for gardeners. It’s rich in organic matter, contains beneficial microorganisms, and has a near-neutral pH that most plants love. The composting process has also broken down complex organic materials into forms that are more readily available to garden plants.

Many local organic farms and mushroom cultivation operations offer spent mushroom compost to gardeners at reasonable prices, creating a perfect circular economy. This practice embodies sustainable agriculture at its finest, turning what could be waste into a valuable soil amendment. For home gardeners, it’s an affordable way to improve soil structure, retain moisture, and boost plant health while supporting local farmers who practice environmentally responsible growing methods.

Building Your Own Mushroom Growing Compost at Home

Essential Ingredients and Where to Find Them Locally

Creating nutrient-rich mushroom compost starts with gathering the right organic materials, and you’ll be surprised how many you can find right in your community. The foundation begins with a nitrogen-rich base like horse manure or chicken droppings, which you can often source from local stables, equestrian centers, or small-scale poultry farmers. Many are happy to share their excess for free or a small fee.

Your local feed store is another goldmine for ingredients. Look for wheat straw, hay, or cottonseed meal, which provide the carbon structure mushrooms love. These stores often carry gypsum too, which helps maintain proper texture and pH levels in your compost pile.

Connect with nearby farms through your area’s CSA networks to find brewers grain from craft breweries or coffee grounds from local roasters. One Michigan farmer I spoke with gets spent grain weekly from three local breweries, creating compost that produces incredible oyster mushroom yields.

Don’t overlook agricultural extension offices and farmers markets as networking spots. Strike up conversations with vendors about their composting materials, and you might discover neighbors with excess organic matter perfect for mushroom cultivation.

Remember to verify that all materials come from organic or pesticide-free sources, as chemical residues can harm mushroom mycelium. Building relationships with these local suppliers not only ensures quality ingredients but also strengthens your community’s sustainable agriculture network. Many experienced growers find that their best resources come from word-of-mouth recommendations within farming circles.

The Step-by-Step Composting Process

Creating your own mushroom compost is a rewarding journey that connects you directly to the growing process. The timeline typically spans 2-4 weeks, depending on your chosen method and mushroom variety.

Start by mixing your base ingredients in layers. Combine straw or agricultural waste with nitrogen-rich materials like chicken manure or coffee grounds at a ratio of roughly 4:1 carbon to nitrogen. Add water until the mixture feels like a wrung-out sponge—moist but not dripping. This initial phase takes 1-2 days and sets the foundation for building living soil that mushrooms will thrive in.

Next comes pasteurization, crucial for eliminating competing organisms. For hot composting, turn your pile every 2-3 days, monitoring internal temperatures. You’re aiming for 140-160°F for at least 3 days. Sarah Chen, an urban mushroom grower in Vancouver, shares this tip: “Use a compost thermometer—it’s a game-changer. Once I started tracking temperatures properly, my oyster mushroom yields doubled.”

For smaller batches, pasteurize substrate by soaking it in 160°F water for 1-2 hours, then drain thoroughly. This method works beautifully for shiitake and wine cap varieties.

The conditioning phase follows, lasting 5-10 days. During this time, beneficial microorganisms colonize the substrate while ammonia levels drop. Turn the mixture occasionally and check the smell—it should transition from pungent to earthy and sweet.

Your compost is ready when it’s dark brown, crumbly, and has that pleasant forest floor aroma. Different mushroom species have preferences: oysters tolerate fresher compost, while button mushrooms prefer fully conditioned substrate. Testing with a small batch helps you perfect timing for your chosen variety.

Matching Compost Recipes to Your Mushroom Variety

Not all mushrooms thrive on the same growing medium, and understanding these preferences is key to successful cultivation. Just as different vegetables need varying soil conditions, each mushroom variety has specific substrate requirements that support optimal growth and flavor development.

Oyster mushrooms are incredibly forgiving for beginners, making them a favorite among home growers. These adaptable fungi flourish on straw-based substrates. A simple recipe includes pasteurized wheat or oat straw combined with a small amount of coffee grounds (about 10-20% by weight). The straw provides structure while coffee grounds add nitrogen, creating an ideal balance. One grower in Oregon shared that she collects used coffee grounds from her local café each week, turning waste into abundant harvests of beautiful pearl and pink oyster mushrooms.

Button mushrooms (the classic white mushrooms found in grocery stores) require a more complex approach. They prefer composted horse manure mixed with straw, gypsum, and a bit of poultry manure. The traditional recipe involves a hot composting phase where temperatures reach 140-160°F, followed by pasteurization. This process creates the nutrient-rich substrate that button mushrooms love. While more involved, the results are worth the effort for those wanting to grow this popular variety.

Shiitake mushrooms need hardwood-based substrates since they naturally grow on logs in forests. For indoor cultivation, use a mixture of hardwood sawdust (oak, maple, or beech work wonderfully) supplemented with wheat bran or rice bran at about 10-20% of the total weight. The supplementation provides extra nutrition without overwhelming these wood-loving fungi. Many growers find success with pre-made shiitake sawdust blocks available from local mushroom farms.

Lion’s mane mushrooms prefer similar conditions to shiitake but benefit from slightly higher supplementation rates. A mixture of hardwood sawdust with 15-25% wheat bran creates the nutrient density these striking white mushrooms need to develop their characteristic cascading tendrils.

Start with oyster mushrooms to build confidence, then experiment with other varieties as your skills develop. Each successful harvest teaches valuable lessons about moisture, temperature, and timing that translate across different mushroom species.

Oyster mushrooms fruiting from dark compost substrate showing healthy growth
Different mushroom varieties like oyster mushrooms require specific compost formulations for optimal fruiting and yields.

From Mushroom Farm to Garden Gold: Using Spent Compost

Hands incorporating spent mushroom compost into garden soil with visible organic matter
Spent mushroom compost transforms into valuable garden amendment, enriching soil structure and providing nutrients for vegetables and flowers.

Connecting with Local Mushroom Farms for Spent Compost

Finding mushroom farms that offer spent compost is easier than you might think. Start by exploring local organic networks and CSA directories in your area, as many mushroom producers participate in these community-supported agriculture programs. Local farmers’ markets are also excellent places to connect directly with growers.

When reaching out to farms, ask about their composting process and whether they use organic substrates. Find out how often spent compost becomes available and what pickup or delivery options they offer. Most importantly, inquire about pricing—many farms provide it free or at minimal cost since it’s a byproduct.

Building lasting relationships with producers benefits everyone. Consider becoming a CSA member to support their operation while securing regular access to compost. Share your gardening results with them too. One home gardener in Ontario transformed her backyard by partnering with a local mushroom farm, creating a thriving vegetable garden that now supplies her family year-round. These connections strengthen community food systems while giving you access to premium soil amendment that would otherwise go to waste.

Troubleshooting Common Mushroom Compost Problems

Even experienced composters encounter challenges when working with mushroom compost. Let’s explore common problems and their solutions to keep your composting journey on track.

Contamination from competing fungi or mold is perhaps the most frustrating issue. Green or black mold indicates unwanted organisms have taken hold. The solution starts with prevention: sterilize your substrate properly through pasteurization at 140-160°F for several hours. If contamination appears, remove affected areas immediately and increase airflow. Sarah from Ontario learned this lesson firsthand when her first batch turned green. After implementing proper sterilization techniques aligned with organic practices, her success rate jumped to 90 percent.

Unpleasant ammonia odors signal nitrogen overload or inadequate aeration. Turn your compost pile more frequently and add carbon-rich materials like straw or shredded leaves to balance the nitrogen. Proper moisture levels matter too – your compost should feel like a wrung-out sponge, not dripping wet.

Poor mushroom yields often stem from incorrect moisture, temperature, or lighting conditions. Mushrooms need 80-95 percent humidity and specific temperature ranges depending on species. Check that your growing environment maintains consistency and adjust as needed.

Nutrient imbalances in spent mushroom compost typically show up as excessive salts affecting plant growth. Aging your spent compost for 6-12 months before garden application resolves this issue naturally. You can also blend it with other materials rather than using it alone.

When troubleshooting, remember that patience and observation are your best tools. Keep detailed notes about conditions and adjustments – this knowledge becomes invaluable for future batches and helps you develop intuition for what your compost needs.

Real Success: How One CSA Farm Transformed Their Operation with Mushroom Composting

When Sarah Martinez took over Green Valley CSA in Oregon three years ago, she faced a common challenge: what to do with the growing mountain of plant waste and how to improve her depleted soil without breaking the bank. Her solution came from an unexpected source, transforming her 5-acre operation into a thriving model of circular agriculture.

Sarah started small, converting an unused barn section into a mushroom growing area. She began with oyster mushrooms, using straw and her own farm waste as the growing substrate. Within six months, she was producing 50 pounds of gourmet mushrooms weekly for her CSA boxes. But the real game-changer was what happened next.

The spent mushroom substrate became her secret weapon. After each growing cycle, Sarah composted the nutrient-rich material and applied it throughout her vegetable beds. The results were remarkable. Her tomato yields increased by 35 percent in the first season, and soil tests showed a 40 percent improvement in organic matter content within 18 months.

The challenges were real, though. Sarah admits the learning curve was steep. Temperature control in the mushroom growing area proved tricky during summer months, and she lost two batches to contamination before mastering sterilization techniques. She invested about $3,000 initially in basic equipment and climate control systems.

Her advice for farmers considering this approach? Start with one mushroom variety and scale gradually. She emphasizes joining online mushroom growing communities for troubleshooting support and recommends keeping detailed records of substrate recipes and growing conditions.

Today, Green Valley CSA has waiting lists for both their vegetable shares and mushroom subscriptions. The composting cycle has reduced Sarah’s fertilizer costs by 60 percent while creating an additional revenue stream. She now mentors other local farmers interested in replicating her integrated system, proving that sustainable practices and profitability can grow together.

Mushroom composting opens doors to incredible sustainability benefits while saving you money and connecting you with your local food community. Whether you’re creating nutrient-rich substrate for growing your own mushrooms or enriching your garden beds with spent mushroom compost, you’re participating in a beautiful cycle that transforms waste into abundance. The environmental impact alone makes this practice worthwhile—reducing landfill waste, sequestering carbon, and building healthier soil ecosystems right in your backyard.

Start small if you’re new to this. A simple bin of spent mushroom compost mixed into your vegetable garden can show you immediate results. As you gain confidence, consider expanding to mushroom cultivation or partnering with local farmers who might share or sell their spent substrate. Many CSA programs now include mushroom growers who are eager to connect with community members interested in composting.

Your next steps are simple: visit a nearby mushroom farm to source spent compost, join a local gardening group to share knowledge and resources, or start your first small mushroom growing project at home. The learning curve is gentle, the rewards are substantial, and the connections you’ll make along the way enrich both your garden and your community. Take that first step today—your soil will thank you.

Why Smart Organic Farms Are Adding Livestock to Their CSA Boxes

Posted by darrell on
0
Organic Farming and Cultivation
Why Smart Organic Farms Are Adding Livestock to Their CSA Boxes

Community Supported Agriculture (CSA) organic farms represent a direct partnership between farmers and consumers, where members purchase shares of the harvest before the growing season begins. This innovative model transforms how we access fresh, chemical-free produce while supporting local agriculture and building resilient food systems.

When livestock integration enters the picture, CSA farms become even more dynamic. Animals like chickens, sheep, and cattle work alongside crop production, creating natural fertilizer cycles, controlling pests, and improving soil health without synthetic inputs. The result? Nutrient-dense vegetables, pasture-raised eggs and meat, and farming operations that mimic nature’s own regenerative processes.

For CSA members, this means receiving weekly boxes brimming with seasonal variety—from crisp salad greens in spring to hearty winter squash—all grown without pesticides or chemical fertilizers. You know exactly where your food comes from and can often visit the farm, meet the animals, and understand the care behind every carrot and tomato.

Farmers benefit too. The upfront capital from share sales provides financial stability during planting season, while the integrated livestock reduces input costs and creates additional revenue streams. It’s a system where economic viability meets environmental stewardship.

Whether you’re considering joining a CSA, starting your own integrated operation, or simply exploring sustainable food options, understanding how these farms operate reveals a practical path toward healthier soil, thriving communities, and farming that works with nature rather than against it.

What Makes Integrated Crop-Livestock Systems Different

The Natural Cycle: How Animals Feed the Soil

Nature has perfected the art of recycling over millions of years, and integrated CSA farms tap into this wisdom by incorporating livestock into their growing systems. When animals like chickens, sheep, or cattle share space with crops, their manure becomes liquid gold for soil health. This natural fertilizer delivers a balanced mix of nitrogen, phosphorus, and potassium along with beneficial microorganisms that chemical fertilizers simply cannot replicate.

The beauty of this closed-loop system lies in its self-sufficiency. Instead of purchasing expensive external inputs, farmers feed their animals with crop residues and pasture, and in return, the animals enrich the soil with nutrient-dense manure. This creates a continuous cycle where nothing goes to waste. For example, raising chickens in CSA operations means chicken manure can be composted and applied to vegetable beds, dramatically improving soil structure and water retention.

Local farmer Maria Chen from Green Valley CSA shares her success story: “After integrating sheep into our rotation, we cut our fertilizer costs by 70% within two years. The soil has never been healthier, and our vegetables practically grow themselves now.” The animals also help manage weeds and pests naturally while building organic matter in the soil.

This approach reduces the farm’s carbon footprint by eliminating the need to transport synthetic fertilizers while creating richer, more resilient soil that produces more nutritious food for CSA members.

Free-range chickens foraging among vegetable garden beds on organic farm
Chickens integrate seamlessly into vegetable production areas, providing pest control and soil enrichment while foraging between crop rows.

Beyond Vegetables: Diversifying Your CSA Share

Modern CSA programs extend far beyond the traditional vegetable box, offering members a diverse array of farm-fresh products throughout the year. Many integrated organic farms now provide add-on shares that include pasture-raised eggs, artisanal cheeses, grass-fed meat cuts, and even honey from on-site apiaries. This diversity means you’re not just getting seasonal produce but building a complete relationship with your food source.

Value-added products like jams, pickles, fresh-baked bread, and herb bundles add convenience while supporting the farm’s economic stability during slower growing months. Some farms partner with neighboring producers to offer items they don’t grow themselves, creating a one-stop shop for local food.

This variety keeps members engaged year-round, even during winter when fresh vegetables are limited. Farmers like Sarah Chen of Green Valley Farm discovered that offering meat and dairy shares reduced member turnover by 40 percent. Members appreciate the consistency and convenience of receiving multiple products from a trusted source, while farmers benefit from steadier income streams and stronger customer relationships. The result is a resilient food system where both farmers and community members thrive together.

Real Benefits You’ll Notice as a CSA Member

Fresher, More Nutrient-Dense Produce

When livestock and crops work together on a farm, something magical happens beneath our feet. The integration creates incredibly healthy soil that produces vegetables bursting with flavor and packed with nutrients. Here’s why this matters for your plate.

Livestock contribute essential organic matter through their manure, which feeds billions of beneficial microorganisms in the soil. These tiny workers—bacteria, fungi, and earthworms—break down organic material and make nutrients readily available to plant roots. Think of them as nature’s nutrient delivery system. This thriving underground ecosystem supports organic soil health in ways synthetic fertilizers simply cannot replicate.

The result? Tomatoes with deeper, more complex flavors. Leafy greens with higher vitamin and mineral content. Carrots that actually taste sweet and earthy. Studies consistently show that produce from biologically active soils contains more antioxidants, vitamins, and beneficial compounds than conventionally grown alternatives.

Sarah Martinez, who runs a successful integrated CSA in Oregon, noticed the difference immediately. “Our members tell us they can taste the quality,” she shares. “Vegetables from well-fed soil have a vibrancy that’s unmistakable—and our retention rates prove people notice the difference.”

True Farm-to-Table Protein Options

When you source protein from an integrated CSA farm, you gain something supermarkets can’t offer: complete transparency about your food’s origins. These farms allow you to see exactly where animals graze, what they eat, and how they spend their days. Pasture-raised chickens roam freely, scratching for insects and enjoying fresh air, while heritage breed pigs root through woodland areas doing what comes naturally.

This visibility translates to exceptional quality. Animals raised on diverse pastures produce nutrient-dense meat and eggs with richer flavors and higher omega-3 fatty acids compared to conventional options. The eggs from truly pastured hens have deep orange yolks bursting with vitamins, reflecting their varied diet of grasses, bugs, and seeds.

Beyond nutrition, there’s profound peace of mind in knowing your protein comes from animals treated with respect throughout their lives. Many CSA farmers welcome visits, hosting farm tours where you can meet the livestock and ask questions directly. This connection transforms your weekly dinner from a simple meal into a statement about the food system you want to support. You’re not just buying meat and eggs; you’re investing in humane treatment, environmental stewardship, and the livelihoods of farmers who prioritize animal welfare above industrial efficiency.

CSA box filled with vegetables, eggs, meat, and farm products on wooden table
Integrated CSA shares offer members a complete range of farm products beyond vegetables, including eggs, meat, and value-added items.

More Resilient Farms Mean Consistent Shares

When you invest in a CSA share, you’re counting on receiving fresh produce throughout the growing season. This is where diversification becomes your farm’s secret weapon for reliability. Farms that integrate crops and livestock naturally build resilience into their operations, protecting your weekly harvest box from unexpected challenges.

Picture this: an unexpected late frost damages the early spring greens. On a diversified farm, your share might include extra eggs, cheese, or root vegetables from storage while new plantings catch up. This backup system means you’ll rarely experience a disappointing pickup, even when Mother Nature throws curveballs.

Diversification also spreads out risk across different production cycles. While vegetables follow seasonal patterns, livestock products provide year-round stability. If a pest outbreak affects tomatoes, your farm can compensate with additional cucumbers, squash, or value-added products like jams or fermented vegetables.

Take Sarah’s story from Green Valley Farm in Vermont. After integrating chickens and sheep with her vegetable operation, she weathered three challenging growing seasons without reducing share values. “The animals became our insurance policy,” she explains. “When drought stressed our crops, we could increase meat and dairy offerings to maintain member satisfaction.”

This reliability translates directly to consistent, valuable shares that keep members happy and farms financially stable season after season.

How These Farms Actually Work

Sheep grazing on pasture with vegetable garden beds in background on integrated farm
Sheep rotate through different areas of the farm, grazing cover crops and enriching soil before beds are planted with vegetables.

Rotating Animals Through Growing Areas

Strategic animal rotation transforms how CSA farms build soil fertility while managing livestock efficiently. This integrated approach creates a beautiful dance between animals and vegetables that benefits both.

Mob grazing lies at the heart of this system. Cattle move through paddocks in concentrated groups, spending just one to three days in each area before relocating. This intensive grazing mimics wild herd behavior, where animals naturally cluster for protection. The cattle deposit rich manure while their hooves break up soil crusts, creating perfect conditions for nutrient cycling. Many farmers report dramatic improvements in soil organic matter within just a few growing seasons.

Following the cattle come the chickens in mobile coops called chicken tractors. These lightweight, portable structures house laying hens or meat birds that scratch through cow patties, spreading nutrients while hunting insects and grub larvae. This secondary grazing breaks pest cycles naturally and adds another layer of fertility. The chickens essentially sanitize the pasture while earning their keep through egg production.

Timing these movements requires thoughtful planning that aligns with crop rotation strategies. Animals graze areas destined for vegetables six to twelve months before planting, allowing manure to decompose and soil biology to flourish. Some farmers finish rotations with cover crops before transitioning to vegetable production, creating optimal growing conditions without synthetic inputs.

This orchestrated movement requires daily attention but rewards farmers with healthier soil, reduced feed costs, and premium products for CSA members who appreciate truly integrated farming.

Choosing the Right Animals for Small-Scale Integration

Selecting the right animals for your CSA organic farm depends on your land size, available resources, and member preferences. Each livestock type offers unique benefits and requires different levels of commitment.

Chickens are the ideal starting point for small-scale integration. They’re relatively low-maintenance, perfect for farms with limited acreage, and provide both eggs and natural pest control. A small flock can supply dozens of CSA members with fresh eggs weekly. Consider protecting your chicken coop from predators as you establish your flock.

Sheep and goats work wonderfully on medium-sized operations with pasture areas. They’re efficient grazers that can help manage vegetation while providing meat, milk, and fiber. Goats are particularly versatile, thriving in areas with brush or rougher terrain that might not suit other livestock.

Pigs excel at land preparation and composting. They’re intelligent animals that can turn food scraps and surplus produce into nutrient-rich manure while clearing overgrown areas. However, they require secure fencing and more hands-on management.

Cattle suit larger CSA operations with substantial pasture land. While they demand more infrastructure and feed, they offer significant meat production and excellent manure for soil building.

Start small with chickens, then expand as you gain experience and understand your members’ interests. Successful farmer Sarah Martinez began with 20 hens and now manages a diverse operation including sheep and pigs, all integrated seamlessly into her thriving CSA model.

Success Story: A Farm That Made the Transition

When Sarah Mitchell took over Green Valley Farm in Vermont five years ago, she inherited a thriving 15-acre CSA operation focused entirely on vegetables. While her 85 members loved their weekly boxes, Sarah noticed something troubling: nutrient deficiencies in her soil despite regular composting, and increasing pressure from weeds and pests. After attending a workshop on integrated farming systems, she decided to add pastured chickens and heritage breed pigs to her operation.

The transition wasn’t without challenges. Sarah started small in year one, introducing 50 laying hens that rotated through her fallow fields. The initial investment of $3,500 covered a mobile coop, fencing, and the birds themselves. She spent evenings researching animal husbandry and securing the necessary permits, which took three months longer than expected due to local zoning questions.

Member response exceeded her hopes. Sarah offered an optional egg add-on for $6 per dozen, and 60 percent of her members signed up immediately. The chickens became farm favorites during member workdays, with families bringing children to collect eggs and watch the birds scratch through composted vegetable matter.

By year three, Sarah added four heritage pigs, timing their rotation to follow the chickens through cover crop areas. The pigs proved remarkably efficient at breaking up compacted soil and controlling invasive plants. Her vegetable yields increased by 25 percent in areas where animals had grazed, and she reduced her organic fertilizer purchases by half.

Today, Green Valley Farm supports 120 CSA members with diversified shares including vegetables, eggs, and seasonal pork cuts. Sarah’s biggest lesson? Start smaller than you think necessary. She recommends beginning with just chickens, mastering the management routine, and waiting at least two full seasons before adding other livestock.

Her advice for farmers considering this transition: budget extra time for infrastructure and learning curves, communicate openly with members about changes, and don’t expect immediate soil improvements. The real magic happens in years two and three when the biological systems start working together. Sarah now mentors other CSA farmers, showing them her detailed records proving that integrated systems can improve both farm ecology and financial stability.

What to Look for When Choosing an Integrated CSA

Questions to Ask Your Potential Farm

Before committing to a CSA membership, ask potential farms about their specific organic practices and certifications. Request details about which crops and products are certified organic versus transitional or naturally grown. If the farm includes livestock, inquire about their organic livestock standards, pasture access, and feed sources. Understanding animal welfare practices helps ensure your values align with the farm’s operations.

Ask about share options and flexibility. Can you customize your weekly box? What happens if you’re on vacation or need to skip a week? Clarify pickup locations, times, and whether home delivery is available. Many successful CSA farms offer half-shares for smaller households or work-share programs where you can volunteer in exchange for reduced membership fees.

Don’t hesitate to ask about farm visits and member events. The best CSA relationships include opportunities to see where your food grows, meet the farmers, and connect with fellow members. Request references from current members who can share their experiences. Finally, ask how the farm communicates with members about weekly harvests, recipes, and farm updates—regular communication strengthens your connection to the land feeding you.

Understanding Different Share Options

CSA farms offer flexible share structures to match different lifestyles and preferences. The most common option is a produce-only share, delivering fresh vegetables, fruits, and herbs throughout the growing season. However, integrated farms take it further by offering combined shares that include meat, eggs, dairy, or value-added products like honey and preserves alongside your weekly vegetables.

Many farms provide add-on options, allowing members to customize their experience. You might choose a half-share if you have a smaller household, or add a monthly meat bundle to your vegetable subscription. Some farmers even offer winter shares featuring storage crops, greenhouse greens, and preserved goods to extend the season.

Seasonal variations matter too. Spring shares often emphasize leafy greens and early crops, while fall boxes overflow with root vegetables and squash. Understanding these options helps you find the perfect fit for your family’s needs and support a thriving local farm ecosystem. Start by assessing your household size, cooking habits, and desired variety before committing to a share structure.

Starting Your Own Integration (For Aspiring CSA Farmers)

Start Small and Scale Gradually

If you’re ready to bring livestock into your CSA operation, resist the temptation to dive in headfirst. Starting small allows you to learn the ropes without overwhelming yourself or your resources.

Chickens make an excellent gateway animal for CSA farms. They require modest space, have relatively simple care needs, and produce eggs that members love. Beginning with a small flock of 15-20 hens lets you master daily routines, understand seasonal variations, and work out logistics like egg collection and distribution. Plus, chickens provide valuable manure for composting and help with pest control in garden areas.

Before expanding, gauge member interest through surveys or trial offerings. You might discover your members prefer fresh eggs over goat cheese, saving you from investing in the wrong direction. One Michigan CSA farmer, Sarah Chen, started by offering optional egg shares to existing members. When demand exceeded supply within weeks, she knew she had a winner.

Scale thoughtfully based on your farm’s actual capacity, not ambitious dreams. Consider available land, water access, housing infrastructure, and crucially, your time. Adding animals means daily commitments, including weekends and holidays. Expand only when you’ve consistently managed your current operation and built adequate financial reserves for unexpected veterinary costs or infrastructure needs.

Managing the Learning Curve

Starting a mixed crop-livestock operation doesn’t mean going it alone. Many farmers find success by connecting with established integrated farms through apprenticeships or farm tours. Organizations like the National Center for Appropriate Technology and your state’s organic farming association offer workshops specifically designed for livestock integration while maintaining organic standards.

Sarah Chen, who transitioned her vegetable CSA to include chickens, shares: “I spent three months volunteering at a neighboring integrated farm before bringing animals to mine. Those hands-on sessions taught me more than any book could about daily rhythms and problem-solving.”

Set realistic timelines for yourself. Most farmers suggest starting with one livestock species and mastering its care before expanding. Expect a learning curve of at least one full season to understand how animals interact with your existing systems.

Online forums and regional farming networks provide invaluable peer support when challenges arise. Remember that mistakes are part of the journey—even experienced farmers continue learning. Focus on gradual improvements rather than perfection, and don’t hesitate to seek mentorship from those who’ve successfully navigated the transition. Your organic certification agency can also clarify livestock-specific requirements, ensuring you stay compliant while experimenting with new practices.

Integrated crop-livestock CSA farms represent a powerful movement toward healthier food systems and more resilient communities. These operations create win-win-win scenarios where farmers build soil fertility naturally and diversify their income, members enjoy incredibly fresh, nutrient-dense food while connecting with their food sources, and the environment benefits from reduced chemical inputs and carbon sequestration. The holistic approach mimics natural ecosystems, creating farms that thrive rather than merely survive.

Whether you’re seeking out your next CSA membership or dreaming of starting your own integrated farm, now is the perfect time to explore this regenerative model. Many farmers who’ve made the transition report not only improved land health but also deeper satisfaction in their work and stronger relationships with their community members. The key is finding operations that align with your values and goals.

Ready to discover integrated CSA farms in your area? Browse our comprehensive directory to connect with local farmers practicing these innovative methods. Your food choices matter, and supporting integrated systems helps build a more sustainable future for everyone. Take that first step today and experience the difference that thoughtfully integrated farming can make on your plate and in your community.

Master These Organic Growing Methods for Your Greenhouse Success

Posted by darrell on
0
Organic Farming and Cultivation
Master These Organic Growing Methods for Your Greenhouse Success

Transform your greenhouse into a thriving organic ecosystem by implementing time-tested growing practices that maximize yield while preserving soil health. Organic cultivation delivers more than just chemical-free produce – it creates a sustainable, balanced growing environment that supports beneficial insects, enriches soil microbiomes, and produces nutrient-dense crops year after year.

Master organic growing by focusing on three core principles: soil vitality, natural pest management, and sustainable resource cycling. Start with building living soil through composting, cover cropping, and beneficial microorganism cultivation. Layer this foundation with integrated pest management strategies like companion planting and beneficial insect habitats. Finally, close the loop by recycling organic matter back into your growing system.

Modern organic greenhouse operations demonstrate that sustainable practices can match or exceed conventional yields while building long-term soil fertility. Whether you’re a home gardener or commercial grower, these methods offer a proven path to successful organic production. The key lies in understanding and working with natural systems rather than against them – creating an environment where plants thrive naturally without synthetic inputs.

Let’s explore the essential techniques that make organic greenhouse growing both productive and sustainable…

Interior view of organic greenhouse with multiple rows of healthy plants
A thriving organic greenhouse ecosystem showcases diverse plant varieties growing in harmony.

Building Your Organic Greenhouse Foundation

Soil Health Management

The foundation of successful organic growing lies in proper organic soil management, which starts with understanding your soil’s composition and nurturing its natural ecosystem. Building healthy soil involves incorporating high-quality compost, which adds essential nutrients and beneficial microorganisms that support plant growth. Regular additions of organic matter, such as leaf mulch, straw, or well-aged manure, help improve soil structure and water retention.

Creating your own compost is a sustainable way to recycle garden and kitchen waste while producing nutrient-rich soil amendments. Layer green materials (vegetable scraps, grass clippings) with brown materials (dried leaves, straw) in a ratio of roughly 3:1. Maintain proper moisture and turn the pile regularly to ensure even decomposition.

Cover cropping between growing seasons helps prevent soil erosion, fixes nitrogen, and adds organic matter when tilled back into the soil. Popular cover crops include clover, vetch, and winter rye. Remember to rotate your crops annually to maintain soil health and prevent nutrient depletion in specific areas.

Climate Control the Natural Way

Managing greenhouse climate doesn’t always require energy-intensive systems. Smart design and natural solutions can effectively control temperature and humidity while staying true to organic principles. Start by positioning your greenhouse to maximize natural sunlight in winter and implementing shade cloth during summer months.

Ventilation is your best friend in natural climate control. Installing adjustable roof vents allows hot air to escape while drawing in cooler air through lower openings, creating natural airflow. This passive cooling system works wonders for temperature regulation and helps prevent moisture-related issues.

Water walls and thermal mass storage are excellent organic solutions. Place dark-colored water barrels along north-facing walls to absorb heat during the day and release it at night. For humidity control, consider gravel floors that provide natural drainage while releasing moisture gradually.

Living solutions like companion planting can also help. Taller plants can shade heat-sensitive crops, while proper spacing ensures good air circulation. Many experienced organic growers use herbs like basil and mint, which naturally release moisture through transpiration, helping maintain optimal humidity levels.

Remember, observation is key – monitor your greenhouse environment daily and adjust these natural systems accordingly.

Natural Pest Management Solutions

Beneficial Insects

Nature’s own pest control squad can be your greatest ally in organic growing. Beneficial insects are the unsung heroes of sustainable agriculture, providing effective natural pest control methods while maintaining ecological balance in your growing space.

Ladybugs, praying mantises, and parasitic wasps act as natural predators, feeding on common pests like aphids, caterpillars, and whiteflies. These helpful creatures work tirelessly to protect your crops without the need for chemical interventions. Ground beetles patrol the soil surface, controlling slugs and other ground-dwelling pests, while lacewings help manage spider mites and thrips.

To attract and maintain these beneficial insects, create a welcoming environment by planting companion flowers like marigolds, yarrow, and dill throughout your growing area. These flowering plants provide nectar and pollen, essential food sources that keep beneficial insects around when pest populations are low.

Consider introducing specific beneficial insects through controlled releases, especially in greenhouse environments. Many organic growers successfully use this strategy as part of their integrated pest management approach. Remember to provide water sources, such as shallow dishes with pebbles, and avoid using any chemical pesticides that might harm these helpful allies.

By fostering a diverse ecosystem that supports beneficial insects, you’ll create a self-regulating environment that naturally protects your crops while promoting sustainable growing practices.

Plant-Based Solutions

Nature provides some of the most effective solutions for pest control and plant health through companion planting and natural repellents. By strategically placing certain plants together, you can create a harmonious ecosystem that benefits all your crops.

Companion planting works by using natural plant relationships to your advantage. For instance, planting basil near tomatoes not only improves their flavor but also repels common pests like hornworms. Marigolds are excellent companions for most vegetables, as their strong scent deters harmful nematodes and other unwanted insects.

For natural pest control, consider growing aromatic herbs like lavender, rosemary, and mint. These plants naturally repel many common garden pests while attracting beneficial insects like bees and butterflies. Nasturtiums act as sacrifice plants, drawing aphids away from your valuable crops, while garlic and onions help protect against various fungal diseases.

Local farmer Sarah Martinez shares her success story: “Since implementing companion planting in my greenhouse, I’ve reduced pest problems by 70% without using any chemical pesticides. My favorite combination is growing carrots with onions – the strong onion smell masks the scent that usually attracts carrot flies.”

Creating your own natural repellents is simple and cost-effective. A mixture of neem oil and water serves as an excellent all-purpose insecticide, while a solution of crushed garlic and chili peppers helps deter various pests without harming beneficial insects or compromising your organic certification.

Water Management for Organic Success

Smart Irrigation Systems

Smart irrigation systems are the backbone of successful organic greenhouse operations, combining efficient water management techniques with sustainable growing practices. By implementing drip irrigation systems, growers can deliver water directly to plant roots, minimizing waste and preventing leaf diseases common in overhead watering methods.

Modern soil moisture sensors and automated timers help maintain optimal growing conditions while conserving water. These tools can be calibrated to deliver precise amounts of water based on plant needs, soil conditions, and local weather patterns. Many organic farmers are now using rainwater harvesting systems alongside their irrigation setup, creating a self-sustaining water cycle that reduces dependency on municipal supplies.

For smaller operations, soaker hoses and micro-sprinklers offer cost-effective alternatives that still maintain organic certification standards. These systems can be integrated with organic-approved water filters to ensure clean, contamination-free irrigation. Remember to regularly maintain and clean your irrigation components to prevent mineral buildup and ensure even water distribution throughout your growing space.

Close-up of ladybugs and beneficial insects on plant leaves
Natural pest control through beneficial insects maintains ecological balance in organic greenhouses.

Water Quality Management

Water quality is fundamental to successful organic growing, and implementing natural treatment methods ensures both plant health and environmental sustainability. Start by testing your water source regularly to understand its mineral content, pH levels, and potential contaminants. Many organic growers use rainwater harvesting systems, which not only provide naturally pure water but also reduce dependency on municipal sources.

For water treatment, biological filtration systems using beneficial bacteria and aquatic plants can effectively remove impurities. Consider installing a constructed wetland or bio-pond system that naturally filters water through layers of gravel, sand, and specific plant species. These systems mimic nature’s own purification processes while creating additional habitat for beneficial insects.

Conservation strategies are equally important. Drip irrigation systems deliver water directly to plant roots, reducing waste and preventing leaf diseases. Mulching helps retain moisture and decrease evaporation, while soil amendments like compost improve water retention capacity. Some successful organic farmers combine these methods with moisture sensors and timers to optimize water usage while maintaining strict organic standards.

Remember to regularly maintain your water management system and monitor plant response to ensure optimal results.

Organic Fertilization Strategies

Hands mixing dark organic compost into greenhouse soil
High-quality organic compost provides essential nutrients and improves soil structure for greenhouse growing.

Natural Nutrient Sources

In organic growing, success starts with understanding natural fertilization methods and nutrient sources that enrich your soil sustainably. Compost serves as the foundation, created from kitchen scraps, yard waste, and agricultural byproducts. This black gold provides a balanced mix of nutrients while improving soil structure and microbial activity.

Animal-based amendments like worm castings, fish emulsion, and well-aged manure offer concentrated nitrogen sources essential for plant growth. For phosphorus, bone meal and rock phosphate work wonders, while kelp meal and wood ash provide potassium and trace minerals. Cover crops like clover and alfalfa naturally fix nitrogen in the soil when incorporated into your rotation.

Many local farmers swear by homemade compost tea, brewing it with mature compost, molasses, and oxygen to create a nutrient-rich solution that also boosts beneficial microorganisms. Green manures – crops grown specifically to be tilled back into the soil – offer a cost-effective way to improve soil fertility naturally.

Remember to test your soil regularly to understand its specific needs. This helps you choose the right combination of natural amendments without over-applying any single nutrient. Working with nature’s cycles, these organic sources create a sustainable, living soil system that supports healthy plant growth year after year.

Feeding Schedules

Establishing a consistent feeding schedule is crucial for successful organic growing. Unlike synthetic fertilizers, organic nutrients are released slowly, requiring careful timing and planning. Start with a nutrient-rich base soil mixture, then supplement with regular applications of organic amendments throughout the growing season.

For most crops, begin feeding two weeks after transplanting or when seedlings show their first true leaves. Apply compost tea or liquid fish emulsion every 7-14 days during the vegetative growth phase. During the flowering and fruiting stages, transition to phosphorus and potassium-rich amendments like bone meal or kelp extract, applying every 10-14 days.

Heavy feeders like tomatoes and cucumbers benefit from weekly applications, while lighter feeders like herbs may only need monthly feeding. Always monitor plant response and adjust accordingly. Morning applications are ideal, allowing plants to uptake nutrients throughout the day.

Remember to follow the “little and often” principle rather than infrequent heavy feedings. This mimics nature’s feeding patterns and prevents nutrient lockout. Keep detailed records of feeding dates and plant responses to fine-tune your schedule over time. Many experienced organic growers recommend reducing feeding frequency during winter months when plant growth naturally slows.

Always water thoroughly before applying organic nutrients to prevent root burn and ensure optimal nutrient absorption. Your feeding schedule should evolve with the seasons and respond to plant growth stages for best results.

Embracing organic growing practices is more than just a trend – it’s a commitment to healthier food production, environmental stewardship, and sustainable agriculture. Through proper soil management, natural pest control methods, and careful attention to plant health, organic growers can achieve bountiful harvests while protecting our ecosystems for future generations.

Success stories from small-scale organic farmers demonstrate that these methods are not only viable but often more profitable in the long run. Take Sarah from Green Valley Farm, who transformed a conventional greenhouse operation into a thriving organic enterprise, now supplying fresh produce to local restaurants and farmers’ markets year-round.

By implementing the organic practices we’ve discussed – from composting and crop rotation to beneficial insect introduction and natural disease prevention – you’re joining a growing community of conscious cultivators. Remember that transitioning to organic doesn’t have to happen overnight; start with small changes and gradually expand your sustainable practices.

Whether you’re a home gardener or commercial grower, the rewards of organic cultivation extend beyond the harvest. You’ll contribute to soil health, support beneficial wildlife, reduce chemical runoff, and produce nutritious, flavorful crops that your community can trust and enjoy.

Take the first step today by incorporating one or two organic practices into your growing routine. Your plants, the environment, and future generations will thank you for making the switch to organic cultivation.

Heritage Seeds That Thrive: Where Expert Gardeners Get Their Organic Seeds

Posted by darrell on
0
Organic Farming and Cultivation
Heritage Seeds That Thrive: Where Expert Gardeners Get Their Organic Seeds

In the quiet revolution of sustainable agriculture, organic and heirloom seed companies stand as guardians of our agricultural heritage. These specialized seed suppliers do more than just sell packets of potential – they preserve centuries of genetic diversity, protect time-tested varieties, and empower gardeners to grow food that tells a story. From rare tomato varieties bursting with forgotten flavors to drought-resistant bean species that sustained generations of farmers, these companies maintain living libraries of agricultural treasure.

As climate change threatens global food security and corporate agriculture narrows the genetic pool of our food crops, organic and heirloom seed companies have become crucial players in protecting our food future. Their catalogs offer more than just seeds; they provide access to varieties adapted to local conditions, naturally resistant to pests, and selected over generations for superior taste and performance. For home gardeners and small-scale farmers alike, these companies represent a direct link to sustainable, resilient growing practices and the pure joy of cultivating plants that have stood the test of time.

Why Choose Organic and Heirloom Seeds?

Organic vs. Conventional Seeds

When choosing seeds for your garden, understanding the difference between organic and conventional options can significantly impact your growing success. organic non-GMO seeds come from plants grown without synthetic pesticides or fertilizers, making them naturally adapted to organic growing conditions. These seeds produce plants with stronger natural resistance to pests and diseases, ideal for sustainable gardening practices.

Conventional seeds, while widely available and often less expensive, may be treated with synthetic chemicals or produced using conventional farming methods. The key advantage of choosing organic seeds lies in their ability to thrive in organic growing conditions and their contribution to maintaining genetic diversity.

Many gardeners report better germination rates and more vigorous plants when using organic seeds, particularly in organic soil systems. Additionally, by choosing organic seeds, you’re supporting sustainable agricultural practices and helping preserve traditional farming methods for future generations. This choice aligns perfectly with the principles of organic gardening and helps create a more resilient food system.

The Heirloom Advantage

Heirloom seeds carry stories that span generations, offering gardeners a direct connection to agricultural history. These time-tested varieties have been carefully preserved by families and farming communities, often for more than 50 years, passing down unique traits, flavors, and cultural significance. Unlike modern hybrid varieties, heirloom plants produce seeds that remain true to their parent characteristics, allowing gardeners to save and replant them year after year.

What makes heirloom varieties particularly special is their remarkable diversity in taste, appearance, and growing characteristics. From purple striped tomatoes to rainbow-colored corn, these vegetables often feature extraordinary colors, shapes, and flavors that you won’t find in conventional produce. Many heirloom varieties have also naturally developed resistance to local pests and diseases, making them well-adapted to specific growing regions and often more resilient in organic growing systems.

By choosing heirloom seeds, gardeners help preserve genetic diversity and protect our agricultural heritage for future generations.

Assortment of multicolored heirloom tomatoes including yellow, purple, red, and striped varieties
Diverse collection of colorful heirloom tomatoes showing various sizes, shapes, and colors

Top Organic Seed Companies Making a Difference

Regional Seed Specialists

Regional seed specialists play a vital role in preserving and distributing locally-adapted varieties that thrive in specific climates and soil conditions. These companies focus on seeds that have proven successful in their particular geographic areas, offering gardeners and farmers the best chances of growing success.

For example, Southern Exposure Seed Exchange in Virginia specializes in varieties that flourish in the humid Southeast, while Adaptive Seeds in Oregon focuses on cold-hardy varieties perfect for the Pacific Northwest. High Desert Seed in Colorado offers seeds specifically adapted to challenging mountain growing conditions and arid climates.

What makes these regional specialists particularly valuable is their intimate knowledge of local growing conditions and their commitment to preserving varieties that might otherwise be lost. Many maintain close relationships with local farmers and conduct extensive trials to identify the hardiest, most productive varieties for their region.

These specialists often collect and preserve heirloom varieties that have been grown in their regions for generations. Through careful selection and seed saving, they help maintain genetic diversity while ensuring these time-tested varieties remain available to future generations of growers.

For best results, gardeners should consider working with seed companies that operate in their climate zone or similar growing conditions. This approach typically leads to better germination rates and overall plant performance.

Hands carefully storing dried organic seeds in labeled paper seed envelopes
Seed saving process showing dried seeds being collected and stored in paper envelopes

Global Heritage Seed Preservers

Several remarkable organizations are working across borders to protect our planet’s agricultural diversity through heritage seed preservation. Seed Savers Exchange, based in Iowa but operating globally, maintains one of the largest non-governmental seed banks in North America, preserving over 20,000 varieties of heirloom plants.

The Global Crop Diversity Trust partners with seed banks worldwide to safeguard crop diversity, including their famous Svalbard Global Seed Vault in Norway, often called the “Doomsday Vault.” This facility currently protects over one million seed samples from nearly every country on Earth.

Native Seeds/SEARCH, working throughout the southwestern United States and Mexico, focuses on preserving indigenous crop varieties and traditional farming knowledge. They’ve successfully saved hundreds of desert-adapted varieties that might otherwise have been lost.

Navdanya, operating in India, has established 122 community seed banks and trained over 900,000 farmers in seed saving techniques. Their work exemplifies how local action can have global impact in preserving agricultural biodiversity.

These organizations don’t just store seeds – they actively distribute them to farmers and gardeners, conduct research, and educate communities about the importance of maintaining genetic diversity in our food systems. Many offer membership programs that allow individuals to participate in their preservation efforts while accessing rare and unique varieties for their own gardens.

What to Look For When Choosing a Seed Company

Certification and Standards

Organic seed companies must adhere to strict certification standards to ensure their products meet organic requirements. The USDA National Organic Program (NOP) oversees these certifications, requiring seeds to be grown without synthetic fertilizers, pesticides, or genetic modification. For a company to label their seeds as organic, they must maintain detailed records of their growing practices and undergo regular inspections by certified agencies.

Quality control measures are equally important in heirloom seed production. While heirloom seeds don’t require official certification, reputable companies implement rigorous testing protocols to verify seed viability, purity, and germination rates. Many leading seed companies conduct multiple germination tests throughout the year and maintain careful documentation of their seed sources and growing conditions.

Look for companies that provide transparency about their growing methods and testing procedures. The best seed suppliers will openly share information about their certification status, seed handling practices, and quality control measures. Many also participate in additional voluntary certification programs, such as Certified Naturally Grown or Biodynamic certification, demonstrating their commitment to sustainable agriculture.

Organic certification seal next to professional seed testing equipment in laboratory setting
Close-up of organic certification label and seed quality testing equipment

Seed Quality Indicators

When evaluating seed companies, several key indicators help ensure you’re getting high-quality seeds for your garden. Look for clear germination rates and recent seed testing dates on packaging – reputable companies always provide this information. Fresh seeds typically have germination rates of 80% or higher.

Customer reviews and gardening community feedback are valuable resources for assessing company reliability. Look for consistent positive experiences regarding seed viability, accurate labeling, and responsive customer service. Many experienced growers share their success stories on gardening forums and social media platforms.

Pay attention to seed storage and shipping practices. Quality seeds should arrive in moisture-proof, properly labeled packages. The best companies use appropriate packaging materials to protect seeds during transit and provide detailed growing instructions.

Third-party certifications, such as USDA Organic or Non-GMO Project Verified, can provide additional assurance. Companies that openly share their seed-saving practices and breeding methods typically demonstrate a commitment to transparency and quality. Consider companies that provide detailed variety descriptions and growing recommendations specific to different climate zones.

Supporting Seed Preservation at Home

Preserving seeds at home is a rewarding practice that connects you to the age-old tradition of maintaining crop diversity while creating a more sustainable and living ecosystem in your garden. Start by selecting healthy, mature plants from your strongest performers, ensuring they’re open-pollinated varieties rather than hybrids.

For wet seeds from fruits and vegetables like tomatoes and cucumbers, scoop out the seeds with their pulp and ferment them in water for 2-3 days. This process helps remove the gel coating and prevents seed-borne diseases. After fermentation, rinse thoroughly and dry on paper towels.

For dry seeds from plants like beans, peas, and flowers, allow the seed pods to dry completely on the plant. Harvest when the pods turn brown and brittle, then remove the seeds and clean off any plant debris.

Proper storage is crucial for seed viability. Store your cleaned and thoroughly dried seeds in paper envelopes or glass jars with silica gel packets to control moisture. Label each container with the variety name, harvest date, and any notable characteristics. Keep them in a cool, dark place with consistent temperature, ideally between 32-41°F.

Remember to save seeds from multiple plants of the same variety to maintain genetic diversity. Start small with easy-to-save varieties like tomatoes, beans, and lettuce, then expand your collection as you gain experience. Consider joining local seed-saving networks to share knowledge and exchange varieties with other gardeners in your community.

Supporting organic and heirloom seed companies goes far beyond simply growing vegetables in our gardens – it’s an investment in our planet’s future. These dedicated seed producers preserve centuries of agricultural heritage while protecting genetic diversity that could prove crucial for food security in changing climates. By choosing to purchase from organic seed companies, we become part of a larger movement that values sustainable agriculture, supports small-scale farmers, and maintains crop varieties that might otherwise disappear.

Every seed packet purchased from these companies helps fund ongoing preservation efforts and encourages sustainable farming practices. The variety and resilience found in heirloom seeds provide gardeners with unique flavors and characteristics while ensuring these precious genetic resources remain available for future generations. As our climate continues to change and industrial agriculture faces new challenges, the diverse gene pool maintained by organic seed companies becomes increasingly valuable.

Remember, when you support organic seed companies, you’re not just growing food – you’re helping preserve agricultural biodiversity, supporting sustainable farming practices, and contributing to a healthier food system for everyone. Your garden becomes part of a larger story of preservation and sustainability.

Smart Crop Rotation That Supercharges Your CSA Farm’s Soil

Posted by darrell on
0
Organic Farming and Cultivation
Smart Crop Rotation That Supercharges Your CSA Farm’s Soil

Rotate crops strategically by grouping plants into families – nightshades, legumes, brassicas, and root vegetables – to maximize soil health and naturally prevent pest cycles. Following intensive feeders like tomatoes with nitrogen-fixing legumes restores vital nutrients, while implementing cover crops between main growing seasons delivers profound organic crop rotation benefits. Map your fields into distinct zones and maintain detailed rotation records spanning 3-5 years to optimize production and build resilient soil ecosystems.

Plan companion planting combinations within each rotation block – marigolds deter pests from tomatoes, while basil enhances pepper growth. This integrated approach creates natural synergies that boost yields while maintaining organic certification standards. The living soil web thrives when diverse plant families take turns nurturing distinct microbial communities.

Small-scale farmers find particular success rotating high-value crops like salad greens through multiple succession plantings, followed by soil-building cover crop periods. This intensive yet sustainable method maximizes both land use and soil fertility while meeting consistent CSA customer demand throughout the growing season.

Diagram of four-season crop rotation cycle showing seasonal transitions between crop types
Four quadrants showing different seasonal crops in rotation, with arrows connecting each season

The Four-Season Rotation System

Season-by-Season Planning

Spring kicks off the rotation cycle with nitrogen-fixing legumes like peas and fava beans, which enrich the soil for heavy-feeding summer crops. These early plantings can be followed by quick-growing leafy greens such as lettuce and spinach, taking advantage of the cool, wet conditions.

As summer approaches, transition to heat-loving crops like tomatoes, peppers, and eggplants in areas where legumes previously grew. These nightshades benefit from the nitrogen-rich soil left behind. Alongside these, plant companion crops like basil and marigolds to naturally deter pests and enhance growth.

Fall presents an opportunity for root vegetables such as carrots, beets, and parsnips, which can be planted in areas where summer crops have depleted upper soil nutrients. These root crops help break up soil compaction and access nutrients from deeper layers. Plant brassicas like kale and cabbage in separate beds, as they have different nutrient needs.

Winter is ideal for soil building with cover crops like winter rye or clover in empty beds. In warmer zones, continue growing hardy greens and root vegetables. Use this quieter season to plan next year’s rotation, considering which areas need rest and rejuvenation.

Remember to keep detailed records of what grows where each season. This helps track nutrient needs and prevents disease buildup by ensuring the same plant families don’t return to the same location for at least three years.

Plant Family Groups

Understanding plant family groups is key to successful crop rotation. Plants within the same family often share similar nutrient needs and are vulnerable to the same pests and diseases, making family-based rotation essential for soil health and pest management.

The main plant families for rotation planning include:

Nightshades (Solanaceae): Tomatoes, peppers, potatoes, and eggplants are heavy feeders that deplete soil nitrogen. These should be followed by nitrogen-fixing legumes in the rotation.

Legumes (Fabaceae): Peas, beans, and other legumes enrich soil by fixing nitrogen from the air. They make excellent predecessors for heavy-feeding crops like brassicas.

Brassicas (Brassicaceae): Cabbage, broccoli, and kale have deep roots that help break up soil compaction. They thrive in nitrogen-rich soil after legumes.

Alliums (Amaryllidaceae): Onions, garlic, and leeks have shallow roots and specific nutrient needs. They work well following brassicas but before root crops.

Root Vegetables (Apiaceae): Carrots, parsnips, and their relatives prefer loose, well-worked soil with moderate nutrients. Plant these after alliums have helped clear the soil of certain pests.

Cucurbits (Cucurbitaceae): Squash, cucumbers, and melons are heavy feeders that spread widely. They benefit from rich soil and work well in rotation after composted areas.

For best results, wait at least three years before planting members of the same family in the same location. This practice helps break pest cycles and maintains optimal soil nutrition.

Building Soil Health Through Strategic Rotation

Nitrogen-Fixing Crops

Nitrogen-fixing crops, particularly legumes, are the unsung heroes of organic crop rotation. These remarkable plants form a symbiotic relationship with beneficial bacteria in their root nodules, naturally converting atmospheric nitrogen into a form that creates a thriving living soil ecosystem. Common nitrogen-fixing crops include peas, beans, clover, and alfalfa.

When incorporated into your rotation plan, these plants act as natural fertilizer factories. They can add up to 200 pounds of nitrogen per acre annually, significantly reducing or eliminating the need for external fertilizers. The best part? This nitrogen remains in the soil, feeding the next crop in your rotation sequence.

Sarah, one of our local CSA farmers, found that incorporating crimson clover as a winter cover crop doubled her tomato yields the following season. The key is timing – allow nitrogen-fixing crops to grow for at least 6-8 weeks before turning them into the soil. This ensures maximum nitrogen fixation and soil enrichment benefits.

These crops also improve soil structure, prevent erosion, and support beneficial insects, making them true multitaskers in your organic farming toolkit.

Microscopic view of nitrogen-fixing nodules on legume roots and beneficial soil bacteria
Split photo showing legume root nodules and soil bacteria up close

Heavy Feeders vs. Light Feeders

Understanding the difference between heavy and light feeders is crucial for successful crop rotation. Heavy feeders, like tomatoes, corn, and brassicas, require abundant nutrients to thrive and can quickly deplete soil. These hungry plants need rich, fertile soil with plenty of organic matter and nutrients, particularly nitrogen.

On the flip side, light feeders such as root vegetables, herbs, and beans are more modest in their nutrient requirements. Many light feeders, especially legumes, actually help improve soil quality by fixing nitrogen from the air into the ground. This makes them perfect follow-up crops after heavy feeders have used up soil nutrients.

Smart rotation planning involves alternating between these two groups. For example, following nitrogen-hungry tomatoes with nitrogen-fixing peas helps restore soil balance naturally. Some crops, like lettuce and herbs, fall into a middle category of moderate feeders, offering flexible placement in your rotation schedule.

By understanding these feeding patterns, you can create a rotation sequence that maintains soil fertility while maximizing crop yields naturally, without relying on external inputs.

CSA-Specific Rotation Strategies

Succession Planting Integration

Integrating succession planting into your crop rotation plan maximizes land use and ensures a steady harvest throughout the growing season. By staggering plantings of quick-growing crops for succession planting, you can maintain continuous production while still adhering to rotation principles.

Start by dividing your rotation blocks into smaller sections, planting the same crop family at 2-3 week intervals. For example, you might plant lettuce in one section, then follow with another lettuce planting a few weeks later, ensuring both fit within your designated leafy greens rotation block.

Consider using season extension techniques like row covers or cold frames to lengthen your growing windows. This allows for more succession opportunities within each rotation cycle. Many CSA farmers find success by maintaining detailed planting calendars that track both succession schedules and rotation requirements.

Remember to account for seasonal variations when planning successions. Spring and fall plantings may need different spacing intervals than summer ones due to changing day lengths and temperatures. Keep good records of what works best in your specific climate and soil conditions.

Visual timeline showing succession planting schedule for multiple crops in a rotating bed system
Timeline illustration of succession planting within a single bed through multiple seasons

Organic crop rotation stands as a cornerstone of sustainable agriculture, offering numerous benefits for soil health, pest management, and crop yield optimization. By implementing thoughtful rotation plans, farmers can create resilient agricultural systems that work in harmony with nature. Remember to start small, perhaps with a three-crop rotation, and gradually expand as you become more comfortable with the process.

Success stories from organic farmers across the country demonstrate that proper crop rotation can reduce input costs while improving soil fertility and crop quality. Take inspiration from Sarah Miller’s farm in Vermont, where implementing a five-year rotation plan led to a 40% increase in soil organic matter and significantly reduced pest problems.

Ready to get started? Begin by mapping your available land, researching companion planting possibilities, and creating a seasonal calendar. Consider joining local farming networks or attending workshops to learn from experienced organic farmers. Document your rotation plans and outcomes, making adjustments based on your observations and results.

With patience and dedication, organic crop rotation can transform your farming operation into a more sustainable and profitable venture while contributing to environmental conservation.

How the Zofnass Program is Revolutionizing Sustainable Farm Infrastructure

Posted by darrell on
0
Organic Farming and Cultivation
How the Zofnass Program is Revolutionizing Sustainable Farm Infrastructure

In an era where infrastructure development often clashes with environmental preservation, the Zofnass Program for Sustainable Infrastructure stands as a groundbreaking initiative transforming how we build our world. Developed at the Harvard Graduate School of Design, this innovative framework provides comprehensive tools and metrics that help communities and organizations create environmentally responsible, socially equitable, and economically viable infrastructure projects. From water treatment facilities to transportation networks, the program’s rating system evaluates and guides infrastructure development through a holistic lens, considering everything from climate resilience to community wellbeing. By integrating sustainability at every project stage, from planning to maintenance, the Zofnass Program empowers developers, engineers, and policymakers to make informed decisions that benefit both current and future generations. This systematic approach to sustainable infrastructure has already transformed numerous projects worldwide, proving that environmental stewardship and development can work hand in hand to create lasting positive impact.

Building Better Farms Through Sustainable Infrastructure

Water Management Systems

The Zofnass Program emphasizes sustainable water management as a cornerstone of organic farming success. Through innovative infrastructure solutions, farms can maximize water efficiency while maintaining optimal crop health. These systems typically include precision irrigation methods, rainwater harvesting equipment, and water quality monitoring tools that work together seamlessly.

Local farmers have found success with features like soil moisture sensors that trigger automated irrigation only when needed, reducing water waste while ensuring crops receive adequate hydration. Storage systems capture rainwater during wet seasons, providing a reliable water source during drier periods. Additionally, natural filtration systems, including constructed wetlands and bioswales, help purify water while supporting local biodiversity.

The program also encourages the integration of water-saving technologies with traditional farming wisdom. For example, combining modern drip irrigation with companion planting techniques has helped many farmers reduce water usage by up to 30% while improving crop yields. These practical solutions make sustainable farming more accessible and economically viable for organic producers of all sizes.

Sustainable water management infrastructure on an organic farm showing irrigation systems and water collection
Aerial view of a modern organic farm implementing sustainable water management systems, including drip irrigation and rainwater harvesting

Energy-Efficient Structures

The Zofnass Program promotes energy-efficient building practices that help farmers reduce their environmental impact while cutting operational costs. These structures incorporate passive solar design, natural ventilation, and high-performance insulation to minimize energy consumption in agricultural facilities.

Solar panels and wind turbines are increasingly integrated into farm buildings, providing clean, renewable energy for daily operations. Many successful farms have implemented geothermal systems for greenhouse climate control, resulting in year-round growing capabilities with minimal energy input.

Smart building materials play a crucial role in creating sustainable farm structures. From recycled steel to sustainably harvested timber, these materials reduce the carbon footprint while maintaining durability. Living roofs and walls provide additional insulation while supporting beneficial insects and improving air quality.

Innovative water management systems, including rainwater harvesting and greywater recycling, are incorporated into building designs. These systems help farms conserve water and reduce dependency on municipal supplies. LED lighting systems and automated climate controls further enhance energy efficiency while optimizing growing conditions for crops.

Farmers who’ve implemented these practices report significant reductions in energy costs, often seeing savings of 30-50% on their utility bills.

Energy-efficient farm building featuring solar panels and green building design elements
Solar panels installed on a barn roof with integrated greenhouse and energy-efficient storage facilities

Real-World Success Stories

Small-Scale Farm Transformations

The Zofnass Program has witnessed remarkable transformations in small-scale farms across the country through its sustainable infrastructure initiatives. These success stories demonstrate how thoughtful planning and organic farming innovations can revolutionize local agriculture.

Take the Green Valley Farm in Vermont, which implemented water-efficient irrigation systems and solar-powered greenhouse operations. Within two years, they reduced water consumption by 40% while increasing crop yields by 25%. Similarly, Fresh Earth Farms in California integrated smart composting systems and pollinator-friendly landscapes, leading to improved soil health and biodiversity.

The program helped these farms design sustainable infrastructure that works in harmony with natural ecosystems. By incorporating features like rainwater harvesting systems, renewable energy solutions, and efficient storage facilities, these small farms have significantly reduced their environmental impact while improving productivity.

What’s particularly inspiring is how these transformations have created ripple effects in their communities, encouraging neighboring farms to adopt similar practices and fostering a growing network of sustainable agricultural operations.

Side-by-side comparison showing farm infrastructure improvements following sustainable guidelines
Before and after comparison of a small farm’s infrastructure transformation using Zofnass Program principles

Community Garden Projects

The Zofnass Program has fostered numerous successful community garden initiatives that showcase the power of sustainable infrastructure at a local level. In Boston’s Dorchester neighborhood, residents transformed a vacant lot into a thriving community garden that now produces over 2,000 pounds of organic vegetables annually. The project incorporated sustainable irrigation systems and composting facilities, becoming a model for urban agriculture.

Another notable success story comes from Seattle, where the Green Gateway Project connected three existing community gardens through eco-friendly pathways and shared resource centers. This integration helped reduce water usage by 40% while increasing overall crop yield. The project also implemented solar-powered tool sheds and rainwater harvesting systems.

In Austin, Texas, the Sustainable Roots Initiative partnered with local schools to create educational garden spaces. These gardens feature permeable pathways, native plant species, and innovative water management systems. The program has not only provided fresh produce to school cafeterias but also serves as a living laboratory for students learning about sustainable agriculture and infrastructure design.

These projects demonstrate how the Zofnass Program’s principles can be successfully applied at the community level, creating lasting positive impact on local food systems and environmental sustainability.

Implementing Sustainable Infrastructure on Your Farm

Assessment and Planning

The Zofnass Program provides comprehensive tools and frameworks to help farmers and infrastructure managers assess their current systems and plan for sustainable improvements. The process begins with a detailed evaluation of existing infrastructure using the Envision rating system, which examines environmental, social, and economic impacts across multiple categories.

To effectively transform your farm infrastructure, start by conducting a baseline assessment. This includes evaluating water management systems, energy usage, waste handling, and transportation networks. The program offers user-friendly checklists and assessment tools that help identify areas needing improvement while highlighting existing sustainable practices.

Once the assessment is complete, the planning phase focuses on developing actionable strategies for enhancement. This involves setting realistic goals, establishing timelines, and prioritizing projects based on their potential impact and available resources. The program encourages collaboration with local stakeholders and experts to ensure plans align with community needs and environmental objectives.

Successful planning also considers future challenges like climate change and population growth. The program provides guidance on incorporating resilience into infrastructure designs, ensuring long-term sustainability. Regular monitoring and adjustment of plans help maintain progress toward sustainability goals while adapting to changing conditions and new technologies.

Resource-Efficient Solutions

The Zofnass Program champions innovative solutions that maximize resource efficiency in agricultural infrastructure. By implementing smart irrigation systems with soil moisture sensors, farms can reduce water consumption by up to 30% while maintaining optimal growing conditions. These systems work alongside rainwater harvesting structures, which capture and store precipitation for use during drier periods.

Energy-efficient greenhouse designs incorporate passive solar heating and natural ventilation, cutting electricity costs while extending growing seasons. Many successful farms have integrated solar panels on equipment sheds and processing facilities, generating clean energy to power daily operations. Some farmers report up to 40% reduction in energy expenses after implementing these improvements.

Composting facilities and organic waste management systems create closed-loop nutrient cycles, transforming farm waste into valuable fertilizer. Modern composting infrastructure can process various organic materials, from crop residues to food processing byproducts, reducing landfill waste while building soil health.

Storage solutions designed with natural cooling and ventilation help preserve harvested crops without excessive energy use. Climate-controlled root cellars and naturally ventilated barn designs maintain proper temperature and humidity levels using minimal resources. These improvements not only reduce operational costs but also enhance product quality and shelf life.

The program also promotes modular infrastructure designs that allow farms to scale operations organically, adding components as needed without disrupting existing systems. This approach helps farmers invest strategically while maintaining operational efficiency.

The Zofnass Program for Sustainable Infrastructure represents a groundbreaking approach to creating more resilient and environmentally conscious farming systems. By implementing these guidelines, farmers and agricultural communities can significantly reduce their environmental impact while improving operational efficiency and long-term viability.

Success stories from farms across the country demonstrate how sustainable infrastructure solutions can lead to substantial water savings, reduced energy consumption, and improved soil health. These benefits extend beyond individual farms to strengthen local food systems and build more resilient agricultural communities.

The program’s comprehensive framework offers practical solutions for farms of all sizes, making sustainable infrastructure accessible to both small family operations and larger agricultural enterprises. From water management systems to renewable energy integration, each element of the program contributes to a more sustainable future for farming.

By embracing these sustainable infrastructure practices, farmers can expect to see reduced operational costs, enhanced crop yields, and increased market competitiveness. Moreover, they’ll be contributing to the broader goals of environmental conservation and climate change mitigation.

As we look to the future of agriculture, the Zofnass Program provides a clear roadmap for creating farming operations that are not only profitable but also environmentally responsible. The time to implement these practices is now – our food security and environmental well-being depend on it.

Get USDA Organic Certification for Your CSA Farm (Step-by-Step Process)

Posted by darrell on
0
Organic Farming and Cultivation
Get USDA Organic Certification for Your CSA Farm (Step-by-Step Process)

Transforming your farm into a USDA certified organic operation unlocks premium market opportunities and demonstrates your commitment to the benefits of organic farming. The certification process, while thorough, follows a clear pathway that thousands of successful farmers have navigated before you. From small CSA operations to large-scale producers, obtaining USDA organic certification requires meticulous record-keeping, a three-year transition period free from prohibited substances, and adherence to strict production standards that prioritize soil health and ecological balance.

Whether you’re an established farmer looking to transition or a new grower starting from scratch, understanding the certification journey is crucial for success. The process involves selecting a certified organic agent, developing an organic system plan, implementing required practices, and maintaining detailed documentation of your farming methods. With proper preparation and guidance, your farm can join the growing community of certified organic producers delivering healthy, sustainable food to conscious consumers.

This comprehensive guide walks you through each step of the USDA organic certification process, helping you navigate requirements, avoid common pitfalls, and build a successful organic operation.

Before You Begin: Essential Requirements

Land Requirements

One of the fundamental requirements for USDA organic certification is maintaining land that’s been free from prohibited substances for at least three years. During this transition period, farmers must implement organic soil management techniques and document their practices meticulously. This means no synthetic fertilizers, pesticides, or genetically modified organisms can be used on the land.

The three-year waiting period allows the soil to naturally cleanse itself of previous chemical inputs and rebuild its organic matter content. During this time, farmers can still grow and sell their produce, but they cannot market it as organic until the full transition period is complete.

Buffer zones are also required if your land borders conventional farms. These zones help prevent drift from neighboring properties that might use prohibited substances. Keep detailed records of your land use history, including maps, field numbers, and acreage calculations, as these will be essential for your certification application.

Bird's eye view of an organic CSA farm showing diverse crop sections and required buffer zones
Aerial view of a diverse CSA farm with clearly separated organic crop sections and buffer zones

Record-Keeping Systems

Maintaining detailed records is a crucial part of organic certification. You’ll need to document everything from seed purchases and planting dates to harvest records and sales transactions. Create a system to track your inputs, including approved fertilizers, pest control methods, and any materials used in production. Keep records of crop rotation plans, field maps, and buffer zone maintenance.

Many farmers find success using digital record-keeping software designed specifically for organic operations, while others prefer traditional paper logbooks. Whatever system you choose, ensure it’s organized and easily accessible for annual inspections. Save all receipts, certificates, and correspondence related to your organic operation.

Important documents to maintain include:
– Detailed field histories
– Seed and input purchase records
– Harvest and sales logs
– Equipment cleaning logs
– Storage facility records
– Employee training documentation

Consider setting up a dedicated filing system, whether physical or digital, to keep everything organized and readily available for inspectors.

The Certification Process Timeline

Selecting a Certifying Agent

Selecting the right certifying agent is a crucial first step in your organic certification journey. The USDA maintains a comprehensive list of accredited certifying agents, with over 80 organizations to choose from. While this might seem overwhelming, you can narrow down your options by focusing on agents who operate in your region and have experience with farms similar to yours.

Start by reaching out to several certifying agents to discuss their services, fees, and processes. Many offer free initial consultations where you can ask questions about their certification approach and timeline. Consider factors like their responsiveness, communication style, and whether they provide educational resources or support services.

Local organic farmers can be valuable resources during this selection process. Ask them about their experiences with different certifying agents and any recommendations they might have. Some agents specialize in certain types of operations, so look for one familiar with CSA farms if that’s your focus.

Remember to compare fee structures carefully, as they can vary significantly between agents. Most charge an initial certification fee plus annual renewal fees based on your operation’s size and gross sales.

Organic System Plan Development

The Organic System Plan (OSP) is your farm’s roadmap to certification and serves as a detailed blueprint of your operation. This comprehensive document outlines everything from your soil management practices and crop rotation plans to your natural pest control methods and record-keeping procedures.

Start by documenting your farm’s history, including past land use and any substances applied in the previous three years. Detail your current farming practices, including seed sources, soil fertility management, and harvesting procedures. Be specific about your buffer zones that prevent contamination from neighboring conventional farms.

Include your plans for maintaining organic integrity during post-harvest handling, storage, and distribution to CSA members. Don’t forget to outline your recordkeeping system – this should track everything from seed purchases to harvest dates and sales records.

Many certifiers provide templates to help you organize this information. While the paperwork might seem daunting, remember that your OSP is a living document that will evolve with your farm. Take time to be thorough, as a well-prepared OSP typically leads to a smoother certification process.

Organic inspector reviewing documentation and inspecting crops with farmer
USDA certified organic inspector examining farm records and conducting field inspection

Initial Inspection

During the initial inspection, a USDA-accredited certifier will visit your farm to verify that your practices align with organic standards. The inspector will walk through your entire operation, examining your fields, storage areas, and processing facilities. They’ll review your record-keeping systems, including seed purchases, crop rotation plans, and pest management strategies.

Be prepared to show documentation of your inputs, including fertilizers and pest control products. The inspector will also evaluate your buffer zones, which protect organic crops from contamination by conventional farming practices on neighboring properties.

The inspection typically takes several hours, during which you’ll need to demonstrate your understanding of organic practices and how you implement them. Your inspector will verify that your actual practices match what you described in your Organic System Plan.

Take this opportunity to ask questions and learn from your inspector’s expertise. Many farmers find the inspection process to be educational and helpful in improving their organic farming practices. After the inspection, you’ll receive a report detailing any issues that need addressing before certification can be granted.

Final Review and Certification

Once all inspections and reviews are complete, the certifying agency will make their final determination. You’ll receive a detailed evaluation report outlining their findings, including any remaining issues that need addressing. If everything meets USDA organic standards, congratulations – you’ll be awarded your organic certification!

Your official USDA organic certificate will arrive with your operation’s name, certification number, and specific products or fields covered under the certification. This valuable document allows you to use the USDA organic seal on your products and marketing materials.

If any issues are identified, don’t worry – you’ll typically have the opportunity to make corrections within a reasonable timeframe. Many farmers successfully address these concerns through simple adjustments to their practices or documentation.

Remember that certification isn’t the end of your organic journey – it’s just the beginning! Your certificate is valid for one year, and you’ll need to complete annual renewal inspections to maintain your organic status. This ongoing process helps ensure the integrity of organic farming practices and builds trust with your CSA members and customers.

Maintaining Your Certification

Annual Updates and Inspections

Maintaining USDA organic certification requires ongoing commitment and regular oversight. Each year, certified operations must undergo an annual inspection and update their organic system plan to maintain their certification status. During these inspections, a USDA-accredited certifying agent reviews your crop rotation practices, pest management strategies, and record-keeping systems.

The annual update process involves submitting documentation of any changes to your farming practices, including new input materials, field expansions, or modifications to your handling procedures. You’ll need to maintain detailed records of all organic activities throughout the year, including planting dates, harvest records, sales documentation, and pest control measures.

Inspectors will visit your farm to verify compliance with organic standards, examining your fields, storage areas, and processing facilities. They’ll review your record-keeping systems and may collect soil or plant tissue samples for residue testing. Any non-compliances identified during the inspection must be addressed promptly to maintain certification.

To ensure a smooth annual renewal process, consider implementing a quarterly self-audit system to track compliance and maintain organized records. Many successful organic farmers use digital record-keeping tools specifically designed for organic certification maintenance, making the annual update process more efficient and less stressful.

Remember, maintaining open communication with your certifying agent throughout the year can help address potential issues before they become problems during your annual inspection.

Common Compliance Challenges

CSA farms often encounter several key challenges when maintaining their USDA organic certification. Record-keeping tends to be one of the biggest hurdles, as farmers must meticulously document everything from seed purchases to harvest dates and sales records. To address this, many successful CSA farmers implement digital tracking systems or dedicate specific times each week for documentation.

Crop rotation and soil management can also prove challenging, especially with limited land. Many CSA farms overcome this by implementing innovative companion planting strategies and utilizing cover crops during off-seasons. Creating detailed field maps and rotation schedules helps ensure compliance while maximizing growing space.

Pest management within organic guidelines requires creative solutions. Successful CSA farmers often integrate beneficial insects, implement physical barriers, and maintain habitat for natural predators. Building healthy soil and promoting biodiversity are key strategies for natural pest resistance.

Buffer zones between organic and conventional fields can be particularly tricky for smaller operations. Some farmers address this by planting tall barrier crops or establishing hedgerows that serve multiple purposes – protecting organic crops while providing habitat for beneficial insects.

Managing multiple varieties of crops, a common practice in CSA operations, can complicate certification compliance. Farmers often streamline this by grouping similar crops together and maintaining detailed planting schedules. Many find success by starting small with fewer varieties and gradually expanding their certified organic offerings as they become more comfortable with the requirements.

Visual breakdown of USDA organic certification fees and available financial assistance programs
Infographic showing certification cost breakdown and funding sources

Cost Considerations

Fee Structure

The cost of USDA organic certification varies based on several factors, including your operation’s size, complexity, and location. For small farms with annual organic sales under $5,000, certification is optional, though you’ll still need to follow organic standards to use the term “organic.”

For most small to medium-sized farms, initial certification costs typically range from $700 to $1,500. This includes the application fee ($250-$500), site inspection fee ($300-$500), and annual certification fee ($200-$500). Larger operations may pay more, sometimes up to $2,500 or higher.

The good news? The USDA offers cost-share programs that can reimburse up to 75% of your certification costs, with a maximum of $750 per certification scope. Many states also provide additional support through grants and assistance programs for organic transition.

Additional costs to consider include soil testing ($30-$100 per sample), organic seeds (generally 20-100% more expensive than conventional), and record-keeping supplies. While these expenses may seem significant initially, many farmers report that the premium prices commanded by certified organic produce often offset the certification costs within the first year.

Remember to factor in annual renewal fees, which are usually lower than initial certification costs but still require budgeting consideration.

Financial Assistance Programs

The USDA recognizes that obtaining organic certification can be financially challenging for many farmers and offers several programs to help offset the costs. Through the Organic Certification Cost Share Program (OCCSP), producers can receive reimbursement for up to 75% of their certification costs, with a maximum of $750 per certification scope annually.

Many states also provide additional financial assistance programs to complement federal support. These programs may include grants, low-interest loans, and technical assistance specifically designed for organic farmers. Beginning farmers and small-scale operations often receive priority consideration for these programs.

For CSA farmers, the USDA’s Environmental Quality Incentives Program (EQIP) offers specific support for implementing conservation practices that align with organic standards. This program can help cover costs associated with soil testing, cover cropping, and other practices required for certification.

Local agricultural extension offices and organic farming organizations frequently provide free or low-cost workshops and consulting services to help farmers navigate the certification process. Some organizations even offer mentorship programs pairing experienced organic farmers with those pursuing certification, providing valuable guidance while keeping costs manageable.

Remember to check application deadlines and eligibility requirements, as these programs typically operate on an annual basis with limited funding availability.

Embarking on your USDA organic certification journey is a significant step toward sustainable agriculture and creating a positive impact on our food system. While the process may seem complex at first, breaking it down into manageable steps makes it more approachable and achievable.

Remember that successful organic certification requires careful planning, detailed documentation, and a commitment to organic principles. From initial preparation and choosing a certifying agent to implementing organic practices and maintaining compliance, each step builds upon the last to create a strong foundation for your organic operation.

The investment in organic certification can open doors to new markets, premium pricing, and a dedicated customer base that values sustainably produced food. Many farmers report that the process itself helps them become better stewards of their land and more efficient operators.

Don’t let the paperwork or requirements intimidate you. Resources and support are available through the USDA, certifying agents, and experienced organic farmers who have successfully navigated this path. Start by reviewing your current practices, gathering documentation, and reaching out to potential certifying agents.

Take the first step today toward joining the growing community of certified organic producers. Your journey not only benefits your operation but also contributes to a healthier environment and provides consumers with access to verified organic products they can trust.

Regenerative Organic Certification: The Future of Heritage Seed Preservation

Posted by darrell on
0
Organic Farming and Cultivation
Regenerative Organic Certification: The Future of Heritage Seed Preservation

Discover how Regenerative Organic Certified (ROC) products are revolutionizing sustainable agriculture by going beyond traditional organic standards. Through regenerative agriculture practices, farmers restore soil health, enhance biodiversity, and improve seed vitality while producing nutrient-dense food. This rigorous certification ensures products meet the highest standards of soil health, animal welfare, and social fairness.

Unlike conventional organic certification, ROC products come from farms that actively rebuild ecosystems, capture carbon, and strengthen local food communities. For conscious consumers and home gardeners, these products represent a direct investment in Earth’s future, offering seeds and foods that are not just sustainably grown, but actually improve the environment with each harvest.

When you choose ROC products, you’re supporting a system that preserves heirloom varieties, promotes genetic diversity, and ensures future generations have access to resilient, adaptive food sources. This holistic approach to agriculture doesn’t just maintain the status quo—it actively heals our planet while producing exceptional quality food and seeds.

Understanding Regenerative Organic Certification

The Three Pillars of ROC

Regenerative Organic Certified (ROC) products stand on three fundamental pillars that work together to create a holistic approach to sustainable agriculture. The first pillar, soil health, focuses on practices that build rich, living soil through methods like cover cropping, crop rotation, and composting. These techniques naturally increase organic matter, improve water retention, and foster beneficial microorganisms that support plant growth.

Animal welfare, the second pillar, ensures that livestock are treated humanely and allowed to express their natural behaviors. This includes providing adequate outdoor access, proper shelter, and appropriate feed. Happy, healthy animals contribute to the farm ecosystem through natural fertilization and grazing patterns that help maintain pasture health.

The third pillar, social fairness, addresses the human element of farming. This standard ensures fair wages and safe working conditions for farm workers, while promoting transparent business practices and supporting local communities. Farmers must provide proper training, healthcare benefits, and fair labor practices to create a sustainable workplace environment.

Together, these pillars create a certification framework that benefits the entire agricultural ecosystem – from the soil beneath our feet to the communities that depend on farming for their livelihood.

Visual diagram of ROC's three pillars: soil health, animal welfare, and social fairness standards
Infographic showing the three pillars of ROC certification with icons representing soil health, animal welfare, and social fairness

Beyond Traditional Organic

While traditional organic certification focuses primarily on avoiding synthetic pesticides and fertilizers, Regenerative Organic Certified (ROC) takes environmental stewardship to the next level. This enhanced certification builds upon the USDA organic standards by incorporating strict requirements for soil health, animal welfare, and social fairness.

ROC farmers must demonstrate continuous improvement in soil organic matter through practices like cover cropping, crop rotation, and minimal tillage. Unlike standard organic certification, ROC requires farmers to measure and document soil health metrics annually, ensuring real progress in carbon sequestration and soil biodiversity.

The social fairness component sets ROC apart by requiring fair wages, safe working conditions, and community engagement – elements not addressed in basic organic certification. For animal welfare, ROC standards exceed organic requirements with specific guidelines for pasture access, animal handling, and living conditions.

Think of ROC as organic certification “plus” – it maintains all organic standards while adding layers of environmental and social responsibility that create a more sustainable and equitable food system.

Seed Preservation Through ROC Practices

Building Living Soil

Building a living soil ecosystem is at the heart of regenerative organic farming and plays a crucial role in seed vitality. When soil teems with beneficial microorganisms, earthworms, and organic matter, it creates the perfect environment for seeds to thrive and develop into strong, resilient plants.

Healthy soil does more than just support plant growth – it actively preserves genetic diversity and enhances seed quality. As plants grow in nutrient-rich soil, they develop stronger natural defense mechanisms and produce more viable seeds for future generations. This creates a positive feedback loop where each successive generation becomes better adapted to local growing conditions.

Farmers practicing regenerative organic methods report that their seeds show improved germination rates and produce more vigorous seedlings. They achieve this by incorporating cover crops, applying compost, and minimizing soil disturbance. These practices increase organic matter content and support beneficial soil microbes that form symbiotic relationships with plant roots.

For home gardeners and small-scale farmers, building living soil starts with simple steps like adding organic matter, avoiding synthetic fertilizers, and maintaining soil moisture. Over time, this approach not only improves seed quality but also reduces the need for external inputs, creating a more sustainable and resilient growing system.

Healthy living soil with visible earthworms and organic material showing soil biodiversity
Close-up photograph of rich, dark soil teeming with earthworms and organic matter

Traditional Breeding Methods

Regenerative Organic Certified (ROC) products champion the preservation and development of heritage seeds through time-tested traditional breeding methods. These practices focus on selecting and saving seeds from plants that demonstrate exceptional vigor, disease resistance, and adaptation to local growing conditions.

Farmers working under ROC guidelines actively participate in seed preservation by maintaining seed banks of diverse crop varieties. They carefully choose parent plants based on desirable traits like drought tolerance, pest resistance, and superior flavor profiles. Through selective breeding over multiple generations, they develop robust plant varieties that thrive without synthetic inputs.

The certification encourages farmers to work with local seed producers and seed-saving networks, fostering community resilience and agricultural biodiversity. This collaborative approach helps preserve rare and endangered crop varieties while developing new strains suited to changing climate conditions.

ROC farmers often document their breeding processes, sharing knowledge about successful crosses and growing techniques with other producers. This exchange of information strengthens the collective understanding of heritage seed development and ensures these valuable genetic resources continue to evolve and adapt.

By supporting traditional breeding methods, ROC helps maintain crop genetic diversity, which is crucial for food security and agricultural sustainability. These efforts result in plants that are naturally vigorous, well-adapted to organic growing conditions, and capable of producing nutritious, flavorful harvests for generations to come.

Benefits for Home Gardeners

Collection of diverse heritage seeds displaying various colors, sizes, and shapes
Side-by-side comparison of heritage seed varieties showing diverse colors and shapes

Superior Seed Quality

Seeds from regenerative organic certified farms consistently demonstrate exceptional germination rates, often exceeding industry standards by 15-20%. This superior quality stems from the holistic approach to soil health and plant care that regenerative practices provide. When plants grow in nutrient-rich, living soil, they produce stronger, more viable seeds with improved genetic expression.

Local farmer Sarah Martinez shares, “Since transitioning to regenerative methods, our tomato seeds show a 95% germination rate, and the seedlings display remarkable vigor right from the start.” This enhanced seed quality translates to stronger plants with better natural resistance to pests and diseases, reducing the need for interventions during the growing season.

The careful selection and saving of seeds from the healthiest plants, combined with soil-building practices, creates a positive feedback loop. Each generation of seeds becomes increasingly well-adapted to local growing conditions, resulting in more resilient and productive crops for both commercial farmers and home gardeners.

Supporting Sustainable Agriculture

When you choose Regenerative Organic Certified (ROC) products, you’re supporting a system that actively preserves our agricultural heritage through organic seed preservation and genetic diversity. ROC farmers maintain and cultivate various heirloom and traditional crop varieties, protecting them from extinction. This practice ensures we don’t lose valuable plant genetics that have evolved over generations to resist specific pests, diseases, and climate conditions.

By growing multiple varieties of crops, ROC farmers create resilient food systems that can better withstand environmental challenges. They save seeds from their strongest plants, allowing beneficial traits to persist and adapt to local conditions. This approach stands in stark contrast to industrial agriculture’s reliance on a narrow range of commercial varieties.

Your purchase of ROC products directly supports farmers who maintain seed libraries and participate in seed-sharing networks, ensuring these precious genetic resources remain available for future generations.

Finding ROC Seeds and Products

Finding Regenerative Organic Certified (ROC) products is becoming easier as more farms and businesses embrace this rigorous certification. The best place to start your search is the Regenerative Organic Alliance’s official directory, which maintains an up-to-date list of certified producers and products.

Local farmers’ markets often feature ROC vendors, making them excellent spots to discover fresh produce and meet the farmers behind these sustainable practices. Many ROC farmers are happy to share their growing methods and can become valuable resources for learning about regenerative agriculture.

Several online marketplaces now specialize in ROC products. Look for trusted retailers like Dr. Bronner’s, Patagonia Provisions, and Nature’s Path, which have committed to sourcing ROC ingredients. These companies often provide detailed information about their farming partners and sustainable practices on their websites.

For those interested in growing their own food, some seed companies now offer ROC-certified seeds. While these are still relatively rare, the number of certified seed producers is growing. Companies like Row 7 Seeds and Hudson Valley Seed Company are leading the way in sustainable seed production.

Here are some practical tips for finding ROC products:
– Subscribe to newsletters from ROC-certified companies
– Join local food co-ops that prioritize regenerative agriculture
– Check natural food stores and ask about their ROC product selection
– Follow social media accounts of ROC farms and producers
– Attend sustainable agriculture conferences and farmers’ events

Remember that ROC is a relatively new certification, so availability may vary by region. Don’t be discouraged if you can’t find everything you’re looking for right away. The number of certified products is steadily increasing as more producers recognize the importance of regenerative organic practices.

Consider starting relationships with local ROC farmers – many offer CSA programs or direct-to-consumer sales. This not only ensures access to certified products but also supports the growth of regenerative agriculture in your community.

Regenerative Organic Certification represents a vital step forward in protecting our seed heritage and building a more sustainable food system. By supporting ROC products, you’re not just choosing healthier food – you’re helping preserve genetic diversity, protect traditional farming wisdom, and ensure future generations have access to resilient, naturally adapted seeds. Every purchase of ROC certified products sends a clear message that consumers value sustainable practices and seed preservation. Start small by choosing ROC certified products at your local market, or consider growing your own garden using ROC certified seeds. Together, we can nurture a food system that regenerates our soil, protects our seeds, and creates a healthier planet for generations to come. Your choices matter – be part of the solution by supporting regenerative organic practices today.

Regenerative Agriculture: The Key to Long-Term CSA Farm Success

Posted by darrell on
0
Organic Farming and Cultivation
Regenerative Agriculture: The Key to Long-Term CSA Farm Success

As global food demands surge and climate concerns intensify, regenerative agriculture stands at the crossroads of farming’s future. This holistic approach to food production – focusing on soil health, biodiversity, and ecosystem restoration – promises to revolutionize how we grow food while healing our planet. But amid the growing buzz around regenerative practices, a crucial question emerges: Is this system truly sustainable for farmers and our food supply?

From small family farms to large agricultural operations, producers worldwide are discovering that regenerative methods can actually increase yields while reducing input costs. These practices, including no-till farming, cover cropping, and rotational grazing, work with nature rather than against it. Yet the transition requires significant knowledge, investment, and patience – factors that deserve careful consideration before making the switch.

As we explore the sustainability of regenerative agriculture, we’ll examine both its remarkable potential and practical challenges, backed by real-world evidence from farmers who’ve successfully made the transition.

The Core Principles of Regenerative Agriculture in CSA Farms

Soil Health Management

At the heart of regenerative agriculture lies the essential practice of building healthy soil ecosystems. This approach prioritizes minimal soil disturbance through reduced tillage techniques, which protect beneficial microorganisms and maintain soil structure. Farmers employ cover cropping to prevent erosion and add organic matter, while crop rotation helps break pest cycles naturally and enhances nutrient availability.

Composting and the application of natural amendments like aged manure play crucial roles in boosting soil fertility. These practices increase organic matter content, improve water retention, and enhance the soil’s ability to sequester carbon. Many regenerative farmers also integrate livestock, using carefully managed grazing to stimulate plant growth and naturally fertilize fields.

The beauty of these soil management techniques lies in their self-reinforcing nature – as soil health improves, the need for external inputs decreases, creating a more resilient and truly sustainable farming system. This approach not only nurtures the land but also produces more nutrient-dense crops while reducing operational costs over time.

Side-by-side comparison of regenerative and conventional farm soil quality
Split-screen comparison of healthy, dark soil with visible organic matter next to depleted, lighter colored soil

Biodiversity and Crop Rotation

Biodiversity is a cornerstone of regenerative agriculture, where farmers create resilient ecosystems through thoughtful crop rotation strategies and diverse plantings. By growing different crops in sequence, farmers naturally enrich their soil while reducing pest and disease pressures. Think of it as nature’s version of risk management!

Instead of growing a single crop, regenerative farmers plant a variety of complementary species that work together. For example, deep-rooted plants like carrots help break up compacted soil, while nitrogen-fixing legumes naturally fertilize the earth. Cover crops protect bare soil between growing seasons, while flowering plants attract beneficial insects that help control pests naturally.

This diversity creates a balanced ecosystem where each plant plays a vital role. When one crop might struggle due to weather or pest challenges, others can thrive, providing farmers with multiple income streams while building healthier soil. It’s a win-win approach that mimics natural ecosystems while producing abundant, nutrient-rich food.

Economic Viability of Regenerative CSA Farming

Visual representation of regenerative agriculture financial benefits and ROI
Infographic showing the economic benefits of regenerative agriculture with charts and icons representing cost savings and revenue streams

Cost-Benefit Analysis

While regenerative agriculture requires initial investments, many farmers find the long-term benefits outweigh the upfront costs. The main startup expenses include soil testing equipment ($300-500), cover crop seeds ($50-100 per acre), and potential machinery modifications ($2,000-5,000). Training and education costs typically range from $500-2,000.

However, these investments often pay off within 3-5 years through reduced input costs. Farmers report 30-50% savings on chemical fertilizers and pesticides, while improved water retention can cut irrigation costs by up to 40%. Enhanced soil health leads to better crop yields, with many farms seeing 10-20% increases in production after transitioning to regenerative practices.

Additional financial benefits come from premium pricing for regeneratively grown products and potential carbon credits. Many farmers also save money through reduced fuel consumption and equipment wear, as regenerative practices often require fewer passes over fields. When considering labor costs, while some practices may require more initial effort, the reduced need for chemical applications and irrigation often balances out the workload over time.

The key is viewing these costs as investments in your farm’s future rather than expenses, as the returns typically compound year after year through improved soil health and ecosystem services.

Market Advantages

Regenerative agriculture offers compelling market advantages that extend beyond environmental benefits. Farmers practicing these methods often command premium prices for their products, with consumers willing to pay 20-30% more for regeneratively grown produce. This price premium reflects the higher quality and nutritional value of the food, as well as the environmental stewardship that goes into its production.

Customer loyalty is another significant advantage. When consumers understand the positive impact of regenerative farming on soil health and ecosystem restoration, they tend to become dedicated supporters. Many regenerative farmers build strong community connections through CSA programs and farmers’ markets, creating lasting relationships with customers who value transparency and sustainable practices.

These market advantages create a positive feedback loop: higher prices support continued investment in sustainable practices, while loyal customers provide stable income through direct sales channels. Additionally, regenerative farms often diversify their revenue streams through value-added products, educational programs, and agritourism activities, making their business models more resilient to market fluctuations.

Environmental Impact and Long-Term Sustainability

Carbon Sequestration

One of the most exciting benefits of regenerative agriculture is its potential to capture and store atmospheric carbon dioxide in the soil. Through practices like no-till farming, cover cropping, and diverse crop rotations, regenerative farms can turn their soil into a powerful carbon sink. When plants photosynthesize, they pull carbon from the air and transfer it to the soil through their root systems and beneficial relationships with soil microorganisms.

Research shows that farms using regenerative practices can sequester between 2-5 tons of carbon per acre annually. This adds up quickly – a 100-acre regenerative farm could potentially offset the annual carbon emissions of over 100 cars! Beyond climate benefits, increased soil carbon also improves water retention, enhances nutrient availability, and creates healthier crops.

The carbon storage potential varies based on factors like soil type, climate, and specific farming practices. While more long-term studies are needed, early results from regenerative farms show promising carbon sequestration rates that continue building year after year. This natural carbon capture technology makes regenerative agriculture a vital tool in addressing climate change while producing nutritious food.

Water Conservation

Regenerative agriculture stands out for its remarkable ability to improve water management on farms. Through practices like cover cropping and no-till farming, these methods help soil retain moisture more effectively, reducing the need for irrigation. Farmers implementing water conservation techniques often report using up to 30% less water compared to conventional farming methods.

The enhanced soil structure created by regenerative practices acts like a natural sponge, capturing rainfall and preventing runoff. This improved water retention not only helps crops thrive during dry spells but also reduces erosion and protects local waterways from pollution. Many farmers have found that after just a few years of regenerative practices, their fields require significantly less irrigation, even during challenging weather conditions.

The water-saving benefits extend beyond the farm itself. By reducing water consumption and improving groundwater recharge, regenerative agriculture helps preserve local water resources for the entire community. This makes it particularly valuable in regions facing water scarcity or irregular rainfall patterns.

Bird's eye view of a thriving regenerative CSA farm with diverse crop patterns
Aerial photograph of a diverse CSA farm showing multiple crop rotations, cover crops, and integrated livestock

Real Success Stories from CSA Farms

Let’s explore some inspiring success stories from farms that have embraced regenerative agriculture principles. The Brown Family Farm in Vermont transformed their struggling dairy operation into a thriving CSA by implementing cover cropping and rotational grazing. Within three years, they reduced their external input costs by 60% while increasing their soil organic matter from 2% to 5%.

In California, Sweet Creek Farm’s journey shows how regenerative practices can succeed even in challenging climates. Owner Maria Rodriguez introduced no-till farming and diverse crop rotations, leading to a 40% reduction in water usage. Her CSA membership grew from 50 to 200 families in just two years, with customers repeatedly praising the superior taste of her produce.

Heartland Roots Farm in Iowa presents another compelling case. Farmers Tom and Sarah Wheeler integrated livestock with their vegetable production, using chickens and sheep to naturally fertilize fields and control pests. This system eliminated their need for synthetic inputs while boosting their profit margins by 35%. Their soil tests show significantly improved nutrient density, and they’ve maintained a waiting list for their CSA shares since 2019.

Perhaps most remarkable is the story of New Dawn Farm in North Carolina. After transitioning to regenerative practices, they weathered three major hurricanes with minimal crop loss, while neighboring conventional farms suffered severe damage. Their resilient soil structure, built through years of regenerative management, helped prevent erosion and retained crucial moisture during extreme weather events.

These success stories share common threads: reduced operational costs, improved soil health, greater climate resilience, and strong community support. While the transition period required patience and learning, each farm emerged more economically stable and environmentally sustainable, proving that regenerative agriculture can work at the CSA scale.

Regenerative agriculture has proven to be a sustainable model for CSA farms, offering both environmental benefits and economic viability. Through the implementation of soil-building practices, water conservation methods, and biodiversity enhancement, these farms are creating resilient ecosystems that can withstand climate challenges while producing nutrient-dense food. The success stories of numerous CSA farmers demonstrate that when properly managed, regenerative practices can reduce operational costs, increase crop yields, and build customer loyalty.

What makes regenerative agriculture particularly sustainable for CSA farms is the symbiotic relationship between farmers and their community members. This direct-to-consumer model provides stable income through member subscriptions while allowing farmers to focus on land stewardship rather than mass production. As more consumers seek locally grown, environmentally responsible food options, regenerative CSA farms are well-positioned to meet this demand while continuing to improve soil health and ecosystem function.

While challenges exist, the growing body of evidence suggests that regenerative agriculture in CSA farms offers a promising path forward for sustainable food production that benefits both people and the planet.