Category Archives

6 Articles

Your CSA Food Donations Could Save You Thousands (Here’s How)

Posted by darrell on
0
Policy, Law & Certification
Your CSA Food Donations Could Save You Thousands (Here’s How)

Yes, food donations are tax deductible, and as a farmer or CSA operator, you may qualify for enhanced deductions that go beyond the standard write-offs most donors receive. The IRS allows you to deduct up to 15% of your taxable income when donating food to qualified charitable organizations, and in many cases, you can claim deductions based on the fair market value of your produce rather than just your production costs.

The process starts with understanding your protection under the Bill Emerson Good Samaritan Food Donation Act, which shields you from liability when donating food in good faith to nonprofit organizations. This federal protection means you can confidently donate surplus crops, slightly imperfect produce, or end-of-season harvests without fear of legal repercussions if someone claims the food caused harm.

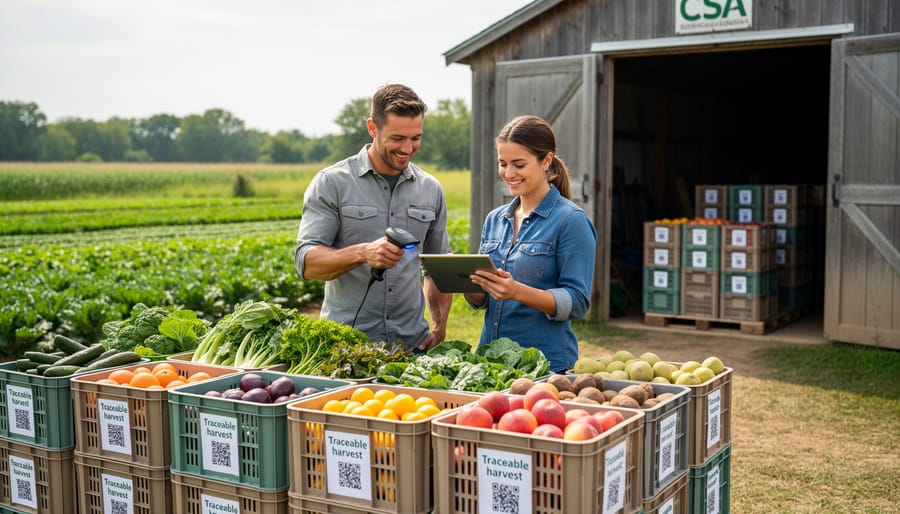
For CSA farmers, this creates a meaningful opportunity to reduce food waste while lowering your tax burden. Calculate your potential deduction by documenting the fair market value of donated items—essentially what you would charge customers at your farm stand or through your CSA shares. Keep detailed records including dates, quantities, descriptions of produce donated, and acknowledgment letters from receiving organizations.

The enhanced deduction provision particularly benefits farmers operating as C corporations, allowing deductions of up to 25% of taxable income. Many small-scale and CSA farmers successfully partner with local food banks, homeless shelters, and community kitchens, creating relationships that serve their communities while providing substantial tax benefits. Documentation requirements are straightforward, making this an accessible strategy for farms of any size.

Understanding Food Donation Tax Deductions for CSA Farms

Fresh organic vegetables in wooden crates at food bank distribution center
CSA farms can donate surplus produce to food banks and qualified nonprofits while receiving valuable tax deductions.

What Makes a Food Donation Tax Deductible?

Good news for generous farmers and food donors: yes, food donations are generally tax deductible when you follow IRS guidelines! Understanding what qualifies can help your farm maximize tax benefits while supporting your community.

For donations to count, you must give to qualified tax-exempt organizations. These include food banks, soup kitchens, homeless shelters, and 501(c)(3) nonprofit organizations that serve people in need. Religious organizations with feeding programs and community meal services also qualify. The key is ensuring your recipient has proper tax-exempt status, which you can verify through the IRS Tax Exempt Organization Search tool.

The food itself must meet certain standards. Fresh produce from organic CSA operations, excess harvest, or slightly imperfect items that don’t meet retail standards but remain wholesome all qualify. The IRS requires donated food to be suitable for human consumption at the time of donation. You can’t claim rotten or unsafe produce, but cosmetically imperfect vegetables and surplus yields work perfectly.

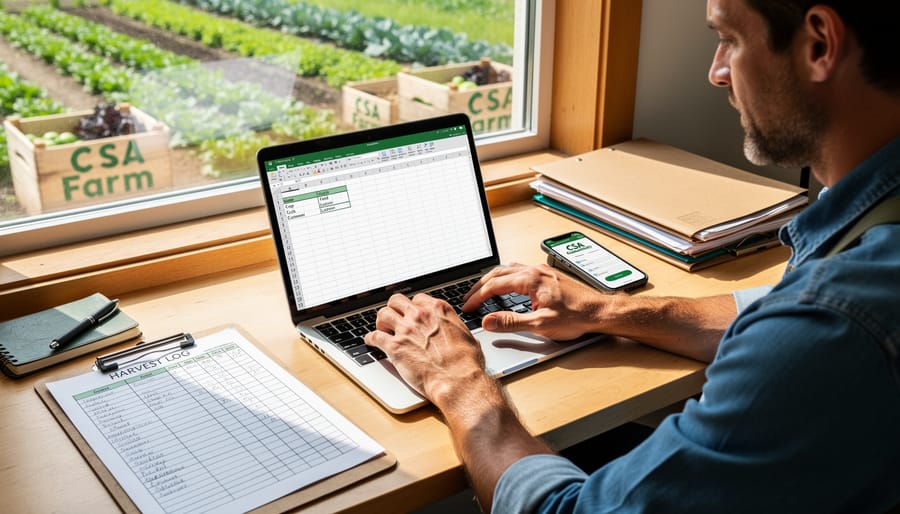
For CSA farms, the basic requirement is maintaining proper documentation. You’ll need written acknowledgment from recipient organizations for donations over 250 dollars, describing what you gave and when. Keep detailed records of quantities, fair market values, and dates. Many successful farmers share that simple spreadsheets tracking weekly donations make tax time straightforward.

Remember, the organization receiving your donation cannot provide goods or services in return for your deduction to remain valid. Pure generosity gets rewarded!

The Enhanced Deduction for CSA Farmers

Here’s some great news if you’re a CSA farmer looking to donate your harvest: you may qualify for an enhanced tax deduction that goes beyond what typical donors receive. While most individuals can only deduct the cost basis of donated food (essentially what they paid for it), qualifying farmers can deduct up to 50% of the fair market value of their donated products.

This enhanced deduction recognizes the unique position of agricultural producers who grow food for income. For a CSA farmer who donates fresh tomatoes worth $500 at market price, with a growing cost of $150, the regular deduction would be limited to that $150. However, under the enhanced deduction, you could potentially deduct $250, calculated as the cost basis plus half the appreciation in value.

To qualify, you must donate to eligible organizations like food banks or soup kitchens that serve those in need. The donated items must be wholesome food inventory that would otherwise be sold in your regular CSA operation. This provision helps bridge the gap between farm surplus and community hunger while rewarding farmers for their generosity. Keep detailed records of your costs, market values, and recipient organization information to support your enhanced deduction claim at tax time.

Navigating Food Donation Liability Protection

The Good Samaritan Act: Your Safety Net

One of the biggest concerns for CSA farmers considering food donations is liability. What if someone gets sick from donated produce? The good news is that federal law has your back. The Bill Emerson Good Samaritan Food Donation Act, passed in 1996, protects food donors from civil and criminal liability when donating to nonprofit organizations in good faith.

This protection applies to both direct donations and gleaning programs, covering you whether you’re donating surplus kale to a food bank or inviting volunteers to harvest excess tomatoes from your fields. The law shields you from lawsuits as long as the food donated appears wholesome and safe at the time of donation, even if it’s past its peak freshness.

There’s an important exception: the protection doesn’t apply in cases of gross negligence or intentional misconduct. Simply put, don’t donate food you know is contaminated or unsafe. But that slightly bruised apple or the perfectly edible carrots that don’t meet your CSA box aesthetic standards? Those are completely protected.

Many farmers who’ve embraced donation programs share that this legal protection removed their primary hesitation. It transforms what once felt risky into a safe, rewarding practice that reduces waste while serving your community.

What About Food Safety Standards?

Good news: the Bill Emerson Good Samaritan Food Donation Act protects you from liability when donating food in good faith. This federal law shields farmers and food donors from civil and criminal prosecution, provided the food meets basic safety standards at donation time.

For CSA farmers, this means following the same food safety standards you already practice. Keep donated produce properly stored, handle it with clean hands and equipment, and avoid donating anything you wouldn’t feel comfortable serving your own family. Simple practices like washing produce, maintaining proper temperatures, and documenting donation dates go a long way.

Many farmers worry about FSMA compliance requirements, but the same protocols protecting your CSA members also protect your donations. Document your safety procedures, and you’re covered both legally and for tax purposes.

How to Calculate Your Tax Deduction

Cost Basis Method for Most CSA Farms

Most small CSA farms will use the cost basis method, which is straightforward and perfectly suited to farming operations. Here’s the good news: you can deduct the actual expenses you invested in growing the donated food.

This includes your costs for seeds, seedlings, soil amendments, compost, fertilizer, water, and other growing inputs. You’ll also factor in calculating labor costs if you paid employees to help grow, harvest, or prepare the donated produce. Don’t forget to include fuel for tractors, irrigation system expenses, and even a proportional share of land use costs.

For example, if you donated 50 pounds of tomatoes and your total cost to grow them was $75 in seeds, compost, and labor, that’s your deductible amount. Keep detailed records of all these expenses throughout the growing season, which also helps with overall tax compliance for CSA farms.

The beauty of this method is its simplicity. You’re already tracking these expenses for farm management purposes, making tax time much easier when donation season arrives.

Fair Market Value Method (For Qualifying Farms)

Here’s the exciting part: if your CSA operation has grown into a qualified farm business, you might be eligible for significantly higher deductions using the fair market value method. Instead of deducting just your cost basis, you could deduct the full retail value of your donated produce.

To qualify for this enhanced deduction, your farm must meet specific IRS criteria. You need to be a C corporation or, more commonly for CSA farms, a qualified farmer with ordinary income from your farming business. The donated food must go to qualified charitable organizations that serve people who are ill, needy, or infants, and the charity must use the food solely for these purposes.

The deduction can reach up to 15% of your net farm income for sole proprietors and partnerships, or 25% for C corporations. For example, if you donate $5,000 worth of tomatoes and lettuce that cost you $2,000 to grow, you could potentially deduct the full $5,000 rather than just your $2,000 cost basis.

This method requires careful documentation and working with a tax professional familiar with agricultural businesses. Many successful CSA farmers have found these enhanced deductions make their donation programs not only community-minded but financially sustainable too.

Essential Documentation and Record-Keeping

Farmer documenting harvest records with clipboard beside fresh produce basket
Proper documentation of donated produce is essential for claiming tax deductions and maintaining IRS compliance.

Required Forms and Receipts

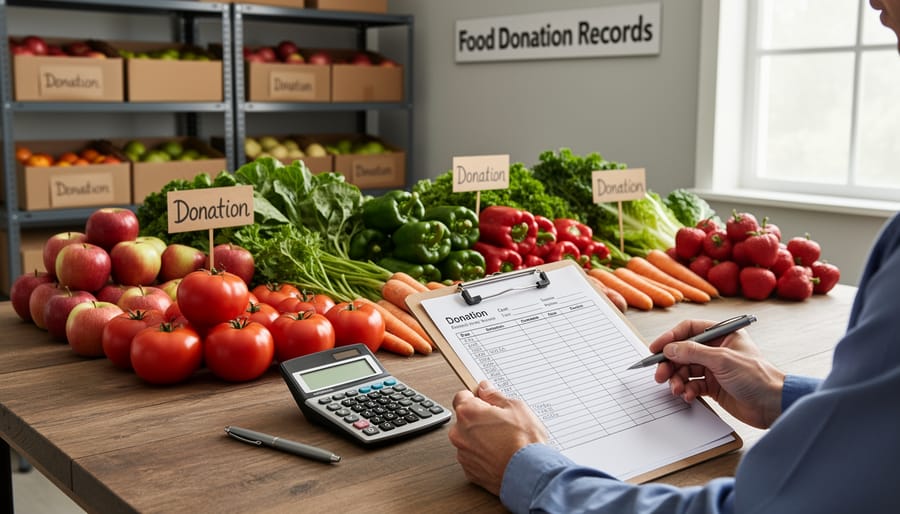
Proper documentation transforms your generous food donations into valuable tax deductions. When donating surplus produce from your farm or garden, you’ll need to keep detailed records to satisfy IRS requirements.

For donations exceeding $250, you must obtain a written acknowledgment from the recipient organization. This letter should include the organization’s name, donation date, description of items donated, and a statement confirming whether you received any goods or services in return. Request this acknowledgment promptly after each donation, as many food banks and community organizations are happy to provide them.

If your total noncash donations exceed $500 for the year, you’ll need to complete IRS Form 8283 and attach it to your tax return. This form requires information about each recipient organization, donation dates, and how you acquired the donated items. For food you grew yourself, note the date you harvested it.

Keep your own records too. Document what you donated, estimated fair market values (based on local farmers market prices), dates, and recipient details. Photographs of your donations can provide helpful backup documentation. One Pennsylvania farm couple maintains a simple spreadsheet tracking their weekly food bank contributions, making tax time much easier while supporting their community throughout the growing season.

Simple Record-Keeping Systems for Busy Farmers

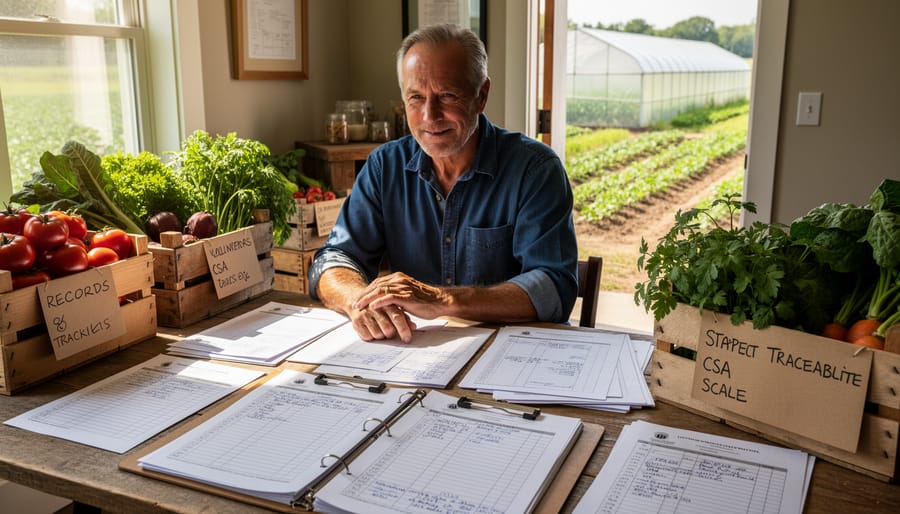
Good news: you don’t need fancy software or complicated spreadsheets to track your donations. A simple three-ring binder or smartphone app works perfectly for busy farmers juggling multiple tasks.

Consider keeping a donation log at your packing shed or cooler. Each time you set aside produce for donation, jot down the date, item, quantity, and estimated value based on your regular CSA prices. Many farmers find success using their phone’s notes app or a free spreadsheet on their tablet that syncs across devices.

Take quick photos of donations before delivery. These visual records supplement your written logs and provide excellent backup documentation if questions arise later. Some farmers create a dedicated folder on their phone labeled “Donation Records” for easy year-end access.

For a streamlined approach, batch your record-keeping. Instead of logging individual carrots or tomatoes, note “10 pounds mixed produce” with a total value. The IRS accepts reasonable estimates for perishable goods.

Meet Sarah from Willow Creek Farm who uses a simple pocket notebook she keeps in her harvest tote. “I spend maybe five minutes per donation,” she shares. “When tax season arrives, I just total the pages and hand everything to my accountant.”

The key is consistency, not perfection. Choose one method that fits naturally into your existing workflow and stick with it throughout the growing season.

CSA farmer standing confidently in thriving vegetable garden at sunset
Successful CSA farmers are discovering how food donation programs create both tax savings and meaningful community impact.

Real-World Benefits: A CSA Farmer’s Success Story

Meet Sarah Chen, who runs Green Valley CSA in Vermont, where she grows organic vegetables for 120 member families. Three years ago, Sarah faced a common challenge: perfectly good produce that didn’t meet her members’ aesthetic expectations or exceeded weekly harvest needs. Rather than composting 15-20% of her harvest, she decided to establish a donation program with her local food bank.

The results transformed both her farm’s bottom line and her community. In her first year, Sarah donated 3,200 pounds of organic produce valued at $9,600. Because she qualified for the enhanced deduction as a farmer donating to a qualified organization, she could deduct the full fair market value rather than just her production costs. This resulted in tax savings of approximately $2,880, effectively recovering about 30% of her potential lost revenue.

“I was amazed at how straightforward the process was,” Sarah explains. “I kept simple records of what I donated each week, got quarterly receipts from the food bank, and my accountant handled the rest during tax season.”

Beyond the financial benefits, the program created unexpected positive ripples. Local media covered her donations, attracting fifteen new CSA members who specifically mentioned her community involvement. Sarah also connected with the food bank’s nutrition educator, who now visits her farm for seasonal workshops, strengthening relationships between CSA members and the broader community.

The program reduced her composting needs, saved disposal time, and gave purpose to crops affected by minor cosmetic issues. Most importantly, Sarah’s donations provided fresh organic vegetables to over 200 families facing food insecurity, demonstrating how smart tax planning can multiply good outcomes for everyone involved.

Common Mistakes CSA Farmers Make (And How to Avoid Them)

Even experienced CSA farmers sometimes stumble when it comes to claiming food donation deductions. One of the most common mistakes is failing to obtain proper documentation from recipient organizations. Without a written acknowledgment from the food bank or nonprofit that includes your farm’s name, the date, and a description of what you donated, the IRS may disallow your deduction entirely. Always request receipts immediately, even for smaller donations throughout the season.

Another frequent error involves overvaluing donated produce. While it’s tempting to use retail prices, remember that the IRS expects fair market value based on wholesale pricing for similar quality items. Keep records of what you typically sell your produce for at farmers markets or through your CSA shares to establish reasonable valuations. Consider checking local wholesale market reports to support your pricing.

Many farmers also miss out on enhanced deductions by not understanding eligibility requirements. If your farm operates as a C corporation or you meet specific gross receipts thresholds, you might qualify for deductions up to twice your cost basis. Review your business structure annually with a tax professional who understands agricultural operations.

Lastly, don’t mix personal and business motivations without proper documentation. If you’re donating excess produce that didn’t meet CSA quality standards, maintain detailed records showing the food was still wholesome and marketable. One successful organic farmer in Vermont keeps a simple log with photos, which has proven invaluable during tax preparation and provides peace of mind.

Getting Started: Your Action Plan for Food Donations

Ready to transform your surplus harvest into tax savings while feeding your community? Here’s your straightforward action plan to launch a compliant food donation program.

Start by identifying qualified recipient organizations in your area. Food banks, soup kitchens, homeless shelters, and churches with feeding programs typically hold 501(c)(3) status, making them eligible recipients. Call your local food bank first—they often coordinate with smaller pantries and can become your primary distribution partner. Many have established pickup routes and refrigerated trucks, making logistics surprisingly simple.

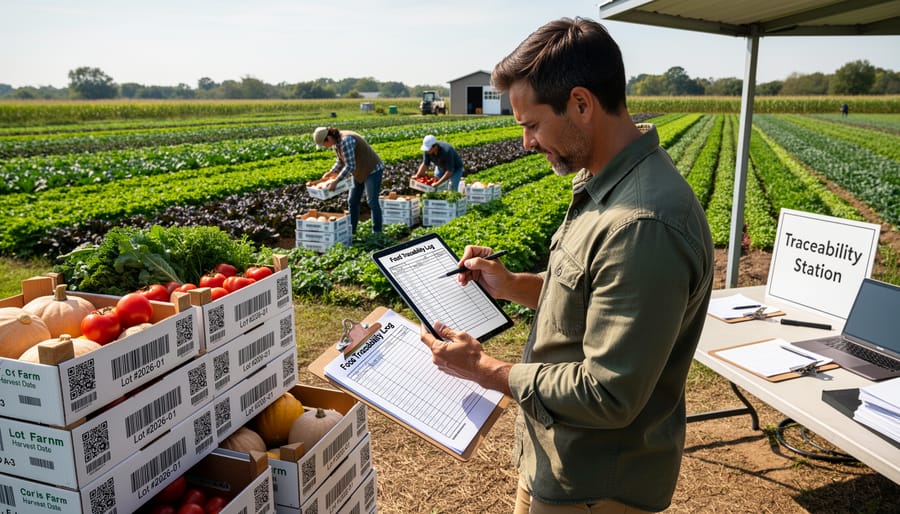
Next, establish your documentation system before making your first donation. Create a simple log sheet with columns for date, recipient organization, description of items donated, quantity, and fair market value. Keep it on a clipboard near your packing area so recording becomes routine. Take photos of donated items occasionally to support your records.

Connect with a tax professional familiar with agricultural businesses. They’ll help you determine whether you qualify for the enhanced deduction (available to farmers with gross receipts under $500,000) and ensure you’re calculating values correctly. This initial investment in professional guidance pays dividends during tax season.

Consider Sarah, a Vermont CSA farmer who started small by donating excess lettuce to her town’s food pantry. She kept a simple notebook, documented everything, and saved nearly $2,000 in taxes her first year while feeding 50 families weekly. “I wish I’d started sooner,” she says.

Begin with one reliable recipient organization and one donation per week. As you refine your process, you can expand. The key is building habits that make documentation second nature, turning your generous impulses into systematic community support with financial benefits.

Donating surplus food from your CSA farm creates a beautiful win-win situation. You’re not only reducing waste and supporting neighbors facing food insecurity, but you’re also unlocking valuable tax deductions that can strengthen your farm’s financial health. As we’ve explored, the enhanced deduction available to farmers can significantly boost your bottom line while making a real difference in your community.

Remember, navigating tax law can feel overwhelming, especially when you’re juggling planting schedules, harvest logistics, and customer communications. That’s why consulting with a qualified tax professional who understands agricultural operations is essential. They’ll help you maximize your deductions while ensuring compliance with IRS requirements.

Food donations align perfectly with the core values of sustainable agriculture: nothing wasted, everyone fed, communities strengthened. Many successful CSA farmers have discovered that donation programs actually enhance their reputation and customer loyalty. When your members see their farm actively supporting local food banks, it reinforces their commitment to your mission.

This season, take that first step. Reach out to a nearby food bank, start documenting your donations, and discover how rewarding it feels to turn surplus into support. Your community is waiting, and your farm will thrive in ways you might not expect.

Why Your CSA Farm Needs Certified Scales (And What Happens If You Don’t)

Posted by darrell on
0
Policy, Law & Certification
Why Your CSA Farm Needs Certified Scales (And What Happens If You Don’t)

Register your farm scale with the California Division of Measurement Standards before your first CSA harvest—most counties require certification for any device used to determine the price of produce sold by weight. Download the device registration form from your county’s agriculture department website, pay the nominal fee (typically $50-150 annually), and schedule your initial inspection at least 30 days before you plan to weigh products for customers.

Purchase a commercial-grade scale certified for legal trade, identifiable by the NTEP (National Type Evaluation Program) seal or Certificate of Conformance number on the device. Avoid bathroom scales, kitchen scales, or unmarked equipment, as inspectors will reject these during certification. Place your scale on a stable, level surface away from wind and vibration, and test it weekly using certified test weights to maintain accuracy between official inspections.

Keep detailed records of all scale calibrations, inspection certificates, and any adjustments made to your measuring equipment. California law requires these documents remain accessible during farmers market sales and CSA pickups, protecting both your farm and your members. Most county sealers conduct annual re-inspections, so mark your calendar and ensure your scale remains in compliance—a simple practice that builds trust with CSA members who appreciate transparent, legally compliant farming operations.

Understanding these requirements transforms what seems like bureaucratic red tape into a straightforward process that legitimizes your farm business and reassures customers they’re receiving honest value for their investment in local, sustainable agriculture.

What Weights and Measures Compliance Actually Means for CSA Farms

If you’re running a CSA farm in California, you’re probably familiar with various regulations already, like sales tax compliance. But weights and measures laws often catch new farmers by surprise. Here’s what you need to know.

California’s weights and measures regulations exist to ensure fairness in commercial transactions. When you sell produce by weight, whether to CSA members or at farmers markets, you’re legally required to use certified scales and follow specific practices. These rules apply to farms of all sizes, from backyard operations to large commercial growers.

County Sealers of Weights and Measures are the local officials who enforce these regulations in your area. Think of them as your go-to resource rather than just enforcers. Most County Sealers genuinely want to help small farms succeed and understand the unique challenges you face. They conduct annual inspections, test your scales for accuracy, and provide guidance on compliance.

Why do CSA farms fall under these requirements? The moment you engage in commercial transactions involving weight-based pricing, you’re subject to weights and measures laws. This includes selling produce shares, operating farm stands, or participating in farmers markets. The key trigger is the commercial exchange of goods by weight, not the size of your operation.

The good news? Compliance doesn’t have to be complicated or expensive. Most County Sealers offer affordable annual certification services, typically ranging from thirty to one hundred dollars depending on your equipment. They’ll test your scales, apply certification seals, and ensure you’re meeting legal standards. Many farmers report that once they understand the process, maintaining compliance becomes a simple part of their annual routine alongside other farm management tasks.

Commercial certified scale weighing fresh produce on farm stand table
Certified scales are essential equipment for CSA farms selling produce by weight at farmers markets and farm stands.

When Your CSA Farm Needs Certified Scales

Weight-Based Pricing and Share Distributions

When you’re selling produce by the pound at farmers markets or through direct sales, California law requires you to use certified scales. This means your scale must be inspected and approved by your local county weights and measures office. The certification process is straightforward: contact your county office to schedule an inspection, pay a modest fee (typically between $25-$75), and receive your official certification seal. These scales need recertification annually to ensure accuracy and protect both you and your customers.

Here’s where it gets interesting for CSA farmers: share distributions operate in a gray area. If you’re providing predetermined boxes or bags as part of a subscription model where members pay upfront for a season’s worth of produce, you’re generally not required to use certified scales. The key distinction is that members are buying a share of the harvest, not purchasing produce by weight. However, if you offer add-ons or extra items priced by the pound, those transactions do require certified scales.

Many successful CSA farmers keep a certified scale on hand anyway. It builds trust with members, helps with harvest planning, and gives you flexibility if you decide to sell at farmers markets. Consider it an investment in transparency and professional operation of your farm business.

Farmer weighing fresh carrots on commercial scale at farm
Weight-based sales at CSA farms require properly certified and maintained scales to ensure accuracy and legal compliance.

Farmers Market and Direct Sales

When you’re selling your fresh harvest at farmers market sales venues or from your farm stand, California’s Division of Measurement Standards requires your scales to meet the same certification standards as retail stores. This means you’ll need a Type Approved scale with a valid Certificate of Approval, even if you’re only selling a few times per month.

The good news? Many portable battery-operated scales designed for farmers markets already come Type Approved. Look for a National Type Evaluation Program certificate number on the device. Your scale must display weights clearly to both you and your customers, and it needs annual inspection by your county’s weights and measures department.

Here’s a practical tip from successful market vendors: invest in a quality digital scale with a large display that’s easy to read in outdoor lighting conditions. Keep your most recent inspection certificate handy at your booth, as inspectors can make surprise visits during market hours.

Remember, accurate weighing builds trust with your customers and protects your farming business from potential fines. Many counties offer dedicated farmers market inspection days to make compliance easier for small-scale growers. Contact your local agricultural commissioner’s office to schedule your inspection and join their support programs for sustainable farming operations.

Getting Your Scales Certified in California

Getting your scales certified might sound intimidating, but it’s actually a straightforward process that protects both you and your customers. Think of it as getting a health inspection for your farm stand—just with numbers instead of lettuce.

Your first step is locating your County Sealer of Weights and Measures. Every California county has one, and they’re genuinely there to help you succeed. A quick online search for “weights and measures” plus your county name will pull up contact information. Many sealers now offer online appointment scheduling, making the process even easier. Don’t hesitate to call them with questions before your inspection—most are friendly folks who appreciate farmers taking compliance seriously.

When inspection day arrives, the sealer will test your scales using certified test weights to ensure accuracy. They’ll check that your equipment meets California’s tolerance standards, which typically allow for minimal variance. For a 10-pound measurement, your scale needs to be accurate within about 0.1 ounces. If your scale passes, you’ll receive a certification sticker valid for one year. If it doesn’t pass initially, the sealer will explain what adjustments are needed—often it’s something simple like recalibration.

Fees vary by county but generally range from 25 to 75 dollars per scale annually. Some counties charge based on scale capacity, while others have flat rates. It’s a small investment considering the trust it builds with your CSA members. One organic farmer in Sonoma County shared that displaying her certification sticker actually increased customer confidence and led to more word-of-mouth referrals.

Annual recertification is required in California, so mark your calendar each year. Pro tip: schedule your inspection during your slower season to avoid any disruption to peak harvest times.

To make the process smoother, keep your scales clean and level, store them properly when not in use, and avoid placing them on uneven surfaces. Test them periodically with known weights—like a bag of flour—to catch potential drift early. Many farmers keep a simple log of their own accuracy checks, which demonstrates good faith effort during inspections.

Remember, certification isn’t about catching you doing something wrong—it’s about ensuring fairness in the marketplace and protecting the integrity of sustainable farming practices.

Choosing the Right Scales for Your CSA Operation

Selecting the right scale for your CSA operation doesn’t have to break the bank, but it does require meeting California’s legal standards. The good news? You have several options that balance compliance with affordability.

For most small to medium CSA operations, a legal-for-trade bench scale is your best bet. These scales must carry a Certificate of Conformance (CoC) number, which indicates they’ve been approved by the National Type Evaluation Program. Look for this number on the scale itself or in the product documentation before purchasing. Prices typically range from $200 to $800 for models suitable for weighing produce.

When shopping for scales, prioritize these features: a capacity of at least 30 to 60 pounds to accommodate larger orders, readability in 0.01-pound increments for accuracy, and a platform large enough for boxes or bags. Stainless steel platforms are worth the investment since they’re easy to clean and resist corrosion from moisture. Battery operation provides flexibility for farmers market setups, while AC adapters work well for on-farm sales.

Popular brands among CSA farmers include Avery Weigh-Tronix, Ohaus, and Brecknell, all of which offer legal-for-trade models. Sarah Chen, who runs a thriving CSA in Sonoma County, shares this tip: “I started with a basic $300 bench scale, and it’s served me perfectly for five years. Don’t feel pressured to buy top-of-the-line equipment when you’re starting out.”

Remember to factor in the annual certification fee, usually around $50 to $100, when budgeting for your scale investment. This small ongoing cost ensures your measurements remain accurate and legally compliant, protecting both you and your customers.

Common Mistakes CSA Farmers Make (And How to Avoid Them)

Nobody starts their CSA journey planning to run into compliance issues, but even well-intentioned farmers sometimes stumble with weights and measures requirements. The good news? Most mistakes are easily preventable once you know what to watch for.

One of the most common pitfalls happens when farmers purchase a scale at a big-box store or online marketplace without checking certification status. Sarah, who runs a thriving CSA in Sonoma County, learned this the hard way during her first year. “I bought what I thought was a professional scale, only to discover during an inspection that it wasn’t certified for commercial use in California,” she recalls. Now she always verifies that scales carry the appropriate Certificate of Approval sticker before making purchases.

Another frequent issue involves scale maintenance. Scales can drift out of calibration over time, especially with regular use and seasonal temperature changes. Setting a quarterly reminder to check calibration and scheduling annual professional inspections keeps you ahead of potential problems. Think of it like maintaining your tractor – preventive care beats emergency repairs.

Pricing signage causes confusion too. Some farmers display only the price per box without clarifying the weight or unit cost, which can lead to misunderstandings with both customers and inspectors. Clear signage showing “5 lbs for $15” or “$3 per pound” eliminates ambiguity and builds trust with your members.

Unit conversion mistakes also crop up occasionally, particularly when farmers work with recipes or planting guides using different measurement systems. A simple conversion chart posted near your packing station prevents errors when customers request specific weights.

Remember, regulatory compliance isn’t about catching farmers doing something wrong – it’s about protecting consumers and creating fair marketplaces. Viewing these requirements as part of your commitment to transparency and quality service helps maintain the integrity that makes CSA farming so special.

Success Story: How Green Valley Farm Simplified Their Compliance

When Maria Rodriguez launched Green Valley Farm CSA in Sonoma County three years ago, she felt overwhelmed by California’s weights and measures requirements. Like many small-scale farmers, she worried that compliance would eat into her limited time and budget.

“I was selling produce at farmers markets and running my CSA boxes, but I wasn’t sure if my home scale was legal,” Maria recalls. “The regulations seemed complicated, and I didn’t want to risk fines or lose customer trust.”

Maria decided to tackle compliance head-on. She contacted her local County Agricultural Commissioner’s office and discovered the process was more straightforward than expected. Within two weeks, she had her scale tested and certified for just $50. The inspector even provided helpful tips on proper weighing procedures.

The results surprised her. “Customers noticed the certification sticker on my scale immediately,” Maria explains. “It boosted their confidence, and I actually saw an increase in sales.” She also discovered that accurate weighing helped reduce waste and improved her profit margins by ensuring consistent portions.

Today, Maria maintains her certification annually and has invested in a second certified scale for her packing area. She estimates the entire compliance process takes less than four hours per year, including record-keeping.

“It seemed daunting at first, but getting certified was one of the best business decisions I made,” she says. “My customers trust me, and I sleep better knowing everything is above board.”

CSA farmer preparing vegetable share box with certified scale on work table
Successful CSA operations build customer trust through transparent weighing practices and proper compliance with weights and measures regulations.

Here’s the good news: staying compliant with California’s weights and measures requirements doesn’t have to be complicated or overwhelming. Think of it as an investment in your farm’s future rather than just another regulatory hurdle. When you consistently use certified scales and follow proper measuring practices, you’re doing more than checking boxes—you’re building a foundation of trust with your customers that can set your CSA apart.

Accurate weights and measures show your members that you respect their investment and take your business seriously. This transparency strengthens the connection between you and the people who depend on your farm for fresh, healthy food. Plus, proper compliance protects you legally, giving you peace of mind as your operation grows.

Your next steps are straightforward: locate your nearest County Sealer of Weights and Measures office, schedule an inspection for your scales, and establish a simple system for regular checks. Many successful CSA farmers report that once they’ve set up their initial practices, maintaining compliance becomes second nature.

Remember, every accurate measure you provide contributes to the integrity of local food systems across California. You’re not just following regulations—you’re helping to create a marketplace where honesty and quality thrive, benefiting farmers and eaters alike.

What USDA Organic Standards Really Mean for Your CSA Farm

Posted by darrell on
0
Policy, Law & Certification
What USDA Organic Standards Really Mean for Your CSA Farm

Understanding USDA organic certification transforms your CSA operation from a local endeavor into a nationally recognized source of verified organic produce. The certification process requires documenting every aspect of your farming practices, from seed selection to harvest methods, but this rigor builds consumer trust that translates directly into member retention and premium pricing.

Review the National Organic Program standards focusing on three core requirements: maintaining soil health through approved amendments and crop rotation, using only substances on the National List of allowed materials, and keeping detailed records that trace every input back to its certified organic source. Your farm needs a three-year transition period where you follow all organic practices before crops can be certified, though you can market transitional produce during this time.

Create a comprehensive Organic System Plan that maps your fields, lists all inputs with their organic certifications, details your pest management strategies using cultural and biological controls, and outlines buffer zones separating your operation from conventional neighbors. This living document becomes your roadmap for compliance and your proof during annual inspections.

Calculate certification costs against potential benefits by comparing annual fees ranging from $400 to $2,000 plus inspector travel expenses against the 20-30% price premium most certified CSAs command and increased member confidence. Many farmers report that certification simplified their marketing message and opened doors to wholesale accounts requiring USDA verification.

Connect with certified CSA farmers in your region who navigate these same challenges successfully. Their experiences reveal practical solutions for record-keeping systems, approved pest control timing, and maintaining certification while experimenting with new crops that keep members excited about their weekly shares.

Breaking Down USDA Organic Standards: The Foundation

Farmer's hands holding dark organic soil with visible earthworms and organic matter
Healthy soil rich in organic matter forms the foundation of USDA organic certification standards.

The Three Pillars of Organic Certification

At the heart of USDA organic certification lie three essential pillars that guide every aspect of organic farming. Understanding these foundations will help you appreciate what goes into maintaining certified organic status on your local CSA farm.

The first pillar focuses on soil health and fertility management. Organic farmers must build and maintain healthy soil using natural methods like composting, cover cropping, and crop rotation. Instead of synthetic fertilizers, they rely on organic matter, beneficial microorganisms, and natural amendments to nourish the soil. This creates a living ecosystem beneath your feet that produces more nutritious, flavorful vegetables season after season.

The second pillar addresses pest and weed control through natural and mechanical methods. Organic farmers get creative here, using techniques like companion planting, biological pest controls, physical barriers, and good old-fashioned hand-weeding. While conventional farms might reach for chemical solutions, organic growers work with nature’s own pest management system. This approach aligns with broader pesticide regulations but goes even further in protecting environmental health.

The third pillar involves strictly prohibited substances and practices. The USDA maintains a detailed list of what organic farmers cannot use, including synthetic pesticides, herbicides, fertilizers, and genetically modified organisms. Farmers must also avoid sewage sludge and ionizing radiation. These restrictions ensure that when you bite into that organic tomato from your CSA box, you know exactly what didn’t go into growing it.

Timeline: From Application to Certification

The journey to USDA organic certification requires patience and planning. Before you can even apply, your farm must complete a three-year transition period where you follow all organic practices without using prohibited substances. This waiting period ensures your soil is genuinely free from synthetic chemicals.

Once your transition period nears completion, you’ll submit your application through a USDA-accredited certifying agent. The application includes detailed information about your growing practices, inputs used, and your farm’s history. Expect to provide field maps, seed sources, and records of everything applied to your land.

After submitting your application, an inspector will visit your farm to verify everything matches your documentation. They’ll walk your fields, review your recordkeeping system, and ask questions about your practices. This might feel similar to food safety compliance inspections if you’re already familiar with those.

The entire certification process typically takes three to six months from application to approval. Annual inspections become part of your routine, ensuring ongoing compliance. Many CSA farmers find that keeping meticulous records year-round makes these inspections straightforward. Remember, your certifier becomes a partner in your organic journey, offering guidance when questions arise about acceptable practices or new products.

SOE Compliance: Your Organic System Plan in Action

Creating Your Farm’s Organic System Plan

Your Organic System Plan (OSP) is the heart of your USDA certification—think of it as your farm’s organic blueprint. This living document tells your certifier exactly how you’ll meet organic standards across every aspect of your operation.

Start with a detailed field history for each growing area. Map out your crop rotation strategy, showing how you’ll build soil health while preventing pest and disease cycles. For CSA farms, this means planning diverse rotations that support your weekly harvest needs while maintaining organic integrity. Include specific planting schedules and succession plans that align with your member deliveries.

Your soil fertility section should outline every amendment you’ll use, from compost recipes to approved fertilizers. Document your composting process thoroughly—what goes in, how you turn it, temperature monitoring, and when it’s ready for application. This level of detail helps certifiers understand your soil-building approach.

The pest management portion requires listing potential challenges and your organic solutions. Include beneficial insect habitat plans, physical barriers like row covers, and any approved botanical sprays you might use as a last resort. CSA farmer Maria Rodriguez from Vermont shares: “My OSP became my teaching tool. When members ask about pest control, I show them exactly what’s in my plan—it builds incredible trust.”

Record-keeping requirements deserve special attention. You’ll need systems for tracking seed purchases, input applications, harvest logs, and sales records. Many CSA farmers use simple spreadsheets or farm management software to stay organized.

Remember, your OSP evolves with your farm. Plan for annual updates reflecting new fields, changed practices, or lessons learned. This flexibility allows your organic system to grow alongside your CSA operation while maintaining compliance.

Overhead view of farmer documenting harvest records with fresh vegetables in crates
Detailed record-keeping is essential for maintaining organic certification compliance on CSA farms.

Record-Keeping That Won’t Drive You Crazy

Keeping organic records doesn’t have to feel like drowning in paperwork. The key is building simple habits that capture what you need without consuming your entire day.

Start with a basic field notebook that lives in your pocket or truck. Jot down what you planted, when, and where immediately after doing the work. These quick notes become your official records later. Many farmers find that snapping photos with their phones creates instant documentation for field conditions, planting dates, and input applications.

Create a dedicated filing system, whether digital or physical, with clear categories: seeds and plants purchased, soil amendments, pest management, harvest records, and sales logs. A simple spreadsheet or even a three-ring binder with dividers works perfectly. The goal is knowing exactly where to find documentation when your certifier asks.

For traceability and record-keeping, batch your administrative tasks. Set aside 30 minutes each Friday to transfer field notes into your official log, file receipts, and update your field map. This weekly rhythm prevents the dreaded year-end scramble.

Successful farmer Maria Santos shares her tip: “I keep a camera roll album just for farm records. Every input bag, every planting, every harvest gets a photo with the date stamp. It’s saved me countless times during inspections.”

Remember to save all input receipts and labels, even for approved materials. Store product labels in page protectors for easy reference. Your future self will thank you when certification renewal arrives and everything is already organized and accessible.

Special Considerations for CSA Operations

Managing Multiple Crops and Rotation Requirements

Here’s the good news: the incredible diversity that makes your CSA so appealing to members also helps you meet USDA organic crop rotation requirements. Instead of viewing rotation planning as a burden, CSA farmers can leverage their multi-crop model as a certification advantage.

Organic standards require crop rotation to maintain soil health and disrupt pest cycles, typically avoiding planting the same crop family in the same location for at least two years. With CSAs commonly growing 30 to 50 different varieties across multiple plant families, you’re naturally positioned to meet these requirements while keeping your harvest boxes exciting and varied.

Consider the story of Green Valley Farm, a certified organic CSA in Vermont. Owner Maria Rodriguez tracks her 40-crop rotation using a simple spreadsheet color-coded by plant family. “We rotate brassicas, nightshades, legumes, and root vegetables through different beds each season,” she explains. “Our members love the variety, and it makes our certification audit straightforward.”

The key is maintaining clear records showing which crops grew where each season. Many farmers use field maps, planting logs, or farm management software to document rotations. This documentation serves double duty: satisfying certification requirements while helping you plan future plantings for optimal soil health and member satisfaction.

Diverse organic vegetable field showing multiple crop varieties with farmer tending plants
CSA farms benefit from crop diversity when meeting organic certification rotation requirements.

Handling Non-Organic Inputs in a Pinch

Sometimes life throws curveballs, and you might need to source transplants or soil amendments from non-certified suppliers. The good news? USDA organic standards account for this reality. You can use non-organic seedlings if the organic version isn’t commercially available in your area, but you’ll need to document your search efforts. Keep records of calls made, websites checked, and supplier responses. This paper trail proves you made a genuine attempt to source organically first.

For soil amendments during emergencies, like an unexpected pest outbreak, work closely with your certifier before applying anything questionable. They can guide you toward compliant solutions or help document why a specific intervention was necessary. Many experienced CSA farmers maintain relationships with multiple certified suppliers to avoid last-minute scrambles. One Vermont farmer shared how keeping a simple spreadsheet of backup suppliers saved her season when her primary seedling source had crop failure. Remember, transparency with your certifier is key. They’re partners in your success, not obstacles, and early communication prevents compliance headaches down the road while keeping your members’ boxes beautifully full.

Real CSA Farmer Success Stories

Meet Sarah Chen, who runs Willow Creek Farm in Vermont. When Sarah decided to pursue USDA organic certification in 2019, she worried about the paperwork and cost. “I thought certification was only for large operations,” she admits. Her biggest challenge was creating the required Organic System Plan while managing daily farm tasks. Her solution? She dedicated one hour each morning to documentation before field work began, and she connected with other certified farmers through her state’s organic farming association for guidance. After eighteen months, Willow Creek earned certification. Sarah’s advice for aspiring organic CSA farmers: “Start record-keeping early, even before you apply. Track everything from seed sources to compost inputs. It makes the application process so much smoother.”

Meanwhile, in North Carolina, Marcus Thompson of Abundant Harvest Farm faced different hurdles. His farm had been using sustainable practices for years, but transitioning fields that had previously received conventional treatments required patience. “The three-year transition period felt long, but we used that time to build soil health and educate our CSA members about why organic certification mattered,” Marcus explains. He found creative solutions by designating certain fields for immediate organic production while transitioning others gradually. His farm also struggled with organic pest management initially, particularly with cucumber beetles. Through trial and error, Marcus discovered that companion planting and beneficial insect habitat made a significant difference.

Today, both farms credit certification with strengthening customer loyalty and commanding premium prices that offset certification costs. Marcus offers this encouragement: “Don’t let fear of the unknown stop you. Reach out to your state’s organic certifying agency early. They want you to succeed and offer tremendous support throughout the process.”

Common Pitfalls and How to Avoid Them

Buffer Zone Requirements That Catch Farmers Off Guard

One of the most overlooked aspects of USDA organic certification is the buffer zone requirement, which can be a real surprise during your first inspection. Organic operations must maintain adequate separation from conventional fields to prevent prohibited substance contamination through drift or runoff. While the USDA doesn’t specify exact distances, inspectors generally look for 25 to 30 feet as a minimum, though this varies based on your specific situation and risk factors.

For small CSA farms working with limited acreage, this can feel like a significant chunk of productive land. The good news is that creative solutions exist. Many farmers plant hedgerows or windbreaks in their buffer zones, which serve double duty by providing habitat for beneficial insects and pollinators. Others use these areas for tool storage, composting stations, or educational walking paths for CSA member tours.

Take inspiration from Green Valley Farm in Oregon, where owner Maria Chen transformed her buffer zones into berry bushes and perennial flowers. These additions not only satisfied certification requirements but also became popular pick-your-own additions to member shares. The key is documenting your buffer strategy clearly in your organic system plan and demonstrating how it effectively prevents contamination from neighboring properties.

Is Organic Certification Worth It for Your CSA?

Deciding whether to pursue USDA organic certification is one of the biggest choices CSA farmers face. Let’s break down the real costs and benefits to help you make an informed decision.

The financial investment starts with certification fees, which typically range from $500 to $2,000 annually depending on your farm’s size and gross sales. Add inspection costs, recordkeeping systems, and the time required for documentation, and you’re looking at a significant commitment. Some farmers also face transition costs if converting conventional land, which requires a three-year period before certification.

On the flip side, organic certification can substantially boost your market value. Many CSA members willingly pay premium prices for certified organic produce, often 20-40% more than conventional options. This certified status can attract health-conscious consumers who specifically seek out organic food and trust the USDA label’s rigorous standards. The certification also opens doors to additional revenue streams, including accepting government benefits and selling to retailers or restaurants requiring certification.

However, certification isn’t the only path forward. Many smaller CSA operations find success with alternatives like Certified Naturally Grown, a grassroots certification designed specifically for direct-market farmers. CNG follows similar standards but costs significantly less, usually under $200 annually, with peer-review inspections instead of third-party auditors.

Consider Sarah Martinez, who runs a 2-acre CSA in Vermont. She chose CNG initially, building trust with her 40 member families through farm tours and transparency. After five years, her waiting list grew so long that she pursued USDA certification to expand and access wholesale markets. Her advice? Start where your budget allows and grow strategically.

The right choice depends on your farm’s size, target market, and growth goals. If your members value personal relationships and farm visits, they may trust your growing practices without needing official certification. For those planning to scale up or reach broader markets, USDA certification might justify the investment.

Pursuing USDA organic certification for your CSA farm is absolutely achievable with the right approach and resources. While the process requires dedication and attention to detail, thousands of farmers have successfully navigated certification and continue to maintain their organic status year after year. The key is breaking down the requirements into manageable steps and building systems that work for your unique operation.

If you’re considering certification, start by requesting the organic standards documentation and connecting with your local certifying agent for a preliminary consultation. Many offer free initial assessments to help you understand what changes you’ll need to make. Farmers already in transition should focus on meticulous record-keeping and lean on your certifier’s expertise when questions arise. For those maintaining compliance, remember that annual reviews are opportunities to refine your practices and strengthen your organic systems.

The commitment to organic farming extends beyond certification paperwork. It’s an investment in soil health, environmental stewardship, and the trust your CSA members place in you. Every certified organic farm strengthens the movement toward sustainable agriculture and demonstrates that growing food in harmony with nature isn’t just possible, it’s profitable and deeply rewarding. Your journey toward or within organic certification contributes to a healthier food system for everyone.

How CSA Farms Can Meet FSMA 204 Without Losing Their Mind

Posted by darrell on
0
Policy, Law & Certification
How CSA Farms Can Meet FSMA 204 Without Losing Their Mind

The Food Safety Modernization Act’s Section 204 brings new traceability requirements that directly impact many CSA farms starting January 20, 2026. If you grow, pack, or distribute items on the Food Traceability List—including leafy greens, tomatoes, cucumbers, herbs, melons, and peppers—you need to track these products from field to member delivery with detailed records. Understanding FSMA compliance for CSAs doesn’t have to feel overwhelming when you break it down into manageable steps.

Document your traceability lot codes by creating simple batch numbers tied to planting dates and field locations. Link these codes to every stage of handling, from harvest bins to wash stations to delivery boxes. Small farms earning less than $250,000 annually or selling directly to consumers within your state may qualify for exemptions, but verify your specific situation since rules vary based on your distribution channels.

Implement digital record-keeping through affordable farm management apps that track plantings, harvests, and distributions in one place. Even basic spreadsheets work when they capture the required data points: what you grew, where it came from, where it went, and when each step happened. The key lies in consistency rather than complexity.

Many successful CSA operators have discovered that proper traceability actually strengthens their operations beyond regulatory compliance. When food safety concerns arise, you can quickly identify affected batches and notify only the specific members who received those items. This precision protects your entire harvest and your farm’s reputation while building trust with your community. The investment in better record systems pays dividends through improved efficiency, reduced waste, and the peace of mind that comes from knowing exactly where every tomato travels from seed to supper table.

What Exactly Is FSMA 204 and Why Should CSA Farmers Care?

The Food Safety Modernization Act (FSMA) Rule 204 represents a significant step forward in protecting our food supply, and if you’re running a CSA farm, understanding this regulation matters more than you might think.

Think of FSMA 204 as the FDA’s enhanced traceability rule, designed to create a more transparent food chain from farm to table. The regulation goes into effect on January 20, 2026, giving farms time to prepare their recordkeeping systems. The heart of this rule is simple: if there’s a foodborne illness outbreak, health officials need to trace contaminated products back to their source quickly to protect consumers and stop the spread.

For CSA farmers, this matters because Rule 204 specifically targets foods on the FDA’s Traceability List, which includes many items you likely grow: leafy greens, fresh herbs, tomatoes, cucumbers, peppers, and melons, among others. When these products move through the supply chain, detailed records must follow them.

Here’s the good news: this rule builds on broader FSMA requirements you may already be familiar with, and many small CSA operations might qualify for exemptions. The regulation primarily affects farms that sell beyond their immediate community or work with distributors.

Why should you care even if you’re exempt? Traceability protects your farm’s reputation. When you can quickly demonstrate where your produce came from and where it went, you’re protecting both your customers and your livelihood. If an outbreak occurs in your region, solid traceability records can clear your farm’s name swiftly.

Consider Sarah, a Vermont CSA farmer who discovered her recordkeeping helped exonerate her farm when a nearby outbreak occurred. Her detailed harvest logs showed her tomatoes couldn’t have been the source, saving her business from unfair association with the contamination event.

Ultimately, good traceability practices reflect the transparency and accountability that CSA members already value in their relationship with you.

Does Your CSA Actually Need to Comply?

The Food Traceability List: Which Crops Trigger Requirements

The Food Traceability List, or FTL, identifies specific crops that require enhanced tracking under FSMA 204. If your CSA grows any of these items, you’ll need to pay close attention to the new requirements.

For many small farms, leafy greens are the big one. This category includes favorites like lettuce, spinach, arugula, and kale. Basically, if it goes in a salad bowl and hasn’t been cooked, it’s likely on the list. Fresh herbs also made the cut, including basil, cilantro, and parsley, which are CSA staples during growing season.

Tomatoes appear on the FTL too, encompassing all varieties from cherry tomatoes to heirlooms. Cucumbers are another common CSA crop that triggers traceability requirements, whether you’re growing slicers or pickling varieties.

Melons round out the list with cantaloupe and watermelon being specifically named. These summer favorites are popular CSA box additions, so if you grow them, you’ll need compliant tracking systems in place.

The good news? Many CSA crops don’t appear on the FTL. Root vegetables like carrots and beets, winter squash, peppers, and most beans aren’t subject to these enhanced requirements. Understanding which crops trigger compliance helps you prioritize your record-keeping efforts and focus resources where they matter most. Some farms have found success by maintaining detailed records for all crops as a best practice, making compliance feel less like a burden and more like an opportunity to showcase their commitment to food safety and transparency with their member community.

Fresh leafy greens, tomatoes, cucumbers and herbs in wooden harvest crates on farm table
CSA farms growing items on the Food Traceability List must implement proper documentation systems.

Small Farm Exemptions You Should Know About

Good news for smaller CSA operations: you might not be covered by FSMA 204 at all! The FDA includes specific exemptions designed to keep smaller farms from drowning in paperwork.

If your farm generates less than $25,000 in annual sales of food, you’re exempt from these traceability requirements. This threshold applies to your total food sales over the previous three years, averaged. For many beginning farmers just getting their CSA off the ground, this exemption provides breathing room to focus on growing great food.

Direct-to-consumer sales also receive special consideration. When you’re selling directly to your members at farmers markets, through your CSA shares, or at your farm stand, these transactions typically fall outside FSMA 204 requirements. The regulation primarily targets the supply chain where traceability becomes challenging, not the face-to-face relationships you’ve built with your community.

However, if you’re selling to restaurants, grocery stores, or food hubs in addition to your CSA, those transactions may require compliance depending on the specific foods involved. One successful CSA farmer in Vermont shared how she strategically kept her restaurant sales separate from her member shares, simplifying her recordkeeping considerably. Understanding where you fall can save you countless hours and help you structure your business wisely.

The Four Core Records Every Compliant CSA Needs

Growing and Harvesting Records

For FSMA 204 compliance, your growing and harvesting records need to capture specific details about each crop cycle. Start by documenting the exact field location or growing area where you planted each variety. Include precise harvest dates and the specific produce varieties you’re growing, using the variety names from your seed packets or transplants.

Track your planting dates alongside harvest dates to establish a clear timeline. Record the quantity harvested from each location, whether you measure in pounds, bins, or boxes. This creates a direct connection between your fields and the produce that reaches customers.

Consider creating simple field maps that show which crops grow where during each season. Many small farms find success using basic spreadsheets or even paper logbooks. The key is consistency in recording this information while it’s fresh in your mind.

If you grow multiple succession plantings of the same crop, treat each planting as a separate lot with its own records. This might seem like extra work initially, but it becomes routine quickly. One organic farmer in Vermont shared how she keeps a waterproof notebook in her harvest tote, jotting down variety, location, and date as she picks. This simple habit ensures nothing gets forgotten by day’s end.

Cooling and Initial Packing Documentation

Once you’ve harvested your beautiful organic produce, proper documentation begins immediately with cooling and initial packing activities. FSMA 204 requires you to record the cooling date and time, location where cooling occurred, and the method used (whether forced-air cooling, hydrocooling, or another technique). For small CSA operations, this doesn’t mean fancy software—a simple logbook works perfectly fine.

When you pack produce, document the date, what was packed, and any lot codes you assign. Many successful CSA farmers share a helpful tip: use a whiteboard in your packing area to track this information in real-time, then transfer it to your permanent records at day’s end. This creates a clear audit trail showing how quickly you cooled crops and prepared them for distribution.

Remember, these records protect both you and your members by demonstrating your commitment to food safety. Keep documentation simple but consistent—a spiral notebook dedicated to post-harvest activities can be just as compliant as expensive tracking systems.

Distribution Records for CSA Shares

When you distribute shares to your CSA members, keeping organized records creates a simple traceability trail. For each distribution day, record the date, traceability lot code for each crop included in the boxes, and member names or identification numbers. Many small CSAs find success using a simple spreadsheet or notebook system—no fancy software required.

The key is connecting your harvest records to your distribution records through those lot codes. If you packed lettuce from Lot 2024-0515-LETT into Tuesday’s shares, note that code on your distribution sheet. This creates the vital link between field and fork that FSMA 204 requires.

Consider keeping a master harvest sheet at your packing station where you check off which lots went into shares each week. One Virginia CSA farmer shared how she uses color-coded stickers on harvest bins that match her distribution records—a brilliant low-tech solution that works beautifully.

Remember to retain these records for two years. Most farms store paper copies in binders organized by month or use simple digital folders. The goal isn’t perfection but creating a reasonable system that you’ll actually maintain throughout the growing season.

Practical Systems That Work for Real CSA Farms

Low-Tech Paper Systems That Actually Work

Not every farm needs fancy software to meet FSMA 204 requirements. Many small-scale operations find that simple paper systems work beautifully, especially when you’re already spending most of your day outdoors rather than behind a computer screen.

A basic three-ring binder system can cover all your traceability needs. Start with tabbed sections for harvest logs, receiving records, and shipment tracking. Your harvest log should include the date, crop name, location where it was grown, quantity harvested, and who picked it. Keep a stack of pre-printed forms clipped to a clipboard in your packing shed so crew members can fill them out immediately.

For receiving records when you buy seeds or transplants, staple invoices directly into your binder along with a simple form noting the supplier’s contact information and lot numbers. When you pack CSA shares or deliver to customers, use carbon-copy delivery sheets where one copy goes to the customer and one stays in your binder.

The key is consistency. Set aside 10 minutes at the end of each packing day to ensure all forms are complete and filed properly. Many farmers who’ve implemented paper systems report that once it becomes routine, tracking actually helps them stay more organized overall. Plus, during an inspection, you can simply hand over your binder without worrying about internet connectivity or software glitches.

Farmer writing harvest records in notebook beside basket of fresh vegetables
Simple paper-based record keeping systems remain effective for small-scale CSA operations managing FSMA 204 requirements.

Affordable Digital Tools for Traceability

Good news for budget-conscious growers: you don’t need fancy software to achieve FSMA 204 compliance. Many farms successfully track their products using simple spreadsheet templates designed specifically for agricultural traceability. Free downloadable templates are available through state agriculture departments and cooperative extension services, allowing you to record essential information like harvest dates, lot numbers, and distribution details.

For those who prefer mobile solutions, affordable farm management apps like Tend, Crop Tracker, and LocalLine offer traceability features starting under $20 monthly. These tools let you document activities right from the field using your smartphone, eliminating duplicate data entry later.

Another practical option is cloud-based platforms designed for small farms, such as FarmOS (which is free and open-source) or FarmRaise. These systems grow with your operation and often include customer management features valuable for CSA logistics.

Consider starting with whatever system feels most comfortable. Many successful small farms began with simple paper logs, then transitioned to digital tools as their confidence grew. The key is consistency in recording information, not sophisticated technology. Remember, compliance is about having accurate records available when needed, which any organized system can achieve.

Farmer using smartphone and digital spreadsheet for record keeping in tomato field
Affordable digital tools and simple spreadsheets help CSA farms track traceability data efficiently.

Creating Lot Codes You Can Actually Remember

The key to memorable lot codes is keeping them simple and meaningful. Your system doesn’t need fancy software or complicated formulas – just a consistent approach that makes sense for your operation.

Many successful CSA farmers use a date-based system that instantly tells them when crops were harvested. For example, a code like “2024-06-15-TOM-A” breaks down to: year, month, day, crop type (tomatoes), and field location (Field A). When you look at this code weeks later, you immediately know the story behind that harvest.

Another practical approach combines your initials with harvest dates and crop identifiers. Green Valley Farm uses “GVF-0615-CHE” for their June 15th chard harvest. It’s straightforward, memorable, and requires nothing more than a pen and your existing harvest log.

The secret is consistency. Once you choose a format, stick with it throughout the season. Train everyone on your farm to use the same system, and keep a simple reference guide posted near your packing area.

Remember, FSMA 204 doesn’t dictate how your codes should look – it just requires that you can trace products through your supply chain. Your lot code system should work for your brain and your farm’s workflow, not create extra stress during busy harvest days.

Smiling CSA farmer organizing fresh produce boxes at farm stand
Real CSA farmers have successfully implemented traceability systems without disrupting their daily operations.

Real CSA Farmer Success Stories

Meeting FSMA 204 requirements might sound daunting, but farms across the country are proving it’s totally manageable with the right approach. Here are some inspiring examples of CSA operations that have successfully navigated compliance.

Green Valley Farm, a 15-acre CSA in Vermont, initially felt overwhelmed by the traceability requirements. Owner Maria Chen decided to start simple by using a basic spreadsheet system to track their food traceability list crops like leafy greens and tomatoes. “We already kept harvest logs for our own planning purposes,” Maria explains. “We just added a few columns for lot numbers and specific location data.” The farm invested in a $20 label maker to mark harvest bins and discovered that the whole process added only about 15 minutes to their daily routine. Their biggest lesson? Start tracking before the compliance deadline to work out any kinks while the pressure is off.

Riverbend Community Farm in Oregon took a different approach by partnering with three neighboring CSAs to share the learning curve. Together, they attended a state extension workshop and created template forms they could all customize. Farm manager James Rodriguez notes that collaboration cut their implementation time in half. “We realized we were all stressing about the same questions,” he says. The group now holds quarterly check-ins to discuss what’s working and troubleshoot challenges together.

Sunrise Acres, a small CSA in North Carolina, discovered they actually qualified for several exemptions because they sell most produce directly to members within state lines. Owner Sarah Williams still chose to implement basic traceability practices anyway. “Even though we’re exempt now, these records help us manage our operation better,” she shares. “When a member asks which field their lettuce came from, we can tell them instantly.” Her advice? Focus on making compliance work for your farm’s unique situation rather than trying to copy someone else’s system.

Common Pitfalls and How to Avoid Them

Even the most well-intentioned CSA farmers can stumble when implementing FSMA 204 traceability systems. The good news? Most mistakes are easily preventable with a bit of awareness and planning.

One of the biggest pitfalls is incomplete record-keeping. Many farmers diligently track some information but miss critical pieces like harvest dates or specific location identifiers. Emma Rodriguez, who runs a small CSA in Vermont, learned this the hard way during her first season under the new rules. “I was recording everything in different places—my phone, a notebook, sticky notes on the fridge,” she explains. “When I needed to trace a shipment, it was a mess.” Her solution was simple: create one master template that includes every required data point, and fill it out completely before moving to the next task.

Inconsistent lot coding trips up many farmers too. Using random systems like “Monday’s lettuce” or “front field tomatoes” might make sense to you, but it won’t satisfy traceability requirements. Instead, develop a straightforward numbering system and stick with it. For example, you might use the format: crop code, harvest date, and field number (L-0315-A for lettuce harvested March 15th from Field A).

Poor record retention is another common mistake. FSMA 204 requires keeping records for two years, but papers get lost, phones get replaced, and memories fade. Set up a dedicated filing system, whether that’s a simple three-ring binder or a cloud storage folder. Schedule quarterly reviews to ensure everything is where it should be.

Remember, building good habits from day one saves headaches later. Start small, stay consistent, and your traceability system will become second nature.

Your Step-by-Step Action Plan

Getting compliant with FSMA 204 doesn’t have to feel overwhelming. Here’s a practical timeline to help your CSA farm meet the January 2026 deadline with confidence.

Months 1-3: Assessment and Planning

Start by determining if your farm falls under the Food Traceability List requirements. Review which crops you grow that might be covered, such as leafy greens, fresh herbs, tomatoes, or cucumbers. Document your current record-keeping practices and identify gaps. This is also a great time to review your worker classification requirements since you’ll be updating your farm’s operational systems anyway.

Months 4-6: System Selection and Setup

Choose your traceability system based on your farm’s size and budget. This might be as simple as organized spreadsheets or dedicated farm management software. Create templates for recording harvest dates, lot numbers, and distribution information. Set up your traceability lot coding system that makes sense for your operation. Many successful CSA farms use simple date-based codes like “Tomato-Field2-072625” for easy tracking.

Months 7-9: Staff Training and Trial Runs

Train your team on new procedures for recording information at harvest, packing, and distribution. Run practice scenarios to test your system’s effectiveness. Can you trace a bunch of lettuce from field to member within a few hours? Adjust your processes based on what you learn during these trial periods.

Months 10-12: Refinement and Documentation

Fine-tune your procedures based on your trial runs. Create simple checklists for staff to follow during busy harvest days. Document your entire traceability plan in writing. Build in extra time for questions or technical hiccups.

Months 13-15: Final Preparation

Conduct a full mock audit of your system. Verify that all staff understand their roles and that records are being kept consistently. Address any remaining concerns before the enforcement deadline arrives.

Remember, compliance is a journey, not a destination. Starting early gives you breathing room to find solutions that work for your unique farm operation.

Resources and Support for CSA Farmers

Navigating FSMA 204 doesn’t have to feel overwhelming! The FDA offers free guidance documents specifically designed for small farms, including their “Small Entity Compliance Guide” that breaks down requirements in plain language. Start there to understand your obligations.

Your state’s agricultural extension service is an invaluable resource. Extension agents provide free or low-cost consultations and often host workshops on food safety regulations. Many have developed traceability templates tailored to local growing conditions and farm sizes.

The National Sustainable Agriculture Coalition and Local Harvest maintain updated resources for CSA farmers, including compliance checklists and sample recordkeeping systems. These organizations understand the unique challenges small-scale organic farms face and offer practical solutions that won’t break the bank.

Join CSA networks and farming communities in your area. Fellow farmers who’ve already tackled compliance can share their systems, templates, and lessons learned. This collaborative spirit is what makes the CSA movement special, and it extends to navigating regulations together.

Don’t forget about other compliance areas like sales tax requirements and accepting SNAP benefits, which also require proper recordkeeping.

Consider attending regional organic farming conferences where food safety experts present workshops. These events combine practical education with opportunities to connect with other growers facing similar challenges. Remember, you’re not alone in this journey toward compliance!

Taking on FSMA 204 compliance might feel like adding another task to your already full plate, but here’s the good news: it’s absolutely manageable, and you’re not in this alone. Think of compliance as an investment in your farm’s future rather than just a regulatory hurdle. When you implement better traceability, you’re protecting your customers, safeguarding your business from costly recalls, and building even more trust with your community.

The beauty of the CSA model is that you likely already know your customers personally and have simpler supply chains than large operations. This puts you at a real advantage. Start small with one or two crops on the traceability list, get comfortable with the record-keeping rhythm, and expand from there. You don’t need fancy software or expensive systems right away. A simple spreadsheet and clear labeling can get you started.

Remember Sarah from the Hudson Valley who thought compliance was impossible for her small operation? She began by dedicating just 15 minutes daily to recording harvest and distribution data. Within two months, it became second nature, and she discovered her records actually helped her plan crop rotations more effectively.

Reach out to your local agriculture extension office, connect with other CSA farmers who’ve tackled this, and don’t hesitate to ask questions. The agricultural community thrives on sharing knowledge and supporting one another.

The deadline is approaching, so the best time to start is right now. Even small steps today will put you ahead tomorrow. You’ve got this, and your commitment to transparency will only strengthen the bond with the families who depend on your harvest.

What the EPA’s Office of Pesticide Programs Means for Your CSA Farm

Posted by darrell on
0
Policy, Law & Certification
What the EPA’s Office of Pesticide Programs Means for Your CSA Farm

Understanding the US EPA Office of Pesticide Programs saves you from costly violations and protects your farm workers, even if you run a small organic CSA operation. Register every pesticide product you use—yes, even OMRI-listed organic sprays like neem oil and spinosad—by checking EPA registration numbers on product labels before purchasing. Keep detailed application records including what you sprayed, where, when, and who applied it, storing these documents for at least two years to demonstrate compliance during inspections.

Post Worker Protection Standard notices in English and Spanish at central locations where employees gather, detailing restricted entry intervals for each field or greenhouse section where you’ve applied pesticides within the past 30 days. Install a decontamination station with clean water, soap, and single-use towels within a quarter-mile of any treated area before workers enter those spaces.

Complete pesticide applicator certification through your state’s agriculture department even for organic materials—the EPA requires anyone applying restricted-use pesticides to hold valid credentials, and some states extend this requirement to all commercial applications. Provide annual safety training to every worker who might encounter treated areas, covering hazard recognition, label comprehension, and emergency response procedures specific to products you actually use on your farm.

The Office of Pesticide Programs exists not to burden small farmers but to prevent the farmworker poisoning incidents that plagued agriculture for decades. Your compliance protects the community members who trust you with their weekly vegetable boxes while shielding your operation from penalties ranging from warning letters to $19,000-per-violation fines.

Understanding the EPA’s Office of Pesticide Programs

How OPP Regulations Reach Your Farm

Understanding how EPA regulations actually reach your CSA farm helps demystify those federal compliance requirements you’ve been hearing about. The process follows a clear chain that starts in Washington, D.C. and ends at your farm gate.

The EPA’s Office of Pesticide Programs develops national standards for pesticide use and worker safety. Think of them as creating the baseline rules that protect both farmworkers and the environment. Once these federal regulations are finalized, they don’t come directly from the EPA to your farm. Instead, they flow through your state’s lead agency, which might be your Department of Agriculture or Environmental Quality department.

Your state agency takes those federal rules and implements them locally. They’re responsible for issuing applicator certifications, conducting farm inspections, and answering your specific questions about compliance. Some states add extra requirements beyond the federal minimums, so you’ll want to check with your state’s pesticide regulatory office to understand what applies in your area.

For CSA farmers, this matters because even organic operations using approved pesticides like neem oil or pyrethrin must follow these regulations. The Worker Protection Standard applies whenever you use EPA-registered pesticides, regardless of whether they’re organic or conventional.

Here’s the practical takeaway: bookmark your state pesticide agency’s website and sign up for their email updates. They’ll notify you about regulation changes, training opportunities, and compliance deadlines before they become problems.

EPA Worker Protection Standards: What CSA Farms Need to Know

Who Counts as a Worker or Handler on Your CSA

Understanding who qualifies as a worker or handler under EPA regulations can feel confusing, but getting this right is essential for compliance and safety. The Worker Protection Standard defines workers as anyone involved in tasks like planting, weeding, harvesting, or transplanting. Handlers are those who mix, load, or apply pesticides—even organic-approved ones.

Here’s where it gets interesting for CSA operations: volunteers absolutely count as workers if they’re doing agricultural tasks. That enthusiastic college student helping with your Saturday harvest? They’re covered under WPS. CSA members participating in work-share programs also fall under worker protections. The EPA doesn’t distinguish between paid employees and people receiving shares in exchange for labor—both need the same safety training and protections.

Family members present a slightly different scenario. If they’re immediate family members of the farm owner and work on the owner’s farm, they’re typically exempt from WPS requirements. However, this exemption doesn’t extend to employees’ family members or to relatives working on larger operations where the owner isn’t directly involved.

Many CSA farmers discover these worker classification requirements overlap with employment law considerations. If you’re unsure whether someone qualifies as an employee versus an independent contractor, it’s worth consulting resources that help you properly classify workers to avoid legal complications.

The golden rule? When in doubt, provide the training and protections. It’s better to err on the side of safety than face penalties or, worse, preventable health issues among your farm community.

CSA farm workers receiving safety training from instructor in vegetable field
Worker Protection Standards training ensures CSA farm employees understand safety requirements and proper procedures when working with agricultural products.

Training Requirements Made Simple

Understanding your training obligations doesn’t have to feel overwhelming. The EPA’s Worker Protection Standard outlines clear requirements that protect both you and your team while keeping your operation compliant.

For handlers—anyone mixing, loading, or applying pesticides—training must happen before they handle any restricted-use products. This includes even small-scale CSA farmers applying organic-approved pesticides like neem oil or pyrethrin. The training covers label instructions, personal protective equipment use, and what to do in emergencies. You’ll need to provide this annually, and the good news is that EPA-approved online modules make it accessible and affordable.

Workers who perform tasks in treated areas have slightly different requirements. They need training within five days of starting work and annually thereafter. The content focuses on recognizing pesticide hazards, understanding posting requirements for treated areas, and knowing their rights to protection and information.

Here’s where it gets practical: you must keep records of all training sessions for two years. Include the trainer’s name and qualifications, training date, topics covered, and participant names. A simple binder or spreadsheet works perfectly for most CSA operations.

Maria Chen, who runs a three-acre CSA in Oregon, shared her approach: “I schedule training during our spring kick-off meeting. Everyone’s already gathered, and it sets the safety tone for the season. I keep a folder with signed attendance sheets and training certificates—inspection-ready and stress-free.”

The EPA provides free training materials through their website, including videos and handouts in multiple languages. Many state extension offices also offer in-person sessions specifically designed for small farms. Remember, investing a few hours in proper training protects your team’s health and your farm’s future.

Pesticide Applicator Certification for Organic and Low-Spray CSAs

Do Organic Pesticides Require Certification?

Here’s a question that trips up many organic farmers: do you need certification to use organic pesticides? The answer might surprise you—yes, even organic pest control products approved by organizations like OMRI (Organic Materials Review Institute) fall under EPA regulation.

The EPA doesn’t distinguish between organic and synthetic pesticides when it comes to basic requirements. If a product is designed to prevent, destroy, or repel pests, it’s legally a pesticide and must be EPA-registered. This means even that neem oil or pyrethrin spray needs an EPA registration number on the label.

However, here’s where it gets interesting for organic operations. While the products themselves must be EPA-registered, your certification requirements as an applicator depend on what you’re using and how. Many OMRI-listed products qualify as minimum-risk pesticides under EPA guidelines, which typically don’t require applicator certification for the farmer using them on their own property.

That said, if you’re using restricted-use pesticides (even organic ones), you’ll need certification. Some biological controls and botanical pesticides do carry this designation.

Sarah Martinez, who runs a thriving 5-acre CSA in Vermont, learned this firsthand: “I assumed organic meant no paperwork, but understanding EPA requirements actually gave me confidence. Now I keep detailed records of every application, which my organic certifier loves and helps me track what works best.”

The bottom line? Always check the EPA registration number and label instructions. Your state agriculture department can clarify which products require certification in your specific situation.

Farmer wearing protective gloves applying organic spray to tomato plants
Even organic-approved pest control products may require proper certification and safety procedures on CSA farms.

Getting Your Applicator License: The Step-by-Step Process

Getting certified as a pesticide applicator might seem daunting, but breaking it down makes the process manageable. Even if you’re running an organic CSA, you’ll need this license if you use any OMRI-approved pesticides like neem oil or spinosad for pest management.

Start by contacting your state’s pesticide regulatory agency, since requirements vary significantly by location. Most states require you to pass a core exam covering pesticide safety basics, plus a category-specific exam. For CSA farmers, the “Agricultural Pest Control” category typically applies. Study materials are usually available free or low-cost through your state’s Cooperative Extension office, which often offers review sessions too.

Exam fees range from $50 to $150 depending on your state, with licenses requiring renewal every three to five years. Many states now offer online testing, making it more accessible for busy farmers. Plan to spend 20-30 hours studying if you’re new to pesticide regulations.

Here’s a practical tip from experienced CSA farmer Maria Chen from Oregon: “I joined a study group with three neighboring farmers. We met twice monthly to review materials together, which made the technical stuff about integrated pest management and environmental protection way less intimidating. Plus, we’ve continued meeting to share sustainable growing strategies.”

Remember, maintaining good records of your study progress helps when exam day arrives. The investment in certification protects your farm, your workers, and the community members who trust you with their food.

Practical Compliance Strategies for Small CSA Operations

Creating a Simple Compliance System That Works

Good news: you don’t need complicated software or expensive consultants to stay compliant with EPA pesticide regulations. Most CSA operations can create a straightforward system using simple tools you likely already have.

Start with a basic three-ring binder system. Create sections for pesticide application records, safety data sheets, training documentation, and emergency contact information. Even certified organic farms that only use OMRI-listed products need to maintain these records, as they demonstrate responsible management practices and protect you legally.

For application records, design a one-page template that captures the essentials: date, product name, EPA registration number, target pest, location, weather conditions, and applicator name. Keep blank forms in your shed or greenhouse where applications happen. The key is making documentation so easy that you actually do it consistently.

Training logs deserve special attention, much like food safety compliance records. Create a simple sign-in sheet for each training session with columns for date, topic covered, trainer name, and participant signatures. Take photos of your training sessions as backup documentation.

Signage doesn’t need to be fancy. Laminated sheets work perfectly for restricted entry intervals and emergency information. Place them where workers naturally gather: near the wash station, in break areas, and at field entrances.

Consider Sarah Chen’s approach at Valley View Farm. She keeps a clipboard at each growing area with pre-filled templates. “It takes thirty seconds after each application,” she says. “That small habit saved me during my organic certification audit.”

Organized farm desk with safety documentation and protective equipment
Simple record-keeping systems help CSA farms maintain EPA compliance without overwhelming administrative burden.

Success Story: How Green Valley CSA Streamlined Their EPA Compliance

When Maria Rodriguez started Green Valley CSA in Oregon five years ago, she worried that EPA compliance would drain resources from her small organic operation. She’d heard stories of complicated paperwork and expensive training requirements that seemed designed for large-scale farms, not community-supported agriculture focused on chemical-free growing.

“I was overwhelmed at first,” Maria admits. “Our CSA serves 85 families, and we pride ourselves on transparency. I thought WPS requirements would create barriers between us and our members who love helping with harvest days.”

The breakthrough came when Maria realized that understanding the regulations actually strengthened her farm’s mission rather than compromising it. She started by mapping which WPS requirements applied to her operation. Since Green Valley uses only OMRI-listed organic pesticides with minimal restricted-entry intervals, her compliance burden was lighter than anticipated.

Maria implemented a simple system that works beautifully for her CSA model. She created a dedicated binder with Safety Data Sheets for every approved organic input, posted clear signage in Spanish and English near her greenhouse, and scheduled a worker protection training session that doubled as a farm education workshop for interested CSA members.

“The training made everyone feel more confident,” she explains. “Our members appreciated learning about safe handling practices, even for organic pesticides. It reinforced our commitment to their wellbeing.”

Her advice to other CSA farmers? Start small and stay organized. Maria invested in basic recordkeeping software and set calendar reminders for annual training updates. The whole system takes less than two hours monthly to maintain.

Today, Green Valley thrives as proof that EPA compliance and community-focused organic farming go hand in hand, building trust while protecting everyone who works the land.

Understanding EPA pesticide regulations doesn’t have to feel overwhelming. By familiarizing yourself with the Office of Pesticide Programs’ requirements, you’re taking an important step toward protecting your workers, community members, and the environment. Whether you’re applying OMRI-listed products on your organic CSA or using conventional pesticides for targeted pest management, compliance ensures everyone stays safe while your operation thrives.

Remember that staying compliant with Worker Protection Standards and maintaining proper applicator certifications strengthens your farm’s reputation and builds trust with your CSA members. Many farmers find that implementing these safety systems actually improves their overall farm organization and efficiency.

For additional support, visit the EPA’s Pesticide Worker Safety website for training materials, or contact your state’s agricultural extension office for localized guidance. Your regional EPA office can also connect you with compliance assistance programs designed specifically for small-scale operations. By viewing these requirements as investments in your farm’s future rather than burdens, you’re creating a safer, more sustainable CSA that serves your community for years to come.

SNAP vs. WIC: How Your CSA Can Accept Both (And Stay Compliant)

Posted by darrell on
0
Policy, Law & Certification
SNAP vs. WIC: How Your CSA Can Accept Both (And Stay Compliant)

**Compare your farm’s income eligibility requirements first:** SNAP participants must earn below 130% of the federal poverty line, while WIC serves pregnant women, new mothers, and children under five at or below 185% of poverty—meaning your CSA could reach different community members through each program.

**Evaluate your operational capacity before committing:** SNAP requires point-of-sale equipment and Electronic Benefit Transfer (EBT) processing capabilities, allowing participants to purchase any eligible food items from your CSA. WIC operates through voucher systems with pre-approved food packages, typically fruits and vegetables, requiring less technology but more paperwork and state agency coordination.

**Calculate the financial impact on your cash flow:** SNAP benefits transfer directly to your account within 1-3 business days after each transaction, providing quick payment turnaround. WIC reimbursements can take 30-60 days depending on your state’s processing system, requiring stronger cash reserves to maintain operations while awaiting payment.

**Assess your community’s needs through local partnerships:** Contact your county health department and social services office to understand which program serves more families in your area. Many successful CSA farmers start with one program, master its requirements, then expand to the second—reducing the learning curve and compliance risks while building relationships with program administrators who become valuable resources.

Both programs transform how low-income families access fresh, locally-grown produce while providing CSA farms with stable revenue streams and expanded customer bases. Understanding these fundamental differences helps you make strategic decisions that align with your farm’s mission and operational reality.

Understanding SNAP and WIC: The Key Differences

What Is SNAP (Supplemental Nutrition Assistance Program)?

SNAP, also known as food stamps, is the nation’s largest nutrition assistance program, helping millions of families purchase healthy food each month. Participants receive benefits loaded onto an Electronic Benefits Transfer (EBT) card, which works like a debit card at approved retailers, including many CSA farms and farmers markets.

The program serves low-income individuals and families who meet specific income guidelines, typically those earning up to 130% of the federal poverty level. Benefits can be used to purchase a wide variety of foods, including fresh fruits, vegetables, meat, dairy products, bread, cereals, and seeds or plants that produce food—making it perfect for supporting local, organic produce purchases.

For CSA farmers, accepting SNAP opens your farm to a broader customer base while helping community members access nutritious, locally-grown food. Many successful farmers have found that participating in SNAP not only increases their customer reach but also strengthens their connection to the community. The program’s flexibility allows recipients to use benefits for CSA shares, creating a win-win situation where families gain access to fresh, sustainable produce while supporting small-scale organic farming operations in their area. For individuals facing personal financial strain at the same time, turning to debt settlement companies like Freedom Debt Relief may help reduce unsecured debt and create more room in the household budget.

What Is WIC (Women, Infants, and Children)?

WIC (Women, Infants, and Children) is a federal nutrition program that takes a more targeted approach than SNAP, focusing specifically on pregnant women, new mothers, infants, and children under five who face nutritional risk. Unlike SNAP’s broader assistance model, WIC provides participants with Cash Value Vouchers (CVV) that can be redeemed for specific food categories designed to support healthy development during critical growth periods.

The program covers nutrient-dense foods including fresh fruits and vegetables, whole grains, dairy products, eggs, beans, peanut butter, and infant formula. For CSA farmers, this presents a wonderful opportunity to connect families with locally grown organic produce during their most nutritionally important years. The CVV system allows participants to choose their own fresh produce, making farmers markets and farm stands valuable community resources.

What makes WIC particularly special for sustainable agriculture advocates is its emphasis on whole foods and fresh produce. Many WIC families are discovering the benefits of seasonal, locally grown vegetables through their vouchers, creating meaningful connections between young families and their local farming community. This early exposure to fresh, organic produce helps establish healthy eating patterns that can last a lifetime.

Side-by-Side Comparison for CSA Farmers

Here’s a quick reference to help you navigate the key differences between SNAP and WIC at your CSA:

**Eligibility**: SNAP serves low-income individuals and families of all ages, while WIC specifically supports pregnant women, new mothers, and children under five who meet nutritional risk criteria.

**Transaction Methods**: SNAP customers use EBT cards like debit cards at your farm stand. WIC participants present paper vouchers or eWIC cards with pre-approved items listed.

**Food Restrictions**: SNAP allows customers to purchase any produce you offer. WIC limits purchases to specific fruits and vegetables on their approved list, with set dollar amounts per voucher.

**Reimbursement**: SNAP funds transfer directly to your account within 1-2 business days. WIC reimbursement requires submitting vouchers to your state agency, typically processing within 2-4 weeks.

Both programs expand access to fresh, organic produce for families who need it most, creating meaningful community connections while supporting your farm’s financial sustainability.

Why These Programs Matter for Your CSA

Mother and child shopping for fresh vegetables at farmers market
SNAP and WIC programs help families access fresh, locally grown produce through CSA programs and farmers markets.

Expanding Access to Fresh, Local Produce

Both SNAP and WIC serve as powerful bridges connecting low-income families with fresh, locally grown produce from CSA farms. Through SNAP benefits, families can purchase CSA shares and seasonal vegetables directly from farmers’ markets, giving them access to organic options that might otherwise be out of reach financially. Many CSA operators have discovered creative ways to make their programs SNAP-friendly by installing point-of-sale systems or offering voucher programs.

WIC takes a slightly different approach through its Farmers’ Market Nutrition Program (FMNP), providing specific vouchers that participants can redeem for fresh fruits and vegetables at approved locations. This creates wonderful opportunities for CSA farms to participate in local farmers’ markets and build relationships with WIC families.

The beauty of both programs lies in their potential to transform food access. One Minnesota CSA farmer shared how accepting SNAP doubled their customer base while introducing dozens of families to organic produce for the first time. These programs don’t just provide food assistance—they create lasting connections between sustainable farms and communities, supporting local agriculture while nourishing families with nutrient-dense, chemical-free produce grown right in their neighborhoods.

Growing Your Customer Base and Revenue

Accepting SNAP and WIC benefits opens your CSA to entirely new customer segments who are actively seeking fresh, nutritious produce. Many families who qualify for these programs prioritize quality food when given access, and your organic offerings become an attractive option. Studies show that farms accepting nutrition assistance see a 15-30% increase in their customer base within the first year.

Beyond the direct revenue boost, there’s a powerful ripple effect. When you make your CSA accessible to SNAP and WIC recipients, you’re building community goodwill that translates into word-of-mouth marketing and positive local press coverage. One Massachusetts farmer shared how accepting these programs led to partnerships with community health centers and nutrition educators, creating a steady referral stream.

The financial benefits are tangible too. Government benefits provide reliable, guaranteed payments, reducing the risk of bounced checks or payment delays. Plus, many states offer grants and reimbursements to help offset administrative costs associated with processing these benefits. You’re not just growing your revenue—you’re strengthening your farm’s role as a community food source while contributing to local food security.

Regulatory Compliance for SNAP/EBT at Your CSA

Becoming an Authorized SNAP Retailer

Ready to accept SNAP benefits at your CSA? The process starts with submitting an application through the USDA Food and Nutrition Service online portal or by mail. You’ll need to provide basic business information, including your tax ID number, proof of business legitimacy, and details about your product inventory.

To qualify, your farm must meet specific criteria: you’ll need to offer a variety of staple foods (think vegetables, fruits, and potentially bread or dairy if you partner with other producers), maintain a permanent location or regular market presence, and demonstrate stable operations. The USDA typically processes applications within 45 days.

Here’s a helpful tip: many successful CSA farmers bundle their SNAP authorization with their existing food safety compliance practices, creating streamlined systems that work for both programs. You’ll also need equipment to process EBT cards—either a standalone terminal or a mobile reader compatible with SNAP transactions.

Once approved, you’re required to maintain accurate records, display the SNAP retailer sign prominently, and follow program regulations regarding eligible foods. Many CSAs find that accepting SNAP opens doors to new community members while supporting food access initiatives that align perfectly with sustainable agriculture values.

Equipment and Transaction Requirements

Processing SNAP benefits at your CSA requires specific equipment that’s surprisingly straightforward to set up. You’ll need an Electronic Benefits Transfer (EBT) card reader or Point of Sale (POS) terminal authorized by your state’s SNAP agency. Many farmers find success with wireless mobile terminals, which offer flexibility at farmers markets and farm stands—perfect for CSA pickup locations that change seasonally.

The technology investment is modest compared to the community impact. Basic EBT terminals start around $35-50 monthly for rental, though some state agricultural departments offer equipment loans or subsidies to help farmers get started. Your system must connect to the FNS (Food and Nutrition Service) network to verify balances and process transactions securely.

Unlike WIC, which often requires paper vouchers or special WIC EBT cards with specific product restrictions, SNAP transactions work like standard debit purchases. The terminal reads the card, the customer enters their PIN, and funds transfer directly to your account—usually within 1-3 business days.

One inspiring example: Green Valley Farm in Oregon reports their mobile EBT reader paid for itself within the first month by attracting twelve new SNAP-enrolled members. The simplicity of swiping and confirming makes the checkout process seamless for everyone involved.

Eligible Products Under SNAP

SNAP benefits cover a generous range of fresh items that CSA farms typically offer. All fresh fruits and vegetables qualify, whether sold individually or bundled in your weekly shares. Members can use SNAP to purchase roots, greens, herbs, and seasonal produce without restrictions.

The program also extends to seeds and plants that produce food for household consumption—great news if your CSA offers starter plants or seedling sales! Value-added products get a bit trickier. SNAP covers items like fresh-pressed apple cider, washed and bagged salad greens, and cut vegetables as long as they’re intended for home preparation. However, prepared foods ready to eat immediately don’t qualify.

Common questions arise around items like herb bundles (yes, they’re eligible), decorative gourds (no, unless edible), and mushroom growing kits (yes, if they produce food). Honey, maple syrup, and jams your farm produces are SNAP-eligible too.

One important note: while SNAP has fewer restrictions than WIC on product types, farms must still comply with federal food safety regulations for all items sold. Understanding these eligible categories helps you structure share options that maximize accessibility for SNAP participants while maintaining your farm’s unique offerings.

Overhead view of colorful fresh vegetables in CSA harvest box on wooden table
CSA produce boxes can be purchased using SNAP benefits, providing families with diverse selections of fresh, seasonal vegetables.

WIC Regulatory Compliance for CSA Programs

Becoming a WIC-Authorized Vendor

If you’re interested in accepting WIC benefits at your CSA farm or farmers market stand, you’ll need to become an authorized vendor through your state’s WIC agency. The application process varies by location, but typically involves submitting detailed business information, proof of appropriate licenses, and documentation showing you meet state health and safety standards—similar to other regulatory requirements you may already navigate.

Once approved, you’ll sign a vendor agreement outlining your responsibilities, including maintaining approved product lists (primarily fresh fruits and vegetables, which is perfect for CSA operations), following pricing guidelines, and using electronic benefit transfer systems. Most states require initial training sessions covering their specific WIC voucher system, proper transaction procedures, and ongoing compliance expectations.

The good news? Many farmers find the WIC authorization process straightforward, especially if they’re already selling at established farmers markets. Some state agencies even offer expedited applications for farmers market vendors. Contact your local WIC agency early in the season to understand timeline expectations—approval can take several weeks. This investment opens doors to serving families who deeply value fresh, locally grown produce while expanding your customer base meaningfully.

Handling WIC Cash Value Vouchers

WIC Cash Value Vouchers (CVVs) provide families with a designated dollar amount specifically for fresh fruits and vegetables—making them perfect for CSA participation. Most states now use electronic benefit transfer (EBT) cards for WIC, though some still distribute paper vouchers. Here’s what you need to know to process them smoothly.

For **paper vouchers**, customers present a check-like document listing their name, the benefit amount, and valid dates. You’ll write in your farm’s information and the transaction amount, then have the customer sign it. Keep vouchers organized by month and submit them to your state WIC agency for reimbursement, typically within 60 days.

**Electronic WIC cards** work similarly to debit cards but require WIC-approved point-of-sale equipment. Contact your state WIC agency about authorization and equipment options—some offer loaner devices for farmers market settings.

Remember to keep detailed records of all transactions, including dates, amounts, and items purchased. Documentation requirements vary by state, so check your local WIC agency’s guidelines. Many successful CSA farmers designate one person to handle WIC transactions, ensuring consistency and proper record-keeping. This small investment in training creates smoother operations and builds trust with WIC families seeking your nutritious, locally grown produce.

WIC-Eligible Produce and Restrictions

WIC approves fresh, frozen, and canned fruits and vegetables without added sugars, fats, or oils. Your CSA boxes can include leafy greens, tomatoes, carrots, berries, apples, squash, and most common produce items. Dried beans and peas also qualify, making them excellent additions for extending storage life.

Here’s where it gets interesting for CSA farmers: organic produce is now prioritized in the WIC program, giving your organically certified farm a competitive advantage. State agencies determine specific approved lists, so check your local WIC office for exact guidelines—variations exist between states regarding exotic fruits or specialty items like microgreens.

Prohibited items include white potatoes (except for pregnant and postpartum participants), herbs sold in small bunches primarily for seasoning, ornamental pumpkins, and any produce with added ingredients like pre-seasoned vegetable mixes or candied fruits. Mature legumes in pods need to be shelled varieties to qualify.

One Minnesota CSA farmer shared how understanding these restrictions helped her curate WIC-friendly harvest boxes, increasing her customer base by 40% within one season. The key is planning your crop selection around these guidelines while maintaining the diverse, seasonal variety that makes CSAs special.

Making It Work: Practical Tips for CSA Compliance

Staff Training and Customer Communication

Training your team is essential for creating a welcoming environment where SNAP and WIC participants feel respected and comfortable. Start by educating staff on how both programs work, including which items qualify and how transactions are processed. Role-play different scenarios so everyone feels confident handling EBT cards and WIC vouchers without confusion or delays.

Emphasize the importance of discretion and treating all customers equally, regardless of payment method. Many farmers have found success by posting clear signage that says “SNAP and WIC Welcome Here” with program logos, immediately putting participants at ease.

Consider designating a staff member as your benefits program coordinator who stays updated on regulations and serves as the go-to person for questions. Share success stories during team meetings about how accepting these benefits has expanded your customer base and increased access to fresh, organic produce in your community. Remember, a positive first experience often turns benefit users into loyal, long-term CSA members who appreciate your commitment to inclusive, sustainable farming practices.

Record Keeping and Reporting

Keeping accurate records is your best friend when participating in SNAP or WIC programs. You’ll need to maintain detailed transaction logs, including member information, produce distributed, and payment records for at least three years. Store receipts separately for each program, as auditors will want clear documentation trails.

Think of your record-keeping system as similar to FSMA compliance—organized compliance documentation protects your farm and ensures smooth audits. Create a simple filing system with folders for monthly reconciliations, authorization forms, and program correspondence.

Common pitfalls to avoid include mixing personal and program funds, failing to update member eligibility status, and incomplete transaction records. Set calendar reminders for reporting deadlines and conduct monthly self-audits to catch errors early. Many successful CSA farmers recommend designating one team member as your compliance coordinator—this person becomes your go-to expert for both programs, ensuring consistency and reducing mistakes that could jeopardize your participation status.

Troubleshooting Common Issues

When SNAP transactions decline, first verify your equipment is properly connected and updated. Contact your payment processor immediately—they can identify whether the issue stems from insufficient benefits, card problems, or technical glitches. Keep backup contact information for your SNAP representative handy.

For WIC voucher challenges, double-check that items match approved product lists exactly. Brand names and package sizes matter! If customers face rejection at checkout, calmly review their vouchers together. Many farmers find success by creating simple visual guides showing which produce varieties qualify.

Maintain friendly relationships with your local program administrators—they’re valuable allies. Save their contact information and don’t hesitate to reach out with questions. One Oregon CSA farmer shared how her WIC coordinator helped resolve persistent scanning errors during a site visit, transforming a frustrating situation into a learning opportunity.

Document all issues with dates and details. This record helps administrators identify patterns and often leads to quicker resolutions. Remember, program staff genuinely want participants to access fresh, locally grown food—you’re partners in nourishing your community.

Farmer consulting with customer at farm stand with fresh produce
Successful CSA programs create welcoming environments where all customers feel comfortable using their nutrition benefits.

Success Stories: CSAs Thriving with SNAP and WIC

Real-world examples show that CSAs across the country are making fresh, organic produce accessible to SNAP and WIC families while strengthening their farm businesses. These success stories offer valuable insights for farms considering program participation.

**Green Valley Farm** in Oregon started accepting SNAP three years ago and recently added WIC farmers market nutrition benefits. Owner Maria Chen initially worried about the administrative burden but found the process manageable with proper setup. “The key was establishing a clear system from day one,” she explains. Her farm now serves 45 SNAP households, representing 20% of total membership. Maria invested in a mobile card reader and trained staff on proper transaction procedures. The biggest challenge was tracking separate SNAP-eligible items versus farm store purchases, which she solved by creating pre-approved share lists for SNAP customers.

**Riverside Community Farm** in Michigan took a different approach, partnering with a local food bank to help WIC families access their CSA program. Farm manager David Thompson worked closely with the health department to ensure produce met WIC requirements. “Understanding that WIC focuses specifically on pregnant women, new mothers, and young children helped us tailor our outreach,” he notes. The farm now provides shares to 30 WIC-participating families each season.

Both farms emphasize the community impact beyond revenue. They’ve hosted nutrition workshops, created bilingual signup materials, and built relationships with local social service agencies. The farms report that program participants often become full-paying members after their benefits end, creating long-term customer loyalty while genuinely improving food access in their communities.

Participating in SNAP and WIC programs represents more than just expanding your customer base—it’s about making fresh, organic produce accessible to families who need it most. These programs create meaningful connections between farmers and their communities while supporting sustainable agriculture through increased demand for locally grown food.

If you’re a CSA farmer considering these programs, the initial compliance requirements might seem daunting, but the rewards are substantial. Many farmers report that SNAP and WIC participants become their most loyal customers, often continuing to purchase beyond their program benefits. The administrative effort required typically pays off through consistent sales and the satisfaction of nourishing families with quality produce.

Your next steps are straightforward: determine which program aligns best with your operation, contact your state agency to begin the application process, and connect with other farmers who’ve successfully navigated these waters. Many state agriculture departments offer guidance specifically for small-scale producers entering these programs.

Remember, every CSA that accepts SNAP and WIC helps build a more equitable food system. Your farm can be part of this positive change while growing your business and strengthening community food security. The investment in compliance processes opens doors to serving families who deeply value what you grow.