Monthly Archives

39 Articles

X-Seed Pastures: How Smart Crop Planning Keeps Your Farm Thriving

Posted by darrell on
0
Seed Preservation and Biodiversity
X-Seed Pastures: How Smart Crop Planning Keeps Your Farm Thriving

Transform your pasture land into a high-performing grazing system by implementing X-seed technology – a revolutionary approach that maximizes both forage production and seed diversity in farming systems. Strategic seeding with X-seed varieties increases drought resistance, extends grazing seasons, and boosts livestock productivity through enhanced nutrient density. This adaptive pasture management method has helped farmers across North America achieve up to 30% higher grazing capacity while reducing supplemental feed costs.

Modern X-seed pastures blend performance-tested grass varieties with hardy legumes, creating resilient ecosystems that thrive in challenging conditions. Whether you manage a small family farm or oversee extensive rangeland, X-seed technology offers a sustainable solution for improving soil health, maximizing forage yield, and ensuring long-term profitability. By combining traditional grazing wisdom with innovative seed engineering, X-seed pastures represent the future of regenerative agriculture.

What Makes X-Seed Pastures Different?

Bird's eye view of an integrated farming system with x-seed pasture boundaries
Aerial view of a farm implementing x-seed pasture system, showing clear divisions between crop areas and pasture zones

The Perfect Balance: Crops and Pasture

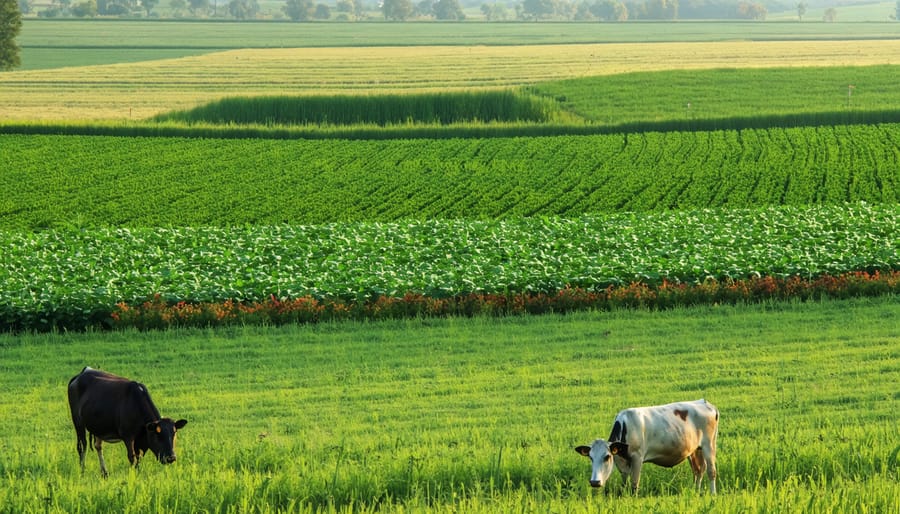
X-seed pastures represent a brilliant harmony between crop production and natural grazing lands. By carefully selecting diverse grass species and legumes, these pastures create a living ecosystem that supports both livestock and soil health. The secret lies in the strategic rotation between grazing periods and crop cultivation seasons.

During the grazing phase, animals naturally fertilize the soil while keeping grass heights manageable. This activity stimulates root growth and increases organic matter in the soil. When it’s time for crops, the enriched soil provides an ideal growing environment, reducing the need for synthetic fertilizers.

Farmers who’ve implemented x-seed systems report impressive results. Sarah Johnson, a Vermont farmer, noticed a 30% increase in soil fertility after just two seasons of alternating between pastured cattle and vegetable crops. The diversity of plant species also attracts beneficial insects and pollinators, creating a natural pest management system.

The beauty of x-seed pastures is their adaptability. Whether you’re growing vegetables, grains, or maintaining dairy cattle, the system can be tailored to meet your specific needs while preserving local biodiversity and improving soil quality year after year.

Natural Barriers and Buffer Zones

X-seed pastures serve as excellent natural buffers between different crop varieties, creating distinct zones that help maintain crop purity and prevent cross-pollination. These buffer zones typically span 15-20 feet wide, acting as living fences that protect specialty crops and organic growing areas from external influences.

The dense growth pattern of x-seed grasses naturally suppresses weed migration between different farming zones, while their robust root systems help define clear boundaries. This natural separation is particularly valuable for farmers growing multiple crop varieties or those maintaining organic certification requirements.

Many farmers have found success using x-seed pastures to create transition zones between conventional and organic fields. The grass barrier effectively filters potential drift from neighboring properties while providing additional grazing opportunities for livestock. These buffer zones also serve as wildlife corridors, supporting beneficial insects and pollinators that enhance overall farm biodiversity.

For small-scale farmers, x-seed buffer zones can double as productive spaces, offering high-quality forage while maintaining crucial separation between different growing areas. This dual-purpose approach maximizes land use efficiency while supporting sustainable farming practices.

Planning Your X-Seed Pasture System

Selecting Compatible Plants

When designing your x-seed pasture system, choosing the right compatible plant combinations is crucial for success. Start by selecting a diverse mix of grasses, legumes, and herbs that complement each other’s growth patterns and nutritional needs.

Consider plants with different root depths to maximize soil resource utilization. Deep-rooted plants like alfalfa can access nutrients and water from lower soil layers, while shallow-rooted species like white clover work well in the top soil. This vertical diversity creates a more resilient system.

Timing is also essential – choose plants with varying growth periods to ensure continuous ground cover throughout the season. For example, pair early-spring grasses with summer-active legumes and fall-growing brassicas.

Some proven combinations include:
– Perennial ryegrass with red and white clover
– Orchardgrass with alfalfa and chicory
– Tall fescue with birdsfoot trefoil

Look for plants that offer multiple benefits: forage quality, soil improvement, and pollinator support. Herbs like plantain and chicory not only provide excellent nutrition but also have medicinal properties for grazing animals.

Remember to account for your specific climate and soil conditions when making selections. Local agricultural extension offices can provide valuable guidance on species that thrive in your region.

Side-by-side comparison of successful plant combinations for x-seed pastures
Split-screen comparison showing compatible plant combinations in x-seed pasture system

Seasonal Rotation Strategies

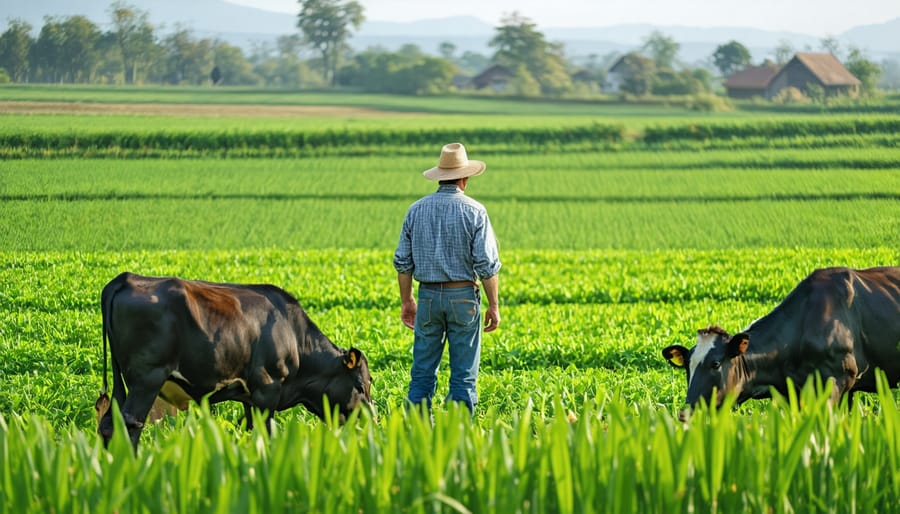
Implementing effective seasonal rotation strategies is crucial for maintaining healthy and productive x-seed pasture land throughout the year. Start by dividing your pasture into distinct sections, allowing for systematic rotation that gives each area adequate rest and recovery time.

In spring, begin with cool-season grasses and legumes, gradually transitioning to warm-season varieties as temperatures rise. Monitor soil moisture levels and grass height carefully during this transition period. A good rule of thumb is to rotate livestock when grass height reaches about 4 inches, preventing overgrazing and promoting robust root development.

Summer management focuses on preventing heat stress and maintaining grass quality. Consider implementing a “leader-follower” system, where different livestock species graze the same paddock in sequence, maximizing forage utilization. Young animals with higher nutritional needs graze first, followed by adult animals that can manage on slightly lower quality forage.

Fall transition requires careful planning to extend the grazing season. Stockpile some pasture areas during late summer for autumn and winter grazing. This approach reduces the need for supplemental feed while maintaining soil health. During winter, use strip grazing techniques to minimize waste and ensure even manure distribution.

Remember to adjust your rotation schedule based on weather conditions, grass growth rates, and livestock needs. Keep detailed records of grazing patterns and pasture recovery times to refine your strategy year after year.

Successful implementation of x-seed pasture system with grazing livestock and crops
Farmer standing in successful x-seed pasture, showing healthy livestock grazing alongside thriving crops

Real Farm Success Stories

The Thompson Family Farm in Vermont transformed their struggling dairy operation into a thriving rotational grazing system using x-seed pasture techniques. Within just two years, they reported a 40% reduction in feed costs and witnessed remarkable improvements in soil health. “Our grass is thicker, greener, and more resilient to drought,” says Sarah Thompson. “The cattle are healthier too, and we’ve seen a noticeable increase in milk production.”

In Texas, the Martinez Ranch successfully implemented x-seed pastures across 200 acres of previously underutilized land. By carefully selecting drought-resistant varieties and following optimal seeding patterns, they created year-round grazing opportunities for their beef cattle. “The return on investment exceeded our expectations,” explains Ramon Martinez. “Our cattle gain weight faster, and we’ve cut our hay purchases by 60%.”

Small-scale success stories are equally impressive. The Green Meadows Homestead, operating on just 15 acres in Oregon, uses x-seed pastures to support their mixed livestock operation. Owner Jenny Chen reports that their carefully planned pasture system supports sheep, goats, and chickens while improving soil quality each year. “The diversity of plants in our x-seed pastures has attracted more beneficial insects and birds. It’s like our land has come alive,” she shares.

Perhaps most inspiring is the story of the Wilson Community Farm in Georgia, where a group of new farmers collectively restored 50 acres of depleted soil using x-seed pasture methods. Their collaborative approach allowed them to share equipment costs and knowledge, resulting in a vibrant farming community. Today, they produce high-quality grass-fed beef and lamb while serving as a learning center for other aspiring farmers in the region.

These success stories demonstrate that regardless of scale or location, x-seed pasture systems can revolutionize farming operations while promoting environmental sustainability and economic viability.

X-seed pasture land offers a sustainable and profitable solution for modern farmers looking to enhance their agricultural operations. By implementing this innovative approach, you’ll enjoy improved soil health, increased biodiversity, and better livestock nutrition. The system’s ability to provide year-round grazing opportunities while reducing feed costs makes it an attractive option for both small-scale and commercial farmers. Success stories from farmers across different regions demonstrate that x-seed pasture land can adapt to various climates and soil conditions. Whether you’re just starting or looking to transform your existing farmland, the benefits of x-seed pasture systems are clear. Take the first step toward sustainable farming by incorporating these practices into your operation, and join the growing community of farmers who are building a more resilient agricultural future.

Zone 9 Perennial Seed Success: Keep Your Garden Blooming Year After Year

Posted by darrell on
0
Seed Preservation and Biodiversity
Zone 9 Perennial Seed Success: Keep Your Garden Blooming Year After Year

Transform your Zone 9 garden into a self-sustaining paradise by saving perennial plant seeds from heat-loving favorites like Echinacea, Black-Eyed Susans, and Salvias. Plant drought-resistant perennials like Lantana, Verbena, and Russian Sage in well-draining soil during fall months, allowing their extensive root systems to establish before summer heat arrives. Harvest seeds when flower heads turn brown and crispy, storing them in paper envelopes within airtight containers at 40°F for maximum viability. Strategic placement of these perennials – taller varieties like Penstemon and Rudbeckia at the back, mid-height Gaillardia in the center, and ground-covering Verbena in front – creates a layered, professional-looking garden that blooms reliably year after year in Zone 9’s warm climate.

Best Perennial Flowers for Zone 9 Seed Saving

Heat-Loving Perennials

Zone 9’s warm climate and long growing season create the perfect environment for heat-loving perennials to thrive. Plants like Lantana, Salvia, and Mexican Sunflower flourish in these conditions, offering vibrant blooms throughout most of the year. The striking Purple Coneflower (Echinacea) not only adds bold color but also attracts beneficial pollinators to your garden.

Blanket Flower (Gaillardia) proves particularly resilient in zone 9’s heat, producing cheerful daisy-like blooms in warm sunset colors. Russian Sage and Yarrow stand up beautifully to both heat and drought, creating impressive displays with minimal maintenance. For stunning vertical interest, consider adding Verbena bonariensis, whose tall, airy stems dance in summer breezes while providing nectar for butterflies.

Black-eyed Susan and Coreopsis varieties offer reliable yellow blooms that can handle intense sunshine. For shaded areas, try Japanese Anemone or Hardy Begonia, which provide late-season color when other perennials are fading. These hardy plants establish strong root systems during their first year, returning bigger and better with each passing season.

Vibrant display of heat-tolerant perennial flowers suitable for zone 9 gardens
Collection of popular zone 9 perennial flowers including Lantana, Salvia, and Echinacea in full bloom

Long-Blooming Varieties

Several perennial varieties in zone 9 offer spectacular extended blooming periods, making them ideal for continuous garden color and seed production. Black-eyed Susans flourish from early summer through fall, producing abundant seeds that readily self-sow. Blanket flowers (Gaillardia) deliver vibrant blooms from spring until frost, with easy-to-collect seeds that maintain high germination rates.

Salvias are particularly well-suited to zone 9’s climate, flowering for months while attracting pollinators. Both the traditional purple varieties and the striking red varieties produce seeds throughout their extended blooming season. Coneflowers stand as another reliable choice, blooming from June through October and offering seeds that birds love – save some for yourself before they feast!

For shaded areas, Japanese Anemones provide elegant late-season flowers and seeds, while Verbena bonariensis offers airy purple blooms that seem to float above other plants from summer through fall. These long-bloomers not only create stunning garden displays but also ensure a steady supply of seeds for future plantings and sharing with fellow gardeners.

Seed Collection Techniques

Timing Your Harvest

Timing is crucial when collecting perennial flower seeds in zone 9. Most seeds reach maturity in late summer to early fall, but each flower species has its unique schedule. Watch for these tell-tale signs of seed readiness: pods turning brown and crispy, seed heads becoming dry and darker in color, or flowers developing fluffy seed heads like those of coneflowers and black-eyed susans.

For morning glories and other pod-forming flowers, wait until the pods turn brown and begin to crack. Collect them just before they split completely to prevent seed loss. Daisy-family flowers, like zinnias and marigolds, are ready when their petals have completely dried and fallen off, leaving behind firm, dark seeds.

In zone 9’s warm climate, seeds often mature earlier than in cooler regions. Plan your collection on a dry, sunny day after morning dew has evaporated but before afternoon heat peaks. Avoid collecting seeds during humid conditions or after rain, as moisture can lead to mold during storage.

Some flowers, like salvias and lantanas, may produce seeds throughout the growing season. Regular monitoring helps you catch seeds at their peak maturity, ensuring the best germination rates for next season’s garden.

Process of collecting seeds from a dried Black-Eyed Susan flower head
Step-by-step demonstration of seed collection from a mature Black-Eyed Susan flower head

Processing and Cleaning

After collecting your perennial flower seeds, proper cleaning and processing ensures the best storage conditions and germination rates. Start by spreading your collected seeds on a clean, dry paper towel and removing any debris, petals, or seed pods. For seeds in pods or with attached fluff (like coneflowers or salvias), gently separate them using a fine-mesh strainer or by hand.

Let the cleaned seeds air dry completely for 5-7 days in a well-ventilated area away from direct sunlight. Zone 9’s humidity can affect drying time, so ensure seeds are thoroughly dried before storage to prevent mold growth. You can test if seeds are ready by trying to bend them – properly dried seeds should snap rather than fold.

For seeds with stubborn chaff, try using a simple winnowing method: pour seeds from one container to another in front of a small fan on low speed. The lighter chaff will blow away while the heavier seeds fall into the catching container.

Label each batch of seeds immediately after cleaning with the plant name, collection date, and any specific notes about the parent plant. This documentation helps track seed viability and breeding success in future growing seasons.

Proper Seed Storage

Temperature and Humidity Control

In zone 9’s warm climate, maintaining ideal storage conditions for perennial flower seeds requires careful attention to temperature and humidity levels. Proper seed storage methods are crucial for preserving seed viability, especially during hot summers and humid periods.

Store seeds in a cool, dry location with temperatures between 35-50°F (1.7-10°C). A dedicated drawer in your refrigerator works perfectly, but ensure seeds are completely dry before storing to prevent mold growth. Use moisture-absorbing packets or food-grade diatomaceous earth in storage containers to combat zone 9’s higher humidity levels.

For long-term storage, maintain relative humidity below 40%. Consider using airtight glass jars or moisture-proof seed storage envelopes. Label everything clearly with the date and flower variety. Check stored seeds monthly for any signs of moisture or pest activity.

During particularly humid seasons, run a dehumidifier in your seed storage area or create a modified climate-controlled space using a small wine cooler set to the appropriate temperature range. This extra effort will reward you with higher germination rates and healthier seedlings next growing season.

Storage Containers and Organization

Proper storage of your perennial flower seeds is crucial for maintaining their viability in zone 9’s warm climate. Glass mason jars with airtight lids work excellently as primary storage containers, protecting seeds from humidity and unwanted pests. For smaller quantities, paper envelopes or small kraft paper bags are perfect, as they allow seeds to breathe while preventing moisture buildup.

Create detailed labels for each seed variety, including the plant name, collection date, and expected viability period. Consider using waterproof labels or permanent markers to prevent fading in our humid environment. Small silica gel packets can be added to storage containers to absorb excess moisture, particularly important during our humid summers.

Organize your seed collection by bloom time or plant family, making it easier to plan your seasonal plantings. A simple index card system or spreadsheet can help track your inventory. Store containers in a cool, dark place with consistent temperature – a dedicated cabinet or drawer in an air-conditioned space works well. Aim for storage temperatures between 35-50°F with relative humidity below 50% for optimal seed longevity.

Properly labeled and stored perennial flower seeds in airtight glass containers
Organized seed storage system showing labeled glass jars with silica gel packets

Seed Viability Testing

Before planting your saved perennial flower seeds, it’s essential to check their viability to ensure successful germination. The good news is that testing seed viability can be done easily at home using simple methods that any gardener can master.

The most reliable method is the paper towel test. Take 10 seeds from your collection, place them on a damp paper towel, and fold it over to keep the seeds moist. Put the towel in a plastic bag and keep it in a warm spot around 70-75°F. Check daily and mist with water if needed. After 7-10 days, count how many seeds sprouted. If 8 or more germinate, you have excellent viability; 5-7 indicates moderate viability, while fewer than 5 suggests you may need fresh seeds.

For larger seeds, you can try the float test. Place the seeds in a container of water and wait 15 minutes. Seeds that sink are usually viable, while floating seeds are often empty or damaged. However, this method isn’t foolproof, as some healthy seeds naturally float.

In zone 9’s warm climate, seeds can lose viability more quickly due to heat and humidity. Store tested seeds in airtight containers with silica gel packets to absorb excess moisture. Keep them in a cool, dark place like a basement or refrigerator to extend their life span.

Remember that different perennial species have varying seed longevity. Some may remain viable for 2-3 years, while others might only last a season. Testing a small batch before planting your entire garden can save time and ensure better results in your zone 9 garden.

Growing perennial flowers from seeds in zone 9 offers endless possibilities for creating a sustainable and vibrant garden that returns year after year. By selecting native and well-adapted varieties, practicing proper seed collection and storage techniques, and understanding the unique growing conditions of your Mediterranean climate, you can establish a thriving flower garden that benefits both local pollinators and the environment.

Remember to start seeds at the right time, typically in early fall or late winter in zone 9, and provide appropriate care during their establishment period. Consider creating a seed exchange network with fellow gardeners in your area to share successful varieties and maintain genetic diversity in your garden. This not only helps preserve heirloom varieties but also builds a stronger gardening community.

As you develop your perennial garden, focus on sustainable practices like mulching, water conservation, and natural pest control methods. By saving your own seeds and growing perennials, you’re not just creating beauty – you’re contributing to a more sustainable future while enjoying the rewards of a garden that becomes more magnificent with each passing season.

Solar-Powered Farms: How Renewable Energy is Revolutionizing Modern Agriculture

Posted by darrell on
0
Agroecology and Ecosystem Practices
Solar-Powered Farms: How Renewable Energy is Revolutionizing Modern Agriculture

Imagine an agricultural system that works in perfect harmony with nature – that’s exactly how modern agroecosystems transform your farm into a living powerhouse. These intricate networks of crops, soil microorganisms, beneficial insects, and natural processes create self-sustaining cycles that boost productivity while protecting our environment.

Unlike conventional farming, agroecosystems mimic natural ecosystems by integrating multiple species, maximizing resource efficiency, and minimizing external inputs. They represent a revolutionary approach to agriculture that combines traditional farming wisdom with cutting-edge ecological science. From small urban gardens to large-scale operations, these systems are proving that productivity and environmental stewardship can go hand in hand.

Today’s farmers are discovering that by working with nature rather than against it, they can create resilient, productive landscapes that generate abundant harvests while building soil health, supporting biodiversity, and helping combat climate change. As we face increasing environmental challenges, agroecosystems offer a promising path forward for sustainable food production that nourishes both people and planet.

Understanding Modern Agroecosystems

The Farm as an Ecosystem

A farm is more than just a place where crops grow and animals graze – it’s a vibrant ecosystem where countless elements work together in harmony. Like natural ecosystems, farms feature complex relationships between living organisms and their environment. Plants, insects, soil microorganisms, livestock, and wildlife all play crucial roles in maintaining the farm’s health and productivity.

In this interconnected system, each component serves multiple purposes. Cover crops protect the soil and provide habitat for beneficial insects. Livestock contribute natural fertilizer while helping to manage vegetation. Pollinators support crop production while beneficial insects help control pests naturally. Even weeds can play positive roles by preventing soil erosion and supporting biodiversity.

The soil itself is a thriving ecosystem, home to billions of microorganisms that break down organic matter, cycle nutrients, and maintain soil structure. Understanding these relationships helps farmers work with nature rather than against it. By viewing their farm as an ecosystem, farmers can make management decisions that support these natural processes, leading to more resilient and sustainable agricultural systems.

Energy Flow in Agricultural Systems

Traditional agricultural systems rely heavily on energy inputs at various stages of food production. From tilling the soil to harvesting crops, farmers traditionally depended on manual labor, animal power, and fossil fuels to keep their operations running. Today, many farms are transitioning to more sustainable energy practices by incorporating smart farming technologies and renewable energy sources.

Energy flows through an agricultural system in multiple ways: solar energy powers photosynthesis in crops, mechanical energy drives farm equipment, and thermal energy maintains optimal growing conditions in greenhouses. Understanding these energy pathways helps farmers optimize their resource use and reduce operational costs.

Modern farmers are increasingly adopting solar panels, wind turbines, and biogas digesters to generate clean energy on-site. These sustainable solutions not only decrease dependency on fossil fuels but also create opportunities for farms to become energy independent. Some innovative farmers even generate surplus power, which they can sell back to the grid, creating an additional revenue stream while contributing to a more sustainable food system.

Diagram depicting energy flows and interconnections in a modern agroecosystem
Infographic showing energy flow diagram in an agroecosystem, illustrating connections between solar power, wind energy, and farming operations

Renewable Energy Solutions for Farms

Aerial photograph of agricultural land with solar panels installed between crop rows
Aerial view of a modern farm with solar panels integrated alongside crop fields, showing the coexistence of agriculture and renewable energy

Solar Power in Agriculture

Solar power has become a game-changer in modern agriculture, offering farmers sustainable solutions for powering their operations while reducing energy costs. From solar-powered irrigation systems to greenhouse climate control, this renewable energy source is transforming how farms operate.

Many farmers are installing solar panels on barn roofs and unused land to generate electricity for various farm operations. These systems can power everything from water pumps and electric fencing to cold storage facilities and processing equipment. For example, dairy farmer Sarah Johnson in Wisconsin reduced her monthly energy bills by 75% after installing a solar array to power her milking parlor and cooling systems.

Solar-powered irrigation systems are particularly valuable in remote areas where grid connection is expensive or unavailable. These systems use photovoltaic panels to pump water from wells or reservoirs, providing reliable irrigation while eliminating fuel costs and reducing carbon emissions.

Smart greenhouse operations benefit significantly from solar technology. Solar panels can power ventilation fans, heating systems, and automated controls while providing partial shade for sensitive crops. Some innovative farmers even use semi-transparent solar panels that allow specific light wavelengths to pass through, optimizing both energy generation and plant growth.

The initial investment in solar equipment is often offset by government incentives, tax credits, and significant long-term energy savings. Plus, many farmers generate excess power they can sell back to the grid, creating an additional revenue stream for their operations.

Wind Energy Integration

Wind energy integration in agroecosystems offers farmers a sustainable way to power their operations while maintaining productive agricultural land. Modern wind turbines can coexist harmoniously with crops and livestock, taking up minimal ground space while generating clean electricity for farm operations.

Many farmers have discovered that wind turbines can provide reliable power for irrigation systems, barn ventilation, and equipment charging. For example, the Johnson Family Farm in Iowa installed two medium-sized turbines that now power their entire dairy operation, including milk storage facilities and automated feeding systems.

The space between turbines remains fully functional for growing crops or grazing livestock. Some farmers have reported that the gentle air mixing from turbines can help protect crops from frost and reduce humidity-related plant diseases. Additionally, the rental income from hosting wind turbines provides farmers with a steady secondary revenue stream, helping to stabilize farm income during challenging growing seasons.

Getting started with wind energy doesn’t always require large investments. Small-scale turbines can power individual farm buildings or specific operations, allowing farmers to test the benefits before expanding. Local agricultural extension offices often provide guidance on wind resource assessment and available incentives for renewable energy projects.

Remember to consider factors like average wind speeds, local zoning regulations, and grid connection requirements when planning wind energy integration. Many successful farm operations start small and gradually expand their renewable energy capacity as they see the benefits firsthand.

Biomass and Biogas Systems

On modern farms, waste isn’t really waste anymore – it’s an opportunity for energy generation! Biomass and biogas systems transform agricultural byproducts into valuable renewable energy sources, perfectly aligning with circular agriculture principles. These systems collect organic materials like crop residues, animal manure, and food processing waste, converting them into usable energy through various processes.

Biogas digesters are becoming increasingly popular on farms, breaking down organic matter to produce methane-rich biogas that can power generators or heat farm buildings. For example, dairy farmer Sarah Thompson installed a biogas system that converts cow manure into enough electricity to power her entire milking operation and farmhouse, with surplus energy sold back to the grid.

Biomass systems, on the other hand, directly burn agricultural waste to generate heat or electricity. Wood chips from pruned orchards, corn stalks, and other crop residues can fuel biomass boilers, providing sustainable heating for greenhouses and farm buildings. These systems not only reduce waste and energy costs but also create valuable byproducts like nutrient-rich fertilizer that can be returned to the soil.

The beauty of these systems lies in their ability to close the loop on farm waste while generating clean, renewable energy. Many farmers report significant reductions in their energy bills and environmental impact after implementing these solutions.

Real Success Stories: Farms Leading the Way

Side-by-side comparison of traditional farm and its renewable energy upgrade
Split image showing before/after transformation of a family farm implementing renewable energy systems, featuring solar panels and wind turbines

Small-Scale Success

Small-scale success stories in agroecosystems often emerge from family farms that embrace diversity and natural cycles. The Martinez family in California transformed their 5-acre plot into a thriving ecosystem by integrating fruit trees, vegetables, and free-range chickens. Their innovative approach includes using chicken manure as fertilizer while the birds help with pest control, creating a self-sustaining cycle that has doubled their crop yield.

In Vermont, the Green Mountain Farm demonstrates how small-scale operations can maximize efficiency through companion planting. By growing corn, beans, and squash together – known traditionally as the “Three Sisters” method – they’ve reduced water usage by 30% while improving soil health. Their success has inspired neighboring farms to adopt similar practices.

The Wilson’s Urban Homestead in Oregon showcases how even a one-acre plot can become a productive agroecosystem. They’ve implemented vertical growing systems, rainwater harvesting, and beneficial insect gardens, producing enough food to feed their family of four with surplus for local farmers’ markets. Their clever use of space and natural resources proves that size isn’t a limiting factor in creating successful agroecosystems.

These examples show that small-scale farming can be both environmentally sustainable and economically viable when natural systems are properly understood and integrated. Each success story demonstrates how working with nature, rather than against it, leads to resilient and productive agricultural systems.

Large-Scale Transformation

Commercial farms across the globe are increasingly embracing agroecosystem principles, leading to remarkable transformations in agricultural practices. Take the Polyface Farm in Virginia, for example, where Joel Salatin has pioneered a rotational grazing system that mimics natural ecosystems. His approach has turned 550 acres into a highly productive operation that supports cattle, chickens, pigs, and rabbits while improving soil health year after year.

In California’s Central Valley, Lundberg Family Farms demonstrates how large-scale rice production can work in harmony with nature. Their operation incorporates wildlife-friendly farming practices, including flooding fields during winter to create temporary wetlands for migrating birds. They’ve also implemented solar panels to power their processing facilities, combining renewable energy with sustainable agriculture.

The Rodale Institute’s farming operations showcase how organic farming can be scaled up without sacrificing productivity. Their long-term studies have proven that organic systems can match or exceed conventional yields while building soil health and sequestering carbon. They utilize cover crops, crop rotation, and natural pest management strategies across hundreds of acres.

These success stories highlight how commercial operations can successfully transition to more sustainable practices while maintaining profitability. Many have reported reduced input costs, improved soil quality, and enhanced biodiversity, proving that ecological farming principles can work at any scale.

Getting Started with Renewable Energy

Assessment and Planning

Evaluating an agroecosystem’s energy needs starts with a comprehensive site assessment that considers multiple factors, including climate conditions, available resources, and existing infrastructure. Farmers should track their current energy usage patterns across all operations, from irrigation systems to storage facilities, to identify areas where renewable solutions could be most impactful.

Creating an energy management plan involves mapping out both short-term and long-term goals while considering seasonal variations in energy demands. This planning process should align with climate-resilient farming practices to ensure sustainable outcomes.

Key assessment steps include:
– Analyzing solar exposure and wind patterns
– Evaluating water resources and flow rates
– Calculating current energy costs and consumption
– Identifying peak usage periods
– Assessing available space for renewable energy installations

Consider starting with small-scale pilot projects to test different solutions before making larger investments. Many farmers find success by implementing a mix of renewable energy sources, such as combining solar panels for irrigation with biomass for heating. Remember to factor in potential incentives and grants when evaluating the financial feasibility of different options.

Resources and Support

Numerous resources and support systems are available to help farmers and gardeners develop successful agroecosystems. The USDA offers several grant programs, including the Environmental Quality Incentives Program (EQIP) and Conservation Stewardship Program (CSP), which provide financial assistance for implementing sustainable practices.

Local extension offices serve as valuable knowledge hubs, offering free consultations, soil testing services, and workshops on sustainable farming techniques. Many states also provide tax incentives for implementing renewable energy systems and water conservation methods in agricultural operations.

For beginners, organizations like the Sustainable Agriculture Research and Education (SARE) program offer detailed guides, online courses, and mentorship opportunities. Community-supported agriculture (CSA) networks can provide both financial and operational support through member investments and shared resources.

Additionally, various non-profit organizations offer microloans and technical assistance specifically for small-scale farmers transitioning to sustainable practices. These resources often include guidance on certification processes, marketing strategies, and connecting with local food networks, making the journey to sustainable farming more accessible and financially viable.

The integration of renewable energy in agroecosystems represents a powerful step toward a more sustainable and resilient agricultural future. As we’ve seen through numerous success stories, farmers who embrace solar, wind, and biogas technologies not only reduce their carbon footprint but also enjoy significant cost savings and increased energy independence.

Looking ahead, the outlook for renewable energy in agroecosystems is incredibly promising. Technological advancements continue to make sustainable energy solutions more affordable and efficient, while growing consumer demand for environmentally responsible farming practices drives further adoption. Innovative approaches like agrivoltaics, which combines solar panels with crop production, showcase how renewable energy can complement rather than compete with traditional farming activities.

The benefits extend beyond individual farms to entire communities. Local food systems powered by renewable energy create jobs, strengthen regional food security, and help build climate-resilient agricultural practices. Small-scale farmers are finding that renewable energy installations can provide additional income streams while supporting their primary agricultural operations.

For those considering the transition to renewable energy, there’s never been a better time to start. Government incentives, improved storage solutions, and decreasing installation costs make sustainable energy more accessible than ever. By embracing these technologies, farmers can position themselves at the forefront of agricultural innovation while contributing to a more sustainable food system for future generations.

How CSA Farms Transform Communities Through Social Work Principles

Posted by darrell on
0
CSA Fundamentals and Benefits
How CSA Farms Transform Communities Through Social Work Principles

The Council on Social Work Education’s (CSWE) nine core competencies serve as the bedrock of modern social work practice, transforming how community-supported agriculture (CSA) programs address food justice and social equity. These fundamental competencies – from ethical practice to community engagement – provide CSA organizers with a powerful framework to build more inclusive, sustainable food systems that serve diverse communities.

By integrating professional ethics, cultural competence, and evidence-based practice, CSA programs can move beyond simply providing fresh produce to become catalysts for social change. Whether working with limited-resource families, addressing food deserts, or creating educational programs for youth, these competencies enable agricultural initiatives to tackle complex social challenges while promoting environmental stewardship.

As local food systems evolve to meet growing community needs, understanding and implementing these core competencies becomes crucial for CSA managers, farm educators, and community organizers. This practical guide explores how each CSWE competency translates into actionable strategies for creating more equitable, accessible, and sustainable food networks that truly serve all members of our communities.

Multi-ethnic group harvesting vegetables together at a community farm
Diverse group of community members and farmers working together in a CSA garden

Fostering Community Engagement Through CSA Programs

Building Meaningful Relationships

CSA programs excel at building stronger, more inclusive communities by fostering meaningful connections between farmers and their members. These relationships go beyond simple transactions, creating a supportive network that benefits both parties. Farmers get to know their members personally, understanding their preferences and dietary needs, while members gain insight into the challenges and triumphs of local agriculture.

Regular farm visits, harvest celebrations, and volunteer opportunities allow members to participate directly in food production, creating lasting bonds with their farmers and fellow CSA members. Many CSAs also organize educational workshops, cooking demonstrations, and family-friendly events that bring people together around shared values of sustainable agriculture and healthy eating.

These connections often extend beyond the growing season, with members becoming long-term advocates for local food systems and sustainable farming practices. Through social media groups, newsletters, and community gatherings, CSAs create spaces for meaningful dialogue about food security, environmental stewardship, and local economic development.

Cultural Competency in Food Systems

Cultural competency in CSA programs goes beyond simply offering diverse produce varieties. Successful CSA farmers recognize and honor the various cultural food traditions within their communities, adapting their growing plans to meet these diverse needs. This might include cultivating specific ethnic crops, providing recipes that reflect different cultural cooking styles, and ensuring communications are accessible in multiple languages.

Many CSAs now collaborate with cultural community leaders to better understand dietary preferences and traditional farming practices. For example, some programs grow traditional Asian greens alongside typical Western vegetables, while others include heritage varieties from Latin American cuisine. These efforts help create more inclusive food systems that celebrate and preserve cultural food traditions.

To enhance cultural competency, CSA programs often organize multicultural cooking demonstrations, harvest festivals, and educational workshops that highlight diverse farming techniques. This approach not only serves various community needs but also enriches the overall CSA experience for all members, fostering cross-cultural understanding and appreciation through shared food experiences.

Social Justice in Local Food Access

Economic Accessibility Programs

Social workers in CSA programs play a vital role in making fresh, local produce accessible to all community members through innovative economic programs. By implementing sliding scale payment systems, farms can serve diverse economic backgrounds while helping to boost your local economy. These flexible payment structures allow members to pay based on their income level, ensuring that nutritious food remains within reach for families facing financial challenges.

Many successful CSAs integrate with food assistance programs like SNAP (Supplemental Nutrition Assistance Program) and WIC (Women, Infants, and Children), making it easier for eligible participants to use their benefits for fresh produce. Social workers help coordinate these partnerships and guide members through the enrollment process, removing barriers to participation.

Some innovative CSAs have established community fund programs where more financially secure members can contribute additional funds to support reduced-cost shares for others. This creates a sustainable model of community support while maintaining the farm’s economic viability. Social workers also connect members with additional resources like cooking classes, nutrition education, and budgeting workshops to maximize the value of their CSA participation.

By focusing on economic accessibility, social workers ensure that local organic produce becomes a realistic option for all community members, regardless of their financial situation.

CSA farm stand displaying prices and payment options including 'Pay what you can' and 'EBT accepted here' signs
Farm stand with sliding scale payment signage and EBT acceptance

Educational Outreach Initiatives

Educational outreach initiatives in sustainable food systems blend social work principles with agricultural education to create lasting community impact. Social workers partner with local farms, schools, and community organizations to develop programs that teach sustainable farming practices while addressing food security and social justice issues.

These initiatives often include hands-on workshops where community members learn about organic growing methods, composting, and seasonal crop planning. Social workers facilitate these learning experiences while ensuring programs remain accessible to diverse populations, including low-income families and historically underserved communities.

Youth education programs are particularly effective, combining classroom learning with practical garden experience. Students participate in planting, harvesting, and preparing fresh produce while learning about nutrition, environmental stewardship, and food justice. These programs often incorporate culturally relevant growing practices and recipes, honoring diverse community traditions.

Social workers also organize community education events focused on food preservation, cooking demonstrations, and farmers’ market operations. These sessions build practical skills while fostering community connections and promoting food system literacy. Through collaborative partnerships with local farmers, participants gain firsthand knowledge of sustainable agriculture while developing a deeper understanding of food production challenges and solutions.

By integrating social work competencies into agricultural education, these programs create meaningful change in how communities understand and interact with their food systems, promoting both environmental and social sustainability.

Advancing Human Rights Through Sustainable Agriculture

Environmental Justice

Community Supported Agriculture (CSA) programs play a vital role in promoting environmental justice and ecological sustainability in underserved communities. Through sustainable agriculture practices, CSAs help address food inequities while preserving natural resources and promoting biodiversity. These programs work to ensure that all community members, regardless of socioeconomic status, have access to fresh, nutritious produce while supporting environmental stewardship.

CSAs implement various strategies to promote ecological justice, including offering sliding-scale payment options, accepting SNAP benefits, and establishing community gardens in food desert areas. They also provide educational workshops on composting, water conservation, and organic farming methods, empowering residents to become environmental stewards in their neighborhoods.

By partnering with local social workers, CSAs create programs that address both environmental and social justice concerns. These collaborations often result in innovative solutions like youth farming programs, senior citizen garden initiatives, and cross-cultural farming exchanges that celebrate diverse agricultural traditions while promoting sustainable practices.

The success of these programs demonstrates how combining social work principles with sustainable agriculture can create lasting positive change in communities while protecting our environment for future generations.

Labor Rights and Fair Practices

Fair labor practices are foundational to ethical social work in agricultural settings. CSA programs must prioritize the well-being of all farm workers through comprehensive policies that ensure safe working conditions, fair wages, and reasonable hours. This includes providing proper safety equipment, regular breaks, and protection from hazardous materials or extreme weather conditions.

Social workers advocate for farm worker rights by establishing clear communication channels between management and laborers, facilitating conflict resolution, and ensuring access to healthcare and workers’ compensation. They help implement transparent wage structures that reflect the value of agricultural labor and support workers’ financial stability.

Cultural competency plays a vital role, as many farm workers come from diverse backgrounds. Social workers help create inclusive environments that respect cultural differences, language needs, and traditional farming practices. They also support workers’ rights to organize and participate in decision-making processes that affect their working conditions.

Training programs and skill development opportunities should be readily available, allowing workers to advance their careers and increase their earning potential. Social workers help design and implement these educational initiatives while ensuring they’re accessible and culturally appropriate. By prioritizing fair labor practices, CSA programs create sustainable working environments that benefit both workers and the broader agricultural community.

Research-Informed CSA Practices

Measuring Community Impact

Effective community impact measurement is essential for CSA programs that aim to transform local communities through sustainable agriculture. Successful programs typically employ a mix of quantitative and qualitative assessment tools to track their progress and outcomes. These include participant surveys, food access metrics, and regular community feedback sessions.

Key measurement areas often focus on:
– Number of families served through food assistance programs
– Increase in local food accessibility
– Community engagement levels
– Educational program participation rates
– Economic impact on local farmers
– Environmental sustainability indicators

Many CSAs use digital tracking systems to monitor distribution patterns and member satisfaction, while maintaining detailed records of harvest yields and resource allocation. Regular assessment helps programs adjust their strategies to better serve community needs and demonstrate their value to stakeholders.

Regular outcome evaluation enables CSAs to identify areas for improvement and celebrate successes, creating a continuous cycle of community-centered growth and development.

Data visualization showing statistics on food access improvement, community engagement, and environmental benefits of CSA programs
Infographic showing positive community impact metrics of CSA programs

Continuous Program Improvement

Community feedback is the cornerstone of effective social work practice, and successful practitioners consistently refine their approaches based on input from those they serve. This involves regularly gathering feedback through surveys, community meetings, and one-on-one conversations with clients and stakeholders. Social workers must stay attuned to changing community needs and adapt their services accordingly.

Effective program improvement also requires careful documentation and analysis of outcomes. Social workers track the success of their interventions, identify areas for growth, and implement evidence-based adjustments to enhance service delivery. This might involve modifying counseling techniques, updating resource referral networks, or restructuring program schedules to better accommodate community members.

The process is inherently collaborative, often involving team meetings where social workers share insights, discuss challenges, and brainstorm solutions. Professional development plays a crucial role, with practitioners staying current on emerging best practices through continuing education, peer supervision, and engagement with professional networks. This commitment to continuous improvement ensures that social work services remain relevant, effective, and responsive to evolving community needs.

Policy Practice in Local Food Systems

CSAs play a vital role in shaping local food policies and advocating for sustainable agriculture practices. Through community engagement and grassroots organizing, these organizations work to influence policy decisions that affect food access, land use, and farming regulations.

Successful CSA programs often partner with local government officials, social workers, and community leaders to develop initiatives that support small-scale farmers and expand access to fresh, healthy food. These partnerships have led to innovative programs like double-up food bucks at farmers’ markets, zoning changes that protect farmland, and farm-to-school programs that connect local growers with educational institutions.

Many CSAs engage in policy practice by organizing member advocacy days, where participants can learn about food policy issues and communicate directly with their representatives. They also collaborate with social workers to identify barriers to food access and develop solutions that address community needs. This might include establishing mobile markets in food desert areas or creating sliding-scale payment options for low-income families.

Social workers within CSA programs often help document the impact of local food systems on community well-being, gathering data that supports policy advocacy efforts. They may track metrics like improved nutrition outcomes, increased food security, and economic benefits to local farmers. This evidence-based approach strengthens proposals for policy changes and funding requests.

By combining social work principles with agricultural expertise, CSAs create powerful advocacy networks that promote food justice and sustainable farming practices while ensuring their communities have a voice in local food policy decisions.

Community Supported Agriculture programs exemplify the core competencies of social work by creating meaningful connections between farmers and communities while addressing systemic food access challenges. Through direct farmer-consumer relationships, CSAs build trust and understanding across diverse populations, fostering social justice and equitable food distribution. These programs demonstrate ethical practice by prioritizing transparency in growing methods and pricing, while ensuring fair compensation for farmers’ labor.

By engaging with local schools, food banks, and community organizations, CSAs advance human rights and social justice through innovative sliding-scale payment options and food assistance partnerships. They create lasting change by educating communities about sustainable agriculture, nutrition, and environmental stewardship. The collaborative nature of CSAs reflects social work’s emphasis on engaging with individuals and communities to promote positive outcomes.

CSAs serve as practical examples of how social work principles can transform local food systems. They address food insecurity through policy advocacy, community organization, and direct service delivery. By incorporating diverse voices in decision-making processes and adapting to community needs, these programs demonstrate cultural competency and responsiveness.

The success of CSAs in creating lasting community change shows how social work competencies can be effectively applied outside traditional settings. Through this integration of social work principles and sustainable agriculture, CSAs continue to build more resilient, equitable, and connected communities.

Farm-Fresh Cooking Classes: Where NC’s CSA Bounty Meets Culinary Excellence

Posted by darrell on
0
Culinary and Food Preservation
Farm-Fresh Cooking Classes: Where NC’s CSA Bounty Meets Culinary Excellence

Transform your culinary journey at North Carolina’s premier cooking schools, where traditional Southern flavors meet modern farm-to-table cooking skills. From Charlotte’s innovative Culinary Arts Institute to Asheville’s sustainable cooking academies, NC offers diverse programs that combine hands-on training with fresh, local ingredients. Whether you’re pursuing professional certification or expanding your home cooking expertise, these schools uniquely integrate seasonal CSA produce into their curriculum, teaching students to master both classic techniques and creative farm-fresh recipes. Professional chefs and passionate home cooks alike discover how to transform weekly CSA harvests into extraordinary meals while building a strong foundation in culinary fundamentals. Local cooking schools celebrate North Carolina’s rich agricultural heritage while preparing students for modern culinary challenges in professional kitchens or home settings.

Top CSA-Based Cooking Schools in North Carolina

Chef teaching students how to prepare seasonal vegetables in a cooking class
Professional chef demonstrating cooking techniques to students using fresh CSA vegetables

Triangle Region Programs

The Triangle region offers a vibrant mix of culinary education opportunities, with programs catering to both aspiring chefs and home cooks. Durham’s Cooking Connection hosts hands-on workshops focusing on farm-to-table cuisine, teaching participants how to transform local seasonal produce into delicious meals. In Raleigh, the Professional Cooking Institute provides comprehensive professional training programs, including specialized courses in Southern cuisine and modern cooking techniques.

Chapel Hill’s Kitchen Works partners with local farms to offer unique farm-to-kitchen experiences, where students harvest ingredients before learning to prepare them. The Natural Chef Program at Central Carolina Community College in Pittsboro stands out for its holistic approach, combining nutrition education with sustainable cooking practices.

For those seeking flexible learning options, Sur La Table in Durham’s University Hill and Williams-Sonoma at Raleigh’s North Hills offer regular cooking demonstrations and technique-focused classes. These shorter workshops are perfect for busy professionals wanting to enhance their culinary skills while supporting local food systems. Many programs offer weekend intensives and evening classes to accommodate various schedules, making culinary education accessible to everyone in the Triangle area.

Mountain Region Offerings

The mountain region of North Carolina, particularly Asheville and its surroundings, offers a unique blend of farm-to-table cooking experiences and traditional Appalachian culinary education. At the Asheville-Buncombe Technical Community College, students can enroll in professional culinary programs that emphasize local ingredients and mountain cooking traditions. The acclaimed John C. Campbell Folk School in Brasstown provides immersive weekend workshops where participants learn everything from biscuit-making to preserving mountain herbs.

For those seeking a more intimate learning experience, Several local chefs offer private cooking classes in their restaurant kitchens during off-hours. These hands-on sessions often feature foraging excursions for mushrooms and wild edibles, followed by instruction in preparing these mountain delicacies. The Seasonal School of Culinary Arts hosts week-long sessions throughout the year, focusing on seasonal ingredients from local farmers and producers.

Many mountain region cooking schools have also partnered with local organic farms to provide farm-to-table workshops, where students harvest ingredients before learning to prepare them in traditional and contemporary Appalachian styles.

What Makes CSA Cooking Classes Unique

Collection of fresh, colorful seasonal vegetables from North Carolina farms
Diverse array of seasonal NC produce arranged on a rustic wooden table

Seasonal Learning Experience

North Carolina’s cooking schools embrace the rhythm of the seasons, crafting their curriculum around seasonal produce availability to provide students with authentic farm-to-table experiences. Spring classes often focus on tender greens, asparagus, and early herbs, teaching students to create light, refreshing dishes that celebrate new growth. As summer arrives, instruction shifts to handling the abundance of tomatoes, peppers, and summer squash, with preserving techniques taking center stage.

Fall brings lessons in root vegetables, winter squashes, and hearty greens, while winter sessions explore creative ways to work with storage crops and greenhouse-grown produce. Many schools partner with local farms to ensure students learn to cook with what’s currently being harvested, making each class uniquely tied to North Carolina’s agricultural calendar.

This seasonal approach helps students develop a deeper connection with local food systems and enhances their understanding of ingredient selection. Classes often include tips for ingredient substitution and menu planning based on what’s available throughout the year, ensuring graduates can adapt their cooking skills to any season.

Farm-to-Kitchen Skills

North Carolina’s cooking schools emphasize the importance of handling fresh, local ingredients with skill and respect. Students learn essential techniques like proper washing and storage of farm-fresh produce to maximize shelf life and preserve nutrients. Hands-on classes teach the art of selecting ripe vegetables, identifying peak-season produce, and understanding harvest times for different crops.

Instructors demonstrate knife skills specifically tailored to working with fresh ingredients, from precisely cutting delicate herbs to breaking down root vegetables. Students master preservation methods including pickling, fermenting, and canning to make the most of seasonal bounty. Special attention is given to working with lesser-known local varieties and heirloom produce that might not be found in typical grocery stores.

The curriculum often includes farm visits where students learn directly from growers about optimal harvesting techniques and post-harvest handling. Practical sessions cover creating zero-waste menus, utilizing all parts of vegetables, and incorporating freshly harvested herbs and edible flowers into dishes. These skills help students transform their home kitchens into efficient spaces for working with local, seasonal ingredients.

Cooking class participants learning proper knife techniques for fresh produce
Students practicing knife skills with fresh herbs and vegetables

Choosing the Right CSA Cooking Workshop

Experience Levels and Class Types

North Carolina’s cooking schools cater to every skill level, from complete beginners to seasoned home cooks looking to refine their techniques. Many programs offer flexible learning formats, including evening classes, weekend intensives, and extended professional courses. Beginners can start with fundamental knife skills and kitchen safety through community cooking workshops that emphasize hands-on learning with seasonal ingredients. Intermediate students often explore specialized cuisines, advanced techniques, and menu planning, while professional-track programs provide comprehensive training in commercial kitchen operations and food service management.

Class sizes typically range from intimate groups of 8-12 students to larger demonstration-style sessions of up to 30 participants. Some schools offer hybrid learning options, combining online instruction with in-person kitchen practice. Whether you’re interested in casual cooking classes or pursuing a culinary career, North Carolina’s cooking schools provide structured pathways to help you achieve your culinary goals.

Schedule and Location Considerations

Most CSA cooking workshops in North Carolina offer flexible scheduling options to accommodate different lifestyles. Weekly classes typically run in the evenings from 6-9 PM, making them accessible for working professionals. Weekend intensive courses are also available, usually running Saturday mornings from 9 AM to 1 PM, perfect for those who prefer concentrated learning sessions.

Locations vary across the state, with many programs hosted at working farms or dedicated teaching kitchens. Popular venues include the Piedmont region’s sustainable farms and urban cooking spaces in Charlotte, Raleigh, and Asheville. Some programs offer seasonal pop-up workshops that follow harvest schedules, allowing students to work with the freshest local ingredients.

When choosing a program, consider travel time and parking availability. Many schools provide detailed directions and transportation suggestions. Some even offer carpooling networks for students traveling from further distances. Weather considerations are important too, especially for farm-based workshops during summer months.

North Carolina’s cooking schools offer an incredible opportunity to connect with local agriculture while developing valuable culinary skills. Through CSA-focused cooking education, you’ll learn to transform fresh, seasonal produce into delicious meals while supporting local farmers and sustainable practices. These programs provide more than just cooking techniques – they offer a deeper understanding of our food system, seasonal eating, and the importance of community-supported agriculture.

Whether you’re a home cook looking to expand your skills or someone passionate about local food systems, NC’s cooking schools provide the perfect blend of hands-on experience and agricultural education. From mountain to coast, each program brings its own unique perspective while maintaining strong ties to local farms and food producers.

Consider exploring the cooking schools in your area to discover how you can become part of this vibrant culinary community. The skills you’ll gain will last a lifetime, helping you make the most of your CSA shares while contributing to a more sustainable and connected food system in North Carolina.

Fresh From Georgia Soil: Your Month-by-Month Produce Calendar

Posted by darrell on
0
Seasonal Planning and Management
Fresh From Georgia Soil: Your Month-by-Month Produce Calendar

Georgia’s rich soil and diverse climate zones create the perfect environment for an abundance of seasonal produce year-round. From the crisp mountain air of North Georgia to the coastal plains of the South, our state’s farmers harness year-round growing techniques to deliver fresh, local harvests throughout all four seasons.

Discover sweet Vidalia onions emerging in spring, juicy peaches coloring summer markets, hearty collard greens thriving in fall, and nutritious root vegetables sustaining us through winter. This natural rhythm of Georgia’s growing seasons not only provides peak-flavor produce but also supports our local farming communities and reduces environmental impact through decreased transportation needs.

Whether you’re a home gardener planning your plots, a conscious consumer seeking the freshest options, or a market shopper looking to maximize your grocery budget, understanding Georgia’s seasonal bounty helps you eat better, save money, and connect with our state’s agricultural heritage. Let’s explore what each season brings to our tables and how to make the most of nature’s perfect timing.

Spring Bounty (March-May)

Early Spring Crops

As Georgia’s winter frost gives way to warmer days, early spring brings a bounty of fresh, vibrant produce across the state. Strawberries lead the charge, typically appearing in March and reaching their peak sweetness by April. These ruby-red gems thrive in Georgia’s climate, offering locals the perfect opportunity to enjoy fresh-picked berries or participate in popular U-pick experiences at local farms.

Spring onions and their milder cousins, green onions, emerge as essential early-season crops, adding a crisp, zesty flavor to seasonal dishes. Their tender stalks and fresh taste make them a favorite among home cooks and chefs alike.

Leafy greens dominate the early spring landscape, with varieties like kale, collards, and Swiss chard thriving in the mild temperatures. These nutrient-packed greens are particularly sweet and tender when harvested during this time. Spinach and various lettuces also flourish, providing the perfect base for fresh spring salads.

Other early spring favorites include radishes, which can be ready for harvest in as little as 30 days, and tender asparagus spears that signal winter’s end. Herbs like cilantro, parsley, and dill also make their appearance, adding fresh flavors to seasonal cooking.

For Georgia gardeners and farmers, this period marks an exciting transition as the soil warms and new growth emerges. Many of these early spring crops can be planted in succession for continuous harvests throughout the season.

Red ripe strawberries growing on plants with farmer's hands picking them
Fresh Georgia strawberries being harvested in a field during early spring

Late Spring Harvest

Late spring in Georgia brings a bounty of fresh, tender produce that captures the essence of the season. By May, gardens and farms across the state burst with vibrant sweet peas, their delicate tendrils producing crisp, sweet pods perfect for fresh eating or quick cooking. These spring treasures are best harvested in the cool morning hours to preserve their natural sweetness.

New potatoes, those small, tender gems with paper-thin skins, make their eagerly anticipated appearance during this time. Unlike their mature counterparts, these young potatoes offer a delightfully creamy texture and subtle, nutty flavor that’s uniquely spring. They’re particularly wonderful when simply prepared with fresh herbs and butter.

Speaking of herbs, late spring sees an explosion of aromatic varieties throughout Georgia gardens. Fragrant basil, cilantro, dill, and parsley thrive in the warming temperatures, providing essential flavors for seasonal cooking. These herbs not only enhance your dishes but also attract beneficial pollinators to your garden.

This is also prime time for harvesting tender salad greens before the summer heat sets in. Look for butter lettuce, arugula, and spinach, which offer the perfect base for light spring meals. Local farmers’ markets showcase these seasonal delights, often harvested just hours before sale for peak freshness and flavor.

Remember to harvest these spring crops regularly to encourage continued production before the intense Georgia summer arrives.

Summer’s Peak Season (June-August)

Georgia’s Famous Peaches

Georgia’s signature peaches grace our markets from mid-May through early August, with peak season hitting in July. These sweet, juicy fruits have earned our state its nickname “The Peach State,” and for good reason – the unique combination of Georgia’s climate, soil composition, and dedicated farming practices produces some of the most flavorful peaches you’ll ever taste.

Local farmers cultivate several varieties throughout the season, each bringing its own distinctive characteristics to the table. Early-season favorites like SpringPrince and FirePrince kick things off in May, offering a perfectly balanced sweetness that signals summer’s arrival. As June rolls in, you’ll find the deeply colored Red Haven and elegant White Lady peaches filling market stands.

July brings the crown jewels of Georgia’s peach harvest – the freestone varieties. These include the celebrated Elberta peach, known for its rich golden flesh and easy pit removal, and the Belle of Georgia, prized for its white flesh and honey-sweet flavor. These varieties are particularly popular for canning and preserving, allowing locals to enjoy Georgia peach goodness year-round.

For the best peach-picking experience, look for fruits that give slightly when gently squeezed and have a strong, sweet aroma. Local farmers recommend storing firm peaches at room temperature until they reach desired ripeness, then transferring them to the refrigerator. For maximum flavor, bring them back to room temperature before eating.

Many small family farms across the state offer U-pick experiences during peak season, providing a wonderful opportunity to connect with local agriculture while gathering the freshest peaches possible.

Close-up of fuzzy, pink-orange Georgia peaches hanging on a tree branch
Sun-ripened Georgia peaches on a tree branch with morning light

Summer Vegetables

Georgia’s summer growing season brings an abundance of vibrant vegetables that thrive in the warm southern climate. To optimize summer growing conditions, many local farmers plant their crops in stages, ensuring a continuous harvest throughout the season.

Tomatoes reign supreme during Georgia summers, with varieties like Cherokee Purple and Better Boy producing sweet, juicy fruits from June through September. These heat-loving plants are joined by an array of peppers, from mild bell peppers to spicy jalapeños and heritage varieties like the Georgia Flame.

Sweet corn becomes a staple during these months, with Silver Queen and Peaches & Cream varieties offering exceptional sweetness. For the best flavor, many local farmers suggest eating corn the same day it’s picked. Okra, a Southern favorite, produces abundantly in the hot weather, with farmers harvesting the tender pods every few days.

Summer squash varieties flourish, including yellow crookneck, zucchini, and patty pan squash. These prolific plants often produce more than enough for both market and table. Eggplants reach their peak during this time, with both traditional Italian varieties and Asian cultivars thriving in Georgia’s heat.

Cucumbers grow rapidly during summer months, perfect for fresh eating or pickling. Green beans, both bush and pole varieties, produce heavy yields when regularly harvested. Many farmers also grow field peas and butter beans, traditional Southern crops that are heat-tolerant and nutrient-rich.

Remember that morning harvesting is crucial for most summer vegetables, helping maintain freshness and optimal flavor in Georgia’s intense summer heat.

Fall Harvest (September-November)

Root Vegetables

Georgia’s rich soil and favorable climate create perfect conditions for growing a variety of nutritious root vegetables. Sweet potatoes are a southern staple, thriving in the state’s sandy loam soil and producing abundantly from late summer through fall. These versatile tubers come in several varieties, from the traditional orange-fleshed Beauregard to the purple-hued Japanese sweet potatoes.

Carrots are another root crop that does exceptionally well in Georgia’s soil, especially during the cooler seasons. Fall plantings often maximize fall harvest yields and produce sweeter carrots, as the cold temperatures encourage sugar development in the roots. Local farmers typically grow both traditional orange carrots and heritage varieties in purple, yellow, and white.

Other successful root crops include turnips, which offer both nutritious roots and leafy greens, and radishes, which can be ready for harvest in as little as 25 days. Parsnips and rutabagas also thrive during Georgia’s mild winters, providing tasty alternatives for seasonal cooking.

Many local organic farmers practice crop rotation with their root vegetables to maintain soil health and prevent pest problems. These crops are not only delicious but also store well, making them excellent choices for sustainable food storage throughout the year.

Fall Fruits

As autumn’s crisp air settles over Georgia, the state’s orchards and vineyards burst with some of the season’s most beloved fruits. Georgia’s apple harvest reaches its peak during fall months, with varieties like Red Delicious, Granny Smith, and the heritage Arkansas Black thriving in the cooler North Georgia climate. These fresh-picked apples offer a sweetness and crunch that store-bought varieties simply can’t match.

Pears also make their grand appearance during fall, with both Asian and European varieties growing beautifully in Georgia’s soil. Bartlett, Seckel, and Kieffer pears are particularly well-suited to our climate, offering gardeners and farmers reliable yields year after year. These versatile fruits are perfect for fresh eating, preserving, or baking into fall desserts.

Perhaps the South’s best-kept secret is the muscadine grape, which reaches perfect ripeness in early fall. These thick-skinned grapes are packed with antioxidants and boast a uniquely sweet flavor that’s distinctly Southern. Whether growing wild or cultivated, muscadines are incredibly resilient and well-adapted to Georgia’s growing conditions, making them an excellent choice for home gardeners.

For the best flavor and nutrition, look for these fall fruits at local farmers markets or consider visiting a pick-your-own orchard. Many Georgia farms offer fall harvest festivals where you can experience picking these seasonal treasures firsthand while supporting local agriculture.

Winter Growing (December-February)

Cold-Hardy Vegetables

Georgia’s winter months bring forth a bounty of cold-hardy vegetables that thrive in the cooler temperatures. Collard greens, a Southern staple, become sweeter and more flavorful after exposure to frost, making them a cherished winter crop. These nutritious greens are joined by their equally robust cousins – kale, mustard greens, and turnip greens – which flourish from late fall through early spring.

Swiss chard and spinach add vibrant color to winter gardens, offering tender leaves packed with vitamins and minerals. Brussels sprouts and cabbage develop their best flavor during the cool season, while root vegetables like turnips and rutabagas store well and provide hearty sustenance throughout winter.

For home gardeners and farmers alike, these cold-hardy vegetables require minimal protection even during Georgia’s occasional freezes. Many can be harvested multiple times throughout the season, providing a continuous supply of fresh, nutritious produce. Their resilience makes them excellent choices for sustainable winter gardening, and their versatility in the kitchen – from traditional Southern dishes to modern healthy recipes – keeps them in high demand at local markets.

Protected Growing

Georgia farmers and gardeners are increasingly turning to protected growing methods to extend their growing seasons and diversify crop production. Greenhouses and high tunnels offer valuable shelter from extreme weather, allowing for year-round cultivation of certain vegetables and herbs. These controlled environments are particularly useful for starting seedlings early and implementing cold-weather growing strategies during Georgia’s mild winters.

Cold frames, which are smaller and more affordable than greenhouses, provide an excellent entry point for home gardeners looking to extend their growing season. These simple structures can protect tender plants from frost and enable earlier spring planting of heat-loving crops like tomatoes and peppers.

Many local farmers combine these methods with traditional outdoor growing, creating a hybrid approach that maximizes production throughout the year. This strategy helps ensure a steady supply of fresh produce even during challenging weather conditions, while reducing dependence on out-of-state imports. Popular protected crops include salad greens, herbs, cherry tomatoes, and specialty items like microgreens, which command premium prices at local markets.

Interior of greenhouse showing organized rows of winter greens and growing equipment
Winter greenhouse growing setup with rows of cold-hardy greens

Storage Tips for Local Produce

Proper storage of your local Georgia produce can help you enjoy the harvest longer while reducing food waste. Here are some tried-and-true storage tips for common Georgia fruits and vegetables:

For leafy greens like collards and kale, wrap them loosely in slightly damp paper towels and store in a plastic bag in the crisper drawer. They’ll stay fresh for up to a week this way. Sweet Vidalia onions need a cool, dry, well-ventilated space – keep them in mesh bags or pantyhose with knots between each onion.

Stone fruits like peaches and plums should ripen on the counter, then move to the refrigerator once they’re perfectly ripe. They’ll last another 3-5 days. For tomatoes, never refrigerate them! Keep them stem-side down on the counter away from direct sunlight.

Root vegetables like sweet potatoes and carrots prefer dark, cool spaces around 55-60°F. Store them in paper bags with a few holes punched for airflow. Summer squash and zucchini do best in the crisper drawer, while winter squash can stay at room temperature for weeks.

For berries, don’t wash them until you’re ready to eat. Store them in a single layer in a paper towel-lined container. Remove any crushed or moldy berries immediately to prevent spreading. Fresh herbs will last longest when treated like flowers – trim the stems and place them in a glass of water with a loose plastic bag over top.

Remember to check your stored produce regularly and use the oldest items first to minimize waste.

Make Your Own Farm-Fresh 7 Spice Blend (Store It for Years)

Posted by darrell on
0
Culinary and Food Preservation
Make Your Own Farm-Fresh 7 Spice Blend (Store It for Years)

Transform your kitchen into an aromatic sanctuary with this traditional 7-spice blend, a centuries-old recipe that helps preserve foods naturally with spices. This versatile blend combines earthy cumin, warm cinnamon, vibrant black pepper, aromatic coriander, nutty allspice, fragrant cloves, and zesty nutmeg to create a symphony of flavors that elevates everything from roasted vegetables to hearty stews. Whether you’re a seasoned home cook or just beginning your culinary journey, crafting your own spice blend ensures maximum freshness, allows complete control over ingredient quality, and connects you to the time-honored tradition of natural food preservation. By sourcing organic, whole spices and grinding them yourself, you’ll create a blend that’s not only more potent and flavorful than store-bought versions but also free from artificial preservatives and anti-caking agents.

Why Make Your Own 7 Spice Blend?

Creating your own 7 spice blend at home is a rewarding practice that offers numerous benefits for both your culinary adventures and your wallet. When you make your own blend, you have complete control over the quality and freshness of each ingredient, ensuring optimal flavor in every pinch. Store-bought blends often sit on shelves for months, losing their potency and aromatic properties.

By mixing your own spices, you can customize the blend to suit your taste preferences. Perhaps you’d like a slightly spicier mix or prefer to emphasize certain flavors – the possibilities are endless. This flexibility allows you to experiment and create a signature blend that’s uniquely yours.

Cost-effectiveness is another compelling reason to make your own spice blend. While the initial investment in quality whole spices might seem higher, the freshly ground blend yields more intense flavors, meaning you’ll use less in your cooking. Plus, buying whole spices in bulk is often more economical than purchasing pre-made blends.

For those concerned about sustainability and food transparency, homemade spice blends allow you to source each ingredient consciously. You can choose organic spices, support local suppliers, and avoid unnecessary packaging waste. Additionally, you’ll know exactly what’s in your blend – no mysterious additives, anti-caking agents, or preservatives that often appear in commercial versions.

Essential Ingredients and Equipment

Sourcing Quality Spices

The key to creating an exceptional 7-spice blend lies in starting with high-quality ingredients. Local farmers’ markets are excellent sources for fresh, organic spices, offering opportunities to meet growers and learn about their cultivation practices. When possible, opt for whole spices rather than pre-ground varieties, as they retain more flavor and essential oils.

Look for spices that have vibrant colors and strong aromas – these are indicators of freshness and proper storage. Quality cinnamon should have a sweet, woody scent, while peppercorns should be uniform in size and feel heavy for their size. Fresh ginger powder should have a sharp, spicy fragrance, and paprika should maintain its bright red hue.

Consider joining a local food co-op or spice collective, where you can often find organic, sustainably sourced spices at better prices. Many specialty stores also offer bulk purchasing options, allowing you to buy smaller quantities to ensure maximum freshness.

Tools for Success

To create your perfect 7 spice blend, you’ll need a few essential tools in your kitchen arsenal. A dedicated spice grinder or coffee grinder is your most valuable ally, allowing you to freshly grind whole spices for maximum flavor. If you prefer traditional methods, a sturdy mortar and pestle works wonderfully for smaller batches and gives you complete control over the grinding process.

Keep a set of measuring spoons handy – precision is key when balancing multiple spices. A fine-mesh sieve helps achieve consistent texture by removing any larger particles after grinding. For storage, you’ll need an airtight glass jar with a tight-fitting lid to maintain freshness and protect your blend from moisture.

Optional but helpful tools include a spice tray for organizing ingredients, small funnels for transferring ground spices, and label-making supplies to mark your creation with the date and ingredients.

Collection of essential spice grinding equipment and tools for making spice blends
Various spice grinding tools including mortar and pestle, electric grinder, and mesh sieves

The Perfect 7 Spice Blend Recipe

Creating your own 7 spice blend is a rewarding way to ensure the freshest, most flavorful seasoning for your dishes while knowing exactly what goes into your food. This classic blend combines carefully measured portions of seven essential spices that work in perfect harmony.

Ingredients:
• 2 tablespoons ground black pepper
• 2 tablespoons ground coriander
• 2 tablespoons ground cumin
• 2 tablespoons ground allspice
• 1 tablespoon ground cinnamon
• 1 tablespoon ground cloves
• 1 tablespoon ground nutmeg

For the best results, start with whole spices whenever possible and grind them just before mixing. This ensures maximum freshness and flavor intensity. If using pre-ground spices, make sure they’re fresh and haven’t been sitting in your pantry for too long.

Mixing Instructions:
1. If using whole spices, grind each one separately in a clean spice grinder or mortar and pestle until you achieve a fine powder.
2. Measure out each spice precisely using measuring spoons.
3. Combine all ground spices in a medium mixing bowl.
4. Whisk the mixture thoroughly for about 2 minutes to ensure even distribution of all spices.
5. Transfer to an airtight glass container.

To maintain optimal freshness, store your blend in a cool, dark place away from direct sunlight. When properly stored, this blend will maintain its potent flavors for up to 6 months. However, for the most vibrant taste, try to use it within 3 months.

This recipe yields approximately ½ cup of spice blend. Feel free to scale the recipe up or down depending on your needs, maintaining the same proportions for consistent results. Remember to always use clean, dry measuring tools to prevent moisture from compromising the blend’s longevity.

Storage and Preservation Tips

To maintain the vibrant flavors of your homemade 7 spice blend, storing it correctly is essential. Start by selecting proper storage containers – airtight glass jars work best as they prevent moisture and preserve the aromatic qualities of your spices. Dark-colored containers offer additional protection against light exposure, which can degrade the spices’ potency over time.

Keep your blend in a cool, dark place away from direct sunlight and heat sources. The ideal storage temperature is between 15-20°C (59-68°F). Avoid storing near your stove or oven, as heat and steam can compromise the blend’s quality.

For maximum freshness, consider these helpful tips:
– Label your container with the date of preparation
– Store only what you’ll use within 4-6 months
– Give the jar a gentle shake every few weeks to prevent clumping
– Check periodically for any signs of moisture or mold
– Keep a small portion in a separate container for daily use

If you notice your blend losing its aromatic punch, it’s time to make a fresh batch. Remember that whole spices last longer than ground ones, so consider grinding small batches as needed for the freshest flavor profile.

For sustainability-minded cooks, reusing clean, dry glass jars from your kitchen is an eco-friendly storage solution that works perfectly for your homemade spice blend.

Various glass and metal containers showing proper storage methods for spice blends
Different airtight storage containers filled with freshly ground spice blend

Using Your 7 Spice Blend

This versatile spice blend brings warmth and depth to countless dishes, making it a staple for your farm-fresh cooking recipes. Sprinkle it generously over roasted root vegetables to enhance their natural sweetness, or add a pinch to warming soups and hearty stews. It’s particularly wonderful when used to season locally-grown winter squash or sweet potatoes before roasting.

For meat dishes, rub the blend onto chicken, lamb, or beef before cooking to create a flavorful crust. It also works beautifully in plant-based meals – try adding it to lentil soups, chickpea stews, or grilled eggplant. The blend adds complexity to homemade tomato sauce and elevates simple rice or grain dishes to new heights.

Don’t limit yourself to savory applications – a small pinch can add intrigue to hot chocolate or spiced tea. Mix it into honey for a unique spread, or combine it with olive oil to create an aromatic dipping sauce for fresh bread. For breakfast, try sprinkling it over your morning oatmeal with some local maple syrup.

Start with a small amount (about ¼ teaspoon per serving) and adjust to taste, as the blend’s intensity can vary depending on the freshness of your spices. Remember that the flavors will become more pronounced as dishes cook, so add gradually and taste as you go.

Now that you have the basic recipe, don’t be afraid to make it your own! Experiment with different ratios of spices to match your taste preferences, or try incorporating additional ingredients like dried orange peel or star anise for unique flavor variations. The beauty of creating your own spice blends lies in the freedom to customize. Start with small batches as you perfect your ideal mix, and remember to store your creation in an airtight container in a cool, dark place to maintain freshness. Whether you’re seasoning homegrown vegetables or adding warmth to winter stews, this versatile blend will become a cherished addition to your sustainable kitchen arsenal.

Small Space Composting That Actually Works (Even in Apartments)

Posted by darrell on
0
Home and Urban Gardening
Small Space Composting That Actually Works (Even in Apartments)

Transform your kitchen counter, balcony, or closet into a thriving compost hub by learning to maximize small spaces for eco-friendly waste management. Start with a compact bokashi bin under your sink to ferment food scraps without odors, creating nutrient-rich fertilizer in just two weeks. Stack multiple trays in a vermicomposting system the size of a shoe box, letting red wiggler worms process your organic waste while producing premium casting soil. Install a sleek, counter-top compost collector with activated charcoal filters to store daily scraps odor-free until processing. These space-conscious composting methods not only reduce household waste but also create premium soil amendments for indoor plants and container gardens, making sustainable living achievable regardless of space constraints.

Smart Indoor Composting Methods

Bokashi Composting

Bokashi composting is a game-changer for small-space dwellers who want to reduce food waste while creating nutrient-rich soil. This Japanese method uses beneficial microorganisms to ferment kitchen waste, including meat and dairy products that traditional composting typically can’t handle.

The process begins with a special bucket system featuring a spigot to drain liquid. Layer your food scraps with Bokashi bran (which contains the essential microorganisms), pressing down to remove air pockets. When the bucket is full, seal it tightly and let it ferment for two weeks. During this time, drain the liquid every few days – this “tea” makes an excellent diluted fertilizer for your plants.

What makes Bokashi perfect for apartments? It’s completely odor-free when done correctly, takes up minimal space (just one or two small buckets), and processes waste quickly. Plus, it’s indoor-friendly since the sealed system prevents pests and produces no foul smells.

The fermented waste can be buried in garden soil or added to a traditional compost pile. For apartment dwellers without outdoor space, you can create a soil factory using a large container with regular soil to break down the fermented material into usable compost.

Diagram showing the different layers inside a Bokashi composting bin with visible fermentation stages
Cross-sectional view of a Bokashi bin showing layers of kitchen scraps and fermentation process

Vermicomposting

Vermicomposting is a perfect solution for urban dwellers, transforming kitchen scraps into nutrient-rich compost using red wiggler worms. These industrious creatures can process up to half their body weight in food waste daily, all while living contentedly in a compact bin under your sink or in a closet corner.

To start, choose a shallow plastic bin with drainage holes and a catch tray for excess moisture. Layer the bottom with moistened shredded paper, cardboard, or coco coir, then add your worm colony. Red wigglers thrive in temperatures between 55-77°F, making indoor spaces ideal for year-round composting.

Feed your worms a diet of fruit and vegetable scraps, coffee grounds, and crushed eggshells. Avoid meat, dairy, oils, and citrus fruits. Keep the bedding moist like a wrung-out sponge and harvest the dark, crumbly castings every 3-4 months.

A well-maintained worm bin is odorless and takes up minimal space – typically no larger than a shoe box. Urban gardener Maria Chen shares, “My under-sink worm bin produces enough compost for all my houseplants and balcony garden, plus it’s a fascinating conversation starter when guests visit!”

Indoor vermicomposting system fitted neatly in an under-sink cabinet with visible worms and bedding
Compact worm composting bin setup under a kitchen sink with labeled parts

Balcony and Patio Solutions

Compact Tumbling Composters

Compact tumbling composters are a game-changer for small-space composting, offering a clean and efficient solution that fits on balconies, patios, or tiny yards. These innovative devices consist of a sealed drum that rotates on an axis, allowing you to mix your compost materials with just a few easy turns.

Unlike traditional compost piles, tumblers keep everything contained and pest-free while speeding up the decomposition process. Most models can transform kitchen scraps and yard waste into rich, garden-ready compost in just 4-8 weeks. The elevated design also makes adding materials and harvesting finished compost a breeze – no bending or heavy lifting required!

Look for dual-chamber tumblers that let you add fresh materials to one side while the other batch finishes composting. For optimal results, maintain a good balance of green materials (food scraps, coffee grounds) and brown materials (dried leaves, paper), and give your tumbler a few spins every couple of days.

Many urban gardeners find that a 37-gallon tumbler provides enough capacity for a small household while taking up minimal space. Plus, the sealed design helps control moisture and odors, making it perfect for shared living spaces.

Space-efficient tumbling composter on an urban apartment balcony with container garden
Small balcony setup featuring a compact tumbling composter next to potted plants

Stack-and-Leave Systems

Stack-and-leave composting systems offer an innovative vertical solution for space-challenged composters. These systems typically consist of stackable trays or bins that can be placed one above another, making efficient use of vertical space while allowing gravity to aid in the composting process.

The basic setup involves adding fresh materials to the top tray while finished compost accumulates in lower levels. As organic matter breaks down, it naturally shifts downward through mesh or perforated bottoms, creating a continuous flow system. Most stack-and-leave designs feature 3-4 tiers and can fit comfortably on a balcony or in a corner of your kitchen.

One of the biggest advantages of these systems is their hands-off nature – there’s no need for regular turning or mixing. The vertical design also promotes better airflow, which speeds up decomposition and reduces odors. Many models come with secure lids and tight seals to keep pests out and contain any potential smells, making them perfect for indoor use.

To maximize efficiency, layer your materials with a mix of browns (paper, cardboard) and greens (food scraps) in the top tray, and let nature do the rest. Within a few months, you’ll have rich compost ready to harvest from the bottom.

What to Compost (and What to Avoid)

Successful small-space composting starts with knowing exactly what materials to include and what to keep out. For the “greens” category, add kitchen scraps like fruit and vegetable waste, coffee grounds, and eggshells. These nitrogen-rich materials provide essential nutrients for your compost. Tea bags (remove staples first), fresh grass clippings, and composting fallen leaves make excellent additions too.

For “browns,” incorporate paper products like cardboard, newspaper (torn into small pieces), and paper towel rolls. These carbon-rich materials help maintain proper moisture levels and prevent odors. Small amounts of dried leaves, straw, or sawdust work well in limited quantities.

Just as important is knowing what to avoid. Never add meat, dairy, or oily foods, as these attract pests and create unpleasant odors – especially crucial in small spaces. Skip diseased plants, chemically treated wood products, and glossy or colored paper. Pet waste, while organic, doesn’t belong in your compost bin either.

For apartment composting, keep materials small and manageable. Chop kitchen scraps into smaller pieces to speed up decomposition. Maintain a rough ratio of three parts browns to one part greens to achieve the perfect balance. Remember that in small-space composting, less is more – start with modest amounts and adjust as you become more comfortable with the process.

Store food scraps in a countertop container with a tight-fitting lid between additions to your main composting bin. This prevents fruit flies and keeps your kitchen tidy while you build your composting routine.

Troubleshooting Common Issues

Even the most experienced composters face common composting challenges, but don’t worry – most issues have simple solutions! Here’s how to tackle the most frequent problems in small-space composting:

Unpleasant Odors
If your compost starts smelling bad, it’s usually due to too much moisture or too many “green” materials. Add more brown materials like dried leaves or paper, and ensure proper airflow by turning the mixture regularly. For indoor bins, sprinkle a thin layer of soil or coconut coir on top to absorb odors.

Fruit Flies
These pesky visitors often appear when food scraps are exposed. Combat them by always covering fresh kitchen scraps with brown materials or finished compost. You can also keep a small container of scraps in your freezer and add them to your compost frozen to discourage flies.

Slow Decomposition
If your compost isn’t breaking down, it might need better balance. Aim for smaller pieces (chop kitchen scraps before adding), maintain moisture like a wrung-out sponge, and ensure a good mix of green and brown materials. For small bins, try adding a handful of finished compost to introduce beneficial microorganisms.

Moisture Issues
Too wet? Add dry browns and ensure proper drainage. Too dry? Spritz with water and add more green materials. For indoor composting, line the bottom of your bin with newspaper to absorb excess moisture.

Limited Space
When your bin gets full, try removing finished compost from the bottom while continuing to add materials on top. You can also start a second small container while the first “rests” and completes decomposition.

Temperature Concerns
Small-space composters might not heat up like larger piles, and that’s okay! Focus on maintaining consistent moisture and a good material mix. Your compost will still break down, just more slowly through cold composting.

Remember, perfection isn’t necessary – even small-scale composting makes a positive environmental impact. With these troubleshooting tips, you’ll be well-equipped to handle any challenges that arise in your composting journey.

Don’t let limited space hold you back from joining the composting revolution! As we’ve explored throughout this guide, there are numerous creative and efficient ways to turn your kitchen scraps into valuable organic matter, even in the tiniest of spaces. Whether you choose a compact bin system, worm composting, or an electric composter, the key is selecting a method that fits your lifestyle and available space.

Remember, successful small-space composting is all about maintaining the right balance of materials, managing moisture levels, and staying consistent with your routine. The benefits far outweigh the initial learning curve – you’ll reduce waste, create nutrient-rich soil for your plants, and contribute to a more sustainable future.

Start small, experiment with different techniques, and don’t be afraid to adjust your approach as you learn. Even a modest composting setup can make a significant environmental impact while providing you with satisfaction and valuable organic material for your indoor or balcony garden. Take that first step today – your plants and the planet will thank you!

Small Space Composting That Actually Works (Even in Apartments)

Posted by darrell on
0
Home and Urban Gardening
Small Space Composting That Actually Works (Even in Apartments)

Transform your kitchen counter, balcony, or closet into a thriving compost hub by learning to maximize small spaces for eco-friendly waste management. Start with a compact bokashi bin under your sink to ferment food scraps without odors, creating nutrient-rich fertilizer in just two weeks. Stack multiple trays in a vermicomposting system the size of a shoe box, letting red wiggler worms process your organic waste while producing premium casting soil. Install a sleek, counter-top compost collector with activated charcoal filters to store daily scraps odor-free until processing. These space-conscious composting methods not only reduce household waste but also create premium soil amendments for indoor plants and container gardens, making sustainable living achievable regardless of space constraints.

Smart Indoor Composting Methods

Bokashi Composting

Bokashi composting is a game-changer for small-space dwellers who want to reduce food waste while creating nutrient-rich soil. This Japanese method uses beneficial microorganisms to ferment kitchen waste, including meat and dairy products that traditional composting typically can’t handle.

The process begins with a special bucket system featuring a spigot to drain liquid. Layer your food scraps with Bokashi bran (which contains the essential microorganisms), pressing down to remove air pockets. When the bucket is full, seal it tightly and let it ferment for two weeks. During this time, drain the liquid every few days – this “tea” makes an excellent diluted fertilizer for your plants.

What makes Bokashi perfect for apartments? It’s completely odor-free when done correctly, takes up minimal space (just one or two small buckets), and processes waste quickly. Plus, it’s indoor-friendly since the sealed system prevents pests and produces no foul smells.

The fermented waste can be buried in garden soil or added to a traditional compost pile. For apartment dwellers without outdoor space, you can create a soil factory using a large container with regular soil to break down the fermented material into usable compost.

Diagram showing the different layers inside a Bokashi composting bin with visible fermentation stages
Cross-sectional view of a Bokashi bin showing layers of kitchen scraps and fermentation process

Vermicomposting

Vermicomposting is a perfect solution for urban dwellers, transforming kitchen scraps into nutrient-rich compost using red wiggler worms. These industrious creatures can process up to half their body weight in food waste daily, all while living contentedly in a compact bin under your sink or in a closet corner.

To start, choose a shallow plastic bin with drainage holes and a catch tray for excess moisture. Layer the bottom with moistened shredded paper, cardboard, or coco coir, then add your worm colony. Red wigglers thrive in temperatures between 55-77°F, making indoor spaces ideal for year-round composting.

Feed your worms a diet of fruit and vegetable scraps, coffee grounds, and crushed eggshells. Avoid meat, dairy, oils, and citrus fruits. Keep the bedding moist like a wrung-out sponge and harvest the dark, crumbly castings every 3-4 months.

A well-maintained worm bin is odorless and takes up minimal space – typically no larger than a shoe box. Urban gardener Maria Chen shares, “My under-sink worm bin produces enough compost for all my houseplants and balcony garden, plus it’s a fascinating conversation starter when guests visit!”

Indoor vermicomposting system fitted neatly in an under-sink cabinet with visible worms and bedding
Compact worm composting bin setup under a kitchen sink with labeled parts

Balcony and Patio Solutions

Compact Tumbling Composters

Compact tumbling composters are a game-changer for small-space composting, offering a clean and efficient solution that fits on balconies, patios, or tiny yards. These innovative devices consist of a sealed drum that rotates on an axis, allowing you to mix your compost materials with just a few easy turns.

Unlike traditional compost piles, tumblers keep everything contained and pest-free while speeding up the decomposition process. Most models can transform kitchen scraps and yard waste into rich, garden-ready compost in just 4-8 weeks. The elevated design also makes adding materials and harvesting finished compost a breeze – no bending or heavy lifting required!

Look for dual-chamber tumblers that let you add fresh materials to one side while the other batch finishes composting. For optimal results, maintain a good balance of green materials (food scraps, coffee grounds) and brown materials (dried leaves, paper), and give your tumbler a few spins every couple of days.

Many urban gardeners find that a 37-gallon tumbler provides enough capacity for a small household while taking up minimal space. Plus, the sealed design helps control moisture and odors, making it perfect for shared living spaces.

Space-efficient tumbling composter on an urban apartment balcony with container garden
Small balcony setup featuring a compact tumbling composter next to potted plants

Stack-and-Leave Systems

Stack-and-leave composting systems offer an innovative vertical solution for space-challenged composters. These systems typically consist of stackable trays or bins that can be placed one above another, making efficient use of vertical space while allowing gravity to aid in the composting process.

The basic setup involves adding fresh materials to the top tray while finished compost accumulates in lower levels. As organic matter breaks down, it naturally shifts downward through mesh or perforated bottoms, creating a continuous flow system. Most stack-and-leave designs feature 3-4 tiers and can fit comfortably on a balcony or in a corner of your kitchen.

One of the biggest advantages of these systems is their hands-off nature – there’s no need for regular turning or mixing. The vertical design also promotes better airflow, which speeds up decomposition and reduces odors. Many models come with secure lids and tight seals to keep pests out and contain any potential smells, making them perfect for indoor use.

To maximize efficiency, layer your materials with a mix of browns (paper, cardboard) and greens (food scraps) in the top tray, and let nature do the rest. Within a few months, you’ll have rich compost ready to harvest from the bottom.

What to Compost (and What to Avoid)

Successful small-space composting starts with knowing exactly what materials to include and what to keep out. For the “greens” category, add kitchen scraps like fruit and vegetable waste, coffee grounds, and eggshells. These nitrogen-rich materials provide essential nutrients for your compost. Tea bags (remove staples first), fresh grass clippings, and composting fallen leaves make excellent additions too.

For “browns,” incorporate paper products like cardboard, newspaper (torn into small pieces), and paper towel rolls. These carbon-rich materials help maintain proper moisture levels and prevent odors. Small amounts of dried leaves, straw, or sawdust work well in limited quantities.

Just as important is knowing what to avoid. Never add meat, dairy, or oily foods, as these attract pests and create unpleasant odors – especially crucial in small spaces. Skip diseased plants, chemically treated wood products, and glossy or colored paper. Pet waste, while organic, doesn’t belong in your compost bin either.

For apartment composting, keep materials small and manageable. Chop kitchen scraps into smaller pieces to speed up decomposition. Maintain a rough ratio of three parts browns to one part greens to achieve the perfect balance. Remember that in small-space composting, less is more – start with modest amounts and adjust as you become more comfortable with the process.

Store food scraps in a countertop container with a tight-fitting lid between additions to your main composting bin. This prevents fruit flies and keeps your kitchen tidy while you build your composting routine.

Troubleshooting Common Issues

Even the most experienced composters face common composting challenges, but don’t worry – most issues have simple solutions! Here’s how to tackle the most frequent problems in small-space composting:

Unpleasant Odors
If your compost starts smelling bad, it’s usually due to too much moisture or too many “green” materials. Add more brown materials like dried leaves or paper, and ensure proper airflow by turning the mixture regularly. For indoor bins, sprinkle a thin layer of soil or coconut coir on top to absorb odors.

Fruit Flies
These pesky visitors often appear when food scraps are exposed. Combat them by always covering fresh kitchen scraps with brown materials or finished compost. You can also keep a small container of scraps in your freezer and add them to your compost frozen to discourage flies.

Slow Decomposition
If your compost isn’t breaking down, it might need better balance. Aim for smaller pieces (chop kitchen scraps before adding), maintain moisture like a wrung-out sponge, and ensure a good mix of green and brown materials. For small bins, try adding a handful of finished compost to introduce beneficial microorganisms.

Moisture Issues
Too wet? Add dry browns and ensure proper drainage. Too dry? Spritz with water and add more green materials. For indoor composting, line the bottom of your bin with newspaper to absorb excess moisture.

Limited Space
When your bin gets full, try removing finished compost from the bottom while continuing to add materials on top. You can also start a second small container while the first “rests” and completes decomposition.

Temperature Concerns
Small-space composters might not heat up like larger piles, and that’s okay! Focus on maintaining consistent moisture and a good material mix. Your compost will still break down, just more slowly through cold composting.

Remember, perfection isn’t necessary – even small-scale composting makes a positive environmental impact. With these troubleshooting tips, you’ll be well-equipped to handle any challenges that arise in your composting journey.

Don’t let limited space hold you back from joining the composting revolution! As we’ve explored throughout this guide, there are numerous creative and efficient ways to turn your kitchen scraps into valuable organic matter, even in the tiniest of spaces. Whether you choose a compact bin system, worm composting, or an electric composter, the key is selecting a method that fits your lifestyle and available space.

Remember, successful small-space composting is all about maintaining the right balance of materials, managing moisture levels, and staying consistent with your routine. The benefits far outweigh the initial learning curve – you’ll reduce waste, create nutrient-rich soil for your plants, and contribute to a more sustainable future.

Start small, experiment with different techniques, and don’t be afraid to adjust your approach as you learn. Even a modest composting setup can make a significant environmental impact while providing you with satisfaction and valuable organic material for your indoor or balcony garden. Take that first step today – your plants and the planet will thank you!