Transform Your CSA Produce: The Magic of Yeast Inoculation in Fermentation

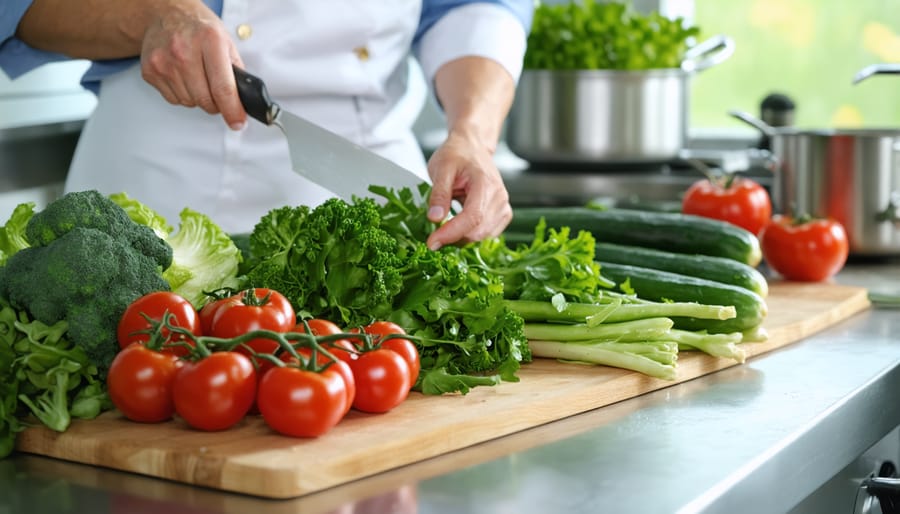
Transform your CSA vegetables into living, probiotic-rich foods by mastering the art of yeast inoculation. This ancient preservation technique not only extends shelf life but creates complex, vibrant flavors through controlled fermentation. To master vegetable fermentation, start with clean, fresh produce and precise measurements of salt to create the perfect environment for beneficial yeasts to thrive. Whether you’re fermenting cabbage for sauerkraut or crafting unique vegetable medleys, proper yeast inoculation ensures consistent results while preventing unwanted bacteria growth. By understanding this fundamental process, you’ll unlock endless possibilities for preserving your seasonal harvest while enhancing its nutritional value and developing distinctive flavors that connect you to centuries of food preservation tradition.
Why Yeast Inoculation Matters for Your CSA Produce
Wild vs. Controlled Fermentation
Fermentation can occur naturally or through controlled methods, each offering unique benefits for CSA produce preservation. Wild fermentation relies on naturally occurring yeasts present on fruits and vegetables, creating unique flavors that reflect local microbial environments. This traditional method has been used for generations and can produce complex, region-specific tastes that many food enthusiasts prize.
Controlled fermentation, achieved through yeast inoculation, offers more predictable results and consistent flavors. By introducing specific strains of carefully selected yeasts, farmers can better manage the fermentation process and reduce the risk of spoilage. This method is particularly valuable when preserving large batches of seasonal produce or creating specific flavor profiles.
Many small-scale farmers combine both approaches, using wild fermentation for traditional products while relying on inoculation for more sensitive or valuable crops. The choice often depends on factors like batch size, desired outcome, and risk tolerance.

Preserving Your CSA Bounty
Yeast inoculation offers an effective way to preserve seasonal produce from your CSA share through controlled fermentation. This natural preservation method not only extends the life of your vegetables but also enhances their nutritional value and creates unique, complex flavors. By introducing specific beneficial yeasts to your produce, you can control the fermentation process and prevent unwanted bacteria from taking hold.
The technique works particularly well for cabbage, cucumbers, and root vegetables – common items in CSA boxes that sometimes arrive in abundance. Start by selecting fresh, clean produce and introducing a carefully measured amount of starter culture. Within days, the beneficial yeasts begin transforming sugars into acids, creating an environment that naturally preserves your vegetables for months.
Local farmer Sarah Jensen shares, “Since implementing yeast inoculation at our farm, we’ve helped our CSA members reduce food waste by 30% during peak harvest seasons. Plus, they love the probiotic benefits!”

Choosing the Right Yeast for Your Ferments
Vegetable-Specific Strains
Different vegetables require specific yeast strains for optimal fermentation results. For leafy greens like cabbage and kale, Lactobacillus plantarum is the go-to choice, producing a crisp texture and bright, tangy flavor. Root vegetables such as carrots and beets benefit from Saccharomyces cerevisiae, which enhances their natural sweetness while maintaining structural integrity.
When fermenting cruciferous vegetables like broccoli and cauliflower, Leuconostoc mesenteroides works exceptionally well, creating a pleasant tang without excessive sourness. For cucumber pickles, a combination of Lactobacillus brevis and Pediococcus pentosaceus yields consistently crunchy results with balanced flavor profiles.
Success story: Local farmer Sarah Chen discovered that using Lactobacillus sakei for her award-winning kimchi resulted in better flavor development and longer shelf life compared to traditional methods. For those new to vegetable fermentation, starting with universal strains like L. plantarum is recommended, as it’s versatile and forgiving across different vegetable types.
Remember to consider temperature and salt concentration when selecting your yeast strain, as these factors significantly impact fermentation success. Many suppliers now offer specialized vegetable fermentation culture blends, making it easier for home fermenters to achieve professional results.
Fruit Fermentation Yeasts
When fermenting fruits, selecting the right yeast strain is crucial for developing optimal flavors and ensuring successful fermentation. For most fruit-based ferments, wine yeasts like Saccharomyces cerevisiae are ideal due to their ability to handle higher sugar content and produce clean, fruit-forward flavors. The popular Red Star Premier Blanc (formerly Côte des Blancs) works exceptionally well with apples, pears, and stone fruits, preserving delicate aromas while achieving consistent fermentation.
For berries and tropical fruits, consider using Lalvin 71B, which enhances fruit characteristics while reducing malic acid, resulting in a smoother finished product. When fermenting citrus fruits, D-47 yeast is an excellent choice, as it tolerates higher acid levels while producing complex honey and fruity notes.
For those seeking wild fermentation, naturally occurring yeasts present on organic fruit skins can create unique flavor profiles. However, this method requires careful monitoring and carries more risk of inconsistent results. To balance tradition with reliability, many home fermenters use a combination approach – allowing wild yeasts to initiate fermentation before introducing a commercial strain to ensure complete fermentation.

Step-by-Step Inoculation Process
Preparation and Safety
Before starting the yeast inoculation process, proper preparation and safety measures are essential for successful fermentation. Begin by thoroughly cleaning and sanitizing all equipment, including fermentation vessels, stirring tools, and measurement instruments. Use food-grade sanitizers and rinse thoroughly with clean water to avoid any chemical residue that could affect fermentation.
Temperature control is crucial for yeast health. Ensure your workspace maintains a steady temperature between 68-72°F (20-22°C). Have a reliable thermometer on hand to monitor both the environment and your fermenting mixture throughout the process.
Always wear clean gloves when handling yeast cultures to prevent contamination. If working with dry yeast, avoid direct skin contact and wear a mask to prevent inhalation of yeast particles. Keep your work surface clean and organized, with all necessary materials within easy reach.
Measure ingredients precisely using calibrated scales or measuring tools. Prepare your yeast starter in a separate, sterile container before introducing it to your main mixture. This allows you to verify the yeast’s viability and activity before committing to the full batch.
Store unused yeast cultures properly according to manufacturer guidelines, typically in a cool, dry place. Keep detailed records of each inoculation, including temperatures, measurements, and timing, to help track success and troubleshoot if needed. Having backup cultures on hand is also recommended in case of unexpected issues.
Temperature and Timing
Temperature control and proper timing are crucial elements that can make or break your fermentation success. The ideal temperature range for yeast inoculation typically falls between 68°F and 72°F (20°C to 22°C). At these temperatures, yeast cells maintain optimal activity without becoming stressed or dormant.
For most vegetable ferments, you’ll want to start with a 24-hour period at room temperature before checking the fermentation progress. During this initial phase, the yeast begins to multiply and establish itself in the environment. Keep your fermentation vessel away from direct sunlight and heat sources, as temperatures above 80°F (27°C) can lead to excessive fermentation and off-flavors.
Timing your inoculation right is equally important. Add your yeast starter when your produce and brine are at room temperature – never when they’re hot, as this can kill the beneficial organisms. After inoculation, monitor the fermentation process every 12-24 hours. You’ll notice subtle changes in aroma and the formation of small bubbles, indicating active fermentation.
Local farmer Sarah Chen shares her success story: “I learned the hard way that patience is key. Now I use a simple kitchen thermometer and keep detailed timing notes. My ferments are consistently delicious, and I never lose a batch anymore.”
Remember that cooler temperatures will slow fermentation, while warmer temperatures speed it up. Finding the sweet spot for your specific produce and desired outcome takes practice, but the results are worth the attention to detail.
Common Challenges and Solutions
Problem Prevention
To ensure successful yeast inoculation, proper preparation and monitoring are essential. Start by sanitizing all equipment thoroughly with food-grade sanitizer to prevent unwanted bacterial growth. Maintain consistent temperature control throughout the fermentation process, ideally between 68-72°F (20-22°C), using a reliable thermometer. Just like our ancestors who mastered traditional preservation techniques, paying attention to environmental conditions is crucial.
Monitor pH levels regularly using test strips or a digital meter, aiming for an initial pH between 4.0 and 4.5. Ensure proper oxygen levels during the first stages of fermentation by leaving adequate headspace in your vessels. Keep detailed records of temperature, pH, and visual observations to track progress and identify potential issues early.
Store starter cultures properly, following temperature guidelines, and regularly refresh them to maintain vitality. Consider creating backup cultures as insurance against failed batches, and always use fresh, high-quality produce for optimal results.
Quick Fixes
If your fermentation isn’t starting as expected, try warming the mixture slightly to activate dormant yeast – aim for around 70-75°F (21-24°C). For sluggish fermentation, add a small amount of sugar or honey to feed the yeast, but be careful not to overdo it. If you notice off-putting smells, check your container’s seal and ensure proper sanitization.
When fermentation seems too vigorous, move your container to a cooler spot to slow things down. For overly sour results, reduce fermentation time in future batches and monitor temperature more closely. If you see a white film on top, it’s likely kahm yeast – simply skim it off and continue fermenting.
Remember that successful fermentation takes practice. Keep detailed notes of what works and what doesn’t, and don’t be afraid to adjust your process based on results. Most importantly, trust your senses – if something doesn’t look, smell, or taste right, it’s better to start fresh than risk consuming spoiled produce.
Mastering yeast inoculation is a rewarding journey that can transform your fermentation projects from unpredictable experiments to reliable successes. As we’ve explored throughout this guide, proper yeast inoculation techniques are essential for achieving consistent, high-quality fermented products while maintaining food safety standards.
Remember that temperature control, cleanliness, and precise measurements are your best allies in the inoculation process. Start with simple projects like fruit preserves or vegetable ferments, and gradually work your way up to more complex endeavors as your confidence grows. Don’t be afraid to take detailed notes of your process – this will help you refine your technique and troubleshoot any issues that arise.
The beauty of yeast inoculation lies in its blend of science and artistry. While following proper procedures is crucial, there’s always room for creativity and experimentation with different ingredients and techniques. We encourage you to start your fermentation journey today, applying these principles to preserve and enhance your seasonal produce. With practice and patience, you’ll develop an intuitive understanding of the process and join the growing community of successful home fermenters.