Monthly Archives

20 Articles

Ancient Wisdom Meets Modern Storage: Indigenous Crop Storage Secrets That Still Work Today

Posted by darrell on
0
Cultural Agriculture Practices
Ancient Wisdom Meets Modern Storage: Indigenous Crop Storage Secrets That Still Work Today

Preserving the harvest has been at the heart of human civilization for millennia, with traditional storage methods often proving more sustainable and effective than modern alternatives. From ancient clay silos to innovative zero-energy cooling chambers, indigenous crop storage techniques offer practical solutions for today’s farming challenges. These time-tested methods not only protect valuable harvests but also maintain crop quality without relying on expensive technology or harmful chemicals.

By understanding and adapting these traditional storage practices, modern farmers and homesteaders can significantly reduce post-harvest losses while embracing environmentally friendly approaches. Whether you’re storing grains, fruits, or vegetables, these methods combine centuries of agricultural wisdom with contemporary sustainability needs. The beauty of indigenous storage techniques lies in their simplicity, cost-effectiveness, and remarkable ability to preserve crops using locally available materials and natural principles of temperature and moisture control.

Let’s explore how these ancient practices can revolutionize your crop storage approach while honoring the earth-conscious principles that have sustained communities for generations.

Traditional Underground Storage Systems

Earth Pits and Root Cellars

Earth pits and root cellars represent time-tested methods of crop storage that harness natural cooling and humidity control. These underground storage solutions maintain a consistent temperature year-round, typically staying between 32-40°F (0-4°C) in winter and 50-70°F (10-21°C) in summer.

A traditional earth pit is created by digging a hole 4-6 feet deep, lining it with straw or dried leaves, and adding layers of vegetables separated by additional straw. The pit is then covered with boards or sturdy materials and topped with soil, creating a natural insulation barrier.

Root cellars are more permanent structures, often built into hillsides or as extensions of existing basements. They feature ventilation systems to control humidity and prevent mold growth. The earth’s natural insulation properties help maintain ideal storage conditions for root vegetables, apples, and hardy winter crops.

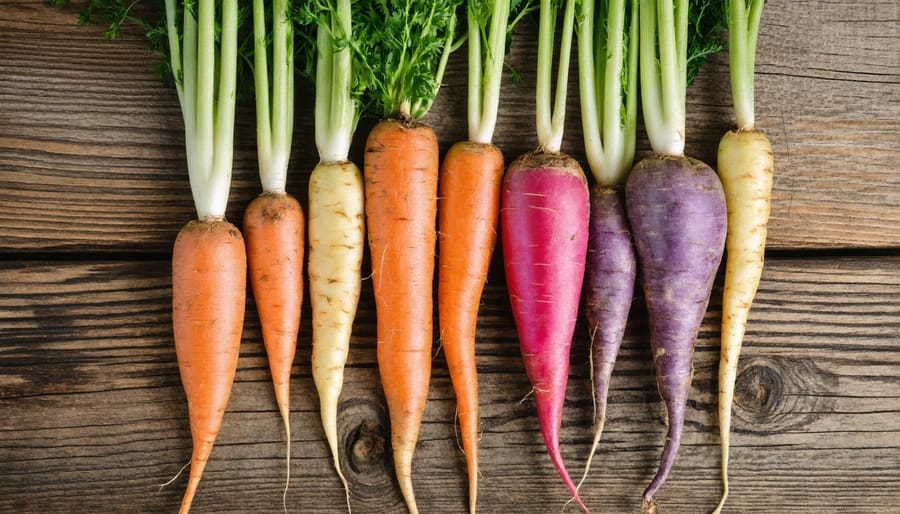
Modern adaptations of these methods include using buried trash cans, repurposed shipping containers, or custom-built concrete structures. These storage solutions are particularly effective for potatoes, carrots, beets, and other root vegetables, often keeping produce fresh for several months without requiring electricity.

For best results, vegetables should be cleaned, dried, and checked for damage before storage. Regular monitoring helps prevent spoilage and ensures a steady supply of fresh produce throughout the winter months.

Cross-section view of an indigenous root cellar with vegetables stored on shelves
Traditional underground root cellar showing earthen walls and stored crops

Natural Climate Control

Indigenous communities around the world mastered the art of natural temperature control for crop storage long before modern technology. They carefully observed their environment and developed ingenious solutions that worked in harmony with nature. Many communities built underground storage chambers, taking advantage of the earth’s constant temperature to keep their harvests cool during summer and protected from frost in winter.

In arid regions, communities constructed adobe structures with thick walls that regulated temperature through thermal mass. These buildings would stay cool during the day and slowly release heat at night, creating ideal conditions for preserving grains and dried foods. Some groups also utilized cave systems, which naturally maintain stable temperatures and humidity levels throughout the year.

Coastal communities often built ventilated storage huts that channeled sea breezes to maintain freshness. In mountainous areas, people constructed storage spaces facing away from direct sunlight and used natural wind patterns for ventilation. These time-tested methods didn’t just preserve food – they did so without consuming any energy, proving that sometimes the most sustainable solutions are rooted in traditional wisdom.

Today, many small-scale farmers are reviving these practices, combining ancient knowledge with modern understanding to create efficient, eco-friendly storage solutions.

Above-Ground Storage Innovations

Raised Granaries

Traditional raised granaries represent one of the most effective indigenous storage solutions, combining practicality with natural pest control. These elevated structures, typically standing 3-4 feet above ground on sturdy posts, protect harvested crops from moisture, rodents, and ground-dwelling insects.

The design typically features wooden or bamboo platforms supported by mushroom-shaped stone or wooden caps, which prevent rats and mice from climbing up. The walls are often made from woven plant materials like bamboo or wood, allowing natural airflow while protecting against rain. This ventilation system helps maintain optimal moisture levels and prevents mold growth.

Many farming communities, especially in Southeast Asia and Africa, still use these time-tested structures. The elevated design creates a cool, dry environment that can preserve grains and other crops for several months without chemical preservatives. Some modern adaptations include metal rodent guards and improved roofing materials while maintaining the traditional structure’s core benefits.

Beyond crop protection, raised granaries often serve as community gathering spaces, where farmers share knowledge and stories. This cultural aspect, combined with their practical benefits, makes them a sustainable storage solution worth considering for today’s small-scale organic farmers.

Elevated wooden granary structure with thatched roof used for grain storage
Traditional African raised granary structure made from wood and thatch

Natural Pest Control Methods

Our ancestors developed ingenious traditional pest control methods that remain effective today. Many farmers still use neem leaves and dried tobacco leaves, spreading them between grain layers to naturally repel insects. Wood ash is another powerful deterrent, creating a protective barrier that suffocates pests while absorbing excess moisture.

Some communities practice the layering technique, alternating crops with aromatic herbs like mint, basil, or marigold leaves. These natural repellents not only keep insects at bay but also add a pleasant scent to the storage area. Turmeric powder, known for its antimicrobial properties, is often sprinkled throughout stored grains to prevent pest infestations.

Cedar and eucalyptus branches placed around storage containers create a natural pest barrier while maintaining crop freshness. Many indigenous farmers also use dried chili peppers, crushing them into a powder to sprinkle around storage areas. The capsaicin in chilies effectively deters both insects and rodents.

These methods are completely chemical-free, making them perfect for organic farming and sustainable agriculture. They’re also cost-effective and readily available, proving that sometimes the most effective solutions are found in nature itself.

Preservation Techniques

Natural Drying Methods

Natural drying has been a trusted method of crop preservation for generations, combining simplicity with effectiveness. Sun drying, the most basic approach, involves spreading crops on clean mats or elevated platforms in direct sunlight. This technique works particularly well for grains, herbs, and certain fruits, allowing them to gradually release moisture while retaining their nutritional value.

Many farmers enhance the sun-drying process by creating raised drying racks, which improve air circulation and protect crops from ground moisture and pests. These platforms, often made from locally sourced materials like bamboo or wood, can be covered with protective netting to keep birds away while still allowing sunlight to penetrate.

Smoke drying offers another traditional solution, especially useful in humid regions where sun drying might be challenging. This method involves hanging crops above a controlled smoke source, typically using aromatic woods that naturally repel insects. The smoke not only dries the crops but also adds a layer of preservation through its antimicrobial properties.

Maria Rodriguez, a small-scale farmer in Mexico, shares her success with these methods: “My family has been using smoke drying for generations to preserve our chile peppers. The process not only extends shelf life but adds a wonderful smoky flavor that our customers love.”

When implementing these techniques, it’s essential to monitor weather conditions and ensure crops are completely dry before storage. Regular turning and proper spacing help achieve even drying and prevent mold growth.

Wooden racks with grains being dried in the sun using traditional methods
Indigenous grain drying process using traditional sun-drying racks

Herbal Preservatives

For centuries, indigenous communities have relied on nature’s own preservatives to protect their harvested crops. These time-tested herbal solutions not only keep crops fresh but also add beneficial properties to stored produce. Neem leaves, widely used across Asia, are particularly effective in protecting grains from insects and fungi. Simply layering dried neem leaves between stored grains creates a natural protective barrier.

Bay leaves and turmeric are other powerful natural preservatives. Bay leaves release compounds that repel storage pests, while turmeric’s antimicrobial properties help prevent mold growth. Some communities mix dried turmeric powder with grains before storage, creating a protective coating that extends shelf life.

Many indigenous farmers also use aromatic herbs like mint, sage, and thyme. These herbs not only deter pests but also impart subtle flavors to stored crops. In parts of South America, farmers traditionally wrap root vegetables in eucalyptus leaves, which naturally protect against rot and insects.

Dried chili peppers and garlic are popular choices for their strong antimicrobial properties. These can be scattered throughout storage containers or hung in mesh bags near stored produce. Some communities create powerful preservative mixtures by combining multiple herbs, often including local varieties specific to their region.

These natural solutions offer chemical-free alternatives that are both environmentally friendly and cost-effective, making them increasingly relevant in today’s sustainable farming practices.

Modern Applications

Modern farmers are increasingly turning to traditional storage methods, combining ancient wisdom with contemporary technology to create more sustainable agricultural practices. Many small-scale organic farms now use modified versions of underground storage pits, lined with modern moisture barriers and equipped with temperature monitoring systems. These hybrid solutions maintain the benefits of natural cooling while ensuring consistent conditions.

Vertical storage structures inspired by traditional grain silos are being reimagined with eco-friendly materials and improved ventilation systems. Some farmers have successfully adapted earthen storage containers by incorporating food-grade sealants and natural pest deterrents like neem oil and diatomaceous earth.

Climate-controlled rooms now mimic the natural temperature regulation of traditional root cellars, using solar power and smart technology to maintain optimal conditions. Mobile apps help farmers monitor humidity levels and temperature fluctuations, while still relying on time-tested principles of air circulation and thermal mass.

Community-supported agriculture (CSA) programs are reviving shared storage facilities, similar to traditional communal granaries. These modern versions feature separate temperature zones for different crops and utilize natural cooling methods alongside minimal mechanical refrigeration. This approach not only preserves food quality but also reduces energy consumption and supports local food security.

Indigenous storage methods represent a vital bridge between traditional wisdom and modern sustainable agriculture. These time-tested techniques not only protect crops effectively but also minimize environmental impact through their use of local materials and zero-energy requirements. From elevated granaries to underground storage pits, these methods have sustained communities for generations while preserving seed viability and nutritional value. By incorporating these ancestral practices into current farming operations, we can reduce dependency on artificial preservation methods and expensive storage facilities. The beauty of indigenous storage solutions lies in their simplicity, cost-effectiveness, and perfect alignment with organic farming principles. As we move toward a more sustainable future, these traditional methods offer valuable lessons in crop preservation while honoring the knowledge of our farming ancestors.

Fresh Winter Treasures: Your Complete January Farmers Market Shopping Guide

Posted by darrell on
0
Market Events and Community Engagement
Fresh Winter Treasures: Your Complete January Farmers Market Shopping Guide

Embrace the hidden bounty of January’s harvest at local winter farmers markets, where root vegetables, hardy greens, and storage crops offer surprising variety during the coldest month. From frost-sweetened parsnips and carrots to vibrant Swiss chard and kale surviving under row covers, January’s produce celebrates nature’s resilience. Despite winter’s grip, local farmers continue delivering fresh, nutritious options through innovative growing techniques and careful storage methods. These seasonal gems not only connect us to the natural growing cycle but also deliver peak nutrition and flavor when our bodies need it most. Whether you’re a seasoned market shopper or just beginning to explore seasonal eating, January’s offerings prove that eating locally remains possible – and delicious – even in the depths of winter.

Fresh winter root vegetables including golden carrots, white parsnips, and purple-topped turnips
Colorful arrangement of winter root vegetables including parsnips, turnips, and carrots on a rustic wooden surface

Root Vegetables: Winter’s Underground Stars

Storage Champions

Root vegetables are the true champions of winter storage, providing local markets with fresh, nutritious options throughout January. Parsnips, with their sweet, nutty flavor, actually become sweeter after exposure to cold temperatures, making them a winter delicacy. These pale cousins of carrots can be stored for up to six months in cool, dark conditions.

Turnips and rutabagas are equally impressive storage veterans, lasting 4-5 months when properly stored. Their robust nature and versatility in cooking make them essential winter staples. Look for firm, heavy specimens without soft spots for the longest storage life.

Carrots deserve special mention, as they can maintain their crisp texture and sweet flavor for months when stored properly. Local farmers often keep them in sand-filled boxes in cool cellars, a traditional method that helps maintain optimal humidity levels.

Other storage superstars include celeriac, with its distinctive celery flavor, and sweet potatoes, which can last several months when kept in a cool, dry place away from light. These underground treasures provide essential nutrients and hearty flavors throughout the coldest months of the year.

Selection and Storage Tips

When selecting fresh produce in January, focus on root vegetables and winter greens. Look for firm, heavy root vegetables without soft spots or blemishes. Choose carrots and parsnips that are crisp and bright in color, avoiding any that are rubbery or have excessive cracks. For winter squash, select ones with intact stems and no soft patches.

Store root vegetables in a cool, dark place with good air circulation, ideally between 32-40°F (0-4°C). Most will keep for several weeks in your refrigerator’s crisper drawer. Remove leafy tops from carrots and beets before storing, as they draw moisture from the roots. Winter squash can be kept at room temperature in a dry area for up to three months.

For leafy greens like kale and Swiss chard, choose bunches with firm, deeply colored leaves free from yellowing or wilting. Store them wrapped loosely in slightly damp paper towels inside a plastic bag in the refrigerator. Most greens will stay fresh for about a week when stored properly.

Winter Greens That Thrive in Cold

Kale and Collards

Kale and collards truly shine during the cold winter months, proving themselves to be winter garden champions. These nutrient-packed greens actually become sweeter and more flavorful after exposure to frost, making January an ideal time to enjoy them. Both varieties are incredibly frost-resistant, often surviving temperatures well below freezing while maintaining their crisp texture and robust flavor.

Look for deep green, firm leaves without any yellowing or wilting. Smaller leaves tend to be more tender and less bitter, perfect for raw applications like salads. The larger, more mature leaves are excellent for cooking and hold up beautifully in soups and stews. Local farmers often offer several varieties, including Lacinato (Dinosaur) kale, curly kale, and Georgia collards.

To store these hardy greens, wrap them loosely in slightly damp paper towels and keep them in a plastic bag in your refrigerator’s crisper drawer. They’ll stay fresh for up to a week, though their vitamin content is highest when eaten within the first few days of harvest. For the best flavor and texture, remove the tough center stems before preparing, and massage kale leaves gently if eating them raw to help break down their fibrous structure.

Vibrant green bunches of kale and collard greens with frost-tipped leaves
Fresh bunches of frost-kissed kale and collard greens at a winter farmers market stall

Winter Lettuce Varieties

Even in the depths of winter, dedicated farmers continue to grow a variety of fresh, crisp lettuces using cold frames and greenhouses. These protective structures create micro-climates that shield tender greens from harsh winter conditions while allowing them to thrive in the limited sunlight.

Popular winter lettuce varieties include butter lettuce, which offers sweet, tender leaves perfect for delicate winter salads. The hardy ‘Winter Density’ romaine variety maintains its crunch despite cold temperatures, while red and green leaf lettuces add beautiful color to winter plates. Many farmers also grow microgreens and baby lettuce varieties, which mature quickly even in lower light conditions.

Local farmer Sarah Chen from Green Valley Farm shares, “We use row covers inside our greenhouse for extra protection on extremely cold nights. This allows us to harvest fresh lettuce throughout January, giving our market customers that summer-fresh taste even in winter.”

Look for lettuces with crisp, vibrant leaves and store them wrapped loosely in slightly damp paper towels in the crisper drawer. Most varieties will stay fresh for about a week when properly stored.

Storage Crops: Fall’s Bounty in January

Winter Squash and Pumpkins

Winter squash and pumpkins stored from fall harvests remain delicious well into January, offering rich nutrients and versatile cooking options. Common varieties available this month include butternut squash, with its sweet, nutty flesh; the compact and flavorful acorn squash; and the dense, creamy kabocha. These hardy vegetables can last several months when stored properly in a cool, dry place between 50-55°F.

Look for squash that feels heavy for its size and has a firm, unblemished rind. Small soft spots can quickly spread, so inspect carefully before purchasing. Most winter squash varieties will keep for 2-3 months when stored on a shelf or in a basket with good air circulation – avoid plastic bags which can trap moisture and lead to spoilage.

Local farmer tip: When selecting pumpkins for cooking, choose smaller sugar pie varieties over large carving types for better flavor and texture in your winter recipes.

Apples and Pears

Winter storage apples and pears are January staples, offering a delicious taste of local fruit even in the coldest months. These fruits are harvested in autumn but stored in temperature-controlled environments, allowing them to maintain their crisp texture and sweet flavors throughout winter. Look for hardy apple varieties like Braeburn, Fuji, and Pink Lady, which store exceptionally well. For pears, winter-friendly varieties include D’Anjou, Bosc, and Comice.

When selecting stored fruit, choose specimens that feel firm and heavy for their size, with no soft spots or bruising. The skin should be taught and unblemished. Store your apples and pears in the refrigerator’s crisper drawer, but keep them separate from other produce as they release ethylene gas, which can speed up ripening of nearby fruits and vegetables.

For the best flavor, bring cold storage apples to room temperature before eating. Pears should be allowed to ripen on the counter until they yield slightly to gentle pressure near the stem.

Modern greenhouse interior showing microgreen trays and hydroponic tomato cultivation
Indoor greenhouse setting with rows of microgreens and hanging tomato plants

Greenhouse and Indoor Growing

Microgreens and Sprouts

While outdoor growing may be limited in January, microgreens and sprouts offer a burst of fresh nutrients year-round. These indoor crops can be grown right on your kitchen counter, providing a sustainable source of fresh produce even during the coldest months.

Microgreens, the young seedlings of vegetables and herbs, pack a surprising nutritional punch – often containing up to 40 times more nutrients than their mature counterparts. Popular varieties include pea shoots, sunflower, radish, and mustard greens, each offering distinct flavors from mild to peppery.

Sprouts, including classics like alfalfa, mung bean, and broccoli sprouts, are another excellent indoor crop. They’re ready to harvest in just 3-7 days and require minimal equipment – just a jar, some cheesecloth, and daily rinsing.

Both options are perfect for adding fresh crunch to winter salads, sandwiches, and smoothies. Plus, growing these nutrient-dense crops at home reduces packaging waste and food miles while ensuring the freshest possible produce during the winter months.

Look for locally grown microgreens and sprouts at your winter farmers market, or try growing your own for a rewarding winter gardening project.

Greenhouse Tomatoes and Herbs

While outdoor growing may be limited in January, greenhouse cultivation keeps fresh produce flowing throughout winter. Local greenhouse growers maintain optimal conditions to produce flavorful tomatoes and aromatic herbs year-round. These protected environments typically maintain temperatures between 65-75°F, creating a Mediterranean-like microclimate even during the coldest months.

You’ll find several varieties of greenhouse tomatoes at winter markets, from juicy beefsteaks to sweet cherry tomatoes. These indoor-grown tomatoes often rival their summer counterparts in taste, thanks to carefully controlled growing conditions. Fresh herbs like basil, parsley, cilantro, and mint also thrive in greenhouse settings, providing essential flavors for winter cooking.

When selecting greenhouse produce, look for tomatoes with rich color and firm texture, and herbs with bright, crisp leaves. These products typically command higher prices than summer produce, but they’re worth the investment for adding fresh flavor to winter meals. Many local greenhouse growers use organic methods and sustainable practices, making these products both environmentally friendly and delicious alternatives to imported produce.

Making the Most of Your January Market Visit

Make your January market visits more rewarding by planning ahead and shopping smart. Start by arriving early when produce is freshest and vendors are most available to answer questions. Bring reusable bags and cash, as many small vendors prefer it.

Create a flexible meal plan that incorporates seasonal vegetables like root crops and winter greens. This allows you to take advantage of unexpected finds while ensuring you’ll use everything you buy. When shopping, look for bright, firm vegetables without soft spots or discoloration.

Don’t shy away from asking farmers about storage tips – they’re usually happy to share their expertise. Many winter vegetables store well in cool, dark places, so consider buying in bulk when prices are good. Some farmers offer winter CSA shares or bulk discounts, which can be excellent value.

Remember to pick up hearty cooking greens like kale and collards, which become sweeter after frost exposure. Also, look for stored apples and winter squash – these storage crops often maintain peak quality well into January when properly kept.

Finally, take time to build relationships with your local farmers. They can alert you to upcoming harvests and maybe even hold special items for regular customers.

Shopping seasonally in January not only ensures you get the freshest, most flavorful produce but also helps reduce your environmental impact and food costs. By choosing local winter vegetables and fruits, you’ll discover delicious new ingredients while helping to support local farmers during the challenging winter months. Visit your nearby farmers market to explore these seasonal treasures and become part of a more sustainable food system, one shopping trip at a time.

How the QC Community Foundation Is Transforming Local Food Systems Through CSA

Posted by darrell on
0
CSA Fundamentals and Benefits
How the QC Community Foundation Is Transforming Local Food Systems Through CSA

Transform your local food system by joining the QC Community Foundation’s groundbreaking community supported agriculture initiatives. Since 1964, this visionary organization has channeled over $25 million into sustainable farming projects, connecting farmers directly with families hungry for fresh, local produce. By bridging the gap between urban consumers and rural producers, the Foundation empowers both communities to thrive through innovative grant programs, educational workshops, and farmer mentorship opportunities.

Operating at the intersection of food security and community development, the QC Community Foundation serves as a vital catalyst for agricultural innovation across the region. Their signature Farm-to-Table Grant Program has launched 50+ successful farming enterprises, while their Youth in Agriculture initiative introduces the next generation to sustainable farming practices through hands-on training and apprenticeships. Whether you’re a budding farmer seeking startup support or a community member passionate about local food systems, the Foundation offers concrete pathways to strengthen our regional food security.

Diverse group of farmers harvesting seasonal produce from community-supported agriculture fields
Local farmers working in their CSA fields harvesting fresh vegetables

Building Stronger Communities Through CSA Partnerships

Grant Programs for Local Farmers

The QC Community Foundation’s grant programs serve as vital lifelines for local farmers, fostering sustainable partnerships between farmers and communities. Through their Agricultural Innovation Fund, farmers can access grants ranging from $2,500 to $10,000 to enhance their operations, implement sustainable farming practices, or expand their CSA programs.

These grants have helped numerous local farmers like Sarah Mitchell, who used the funding to install a solar-powered irrigation system, and Marcus Rodriguez, who established a greenhouse for year-round growing. The foundation also offers mentorship opportunities, connecting experienced farmers with newcomers to share knowledge and best practices.

Additional resources include educational workshops, equipment-sharing programs, and marketing support to help farmers build their customer base. The foundation’s commitment extends beyond financial assistance, creating a supportive ecosystem that encourages sustainable farming practices while ensuring fresh, local produce remains accessible to community members.

To apply for grants, farmers must demonstrate their commitment to sustainable practices and community engagement. Applications are accepted twice yearly, with deadlines in March and September.

Community Education Initiatives

The QC Community Foundation hosts a variety of educational workshops throughout the year, empowering local residents with sustainable agriculture knowledge and skills. Their flagship “Grow Your Own” workshop series teaches participants everything from soil preparation and composting to seed saving and organic pest management. These hands-on sessions take place at their demonstration garden, where experienced farmers share practical tips and real-world experience.

Local farmer Mary Johnson, who started with a backyard garden and now runs a successful urban farm, leads the popular “Urban Farming 101” course. This six-week program covers essential topics for aspiring farmers, including season extension techniques, water conservation, and small-scale organic farming methods.

The Foundation also partners with local schools to implement garden-based learning programs. Students get hands-on experience growing vegetables while learning about nutrition and environmental stewardship. Their youth summer program, “Farm to Future,” introduces teenagers to agricultural career paths through mentorship opportunities with established organic farmers.

For those interested in food preservation, monthly workshops teach canning, fermentation, and other traditional food storage methods, helping community members extend their harvest and reduce food waste.

Making Fresh Produce Accessible to All

Subsidy Programs for Low-Income Families

The QC Community Foundation offers several financial assistance programs to help make CSA memberships more accessible to low-income families, transforming community health through CSA participation. Through their Farm Share Support Program, eligible families can receive up to 75% off their CSA membership costs, making fresh, local produce more affordable.

Families earning below 185% of the federal poverty level can apply for subsidies during the annual enrollment period, typically running from January through March. The foundation also offers flexible payment plans and accepts SNAP/EBT benefits, allowing participants to spread costs throughout the growing season.

Additional support includes cooking classes, recipe guides, and food preservation workshops to help families make the most of their CSA shares. The foundation partners with local nutrition educators to provide these resources at no extra cost to subsidy recipients.

To apply, interested families can complete a simple online application or visit the foundation’s office for assistance. Bilingual staff members are available to help with the application process and answer questions about the program.

Partnership Success Stories

The Smith family’s urban farming initiative, supported by our foundation’s micro-grant program, has blossomed into a thriving community garden that now feeds over 50 local families. Through mentorship and resources provided by the foundation, they transformed an empty lot into a vibrant growing space that hosts weekly farmers’ markets and educational workshops.

Local entrepreneur Maria Rodriguez partnered with us to launch her organic honey business. With initial funding and business development support, her operation now supplies honey to three local schools and multiple restaurants while providing valuable pollination services to nearby farms.

The Youth Agriculture Program, another success story, has helped high school students like James Chen develop practical farming skills. James started with a small herb garden and now manages a quarter-acre plot, selling his produce at our weekly markets. His success inspired the school district to incorporate agricultural education into their curriculum.

These partnerships demonstrate how community support and sustainable agriculture can create lasting positive change in our region, improving both food security and economic opportunities for local residents.

Happy family picking up their weekly CSA vegetable share from a community center
Family receiving their CSA share at a local distribution point

Growing a Sustainable Future

Youth Agricultural Programs

The QC Community Foundation actively nurtures the next generation of farmers through comprehensive youth agricultural programs designed to inspire and educate. Students aged 12-18 can participate in hands-on farming experiences through the Young Farmers Initiative, where they learn essential skills from seasoned local farmers. This program includes practical workshops on organic growing methods, soil health management, and sustainable farming practices.

During summer months, the Foundation hosts week-long Agricultural Youth Camps, providing immersive experiences in farming, animal care, and farm-to-table food preparation. Participants engage in daily activities like planting, harvesting, and preparing healthy meals using fresh produce they’ve grown themselves.

The Foundation also partners with local schools to establish educational gardens, helping students understand the importance of local food systems and environmental stewardship. Through these school gardens, children develop practical skills while learning about nutrition, biodiversity, and sustainable agriculture.

Additionally, the Junior Farmer Mentorship Program pairs high school students with experienced organic farmers for year-round learning opportunities, creating pathways for future careers in agriculture.

Group of children participating in hands-on agricultural education program
Young students learning about sustainable farming in a community garden

Expanding Local Food Networks

The QC Community Foundation is taking bold steps to expand its CSA program, reaching more families and strengthening local food networks throughout the region. Building on the success of existing partnerships, the foundation plans to add five new farm collaborations in the coming year, potentially doubling the number of weekly produce shares available to community members.

To make fresh, local produce more accessible, the foundation is introducing a flexible payment system and expanding its subsidized share program for low-income families. The new “Pay What You Can” initiative ensures that financial constraints don’t prevent anyone from participating in the CSA program.

Education remains a cornerstone of expansion efforts, with monthly workshops connecting experienced farmers with aspiring growers. These sessions cover everything from seasonal planting schedules to sustainable farming techniques, fostering knowledge exchange and building a stronger agricultural community.

The foundation is also launching a mobile market program, bringing fresh produce directly to neighborhoods with limited access to healthy food options. This innovative approach combines traditional CSA distribution with the convenience of a traveling farmers market, making local food more readily available to all community members.

The QC Community Foundation has become a cornerstone of sustainable agriculture and community development in our region, touching countless lives through its innovative programs and unwavering commitment to local food security. Through partnerships with local farmers, educational initiatives, and grant programs, the foundation has helped create a more resilient and interconnected food system that benefits everyone in our community.

The impact of the foundation’s work can be seen in the thriving network of CSA programs, the increasing number of new farmers entering the field, and the growing awareness of sustainable agriculture practices among residents. From helping families access fresh, organic produce to supporting beginning farmers with crucial resources, the foundation continues to nurture positive change throughout our region.

You can become part of this transformative movement in several ways. Consider becoming a monthly donor to support ongoing programs, volunteer at foundation events, or participate in educational workshops. Farmers can apply for grants and mentorship opportunities, while community members can join CSA programs or attend seasonal farmers’ markets. For businesses, partnership opportunities are available to help expand the foundation’s reach and impact.

Together, we can build an even stronger, more sustainable local food system. Visit the foundation’s website or stop by their office to learn more about how you can contribute to this vital community resource.

Dehydrated Organic Food: Your Secret to Long-Lasting Fresh Flavor

Posted by darrell on
0
Culinary and Food Preservation
Dehydrated Organic Food: Your Secret to Long-Lasting Fresh Flavor

Preserve nature’s bounty while maintaining the full benefits of organic produce through the ancient art of food dehydration. Modern food dehydrators transform fresh organic fruits, vegetables, and herbs into nutrient-dense, shelf-stable ingredients that retain up to 95% of their original nutritional value. This sustainable preservation method eliminates the need for artificial preservatives while reducing food waste and storage space requirements by up to 90%.

Unlike conventional dried foods, dehydrated organic products offer superior flavor concentration and maintain their certification status, making them ideal for year-round access to seasonal organic ingredients. Whether you’re a homesteader looking to preserve your garden’s harvest or an eco-conscious consumer seeking sustainable food storage solutions, dehydration provides a practical bridge between harvest seasons while honoring the integrity of organic farming practices.

From creating nutritious hiking snacks to stocking your pantry with wholesome ingredients, dehydrated organic food represents a perfect fusion of traditional preservation methods and modern sustainable living. This guide explores how to maintain optimal nutritional value while extending the life of your organic investments through proper dehydration techniques.

Why Choose Organic Food Dehydration?

Nutrient Retention in Dehydrated Organic Foods

Dehydrating organic produce stands out among various food preservation methods for its exceptional ability to maintain nutritional value. When done properly, dehydration can retain up to 95% of the food’s original nutrients, making it an excellent choice for preserving organic harvests.

The gentle drying process helps maintain crucial vitamins and minerals while concentrating beneficial compounds. For example, dried organic tomatoes actually contain more lycopene per serving than fresh ones. Similarly, dehydrated organic herbs retain their essential oils and medicinal properties, often becoming more potent in their dried form.

What’s particularly wonderful about dehydration is that it preserves the organic integrity of your produce. Since no chemicals or preservatives are needed, your organic foods stay truly organic. The process simply removes water while leaving beneficial compounds intact, including antioxidants, fiber, and enzymes.

To maximize nutrient retention, it’s important to dehydrate at the right temperature – typically between 95°F and 140°F, depending on the food type. This ensures that heat-sensitive vitamins aren’t destroyed while effectively removing moisture.

Cost-Effective Storage Solution

Dehydrating seasonal organic produce offers a smart way to maximize your food budget while preserving the goodness of peak-season fruits and vegetables. When organic produce is abundant and prices are low, buying in bulk and dehydrating for later use can lead to significant savings. For example, purchasing organic tomatoes during summer harvest can cost 50-60% less than buying them off-season, and dehydrating allows you to enjoy these savings year-round.

The storage efficiency of dehydrated foods also translates to economic benefits. A pound of fresh organic apples reduces to about one-sixth of its original weight when dehydrated, requiring minimal storage space while retaining its nutritional value. This space-saving aspect means you can stock up on organic produce without investing in expensive storage solutions or extra freezer space.

Many home gardeners and small-scale farmers have found success in dehydrating their excess harvest, preventing waste and extending their food supply through leaner months. The initial investment in a quality food dehydrator typically pays for itself within one growing season through preserved organic produce that would otherwise spoil or require costly alternative storage methods.

Best Organic Foods for Dehydration

Collection of dehydrated organic fruits including apples, strawberries, mangoes, and bananas
Assortment of vibrant dehydrated organic fruits arranged artistically, showing different textures and colors

Fruits and Berries

Dehydrating seasonal organic produce is an excellent way to preserve nature’s sweetness year-round. When dehydrating fruits and berries, proper preparation is key to achieving the best results. Start by selecting ripe, unblemished fruit and washing it thoroughly. Most fruits benefit from a quick lemon juice bath to prevent browning during the drying process.

For apples and pears, slice them uniformly (about ¼ inch thick) and remove the cores. Berries like strawberries should be halved or sliced, while smaller berries such as blueberries can be left whole after checking the skin. Stone fruits like peaches and apricots need to be pitted and cut into even pieces.

Arrange your prepared fruit in single layers on dehydrator trays, ensuring pieces don’t overlap. Most fruits dry best at 135°F (57°C), though times vary significantly: berries typically take 10-18 hours, while apple slices might need 6-12 hours. The fruit is ready when it feels leather-like and pliable, with no moisture when squeezed.

For optimal results, rotate your trays every few hours and check progress regularly. Once dried, let your fruits cool completely before storing in airtight containers. Remember that organic fruits often dry differently than conventional ones due to their natural sugar content and lack of preservatives, so monitoring moisture levels is especially important.

Vegetables and Herbs

Dehydrating organic vegetables and herbs is an excellent way to preserve your garden’s bounty while maintaining nutritional value. Start by selecting fresh, unblemished produce at peak ripeness. Wash thoroughly and cut vegetables into uniform pieces about 1/4 inch thick to ensure even drying.

For leafy greens like kale and spinach, remove tough stems and tear into bite-sized pieces. Root vegetables such as carrots and beets should be sliced thinly or cut into small cubes. Tomatoes can be halved or sliced, while mushrooms are best cut into 1/4-inch slices.

Herbs require special attention due to their delicate nature. Remove stems and spread leaves in a single layer. Popular herbs for dehydrating include basil, oregano, thyme, and sage. These can be dried at lower temperatures (95°F to 105°F) to preserve their essential oils and flavors.

Pre-treatment isn’t always necessary for vegetables, but blanching can help maintain color and reduce drying time. For best results, maintain a consistent temperature between 125°F and 135°F for vegetables. Your produce is ready when it’s crisp and brittle – a process that typically takes 6-12 hours depending on the item and humidity levels.

Store your dehydrated vegetables and herbs in airtight containers away from direct sunlight. When properly dried and stored, they can last up to a year while retaining their organic integrity and most of their nutritional benefits.

Essential Equipment and Techniques

Choosing Your Dehydrator

Selecting the right dehydrator is crucial for successfully preserving your organic produce. Start by considering the size you’ll need – a smaller 5-tray model works well for occasional use, while larger 9-12 tray units are perfect for homesteaders processing seasonal harvests. Look for adjustable temperature controls, which allow you to safely dry different types of produce at their optimal temperatures.

For organic food preservation, stainless steel trays are worth the investment over plastic ones. They’re more durable, easier to clean, and won’t leach chemicals into your food. A model with a timer and automatic shut-off can prevent over-drying and save energy.

Consider the airflow system – horizontal flow dehydrators typically provide more even drying than vertical models. Also check the noise level, especially if you’ll be running it in shared living spaces. Many modern dehydrators feature quiet operation without sacrificing performance.

Budget-friendly options start around $50, while premium models can reach $300 or more. Remember that a quality dehydrator is an investment that will help you preserve organic produce for years to come.

Modern food dehydrator with trays of organic fruits and vegetables being dried
Professional food dehydrator displaying multiple trays of colorful organic produce in various stages of dehydration

Natural Sun-Drying Methods

Natural sun-drying is one of humanity’s oldest and most sustainable methods of food preservation. This traditional technique harnesses solar energy and natural airflow to slowly remove moisture from organic produce, helping preserve its nutrients and flavors. The process begins by selecting fully ripe, unblemished organic fruits, vegetables, or herbs.

To sun-dry effectively, choose a location that receives direct sunlight for at least 6-8 hours daily and has good air circulation. Place your prepared produce on drying racks or screens, ideally elevated about 6 inches off the ground. Traditional materials like bamboo or wood work well, though modern food-grade mesh screens are also suitable.

Many Mediterranean cultures still practice sun-drying tomatoes, figs, and herbs on their rooftops or in dedicated drying yards. The key is to cover the produce with breathable mesh to protect it from insects while allowing moisture to escape. Depending on your climate and the type of produce, drying times can range from 2-14 days.

For best results, bring your produce indoors at night to prevent moisture reabsorption, and continue the process the next day until the desired dryness is achieved.

Well-organized storage system for dehydrated organic foods in labeled glass jars
Organized pantry shelf showing properly stored dehydrated organic foods in airtight glass containers with labels

Storage and Usage Tips

Proper storage is crucial for maintaining the quality and shelf life of your dehydrated organic foods. Using proper storage containers like airtight glass jars, food-grade mylar bags, or vacuum-sealed containers will protect your preserved goods from moisture and light exposure.

Store your dehydrated foods in a cool, dark place with temperatures between 50-60°F (10-15°C). A pantry or basement shelf works perfectly, but avoid areas near stoves or heating vents. Consider using oxygen absorbers in your storage containers to prevent oxidation and extend shelf life.

When using dehydrated foods, remember they’re concentrated versions of their fresh counterparts. Start by rehydrating smaller portions to avoid waste. Most items will reconstitute within 30 minutes to 2 hours in warm water. For faster results, use hot (not boiling) water and reduce soaking time by half.

Here’s a helpful tip from our community garden: label each container with the contents and drying date. While properly stored dehydrated organic foods can last 1-2 years, it’s best to rotate your stock and use older items first.

To maintain freshness after opening, ensure container lids are tightly sealed and check periodically for any signs of moisture or mold. If you notice any off-odors or visible mold, discard the affected items immediately. For frequently used items, consider storing smaller portions in separate containers to minimize exposure to air and moisture when accessing your preserved foods.

Dehydrating organic produce offers an excellent way to preserve the bounty of your garden or local farmer’s market while maintaining the nutritional benefits and clean eating principles you value. By removing moisture while keeping vital nutrients intact, you’re creating shelf-stable foods that retain their organic integrity without artificial preservatives or additives.

As we’ve explored throughout this guide, food dehydration is both an art and a science that’s accessible to everyone. Whether you’re starting with simple fruits and vegetables or advancing to more complex recipes, the possibilities are endless. The initial investment in a quality dehydrator and some basic knowledge can lead to significant savings while reducing food waste and maintaining a year-round supply of organic snacks and ingredients.

We encourage you to start your dehydrating journey with easy projects like apple chips or kale crisps. As your confidence grows, experiment with different temperatures, timing, and combinations to create your signature dried treats. Remember that practice makes perfect, and even small batches can yield delicious results. By dehydrating your organic produce, you’re not just preserving food – you’re preserving the essence of sustainable, healthy living.

Transform Your School Garden: Co-Teaching Models That Spark Student Success

Posted by darrell on
0
Educational Programs and Partnerships
Transform Your School Garden: Co-Teaching Models That Spark Student Success

Transform your classroom into a dynamic learning environment through co-teaching models that maximize student engagement and academic success. Integrating garden-based education with traditional curriculum becomes seamless when two educators combine their expertise and teaching strategies effectively.

Co-teaching breaks down traditional classroom barriers, allowing teachers to differentiate instruction, provide targeted support, and create inclusive learning spaces that benefit all students. Whether you’re partnering with a garden educator, special education teacher, or content specialist, understanding these six proven models empowers you to choose the right approach for your specific classroom needs.

From station teaching to parallel instruction, each model offers unique advantages that enhance student learning outcomes while making the most of both teachers’ strengths. These collaborative approaches have transformed classrooms across North America, leading to improved student achievement, increased engagement, and more effective delivery of cross-curricular content.

Let’s explore these six co-teaching models and discover how they can revolutionize your teaching practice, creating richer learning experiences that connect students with both academic content and hands-on learning opportunities.

One Lead, One Support: The Foundation of Garden Education

Two educators co-teaching in an outdoor garden classroom setting
Two teachers working together in a school garden, one leading a demonstration while the other assists students

Practical Applications in the School Garden

School gardens offer perfect opportunities to implement various co-teaching models in dynamic outdoor classrooms. Science teachers might pair with math instructors to combine lessons on plant growth with data collection and graphing. English and agriculture teachers collaborate to help students write garden journals while learning about crop rotation. Special education teachers work alongside master gardeners to create inclusive planting activities that accommodate different learning styles. Social studies and garden educators team up to explore local food systems and indigenous growing practices. These real-world applications help students connect academic concepts with hands-on experience while fostering collaboration between educators with diverse expertise.

Station Teaching: Rotating Through Garden Learning Centers

Setting Up Effective Learning Stations

Create engaging learning stations by dividing your garden space into themed areas that encourage hands-on exploration and collaboration. Set up a soil testing station where students can analyze different soil types, a seed starting area for learning about germination, and a composting zone for understanding decomposition. Ensure each station has clear instructions, necessary materials, and enough space for small groups to work comfortably.

Include visual aids like plant identification charts and seasonal growing guides at each station. Rotate activities regularly to maintain student interest and accommodate different learning styles. Consider incorporating weather monitoring stations, pollinator observation areas, and harvest collection points to create a comprehensive learning environment.

Remember to make stations accessible for all ability levels and provide options for both independent and group work. Keep tools organized and labeled, and establish clear procedures for station transitions to maximize learning time.

Students engaged in different garden learning stations with educational signage
Three distinct garden learning stations with students rotating between composting, planting, and harvesting activities

Parallel Teaching: Maximizing Garden-Based Learning

Coordinating Parallel Lessons

To maintain consistency across parallel groups, establish clear learning objectives and ensure both teachers follow the same curriculum framework while allowing for individual teaching styles. Create shared assessment criteria and regularly compare notes on student progress. Use common planning templates and schedule brief check-ins before and after lessons to align teaching approaches. Consider rotating between groups periodically to maintain equal familiarity with all students. Share resources and materials equitably between groups, and develop consistent behavior management strategies. Document successful teaching strategies and challenges to refine the approach over time. Remember that while delivery methods may vary slightly, core content and learning outcomes should remain consistent for all students.

Visual diagram of six different co-teaching models for garden education
Infographic showing the 6 co-teaching models with simple icons and brief descriptions

Alternative Teaching: Supporting Diverse Learners in the Garden

In the garden, alternative teaching methods shine as they accommodate diverse learning styles and abilities. By implementing collaborative teaching strategies, educators can create an inclusive environment where all students thrive while learning about sustainable agriculture.

Visual learners benefit from demonstration stations where they can observe seed starting, transplanting, or composting techniques. Kinesthetic learners excel with hands-on activities like soil testing or harvest collection. For auditory learners, incorporating garden-themed songs, storytelling, or verbal instructions helps reinforce concepts.

Consider creating designated zones within the garden for different learning approaches. A sensory garden area allows students to explore through touch and smell, while a quiet observation space supports those who need minimal distraction. Small group rotations enable teachers to provide specialized instruction while maintaining the flow of general garden activities.

Adaptive tools and modified activities ensure all students can participate meaningfully. Raised beds at different heights accommodate various physical abilities, while color-coded plant markers help visual processors identify different crops. Breaking tasks into smaller steps supports students who benefit from structured learning sequences.

Remember to celebrate different approaches to problem-solving in the garden. Some students might excel at designing efficient watering systems, while others show natural talent for identifying beneficial insects or creating garden art.

Team Teaching: Collaborative Garden Instruction

Team teaching in the garden creates a dynamic learning environment where two educators work together seamlessly to deliver engaging lessons. This collaborative approach allows teachers to combine their expertise, whether it’s pairing a science teacher with a garden educator or partnering classroom teachers with local farmers involved in farm-based learning programs.

In practice, both teachers actively participate throughout the lesson, taking turns leading different activities while supporting each other. For example, one teacher might demonstrate proper planting techniques while the other connects the activity to scientific concepts like plant biology or soil composition. This dual perspective enriches students’ understanding and provides multiple entry points for learning.

The beauty of team teaching lies in its flexibility. Teachers can alternate roles smoothly, with one handling hands-on demonstrations while the other circulates to provide individual support. During harvest time, one educator might guide students through proper picking techniques while their partner facilitates a math lesson on weighing and measuring produce.

This model works particularly well for interdisciplinary lessons, such as combining environmental science with practical gardening skills. The collaborative approach also allows teachers to model effective communication and teamwork, demonstrating the cooperative nature of sustainable agriculture to their students.

For successful implementation, teachers should plan lessons together, clearly define their roles, and maintain open communication throughout the session. This ensures smooth transitions and maximizes the educational benefits for students.

Complementary Teaching: Blending Expertise

In complementary teaching, two educators work together to blend their unique expertise, creating a rich learning environment that connects agricultural concepts with core academic subjects. For example, a science teacher might collaborate with a master gardener to demonstrate photosynthesis using the school garden as a living laboratory. The traditional teacher handles curriculum standards while the agricultural expert provides real-world context and hands-on demonstrations.

This model shines when teaching topics like soil chemistry, where students can learn scientific principles while getting their hands dirty testing soil pH levels. Math lessons come alive through garden planning and crop yield calculations, while language arts flourish through nature journaling and garden-themed creative writing exercises.

Success stories from schools implementing this model show improved student engagement and better retention of both academic concepts and agricultural knowledge. One elementary school reported that their third-grade students scored 15% higher on science assessments after incorporating garden-based learning into their curriculum through complementary teaching.

To maximize effectiveness, partners should meet regularly to align their expertise and ensure lessons flow naturally between classroom concepts and garden applications.

Co-teaching models offer powerful opportunities for schools and CSA partners to create enriching garden-based learning experiences. By selecting and implementing the right model, educators can combine classroom expertise with hands-on farming knowledge to deliver engaging lessons that stick. Success comes from careful planning, open communication, and a willingness to adapt teaching styles. Start small with one model, evaluate its effectiveness, and gradually expand your collaborative teaching approach to maximize student learning in the garden classroom.

Smart Kitchen Secrets: How to Slash Your Cooking Energy Bill

Posted by darrell on
0
Sustainable Consumer Practices
Smart Kitchen Secrets: How to Slash Your Cooking Energy Bill

Transform your kitchen into an energy-saving powerhouse by stacking multiple dishes in your oven, using the right-sized burners for your pots, and mastering the art of residual heat cooking. Smart meal prep not only cuts your energy bills but also reduces your carbon footprint while creating delicious, efficiently-cooked meals. Organize ingredients before turning on any heat source, choose energy-efficient cookware like cast iron and copper-bottom pans, and embrace one-pot cooking methods that maximize flavor while minimizing resource use. Batch cooking on weekends saves both time and energy, turning a single heating session into multiple meals that can be quickly reheated throughout the week. These practical cooking strategies work together to create a more sustainable kitchen without sacrificing the quality of your food or the joy of cooking.

Energy consumption comparison between microwave, stovetop, and oven cooking methods
Split-screen comparison showing energy usage meters for different cooking methods (microwave, stovetop, oven)

Choose Your Cooking Method Wisely

Microwave Magic

The microwave often gets a bad rap, but it’s actually one of the most energy-efficient cooking methods available. When used correctly, it consumes up to 80% less energy than conventional ovens. For best results, arrange food in a circle, leaving the center empty for even cooking. Use microwave-safe containers with lids to trap steam and cook food more efficiently. Clean your microwave regularly to maintain its performance, and adjust power levels based on what you’re cooking – lower settings work better for delicate foods like vegetables. Remember to cut foods into similar-sized pieces for consistent cooking, and always let food stand for a minute or two after cooking to allow heat to distribute evenly. For large quantities, it’s often more efficient to use conventional cooking methods, but the microwave excels at small portions and reheating.

Pressure Cooking Power

Pressure cookers are true champions of energy-efficient cooking, reducing cooking times by up to 70% compared to conventional methods. By creating a sealed, high-pressure environment, these kitchen powerhouses can transform tough beans into tender perfection in just 20 minutes instead of hours. The trapped steam not only cooks food faster but also requires less energy to maintain cooking temperature. A bonus for flavor enthusiasts: pressure cooking helps retain more nutrients and develops deeper flavors in soups, stews, and hearty dishes. Modern electric pressure cookers even come with smart features like delayed start and keep-warm functions, making them perfect for busy households looking to save time and energy while preparing nourishing meals.

Slow Cooker Savings

Slow cookers are champions of energy efficiency, using about as much electricity as a standard light bulb while transforming tough cuts of meat and hearty vegetables into tender, flavorful meals. These handy appliances consume roughly 70% less energy than conventional ovens when preparing dishes that require long cooking times, such as stews, soups, and braised meats. By maintaining a steady, low temperature over several hours, slow cookers not only save energy but also help preserve nutrients and develop rich flavors. They’re particularly efficient during summer months, as they generate minimal heat compared to traditional ovens, reducing the strain on your cooling system. Plus, the “set it and forget it” nature of slow cooking means you can prepare meals while away, maximizing both energy and time efficiency in your kitchen routine.

Smart Meal Planning Strategies

Batch Cooking Benefits

Batch cooking is a game-changing strategy that can dramatically improve your kitchen efficiency while helping you reduce kitchen waste. By preparing multiple meals simultaneously, you can maximize your oven or stovetop’s energy use and save significant time throughout the week. Consider roasting various vegetables on different racks while baking a casserole, or preparing several grain-based dishes using multiple burners. This approach works especially well with seasonal produce, allowing you to process and preserve abundant harvests efficiently. Create complementary meal combinations by thinking about compatible cooking temperatures and times – for example, roasting root vegetables alongside a whole chicken, or steaming different vegetables in stacked bamboo steamers. Remember to use appropriate container sizes for storing your prepared meals and label everything clearly with dates to maintain freshness and prevent food waste.

Multiple dishes being prepared at once on stovetop and in oven for efficient batch cooking
Organized kitchen scene showing batch cooking with multiple dishes being prepared simultaneously

One-Pot Wonders

One-pot meals are the ultimate solution for energy-efficient cooking, combining flavor and sustainability in a single vessel. These versatile dishes minimize energy usage by cooking all ingredients together, reducing the number of appliances needed and cutting down on cleanup time. Try a hearty vegetable and bean stew, which allows you to layer flavors while using just one burner. Mediterranean-style chickpea and spinach pasta is another excellent option, cooking the pasta directly in the sauce for maximum efficiency.

For maximum energy savings, choose recipes that cook at lower temperatures for longer periods, allowing residual heat to do much of the work. A classic rice and lentil pilaf or a rustic ratatouille are perfect examples. These dishes often taste even better the next day, making them ideal for batch cooking and reducing overall energy consumption. Remember to match your pot size to your burner diameter and always use a lid to trap heat effectively, further minimizing energy waste while creating delicious, wholesome meals.

Kitchen Equipment Tips

Right Size, Right Time

Selecting the right pot or pan size for your ingredients is a game-changer for energy-efficient cooking. When you use a pot that’s too large, you waste energy heating unnecessary space. Conversely, overcrowding ingredients in a small pan increases cooking time and affects food quality.

For optimal efficiency, choose cookware that matches your portion size. A good rule of thumb is to fill pots about two-thirds full and ensure pan-fried foods have enough space to cook without overlapping. For example, when boiling pasta, use just enough water to cover the noodles by about an inch, rather than filling a large pot unnecessarily.

Timing is equally crucial. Start with room-temperature ingredients when possible, as they cook more evenly and quickly than cold items. Plan your cooking sequence so that dishes requiring similar temperatures can be prepared together. Consider using a timer and familiarize yourself with proper cooking times – overdone food not only wastes energy but also sacrifices nutritional value and taste.

Remember that different cooking methods require different timing approaches. Quick-cooking vegetables like asparagus need just a few minutes, while root vegetables require longer cooking times. Match your cooking method to your ingredients for the best results.

Diagram illustrating proper matching of pot sizes to burner sizes for energy efficiency
Infographic showing correct pot sizes matched to stovetop burner sizes

Maintenance Matters

Regular maintenance of your cooking equipment isn’t just about cleanliness – it’s a key factor in energy efficiency. Clean burners and heating elements work more effectively, requiring less energy to reach and maintain proper temperatures. Make it a habit to wipe down stovetop burners after each use and deep clean them monthly to prevent food debris buildup.

For ovens, remove any burnt residue that can affect heat distribution and run the self-cleaning function sparingly, as it consumes significant energy. Keep oven door seals free from grease and debris to prevent heat loss. Check that your pot and pan bottoms remain flat and undamaged to maintain even contact with heating surfaces.

Don’t forget about small appliances – descale your electric kettle regularly, clean microwave interiors, and keep toaster slots crumb-free. These simple maintenance steps not only extend equipment life but also ensure your cooking remains as energy-efficient as possible.

Smart Storage Solutions

Smart food storage isn’t just about keeping things fresh – it’s a key strategy for energy-efficient cooking. Store frequently used ingredients at eye level in clear containers, making them easily accessible and reducing the time spent searching with the refrigerator door open. Group meal components together to minimize multiple trips to the fridge and repeated reheating sessions.

Consider portioning leftovers into meal-sized containers immediately after cooking. This eliminates the need to reheat large quantities multiple times, saving both energy and maintaining food quality. For ingredients like herbs and vegetables, proper storage methods such as using produce bags or glass containers with tight-fitting lids help maintain freshness longer, reducing waste and the energy needed for additional cooking sessions.

Keep a designated “eat soon” section in your fridge for items approaching their prime, and organize your pantry with a first-in-first-out system. This mindful approach to storage not only conserves energy but also helps reduce food waste while maintaining the nutritional value of your ingredients.

Seasonal Cooking Connection

Connecting your cooking habits with the natural rhythm of seasons isn’t just good for your health – it’s a smart way to reduce energy consumption in the kitchen. When you cook with local seasonal ingredients, you’re automatically choosing produce that requires less energy to grow, transport, and prepare.

Think about it: summer tomatoes and zucchini are perfect for quick, light cooking methods, while winter root vegetables naturally lend themselves to slow-cooking techniques you can combine with other dishes. This alignment helps you batch cook efficiently and make the most of your oven’s heat when it’s already running.

Joining a CSA (Community Supported Agriculture) program enhances this connection further. Since you receive fresh, seasonal produce regularly, you can plan your meals around what’s naturally abundant. This reduces the energy needed for storage and eliminates the need to run to the store for last-minute ingredients.

Some practical ways to maximize seasonal cooking efficiency:
– Group your cooking tasks by temperature requirements
– Plan oven dishes during cooler hours in summer
– Use residual heat from one dish to prepare another
– Preserve excess seasonal produce through low-energy methods like dehydrating
– Organize weekly menus around your CSA box contents

Remember that seasonal cooking naturally leads to more energy-efficient meal preparation because you’re working with ingredients at their peak – requiring less cooking time and energy to bring out their best flavors.

By implementing these energy-efficient cooking practices, you can make a significant impact on both your utility bills and the environment. From simple habits like using lids and matching pot sizes to burners, to smart meal planning and batch cooking, every small change adds up to meaningful savings. Remember that efficient cooking isn’t just about using less energy – it’s about making the most of your time in the kitchen while creating delicious, nutritious meals for your family.

Start by incorporating one or two of these techniques into your daily routine. Perhaps begin with meal planning and proper pot selection, then gradually add more practices as they become habits. Keep track of your energy bills to see the difference these changes make. You might be surprised by how much you can save while becoming a more organized and efficient cook.

By choosing energy-efficient appliances, maintaining them properly, and being mindful of your cooking methods, you’re not just saving money – you’re contributing to a more sustainable future. Let’s cook smarter, not harder, and make our kitchens more environmentally friendly, one meal at a time.

Transform Kitchen Scraps into Garden Gold: Your Easy Home Composting Setup

Posted by darrell on
0
Sustainable Consumer Practices
Transform Kitchen Scraps into Garden Gold: Your Easy Home Composting Setup

Transform your kitchen scraps into nutrient-rich soil with a simple countertop composting system that fits seamlessly into your daily routine. By converting food waste into garden gold, you’ll reduce landfill impact while discovering the benefits of organic gardening right in your home. A compact bin under your sink, paired with a balanced mix of green and brown materials, creates perfect composting conditions without odors or pests. Even apartment dwellers can harness this natural process, turning coffee grounds, vegetable scraps, and fallen leaves into rich, dark compost that nourishes houseplants and container gardens.

Starting today, collect kitchen scraps in a dedicated container, layer them with dry materials like shredded paper or leaves, and maintain moisture levels similar to a wrung-out sponge. Within weeks, you’ll witness the transformation of waste into valuable garden resources, joining thousands of urban composters who make sustainability a daily practice. This simple yet powerful step toward eco-friendly living proves that significant environmental impact starts right in your kitchen.

Getting Started with Kitchen Composting

Choosing Your Composting Method

When it comes to turning your kitchen scraps into black gold, you’ve got several fantastic options to choose from. Traditional compost bins are perfect for beginners – they’re affordable, low-maintenance, and can handle large volumes of waste. These stationary bins work well in outdoor spaces and can be as simple as a basic plastic container with drainage holes or a more elaborate multi-bin system.

Compost tumblers offer a speedier alternative, producing finished compost in as little as 4-8 weeks. Their sealed, rotating design helps maintain optimal moisture levels and makes turning the compost effortless. While they’re typically more expensive than bins, tumblers are excellent for urban settings where space is limited and pest prevention is crucial.

For indoor composting enthusiasts, a worm composting setup might be your best bet. Red wiggler worms transform kitchen scraps into nutrient-rich castings while taking up minimal space under your sink or in a closet. This method is odorless when maintained properly and produces some of the highest quality compost for your plants.

Consider your available space, time commitment, and composting goals when choosing your method. Many successful composters actually combine multiple systems – using a tumbler for quick results while maintaining a traditional bin for larger volumes and keeping a worm bin for indoor scraps during winter months.

Three types of home composting systems: rotating tumbler, stationary bin, and worm composting bin
Side-by-side comparison of different home composting systems including a tumbler, traditional bin, and worm composting setup

Perfect Location and Setup

Finding the perfect spot for your indoor composting system is crucial for success. Ideally, choose a location in your kitchen that’s easily accessible but away from direct sunlight and heat sources. Under the sink or in a corner of your pantry works well for most households. The area should have good ventilation to prevent odors and maintain proper decomposition.

When setting up your system, start with a container that matches your household’s needs. For a family of four, a 2-3 gallon container usually suffices. Choose a bin with a tight-fitting lid to control odors and keep pests out. Make sure it has small holes drilled in the bottom and sides for airflow and drainage.

Begin by laying a base layer of brown materials like shredded newspaper or dry leaves (about 2 inches deep). This creates essential air pockets and helps absorb excess moisture. Add a handful of garden soil or finished compost to introduce beneficial microorganisms that will jumpstart the decomposition process.

Place a small tray underneath your container to catch any liquid that might drain out. This “compost tea” can be diluted and used as a nutrient-rich plant fertilizer. Keep a smaller collection container on your counter for daily food scraps, transferring them to the main bin every few days.

Remember to position your bin where the temperature remains relatively stable, ideally between 40-80°F (4-27°C). Extreme temperatures can slow down or halt the composting process.

Kitchen Waste That Makes Great Compost

Various compostable kitchen items including fruit peels, vegetable scraps, coffee grounds, and eggshells
Organized collection of common kitchen scraps suitable for composting, arranged on a wooden surface

Green Materials (Nitrogen-Rich)

Kitchen scraps rich in nitrogen are essential for creating healthy compost, and your kitchen produces plenty of these “green materials” daily. Fresh fruit and vegetable scraps form the backbone of your nitrogen-rich materials – think apple cores, banana peels, carrot tops, and lettuce leaves. Coffee grounds and used tea bags are excellent additions, providing both nitrogen and beneficial minerals to your compost pile.

Eggshells, while technically not nitrogen-rich, can be included with your green materials. They add calcium to your compost and help improve soil structure. Fresh grass clippings from your lawn also make excellent green material, though be sure to mix them well with other ingredients to prevent clumping.

Plant-based kitchen waste like bread, pasta, and grains can be composted, but add these in moderation to avoid attracting pests. Used paper napkins and paper towels (as long as they’re not contaminated with chemicals or cleaning products) also work well.

Keep in mind that smaller pieces decompose faster, so consider chopping larger scraps into smaller chunks. Store your kitchen scraps in a countertop container with a tight-fitting lid to prevent odors and fruit flies. Empty this container into your main compost bin every few days to maintain freshness and prevent unwanted smells in your kitchen.

Remember to avoid adding meat, dairy, oils, or fatty foods, as these can create odor problems and attract unwanted wildlife to your compost pile.

What to Keep Out

While composting is great for many kitchen scraps, certain items can harm your compost pile or create unwanted issues. Keep meat, fish, and dairy products out of your home compost, as they attract pests and create unpleasant odors. These items also break down slowly and can introduce harmful bacteria into your pile.

Avoid adding oils, fats, and greasy foods, which can disrupt the decomposition process and create anaerobic conditions that slow down composting. Cooked foods with sauces or seasonings should also stay out, as they can attract unwanted critters and throw off your pile’s balance.

Citrus peels and onions should be added sparingly, if at all. While they will eventually break down, their natural compounds can kill beneficial composting organisms and slow the overall process. Bread products and grains can attract rodents, so it’s best to exclude these as well.

Never add pet waste, as it can contain harmful pathogens. Similarly, keep diseased plants out of your pile to prevent spreading plant diseases to your garden. Glossy or colored paper products, including magazines and wrapping paper, often contain chemicals that don’t belong in your compost.

By being mindful of what you keep out, you’ll create healthier compost and avoid common problems that discourage new composters.

Maintaining Your Kitchen Compost

Balancing Your Compost Mix

Achieving the perfect balance in your compost pile is like following a simple recipe. The key ingredients are your “greens” (nitrogen-rich materials) and “browns” (carbon-rich materials). The ideal ratio is roughly 3:1 browns to greens, though you don’t need to be exact – composting is more art than science!

Greens include kitchen scraps like fruit and vegetable waste, coffee grounds, and fresh grass clippings. These materials are high in nitrogen and provide the protein-rich fuel that beneficial bacteria need to break down your compost. Browns consist of dry leaves, paper products, cardboard, and straw, which provide carbon and help maintain proper airflow in your pile.

When adding kitchen scraps (greens), cover them with a layer of browns to prevent odors and discourage pests. If your pile starts to smell like ammonia, add more browns. If it’s not breaking down quickly enough, try adding more greens. A well-balanced pile will smell earthy and feel slightly damp, like a wrung-out sponge.

Keep a container of dry browns near your compost bin for easy access. Many composting enthusiasts collect fall leaves in bags to use throughout the year – a trick that makes maintaining the right balance much easier. Remember that smaller pieces break down faster, so consider tearing up cardboard or shredding leaves before adding them to your pile.

Illustrated cross-section of compost pile layers showing green and brown materials, moisture, and air flow
Cross-section diagram of a healthy compost pile showing proper layering of materials

Troubleshooting Common Issues

Even the best-maintained compost bins can occasionally face challenges, but most issues have simple solutions. If your compost develops an unpleasant odor, it usually indicates too much moisture or insufficient oxygen. Add dry, carbon-rich materials like leaves or shredded paper, and turn the pile more frequently to improve airflow.

To prevent pest problems, avoid adding meat, dairy, or oily foods to your compost. If you notice flies or other insects, cover fresh food scraps with a layer of brown materials or finished compost. For rodent control, use a sealed bin with small ventilation holes and bury food scraps in the center of the pile.

If your compost isn’t breaking down quickly enough, check the moisture level – it should feel like a wrung-out sponge. Too dry? Add water or fresh green materials. Too wet? Mix in dry browns and ensure proper drainage. A slow-decomposing pile might also need more nitrogen-rich materials or smaller pieces to break down more efficiently.

When your compost looks too clumpy or matted, it’s likely due to too many layers of similar materials. Break up any compacted areas and mix different types of materials thoroughly. Remember, successful composting is about maintaining the right balance of ingredients and conditions.

Seasonal Maintenance Tips

Successful composting requires adjusting your routine as seasons change. During spring, increase the amount of “green” materials like fresh grass clippings and early garden trimmings to jumpstart decomposition after winter. This is also the perfect time to turn your pile thoroughly and add moisture if needed.

Summer brings abundant green materials from yard work and garden maintenance. Balance these with extra “brown” materials like dried leaves you saved from fall to maintain proper carbon-nitrogen ratios. Keep your pile slightly moist, similar to a wrung-out sponge, and consider placing it in partial shade to prevent excessive drying.

As autumn approaches, collect and store fallen leaves – they’re composting gold for the entire year! Create a separate pile or store them in bags to use as brown materials throughout other seasons. Consider covering your active pile to prevent it from becoming waterlogged during fall rains.

Winter requires extra insulation to keep the decomposition process active. Add a thick layer of straw or leaves around your bin, and continue adding kitchen scraps even when it’s cold. While decomposition slows down, your pile will remain active at its core. Keep materials chopped smaller in winter to help them break down more easily despite the cold.

Remember to monitor moisture levels year-round, but pay special attention during extreme weather conditions. Your compost should always feel like a wrung-out sponge, regardless of the season.

Using Your Finished Compost

Your finished compost is ready to use when it’s dark brown, crumbly, and smells like fresh earth. To harvest your compost, simply remove the top layer of newer materials to access the decomposed matter at the bottom of your bin. Sift the mature compost through a large-mesh screen to remove any chunks that haven’t fully broken down – these can go back into your active pile.

There are numerous ways to put your homemade black gold to work. The most common use is to improve garden soil by mixing in 2-3 inches of compost before planting. For established plants, apply a 1-inch layer around their base as a nutrient-rich mulch. Your houseplants will thrive with a thin top layer of compost added every few months.

Create a potent “compost tea” by steeping finished compost in water for 24-48 hours. This liquid fertilizer can be used to water plants or as a foliar spray. For seed starting, mix one part compost with two parts potting soil to give seedlings a strong start.

Store excess compost in a dry, covered container or bag until needed. Your homemade compost will retain its beneficial properties for many months when properly stored. Remember that a little goes a long way – compost is concentrated nutrition for your plants, so use it sparingly but consistently for the best results.

Pro tip: Keep a garden journal noting when and where you apply compost. This helps track your garden’s progress and plan future applications for optimal plant growth.

Starting your home composting journey is one of the most rewarding steps you can take toward sustainable living. By converting kitchen scraps and yard waste into nutrient-rich soil, you’re not only reducing landfill waste but also creating a valuable resource for your garden. The benefits are truly remarkable – from lowering your carbon footprint and reducing methane emissions to saving money on fertilizers and improving your soil quality.

Best of all, composting is accessible to everyone, whether you live in a spacious house with a backyard or a cozy apartment. With the right setup and basic knowledge, you can start transforming your waste into black gold today. The satisfaction of creating your own compost and watching your plants thrive with this natural fertilizer is incomparable.

Remember, every small step counts in our journey toward environmental sustainability. By joining the composting community, you’re becoming part of a global movement toward a greener future. So why wait? Start your composting adventure today and experience the joy of turning waste into wonder while helping our planet thrive.

These Farm-Tested Sustainability Practices Are Transforming Local Agriculture

Posted by darrell on
0
Environmental Sustainability
These Farm-Tested Sustainability Practices Are Transforming Local Agriculture

Transform your business or lifestyle with proven sustainability initiatives that deliver measurable environmental impact. Leading organizations worldwide have successfully implemented water recycling systems that reduce consumption by 40%, installed solar panels that slash energy costs by 60%, and created zero-waste programs diverting 90% of materials from landfills. From Fortune 500 companies to small local farms, sustainable practices aren’t just preserving resources – they’re driving innovation and boosting bottom lines.

Consider how Seattle’s Pike Place Market composts 1,000 tons of food waste annually, converting it into rich soil for local farms, while Tesla’s Nevada Gigafactory operates entirely on renewable energy, proving that sustainability scales from community projects to industrial operations. These real-world examples demonstrate how environmental stewardship creates ripple effects across communities, economies, and ecosystems.

Whether you’re a business leader, community organizer, or household decision-maker, implementing sustainability efforts offers immediate benefits and long-term rewards for both planet and profit.

Smart Water Management Solutions That Work

Drip Irrigation Success Stories

Jordan and Sarah Miller’s 15-acre vegetable farm in California’s Central Valley serves as a shining example of drip irrigation success. After switching from traditional sprinkler systems, they reduced their water usage by 60% while increasing crop yields by 25%. Their precision irrigation system delivers water directly to plant roots, minimizing waste and preventing weed growth between rows.

In Arizona, Desert Springs Farm transformed their water management practices by implementing a solar-powered drip system. Owner Maria Rodriguez reports saving 800,000 gallons of water annually while producing the same amount of crops. The system’s moisture sensors ensure optimal water delivery, and the farm’s success has inspired five neighboring properties to adopt similar practices.

Small-scale success stories include the Green Thumb Community Garden in Oregon, where 50 plot holders collectively reduced water consumption by 40% after installing a shared drip irrigation network. The garden now serves as a learning center for sustainable water management, hosting monthly workshops for local growers interested in efficient irrigation techniques.

Close-up of drip irrigation lines delivering water to rows of crops
Modern drip irrigation system in action on a vegetable farm

Rainwater Harvesting Systems

Rainwater harvesting systems have become a cornerstone of sustainable agriculture, offering farmers and homeowners a smart solution for water conservation. These systems typically include gutters, downspouts, and storage tanks that collect rainfall from rooftops and other surfaces. Many successful farms have implemented simple yet effective setups using food-grade plastic tanks connected to greenhouse roofs, capable of storing thousands of gallons of water for dry seasons.

For example, Green Valley Farm in Oregon reduced their water bills by 40% after installing a 5,000-gallon collection system. They use this stored rainwater for irrigation, livestock, and greenhouse operations. The system pays for itself within two to three growing seasons through reduced utility costs.

Beyond storage tanks, some farmers are incorporating swales and retention ponds into their landscape design. These natural collection methods help replenish groundwater and create moisture-rich growing areas. Simple filters and first-flush diverters ensure the collected water remains clean and suitable for agricultural use.

DIY enthusiasts can start small with rain barrels under downspouts, gradually expanding their system as needs grow. This scalable approach makes rainwater harvesting accessible to both small garden plots and larger farming operations.

Waste Reduction Practices That Save Money

Aerial view of organized compost rows with steam rising showing active decomposition
Large-scale composting operation at a sustainable farm

Composting Innovation

Modern composting initiatives are revolutionizing how we handle organic waste, going far beyond traditional backyard bins. Innovative farmers are implementing effective composting methods that transform agricultural waste into valuable resources. These include in-vessel composting systems that speed up decomposition and vermiculture setups that use worms to create nutrient-rich castings.

Many farms now use smart sensors to monitor moisture levels and temperature in their compost piles, ensuring optimal conditions for breakdown. Some have even introduced solar-powered aeration systems that maintain proper oxygen levels while reducing the need for manual turning.

Community-scale composting programs are gaining traction, with some farms partnering with local restaurants and markets to process food waste. This collaboration not only diverts waste from landfills but also creates high-quality soil amendments for organic farming. The resulting compost helps improve soil structure, retain water, and boost crop yields naturally, completing a sustainable cycle of waste reduction and soil enrichment.

Package-Free Distribution

Innovative farms are revolutionizing produce distribution by embracing package-free solutions that drastically reduce waste. Many local farms now offer “bring-your-own-container” programs, where customers can fill reusable bags or boxes with fresh produce directly from harvest bins. Some farms have introduced creative solutions like returnable wooden crates or mesh bags that customers can exchange on their next visit.

Community Supported Agriculture (CSA) programs have taken this concept further by delivering produce in reusable bins that members return weekly. Farms like Green Valley Organics save thousands of plastic bags annually by using cloth produce bags and encouraging customers to bring their own containers to farmers’ markets.

Several farms have partnered with local grocery stores to create “loose produce” sections, where fruits and vegetables are displayed without packaging, allowing customers to select exactly what they need. This approach not only eliminates unnecessary packaging but also helps reduce food waste by enabling customers to purchase precise quantities.

Some farms even offer bulk dispensing systems for items like grains, nuts, and dried fruits, completely eliminating the need for pre-packaged portions. These initiatives have shown that package-free distribution isn’t just environmentally friendly – it’s also cost-effective and popular with customers.

Soil Health Revolution

Cover Cropping Success

Cover cropping has become a game-changer for many sustainable farms across the country. Take Sarah’s Heritage Farm in Vermont, where implementing winter rye and crimson clover rotation helped increase soil organic matter by 2.5% in just two growing seasons. The cover crops not only prevented erosion but also naturally suppressed weeds, reducing the need for mechanical cultivation.

In California’s Central Valley, the Martinez Family Farm saw remarkable success with their mustard and vetch cover crop system. Their water retention improved by 30%, while beneficial insect populations doubled, leading to better natural pest control. They also noticed significantly improved tomato yields in fields following their cover crop rotation.

Green Acres Farm in Iowa combines cereal rye with hairy vetch, planting in fall after corn harvest. This practice has cut their nitrogen fertilizer needs by 40% and provides excellent protection against soil erosion during winter months. The farm saves approximately $75 per acre annually on input costs while building healthier soil.

These success stories demonstrate how cover cropping can simultaneously improve soil health, reduce costs, and enhance crop productivity when implemented thoughtfully.

Natural Fertilization Methods

Natural fertilization methods offer sustainable alternatives that nourish soil while protecting the environment. Compost is a cornerstone of organic fertilization, created by recycling kitchen scraps, yard waste, and agricultural byproducts into nutrient-rich soil amendments. Many farmers successfully use cover crops like clover and alfalfa, which naturally fix nitrogen in the soil while preventing erosion.

Green manure, created by turning these cover crops back into the soil, provides essential nutrients and improves soil structure. Vermicomposting, using earthworms to break down organic matter, produces highly effective fertilizer rich in beneficial microorganisms. Local farmer Sarah Chen shares, “Since switching to vermicompost, my vegetable yields have increased by 30%, and soil health has dramatically improved.”

Other natural methods include using bone meal for phosphorus, seaweed extracts for micronutrients, and aged animal manure for balanced nutrition. These alternatives not only reduce dependency on synthetic fertilizers but also build long-term soil fertility. Remember to test your soil regularly to understand its specific needs and adjust your natural fertilization strategy accordingly.

Energy-Smart Farming

Solar-Powered Solutions

Innovative farmers across the country are harnessing the sun’s power to create more sustainable operations. Solar power in agriculture has evolved from simple panel installations to sophisticated systems that power entire farm operations.

Take Fresh Earth Farm in California, where solar panels mounted on barn roofs power irrigation systems, cold storage units, and processing facilities. This setup not only reduces their carbon footprint but saves them $15,000 annually in energy costs. In Vermont, Blue Mountain Organics installed a ground-mounted solar array that doubles as shade protection for grazing sheep, maximizing land use while generating clean energy.

Solar solutions aren’t limited to large operations. Small-scale farmers are using portable solar panels to power electric fencing, water pumps, and greenhouse ventilation systems. Some innovative growers even use solar dehydrators for preserving herbs and vegetables, eliminating the need for electric dryers.

These real-world examples show how solar technology can be both environmentally responsible and economically smart, helping farms reduce operational costs while contributing to a more sustainable future.

Modern barn featuring rooftop solar array overlooking productive farmland
Solar panels installed on a barn roof with agricultural fields in background

Wind Energy Integration

Modern farms are increasingly turning to wind energy as a sustainable power solution, with impressive results for both the environment and their bottom line. Many farmers are installing wind turbines that generate clean electricity for their operations while reducing dependency on the grid. For example, the Peterson Family Farm in Iowa powers their entire dairy operation through two medium-sized turbines, saving over $45,000 annually on electricity costs.

Some farmers are taking it a step further by participating in wind farm cooperatives, where multiple properties host larger turbines and share the energy benefits. These arrangements provide steady income through power company partnerships while maintaining regular farming operations. The Rising Sun Collective in Minnesota demonstrates this dual-purpose approach, using their land for both crop production and wind energy generation.

Small-scale solutions are also gaining popularity, with portable turbines powering irrigation systems and greenhouse climate control. These systems are particularly effective for farms in windy regions, where consistent air movement can be harnessed for practical daily operations. The initial investment in wind energy typically pays for itself within 5-7 years through reduced utility costs and potential energy credits.

The sustainability efforts we’ve explored demonstrate that small changes can lead to significant environmental impact when implemented consistently. From water conservation techniques to renewable energy adoption, these examples show how farms and businesses are successfully balancing ecological responsibility with economic viability. What’s particularly encouraging is that many of these initiatives have resulted in cost savings while reducing environmental footprints, proving that sustainability can benefit both the planet and the bottom line.

These success stories serve as inspiration and practical blueprints for others looking to embrace more sustainable practices. Whether you’re a small-scale farmer, business owner, or individual looking to make a difference, there’s an entry point for everyone. Start small by implementing one or two practices that align with your goals and capabilities, then gradually expand your efforts as you see results.

Remember, sustainability isn’t just about environmental protection—it’s about creating resilient systems that can thrive long into the future. By adopting these proven practices and continuously innovating, we can all contribute to a more sustainable world for generations to come. The time to act is now, and every effort, no matter how small, counts toward our collective goal of a greener future.

How Local Communities Shape Food Research (And Why It Matters)

Posted by darrell on
0
Local Food Systems and Distribution
How Local Communities Shape Food Research (And Why It Matters)

Community-based participatory research (CBPR) revolutionizes how we understand and improve local food systems by putting community members at the center of the research process. Like community-supported agriculture, CBPR builds lasting partnerships between researchers and local stakeholders to create meaningful, sustainable change. This collaborative approach combines scientific rigor with community wisdom, ensuring research directly benefits those most affected by food system challenges.

By engaging farmers, consumers, and local organizations as equal partners rather than subjects, CBPR transforms traditional research methods into powerful tools for community empowerment. This democratic approach to research has proven particularly effective in addressing food security, sustainable farming practices, and equitable food distribution across diverse communities.

Whether you’re a researcher, community organizer, or concerned citizen, understanding CBPR opens new possibilities for creating positive change in your local food system through genuine collaboration and shared decision-making.

What Makes Research Truly Community-Based?

Key Principles of CBPR

Community-based participatory research thrives on several key principles that make it uniquely effective in supporting local food systems. At its core, CBPR recognizes the community as an equal partner, not just a subject of study. This means local farmers, market organizers, and consumers actively participate in shaping research questions and methods.

Another vital principle is the emphasis on mutual learning and benefit-sharing. Researchers and community members learn from each other’s expertise, with farmers sharing generations of practical knowledge while researchers contribute scientific insights. This collaborative approach ensures that research outcomes directly benefit the local food system.

Trust-building and long-term commitment are essential elements. Unlike traditional research models, CBPR involves ongoing relationships and regular communication between all participants. This helps create sustainable solutions that truly work for the community.

The process also emphasizes action-oriented outcomes. Research findings aren’t just published in academic journals; they’re transformed into practical improvements for local food systems, whether that’s developing better distribution methods or creating more effective farmer training programs.

Lastly, CBPR values transparency and open communication throughout the entire research process, ensuring all voices are heard and respected.

The Partnership Approach

In community-based participatory research, researchers and community members form a unique partnership where both parties contribute equally valuable knowledge and expertise. Local farmers, market organizers, and community members bring their practical experience and deep understanding of local food systems, while researchers contribute their methodological expertise and analytical skills. This collaborative approach ensures that research questions, methods, and outcomes genuinely reflect community needs and priorities.

The partnership often begins with relationship-building activities, such as community meetings, farm visits, and shared meals, where both parties can learn from each other and establish trust. Decisions about research design, data collection, and implementation of findings are made jointly, with community members having an equal voice in shaping the direction of the project.

This equal partnership extends to sharing resources, responsibilities, and credit for the research outcomes. Community members often serve as co-researchers, helping to gather data, interpret results, and determine how findings should be used to benefit their local food system. This approach ensures that research directly serves community interests while building local capacity for future initiatives.

Community members and researchers working together during a participatory research meeting
Diverse group of community members and researchers collaborating around a table with local food system maps and documents

CBPR in Action: Local Food System Success Stories

Farmer-Led Research Initiatives

Several inspiring examples showcase how farmers have successfully led research initiatives that benefit their communities and advance sustainable agriculture. In Vermont, a group of small-scale organic farmers collaborated with the University of Vermont to study innovative season extension techniques. The farmers designed experiments testing different greenhouse materials and heating methods, resulting in a 30% increase in winter crop production across participating farms.

In California’s Central Valley, a collective of family farmers spearheaded research into beneficial insect habitats. They documented how planting specific native flower species alongside crops naturally reduced pest problems while supporting local pollinator populations. Their findings have since been adopted by over 100 farms in the region.

The Practical Farmers of Iowa network demonstrates the power of farmer-led research through their on-farm trials program. Member farmers conduct structured experiments on topics ranging from cover crop varieties to grazing practices. One notable success was a three-year study on roller-crimping techniques for organic no-till farming, which helped participating farmers reduce fuel costs by 40% while improving soil health.

These initiatives show how farmers’ hands-on experience and practical knowledge can drive meaningful agricultural research. When farmers take the lead in research design and implementation, the results tend to be more readily applicable and quickly adopted by other producers in their communities.

Farmers and scientists conducting collaborative field research on agricultural land
Local farmers collecting soil samples and recording data in their fields alongside research team members

Community Food Security Projects

Community-based participatory research has proven invaluable in developing sustainable food security solutions across diverse communities. A notable example is the Growing Together Project in Oakland, California, where researchers partnered with local residents to transform vacant lots into productive community gardens. This collaboration not only provided fresh produce but also created educational opportunities and strengthened local food networks.

In Minneapolis, the Urban Agriculture Coalition engaged residents in studying food desert solutions, resulting in the establishment of neighborhood-run farmers’ markets and educational programs about seasonal growing. Community members were involved in every research phase, from identifying challenges to implementing solutions.

The Navajo Nation’s Food Sovereignty Initiative demonstrates how CBPR can honor traditional knowledge while addressing modern challenges. Researchers worked alongside tribal members to document traditional farming methods and develop drought-resistant growing techniques that respect cultural practices.

These projects share common success factors: genuine community engagement, respect for local knowledge, and practical outcomes that benefit residents directly. They’ve shown that when communities lead the research process, solutions are more sustainable and culturally appropriate. The resulting programs often extend beyond food production to include skill-sharing, youth education, and economic development opportunities.

Visual diagram depicting the interconnected elements of community-based food system research
Infographic showing the circular relationship between community knowledge, research, and sustainable food systems

Benefits for Local Food Systems

Enhanced Local Knowledge

CBPR harnesses the deep well of local knowledge that community members possess, recognizing that residents are experts in their own lived experiences and local food systems. This approach values traditional farming wisdom, cultural food practices, and generational knowledge passed down through families and communities.

When local farmers and gardeners participate in research, they bring invaluable insights about soil conditions, weather patterns, and successful growing techniques specific to their region. Their practical experience often reveals solutions that might be overlooked by conventional research methods. For instance, many communities have developed innovative pest management strategies using local plants or have perfected crop rotation patterns based on generations of observation.

Community wisdom also encompasses understanding of local food preferences, cooking methods, and preservation techniques. This knowledge helps ensure research outcomes are both practical and culturally appropriate. Local participants can identify which crops will truly benefit their community and how to integrate new growing methods with existing practices.

By incorporating local expertise, CBPR creates more effective and sustainable solutions. When community members share their knowledge, the research becomes grounded in real-world experience, leading to more successful implementation and long-term adoption of new practices.

Sustainable Solutions

Community-based participatory research creates lasting positive impacts through its sustainable, collaborative approach. When communities actively engage in research processes, they develop valuable skills and infrastructure that continue benefiting local development long after specific projects conclude. These initiatives often lead to the establishment of successful food equity programs and other community-driven solutions.

The sustainability of CBPR stems from its focus on building local capacity. Community members learn research methods, data analysis, and project management skills they can apply to future challenges. This knowledge transfer creates a ripple effect, empowering residents to initiate and lead their own research projects and community improvements.

Additionally, CBPR helps establish lasting partnerships between academic institutions and communities, creating channels for ongoing collaboration and resource sharing. These relationships often evolve into long-term initiatives that address various community needs, from food security to environmental conservation.

The approach also strengthens community bonds and social networks, leading to increased civic engagement and collective problem-solving capacity. This enhanced social capital becomes a valuable resource for addressing future challenges and maintaining positive changes within the community.

Getting Started with CBPR

Starting a community-based participatory research project in local food systems begins with building strong relationships in your community. First, identify and reach out to key stakeholders, including local farmers, market vendors, food bank operators, and community gardeners. Schedule informal meetings over coffee or at farmers’ markets to discuss shared interests and concerns about local food access and sustainability.

Create a diverse advisory board that represents various community perspectives, including both producers and consumers. This group should meet regularly to establish research priorities and guide project development. Remember that successful CBPR relies on equal partnership – community members aren’t just research subjects but active collaborators.

Begin with small, achievable goals that address immediate community needs. This might involve mapping local food assets, conducting surveys about food access barriers, or documenting traditional growing methods used by local farmers. Use participatory methods like photovoice or community mapping workshops to gather data in ways that engage and empower participants.

Maintain transparency throughout the process by sharing findings regularly through community newsletters, social media, or local meetings. Consider creating a shared online platform where participants can access and contribute to research materials. Most importantly, ensure that research outcomes directly benefit the community through practical applications, such as improved farmers’ market programs or new community garden initiatives.

Remember to celebrate small wins and maintain regular communication with all partners. This helps sustain momentum and builds trust for future collaboration.

Community-based participatory research has proven to be a powerful tool in strengthening and sustaining local food systems. By bringing together farmers, consumers, researchers, and community leaders, CBPR creates lasting partnerships that address real food system challenges while empowering local communities. Through collaborative research efforts, communities have successfully improved access to fresh produce, developed innovative distribution methods, and created more resilient food networks that benefit everyone involved. The participatory nature of this approach ensures that solutions are practical, culturally appropriate, and sustainable in the long term. As we continue to face challenges in our food systems, CBPR remains an essential methodology for creating positive change from the ground up, fostering food sovereignty, and building stronger, more connected communities around local food production and consumption.

How Rural Partnerships Are Transforming Local Food Communities Through CSA

Posted by darrell on
0
CSA Fundamentals and Benefits
How Rural Partnerships Are Transforming Local Food Communities Through CSA

Rural communities thrive when local organizations forge meaningful partnerships between farmers and communities, creating sustainable networks of support and growth. These vital collaborations connect agricultural producers with essential resources, technical expertise, and funding opportunities while strengthening food security and economic development in America’s heartland. Through strategic assistance partnerships, small towns and farming communities gain access to infrastructure improvements, sustainable agriculture programs, and capacity-building initiatives that might otherwise remain out of reach. From water quality enhancement projects to renewable energy installations, these partnerships have transformed countless rural landscapes while preserving the unique character and cultural heritage that defines our countryside. By bringing together local government agencies, nonprofit organizations, and private sector partners, rural community assistance programs create lasting positive change that ripples through generations of farming families and their neighbors.

Building Stronger Communities Through Local Food Networks

Bird's eye view of a working CSA farm showing diverse crops and community gathering space
Aerial view of a diverse CSA farm with multiple crop rows and a distribution center where community members gather

Creating Sustainable Food Systems

Rural community assistance partnerships play a vital role in building sustainable food systems by connecting local farmers with essential resources and support networks. These partnerships help establish crucial infrastructure like food hubs, processing facilities, and distribution channels that enable small-scale farmers to reach broader markets.

Through collaborative efforts, these initiatives provide farmers with access to shared equipment, cold storage facilities, and transportation services that might otherwise be cost-prohibitive for individual producers. Local food advocates work alongside agricultural experts to develop training programs, offering guidance on sustainable farming practices and business management skills.

The partnerships also foster connections between farmers and community institutions like schools, hospitals, and restaurants, creating stable markets for locally grown produce. This integrated approach strengthens regional food security while supporting economic growth in rural areas, making fresh, healthy food more accessible to all community members.

Economic Benefits for Rural Communities

Rural community assistance partnerships create significant economic ripples throughout local areas. Farmers receive direct support through grants, low-interest loans, and equipment-sharing programs, enabling them to expand operations and hire local workers. These partnerships also facilitate connections between farmers and nearby restaurants, schools, and markets, creating stable income streams through guaranteed purchase agreements.

Local businesses benefit from increased foot traffic as farmers’ markets and food festivals draw visitors from surrounding areas. Studies show that every dollar spent at local farms generates an additional $2.50 in local economic activity. Small-scale food processors, distributors, and agricultural supply stores see growth as farming operations expand.

The partnerships also help communities attract tourism dollars through agritourism initiatives like farm tours, harvest festivals, and educational programs. This diversification of income sources strengthens the overall economic resilience of rural areas while preserving traditional farming heritage and creating sustainable employment opportunities for future generations.

Resources and Support for CSA Farmers

Training and Education Programs

The Rural Community Assistance Partnership offers comprehensive training programs designed to empower farmers and rural communities. These educational initiatives include hands-on workshops in sustainable farming practices, business management courses, and technical assistance for agricultural operations.

Local farmers can participate in seasonal workshops covering topics like organic certification, soil health management, and water conservation techniques. The partnership also provides mentorship opportunities, connecting experienced farmers with newcomers to share knowledge and best practices.

Financial literacy programs help farmers understand budgeting, loan applications, and grant writing, while marketing workshops teach effective strategies for selling produce locally. Online resources and webinars make education accessible to remote communities, covering everything from crop planning to food safety regulations.

Success stories include Sarah Miller, who transformed her small family farm into a thriving organic operation after completing the partnership’s business development program. The partnership also offers specialized training for women farmers and veterans interested in agricultural careers, ensuring inclusive support for all community members.

Regular farm tours and field days provide practical demonstrations and networking opportunities, fostering a collaborative learning environment within the rural farming community.

Group of farmers attending an educational workshop on sustainable farming practices
Farmers participating in a hands-on training workshop, learning sustainable farming techniques

Financial and Infrastructure Support

Rural community assistance partnerships offer vital financial support through various grants, low-interest loans, and matching fund programs designed specifically for small-scale farmers and local food initiatives. These partnerships often connect farmers with federal and state funding opportunities, including USDA grants and regional development funds. Additionally, they facilitate resource sharing in CSA farms, helping reduce operational costs through shared equipment programs and cooperative purchasing arrangements.

Infrastructure support typically includes access to essential farming equipment, cold storage facilities, and distribution networks. Many partnerships maintain tool libraries where members can borrow expensive equipment they might not otherwise be able to afford. They also provide shared processing facilities and food safety testing equipment, making it easier for small farms to meet regulatory requirements.

Some partnerships even offer shared greenhouse space, irrigation systems, and packaging facilities. This collaborative approach helps farmers minimize startup costs while maximizing their production capacity. Educational resources and technical assistance are often bundled with these physical assets, ensuring farmers can effectively utilize available infrastructure while building sustainable agricultural businesses.

Community Engagement and Education

Consumer Education Programs

Rural community assistance partnerships offer comprehensive educational programs designed to help community members understand and maximize the benefits of Community Supported Agriculture (CSA). These initiatives include hands-on workshops where participants learn about seasonal eating, food preservation techniques, and creative ways to use their weekly produce shares.

Monthly cooking demonstrations showcase practical methods for preparing unfamiliar vegetables and reducing food waste. Experienced CSA members often lead these sessions, sharing their tips and favorite recipes with newcomers. The partnerships also organize farm visits, allowing subscribers to see firsthand how their food is grown and connect with local farmers.

Educational resources extend beyond the kitchen, covering topics like sustainable living, composting, and the economic impact of supporting local agriculture. Many programs offer bilingual materials and classes to ensure accessibility for diverse community members. Special focus is given to helping families with children develop healthy eating habits through fun, interactive activities and kid-friendly recipe collections.

Digital resources, including newsletters and online tutorials, complement in-person learning opportunities, making CSA education available to all community members regardless of their schedules.

Building Long-term Food Partnerships

Building successful food partnerships requires dedication, clear communication, and a shared vision between farmers and community members. The key lies in establishing regular touchpoints through seasonal meet-and-greets, farm tours, and harvest celebrations that bring producers and consumers together in meaningful ways.

Many thriving partnerships start with simple initiatives like monthly farmer newsletters or social media updates that keep community members informed about crop progress and upcoming harvests. Farmers can foster deeper connections by offering workshops on food preservation or cooking demonstrations using seasonal ingredients.

Community members can strengthen these bonds by volunteering during peak harvest times, participating in work-share programs, or joining advisory committees that help shape farm planning decisions. Success stories like the Green Valley Farm Collective show how consistent engagement leads to lasting relationships – they’ve maintained a 90% member retention rate through their innovative community involvement programs.

Creating flexible payment options, including sliding-scale pricing and work-trade opportunities, helps ensure partnerships remain accessible to all community members while supporting farm sustainability. Regular feedback sessions and annual surveys help both parties adapt and grow together, ensuring partnerships evolve to meet changing needs.

Success Stories from Rural Communities

Farm Spotlight: Growing Together

The Growing Together initiative in Millbrook County stands as a shining example of how rural community partnerships can transform local agriculture. What started as a small collaboration between three family farms has blossomed into a thriving network of 15 sustainable farming operations supporting over 200 families through their CSA programs.

Sarah Chen, one of the founding farmers, explains how the partnership helped her transition from traditional farming methods to organic practices: “The shared knowledge and resources made it possible for us to take that leap. We couldn’t have done it alone.”

The program’s success stems from its innovative approach to resource sharing. Participating farms share equipment, bulk-order supplies, and coordinate planting schedules to ensure year-round produce availability. They’ve also established a mentor system where experienced organic farmers guide newcomers through certification processes and sustainable farming techniques.

The impact extends beyond the farms themselves. Local schools now source 40% of their cafeteria produce from Growing Together farms, while the partnership’s community education programs have inspired dozens of backyard gardens throughout the county.

“What makes this partnership special is how it brings people together,” says Tom Martinez, the county’s agricultural extension officer. “It’s not just about growing food – it’s about growing relationships and building a resilient local food system that benefits everyone.”

Smiling farmer distributing fresh produce to CSA members at a weekly pickup
Happy farmer and community members at a CSA pickup point exchanging produce and conversation

Community Impact Stories

The Rural Community Assistance Partnership has transformed countless communities across America through targeted support and sustainable development initiatives. In Montana’s Bitterroot Valley, a small farming collective received guidance and funding to establish a food processing facility, enabling local farmers to extend their selling season and increase income by 40% through value-added products.

In rural New Mexico, the partnership helped the Torres family launch a community-supported agriculture program that now serves over 200 families with fresh, organic produce. Their success inspired neighboring farms to adopt sustainable practices, creating a ripple effect throughout the region.

A particularly inspiring story comes from coastal Maine, where the partnership assisted in developing a cooperative seafood market. Local fishermen now have direct access to consumers, eliminating middlemen and increasing their profits while providing the community with fresh, sustainable seafood at fair prices.

In Kentucky’s Appalachian region, the partnership facilitated the creation of a mobile farmers’ market that brings fresh produce to food desert areas. This initiative not only improved access to healthy food but also created six new jobs and established valuable connections between rural farmers and urban consumers.

These success stories demonstrate how targeted assistance and community collaboration can create lasting positive change in rural areas, strengthening local food systems and building more resilient communities.

Rural community assistance partnerships play a vital role in the success and sustainability of CSA programs across America’s heartland. By connecting farmers with essential resources, technical support, and community networks, these partnerships help create thriving local food systems that benefit everyone involved. Through collaborative efforts, small-scale farmers gain access to valuable knowledge, equipment sharing programs, and marketing assistance that might otherwise be out of reach. These partnerships also strengthen rural economies by keeping food dollars local and creating jobs in agriculture. As more communities embrace this model, we see increased food security, improved farmer livelihoods, and stronger connections between producers and consumers. The future of sustainable agriculture depends on these vital partnerships that bridge gaps and build resilient local food systems for generations to come.