darrell


Why Your Farm Needs a Landscape Mosaic (And How It Transforms Your Harvest)

Posted by darrell on
0
Agroecology and Ecosystem Practices
Why Your Farm Needs a Landscape Mosaic (And How It Transforms Your Harvest)

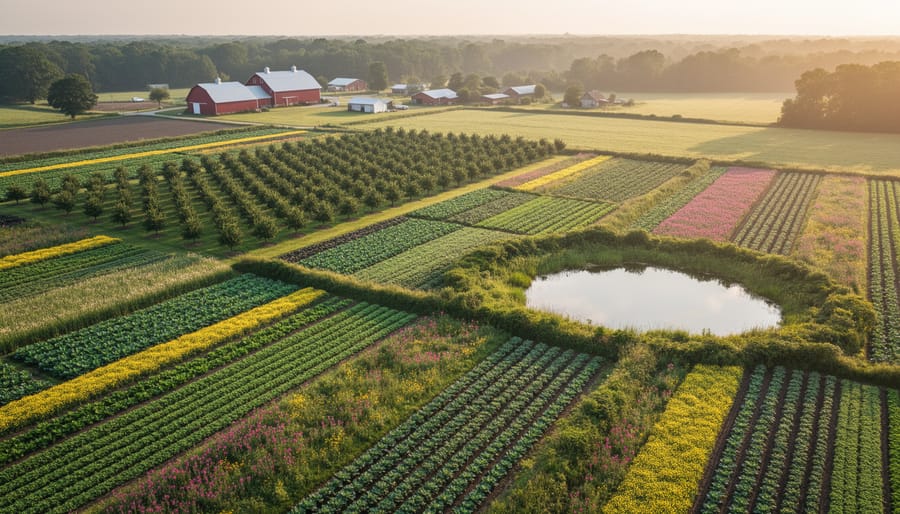
Picture your farm as a living quilt, where each patch of vegetables, wildflowers, hedgerows, and cover crops works together to create something far more resilient than any single crop could achieve alone. This is landscape mosaic, a practical approach that transforms your farm into a diverse network of interconnected habitats that naturally support each other.

Rather than viewing your land as separate, isolated plots, landscape mosaic thinking recognizes that the borders between your tomato beds and native flower strips, between your orchard and nearby woodland edge, create opportunities for beneficial insects, pollinators, and wildlife to thrive. When these diverse elements connect across your property, they form ecological highways that strengthen your entire farming system.

The results speak for themselves. Farmers implementing landscape mosaic principles report fewer pest problems as predatory insects find year-round habitat in hedgerows and field margins. Pollination rates improve when bees have continuous flowering resources beyond crop bloom periods. Soil health increases as diverse root systems and organic matter from varied plantings build fertility naturally.

You don’t need to overhaul your entire operation overnight. Start by identifying existing diversity on your land, then thoughtfully add elements that bridge gaps between habitats. Even small changes like planting native perennials along fence lines or leaving unmowed buffer strips create meaningful connections that amplify the ecological services supporting your crops. Your farm becomes stronger, more productive, and remarkably more self-sustaining.

What Is a Landscape Mosaic in Agroecology?

Aerial view of diversified farm showing patchwork of crop fields, wildflower strips, hedgerows and pond
A landscape mosaic integrates diverse habitat types including crop fields, wildflower borders, hedgerows, and water features into a functional farm ecosystem.

The Patchwork Effect: Understanding Habitat Diversity

Think of your farm as a living quilt, where each patch plays a unique role in supporting the whole system. These distinct areas work together to create a healthier, more productive landscape.

Your cultivated areas are the workhorses—the vegetable beds, fruit orchards, or grain fields where your main crops grow. These patches benefit enormously from what happens around them. Wild edges and hedgerows act as nature’s safety nets, providing shelter for beneficial insects and birds that help control pests naturally. Sarah Martinez, an organic vegetable grower in Vermont, noticed a 40% decrease in aphid damage after planting mixed hedgerows along her field borders.

Pollinator strips are the unsung heroes of farm productivity. These deliberate plantings of native wildflowers and flowering herbs create highways for bees, butterflies, and other pollinators moving across your property. Even a simple 10-foot strip planted with sunflowers, cosmos, and native asters can dramatically boost pollination rates in nearby crops.

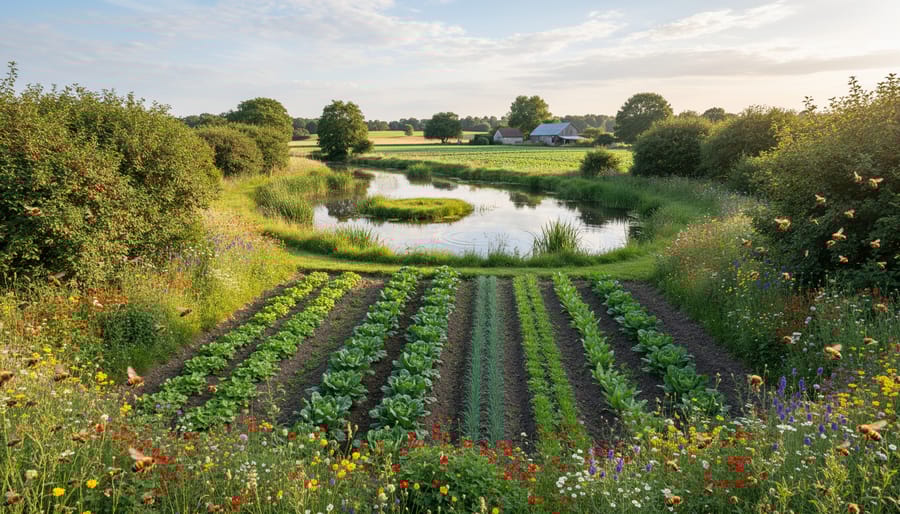
Water sources—whether ponds, seasonal wetlands, or simple birdbaths—serve multiple purposes. They attract beneficial wildlife, provide irrigation reserves during dry spells, and create microclimates that moderate temperature extremes.

The magic happens when these patches connect and interact. A dragonfly hatches in your pond, hunts mosquitoes over your lettuce beds, then rests in your wildflower strip. This interconnectedness is what transforms scattered patches into a thriving landscape mosaic, where diversity becomes your greatest farming asset.

How Landscape Connectivity Makes the Magic Happen

Think of landscape connectivity as the highway system that keeps your farm ecosystem thriving. While diverse habitat patches are valuable, they only reach their full potential when beneficial organisms can travel freely between them. This is where corridors, hedgerows, and transitional zones become game-changers for your functional ecosystem.

Hedgerows act as protected pathways, allowing ladybugs, ground beetles, and parasitic wasps to move from field to field, controlling pests wherever they go. Native pollinators use these green corridors to access different flowering plants throughout the season, ensuring consistent pollination across your entire property. Even a simple grass strip between crop fields creates safe passage for small mammals and birds that help control rodent populations and disperse seeds.

Sarah Chen, an organic vegetable grower in Ontario, transformed her farm’s productivity by planting hedgerows connecting her woodlot to her market gardens. Within two growing seasons, she noticed a remarkable increase in native bee populations and a 40 percent reduction in aphid damage. The key was creating continuous pathways rather than isolated habitat islands.

Don’t overlook transitional zones where different habitats meet. These edge areas between forest and field, or wetland and meadow, support the highest concentration of species diversity. By maintaining these gradients and connecting them with simple features like stone walls, brush piles, or flowering borders, you create an integrated network where nature does much of your farm management work for you.

The Hidden Benefits Your Farm Gets from Habitat Mosaics

Ladybug beetle on plant stem with wildflowers in background showing natural pest control
Beneficial predator insects like ladybugs thrive in diverse farm habitats and provide natural pest control for crops.

Natural Pest Control That Actually Works

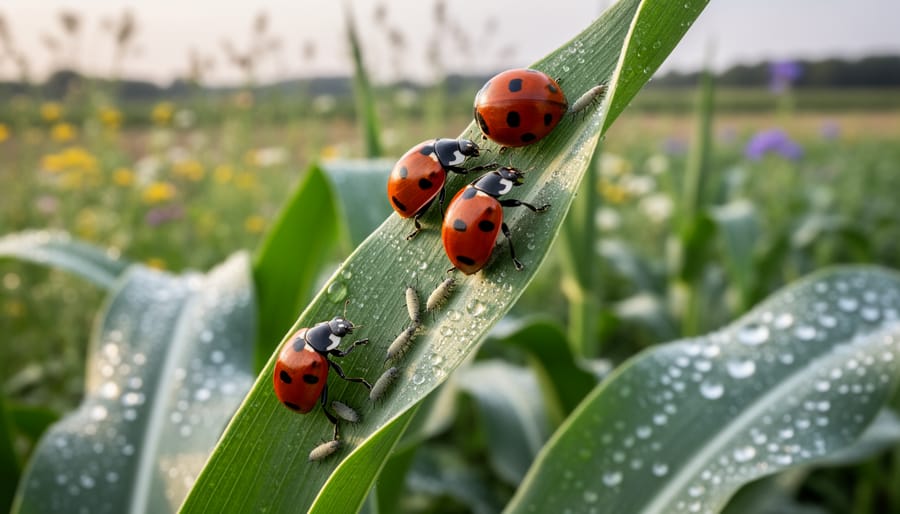
Here’s the secret that organic farmers have discovered: when you create a landscape mosaic with diverse habitats, nature handles pest control for you. Different plantings and wild areas provide homes for beneficial predator insects like ladybugs, lacewings, and ground beetles that feast on common garden pests.

Take Sarah Chen’s Oregon farm as an example. By planting flowering hedgerows between her vegetable beds and maintaining strips of native grasses, she attracted hover flies that demolished her aphid problem naturally. The key is providing year-round habitat: hedgerows offer shelter, flowering plants supply nectar for adult predators, and unmowed grass strips create homes for pest-eating spiders.

Start small by leaving a corner of your garden a bit wild or planting alyssum and yarrow near your crops. These simple additions invite helpful insects that patrol your plants 24/7, reducing pests by up to 70 percent without a single spray bottle in sight. Your diverse landscape becomes a living pest management system.

Supercharged Pollination for Better Yields

Here’s the thing about landscape mosaics: they create the perfect dinner-and-hotel package for pollinators. When you weave together wildflower strips, hedgerows, and diverse plantings around your crops, you’re essentially building a neighborhood that bees, butterflies, and beneficial insects can’t resist. This variety means pollinators have continuous food sources throughout the growing season, not just when your main crops are flowering.

The payoff? Robust pollinator populations translate directly to your bottom line. Organic farmer Maria Chen saw her squash yields jump 35% after planting native wildflower borders around her fields. Her secret wasn’t fancy techniques, just creating habitat that kept pollinators close and active.

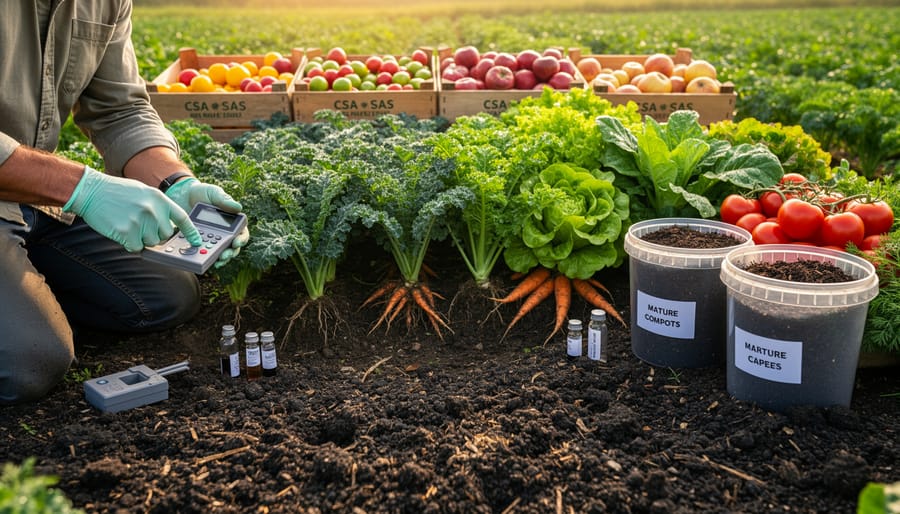
Better pollination means more than quantity too. Fruits and vegetables develop more uniformly, with improved size and flavor. Think plumper tomatoes, perfectly formed peppers, and berries that actually fill their containers. For small-scale growers focused on quality over volume, this improvement in produce appearance and taste can command premium prices at farmers markets and through CSA shares.

Healthier Soil Through Natural Cycles

When you create a landscape mosaic on your farm, you’re essentially building an underground support system that works around the clock. Different vegetation types in your mosaic contribute various organic materials—fallen leaves, plant roots, and decomposing matter—that feed the soil at different depths and times throughout the year. This continuous cycle of nutrient recycling creates richer, more productive earth for your crops.

The diverse plantings in a mosaic act as natural erosion barriers. Hedgerows and buffer strips slow down water runoff, giving it time to soak into the ground rather than washing away your precious topsoil. Root systems from different plants create an intricate underground network that holds soil particles together, particularly on slopes or areas prone to washing.

Perhaps most importantly, varied habitats support diverse communities of beneficial soil organisms. These tiny workers—from earthworms to mycorrhizal fungi—break down organic matter, improve soil structure, and make nutrients available to your plants. A thriving landscape mosaic essentially creates ideal real estate for these microscopic helpers, dramatically improving soil health without expensive inputs or constant intervention.

Climate Resilience on Your Farm

Think of your landscape mosaic as nature’s insurance policy against unpredictable weather. Diverse landscapes naturally enhance climate resilience by creating multiple layers of protection for your crops. Hedgerows and tree lines act as windbreaks during storms, reducing soil erosion and protecting tender plants from damage. These features also moderate temperature swings, creating beneficial microclimates where frost-sensitive crops can thrive.

Water management becomes easier too. Wetland patches and varied vegetation slow rainfall runoff, allowing moisture to percolate into the soil rather than rushing away. This natural sponge effect helps your fields stay hydrated during dry spells while preventing flooding during heavy rains.

Ontario farmer Maria Santos found that adding pollinator strips and woodland edges to her vegetable operation reduced crop stress during the 2023 heat waves. The shaded areas stayed five degrees cooler, and her soil retained moisture 30 percent longer than neighboring fields. Her diversified landscape literally created its own weather protection system, safeguarding her harvest when it mattered most.

Building Your Own Landscape Mosaic: Practical Steps for Small Farms

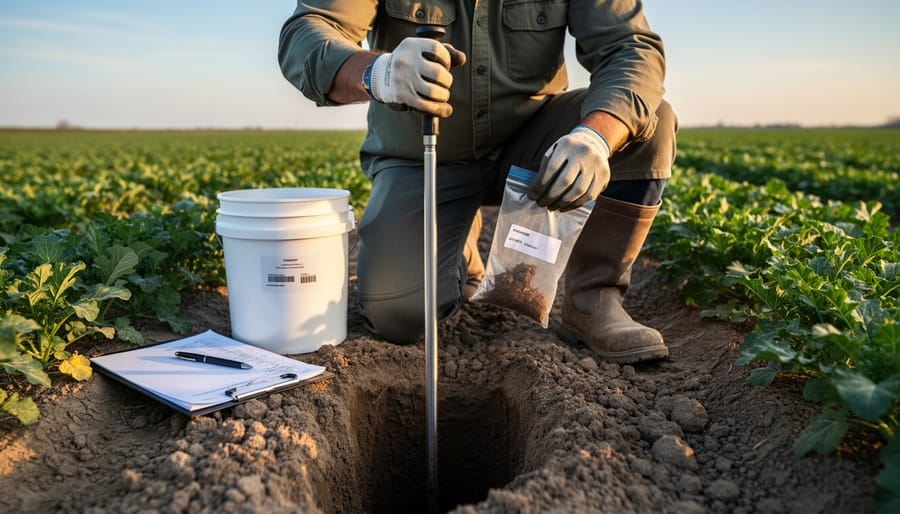
Map Your Current Landscape

Start by taking a simple walk around your property with a notebook in hand. Sketch out the different areas you notice—maybe you have a vegetable patch, some wildflower borders, a hedgerow, or even a small pond. Don’t worry about being an artist; a rough map works perfectly.

Next, identify what habitat types already exist. Are there areas with native plants that attract pollinators? Do you have spaces that could support beneficial insects? Look for spots where water collects naturally or where birds tend to gather.

Now comes the exciting part: spotting opportunities for improvement. Perhaps that bare corner could become a pollinator haven, or those unused strips between crops could host cover crops that enrich your soil. One organic farmer in Vermont transformed her field edges into wildflower corridors and saw her pest problems decrease by nearly half within two seasons.

Take photos during different seasons to see how your landscape changes. This visual record helps you make informed decisions about where small improvements can create the biggest impact for biodiversity and farm productivity.

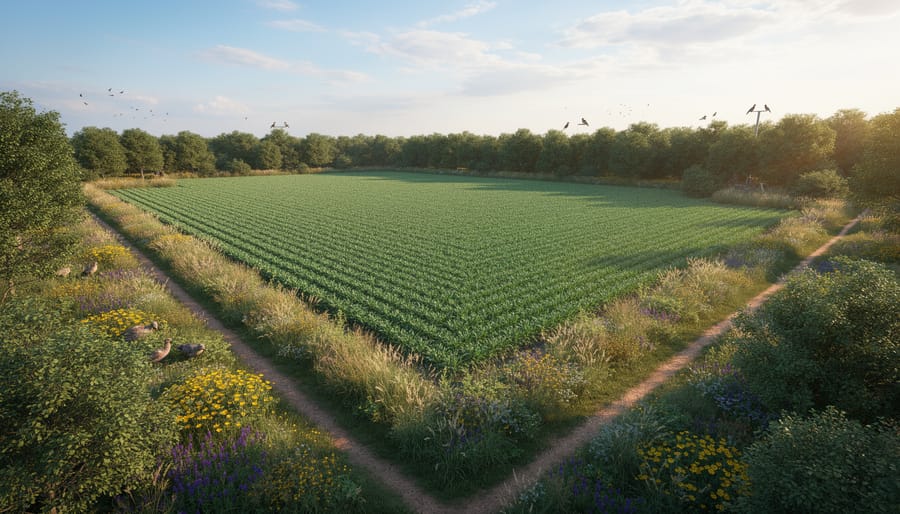
Start with Strategic Edges and Borders

The edges of your fields hold untapped potential for supporting beneficial insects, pollinators, and wildlife while enhancing your farm’s productivity. Rather than leaving fencerows and field margins as weedy afterthoughts, intentionally transform these boundaries into thriving habitat corridors.

Start by identifying underutilized borders around your property. These narrow strips don’t compete with your production space but create enormous ecological value. Plant native perennials and wildflowers that bloom at different times throughout the season, providing consistent nectar sources for pollinators. Consider species like milkweed for monarch butterflies, native asters for late-season pollinators, and goldenrod for beneficial wasps.

Minnesota farmer Sarah Chen transformed her half-acre of field edges with a pollinator strip mix and noticed a 40% increase in vegetable yields the following year thanks to improved pollination. She also observed more beneficial insects controlling pest populations naturally.

Keep your strips manageable by choosing low-maintenance native plants suited to your region’s conditions. Mow paths through taller plantings to maintain access while creating diverse habitat structure. These strategic edges become living fencerows that work for you year-round, reducing your need for pesticides while beautifying your farm landscape and connecting isolated habitat patches across your property.

Farmer planting native wildflowers along field edge to create habitat corridor
Transforming field edges and borders with native plantings creates valuable habitat corridors without sacrificing productive farmland.

Add Diverse Habitat Patches

You don’t need to sacrifice productive space to create wildlife-friendly habitat patches. Start by identifying marginal areas where crops struggle, like edges near tree lines, steep slopes, or compacted corners. These spots are perfect for wildflower meadows that attract pollinators and beneficial insects. A 10-by-20-foot strip can make a real difference.

Small ponds or water features don’t require much space either. Even a half-whiskey barrel filled with water and native plants provides drinking spots for birds and habitat for dragonflies that devour aphids and mosquitoes. Position these near garden beds for maximum pest control benefits.

Brush piles tucked along fence lines offer shelter for ground beetles, toads, and small mammals that prey on common pests. Simply stack pruned branches and woody debris in out-of-the-way spots rather than hauling them off-site.

Consider planting insectary strips between crop rows using flowering plants like alyssum, yarrow, or buckwheat. These low-growing options support beneficial insects without shading your vegetables. Oregon farmer Maria Chen reports a 40 percent reduction in aphid damage after adding just three insectary strips throughout her two-acre vegetable operation. These strategic patches work harder than you’d expect, delivering measurable pest control while enhancing your farm’s ecological resilience.

Create Connections Between Habitat Areas

Creating living connections between your habitat patches transforms isolated islands into a thriving, interconnected ecosystem. Hedgerows make excellent wildlife highways—plant a mix of native shrubs, flowering plants, and small trees along property boundaries or between fields. These dense corridors provide shelter for beneficial insects and birds while they travel between larger habitat areas.

Living fences offer a productive alternative, combining fruiting shrubs like elderberry or hazelnut with nitrogen-fixing species. They create functional boundaries while supporting biodiversity. Keep corridors at least 6-10 feet wide for maximum effectiveness.

Vegetated waterways and grass strips along ditches naturally link wetland areas to upland habitats. One Oregon farmer increased beneficial insect populations by 40% after establishing pollinator corridors connecting her orchard to meadow patches. Start small—even a single hedgerow creates measurable improvements. Plant diverse species at different heights to accommodate various wildlife, and avoid pesticide use near these critical connections.

Real Farms, Real Results: Success Stories from the Field

When Sarah Thompson started her 8-acre CSA operation in Vermont, she was struggling with aphid infestations on her brassicas and declining yields in her tomato patches. After integrating a landscape mosaic approach by adding flowering hedgerows between crop sections and establishing a small pollinator meadow at the field’s edge, everything changed. Within two seasons, Sarah noticed a 40% reduction in pest damage and her beneficial insect population tripled. Her customers loved seeing the vibrant wildflower strips during farm tours, and she saved nearly $800 annually on organic pest control inputs.

Over in Oregon, Green Valley Farm transformed 12 acres of monoculture into a diverse landscape mosaic featuring vegetable beds interspersed with perennial herb borders, intentional beetle banks, and native shrub corridors. Farm manager David Chen documented impressive results: crop yields increased by 25% over three years, and the farm experienced significantly less damage during an unusually dry summer. The varied landscape created microclimates that helped vulnerable crops survive temperature extremes. David attributes their improved resilience directly to the mosaic design, which retained more soil moisture and provided natural windbreaks.

Perhaps most inspiring is Meadowbrook Community Farm in Wisconsin, where beginning farmers learn sustainable techniques firsthand. They incorporated landscape mosaic principles from day one, dedicating 15% of their land to habitat strips, berry hedges, and strategically placed cover crop patches. Their integrated pest management needs dropped dramatically, reducing labor hours spent on pest control by half. The diversified landscape also became an educational asset, attracting school groups and community members eager to learn about biodiversity in action.

These farmers emphasize that starting small works beautifully. You don’t need to overhaul everything at once. Sarah began with just one hedgerow. David added habitat features incrementally over three seasons. Their advice? Start where pest pressure is highest, observe what thrives naturally on your land, and let the landscape teach you as it grows.

Common Mistakes to Avoid When Creating Habitat Mosaics

Creating a thriving landscape mosaic is rewarding, but a few common missteps can derail your efforts. Let’s walk through what to avoid and how to stay on track.

One frequent mistake is over-complicating your design from the start. When Sarah, a Michigan organic farmer, first learned about habitat mosaics, she tried implementing twelve different habitat types simultaneously. The result? Overwhelming maintenance demands and scattered resources. Start simple with three to four complementary habitats that match your farm’s existing conditions. You can always expand once you’ve mastered the basics.

Choosing the wrong plants poses another significant challenge. It’s tempting to select vigorous, fast-growing species, but some can quickly become invasive nightmares. Before planting, research whether species are appropriate for your region and won’t outcompete native vegetation. Your local agricultural extension office can provide lists of beneficial, non-invasive plants suited to your area.

Neglecting maintenance is perhaps the most common pitfall. Habitat mosaics aren’t set-and-forget projects. Plan for seasonal management tasks like controlling unwanted species, refreshing mulch, and monitoring plant health. Schedule these activities into your regular farm calendar, dedicating just an hour or two monthly during the growing season.

Finally, avoid creating isolated habitat patches. Disconnected islands won’t support wildlife movement or provide the ecological benefits you’re seeking. Connect your habitats with corridors like hedgerows, grassy strips, or flowering borders. Think of these connections as highways allowing beneficial insects and pollinators to travel safely throughout your farm.

Remember, successful landscape mosaics develop gradually. Give yourself permission to learn through experience, adjust as needed, and celebrate small victories along the way.

Creating a landscape mosaic on your farm isn’t reserved for large operations with extensive resources. Whether you manage two acres or two hundred, you can start transforming your land today. Begin with something simple: plant a hedgerow along one field edge, leave a small wetland area unmown, or establish a pollinator strip between crops. These modest steps ripple outward, creating habitat connections that benefit your entire farm ecosystem.

The beauty of landscape mosaic principles lies in their flexibility and scalability. Sarah Martinez, who runs a three-acre CSA operation in Vermont, started by adding just three native tree islands to her vegetable fields. Within two seasons, she noticed improved pest control and higher yields. Her story reminds us that every small action counts.

As members of the organic farming community, we share a commitment to working with nature rather than against it. Landscape mosaics embody this philosophy perfectly, weaving biodiversity into productive farmland. Your farm can become more than a food production site—it can be a thriving ecosystem that nourishes both people and wildlife. Take that first step today and watch your land come alive with possibility.

How Farmers Markets Became Your Community’s Best Health Resource

Posted by darrell on
0
Market Events and Community Engagement
How Farmers Markets Became Your Community’s Best Health Resource

Farmers markets and CSA pick-up locations are transforming into vibrant health hubs where fresh produce meets preventive care. Picture a Saturday morning where families selecting heirloom tomatoes can also get their blood pressure checked, learn about nutrition from registered dietitians, or participate in cooking demonstrations using seasonal vegetables. These community health partnerships create powerful synergy—health professionals gain access to motivated audiences already invested in wellness, while farmers and market organizers attract diverse crowds and reinforce their role as cornerstones of healthy communities.

The model works remarkably well because it meets people where they already gather for nourishment. A Vermont farmers market increased foot traffic by 40% after partnering with a local clinic to offer free health screenings, while participating farmers reported higher sales of leafy greens following on-site nutrition workshops. Similarly, a California CSA farm hosting monthly wellness events saw member retention rates jump significantly as subscribers felt more connected to both their food source and their neighbors.

Creating these partnerships requires minimal investment but delivers measurable impact for everyone involved—from the organic farmer building customer loyalty to the community member discovering that eating well starts with knowing their grower.

Why Market Events Are Perfect for Community Health Initiatives

The Natural Connection Between Fresh Food and Wellness

Farmers markets naturally draw people who prioritize wellness and mindful eating choices. These shoppers are already taking active steps toward better health by seeking fresh, locally grown produce and supporting sustainable agriculture. This creates a unique opportunity to expand health conversations beyond what’s on the plate.

When someone chooses organic tomatoes over conventional ones, they’re demonstrating an interest in how food impacts their wellbeing. This mindset makes market visitors particularly receptive to broader health information, from preventive screenings to mental health resources. The relaxed, community-focused atmosphere of farmers markets removes many barriers that prevent people from engaging with healthcare providers in traditional clinical settings.

Consider the success story of Green Valley Farm, where the farmer noticed market customers asking not just about growing practices, but about preparing nutritious meals for specific health conditions. This sparked a partnership with a local nutritionist who now offers free consultations at their booth. The result has been increased customer loyalty and a genuine sense of serving community health needs.

The connection between fresh food and total wellness is intuitive to market-goers, making these venues ideal for introducing services like blood pressure checks, nutrition education, and stress management workshops alongside the season’s harvest.

Building Trust Through Familiar Faces

When Maria, a nurse practitioner, first set up her blood pressure screening booth at the weekly farmers market, she noticed something remarkable. Vendors she’d been buying tomatoes from for months became her most enthusiastic health advocates, encouraging their customers to stop by for a quick check. This illustrates the magic of market-based health events: trust grows naturally through repeated, face-to-face connections.

Regular market-goers already know the farmers who grow their food and the artisans who craft their goods. When health professionals become part of this familiar community fabric, they shed the intimidating clinical atmosphere that keeps many people away from traditional healthcare settings. A vendor who shares gardening tips one week might comfortably refer someone to a diabetes screening the next. These ongoing relationships transform health education from a formal lecture into a conversation between neighbors who genuinely care about each other’s wellbeing, making people far more receptive to important health information and preventive screenings.

What Community Health Events Actually Look Like at Markets

Quick Health Screenings That Fit Market Day

Integrating health screenings into your farmers market creates a welcoming atmosphere where shoppers can prioritize wellness without interrupting their Saturday morning routine. Blood pressure checks take just minutes and require minimal space—a small table with two chairs works perfectly near the market entrance or exit. Many health partners provide portable equipment and trained volunteers who can perform these screenings while chatting with visitors about their favorite seasonal produce.

BMI measurements and basic wellness consultations fit naturally into the market environment. Consider setting up a health station between vendor rows where a nurse or health educator can offer quick assessments, answer nutrition questions, and connect people with local resources. Sarah Martinez, who manages a successful organic vegetable farm and hosts monthly market health days, shares that these brief interactions often spark conversations about eating more fresh vegetables and supporting local growers.

Keep screenings simple and non-invasive. Glucose testing, cholesterol checks, and hydration assessments work well because they’re fast and provide immediate results that participants can discuss with their healthcare providers. Offering these services free or low-cost removes barriers and demonstrates your market’s commitment to community wellbeing beyond just selling produce.

Healthcare worker performing blood pressure check for community member at farmers market booth
Health screenings at farmers markets provide convenient preventive care while community members shop for fresh produce.

Cooking Demonstrations That Teach and Inspire

Live cooking demonstrations transform market events into interactive learning experiences that bridge the gap between farm-fresh ingredients and everyday meals. These hands-on sessions feature local chefs or nutritionists preparing simple, nutritious dishes using produce available at the market that day, showing attendees exactly what’s possible with seasonal ingredients.

Demonstrations focus on practical skills like preparing vegetables kids will actually eat, budget-friendly meal planning, and time-saving techniques for busy families. One farmer at a community market in Oregon shared how cooking demos increased his vegetable sales by 40 percent after attendees discovered new ways to prepare unfamiliar items like kohlrabi and Swiss chard.

The demonstrations emphasize that healthy eating doesn’t require expensive ingredients or complicated techniques. Participants receive recipe cards, learn proper knife skills, and discover how to maximize nutrition while minimizing food waste. Many markets offer free samples, allowing people to taste before committing to purchases. This accessible approach helps break down barriers to healthy eating, showing families that fresh, organic produce fits naturally into their cooking routines and budgets while supporting local farmers.

Chef demonstrating healthy cooking techniques with fresh vegetables at farmers market
Live cooking demonstrations connect market shoppers directly with nutritious meal preparation using seasonal local produce.

Kids’ Activities That Plant Health Seeds Early

Engaging kids in farm-based activities creates lifelong connections to healthy eating and sustainable agriculture. Many farmers markets now incorporate youth programming as part of their creative market events, helping children understand where food comes from while having fun.

Garden education stations let kids get their hands dirty planting seeds and learning about soil health. Interactive taste testing booths introduce young palates to fresh vegetables they might otherwise avoid at home. Nutrition-focused games turn learning about vitamins and minerals into playful competition, while scavenger hunts teach children to identify different produce varieties.

Farm-to-fork demonstrations show the complete journey from seed to plate, often featuring young farmer success stories that inspire the next generation. Cooking classes designed for children teach basic food preparation skills using seasonal ingredients. These hands-on experiences plant seeds of understanding about organic growing practices and environmental stewardship, creating informed consumers who value locally grown food and sustainable farming methods from an early age.

Success Stories: Partnerships That Are Making a Difference

A Small Farm That Partnered With Local Nurses

When Greenleaf Farm, a 12-acre CSA operation in Vermont, noticed their members often skipped annual health checkups due to busy schedules, owner Maria Chen saw an opportunity. She reached out to a local community health clinic and proposed a simple idea: bring basic health screenings directly to the farm during monthly pickup days.

The partnership launched in spring 2022 with blood pressure checks and diabetes screenings offered in a quiet corner of the barn. Within six months, three members discovered previously undetected high blood pressure, while another caught early warning signs of pre-diabetes. The nurse practitioners found that farmers market settings created a relaxed atmosphere where people felt more comfortable discussing health concerns than in clinical environments.

Maria learned valuable lessons through this initiative. First, consistency matters—holding screenings on the same Saturday each month helped members plan ahead. Second, privacy is essential, so they converted a storage area into a dedicated screening space. Third, clear communication about available services helped overcome initial hesitation.

The program’s success attracted attention from neighboring farms interested in replicating the model, demonstrating how successful farm partnerships can address both food security and healthcare access simultaneously. Today, Greenleaf’s health screening days see an average of 25 participants monthly, proving that small farms can make significant impacts on community wellness.

How One Market Increased Fresh Food Access for Seniors

At Riverside Farmers Market in Oregon, organizers noticed a troubling pattern: their senior neighbors were rarely shopping for fresh produce despite living just blocks away. Rather than accept this disconnect, market manager Elena Rodriguez partnered with the local Area Agency on Aging to create the Senior Fresh Food Initiative, a program that now serves over 200 elderly residents monthly.

The program provides eligible seniors with $40 monthly vouchers redeemable at any market vendor. But the real magic happens beyond the financial assistance. Volunteer “market buddies” meet participants at designated pickup points, offering rides and companionship during shopping trips. Once at the market, nutrition educators host informal cooking demonstrations featuring seasonal vegetables, sharing simple recipes that accommodate dietary restrictions and limited mobility.

Local farmer Tom Hendricks credits the program with transforming his customer base. “I’ve learned so much from our senior shoppers about food preservation and old-variety vegetables their grandparents grew,” he shares. “They’re teaching the younger generation while discovering new greens they’ve never tried.”

The initiative also addresses food waste, as farmers donate produce nearing peak ripeness specifically for senior meal prep workshops held twice monthly. Transportation volunteers report that many participants now attend independently, having gained confidence navigating the market and forming friendships with vendors who reserve their favorite items.

Senior woman with shopping bag of fresh vegetables talking with farmer at market stand
Programs connecting seniors with fresh market produce and nutrition support strengthen community health outcomes.

Starting Health Programming at Your Local Market

Finding the Right Health Partners in Your Community

Start by reaching out to your local public health department, as they often welcome opportunities to connect with communities through farmers markets and agricultural events. These departments typically offer free health screenings, educational materials, and nutrition expertise that perfectly complement fresh produce offerings. Hospitals and healthcare systems in your area may have community wellness programs actively seeking partnership opportunities for health promotion initiatives.

Look for registered dietitians who specialize in nutrition education and might be excited to demonstrate seasonal recipe ideas using market produce. Local wellness organizations, yoga studios, and fitness centers often appreciate collaborative opportunities that align with their mission. When approaching potential partners, emphasize the mutual benefits: they gain access to health-conscious audiences already interested in wholesome food, while you enhance your market’s value to the community.

The key to successful building community markets lies in finding partners who share your values around sustainable living and community health. Start conversations early, be clear about your goals, and remain flexible in designing programming that works for everyone involved.

Keeping It Simple: Start Small and Grow

You don’t need a massive budget or complex infrastructure to launch community health events at your market. Start with something simple, like setting up an informational table staffed by a local nutritionist or nurse practitioner who can answer basic wellness questions. One farmer shared how his market began with just monthly blood pressure screenings, then gradually added seasonal cooking demonstrations and farm-to-table nutrition workshops as relationships with healthcare partners strengthened. This small-steps approach lets you test what resonates with your community while building confidence and connections. Consider piloting a single event, perhaps a harvest-season wellness fair or a spring gardening-for-health workshop, before committing to regular programming. As you gain experience and see what your customers value most, you can thoughtfully expand offerings without overwhelming your resources or volunteers. Remember, sustainable growth mirrors good farming practices—nurture carefully, observe what thrives, and cultivate accordingly.

Funding and Resources You Might Not Know About

Many funding opportunities exist that you might not have discovered yet. The USDA’s Farmers Market Promotion Program offers grants up to $500,000 specifically for market-based community health initiatives. State departments of agriculture and public health often provide smaller grants perfect for pilot programs.

SNAP incentive programs like Double Up Food Bucks can transform your market’s accessibility while bringing additional funding. These programs match SNAP benefits spent on fresh produce, effectively doubling customers’ purchasing power. Regional healthcare systems and insurers increasingly partner with farmers markets, viewing preventive nutrition as cost-effective medicine. Reach out to local hospitals about sponsorship opportunities.

Community foundations and regional food banks frequently fund nutrition education programs. Consider applying for grants from organizations like the Wholesome Wave Foundation, which specializes in supporting healthy food access. Local businesses, especially health-focused retailers and restaurants, often welcome sponsorship opportunities that connect them with community wellness efforts. One successful farmer shared how a small regional healthcare grant allowed his market to launch cooking demonstrations that tripled their customer base within six months, proving that even modest funding creates significant impact.

Making Sure Everyone Feels Welcome

Health events succeed when they truly serve everyone in your community. Start by offering inclusive market programming that accommodates different languages, physical abilities, and cultural backgrounds. Partner with local organizations that already serve diverse populations to understand specific needs and build trust.

Remove practical barriers by choosing accessible locations, offering services at no cost or on a sliding scale, and scheduling events at varied times. Respect cultural food traditions by ensuring health screenings and nutrition education honor different dietary practices. One farmer’s market in Ontario partnered with refugee support services to provide translated materials and culturally familiar produce samples, resulting in 40% higher participation from newcomers. Simple changes like adding wheelchair-accessible pathways and visual signage create welcoming spaces where everyone feels valued and supported.

The Bigger Picture: Markets as Community Health Cornerstones

When farmers markets partner with health organizations, they become powerful engines for community transformation that ripples far beyond individual wellness checks. These collaborations address some of our most pressing social challenges while nurturing the environmental connections that sustain us all.

Food security takes center stage at these events. By accepting SNAP benefits, offering produce prescription programs, and providing nutrition education, markets bridge the gap between fresh, organic food and families who might otherwise struggle to access it. One Oregon farmer shared how partnering with a local health clinic’s produce prescription program increased his low-income customer base by 40 percent while introducing entire families to the joys of seasonal eating.

The preventive healthcare aspect cannot be overstated. Regular screenings catch conditions early, when they’re most treatable and least costly. Instead of waiting for emergency room visits, community members develop relationships with healthcare providers in comfortable, familiar settings. This approachable model particularly resonates with populations who might avoid traditional clinical environments.

Social connection forms another vital thread in this tapestry. Markets become gathering places where neighbors meet, isolated seniors find conversation, and newcomers discover community roots. These relationships combat loneliness while building the social fabric that supports mental health and resilience.

Perhaps most exciting is how these partnerships strengthen sustainable agriculture. When health professionals recommend locally grown organic produce, they validate farmers’ commitment to chemical-free practices. Insurance companies and health systems increasingly recognize that investing in preventive nutrition programs, including farmers market partnerships, reduces long-term healthcare costs.

This creates a beautiful cycle: healthy soil grows nutritious food, nourishing both people and planet. Farmers gain stable markets, communities gain health resources, and everyone benefits from reduced environmental impact. These partnerships prove that individual wellness and ecological sustainability aren’t separate goals but interconnected realities strengthening our collective future.

The partnership between farmers markets and health initiatives represents more than just programming—it’s a movement toward accessible wellness for everyone. When communities embrace these collaborations, they’re creating spaces where fresh, organic produce meets preventive care, where nutritional education connects directly with the people growing your food, and where health equity becomes a shared responsibility rather than a distant goal.

Whether you’re a market organizer ready to bring health screenings to your venue, a farmer eager to share knowledge about nutrient-dense crops, a health professional looking for meaningful community engagement, or simply someone who believes everyone deserves access to good food and quality care—you have a role to play. Start small: attend your local farmers market, ask vendors about their growing practices, participate in cooking demonstrations, or volunteer at community health days.

These partnerships thrive because ordinary people take extraordinary steps to support their neighbors. Together, we’re proving that sustainable agriculture and community wellness aren’t separate goals—they’re intertwined paths leading to stronger, healthier communities. Your involvement matters. The transformation begins when we recognize that fresh food and accessible healthcare aren’t privileges—they’re fundamental rights worth cultivating together.

How Utah State’s Seed Program Keeps Heirloom Varieties Alive in Your Garden

Posted by darrell on
0
Cultural Agriculture Practices
How Utah State’s Seed Program Keeps Heirloom Varieties Alive in Your Garden

Every seed tells a story of resilience, adaptation, and centuries of careful cultivation by farmers who understood that preserving genetic diversity means preserving our future food security. The Utah State University (USU) Seed Program stands at the forefront of this vital mission, connecting modern gardeners and small-scale farmers with rare heirloom varieties that might otherwise disappear from our agricultural landscape forever.

This community-driven initiative does more than distribute seeds—it creates a living library of plant genetics adapted to regional growing conditions. When you participate in seed preservation, you become part of a network safeguarding varieties that have fed families for generations, each one uniquely suited to specific climates, resistant to local pests, and packed with flavors you won’t find in commercial produce aisles.

The program works through a simple yet powerful exchange: receive heritage seeds, grow them using sustainable practices, save seeds from your healthiest plants, and return a portion to keep the cycle alive. This approach has helped countless gardeners discover varieties perfectly matched to their microclimates while building skills that reduce dependence on industrial seed companies.

Whether you’re establishing your first garden bed or managing acres of farmland, seed saving transforms you from a passive consumer into an active guardian of agricultural biodiversity. The knowledge you’ll gain—from proper harvesting techniques to storage methods that maintain viability for years—empowers you to grow food with purpose while connecting to farming traditions that sustained communities long before chemical inputs became the norm.

What Makes the USU Seed Program Different

The Utah State University Seed Program stands out as a unique bridge between cutting-edge agricultural research and grassroots community engagement. Unlike commercial seed companies focused primarily on mass production, this program dedicates itself to preserving and sharing seeds specifically adapted to the Intermountain West’s challenging growing conditions—where short seasons, temperature swings, and variable moisture levels test even experienced gardeners.

What truly sets USU apart is its dual mission. As a research institution, the program systematically evaluates heirloom and open-pollinated varieties to identify those best suited to local climates. At the same time, it operates as an accessible community resource, making these regionally adapted seeds available to home gardeners and small-scale farmers who might otherwise struggle to source varieties that thrive in their specific environment.

The program honors traditional seed saving wisdom while applying modern scientific understanding. Rather than simply storing seeds in a vault, USU actively grows them out each season, maintaining their vigor and continuously selecting for traits like cold tolerance and drought resistance. This living collection approach ensures seeds remain viable and well-adapted rather than merely preserved.

Community members particularly appreciate the program’s educational component. Through workshops and growing guides, USU shares time-tested techniques that help everyday gardeners become seed savers themselves. Success stories abound, like Maria, a backyard gardener in Logan who now saves seeds from three tomato varieties she received through the program, creating a personal seed library adapted to her microclimate.

By reconnecting people with these resilient, locally adapted varieties, the USU Seed Program empowers individuals to build food security while preserving genetic diversity that commercial agriculture often overlooks.

Elderly hands holding assorted heirloom seeds with vintage seed packets in background
Heirloom seeds preserved through traditional methods represent generations of agricultural heritage and genetic diversity.

The Traditional Roots of Modern Seed Preservation

Seed Saving as Cultural Heritage

For centuries, indigenous peoples and farming communities across the globe have been the true guardians of agricultural diversity. These caretakers understood something profound: seeds aren’t just planting material—they’re living libraries containing generations of adaptation, resilience, and cultural identity. Through traditional seed saving practices, families passed down treasured varieties alongside stories, recipes, and growing wisdom that connected them to their ancestors.

Think about the Cherokee Purple tomato, with its rich, smoky flavor perfected over centuries in Tennessee, or the Three Sisters planting method where corn, beans, and squash varieties were carefully selected and saved season after season. These weren’t random choices. Traditional communities observed which plants thrived in their specific climates, which resisted local pests, and which provided the best nutrition and flavor for their families.

Today, these practices matter more than ever. When we preserve heirloom varieties, we’re maintaining genetic diversity that could be crucial for future food security. Each saved seed represents solutions to challenges we haven’t even encountered yet—drought tolerance, disease resistance, or adaptability to changing climates.

The Hopi Blue corn, Mortgage Lifter tomatoes, and Scarlet Runner beans are just a few examples of varieties that survived because someone cared enough to save their seeds. By participating in programs that preserve these treasures, you’re becoming part of this incredible legacy of stewardship and hope for future generations.

From Kitchen Tables to University Labs

For generations, families carefully tucked away their best seeds in mason jars and paper envelopes, passing down treasured varieties that thrived in their specific microclimates. These kitchen table collections represented more than just seeds—they held stories, flavors, and genetic diversity adapted to local growing conditions over decades.

However, when families moved away or stopped gardening, these irreplaceable varieties often disappeared forever. That’s where Utah State University’s seed program steps in, creating a vital bridge between traditional home seed saving and scientific preservation.

The program actively works with families to rescue heirloom seeds that might otherwise be lost, cataloging their origins and growing characteristics. By combining the knowledge of longtime gardeners with university resources like proper storage facilities and germination testing, USU ensures these seeds remain viable for future generations.

Take the Johnson family from Cache Valley, who donated their 80-year-old tomato variety to the program. Now, instead of existing in a single backyard, dozens of local farmers are growing and preserving this exceptional tomato, keeping the tradition alive while expanding its reach throughout the community.

How the Program Works for Gardeners and Farmers

Group of gardeners working together planting seedlings in community garden
Community gardeners participate in seed preservation efforts by growing out rare varieties and sharing their harvests.

Getting Seeds from the Program

Getting seeds from the USU program is refreshingly straightforward. Start by visiting their seed library during operating hours or checking their online catalog to browse available varieties. The program typically offers an impressive selection of heirloom tomatoes, peppers, beans, squash, and various herbs—all carefully preserved for their adaptability to Utah’s unique climate.

Most programs operate on a borrowing system where you “check out” seeds at no cost or for a minimal membership fee, usually around $5-10 annually. The beautiful part? You’re encouraged to grow these varieties, save seeds from your healthiest plants, and return a portion to the library. This ensures future gardeners can benefit while you’re actively participating in seed preservation.

When requesting seeds, you’ll fill out a simple form indicating which varieties interest you. Staff members, often experienced gardeners themselves, can recommend varieties suited to your growing conditions and experience level. They’ll provide growing instructions and seed-saving tips specific to each plant.

First-time participants especially appreciate the program’s educational support. Many members report that starting with just three or four varieties helps them learn proper seed-saving techniques before expanding their collection. This approach builds confidence while contributing to agricultural biodiversity preservation.

Growing Out and Returning Seeds

Growing out seeds from the USU program is where your garden becomes part of something bigger. Once you’ve selected your varieties, plant them according to their specific needs and let them complete their full life cycle. The magic happens when flowers turn to seed heads and pods begin to dry on the plant.

For successful seed saving, timing is everything. Wait until seeds are fully mature before harvesting—beans should rattle in their pods, and tomato seeds need fermentation to remove their protective gel coating. Lettuce and other greens will send up tall flower stalks when they’re ready to go to seed. Allow these to dry completely before collecting.

Clean your seeds by removing any plant debris, then store them in paper envelopes or breathable containers in a cool, dry place. Label everything with the variety name and harvest date—you’ll thank yourself later!

When you’re ready to give back, package your saved seeds and return a portion to the program. Most participants keep some for their own garden while sharing the rest. This simple act ensures these precious varieties remain available for future growers. One gardener in Cache Valley successfully grew out rare Utah heirloom beans and returned enough seeds to supply twenty other families the following season.

Becoming a Seed Guardian

Taking your involvement to the next level as a Seed Guardian offers a rewarding way to contribute to agricultural biodiversity. Through USU’s program, passionate gardeners can become stewards of rare and heirloom varieties, growing out specific seeds each season to maintain their genetic diversity. This hands-on approach connects you with community seed exchange networks where you can share harvests, learn from experienced growers, and access varieties not available commercially. Many guardians start small, perhaps maintaining one or two varieties, before expanding their preservation work. The program provides guidance on isolation distances, population sizes, and proper seed cleaning techniques. You’ll join a dedicated community working together to safeguard food security for future generations while gaining deeper knowledge of plant genetics and traditional growing methods.

Success Stories: Farmers and Gardeners Making an Impact

The USU seed program has touched countless lives, transforming backyard gardens into thriving ecosystems and helping small farms discover new paths to profitability. These real-world success stories demonstrate how seed preservation creates ripples of positive change throughout our communities.

Maria Chen, a home gardener from Salt Lake City, credits the program with rekindling her connection to her grandmother’s heritage. After receiving Moon and Stars watermelon seeds through USU’s collection, she successfully grew varieties that hadn’t graced her family’s table in three generations. “I was amazed at how different these heirloom melons tasted compared to store-bought produce,” Maria shares. “Now I’m saving seeds every season and sharing them with neighbors who want to experience the same flavors I remember from childhood.”

The program has also launched entrepreneurial ventures. Tom and Rebecca Martinez started a small seed company after participating in USU’s training workshops. They now specialize in drought-tolerant beans and squash varieties perfectly adapted to Utah’s climate. Within two years, their business grew from selling at farmers markets to supplying dozens of regional garden centers. “The knowledge we gained about proper seed cleaning, storage, and testing gave us the confidence to turn our passion into a livelihood,” Tom explains.

Meanwhile, Green Valley Farm near Logan preserved three rare tomato varieties that were on the verge of disappearing from their region. By partnering with USU’s seed library, they’ve distributed these seeds to over 200 gardeners statewide, ensuring these precious genetics survive for future generations.

These stories illustrate how the program empowers everyday people to become stewards of agricultural biodiversity. Whether you’re growing food for your family, preserving cultural heritage, or building a seed business, the USU seed program provides the resources and community support to help your vision flourish.

Why Seed Preservation Matters for Your Table

Colorful assortment of heirloom tomatoes in purple, orange, yellow, and red on wooden board
Heirloom varieties offer superior flavor profiles and diverse colors compared to commercial tomatoes bred for shipping.

Better Flavor and Nutrition

One of the most exciting benefits of growing heirloom and regionally adapted varieties from the USU Seed Program is the remarkable difference in flavor. These seeds haven’t been bred for shelf life or uniform appearance like commercial varieties—they’ve been selected for taste. Gardeners consistently report that heirloom tomatoes burst with complex, sweet flavors, while heritage beans offer richer, creamier textures that transform everyday meals into something special.

Beyond taste, these traditional varieties often pack more nutritional punch. Research shows that many heirloom vegetables contain higher levels of vitamins, minerals, and beneficial antioxidants compared to their mass-produced counterparts. When you grow regionally adapted seeds suited to your local soil and climate, plants develop stronger root systems and absorb nutrients more efficiently. Local farmers participating in the program have discovered that varieties thriving in Utah’s unique conditions produce more nutritious harvests while requiring fewer inputs. It’s a win for your taste buds, your health, and your garden’s sustainability.

Climate Resilience in Your Garden

Diverse seed varieties offer your garden a natural insurance policy against unpredictable weather. When you grow multiple varieties of the same crop, each with unique genetic traits, some will naturally thrive despite drought, early frosts, or excessive rain. The USU seed program preserves these valuable genetic differences that took generations to develop.

Think of local gardener Maria Rodriguez, who saved three tomato varieties through the program. When an unexpected cold snap hit her area, one heat-loving variety struggled while her cold-tolerant heirloom flourished, ensuring she still had a harvest. This genetic diversity becomes increasingly vital as weather patterns shift.

By participating in seed saving, you’re not just growing food—you’re cultivating climate adaptation right in your backyard. Seeds that perform well in your specific microclimate can be saved and shared, creating a community resource of resilient varieties perfectly suited to local conditions. This grassroots approach strengthens food security while connecting you to generations of agricultural wisdom.

Starting Your Own Seed Saving Practice

Starting your own seed saving journey is easier than you might think, and the USU seed program offers an excellent model to follow. Begin with simple, open-pollinated varieties that naturally produce seeds true to type. Beans, peas, lettuce, and tomatoes are perfect starter crops since they self-pollinate and require minimal intervention.

Choose healthy, vigorous plants as your seed sources. Let the fruits or pods fully mature on the plant rather than harvesting them early for eating. For tomatoes, select perfectly ripe specimens from your most productive plants. Scoop out the seeds, ferment them in water for a few days to remove the gel coating, then rinse and dry them thoroughly on paper plates.

Beans and peas are even simpler. Just leave a few pods on your best-performing plants until they’re completely dry and papery. Shell them out and store in cool, dry conditions.

Proper storage is crucial for maintaining seed viability. Use small envelopes or glass jars, clearly labeled with variety name and harvest date. Keep them in a dark, cool location with low humidity. A sealed container with silica gel packets in your refrigerator works wonderfully for long-term storage.

Sarah Martinez, a community gardener in Salt Lake City, started saving seeds from just three tomato plants. Within two years, she’d built a collection of twelve locally adapted varieties that she now shares with neighbors. Her success demonstrates how traditional seed saving techniques create resilient gardens while strengthening community connections.

Start small, keep detailed records, and don’t worry about perfection. Every seed you save is a step toward food independence and agricultural sustainability.

Every seed saved is a small act of rebellion against the erosion of agricultural biodiversity—and you can be part of this vital movement. Whether you’re tending a backyard garden or dreaming of starting a small farm, participating in seed preservation programs like USU’s connects you to generations of farmers who understood that resilience starts with diverse, locally adapted seeds. These programs aren’t just about maintaining the past; they’re building a more sustainable future where communities have access to nutritious, regionally appropriate food crops.

The beauty of seed preservation is that anyone can contribute. Start small by growing just one heirloom variety this season, observe how it performs in your specific conditions, and save those seeds for next year. Share your experiences with fellow gardeners, swap seeds at local exchanges, and document what works in your microclimate. Each successful harvest strengthens our collective seed knowledge and food security.

Ready to join the movement? Visit the USU seed program website or contact your local extension office to request your first heirloom seed variety. Your journey toward sustainable agriculture starts with a single seed—plant it, nurture it, and watch how your involvement grows into something truly transformative.

Why Your CSA Farm’s Digital Systems Are More Vulnerable Than You Think

Posted by darrell on
0
Technology and Innovation
Why Your CSA Farm’s Digital Systems Are More Vulnerable Than You Think

Your CSA farm’s online ordering system, customer database, and automated irrigation controls need protection just like your crops need fencing against deer. Modern farming operations increasingly depend on digital tools—from payment processors and email marketing platforms to soil sensors and climate monitoring apps—making cybersecurity as essential as crop rotation or pest management.

The eight cybersecurity domains provide a comprehensive framework for protecting digital assets on small-scale farms. Originally developed for large corporations, these domains translate surprisingly well to agricultural settings where a single data breach could expose customer payment information, delete years of planting records, or compromise automated growing systems. Think of them as different aspects of farm security: just as you protect your physical infrastructure through fences, locks, and insurance, you protect digital infrastructure through layered defenses.

Small farms face unique cybersecurity challenges. Unlike corporations with dedicated IT departments, most CSA operators manage technology alongside countless other responsibilities. You’re vulnerable to the same threats as larger operations—ransomware, phishing emails, stolen customer data—but with fewer resources to respond. A hacker doesn’t care whether you’re managing 5 acres or 500; they see an opportunity.

Understanding these eight domains empowers you to make informed decisions about farm technology without becoming a cybersecurity expert. Each domain addresses a specific aspect of digital protection, from controlling who accesses your systems to planning recovery after equipment failure. Together, they create a practical roadmap for securing your farm’s digital future while you focus on what matters most: growing healthy food for your community.

What Are the 8 Cybersecurity Domains?

If you’re running a Community Supported Agriculture operation, you might wonder what cybersecurity has to do with growing fresh, organic vegetables. The truth is, modern farms rely on digital tools more than ever before. From online payment systems and customer databases to automated irrigation controls and social media marketing, your farm’s digital infrastructure needs protection just like your crops need proper care.

The 8 cybersecurity domains originated from information security professionals who needed a comprehensive framework to protect sensitive data and systems. Think of these domains as eight different garden beds in your farm’s security garden—each one requires attention and specific care to keep your entire operation healthy and thriving.

These domains cover everything from securing your physical equipment to protecting customer information and responding to potential threats. For CSA operators, understanding these areas means safeguarding member payment details, protecting harvest planning data, and ensuring your farm management software stays reliable during critical growing seasons.

The framework might sound technical, but it’s surprisingly practical for farmers. Just as you rotate crops and maintain soil health using proven agricultural principles, these eight domains provide time-tested methods for keeping your digital operations secure. Whether you’re managing a small family farm or a larger cooperative, these guidelines help you protect the trust your community places in you while keeping your systems running smoothly season after season.

Farmer using smartphone and laptop for farm management with fresh vegetables on table
Modern CSA farms rely on digital systems to manage customer data, payments, and communications, making cybersecurity essential to farm operations.

Security and Risk Management: Protecting Your Farm’s Foundation

Think of your farm’s digital foundation like the soil you tend—it needs protection to thrive. Security and risk management starts with knowing exactly what you’re protecting. Your CSA operation likely manages customer databases with names, addresses, and payment information, online payment processing systems, your website with product listings and blog content, and perhaps email marketing platforms. Each of these represents a digital asset that needs safeguarding.

Start by creating a simple inventory. List every system where customer information lives, from your farm management software to that spreadsheet you use for delivery routes. Next, assess your risks. What would happen if your customer database disappeared overnight? Could you fulfill orders without access to your digital records? Small farms face unique vulnerabilities—limited IT budgets, shared devices among staff, and often, one person managing everything.

Creating basic security policies doesn’t require a law degree. Begin with fundamentals: require strong passwords that mix letters, numbers, and symbols. Establish who can access what information—your harvest crew doesn’t need payment system access. Schedule regular backups of critical data, storing copies both online and on an external drive kept safely off-site.

Green Valley Farm in Vermont learned these lessons the hard way. In 2022, a ransomware attack locked their customer database right before spring share sign-ups. Thanks to weekly backups they’d started just months earlier, they restored operations within 48 hours. Owner Maria Chen now conducts quarterly security reviews and trains each team member on data protection. “We thought cybersecurity was for big corporations,” she shares. “Protecting our members’ trust became as important as protecting our crops from pests.”

Asset Security: Safeguarding Your Member Information

When you’re running a CSA operation, you’re collecting valuable information from your members—names, addresses, email contacts, and payment details. Think of this data like the seeds in your greenhouse: it needs proper protection and careful handling to maintain trust with your community.

Asset security starts with understanding what information you have and how sensitive it is. Member payment information requires the highest level of protection, while your weekly newsletter list might need less intensive security. Create a simple classification system—perhaps using labels like “public,” “member-only,” and “highly sensitive”—to organize your digital assets appropriately.

For payment processing, never store credit card numbers on your personal computer or spreadsheets. Instead, use reputable payment processors that handle this responsibility for you. These services are designed specifically to meet legal requirements and protect financial data, giving you peace of mind while you focus on growing food.

Store member contact lists in password-protected files, and limit access to only those team members who truly need it. Consider using encrypted cloud storage services rather than keeping everything on a single laptop that could be lost or stolen. Regular backups are essential—treat your digital records with the same care you’d give to your heirloom seed collection.

Remember that in most regions, you have legal obligations around personal data protection. These laws exist to protect your members’ privacy, and compliance builds the trust that makes your CSA community thrive. When members know their information is safe, they’re more likely to recommend your farm to friends and remain loyal subscribers season after season.

Security Architecture: Building Strong Digital Defenses

Think of your farm’s digital security like the physical barriers you use to protect your crops and livestock. Just as you wouldn’t leave your greenhouse unlocked or your chicken coop gate open, your digital infrastructure needs similar protection layers.

Security architecture is about building strong defenses around your farm’s technology systems. Start with your network setup—the digital equivalent of a perimeter fence. When you install wifi at your farm stand or farmers market booth, use strong, unique passwords and separate networks for business and guest access. Consider your public wifi like a viewing area where visitors can connect safely without accessing your private operations.

Your point-of-sale systems require special attention. These devices handle sensitive customer payment information, making them attractive targets. Always use encrypted connections (look for the padlock symbol in your browser), update software regularly, and never process payments over public wifi networks. Many small farms have experienced payment fraud simply because their systems weren’t properly secured.

For farms using IoT farm systems like automated irrigation or temperature monitors, create separate network segments. This prevents a compromised smart sensor from giving hackers access to your customer database—similar to how you’d separate different livestock areas to prevent disease spread.

Basic infrastructure protection includes using firewalls (digital gatekeepers that filter incoming traffic), regularly backing up your data to external drives, and positioning routers in secure locations. One successful organic farm owner compares her layered security approach to companion planting—each element supports and protects the others, creating a resilient ecosystem that’s harder for threats to penetrate.

Communication and Network Security: Keeping Your Connections Safe

Your farm’s digital communications are just as important as the locks on your barn. Whether you’re emailing CSA members about weekly harvest updates or coordinating with suppliers during the busy season, protecting these connections keeps your farm business running smoothly.

Start with secure email practices. Use strong, unique passwords for your farm email accounts and enable two-factor authentication whenever possible. When sending member information like payment details or addresses, consider using encrypted email services. During harvest season when you’re rushing between the field and your inbox, it’s tempting to check emails on public Wi-Fi at the farmers market—resist this urge or use a VPN to protect sensitive communications.

Social media has become essential for farm marketing, but it requires careful handling. When posting about your farm, avoid sharing details that reveal security vulnerabilities like vacation dates or exact locations of expensive equipment. Implement a secure social media marketing strategy by using separate business accounts, enabling privacy settings, and reviewing what information is publicly visible.

For sharing files with members—like recipe collections or farm newsletters—use reputable cloud services with built-in security features rather than emailing large attachments. Services like Google Drive or Dropbox offer password-protected sharing options.

One successful organic farmer shared how establishing a communication protocol during harvest season prevented a phishing attempt: “We created a rule that any payment changes must be verified by phone call. When a suspicious email arrived requesting new banking details, our team immediately caught it.”

Remember, protecting your digital communications protects your community’s trust and your farm’s reputation.

Identity and Access Management: Controlling Who Sees What

Think of Identity and Access Management as the key ring for your farm’s digital spaces. Just like you wouldn’t give everyone keys to your equipment shed, you need to control who accesses your farm’s online accounts and what they can do there.

Start with password basics. Create unique, strong passwords for each farm account using a password manager like LastPass or 1Password. These tools securely store your login information, so you’re not tempted to reuse the same password across multiple platforms. A good password combines letters, numbers, and symbols—think “RedTomato#2024Farm!” rather than “password123.”

Multi-factor authentication is your second line of defense. When you enable this feature on accounts like your CSA management platform, online store, or email, anyone trying to log in needs both your password and a second verification method, typically a code sent to your phone. Sarah Chen, who runs a 10-acre organic operation in Vermont, shared that adding multi-factor authentication stopped three unauthorized login attempts last season alone.

For team management, assign access based on actual job needs. Your volunteer helping with harvest doesn’t need administrative access to your accounting software. Create different permission levels—maybe your farm manager gets full access while seasonal helpers only see the harvest schedule.

Protect administrative accounts especially carefully. These master accounts control everything, so limit who has this access, never share these credentials, and review permissions quarterly as staff roles change. When someone leaves your operation, immediately remove their access to all farm systems.

Person typing secure password on laptop keyboard in farm office setting
Strong password management and access controls form the foundation of protecting farm member information and business systems.

Security Assessment and Testing: Regular Check-Ups for Your Systems

Think of security testing like checking your greenhouse for pests – regular inspections prevent small problems from becoming catastrophic. For your CSA’s digital systems, you don’t need expensive consultants to conduct basic security check-ups.

Start with simple monthly audits you can perform yourself. Review who has access to your systems, check for software updates you might have missed, and verify that backups are running properly. Many farmers find Sunday evenings perfect for this quick 30-minute routine, much like planning the week’s harvest schedule.

Several free tools make security testing accessible. Password managers like Bitwarden help identify weak passwords across your systems. Google’s free Security Checkup reviews your account vulnerabilities. For your website, tools like Sucuri SiteCheck scan for malware and security issues without cost.

Create a seasonal security checklist aligned with your farm rhythm. Before spring planting season, update all passwords and review customer data access. Mid-summer, test your backup restoration process. Fall harvest time calls for reviewing payment processing security before your busiest sales period. Winter months are ideal for comprehensive system reviews and planning security improvements.

One Vermont CSA operator shares how quarterly security check-ups revealed an outdated plugin vulnerable to attacks, preventing potential customer data exposure. These regular inspections became as routine as maintaining their tractors, protecting both their digital presence and member trust.

Security Operations: Day-to-Day Protection Practices

Your farm’s digital security isn’t just about setting up protections and walking away—it requires daily attention, much like tending your crops. Establishing simple, consistent routines makes all the difference in catching threats before they become disasters.

Start each day with a quick 10-minute security check. Review overnight alerts from your farm management software, check for unusual login attempts, and scan email for suspicious messages before clicking anything. This morning ritual becomes second nature, like checking weather forecasts before heading to the fields.

Monitor your systems throughout the day for red flags: unexpected slowdowns, programs behaving strangely, or unfamiliar pop-ups. Trust your instincts—if something feels off, investigate immediately rather than waiting for a full-blown crisis.

Backup strategies are your insurance policy. Follow the 3-2-1 rule: maintain three copies of critical data (customer lists, financial records, crop planning documents), on two different types of storage, with one copy stored offsite. Automate daily backups during off-peak hours, and test restoration monthly to ensure backups actually work when needed.

Farmer Success Story: Maria Rodriguez of Sunrise Valley Farm implemented a simple daily checklist after a close call with ransomware. Her routine includes checking system logs, verifying backups completed successfully, and reviewing access permissions weekly. When a phishing attempt targeted her CSA coordinator, Maria’s monitoring caught the suspicious activity within hours, preventing data loss. “Five minutes daily protects years of customer relationships,” she says. Her proactive approach saved countless hours and maintained customer trust during a vulnerable moment.

Backup hard drives and storage devices on farm office desk with laptop and paperwork
Regular backups of critical farm data ensure business continuity and protect against ransomware attacks or system failures.

Software Development Security: Choosing and Using Farm Software Safely

Choosing the right farm software is like selecting seeds for your garden—quality matters from the start. When evaluating CSA management software, prioritize vendors who take security seriously.

Ask potential software providers key questions: Do they encrypt your data? How often do they release security updates? Where are your farm records stored, and who has access? Can you export your data if you switch systems? Reputable vendors will answer these confidently and provide documentation about their security practices.

Before adopting any third-party app or tool, research the company’s reputation. Read reviews from other farmers, check how long they’ve been in business, and verify they comply with privacy regulations. Avoid downloading apps from unofficial sources.

Keep all software updated regularly. Those update notifications aren’t just annoying—they often patch security vulnerabilities that hackers exploit. Enable automatic updates when possible.

Success story: Green Valley Farm switched to a vendor-supported platform after their homemade spreadsheet system became unwieldy. The farm manager now spends less time troubleshooting and more time connecting with members, knowing their customer data is professionally protected.

Remember, free software isn’t always the best deal if it compromises your farm’s security. Investing in reliable, secure tools protects both your business and your members’ trust.

Building Your Farm’s Cybersecurity Action Plan

Ready to strengthen your farm’s digital defenses? Start small and build momentum. First, assess where you are today by making a simple checklist of your current digital assets—from your customer database to your website login credentials. This inventory helps you prioritize what needs protection most urgently.

For small CSA operations, begin with quick wins that deliver immediate protection. Change default passwords on all devices, enable two-factor authentication on email accounts, and set up automatic backups for your customer database. These foundational steps cost nothing but time and dramatically reduce your vulnerability to common attacks.

Medium-sized farms might invest in password management software like Bitwarden (free version available) and create a basic incident response plan—essentially a one-page document outlining who to call if something goes wrong. The Cybersecurity and Infrastructure Security Agency offers free resources specifically designed for small businesses, including downloadable guides and security assessments.

Think of cybersecurity as similar to sustainable farming practices—both require ongoing attention, seasonal reviews, and continuous learning. Just as you wouldn’t skip soil testing or crop rotation, don’t skip monthly password updates or quarterly security reviews.

Connect with other CSA farmers through agricultural networks to share experiences and solutions. Many have faced similar challenges and discovered affordable tools that work for farm-scale operations. Consider scheduling a “digital health day” each season to review your security practices, update software, and train any team members on new protocols.

Remember, protecting your farm’s digital infrastructure protects your customers’ trust and your community’s food security. Start today, even if it’s just one small step forward.

Protecting your farm’s digital infrastructure isn’t just about technology—it’s about safeguarding the relationships and trust you’ve built with your community. As more CSA operations embrace digital local food systems, cybersecurity becomes an essential part of farm resilience, right alongside soil health and crop rotation.

The good news? You don’t need to tackle all eight domains at once. Start with the basics: create strong passwords, back up your member data regularly, and have honest conversations with your team about online safety. These small steps create a foundation that protects not just your business information, but also the personal details your members trust you with every season.

Consider the story of Green Valley Farm, which started by simply implementing two-factor authentication and regular software updates. Within six months, they’d prevented a phishing attack that could have compromised hundreds of member email addresses. Their commitment to digital security strengthened member confidence and became part of their farm’s reputation for reliability.

Remember, sustainable agriculture extends beyond organic practices and regenerative farming—it includes building systems that can withstand modern challenges. By taking practical steps to secure your digital operations, you’re investing in your farm’s future, protecting your community’s privacy, and contributing to a more resilient local food movement. Start small, stay consistent, and watch your digital security grow alongside your crops.

Why Some Seeds Die When You Store Them (And How to Save Them Anyway)

Posted by darrell on
0
Seed Preservation and Biodiversity
Why Some Seeds Die When You Store Them (And How to Save Them Anyway)

Not all seeds play by the rules. While most vegetable and grain seeds can sit patiently in jars or packets for years, recalcitrant seeds refuse to cooperate with conventional storage methods. These stubborn survivors—including avocado, mango, oak, and tropical crops like cacao—die within weeks or months if dried and frozen using standard preservation techniques.

This quirk poses a serious challenge for biodiversity. As climate change accelerates and wild habitats shrink, we’re losing irreplaceable genetic diversity from species that simply can’t be tucked away in seed banks. For farmers and gardeners committed to preserving heritage varieties and regional food traditions, understanding recalcitrant seeds isn’t just academic—it’s essential for keeping rare cultivars alive.

The solution requires rethinking preservation entirely. Instead of drying these seeds down to minimal moisture content, they must remain plump and metabolically active. This means maintaining specific humidity levels, preventing fungal growth, and sometimes even keeping seeds embedded in their fruit tissue. Some farmers have discovered that mimicking natural conditions—like storing acorns in slightly moist sand in a cool basement—extends viability far beyond expectations.

What makes this work worthwhile? Consider the breadfruit trees in Hawaii or the rambutans in Florida backyard orchards, each representing generations of careful selection. These living libraries of agricultural knowledge depend on understanding what makes recalcitrant seeds tick and adapting our preservation strategies accordingly.

What Makes a Seed Recalcitrant?

Seeds You Can’t Just Jar and Forget

If you’re growing your own food or managing a CSA operation, you’ll want to know which seeds need special attention. Recalcitrant seeds are more common than you might think, especially if you’re working with diverse crops.

Among familiar garden favorites, beans can surprise you. Lima beans and runner beans don’t store well long-term, unlike their cousin the dried navy bean. Chestnuts, walnuts, and hickory nuts are also recalcitrant, which is why you won’t find them in typical seed catalogs. If you’re passionate about saving native trees, oaks and maples fall into this category too, requiring immediate planting or specialized storage.

For those growing tropical or subtropical crops, avocados, mangoes, lychees, and cacao seeds lose viability quickly once removed from their fruit. Citrus seeds also prefer moist storage conditions. Many native wetland plants like willow and cottonwood produce recalcitrant seeds that naturally germinate within days of falling.

Even some perennial vegetables join this list. Horseradish and ginger roots, while not technically seeds, require similar fresh-storage approaches. Understanding which crops you’re working with helps you plan preservation strategies before harvest time arrives, ensuring you’re ready to act quickly when those precious seeds are ready.

Why These Seeds Are So Picky

Unlike most seeds that hunker down for winter, recalcitrant seeds never learned to take a nap. These seeds contain exceptionally high moisture content, often 30-50% or more, which keeps their internal systems running continuously. Think of them like marathon runners who can’t stop moving—their cells remain active and alive from the moment they leave the parent plant.

This constant activity creates a real challenge. Most seeds we’re familiar with enter dormancy, essentially hitting pause on their biological processes. They dry out, their metabolism slows to a crawl, and they can wait patiently for the right conditions. Recalcitrant seeds skip this survival strategy entirely. They’re programmed to germinate quickly, which makes sense in their native tropical and subtropical environments where conditions stay relatively stable year-round.

Temperature sensitivity adds another layer of pickiness. These seeds are accustomed to consistent warmth and can’t tolerate the cold storage that preserves conventional seeds. Drop them below a certain temperature—often around 50°F—and their cellular structure begins breaking down. Similarly, letting them dry out damages their delicate internal machinery irreversibly. It’s this combination of high moisture needs, active metabolism, and temperature sensitivity that makes preserving biodiversity of species like avocado, mango, and many native oak varieties such a delicate balancing act.

Close-up of halved avocado seed with visible moisture and emerging root held in hands
Recalcitrant seeds like avocado maintain high moisture content and begin germinating quickly, making traditional storage methods ineffective.

Why Preserving These Seeds Matters for Your Local Farm

The Heirloom Varieties We’re Losing

Each year, we’re quietly losing precious heirloom varieties that carry recalcitrant seeds. Think about the tropical breadfruit trees that once sustained entire Pacific Island communities, or the mangosteen varieties cherished across Southeast Asia. Closer to home, native chestnuts and certain oak species that fed both wildlife and people are becoming increasingly rare.

These losses hit especially hard for regional food systems. When a local mango variety disappears from a Caribbean island, it takes with it generations of culinary traditions and farmers’ knowledge. The flavor profiles, disease resistance, and climate adaptations developed over centuries vanish too.

Many Indigenous communities are particularly affected, as traditional food plants with recalcitrant seeds often form the backbone of their food sovereignty. Without these varieties, we lose not just genetic diversity but entire cultural food traditions. Small-scale farmers who’ve built their livelihoods around unique local fruits face economic challenges when these irreplaceable crops decline. The solution lies in supporting community-based growing networks and living seed banks where these precious varieties can continue thriving in their natural environments.

Proven Strategies to Keep Recalcitrant Seeds Viable

The Controlled Moisture Method

Unlike orthodox seeds that can be dried and frozen, recalcitrant seeds need a goldilocks approach to moisture – not too wet, not too dry, but just right. These sensitive seeds, like avocado, mango, and many tropical species, will die if they dry out below 30-50% moisture content. This makes them tricky to preserve using conventional seed storage methods.

The controlled moisture method involves maintaining seeds at their natural moisture level while preventing germination and decay. Here’s how to implement it successfully:

First, you’ll need breathable containers like mesh bags or perforated plastic boxes, slightly damp sphagnum moss or vermiculite, and a cool storage area maintaining 10-15°C. Check seeds weekly for any signs of mold or sprouting.

Begin by cleaning freshly harvested seeds gently, removing any fruit pulp without damaging the seed coat. Mix your storage medium with just enough water so it feels barely damp when squeezed. Layer seeds in your container, separating them with the moistened medium to prevent direct contact.

Store the container in a cool, dark location with good air circulation. This could be a basement corner, root cellar, or dedicated refrigerator set at the warmer end of the temperature range.

Sarah, a CSA farmer in British Columbia, successfully preserved rare pawpaw seeds this way for three months, achieving an 80% germination rate when spring planting arrived. Regular monitoring is your secret weapon – catching problems early makes all the difference in preserving these botanical treasures for future growing seasons.

Seed storage area showing various preservation methods including controlled moisture containers
Proper storage of recalcitrant seeds requires maintaining moisture levels and cool temperatures, contrasting with the dry storage methods used for orthodox seeds.

Cool Storage Without Freezing

Finding the sweet spot for recalcitrant seed storage means keeping them cool enough to slow metabolism, but warm enough to avoid cold damage. Most recalcitrant seeds thrive between 50-59°F (10-15°C), though some tropical species prefer slightly warmer conditions around 60-68°F (15-20°C).

A simple basement or root cellar often provides ideal conditions naturally. Check your space with a reliable thermometer throughout different seasons to ensure it stays within range. For those without access to naturally cool areas, a wine cooler can work wonderfully since these appliances are designed to maintain steady temperatures in that perfect zone.

Sarah Chen, who manages a community seed bank in Oregon, transformed an insulated garden shed into a storage haven. She installed a small ventilation system and keeps a digital thermometer with alerts to monitor temperature fluctuations. This DIY approach has successfully preserved avocado and mango seeds for her educational programs.

Remember to keep seeds in breathable containers like paper bags or mesh pouches rather than sealed plastic, which can trap moisture and encourage mold. Place containers away from walls and floors where temperature variations are greatest. Check your stored seeds weekly for any signs of sprouting, decay, or drying out, adjusting conditions as needed to maintain that crucial balance.

Cryopreservation for the Dedicated Seed Saver

For seed savers determined to preserve recalcitrant varieties like avocado, mango, or cacao, cryopreservation offers a cutting-edge solution. This technique involves storing seeds or embryos at ultra-cold temperatures, typically in liquid nitrogen at minus 196 degrees Celsius, essentially pausing all biological activity.

While this sounds like science fiction, cryopreservation is becoming more accessible to dedicated growers. Small-scale operations can explore partnerships with university research programs or botanical gardens that maintain cryo-storage facilities. Some regional seed banks now accept contributions of rare recalcitrant varieties, helping preserve genetic diversity while making the technology more available.

Is it worth considering? If you’re working with endangered heirloom varieties or regionally significant crops that can’t be stored conventionally, absolutely. The initial investment and technical learning curve are significant, but the payoff is long-term genetic preservation.

Start by connecting with your local agricultural extension office or conservation organizations. Many offer workshops on advanced seed saving techniques. Maria Rodriguez, a California avocado grower, partnered with a nearby university to cryopreserve tissue cultures from her century-old trees, ensuring their unique genetics survive for future generations.

For most home gardeners, simpler recalcitrant seed strategies work beautifully. But for those special varieties worth extraordinary effort, cryopreservation represents hope for genuine biodiversity conservation.

Living Collections and Continuous Planting

When traditional storage fails for recalcitrant seeds, maintaining living collections becomes your best preservation strategy. This approach means keeping the actual plants growing continuously, either in your garden, greenhouse, or through partnerships with other growers in your community.

Think of living collections as a botanical insurance policy. Instead of relying on stored seeds that might lose viability, you’re cultivating mother plants that produce fresh seeds regularly. Many tropical fruit trees, avocados, and certain root crops with recalcitrant seeds thrive under this system. One Georgia farmer shared how she maintains a thriving cacao collection by dedicating greenhouse space to parent plants, harvesting fresh seeds whenever she needs them for propagation or sharing.

Crop rotation plays a crucial role here too. By staggering your plantings throughout the growing season, you ensure a continuous supply of viable seeds. Plant a new generation every few months so you always have mature plants ready to produce seeds when others finish their cycle.

Community seed-sharing networks amplify these efforts beautifully. When multiple gardeners in your area each maintain different varieties of recalcitrant-seeded plants, you create a distributed preservation system that’s resilient and accessible. Local seed swaps and CSA partnerships make it easy to exchange cuttings, fresh seeds, or even young plants.

Consider starting small with just a few varieties that matter most to your garden or farm. Document your planting schedules and connect with neighbors who share your passion for preserving agricultural biodiversity. Together, you’re not just growing plants but safeguarding living genetic diversity for future generations.

What CSA Farmers Are Doing Right Now

Across the country, innovative CSA farmers are tackling the challenge of recalcitrant seed preservation head-on, developing creative solutions that benefit both their farms and the broader agricultural community.

At Green Valley Farm in Oregon, farmer Maria Rodriguez has built a thriving collaboration with her local university’s agricultural department. Together, they’ve established a small-scale cryogenic storage system specifically for her heritage avocado varieties. Maria discovered that by carefully timing seed collection at peak viability and using liquid nitrogen preservation, she could maintain germination rates above 70 percent for seeds that typically lose viability within weeks. She shares her protocols freely with other farmers through regional workshops, demonstrating that preservation technology doesn’t have to be prohibitively expensive. Her system, adapted from research methods, costs less than $2,000 to set up and has helped preserve six rare avocado cultivars that were on the verge of disappearing from the region.

Meanwhile, in Florida, Riverside Community Farm took a different approach by creating a living seed bank. Farmer James Chen maintains multiple generations of tropical fruit trees with recalcitrant seeds, including mango, lychee, and jackfruit varieties passed down through immigrant communities. Rather than storing seeds, he keeps mother trees healthy and coordinates with neighboring farms to ensure genetic diversity. James has organized a quarterly seed swap focused exclusively on recalcitrant species, where farmers share fresh seeds and grafting materials within 48 hours of harvest. This rapid exchange network has preserved 23 rare varieties that members’ grandparents brought from their home countries.

In Vermont, Meadowbrook CSA farmer Sarah Thompson focuses on native nut trees like hickory and black walnut. She’s mastered the art of stratification timing, planting seeds in carefully monitored outdoor beds that mimic natural conditions. Sarah documents everything, sharing her detailed growing calendars with other farmers online, creating a valuable resource for those working with temperate recalcitrant seeds. Her success rate has inspired fifteen other farms to establish their own native nut tree nurseries.

Practical Tips for Home Gardeners and Small Farms

Start Simple: What You Can Do This Season

Good news: you probably already have recalcitrant seeds in your garden! Start by identifying them. Common examples include avocados, chestnuts, acorns, citrus seeds, and many tropical fruits. Unlike tomatoes or beans that you can dry and store, these seeds need to stay moist and viable for only a short window.

This season, take these simple steps. First, plant recalcitrant seeds immediately after harvesting. Don’t let them sit on your counter drying out. If you can’t plant right away, store them in slightly damp sand or peat moss in a cool spot, checking weekly for mold or drying. Second, connect with your local seed library or gardening club to share fresh seeds with others who can plant them quickly.

Consider expanding your seed-saving practices by focusing on easy-to-store seeds first while learning these special techniques for temperamental varieties. Even small efforts help preserve biodiversity in your community garden ecosystem.

Community members exchanging seeds and plants at outdoor gathering table
Community seed-saving networks enable farmers and gardeners to share the responsibility of preserving challenging varieties through living collections and knowledge exchange.

Building a Seed-Saving Network in Your Community

Preserving recalcitrant seeds becomes much easier when you’re not doing it alone. Start by connecting with fellow gardeners through local garden clubs, farmers’ markets, or online community groups focused on seed saving. These connections create opportunities to share both the workload and the knowledge that makes preserving challenging varieties more successful.

Consider establishing or joining community seed libraries in your area. These collaborative spaces allow members to borrow seeds, grow them out, and return fresh seeds while sharing preservation techniques specific to difficult varieties. You might organize seasonal workshops where experienced seed savers demonstrate proper collection and short-term storage methods for recalcitrant seeds like avocados or chestnuts.

Create a neighborhood network where different members take responsibility for specific recalcitrant varieties based on their growing conditions and availability. One gardener might focus on oak species while another maintains a small orchard of tropical fruits. Regular meetups allow you to exchange seedlings, cuttings, and successful strategies.

Many communities have found success establishing “seed guardian” programs where volunteers commit to growing and propagating one or two challenging species, ensuring these valuable genetics remain available locally for future generations.

Resources and Where to Learn More

Ready to dive deeper into recalcitrant seed conservation? The Global Crop Diversity Trust offers comprehensive resources on seed preservation strategies and their importance for food security. Connect with Seed Savers Exchange, a grassroots organization maintaining a diverse collection of heirloom seeds and providing education on preservation techniques. The Millennium Seed Bank Partnership shares research and practical guidance on conserving plant diversity worldwide. For hands-on learning, check with your local botanical gardens, many of which run seed-saving workshops and community programs. Join online communities like GardenWeb’s Seed Exchange forum to swap seeds and preservation tips with fellow gardeners. The USDA National Genetic Resources Program provides scientific information about seed storage and germplasm conservation. Your local agricultural extension office can also connect you with regional seed-saving networks and offer location-specific advice for preserving native and heritage varieties that matter most to your community’s biodiversity.

Preserving recalcitrant seeds isn’t just about saving plant varieties—it’s about safeguarding our food future and protecting the incredible diversity that makes resilient agricultural systems possible. Every seed you save, every connection you make with fellow growers, contributes to a living library of genetic diversity that benefits us all.

You don’t need to be an expert to make a difference. Start small by choosing just one recalcitrant seed variety that grows well in your region. Connect with your local Community Supported Agriculture (CSA) farm to learn which varieties they’re working to preserve. Many farmers are eager to share knowledge and even seeds with dedicated gardeners who want to help maintain rare varieties.

Seek out seed-saving groups in your area—these communities are treasure troves of practical wisdom and often organize seed swaps where you can access unusual varieties while contributing to collective preservation efforts. Your participation, no matter how modest, strengthens the network of growers committed to biodiversity.

The seeds we save today become the resilient crops that will feed future generations. By taking that first step, you’re joining a movement of people who understand that sustainable agriculture starts with preserving the diversity we already have. What variety will you champion?

How CSA Farms Can Meet FSMA 204 Without Losing Their Mind

Posted by darrell on
0
Policy, Law & Certification
How CSA Farms Can Meet FSMA 204 Without Losing Their Mind

The Food Safety Modernization Act’s Section 204 brings new traceability requirements that directly impact many CSA farms starting January 20, 2026. If you grow, pack, or distribute items on the Food Traceability List—including leafy greens, tomatoes, cucumbers, herbs, melons, and peppers—you need to track these products from field to member delivery with detailed records. Understanding FSMA compliance for CSAs doesn’t have to feel overwhelming when you break it down into manageable steps.

Document your traceability lot codes by creating simple batch numbers tied to planting dates and field locations. Link these codes to every stage of handling, from harvest bins to wash stations to delivery boxes. Small farms earning less than $250,000 annually or selling directly to consumers within your state may qualify for exemptions, but verify your specific situation since rules vary based on your distribution channels.

Implement digital record-keeping through affordable farm management apps that track plantings, harvests, and distributions in one place. Even basic spreadsheets work when they capture the required data points: what you grew, where it came from, where it went, and when each step happened. The key lies in consistency rather than complexity.

Many successful CSA operators have discovered that proper traceability actually strengthens their operations beyond regulatory compliance. When food safety concerns arise, you can quickly identify affected batches and notify only the specific members who received those items. This precision protects your entire harvest and your farm’s reputation while building trust with your community. The investment in better record systems pays dividends through improved efficiency, reduced waste, and the peace of mind that comes from knowing exactly where every tomato travels from seed to supper table.

What Exactly Is FSMA 204 and Why Should CSA Farmers Care?

The Food Safety Modernization Act (FSMA) Rule 204 represents a significant step forward in protecting our food supply, and if you’re running a CSA farm, understanding this regulation matters more than you might think.

Think of FSMA 204 as the FDA’s enhanced traceability rule, designed to create a more transparent food chain from farm to table. The regulation goes into effect on January 20, 2026, giving farms time to prepare their recordkeeping systems. The heart of this rule is simple: if there’s a foodborne illness outbreak, health officials need to trace contaminated products back to their source quickly to protect consumers and stop the spread.

For CSA farmers, this matters because Rule 204 specifically targets foods on the FDA’s Traceability List, which includes many items you likely grow: leafy greens, fresh herbs, tomatoes, cucumbers, peppers, and melons, among others. When these products move through the supply chain, detailed records must follow them.

Here’s the good news: this rule builds on broader FSMA requirements you may already be familiar with, and many small CSA operations might qualify for exemptions. The regulation primarily affects farms that sell beyond their immediate community or work with distributors.

Why should you care even if you’re exempt? Traceability protects your farm’s reputation. When you can quickly demonstrate where your produce came from and where it went, you’re protecting both your customers and your livelihood. If an outbreak occurs in your region, solid traceability records can clear your farm’s name swiftly.

Consider Sarah, a Vermont CSA farmer who discovered her recordkeeping helped exonerate her farm when a nearby outbreak occurred. Her detailed harvest logs showed her tomatoes couldn’t have been the source, saving her business from unfair association with the contamination event.

Ultimately, good traceability practices reflect the transparency and accountability that CSA members already value in their relationship with you.

Does Your CSA Actually Need to Comply?

The Food Traceability List: Which Crops Trigger Requirements

The Food Traceability List, or FTL, identifies specific crops that require enhanced tracking under FSMA 204. If your CSA grows any of these items, you’ll need to pay close attention to the new requirements.

For many small farms, leafy greens are the big one. This category includes favorites like lettuce, spinach, arugula, and kale. Basically, if it goes in a salad bowl and hasn’t been cooked, it’s likely on the list. Fresh herbs also made the cut, including basil, cilantro, and parsley, which are CSA staples during growing season.

Tomatoes appear on the FTL too, encompassing all varieties from cherry tomatoes to heirlooms. Cucumbers are another common CSA crop that triggers traceability requirements, whether you’re growing slicers or pickling varieties.

Melons round out the list with cantaloupe and watermelon being specifically named. These summer favorites are popular CSA box additions, so if you grow them, you’ll need compliant tracking systems in place.

The good news? Many CSA crops don’t appear on the FTL. Root vegetables like carrots and beets, winter squash, peppers, and most beans aren’t subject to these enhanced requirements. Understanding which crops trigger compliance helps you prioritize your record-keeping efforts and focus resources where they matter most. Some farms have found success by maintaining detailed records for all crops as a best practice, making compliance feel less like a burden and more like an opportunity to showcase their commitment to food safety and transparency with their member community.

Fresh leafy greens, tomatoes, cucumbers and herbs in wooden harvest crates on farm table
CSA farms growing items on the Food Traceability List must implement proper documentation systems.

Small Farm Exemptions You Should Know About

Good news for smaller CSA operations: you might not be covered by FSMA 204 at all! The FDA includes specific exemptions designed to keep smaller farms from drowning in paperwork.

If your farm generates less than $25,000 in annual sales of food, you’re exempt from these traceability requirements. This threshold applies to your total food sales over the previous three years, averaged. For many beginning farmers just getting their CSA off the ground, this exemption provides breathing room to focus on growing great food.

Direct-to-consumer sales also receive special consideration. When you’re selling directly to your members at farmers markets, through your CSA shares, or at your farm stand, these transactions typically fall outside FSMA 204 requirements. The regulation primarily targets the supply chain where traceability becomes challenging, not the face-to-face relationships you’ve built with your community.

However, if you’re selling to restaurants, grocery stores, or food hubs in addition to your CSA, those transactions may require compliance depending on the specific foods involved. One successful CSA farmer in Vermont shared how she strategically kept her restaurant sales separate from her member shares, simplifying her recordkeeping considerably. Understanding where you fall can save you countless hours and help you structure your business wisely.

The Four Core Records Every Compliant CSA Needs

Growing and Harvesting Records

For FSMA 204 compliance, your growing and harvesting records need to capture specific details about each crop cycle. Start by documenting the exact field location or growing area where you planted each variety. Include precise harvest dates and the specific produce varieties you’re growing, using the variety names from your seed packets or transplants.

Track your planting dates alongside harvest dates to establish a clear timeline. Record the quantity harvested from each location, whether you measure in pounds, bins, or boxes. This creates a direct connection between your fields and the produce that reaches customers.

Consider creating simple field maps that show which crops grow where during each season. Many small farms find success using basic spreadsheets or even paper logbooks. The key is consistency in recording this information while it’s fresh in your mind.

If you grow multiple succession plantings of the same crop, treat each planting as a separate lot with its own records. This might seem like extra work initially, but it becomes routine quickly. One organic farmer in Vermont shared how she keeps a waterproof notebook in her harvest tote, jotting down variety, location, and date as she picks. This simple habit ensures nothing gets forgotten by day’s end.

Cooling and Initial Packing Documentation

Once you’ve harvested your beautiful organic produce, proper documentation begins immediately with cooling and initial packing activities. FSMA 204 requires you to record the cooling date and time, location where cooling occurred, and the method used (whether forced-air cooling, hydrocooling, or another technique). For small CSA operations, this doesn’t mean fancy software—a simple logbook works perfectly fine.

When you pack produce, document the date, what was packed, and any lot codes you assign. Many successful CSA farmers share a helpful tip: use a whiteboard in your packing area to track this information in real-time, then transfer it to your permanent records at day’s end. This creates a clear audit trail showing how quickly you cooled crops and prepared them for distribution.

Remember, these records protect both you and your members by demonstrating your commitment to food safety. Keep documentation simple but consistent—a spiral notebook dedicated to post-harvest activities can be just as compliant as expensive tracking systems.

Distribution Records for CSA Shares

When you distribute shares to your CSA members, keeping organized records creates a simple traceability trail. For each distribution day, record the date, traceability lot code for each crop included in the boxes, and member names or identification numbers. Many small CSAs find success using a simple spreadsheet or notebook system—no fancy software required.

The key is connecting your harvest records to your distribution records through those lot codes. If you packed lettuce from Lot 2024-0515-LETT into Tuesday’s shares, note that code on your distribution sheet. This creates the vital link between field and fork that FSMA 204 requires.

Consider keeping a master harvest sheet at your packing station where you check off which lots went into shares each week. One Virginia CSA farmer shared how she uses color-coded stickers on harvest bins that match her distribution records—a brilliant low-tech solution that works beautifully.

Remember to retain these records for two years. Most farms store paper copies in binders organized by month or use simple digital folders. The goal isn’t perfection but creating a reasonable system that you’ll actually maintain throughout the growing season.

Practical Systems That Work for Real CSA Farms

Low-Tech Paper Systems That Actually Work

Not every farm needs fancy software to meet FSMA 204 requirements. Many small-scale operations find that simple paper systems work beautifully, especially when you’re already spending most of your day outdoors rather than behind a computer screen.

A basic three-ring binder system can cover all your traceability needs. Start with tabbed sections for harvest logs, receiving records, and shipment tracking. Your harvest log should include the date, crop name, location where it was grown, quantity harvested, and who picked it. Keep a stack of pre-printed forms clipped to a clipboard in your packing shed so crew members can fill them out immediately.

For receiving records when you buy seeds or transplants, staple invoices directly into your binder along with a simple form noting the supplier’s contact information and lot numbers. When you pack CSA shares or deliver to customers, use carbon-copy delivery sheets where one copy goes to the customer and one stays in your binder.

The key is consistency. Set aside 10 minutes at the end of each packing day to ensure all forms are complete and filed properly. Many farmers who’ve implemented paper systems report that once it becomes routine, tracking actually helps them stay more organized overall. Plus, during an inspection, you can simply hand over your binder without worrying about internet connectivity or software glitches.

Farmer writing harvest records in notebook beside basket of fresh vegetables
Simple paper-based record keeping systems remain effective for small-scale CSA operations managing FSMA 204 requirements.

Affordable Digital Tools for Traceability

Good news for budget-conscious growers: you don’t need fancy software to achieve FSMA 204 compliance. Many farms successfully track their products using simple spreadsheet templates designed specifically for agricultural traceability. Free downloadable templates are available through state agriculture departments and cooperative extension services, allowing you to record essential information like harvest dates, lot numbers, and distribution details.

For those who prefer mobile solutions, affordable farm management apps like Tend, Crop Tracker, and LocalLine offer traceability features starting under $20 monthly. These tools let you document activities right from the field using your smartphone, eliminating duplicate data entry later.

Another practical option is cloud-based platforms designed for small farms, such as FarmOS (which is free and open-source) or FarmRaise. These systems grow with your operation and often include customer management features valuable for CSA logistics.

Consider starting with whatever system feels most comfortable. Many successful small farms began with simple paper logs, then transitioned to digital tools as their confidence grew. The key is consistency in recording information, not sophisticated technology. Remember, compliance is about having accurate records available when needed, which any organized system can achieve.

Farmer using smartphone and digital spreadsheet for record keeping in tomato field
Affordable digital tools and simple spreadsheets help CSA farms track traceability data efficiently.

Creating Lot Codes You Can Actually Remember

The key to memorable lot codes is keeping them simple and meaningful. Your system doesn’t need fancy software or complicated formulas – just a consistent approach that makes sense for your operation.

Many successful CSA farmers use a date-based system that instantly tells them when crops were harvested. For example, a code like “2024-06-15-TOM-A” breaks down to: year, month, day, crop type (tomatoes), and field location (Field A). When you look at this code weeks later, you immediately know the story behind that harvest.

Another practical approach combines your initials with harvest dates and crop identifiers. Green Valley Farm uses “GVF-0615-CHE” for their June 15th chard harvest. It’s straightforward, memorable, and requires nothing more than a pen and your existing harvest log.

The secret is consistency. Once you choose a format, stick with it throughout the season. Train everyone on your farm to use the same system, and keep a simple reference guide posted near your packing area.

Remember, FSMA 204 doesn’t dictate how your codes should look – it just requires that you can trace products through your supply chain. Your lot code system should work for your brain and your farm’s workflow, not create extra stress during busy harvest days.

Smiling CSA farmer organizing fresh produce boxes at farm stand
Real CSA farmers have successfully implemented traceability systems without disrupting their daily operations.

Real CSA Farmer Success Stories

Meeting FSMA 204 requirements might sound daunting, but farms across the country are proving it’s totally manageable with the right approach. Here are some inspiring examples of CSA operations that have successfully navigated compliance.

Green Valley Farm, a 15-acre CSA in Vermont, initially felt overwhelmed by the traceability requirements. Owner Maria Chen decided to start simple by using a basic spreadsheet system to track their food traceability list crops like leafy greens and tomatoes. “We already kept harvest logs for our own planning purposes,” Maria explains. “We just added a few columns for lot numbers and specific location data.” The farm invested in a $20 label maker to mark harvest bins and discovered that the whole process added only about 15 minutes to their daily routine. Their biggest lesson? Start tracking before the compliance deadline to work out any kinks while the pressure is off.

Riverbend Community Farm in Oregon took a different approach by partnering with three neighboring CSAs to share the learning curve. Together, they attended a state extension workshop and created template forms they could all customize. Farm manager James Rodriguez notes that collaboration cut their implementation time in half. “We realized we were all stressing about the same questions,” he says. The group now holds quarterly check-ins to discuss what’s working and troubleshoot challenges together.

Sunrise Acres, a small CSA in North Carolina, discovered they actually qualified for several exemptions because they sell most produce directly to members within state lines. Owner Sarah Williams still chose to implement basic traceability practices anyway. “Even though we’re exempt now, these records help us manage our operation better,” she shares. “When a member asks which field their lettuce came from, we can tell them instantly.” Her advice? Focus on making compliance work for your farm’s unique situation rather than trying to copy someone else’s system.

Common Pitfalls and How to Avoid Them

Even the most well-intentioned CSA farmers can stumble when implementing FSMA 204 traceability systems. The good news? Most mistakes are easily preventable with a bit of awareness and planning.

One of the biggest pitfalls is incomplete record-keeping. Many farmers diligently track some information but miss critical pieces like harvest dates or specific location identifiers. Emma Rodriguez, who runs a small CSA in Vermont, learned this the hard way during her first season under the new rules. “I was recording everything in different places—my phone, a notebook, sticky notes on the fridge,” she explains. “When I needed to trace a shipment, it was a mess.” Her solution was simple: create one master template that includes every required data point, and fill it out completely before moving to the next task.

Inconsistent lot coding trips up many farmers too. Using random systems like “Monday’s lettuce” or “front field tomatoes” might make sense to you, but it won’t satisfy traceability requirements. Instead, develop a straightforward numbering system and stick with it. For example, you might use the format: crop code, harvest date, and field number (L-0315-A for lettuce harvested March 15th from Field A).

Poor record retention is another common mistake. FSMA 204 requires keeping records for two years, but papers get lost, phones get replaced, and memories fade. Set up a dedicated filing system, whether that’s a simple three-ring binder or a cloud storage folder. Schedule quarterly reviews to ensure everything is where it should be.

Remember, building good habits from day one saves headaches later. Start small, stay consistent, and your traceability system will become second nature.

Your Step-by-Step Action Plan

Getting compliant with FSMA 204 doesn’t have to feel overwhelming. Here’s a practical timeline to help your CSA farm meet the January 2026 deadline with confidence.

Months 1-3: Assessment and Planning

Start by determining if your farm falls under the Food Traceability List requirements. Review which crops you grow that might be covered, such as leafy greens, fresh herbs, tomatoes, or cucumbers. Document your current record-keeping practices and identify gaps. This is also a great time to review your worker classification requirements since you’ll be updating your farm’s operational systems anyway.

Months 4-6: System Selection and Setup

Choose your traceability system based on your farm’s size and budget. This might be as simple as organized spreadsheets or dedicated farm management software. Create templates for recording harvest dates, lot numbers, and distribution information. Set up your traceability lot coding system that makes sense for your operation. Many successful CSA farms use simple date-based codes like “Tomato-Field2-072625” for easy tracking.

Months 7-9: Staff Training and Trial Runs

Train your team on new procedures for recording information at harvest, packing, and distribution. Run practice scenarios to test your system’s effectiveness. Can you trace a bunch of lettuce from field to member within a few hours? Adjust your processes based on what you learn during these trial periods.

Months 10-12: Refinement and Documentation

Fine-tune your procedures based on your trial runs. Create simple checklists for staff to follow during busy harvest days. Document your entire traceability plan in writing. Build in extra time for questions or technical hiccups.

Months 13-15: Final Preparation

Conduct a full mock audit of your system. Verify that all staff understand their roles and that records are being kept consistently. Address any remaining concerns before the enforcement deadline arrives.

Remember, compliance is a journey, not a destination. Starting early gives you breathing room to find solutions that work for your unique farm operation.

Resources and Support for CSA Farmers

Navigating FSMA 204 doesn’t have to feel overwhelming! The FDA offers free guidance documents specifically designed for small farms, including their “Small Entity Compliance Guide” that breaks down requirements in plain language. Start there to understand your obligations.

Your state’s agricultural extension service is an invaluable resource. Extension agents provide free or low-cost consultations and often host workshops on food safety regulations. Many have developed traceability templates tailored to local growing conditions and farm sizes.

The National Sustainable Agriculture Coalition and Local Harvest maintain updated resources for CSA farmers, including compliance checklists and sample recordkeeping systems. These organizations understand the unique challenges small-scale organic farms face and offer practical solutions that won’t break the bank.

Join CSA networks and farming communities in your area. Fellow farmers who’ve already tackled compliance can share their systems, templates, and lessons learned. This collaborative spirit is what makes the CSA movement special, and it extends to navigating regulations together.

Don’t forget about other compliance areas like sales tax requirements and accepting SNAP benefits, which also require proper recordkeeping.

Consider attending regional organic farming conferences where food safety experts present workshops. These events combine practical education with opportunities to connect with other growers facing similar challenges. Remember, you’re not alone in this journey toward compliance!

Taking on FSMA 204 compliance might feel like adding another task to your already full plate, but here’s the good news: it’s absolutely manageable, and you’re not in this alone. Think of compliance as an investment in your farm’s future rather than just a regulatory hurdle. When you implement better traceability, you’re protecting your customers, safeguarding your business from costly recalls, and building even more trust with your community.

The beauty of the CSA model is that you likely already know your customers personally and have simpler supply chains than large operations. This puts you at a real advantage. Start small with one or two crops on the traceability list, get comfortable with the record-keeping rhythm, and expand from there. You don’t need fancy software or expensive systems right away. A simple spreadsheet and clear labeling can get you started.

Remember Sarah from the Hudson Valley who thought compliance was impossible for her small operation? She began by dedicating just 15 minutes daily to recording harvest and distribution data. Within two months, it became second nature, and she discovered her records actually helped her plan crop rotations more effectively.

Reach out to your local agriculture extension office, connect with other CSA farmers who’ve tackled this, and don’t hesitate to ask questions. The agricultural community thrives on sharing knowledge and supporting one another.

The deadline is approaching, so the best time to start is right now. Even small steps today will put you ahead tomorrow. You’ve got this, and your commitment to transparency will only strengthen the bond with the families who depend on your harvest.

What’s Fresh Right Now: Your Month-by-Month California Produce Calendar

Posted by darrell on
0
Seasonal Planning and Management
What’s Fresh Right Now: Your Month-by-Month California Produce Calendar

California’s Mediterranean climate creates one of the longest growing seasons in the United States, delivering fresh, locally grown produce nearly year-round. Understanding what thrives in each season transforms how you shop at farmers markets, plan your garden, and connect with the rhythms of sustainable agriculture.

Visit your local farmers market during peak harvest times to access the freshest, most flavorful produce while supporting small-scale growers in your community. Summer brings abundant stone fruits, tomatoes, and peppers from June through September, while winter months offer robust citrus, leafy greens, and root vegetables that actually taste better after a light frost.

Plan your garden plantings around California’s distinct microclimates and USDA zones, which range from cool coastal regions to warm inland valleys. Cool-season crops like lettuce, broccoli, and peas thrive when planted in fall for winter harvests, while warm-season favorites including squash, melons, and beans need soil temperatures above 60°F for successful germination in spring.

Shop and cook with the seasons to reduce your environmental footprint and enjoy produce at its nutritional peak. Seasonal eating means strawberries taste like strawberries should in May, not December, and winter squash develops its characteristic sweetness only after autumn temperatures trigger natural sugar conversion.

This comprehensive guide breaks down each month’s harvest bounty and planting opportunities, helping you make informed choices whether you’re filling your shopping basket or planning your next garden bed. Embrace California’s incredible agricultural diversity and discover how seasonal eating connects you to the land and the dedicated farmers who nurture it.

Why California’s Climate Makes Us the Nation’s Garden

California’s unique position as America’s produce powerhouse isn’t just luck—it’s geography. Our state’s remarkable diversity of microclimates creates nearly perfect growing conditions for an astonishing variety of crops year-round. From the fog-kissed coastal regions to sun-drenched inland valleys and the subtropical warmth of Southern California, each area cultivates its own specialty crops.

The coastal zones, cooled by Pacific breezes, excel at growing leafy greens, artichokes, and Brussels sprouts even during summer months when inland temperatures soar. Meanwhile, the Central Valley’s hot days and cool nights create ideal conditions for stone fruits, tomatoes, and almonds. Southern California’s mild winters allow citrus groves and avocado orchards to flourish when most of the country is blanketed in snow.

What truly sets California apart is our extended growing season. Many regions enjoy 300-plus days of sunshine annually, enabling farmers to succession plant and harvest multiple crops from the same field. This means fresh strawberries can appear at farmers markets as early as January in some areas, while coastal farms still harvest summer squash well into November.

This agricultural abundance directly benefits local communities through Community Supported Agriculture programs and vibrant farmers markets. Small-scale organic farmers have mastered year-round gardening strategies that take advantage of regional microclimates, providing members with diverse weekly harvest boxes throughout every season.

Home gardeners can apply these same principles. By understanding your specific microclimate—whether you’re gardening in foggy San Francisco or sunny San Diego—you can select crops that naturally thrive in your conditions, reducing water needs and chemical inputs while maximizing harvests. This climate diversity makes California truly exceptional for both commercial farming and backyard food production.

Overhead view of diverse California produce including citrus, stone fruits, and vegetables arranged on wooden table
California’s diverse growing regions produce an incredible variety of fresh fruits and vegetables year-round.

Spring in California (March-May): The Season of Renewal

Harvest basket filled with spring produce including artichokes, asparagus, strawberries and peas in garden setting
Spring brings California’s most delicate produce including artichokes, asparagus, and the first strawberries of the season.

Early Spring Favorites

As California transitions from winter’s chill, early spring brings some of the state’s most anticipated produce to farmers’ markets and gardens. This is when you’ll find tender artichokes with their nutty, slightly sweet flavor—perfect for steaming whole and serving with lemon butter. Look for tight, heavy globes with no browning at the tips.

Asparagus spears appear in abundance, offering a fresh, grassy taste that shines when simply roasted with olive oil and sea salt. Choose firm stalks with tight tips for the best flavor. Meanwhile, strawberries reach their peak sweetness in California’s coastal regions, delivering that perfect balance of sugar and acidity that makes store-bought versions pale in comparison.

English peas and sugar snap peas bring crisp sweetness to spring meals. Shell peas make wonderful additions to risottos, while snap peas are delicious raw in salads or quickly sautéed with garlic. Leafy greens like arugula, spinach, and butter lettuce thrive in cooler spring temperatures, offering peppery or mild flavors depending on variety.

Spring onions, with their delicate flavor and edible green tops, add brightness to stir-fries and salads without the sharp bite of mature onions.

For home gardeners, early spring is ideal for direct-seeding peas and transplanting lettuce starts. Many California farmers have found success using succession planting for continuous lettuce harvests—a sustainable practice that maximizes garden space while reducing waste. Plant every two weeks for a steady supply throughout spring.

Growing Your Own Spring Crops

Spring is the perfect time to start your thriving home garden in California. With our mild climate and extended growing season, even beginners can enjoy success with the right timing and crop selection.

For early spring planting (February through March), focus on cool-season crops that can handle occasional chilly nights. Lettuce, spinach, and arugula are incredibly forgiving and produce harvests within 30-45 days. Peas thrive when planted in late winter, climbing happily up trellises as temperatures warm. Radishes are another winner for new gardeners, maturing in just 3-4 weeks and signaling when soil conditions are right for other crops.

As March rolls into April, it’s time to think about transplants. Start tomatoes, peppers, and basil indoors 6-8 weeks before your last frost date, or purchase starts from local nurseries. These warm-season favorites need soil temperatures above 60 degrees to really take off.

California gardeners should pay attention to microclimates within their own yards. Coastal regions stay cooler longer, while inland valleys warm up faster, affecting ideal planting times by several weeks. A simple soil thermometer takes the guesswork out of timing.

Start small with just a few crops to build confidence. Many successful CSA farmers began with backyard beds, learning seasonal rhythms through hands-on experience. The key is getting seeds or starts in the ground at the right moment and staying consistent with watering as spring sunshine intensifies.

Summer Abundance (June-August): Peak Harvest Season

Stone Fruits and Berries

California’s warm summers bring an incredible bounty of stone fruits and berries that make this season truly special. From late May through September, our state’s orchards produce some of the world’s finest peaches, nectarines, plums, apricots, and cherries.

The Central Valley, particularly around Fresno and the San Joaquin Valley, serves as the heart of California’s stone fruit production. Peak season runs from June through August, with apricots arriving first in late May, followed by cherries in June, and peaches and nectarines hitting their stride in July and August. For the sweetest fruit, look for those picked at peak ripeness from local farms rather than supermarket varieties harvested early for shipping.

Berries thrive in California’s coastal regions, with strawberries available nearly year-round but tastiest from April through June. Blackberries, raspberries, and blueberries peak in summer months. Watsonville and Oxnard are renowned berry-growing areas worth visiting.

Many small-scale organic farmers have found success growing heirloom stone fruit varieties that offer superior flavor but don’t ship well commercially. Visit your local farmers market to discover unique varieties like Flavor King pluots or donut peaches. For home gardeners, stone fruits need winter chill hours, so choose varieties suited to your specific microclimate for best results.

Close-up of fresh summer stone fruits including peaches, nectarines, and apricots with water droplets
Summer stone fruits reach their peak in California’s warm valleys, offering unmatched sweetness and flavor.

Summer Vegetables

California’s summer bounty brings the most beloved vegetables of the season from June through September. Heirloom tomatoes steal the spotlight—look for varieties like Brandywine, Cherokee Purple, and Early Girl at your local farmers market. These sun-ripened gems should never be refrigerated; instead, keep them stem-side down on your counter where they’ll maintain their flavor for about a week.

Bell peppers and spicy chilies thrive in summer heat, offering a rainbow of colors and flavors. Shishito peppers have become a farmers market favorite for their mild, blistery goodness. Store peppers in your crisper drawer for up to two weeks.

Zucchini and summer squash grow so abundantly that many farmers share creative recipes at market stands. Choose smaller specimens for the sweetest flavor and use them within five days. Cucumbers, perfect for refreshing salads, stay crisp when wrapped in a damp towel in the fridge.

Japanese and Italian eggplant varieties offer different textures for grilling and roasting. Sweet corn reaches peak sweetness in July—eat it within two days of purchase for the best flavor. Green beans and romano beans provide protein-rich options that last about a week when refrigerated. Many organic farms grow these vegetables without synthetic pesticides, supporting healthier soil and communities.

Heat-Loving Plants for California Gardens

California’s summer heat is perfect for growing tomatoes, peppers, eggplants, squash, and melons. These sun-worshippers thrive in warm soil, so wait until nighttime temperatures consistently stay above 50°F before transplanting. Deep, infrequent watering encourages robust root systems—check out these watering strategies for California‘s dry climate. Apply 2-3 inches of mulch around plants to retain moisture and keep roots cool. For extended harvests, succession plant heat-tolerant lettuce varieties every two weeks and choose bolt-resistant varieties. Install shade cloth during extreme heat waves to protect tender crops. Many California farmers successfully grow summer crops well into October by selecting varieties suited to their microclimate and maintaining consistent care routines.

Fall Harvest (September-November): Transition Time

Autumn’s Bounty

As California’s scorching summer heat mellows into cooler days, the landscape of available produce shifts beautifully. This transition period brings some of the most celebrated flavors of the year, with harvest season in full swing across the state.

The orchards come alive with crisp apples and juicy pears, particularly in Northern California regions where cooler temperatures help these fruits develop their signature sweetness. Wine country celebrates grape harvest, while Southern California groves offer up glossy pomegranates bursting with ruby-red seeds. Persimmons, both the astringent Hachiya and sweet Fuyu varieties, add their unique honey-like flavor to autumn markets.

Root vegetables begin their reign, with carrots, beets, and turnips thriving in the cooling soil. These hardy crops store beautifully and provide essential nutrients as we head into winter months. Winter squash varieties like butternut, acorn, and kabocha reach peak maturity, offering versatility in the kitchen and impressive shelf life for home cooks. Pumpkins arrive not just for decoration but as nutritious ingredients for soups, breads, and roasted dishes.

For home gardeners, autumn presents perfect planting conditions for cool-season crops. The soil retains summer warmth while air temperatures drop, creating ideal germination conditions. Consider this your opportunity to establish garlic, onions, and leafy greens that will reward you through winter and early spring. Many organic farmers report that fall plantings often outperform spring ones due to fewer pest pressures and consistent moisture from seasonal rains.

Fall Planting for Winter Harvests

Fall is the golden opportunity for California gardeners to plant a bounty of cool-season crops that will feed you through winter. As temperatures drop and autumn rains arrive, it’s time to shift gears from summer’s heat-lovers to cold-hardy vegetables.

Start by planting leafy greens like kale, chard, arugula, and lettuce varieties, which thrive in cooler temperatures and actually taste sweeter after a light frost. Root vegetables are also fall favorites—sow carrots, beets, turnips, and radishes directly into your garden beds. Broccoli, cauliflower, and cabbage transplants should go in the ground by mid-September to give them time to mature before winter’s chill sets in.

Succession planting is your secret weapon to maximize your harvest. Instead of planting everything at once, sow small batches of quick-growing crops like lettuce and spinach every two to three weeks through October. This ensures a continuous supply of fresh greens rather than a single overwhelming harvest.

Don’t forget about cover crops for soil health. Fava beans, crimson clover, and annual ryegrass are excellent choices that fix nitrogen, prevent erosion, and add organic matter when turned under in spring. Local farmer Maria Santos from Sonoma County swears by her fall fava bean cover crop: “It’s like giving my soil a winter spa treatment while providing early spring harvests.”

Plan your fall garden now, and you’ll enjoy fresh, homegrown produce all winter long.

Winter Plenty (December-February): California’s Secret Season

Citrus Season Peaks

California’s citrus season brings a rainbow of flavors from November through June, with peak harvests brightening winter markets when most other fruits are dormant. The state produces over 80% of the nation’s fresh citrus, thanks to diverse growing regions each contributing unique characteristics.

The warm Central Valley yields sweet navels and Valencia oranges, while coastal regions like Ventura and Ojai produce exceptional lemons year-round. Southern California’s inland valleys are famous for mandarins and grapefruits that thrive in the region’s Mediterranean climate.

Beyond conventional varieties, seek out heirloom treasures at farmers markets. Blood oranges with their crimson flesh peak in February, while Cara Cara navels offer a stunning pink interior and berry-like sweetness. Pixie tangerines, a California original developed in Ojai, arrive in early spring with their seedless, easy-to-peel perfection.

For home growers, citrus trees are incredibly rewarding. They’re relatively low-maintenance once established and can produce fruit for decades. Choose dwarf varieties for containers if space is limited, and remember that most citrus needs minimal water once mature—a sustainable choice for California’s climate. Local organic farmer Maria Rodriguez shares that her 20-year-old Meyer lemon tree still produces abundantly with just quarterly composting and occasional deep watering.

Variety of citrus fruits including oranges, mandarins, grapefruit, and lemons on branches with leaves
Winter citrus season showcases California’s unique ability to produce fresh fruit when other regions go dormant.

Winter Vegetables and Greens

California’s winter brings a bounty of hearty vegetables that thrive in cooler temperatures. This is prime season for brassicas like broccoli, cauliflower, Brussels sprouts, and several varieties of kale. You’ll also find crisp winter lettuce, aromatic fennel, and an abundance of root vegetables including carrots, turnips, and beets filling farmers market stalls.

Here’s something fascinating: many winter vegetables actually taste sweeter after a frost. When temperatures drop, plants convert their stored starches into sugars as a natural antifreeze mechanism. This process protects plant cells from freezing damage while giving vegetables like kale, Brussels sprouts, and carrots their characteristic sweet, mellow flavor. Many California farmers who practice sustainable growing methods actually wait for cooler nights before harvesting these crops to maximize their sweetness.

For home gardeners, winter vegetables are incredibly forgiving and require less water than summer crops, making them perfect for sustainable gardening practices. Plant seedlings in fall for winter harvests, and you’ll enjoy fresh, nutrient-dense greens throughout the cooler months. Local organic farmers recommend succession planting lettuce every few weeks to ensure a continuous supply of tender greens all season long.

Keeping Your Garden Productive in Winter

California’s mild winters are a gardener’s dream, offering perfect conditions for cool-season crops that struggle in harsher climates. Take advantage of December through February by planting cold-hardy varieties like kale, Swiss chard, broccoli, and lettuce. These vegetables actually sweeten after light frosts, developing richer flavors that summer crops can’t match. In coastal regions, you might not need frost protection at all, but inland gardeners should keep row covers handy for occasional cold snaps.

Local farmer Maria Rodriguez from Sonoma County shares her winter success strategy: “I plant succession crops of lettuce every two weeks and use simple hoop houses made from PVC pipe and clear plastic. This extends my harvest window and keeps my CSA members happy all winter long.”

For maximum productivity, focus on leafy greens and root vegetables like carrots, beets, and radishes. These crops thrive in cooler temperatures and actually taste better than their summer counterparts. Consider adding peas and fava beans too—they’ll fix nitrogen in your soil while providing fresh harvests through early spring.

How to Find and Use Seasonal Produce Near You

CSA Boxes and Farmers Markets

Joining a CSA program connects you directly with local farms while guaranteeing the freshest seasonal produce available. When you become a CSA member, you’ll receive weekly or bi-weekly boxes filled with whatever’s thriving on the farm that week. Expect abundant leafy greens and strawberries in spring, tomatoes and stone fruits in summer, winter squash and root vegetables in fall, and citrus and brassicas during winter months. Each box is a delicious surprise that encourages you to cook with the seasons.

To find California farmers markets near you, visit the California Federation of Certified Farmers’ Markets website or download apps like LocalHarvest. Most markets operate year-round, with peak variety during summer and fall. Arrive early for the best selection, bring reusable bags, and don’t hesitate to chat with farmers about growing practices and recipe ideas. Many growers offer tips for storing and preparing unfamiliar vegetables. Shopping at farmers markets supports small-scale agriculture while reducing your carbon footprint, and you’ll taste the difference that farm-fresh, just-harvested produce makes in your meals.

Building Relationships with Local Farmers

Meet the Rodriguez family, who’ve been running their 15-acre organic farm in Watsonville for three generations. “We plant what the season tells us,” explains Maria Rodriguez. “In spring, we focus on leafy greens and strawberries. Come summer, our fields explode with tomatoes and peppers. Fall brings squash and root vegetables, while winter is all about citrus and brassicas.” This rhythm with nature has made their CSA boxes a community favorite and reduced their water usage by 40%.

When you visit your local farmers market, don’t hesitate to chat with growers. Ask questions like “What’s just coming into season?” or “How do you handle pests organically?” Most farmers love sharing their knowledge and can offer recipe suggestions for unfamiliar vegetables.

Building these relationships helps you discover produce at peak flavor and freshness. You’ll learn which weeks bring the sweetest strawberries or when heirloom tomatoes will arrive. Many farmers even take requests for specific varieties if you ask early in the season. These conversations transform shopping from a transaction into a meaningful connection with the people growing your food and the land that sustains your community.

Eating with the seasons isn’t just about following a calendar—it’s about connecting with the natural rhythms of California’s incredible agricultural landscape. When you bite into a sun-ripened strawberry in May or savor a crisp autumn apple in October, you’re experiencing food at its peak flavor and nutritional value. You’re also supporting sustainable farming practices that work with nature rather than against it.

The beauty of seasonal eating is that it doesn’t require perfection. Start small by challenging yourself to try one new seasonal item each month. Maybe it’s romanesco in winter or stone fruit in summer. These small experiments will gradually transform how you shop, cook, and think about food.

If you’re ready to dive deeper, consider joining a Community Supported Agriculture program. CSA memberships connect you directly with local farms, delivering seasonal produce boxes right to your door or pickup location. You’ll discover vegetables you’ve never tried before and build relationships with the farmers who grow your food. Many California CSAs also offer farm visits, cooking classes, and volunteer opportunities that strengthen these connections even further.

For those with a green thumb, starting your own seasonal garden brings the farm-to-table experience to your backyard. Even a small container garden on a balcony can yield fresh herbs and tomatoes during the growing season. Gardening teaches patience, provides physical activity, and creates a deeper appreciation for the work farmers do every day.

Ultimately, seasonal eating grounds us in place. It reminds us that we’re part of a larger community—one that includes farmers, soil, sunshine, and the land itself. When we choose seasonal produce, we’re not just feeding ourselves; we’re nurturing these vital connections and investing in California’s sustainable food future.

Why UMass Soil Testing Changes Everything for Your CSA Compost Strategy

Posted by darrell on
0
Environmental Sustainability
Why UMass Soil Testing Changes Everything for Your CSA Compost Strategy

Testing your soil through UMass Extension’s Soil and Plant Nutrient Testing Laboratory gives you the precise data needed to transform your compost from a guessing game into a targeted soil-building strategy. Submit samples following the lab’s protocol—collect 15-20 cores from different spots in your growing area, mix them thoroughly, and send two cups of the combined soil along with your $20 fee and completed form. Request the basic soil test plus organic matter analysis to understand exactly what nutrients your compost needs to supply. Within two weeks, you’ll receive a detailed report showing pH levels, nutrient concentrations, and specific recommendations for amendments, allowing you to adjust your compost recipe and application rates to address deficiencies rather than over-applying materials blindly. Many CSA farmers who integrate regular UMass soil testing with their composting programs report healthier crops, reduced input costs, and improved soil structure within just two growing seasons. The investment pays for itself quickly when you stop wasting money on unnecessary amendments and start feeding your soil exactly what it needs to support thriving vegetables, season after season.

What Makes UMass Soil Testing Different

The UMass Extension Soil and Plant Nutrient Testing Laboratory has earned its reputation as one of the Northeast’s most trusted resources for soil analysis, serving everyone from commercial CSA farmers to backyard gardeners. What sets this service apart is its unique combination of accuracy, affordability, and accessibility—three qualities that matter most when you’re making important decisions about your soil health and compost management.

Located at the University of Massachusetts Amherst, the lab offers several testing packages tailored to different needs. The Standard Soil Test analyzes pH, nutrient levels including nitrogen, phosphorus, and potassium, plus essential micronutrients and organic matter content. For farms incorporating compost, the Compost and Manure Analysis provides specific insights into the nutrient value of your amendments. Pricing remains remarkably affordable, with the Standard Soil Test costing around $15 per sample—a small investment considering the value of the information you receive.

Turnaround times typically range from 7 to 14 business days during most of the year, though spring can bring longer waits as gardening season kicks into high gear. The lab recommends submitting samples in fall or early winter when possible to avoid the rush.

CSA farmers particularly appreciate the lab’s research-backed recommendations that account for regional growing conditions and soil types specific to Massachusetts and the broader Northeast. Maria Chen, who runs a 50-member CSA in Western Massachusetts, credits UMass soil testing with helping her fine-tune her compost application rates. “The detailed reports helped me understand exactly what my compost was contributing,” she shares. “I stopped over-applying and saved both time and resources.”

Home gardeners trust the service because results come with clear, practical recommendations written in accessible language—no agriculture degree required to understand what your soil needs.

Farmer's hands holding soil sample bag with UMass Extension submission form
Proper soil sample collection and submission to UMass Extension laboratory is the first step toward understanding your garden’s nutrient needs.

Understanding Your Soil Before Adding Compost

The Key Numbers CSA Farmers Need to Watch

When your UMass soil report arrives, you’ll find a treasure map of information that guides your composting and growing decisions. Let’s decode the numbers that matter most for CSA success.

First up is pH, measuring how acidic or alkaline your soil is on a scale from 0 to 14. Most vegetables thrive between 6.0 and 7.0. If your pH is off, even nutrient-rich compost won’t help plants access what they need. The good news? This is easily adjustable with lime for acidic soil or sulfur for alkaline conditions.

Next, you’ll see the big three nutrients: nitrogen (N), phosphorus (P), and potassium (K). Nitrogen fuels leafy growth, phosphorus supports root development and flowering, and potassium strengthens disease resistance. UMass reports these as parts per million and rate them from very low to very high. These numbers tell you exactly what your compost needs to deliver.

Organic matter percentage is the game-changer for CSA farmers. Healthy soil typically contains 5 to 8 percent organic matter, though some exceptional farms reach higher. This number directly reflects your compost application success over time. One Vermont CSA farmer raised her organic matter from 3 to 7 percent over five seasons through consistent compost use, resulting in noticeably better water retention during dry spells.

The report also includes micronutrients like calcium and magnesium. While often overlooked, these support everything from strong plant cell walls to chlorophyll production, making them essential for producing the vibrant, nutritious vegetables your CSA members expect.

How Compost Changes Your Soil Chemistry

When you add compost to your garden or farm, you’re doing more than just enriching the soil with nutrients. Compost fundamentally transforms your soil’s chemistry in multiple beneficial ways. It increases organic matter content, which improves the soil’s ability to hold moisture and nutrients where plant roots can access them. As compost breaks down, it releases nitrogen, phosphorus, and potassium gradually, creating a steady nutrient supply rather than the quick spike and crash of synthetic fertilizers.

Compost also affects your soil’s pH balance, typically nudging acidic soils toward a more neutral range that most vegetables prefer. The organic matter feeds beneficial soil microbes, which in turn create compounds that help plants absorb nutrients more efficiently. Additionally, compost additions improve your soil’s cation exchange capacity, essentially creating more storage spaces for nutrients.

Regular UMass soil testing helps you track these gradual improvements over time. By testing annually, you can see how your compost applications are changing nutrient levels, organic matter percentages, and pH. This data empowers you to adjust your compost quantities and application timing, ensuring you’re building soil health without overdoing any single nutrient.

Creating Your CSA Testing Schedule

Timing is everything when it comes to soil testing for your CSA operation. The ideal schedule balances getting actionable data with the practical realities of farm life and seasonal rhythms.

For farms integrating compost, late fall is your sweet spot for baseline testing. Sample after harvest but before applying winter compost or cover crops. This gives you a clear picture of what your soil needs and plenty of time to adjust your compost recipes before spring planting. UMass Extension recommends testing every three years for established fields, but if you’re actively building soil with compost, annual testing helps you track progress and avoid over-application of nutrients.

Different field zones need different attention. Test high-use areas like your main vegetable beds annually, especially if you’re rotating crops intensively. Less demanding zones, such as perennial beds or areas planted with nitrogen-fixing cover crops, can stretch to every two or three years.

Here’s a practical approach: divide your farm into zones based on crop rotation and compost application rates. Sample Zone A in year one, Zone B in year two, and Zone C in year three, while retesting Zone A. This staggers costs while maintaining comprehensive monitoring.

Spring testing works too, but sample at least six weeks before planting to allow time for receiving results and making adjustments. Sarah Chen, a CSA farmer in Western Massachusetts, follows this rhythm: “I test my intensive beds every November, get my results by December, and adjust my compost blends over winter. By March, I’m applying precisely what each bed needs.”

Coordinate your testing schedule with compost application timing. Sample before adding compost to understand baseline needs, then verify improvements the following season.

How to Collect Soil Samples the Right Way

Collecting accurate soil samples is simpler than you might think, and getting it right makes all the difference in your results. Here’s what you’ll need: a clean bucket, a soil probe or garden trowel, and a sampling container from UMass Extension.

Start by identifying the area you want to test. If you’re testing garden beds or fields where you plan to add compost, keep those areas separate from your lawn or other zones. Walk a zigzag pattern across your sampling area, collecting 10-15 small cores or slices from different spots. This random pattern gives you a true picture of your soil’s overall condition rather than just one small area.

For most garden and agricultural applications, sample to a depth of 6-8 inches. If you’re testing established perennial beds or orchards, go a bit deeper to 8-12 inches. Push your probe straight down, pull up the core, and place it in your clean bucket. Avoid sampling near buildings, roads, or burn piles where contamination could throw off your results.

Once you’ve collected all your cores, mix them thoroughly in the bucket to create one composite sample. Remove any rocks, roots, or debris, then fill your UMass sample container with about two cups of this mixed soil. Local farmer Maria Rodriguez from Western Massachusetts credits proper sampling technique with helping her dial in her compost application rates perfectly: “Following these steps gave me confidence that my test results truly represented what was happening across my whole field.”

Soil probe being inserted into garden soil for sample collection
Using proper soil sampling tools and technique ensures accurate test results that reflect your field’s true nutrient status.

Using Test Results to Fine-Tune Your Compost Program

When Compost Alone Isn’t Enough

Sometimes your UMass soil test results reveal challenges that even the best composting strategies can’t fully address. Don’t be discouraged if your report shows severe deficiencies in specific nutrients like phosphorus, potassium, or micronutrients. This is actually valuable information that helps you make targeted improvements.

Take Sara Chen, a Massachusetts CSA farmer who discovered her soil’s magnesium levels were critically low despite years of composting. After applying dolomitic limestone as recommended by her soil test, her tomato yields increased by 40 percent the following season. The key is understanding that compost excels at building organic matter and providing slow-release nutrients, but it may not supply enough of certain elements your crops desperately need.

When tests indicate specific deficiencies, consider approved organic amendments like rock phosphate for phosphorus, greensand for potassium, or kelp meal for trace minerals. Think of compost as your foundation and these targeted amendments as precision tools. By combining regular compost applications with strategic nutrient additions based on soil test guidance, you’ll create truly optimal growing conditions for abundant, healthy harvests.

Real Results: A Massachusetts CSA Farmer’s Story

When Sarah Chen started Green Valley CSA in Western Massachusetts five years ago, she knew healthy soil would be the foundation of her success. What she didn’t expect was how dramatically UMass soil testing would transform her operation.

“I thought our homemade compost was doing the job,” Sarah admits, “but our first UMass soil test told a different story.” The results revealed high phosphorus levels but dangerously low calcium, along with a pH of 5.8—far too acidic for most vegetables.

Armed with these insights, Sarah adjusted her composting program. She began sourcing crushed oyster shells from a local seafood processor and added lime based on UMass recommendations. She also diversified her compost ingredients, incorporating carbon-rich materials like wood chips to balance the nitrogen-heavy kitchen scraps and manure she’d been relying on.

The transformation didn’t happen overnight, but the metrics speak for themselves. After two growing seasons of targeted amendments guided by annual soil tests, her soil pH climbed to an optimal 6.5. Calcium levels doubled, and organic matter increased from 3.2 percent to 5.8 percent.

“Our tomato yields jumped by nearly 40 percent in year two,” Sarah shares enthusiastically. “But the real win? Our members noticed. They commented on how the vegetables tasted sweeter, stored longer, and had that deep, vibrant color you only get from truly healthy plants.”

By the third season, Sarah reduced her external fertilizer costs by 60 percent because her improved compost was finally providing balanced nutrition. Member retention hit 92 percent, well above the regional average.

“UMass soil testing gave me confidence,” Sarah reflects. “Instead of guessing what my soil needed, I knew exactly how to make my compost work harder for us.”

Colorful harvest of fresh CSA vegetables including tomatoes, kale, carrots, and eggplants
Healthy soil supported by proper testing and compost management produces vibrant, nutrient-dense vegetables for CSA members.

Getting Started With Your First Soil Sample

Ready to unlock the secrets hiding in your soil? Getting started with a UMass soil sample is easier than you might think. First, visit the UMass Extension Soil and Plant Nutrient Testing Laboratory website to order your testing kit. Current pricing runs approximately $20 for a standard soil test, which includes essential measurements like pH, phosphorus, potassium, and organic matter content. The investment is minimal compared to the insights you’ll gain.

When your kit arrives, you’ll find clear instructions for collecting samples. The key is taking samples from multiple spots across your growing area and mixing them together for an accurate representation. Submit your sample with payment through mail, and expect results within two weeks during peak season.

Your results will arrive with specific recommendations tailored to Massachusetts growing conditions. Don’t feel overwhelmed by the numbers – the report includes easy-to-understand explanations and application rates for amendments. Pay special attention to the organic matter percentage, as this becomes your baseline for tracking improvements over time.

Here’s a tip from seasoned CSA farmer Maria Rodriguez: “I test my fields every two years and keep a simple spreadsheet. Watching my organic matter climb from 3.2% to 5.8% over six years proved my compost program was working. Those numbers translate directly to healthier crops and happier customers.”

Start your soil health journey today, and you’ll have data-driven confidence as you build your compost integration strategy.

Taking the guesswork out of soil management is one of the most empowering steps you can take as a CSA farmer or home gardener. UMass soil testing provides the concrete data you need to make your compost work harder, transforming it from a simple soil amendment into a precision tool for building long-term soil health. Instead of wondering whether your compost application rates are right or if nutrients are balanced, you’ll have science-backed answers that guide every decision.

Starting your testing journey is straightforward and affordable. A single soil test can reveal opportunities to adjust your composting practices, save money on unnecessary amendments, and grow more nutritious produce for your community. Remember, healthy soil doesn’t just support plant growth—it creates vegetables and fruits with higher nutrient density, directly benefiting everyone who enjoys your harvest.

The connection between thriving soil and vibrant community health is undeniable. By investing in professional soil testing today, you’re not just improving your farm or garden—you’re contributing to a more sustainable local food system that nourishes both people and the planet. Take that first step and discover what your soil is telling you.

Why Organic Produce Might Be Your Best Defense Against Food Allergies

Posted by darrell on
0
Consumer Health and Nutrition
Why Organic Produce Might Be Your Best Defense Against Food Allergies

Food allergies affect millions of Americans, and if you’ve noticed mysterious reactions after meals, you’re right to question what’s in your food. The connection between genetically modified organisms and allergic reactions remains one of the most debated topics in food science, leaving concerned consumers searching for answers and safer alternatives.

GMOs are crops altered at the DNA level to resist pests, tolerate herbicides, or enhance nutritional content. While regulatory agencies maintain these foods are safe, the reality is more nuanced. When genes from allergenic sources like nuts or soybeans are transferred into other crops, they can potentially introduce new proteins that trigger immune responses in sensitive individuals. The 1990s StarLink corn incident, where an approved animal-feed GMO entered human food supplies and caused allergic reactions, demonstrated these risks aren’t merely theoretical.

Beyond direct genetic transfers, GMOs often contain higher pesticide residues because many are engineered to withstand heavy chemical applications. These residues can irritate digestive systems and exacerbate existing sensitivities, creating symptoms that mimic or worsen true allergies.

For families experiencing unexplained food reactions, switching to organic produce offers a practical solution. Organic certification prohibits GMOs entirely, ensuring you receive crops grown from traditional seeds without genetic modification. Local farms practicing organic methods provide the cleanest option, as produce travels shorter distances and requires fewer preservatives. Community Supported Agriculture programs connect you directly with farmers who can verify their growing practices, answer questions about seed sources, and provide the transparency conventional grocery stores cannot guarantee.

Understanding what enters your body starts with knowing where your food originates.

The GMO-Allergy Connection: What Science Actually Shows

Scientist examining corn cob in laboratory setting for GMO research
Scientific research examines how genetic modifications in crops like corn may alter protein structures that can trigger immune responses in sensitive individuals.

How Genetic Modification Changes Food Proteins

Genetic modification introduces new genes into crops, which can change the proteins these plants produce. Think of proteins as the building blocks that make up food—when scientists alter a plant’s DNA, they’re essentially teaching it to create proteins it wouldn’t naturally make.

Let’s look at Bt corn as an example. Scientists insert a gene from Bacillus thuringiensis bacteria into corn, enabling the plant to produce its own insect-fighting protein. While this protein targets specific pests, it’s a completely new addition to our food supply that wasn’t present in traditional corn varieties. For people with sensitivities, this introduces an unfamiliar protein their immune systems haven’t encountered before.

Herbicide-resistant crops tell a similar story. Soybeans and other crops modified to withstand weedkillers now produce proteins that help them survive chemical applications. These newly created proteins become part of the food we eat, whether in cooking oils, processed foods, or animal feed that eventually reaches our dinner plates.

Here’s why this matters for sensitive individuals: our immune systems recognize proteins as friend or foe. When a new protein enters the picture, some people’s bodies may flag it as a potential threat, triggering an immune response. While not everyone reacts to these modified proteins, those with existing food sensitivities or compromised immune systems might experience increased reactions.

The challenge is that these protein changes happen at the molecular level, making them invisible to consumers. This is precisely why many people concerned about allergies and sensitivities choose organic produce, where genetic modification isn’t permitted, giving them peace of mind about what proteins they’re consuming.

Real Cases Where GMOs Triggered Reactions

While GMOs undergo rigorous safety testing, a few documented cases have raised questions about unexpected reactions. The most notable example involved StarLink corn, which contained a protein called Cry9C. This variety was approved only for animal feed but accidentally entered the human food supply in 2000, prompting concerns about potential allergic responses. Though investigations couldn’t definitively link it to allergic reactions, the incident led to significant recalls and highlighted gaps in containment protocols.

Another case involved Brazil nuts genes transferred into soybeans to boost protein content. Testing revealed the modified soybeans could trigger reactions in people with Brazil nut allergies, so the project was discontinued before reaching consumers. This actually demonstrates how safety testing protocols work as intended.

It’s worth noting that these instances are rare exceptions rather than the rule. Regulatory agencies like the FDA require extensive allergenicity testing before any GMO reaches the market. However, for those with food sensitivities or anyone preferring a precautionary approach, choosing organic produce from local farms through community-supported agriculture programs offers peace of mind. Organic certification prohibits GMO use, giving you complete transparency about what you’re eating while supporting sustainable farming practices in your community.

Beyond GMOs: Hidden Allergy Triggers in Conventional Produce

Pesticide Residues and Immune System Stress

When we think about pesticides, we often focus on GMO crops, but the reality is that conventional produce—whether genetically modified or not—frequently carries chemical residues that can impact our bodies in unexpected ways. These pesticide residues don’t just wash off easily. They can accumulate in the digestive tract, where they interact with the delicate gut lining that plays a crucial role in gut health and immune function.

Research suggests that pesticide exposure may compromise the intestinal barrier, sometimes called the gut lining. When this protective barrier becomes irritated or damaged, it can allow partially digested proteins to pass into the bloodstream, potentially triggering immune responses that manifest as food sensitivities or allergic reactions. It’s not always the food itself causing problems—sometimes it’s the chemical hitchhikers coming along for the ride.

The good news? Choosing organic produce from local farms significantly reduces your pesticide exposure. Organic farming practices prohibit synthetic pesticides, giving your gut a chance to heal and function optimally. Many people who switch to organic report improvements in their digestive comfort and overall wellbeing.

Consider incorporating fermented foods and organic produce into your diet to support gut lining health. Supporting local organic farmers through CSA programs not only benefits your immune system but also helps build a healthier food system for everyone.

Cross-Contamination from Processing

Even when produce isn’t genetically modified, cross-contamination during processing can introduce unexpected allergens into your food. This happens more often than you might think, especially in conventional processing facilities that handle multiple crops through shared equipment.

Think about it: commercial facilities often process various crops on the same production lines, from corn and soybeans to wheat and tree nuts. When equipment isn’t thoroughly cleaned between batches, protein residues from allergenic foods can transfer to otherwise safe produce. For individuals with severe allergies, even trace amounts can trigger reactions.

The challenge extends beyond processing equipment. Shared storage facilities, transportation trucks, and packaging lines all create opportunities for allergen transfer. Dust particles containing allergenic proteins can settle on nearby produce, and cleaning protocols in large-scale operations sometimes prioritize efficiency over complete allergen removal.

This is where choosing organic produce from local farms offers a real advantage. Smaller-scale organic operations typically process fewer crop varieties and maintain more control over their facilities. Many organic farmers who sell through CSA programs or farmers markets handle their own post-harvest processing, reducing the risk of cross-contamination significantly.

When you connect directly with your local organic farmer, you can ask specific questions about their processing methods and what other crops share their facilities. This transparency simply isn’t possible with conventional produce that passes through multiple processing stages before reaching grocery store shelves. For those managing food allergies, this direct relationship provides invaluable peace of mind and safer food choices.

How Organic Farming Practices Protect Against Allergens

Fresh organic vegetables displayed at farmers market including tomatoes, peppers, and leafy greens
Organic produce maintains natural genetic profiles and eliminates synthetic pesticide residues that can stress immune systems in allergy-prone individuals.

No Synthetic Chemicals Means Cleaner Produce

When you choose organic produce, you’re getting more than just fruits and vegetables grown without GMOs. Organic certification standards strictly prohibit synthetic pesticides, herbicides, and fungicides that often leave residues on conventionally grown crops. These chemical residues can act as immune system irritants, potentially triggering inflammatory responses in sensitive individuals.

Research shows that pesticide exposure may heighten allergic reactions by disrupting the body’s natural defenses. Your immune system can misidentify these chemical compounds as threats, leading to increased sensitivity over time. For people already dealing with food allergies or sensitivities, eliminating this additional burden makes a meaningful difference.

Organic farmers use natural pest management strategies like crop rotation, beneficial insects, and companion planting instead of synthetic chemicals. This approach produces cleaner food that works with your body rather than against it. Many families switching to organic report fewer allergy symptoms and improved overall wellness.

Beyond reducing allergic reactions, organic vegetables provide additional benefits for your health. By choosing certified organic produce from local CSA farms, you’re supporting farming practices that prioritize both environmental health and human wellbeing while enjoying truly clean, nourishing food.

Preserving Natural Protein Structures

When you bite into an organic apple or slice an heirloom tomato, you’re experiencing food in its most natural form. Organic produce maintains its original genetic blueprint, meaning the proteins within these foods remain unchanged from how nature intended them. This preservation matters more than you might think when it comes to allergic reactions.

Our immune systems have evolved over thousands of years to recognize naturally occurring proteins in foods. When genetic modification introduces new proteins or alters existing ones, our bodies may struggle to recognize these unfamiliar structures. Think of it like meeting a friend who’s changed their appearance dramatically – there’s a moment of confusion while your brain processes the differences.

By choosing organic, you’re selecting produce with predictable protein profiles that your body recognizes. Sarah, an organic farmer from Vermont, shares how customers with food sensitivities often report fewer reactions when switching to her farm’s produce. While individual experiences vary, maintaining natural genetic structures provides peace of mind for those concerned about unexpected immune responses. The familiarity principle applies beautifully here – sticking with foods in their original form means fewer surprises for your digestive system and immune defenses.

Soil Health and Nutrient Density Connection

The connection between soil health and your body’s immune response is more direct than you might think. When farmers nurture their soil with organic practices, they’re creating an ecosystem rich in beneficial microorganisms, minerals, and organic matter. This living soil produces crops with higher levels of vitamins, minerals, and phytonutrients compared to conventionally grown alternatives.

Research shows that organically grown produce often contains more antioxidants and essential nutrients that strengthen immune systems naturally. These nutritional powerhouses help your body recognize and respond appropriately to real threats while reducing inflammatory responses that can trigger allergic reactions.

Local organic farmers understand this connection deeply. Many CSA farmers we’ve worked with report that their customers notice improved digestion and fewer sensitivities when switching to nutrient-dense organic produce. The secret lies in the soil—healthy, living soil creates resilient plants that, in turn, support resilient people. By choosing organic options from your local CSA, you’re not just avoiding potentially problematic GMO proteins; you’re actively nourishing your body with food grown in soil designed to support optimal health.

Real Stories: Families Who Found Relief Through Organic

When the Martinez family from Portland began experiencing unexplained skin rashes and digestive issues, they never suspected their food might be the culprit. After keeping a detailed food diary, Maria Martinez noticed their symptoms worsened after eating conventional produce. “We decided to try organic for three months,” she explains. “Within six weeks, my daughter’s eczema cleared up significantly, and my husband’s stomach problems practically disappeared.”

Their story isn’t unique. Local farmer Tom Chen witnessed a similar transformation after converting his 15-acre farm to organic practices five years ago. “I suffered from seasonal allergies my entire life,” Tom shares. “After working exclusively with organic crops and eliminating exposure to synthetic pesticides, my allergy symptoms decreased by about 70 percent. I rarely need antihistamines anymore.”

Sarah Patel, a long-time CSA member at Greenfield Farms, experienced relief from chronic hives after switching to their organic produce box. “I was skeptical at first, but desperate,” she recalls. “My dermatologist couldn’t pinpoint the cause of my hives. After eight weeks of eating only organic fruits and vegetables from the CSA, my skin was completely clear. When I accidentally ate conventional strawberries at a party, the hives returned within days.”

These experiences align with what many organic farmers observe in their communities. Jake Morrison, who runs a small organic operation in Vermont, notes that several customers specifically seek out his produce because of food sensitivities. “One family told me their son’s respiratory issues improved dramatically after switching to our organic apples and lettuce,” he says.

While individual experiences vary and more research is needed to establish direct causation, these families found meaningful relief by choosing organic options. Their stories remind us that sometimes the simplest solution—returning to food grown without synthetic chemicals—can make a remarkable difference in our daily lives and overall wellness.

Family holding crate of fresh organic vegetables in farm field
Families increasingly turn to local organic farms and CSA programs to access allergen-conscious produce that supports better health outcomes.

Making the Switch: Practical Steps for Allergy-Prone Households

Which Produce to Prioritize First

When considering which produce to prioritize for organic purchasing, start with the Environmental Working Group’s Dirty Dozen list, which identifies conventionally grown fruits and vegetables with the highest pesticide residues. Strawberries, spinach, and apples consistently top this list. While these aren’t necessarily GMO crops, the heavy pesticide use makes them priority switches to organic versions.

For GMO-specific concerns, focus on corn, soybeans, canola, and sugar beets, as these represent the most common genetically modified crops in our food system. Sweet corn and summer squash also have GMO varieties available commercially. If you’re managing food sensitivities, these should be your first organic purchases.

The good news? Many fruits and vegetables have minimal GMO presence. Items like broccoli, carrots, and cauliflower are naturally bred varieties, though organic versions still eliminate synthetic pesticide exposure.

Consider joining a local CSA or visiting farmers markets where you can ask growers directly about their growing practices. Many small-scale farmers follow organic methods even without formal certification, offering you fresh, locally grown produce at reasonable prices. This approach not only supports your health goals but also strengthens your community’s agricultural network. Start with just a few priority items and gradually expand your organic choices as your budget allows.

Finding Local Organic Sources Through CSAs

If you’re concerned about GMOs and potential allergic reactions, joining a Community Supported Agriculture (CSA) program offers a wonderful solution. CSAs connect you directly with local farms committed to organic practices, giving you access to fresh, seasonal produce that’s free from genetically modified organisms and typically grown without synthetic pesticides.

When you join a CSA, you purchase a share of a farm’s harvest at the beginning of the growing season. In return, you receive weekly boxes of freshly harvested vegetables, fruits, and sometimes eggs, meat, or dairy products. This direct relationship with your farmer means you know exactly where your food comes from and how it’s grown, which is especially important if you’re managing food sensitivities.

Choosing the right CSA requires a bit of research. Start by asking about their growing practices and whether they’re certified organic or use organic methods. Visit the farm if possible to see their operations firsthand and meet the farmers. Consider the pickup location and schedule to ensure it fits your routine. Some CSAs offer flexible options like half shares for smaller households or workplace delivery.

Many farmers have inspiring stories about transitioning to organic methods after witnessing the positive impact on both soil health and customer wellbeing. Ask about their crop variety too, since diverse farms provide better nutrition and help you explore new vegetables you might not find at conventional stores. CSA membership not only supports your health goals but also strengthens local food systems and builds community connections with like-minded individuals who value sustainable living.

While the scientific evidence linking GMOs directly to allergic reactions remains limited, choosing organic produce offers peace of mind and potential health benefits that matter to many families. By opting for foods grown without genetic modification, synthetic pesticides, or chemical fertilizers, you’re reducing your exposure to substances that may trigger sensitivities in some individuals.

The good news? Taking control of your food choices has never been easier. Community Supported Agriculture programs and local farmers markets provide wonderful opportunities to connect with growers who share your values about food quality and transparency. When you buy directly from organic farmers, you’re not just getting fresh, nutrient-dense produce—you’re also learning exactly how your food was grown and what practices were used.

Consider visiting your neighborhood farmers market this weekend or researching CSA options in your area. Many farms offer tours, allowing you to see their sustainable practices firsthand and build relationships with the people growing your food. These connections transform grocery shopping from a mundane task into an empowering journey toward better health.

Remember, every food choice you make is a vote for the kind of agriculture you want to support. By choosing organic, you’re investing in your wellbeing while supporting farming practices that nurture both people and planet.

How Smart Technology Transforms Your Urban CSA Garden into a Thriving Food System

Posted by darrell on
0
Technology and Innovation
How Smart Technology Transforms Your Urban CSA Garden into a Thriving Food System

Map your growing space by measuring every sunny spot—balconies, windowsills, rooftops, and shared yards—then calculate hours of direct sunlight each location receives daily. This data-driven approach helps you match crops to microclimates, ensuring tomatoes claim your south-facing balcony while shade-tolerant lettuce thrives under partial cover.

Design vertical growing systems using wall-mounted planters, trellises, and tiered shelving to multiply your productive area without expanding your footprint. A 4×8 foot balcony can yield over 100 pounds of produce annually when you grow upward rather than outward, stacking herbs, greens, and vining crops in carefully planned layers.

Schedule succession plantings every two weeks using a simple calendar system that tracks planting dates, expected harvest windows, and crop rotation patterns. This planning method prevents feast-or-famine cycles and keeps fresh vegetables flowing from spring through fall, maximizing every container’s productivity throughout the growing season.

Connect with urban Community Supported Agriculture programs that provide proven growing blueprints and seasonal crop plans tailored to city conditions. These partnerships offer structured guidance for beginners while creating food security through coordinated neighborhood efforts. Urban farmers who adopt integrated planning methods report harvesting 3-5 times more produce than those using random, unplanned approaches.

Transform scattered containers into productive mini-farms by treating your urban space as a complete agricultural system where every element—from water collection to companion planting—works together intentionally.

What Integrated Urban Planning Means for Your Garden

The CSA Connection: From Farm to Urban Plot

Traditional Community Supported Agriculture models are experiencing an exciting urban evolution. Instead of simply delivering produce from distant farms, modern CSA programs are embracing integrated urban planning to create interconnected food networks right in the heart of cities. This transformation turns urban members from passive consumers into active participants in local food production.

Urban CSA farms now work closely with city planners to establish micro-farms on vacant lots, rooftop gardens, and underutilized green spaces. These small-scale operations serve as demonstration sites and educational hubs, showing residents how professional farming techniques can scale down for home gardens. Members learn directly from farmers during work shares, then apply those same principles to their backyard plots or balcony containers.

The real magic happens when home gardens become recognized extensions of the larger CSA system. Some programs now offer seed sharing initiatives, where members receive the same heirloom varieties grown at the main farm. Others coordinate neighborhood growing clusters, where several households focus on different crops and share their harvests, mimicking the diversity of a traditional CSA box.

Sarah Martinez, a CSA member in Portland, transformed her 400-square-foot backyard into a productive plot after working weekend shifts at her local urban farm. “I grew enough tomatoes and herbs last season to supply three neighboring families,” she shares. “We’re essentially creating our own micro-CSA network, and it started with what I learned through the main farm’s integrated planning workshops.”

This model proves that urban agriculture isn’t just about individual gardens but rather coordinated systems that strengthen community food security together.

Why Your Backyard Matters to City Food Security

Your backyard might seem like just a small patch of green space, but when connected through smart planning systems, it becomes part of something much bigger. Individual urban gardens collectively create a network of local food production that strengthens community resilience during supply chain disruptions and reduces reliance on distant food sources.

Think of integrated planning as connecting the dots between your tomato plants and your neighbor’s herb garden, then linking those to community plots and local CSA farms. When cities implement coordinated urban agriculture solutions, they create systems where resources like compost, seeds, and knowledge flow efficiently between growers.

The impact is real. In Detroit, networked urban gardens now produce over 400,000 pounds of food annually, demonstrating how individual efforts add up. Your backyard contributions matter because they diversify what your neighborhood grows, reduce food miles, and create living examples that inspire others to start growing.

Smart planning systems help track what each garden produces, identify gaps in local food availability, and coordinate seasonal growing schedules. This transforms scattered individual efforts into a cohesive food security strategy that benefits everyone in your community.

Technology That Makes Urban Growing Smarter, Not Harder

Aerial view of urban rooftop garden with raised beds and soil moisture sensors
Smart sensors integrated into urban rooftop gardens help maximize yields in limited city spaces while optimizing water and resource use.

Sensors and Automation: Your Garden’s Digital Assistant

Urban gardening doesn’t require constant vigilance when you have the right digital tools working alongside you. Modern sensors and automation systems act as your garden’s tireless assistant, monitoring conditions and responding to your plants’ needs even when you’re at work or away.

Soil moisture sensors are the perfect entry point for beginners. These affordable devices measure water levels in your soil and send alerts to your phone when plants need watering. Basic models start around $20-30, while smart sensors with Bluetooth connectivity range from $50-100. They eliminate guesswork and prevent both overwatering and drought stress, crucial for apartment balconies where you can’t easily check soil daily.

Compact weather stations designed for urban settings track temperature, humidity, rainfall, and sunlight. These mini stations help you understand your microclimate—essential information since rooftop conditions differ dramatically from ground-level patios. Expect to invest $75-150 for reliable models that sync with smartphone apps.

Automated watering systems transform how city dwellers maintain gardens. Simple drip irrigation kits with timers cost $30-60 and work perfectly for balcony container gardens. More sophisticated systems ($150-300) integrate with moisture sensors and weather data, adjusting watering schedules automatically. This technology proves invaluable during summer vacations or busy work weeks.

Maria, a Toronto CSA member, installed a basic moisture sensor system in her vertical garden last spring. “I was drowning my tomatoes and under-watering my peppers,” she shares. “Now my phone tells me exactly what each section needs. My harvest doubled, and I’m spending less time worrying.”

The beauty of these systems is scalability. Start with one moisture sensor, then expand as you gain confidence. As IoT technology transforms commercial farming, similar tools become increasingly accessible and affordable for home gardeners seeking efficiency in limited urban spaces.

Apps That Connect Growers and Build Community

Technology is bringing urban growers together in exciting new ways, making it easier than ever to share knowledge, coordinate harvests, and build thriving digital communities around local food production.

Apps like Crop Swap and ShareHarvest connect neighbors who want to exchange surplus produce, seeds, and gardening supplies. These platforms help reduce food waste while strengthening community bonds. Simply post what you have available, browse nearby offerings, and arrange pickups with fellow growers in your area.

For CSA members, coordination apps like Harvie and Local Line streamline communication between farms and shareholders. Members can customize their weekly shares, swap items they don’t want, and even pick up extra produce when available. The real-time updates keep everyone informed about harvest schedules and farm happenings.

Knowledge-sharing platforms such as GrowIt! and PlantSnap function as social networks specifically for gardeners. Upload photos of your urban garden, identify unfamiliar plants, troubleshoot pest problems, and get advice from experienced growers worldwide. These apps create supportive spaces where beginners feel comfortable asking questions and experts enjoy sharing their wisdom.

Many urban farms now use apps like Growing Gardens to manage volunteer schedules, workshop registrations, and community events. Members receive notifications about planting days, harvest festivals, and educational sessions, making participation effortless.

These digital tools transform isolated backyard efforts into collaborative movements, proving that even in dense cities, growers can cultivate both vegetables and meaningful connections with their neighbors.

Person checking garden monitoring app on smartphone next to vertical hydroponic growing system
Mobile apps connect urban growers to real-time garden data and community networks, making high-tech food production accessible to apartment dwellers.

Vertical and Indoor Systems: Growing Beyond Ground Level

When ground space is scarce, thinking vertically transforms your urban growing potential. Hydroponic tower systems stack growing pockets upward, allowing you to cultivate dozens of plants in the footprint of a single houseplant. These innovative structures use nutrient-rich water instead of soil, making them perfect for balconies and patios where weight matters.

Indoor growing has evolved dramatically with LED grow light technology. These energy-efficient lights mimic natural sunlight, enabling year-round harvests regardless of weather or season. Modern LED systems use specific light spectrums to boost plant growth while consuming 40-60% less energy than traditional grow lights. You can now grow fresh lettuce, herbs, and even tomatoes right in your kitchen or spare bedroom.

Smart indoor systems take the guesswork out of urban farming. Automated controllers monitor moisture levels, adjust lighting schedules, and alert you when plants need attention. Some systems connect to smartphone apps, letting you tend your garden remotely during busy workdays.

Take Maria from Chicago, who transformed her studio apartment’s unused corner into a thriving vertical garden. Using a simple tower system and LED lights, she grows enough salad greens and herbs to supply her weekly meals and share with neighbors. She reports saving over $50 monthly on produce while enjoying fresher, pesticide-free food.

Starting small is key. Begin with a countertop herb garden to learn the basics, then expand as your confidence grows. The beauty of vertical and indoor systems is their scalability—you control exactly how much space and effort you invest.

Group of urban gardeners working together and sharing harvest in city backyard garden
Urban CSA members collaborate in shared growing spaces, combining traditional community-supported agriculture with modern city gardening techniques.

Real Success: Urban Growers Making It Work

The best proof that integrated urban planning works? Real people growing real food in real cities. Let’s meet some urban growers who’ve cracked the code.

Sarah Chen transformed her Brooklyn apartment building’s rooftop into a thriving CSA that now feeds 25 neighborhood families. She started with just three raised beds and a simple drip irrigation system controlled by her smartphone. By mapping sun exposure throughout the day and using vertical growing structures, Sarah maximized every square foot. Her secret weapon? A combination of automated watering scheduled around weather forecasts and a detailed planting calendar that ensures continuous harvests from April through November. What began as a personal experiment now generates enough produce to supply weekly shares while building community among her neighbors.

In Detroit, Marcus Williams turned his backyard and two vacant side lots into an urban farm that supplies three local restaurants. His integrated approach combines solar-powered irrigation, companion planting strategies, and a simple spreadsheet system that tracks what to plant when. Marcus emphasizes that you don’t need expensive technology to succeed. His planning notebook and basic weather app help him stay ahead of planting deadlines and pest problems. The key, he says, is consistency and observation.

Even balcony gardeners are seeing remarkable results. Lima Rodriguez feeds her family of four with vegetables grown entirely on her Chicago apartment balcony. She uses container gardens with self-watering systems and follows a succession planting schedule she learned from online gardening communities. By growing vertically and choosing high-yield varieties like cherry tomatoes, peppers, and leafy greens, Lima harvests something fresh almost daily during the growing season.

These growers share common threads: they all started small, learned from mistakes, and used simple planning tools to track what worked. They prove that integrated urban planning isn’t about having the perfect setup or expensive equipment. It’s about understanding your space, using available resources wisely, and staying committed to the process. Whether you have a rooftop, backyard, or just a sunny balcony, their stories show that thoughtful planning makes urban food production not just possible, but genuinely rewarding.

Getting Started: Your First Steps Toward an Integrated Garden

Assess Your Space and Resources

Before diving into urban agriculture, take time to understand what you’re working with. Start by observing your available space throughout the day. Which areas receive at least six hours of direct sunlight? These prime spots are perfect for fruiting plants like tomatoes and peppers, while shadier corners work well for leafy greens.

Next, evaluate your water situation. Is there easy access to a hose or outdoor faucet? Consider installing rain barrels to harvest free water while reducing your environmental footprint. One urban farmer in Chicago saved 40% on her water bill by collecting rainwater from her roof.

Measure your actual growing space, whether it’s a balcony, rooftop, or small yard. Don’t let limited square footage discourage you. Vertical gardens, container systems, and intensive planting methods can transform even tiny areas into productive gardens.

Finally, establish a realistic budget. Factor in initial setup costs for containers, soil, seeds, and any technology like drip irrigation systems or grow lights. Remember that many investments, like quality containers and automated watering systems, pay dividends through years of use. Start small if needed—you can always expand as you gain experience and confidence in your urban growing journey.

Start Small, Scale Smart

You don’t need to transform your entire urban garden overnight. The most successful city growers start with one or two simple technologies and expand as they learn what works in their specific environment. Begin by choosing a single system that addresses your biggest challenge. If watering is your struggle, try a basic drip irrigation timer before investing in a smart controller. If space is tight, test one vertical growing structure before covering every wall.

Consider running small experiments. Set up moisture sensors in half your containers while watering the others manually, then compare plant health and water usage over a month. This hands-on approach teaches you what your plants actually need rather than guessing. Maria, a Brooklyn balcony gardener, started with just three self-watering containers. After seeing her tomato yields double, she gradually expanded to 15 containers with a rainwater collection system.

Track what you observe in a simple notebook or phone app. Note which plants thrive, when pests appear, and how much you harvest. These insights become invaluable when deciding where to invest time and resources next. Remember, urban farming is about progress, not perfection. Each growing season offers new lessons that help you refine your approach and scale thoughtfully.

Overcoming Common Urban Growing Challenges

Urban gardening comes with its fair share of hurdles, but integrated planning paired with smart technology turns these obstacles into opportunities. Let’s explore how modern solutions tackle the common urban farming challenges that city growers face.

Limited space ranks as the biggest concern for urban farmers. Vertical growing systems, including tower gardens and wall-mounted planters, maximize every square foot available. Many urban CSAs now use tiered shelving with grow lights to transform small warehouses into productive farms. By mapping your space digitally using garden planning apps, you can optimize layouts and calculate exactly how many plants fit in your area.

Contaminated soil presents another significant barrier in cities where industrial history left behind harmful residues. Raised beds with purchased organic soil provide a clean growing medium, while container gardening eliminates ground contact entirely. Some urban farmers use soil testing kits to assess contamination levels before planting, then choose appropriate growing methods based on results.

Unpredictable microclimates make urban growing tricky. Tall buildings create wind tunnels and shade patterns that shift throughout the day. Temperature variations between sunny pavement and shaded areas can differ by 15 degrees. Weather monitoring stations and smartphone apps help you track these variations, allowing you to position heat-loving tomatoes in warm spots while placing leafy greens in cooler zones.

Water management also challenges city growers. Integrated drip irrigation systems with timers ensure consistent moisture without waste, while rainwater collection barrels turn rooftops into water sources. These technologies, combined with moisture sensors that alert you via smartphone, prevent both drought stress and overwatering, helping your urban garden thrive despite city conditions.

The beauty of integrated urban planning is that it transforms what seems impossible into something genuinely achievable. By combining thoughtful space design with accessible technology like soil sensors, vertical growing systems, and simple planning apps, city dwellers can create thriving food gardens right where they live. You don’t need a sprawling farm or expensive equipment to participate in CSA programs or grow your own fresh produce.

The success stories we’ve explored prove that anyone can start small and scale up gradually. Whether you’re joining a community garden with shared technology resources or setting up a modest balcony garden with a few smart tools, taking that first step matters most. Connect with your local CSA programs to learn what’s possible in your neighborhood and discover what resources already exist in your community.

Technology has democratized urban agriculture, making it accessible to beginners and experienced gardeners alike. Start by assessing your available space, research one or two tech tools that match your budget, and begin growing something simple. Your urban garden journey doesn’t have to be perfect from day one. The important thing is to begin, learn as you grow, and enjoy the fresh, organic produce you’ve cultivated yourself while contributing to a more sustainable food system in your city.