Monthly Archives

40 Articles

What’s Fresh Right Now: Your Month-by-Month California Produce Calendar

Posted by darrell on
0
Seasonal Planning and Management
What’s Fresh Right Now: Your Month-by-Month California Produce Calendar

California’s Mediterranean climate creates one of the longest growing seasons in the United States, delivering fresh, locally grown produce nearly year-round. Understanding what thrives in each season transforms how you shop at farmers markets, plan your garden, and connect with the rhythms of sustainable agriculture.

Visit your local farmers market during peak harvest times to access the freshest, most flavorful produce while supporting small-scale growers in your community. Summer brings abundant stone fruits, tomatoes, and peppers from June through September, while winter months offer robust citrus, leafy greens, and root vegetables that actually taste better after a light frost.

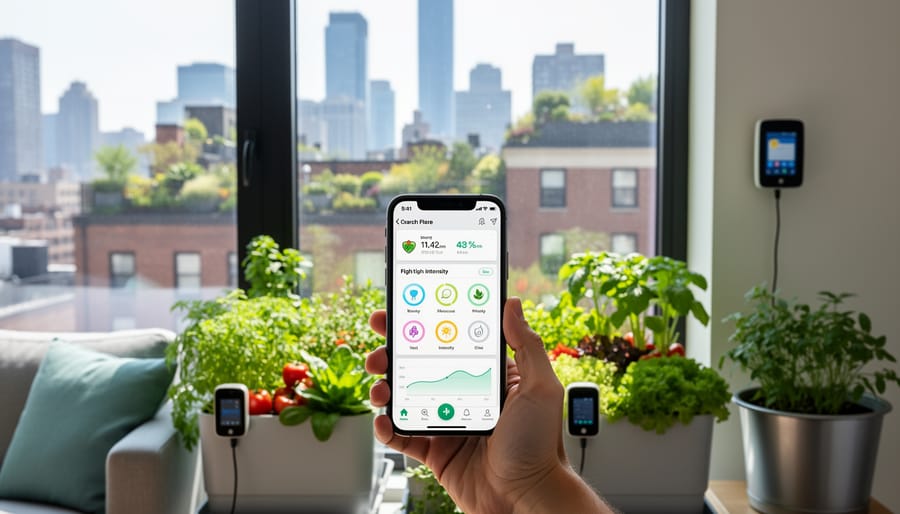
Plan your garden plantings around California’s distinct microclimates and USDA zones, which range from cool coastal regions to warm inland valleys. Cool-season crops like lettuce, broccoli, and peas thrive when planted in fall for winter harvests, while warm-season favorites including squash, melons, and beans need soil temperatures above 60°F for successful germination in spring.

Shop and cook with the seasons to reduce your environmental footprint and enjoy produce at its nutritional peak. Seasonal eating means strawberries taste like strawberries should in May, not December, and winter squash develops its characteristic sweetness only after autumn temperatures trigger natural sugar conversion.

This comprehensive guide breaks down each month’s harvest bounty and planting opportunities, helping you make informed choices whether you’re filling your shopping basket or planning your next garden bed. Embrace California’s incredible agricultural diversity and discover how seasonal eating connects you to the land and the dedicated farmers who nurture it.

Why California’s Climate Makes Us the Nation’s Garden

California’s unique position as America’s produce powerhouse isn’t just luck—it’s geography. Our state’s remarkable diversity of microclimates creates nearly perfect growing conditions for an astonishing variety of crops year-round. From the fog-kissed coastal regions to sun-drenched inland valleys and the subtropical warmth of Southern California, each area cultivates its own specialty crops.

The coastal zones, cooled by Pacific breezes, excel at growing leafy greens, artichokes, and Brussels sprouts even during summer months when inland temperatures soar. Meanwhile, the Central Valley’s hot days and cool nights create ideal conditions for stone fruits, tomatoes, and almonds. Southern California’s mild winters allow citrus groves and avocado orchards to flourish when most of the country is blanketed in snow.

What truly sets California apart is our extended growing season. Many regions enjoy 300-plus days of sunshine annually, enabling farmers to succession plant and harvest multiple crops from the same field. This means fresh strawberries can appear at farmers markets as early as January in some areas, while coastal farms still harvest summer squash well into November.

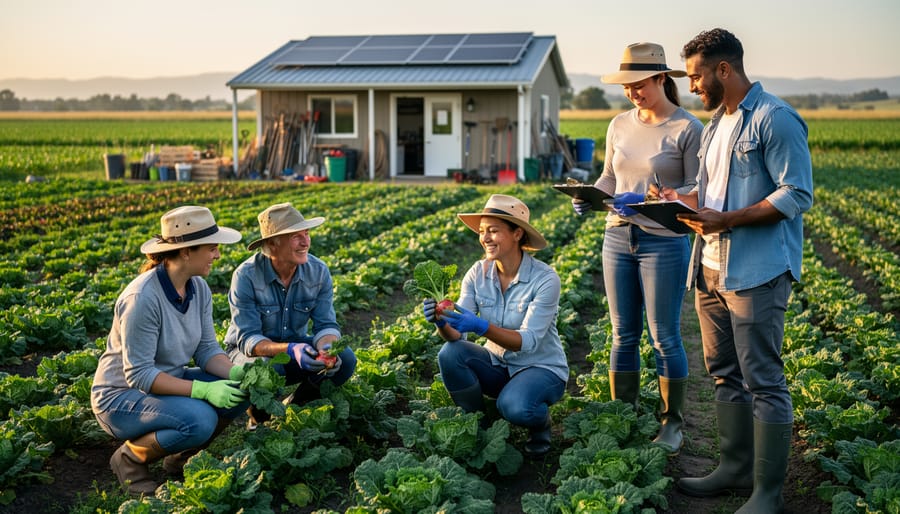
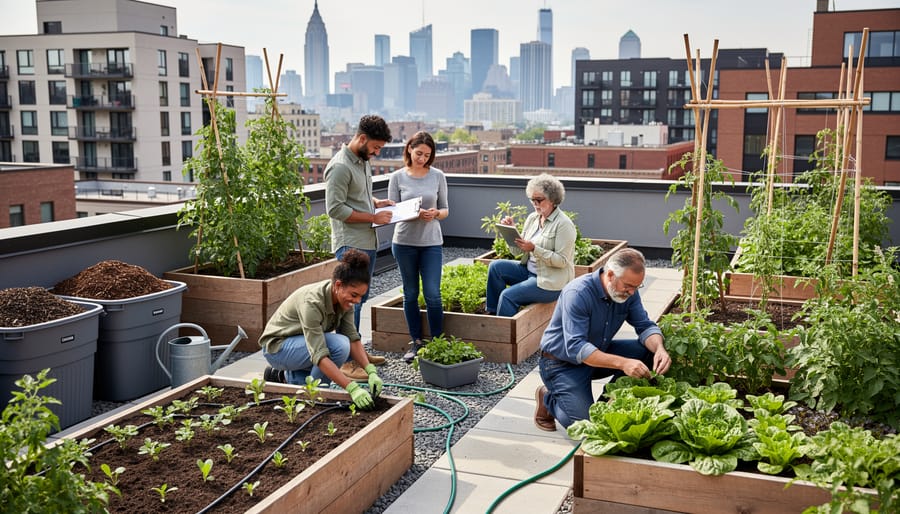
This agricultural abundance directly benefits local communities through Community Supported Agriculture programs and vibrant farmers markets. Small-scale organic farmers have mastered year-round gardening strategies that take advantage of regional microclimates, providing members with diverse weekly harvest boxes throughout every season.

Home gardeners can apply these same principles. By understanding your specific microclimate—whether you’re gardening in foggy San Francisco or sunny San Diego—you can select crops that naturally thrive in your conditions, reducing water needs and chemical inputs while maximizing harvests. This climate diversity makes California truly exceptional for both commercial farming and backyard food production.

Overhead view of diverse California produce including citrus, stone fruits, and vegetables arranged on wooden table
California’s diverse growing regions produce an incredible variety of fresh fruits and vegetables year-round.

Spring in California (March-May): The Season of Renewal

Harvest basket filled with spring produce including artichokes, asparagus, strawberries and peas in garden setting
Spring brings California’s most delicate produce including artichokes, asparagus, and the first strawberries of the season.

Early Spring Favorites

As California transitions from winter’s chill, early spring brings some of the state’s most anticipated produce to farmers’ markets and gardens. This is when you’ll find tender artichokes with their nutty, slightly sweet flavor—perfect for steaming whole and serving with lemon butter. Look for tight, heavy globes with no browning at the tips.

Asparagus spears appear in abundance, offering a fresh, grassy taste that shines when simply roasted with olive oil and sea salt. Choose firm stalks with tight tips for the best flavor. Meanwhile, strawberries reach their peak sweetness in California’s coastal regions, delivering that perfect balance of sugar and acidity that makes store-bought versions pale in comparison.

English peas and sugar snap peas bring crisp sweetness to spring meals. Shell peas make wonderful additions to risottos, while snap peas are delicious raw in salads or quickly sautéed with garlic. Leafy greens like arugula, spinach, and butter lettuce thrive in cooler spring temperatures, offering peppery or mild flavors depending on variety.

Spring onions, with their delicate flavor and edible green tops, add brightness to stir-fries and salads without the sharp bite of mature onions.

For home gardeners, early spring is ideal for direct-seeding peas and transplanting lettuce starts. Many California farmers have found success using succession planting for continuous lettuce harvests—a sustainable practice that maximizes garden space while reducing waste. Plant every two weeks for a steady supply throughout spring.

Growing Your Own Spring Crops

Spring is the perfect time to start your thriving home garden in California. With our mild climate and extended growing season, even beginners can enjoy success with the right timing and crop selection.

For early spring planting (February through March), focus on cool-season crops that can handle occasional chilly nights. Lettuce, spinach, and arugula are incredibly forgiving and produce harvests within 30-45 days. Peas thrive when planted in late winter, climbing happily up trellises as temperatures warm. Radishes are another winner for new gardeners, maturing in just 3-4 weeks and signaling when soil conditions are right for other crops.

As March rolls into April, it’s time to think about transplants. Start tomatoes, peppers, and basil indoors 6-8 weeks before your last frost date, or purchase starts from local nurseries. These warm-season favorites need soil temperatures above 60 degrees to really take off.

California gardeners should pay attention to microclimates within their own yards. Coastal regions stay cooler longer, while inland valleys warm up faster, affecting ideal planting times by several weeks. A simple soil thermometer takes the guesswork out of timing.

Start small with just a few crops to build confidence. Many successful CSA farmers began with backyard beds, learning seasonal rhythms through hands-on experience. The key is getting seeds or starts in the ground at the right moment and staying consistent with watering as spring sunshine intensifies.

Summer Abundance (June-August): Peak Harvest Season

Stone Fruits and Berries

California’s warm summers bring an incredible bounty of stone fruits and berries that make this season truly special. From late May through September, our state’s orchards produce some of the world’s finest peaches, nectarines, plums, apricots, and cherries.

The Central Valley, particularly around Fresno and the San Joaquin Valley, serves as the heart of California’s stone fruit production. Peak season runs from June through August, with apricots arriving first in late May, followed by cherries in June, and peaches and nectarines hitting their stride in July and August. For the sweetest fruit, look for those picked at peak ripeness from local farms rather than supermarket varieties harvested early for shipping.

Berries thrive in California’s coastal regions, with strawberries available nearly year-round but tastiest from April through June. Blackberries, raspberries, and blueberries peak in summer months. Watsonville and Oxnard are renowned berry-growing areas worth visiting.

Many small-scale organic farmers have found success growing heirloom stone fruit varieties that offer superior flavor but don’t ship well commercially. Visit your local farmers market to discover unique varieties like Flavor King pluots or donut peaches. For home gardeners, stone fruits need winter chill hours, so choose varieties suited to your specific microclimate for best results.

Close-up of fresh summer stone fruits including peaches, nectarines, and apricots with water droplets
Summer stone fruits reach their peak in California’s warm valleys, offering unmatched sweetness and flavor.

Summer Vegetables

California’s summer bounty brings the most beloved vegetables of the season from June through September. Heirloom tomatoes steal the spotlight—look for varieties like Brandywine, Cherokee Purple, and Early Girl at your local farmers market. These sun-ripened gems should never be refrigerated; instead, keep them stem-side down on your counter where they’ll maintain their flavor for about a week.

Bell peppers and spicy chilies thrive in summer heat, offering a rainbow of colors and flavors. Shishito peppers have become a farmers market favorite for their mild, blistery goodness. Store peppers in your crisper drawer for up to two weeks.

Zucchini and summer squash grow so abundantly that many farmers share creative recipes at market stands. Choose smaller specimens for the sweetest flavor and use them within five days. Cucumbers, perfect for refreshing salads, stay crisp when wrapped in a damp towel in the fridge.

Japanese and Italian eggplant varieties offer different textures for grilling and roasting. Sweet corn reaches peak sweetness in July—eat it within two days of purchase for the best flavor. Green beans and romano beans provide protein-rich options that last about a week when refrigerated. Many organic farms grow these vegetables without synthetic pesticides, supporting healthier soil and communities.

Heat-Loving Plants for California Gardens

California’s summer heat is perfect for growing tomatoes, peppers, eggplants, squash, and melons. These sun-worshippers thrive in warm soil, so wait until nighttime temperatures consistently stay above 50°F before transplanting. Deep, infrequent watering encourages robust root systems—check out these watering strategies for California‘s dry climate. Apply 2-3 inches of mulch around plants to retain moisture and keep roots cool. For extended harvests, succession plant heat-tolerant lettuce varieties every two weeks and choose bolt-resistant varieties. Install shade cloth during extreme heat waves to protect tender crops. Many California farmers successfully grow summer crops well into October by selecting varieties suited to their microclimate and maintaining consistent care routines.

Fall Harvest (September-November): Transition Time

Autumn’s Bounty

As California’s scorching summer heat mellows into cooler days, the landscape of available produce shifts beautifully. This transition period brings some of the most celebrated flavors of the year, with harvest season in full swing across the state.

The orchards come alive with crisp apples and juicy pears, particularly in Northern California regions where cooler temperatures help these fruits develop their signature sweetness. Wine country celebrates grape harvest, while Southern California groves offer up glossy pomegranates bursting with ruby-red seeds. Persimmons, both the astringent Hachiya and sweet Fuyu varieties, add their unique honey-like flavor to autumn markets.

Root vegetables begin their reign, with carrots, beets, and turnips thriving in the cooling soil. These hardy crops store beautifully and provide essential nutrients as we head into winter months. Winter squash varieties like butternut, acorn, and kabocha reach peak maturity, offering versatility in the kitchen and impressive shelf life for home cooks. Pumpkins arrive not just for decoration but as nutritious ingredients for soups, breads, and roasted dishes.

For home gardeners, autumn presents perfect planting conditions for cool-season crops. The soil retains summer warmth while air temperatures drop, creating ideal germination conditions. Consider this your opportunity to establish garlic, onions, and leafy greens that will reward you through winter and early spring. Many organic farmers report that fall plantings often outperform spring ones due to fewer pest pressures and consistent moisture from seasonal rains.

Fall Planting for Winter Harvests

Fall is the golden opportunity for California gardeners to plant a bounty of cool-season crops that will feed you through winter. As temperatures drop and autumn rains arrive, it’s time to shift gears from summer’s heat-lovers to cold-hardy vegetables.

Start by planting leafy greens like kale, chard, arugula, and lettuce varieties, which thrive in cooler temperatures and actually taste sweeter after a light frost. Root vegetables are also fall favorites—sow carrots, beets, turnips, and radishes directly into your garden beds. Broccoli, cauliflower, and cabbage transplants should go in the ground by mid-September to give them time to mature before winter’s chill sets in.

Succession planting is your secret weapon to maximize your harvest. Instead of planting everything at once, sow small batches of quick-growing crops like lettuce and spinach every two to three weeks through October. This ensures a continuous supply of fresh greens rather than a single overwhelming harvest.

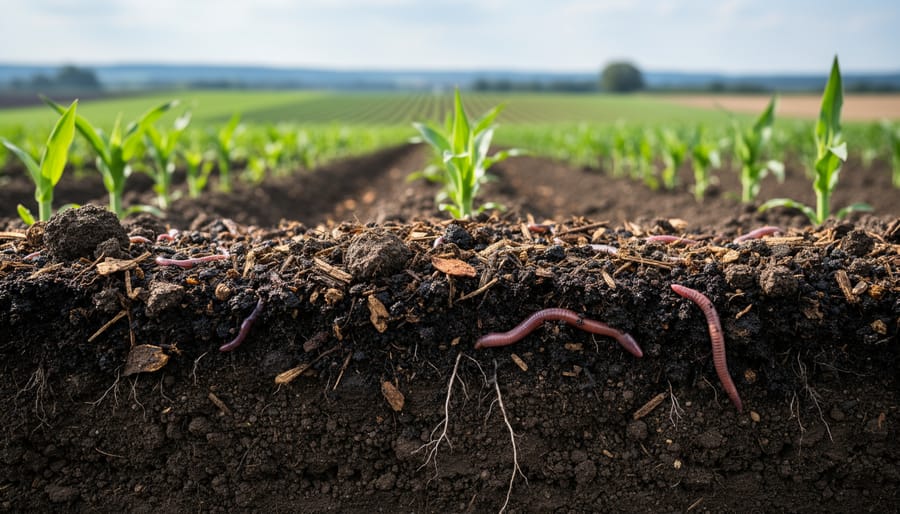
Don’t forget about cover crops for soil health. Fava beans, crimson clover, and annual ryegrass are excellent choices that fix nitrogen, prevent erosion, and add organic matter when turned under in spring. Local farmer Maria Santos from Sonoma County swears by her fall fava bean cover crop: “It’s like giving my soil a winter spa treatment while providing early spring harvests.”

Plan your fall garden now, and you’ll enjoy fresh, homegrown produce all winter long.

Winter Plenty (December-February): California’s Secret Season

Citrus Season Peaks

California’s citrus season brings a rainbow of flavors from November through June, with peak harvests brightening winter markets when most other fruits are dormant. The state produces over 80% of the nation’s fresh citrus, thanks to diverse growing regions each contributing unique characteristics.

The warm Central Valley yields sweet navels and Valencia oranges, while coastal regions like Ventura and Ojai produce exceptional lemons year-round. Southern California’s inland valleys are famous for mandarins and grapefruits that thrive in the region’s Mediterranean climate.

Beyond conventional varieties, seek out heirloom treasures at farmers markets. Blood oranges with their crimson flesh peak in February, while Cara Cara navels offer a stunning pink interior and berry-like sweetness. Pixie tangerines, a California original developed in Ojai, arrive in early spring with their seedless, easy-to-peel perfection.

For home growers, citrus trees are incredibly rewarding. They’re relatively low-maintenance once established and can produce fruit for decades. Choose dwarf varieties for containers if space is limited, and remember that most citrus needs minimal water once mature—a sustainable choice for California’s climate. Local organic farmer Maria Rodriguez shares that her 20-year-old Meyer lemon tree still produces abundantly with just quarterly composting and occasional deep watering.

Variety of citrus fruits including oranges, mandarins, grapefruit, and lemons on branches with leaves
Winter citrus season showcases California’s unique ability to produce fresh fruit when other regions go dormant.

Winter Vegetables and Greens

California’s winter brings a bounty of hearty vegetables that thrive in cooler temperatures. This is prime season for brassicas like broccoli, cauliflower, Brussels sprouts, and several varieties of kale. You’ll also find crisp winter lettuce, aromatic fennel, and an abundance of root vegetables including carrots, turnips, and beets filling farmers market stalls.

Here’s something fascinating: many winter vegetables actually taste sweeter after a frost. When temperatures drop, plants convert their stored starches into sugars as a natural antifreeze mechanism. This process protects plant cells from freezing damage while giving vegetables like kale, Brussels sprouts, and carrots their characteristic sweet, mellow flavor. Many California farmers who practice sustainable growing methods actually wait for cooler nights before harvesting these crops to maximize their sweetness.

For home gardeners, winter vegetables are incredibly forgiving and require less water than summer crops, making them perfect for sustainable gardening practices. Plant seedlings in fall for winter harvests, and you’ll enjoy fresh, nutrient-dense greens throughout the cooler months. Local organic farmers recommend succession planting lettuce every few weeks to ensure a continuous supply of tender greens all season long.

Keeping Your Garden Productive in Winter

California’s mild winters are a gardener’s dream, offering perfect conditions for cool-season crops that struggle in harsher climates. Take advantage of December through February by planting cold-hardy varieties like kale, Swiss chard, broccoli, and lettuce. These vegetables actually sweeten after light frosts, developing richer flavors that summer crops can’t match. In coastal regions, you might not need frost protection at all, but inland gardeners should keep row covers handy for occasional cold snaps.

Local farmer Maria Rodriguez from Sonoma County shares her winter success strategy: “I plant succession crops of lettuce every two weeks and use simple hoop houses made from PVC pipe and clear plastic. This extends my harvest window and keeps my CSA members happy all winter long.”

For maximum productivity, focus on leafy greens and root vegetables like carrots, beets, and radishes. These crops thrive in cooler temperatures and actually taste better than their summer counterparts. Consider adding peas and fava beans too—they’ll fix nitrogen in your soil while providing fresh harvests through early spring.

How to Find and Use Seasonal Produce Near You

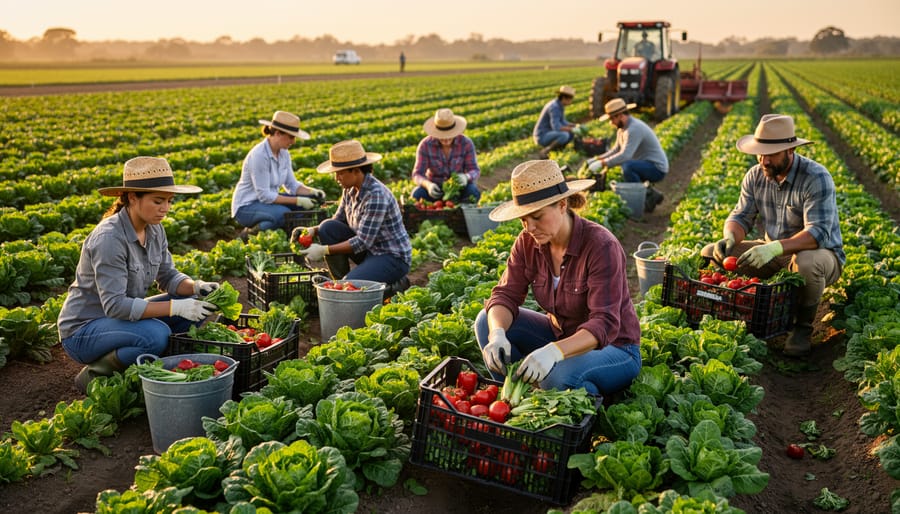
CSA Boxes and Farmers Markets

Joining a CSA program connects you directly with local farms while guaranteeing the freshest seasonal produce available. When you become a CSA member, you’ll receive weekly or bi-weekly boxes filled with whatever’s thriving on the farm that week. Expect abundant leafy greens and strawberries in spring, tomatoes and stone fruits in summer, winter squash and root vegetables in fall, and citrus and brassicas during winter months. Each box is a delicious surprise that encourages you to cook with the seasons.

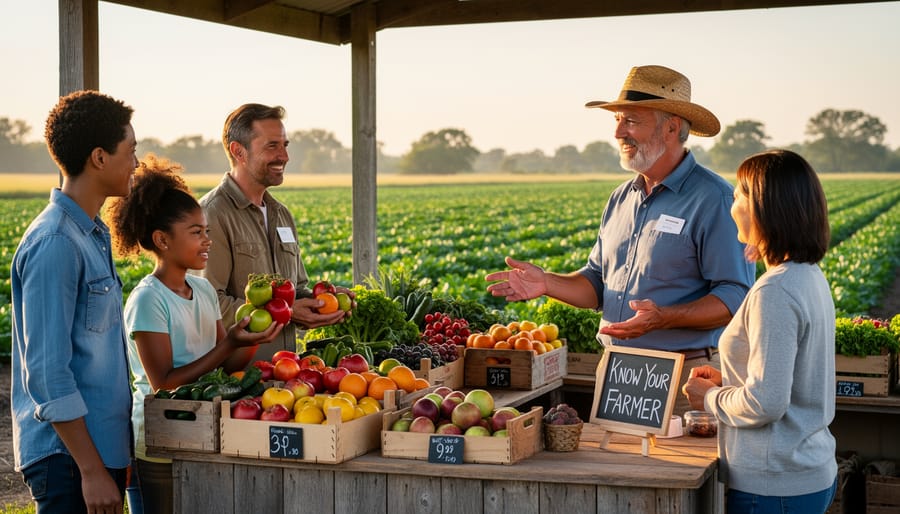
To find California farmers markets near you, visit the California Federation of Certified Farmers’ Markets website or download apps like LocalHarvest. Most markets operate year-round, with peak variety during summer and fall. Arrive early for the best selection, bring reusable bags, and don’t hesitate to chat with farmers about growing practices and recipe ideas. Many growers offer tips for storing and preparing unfamiliar vegetables. Shopping at farmers markets supports small-scale agriculture while reducing your carbon footprint, and you’ll taste the difference that farm-fresh, just-harvested produce makes in your meals.

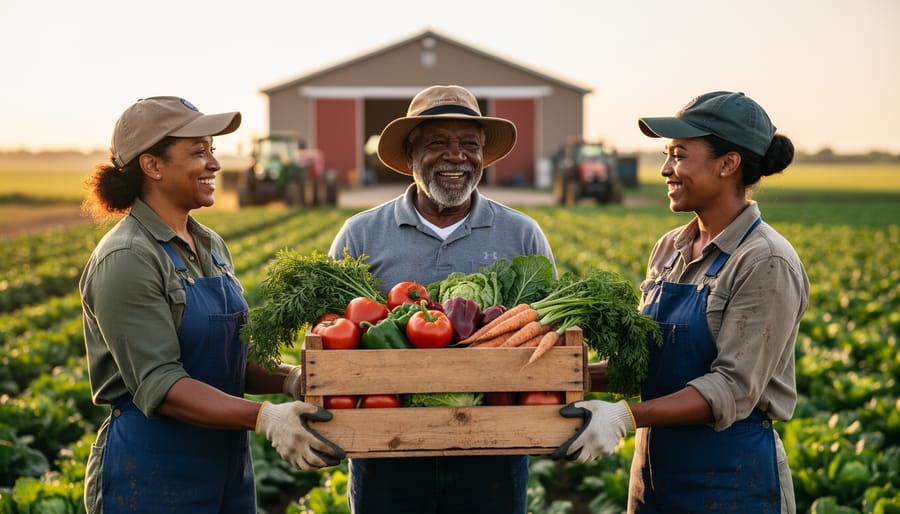
Building Relationships with Local Farmers

Meet the Rodriguez family, who’ve been running their 15-acre organic farm in Watsonville for three generations. “We plant what the season tells us,” explains Maria Rodriguez. “In spring, we focus on leafy greens and strawberries. Come summer, our fields explode with tomatoes and peppers. Fall brings squash and root vegetables, while winter is all about citrus and brassicas.” This rhythm with nature has made their CSA boxes a community favorite and reduced their water usage by 40%.

When you visit your local farmers market, don’t hesitate to chat with growers. Ask questions like “What’s just coming into season?” or “How do you handle pests organically?” Most farmers love sharing their knowledge and can offer recipe suggestions for unfamiliar vegetables.

Building these relationships helps you discover produce at peak flavor and freshness. You’ll learn which weeks bring the sweetest strawberries or when heirloom tomatoes will arrive. Many farmers even take requests for specific varieties if you ask early in the season. These conversations transform shopping from a transaction into a meaningful connection with the people growing your food and the land that sustains your community.

Eating with the seasons isn’t just about following a calendar—it’s about connecting with the natural rhythms of California’s incredible agricultural landscape. When you bite into a sun-ripened strawberry in May or savor a crisp autumn apple in October, you’re experiencing food at its peak flavor and nutritional value. You’re also supporting sustainable farming practices that work with nature rather than against it.

The beauty of seasonal eating is that it doesn’t require perfection. Start small by challenging yourself to try one new seasonal item each month. Maybe it’s romanesco in winter or stone fruit in summer. These small experiments will gradually transform how you shop, cook, and think about food.

If you’re ready to dive deeper, consider joining a Community Supported Agriculture program. CSA memberships connect you directly with local farms, delivering seasonal produce boxes right to your door or pickup location. You’ll discover vegetables you’ve never tried before and build relationships with the farmers who grow your food. Many California CSAs also offer farm visits, cooking classes, and volunteer opportunities that strengthen these connections even further.

For those with a green thumb, starting your own seasonal garden brings the farm-to-table experience to your backyard. Even a small container garden on a balcony can yield fresh herbs and tomatoes during the growing season. Gardening teaches patience, provides physical activity, and creates a deeper appreciation for the work farmers do every day.

Ultimately, seasonal eating grounds us in place. It reminds us that we’re part of a larger community—one that includes farmers, soil, sunshine, and the land itself. When we choose seasonal produce, we’re not just feeding ourselves; we’re nurturing these vital connections and investing in California’s sustainable food future.

Why UMass Soil Testing Changes Everything for Your CSA Compost Strategy

Posted by darrell on
0
Environmental Sustainability
Why UMass Soil Testing Changes Everything for Your CSA Compost Strategy

Testing your soil through UMass Extension’s Soil and Plant Nutrient Testing Laboratory gives you the precise data needed to transform your compost from a guessing game into a targeted soil-building strategy. Submit samples following the lab’s protocol—collect 15-20 cores from different spots in your growing area, mix them thoroughly, and send two cups of the combined soil along with your $20 fee and completed form. Request the basic soil test plus organic matter analysis to understand exactly what nutrients your compost needs to supply. Within two weeks, you’ll receive a detailed report showing pH levels, nutrient concentrations, and specific recommendations for amendments, allowing you to adjust your compost recipe and application rates to address deficiencies rather than over-applying materials blindly. Many CSA farmers who integrate regular UMass soil testing with their composting programs report healthier crops, reduced input costs, and improved soil structure within just two growing seasons. The investment pays for itself quickly when you stop wasting money on unnecessary amendments and start feeding your soil exactly what it needs to support thriving vegetables, season after season.

What Makes UMass Soil Testing Different

The UMass Extension Soil and Plant Nutrient Testing Laboratory has earned its reputation as one of the Northeast’s most trusted resources for soil analysis, serving everyone from commercial CSA farmers to backyard gardeners. What sets this service apart is its unique combination of accuracy, affordability, and accessibility—three qualities that matter most when you’re making important decisions about your soil health and compost management.

Located at the University of Massachusetts Amherst, the lab offers several testing packages tailored to different needs. The Standard Soil Test analyzes pH, nutrient levels including nitrogen, phosphorus, and potassium, plus essential micronutrients and organic matter content. For farms incorporating compost, the Compost and Manure Analysis provides specific insights into the nutrient value of your amendments. Pricing remains remarkably affordable, with the Standard Soil Test costing around $15 per sample—a small investment considering the value of the information you receive.

Turnaround times typically range from 7 to 14 business days during most of the year, though spring can bring longer waits as gardening season kicks into high gear. The lab recommends submitting samples in fall or early winter when possible to avoid the rush.

CSA farmers particularly appreciate the lab’s research-backed recommendations that account for regional growing conditions and soil types specific to Massachusetts and the broader Northeast. Maria Chen, who runs a 50-member CSA in Western Massachusetts, credits UMass soil testing with helping her fine-tune her compost application rates. “The detailed reports helped me understand exactly what my compost was contributing,” she shares. “I stopped over-applying and saved both time and resources.”

Home gardeners trust the service because results come with clear, practical recommendations written in accessible language—no agriculture degree required to understand what your soil needs.

Farmer's hands holding soil sample bag with UMass Extension submission form
Proper soil sample collection and submission to UMass Extension laboratory is the first step toward understanding your garden’s nutrient needs.

Understanding Your Soil Before Adding Compost

The Key Numbers CSA Farmers Need to Watch

When your UMass soil report arrives, you’ll find a treasure map of information that guides your composting and growing decisions. Let’s decode the numbers that matter most for CSA success.

First up is pH, measuring how acidic or alkaline your soil is on a scale from 0 to 14. Most vegetables thrive between 6.0 and 7.0. If your pH is off, even nutrient-rich compost won’t help plants access what they need. The good news? This is easily adjustable with lime for acidic soil or sulfur for alkaline conditions.

Next, you’ll see the big three nutrients: nitrogen (N), phosphorus (P), and potassium (K). Nitrogen fuels leafy growth, phosphorus supports root development and flowering, and potassium strengthens disease resistance. UMass reports these as parts per million and rate them from very low to very high. These numbers tell you exactly what your compost needs to deliver.

Organic matter percentage is the game-changer for CSA farmers. Healthy soil typically contains 5 to 8 percent organic matter, though some exceptional farms reach higher. This number directly reflects your compost application success over time. One Vermont CSA farmer raised her organic matter from 3 to 7 percent over five seasons through consistent compost use, resulting in noticeably better water retention during dry spells.

The report also includes micronutrients like calcium and magnesium. While often overlooked, these support everything from strong plant cell walls to chlorophyll production, making them essential for producing the vibrant, nutritious vegetables your CSA members expect.

How Compost Changes Your Soil Chemistry

When you add compost to your garden or farm, you’re doing more than just enriching the soil with nutrients. Compost fundamentally transforms your soil’s chemistry in multiple beneficial ways. It increases organic matter content, which improves the soil’s ability to hold moisture and nutrients where plant roots can access them. As compost breaks down, it releases nitrogen, phosphorus, and potassium gradually, creating a steady nutrient supply rather than the quick spike and crash of synthetic fertilizers.

Compost also affects your soil’s pH balance, typically nudging acidic soils toward a more neutral range that most vegetables prefer. The organic matter feeds beneficial soil microbes, which in turn create compounds that help plants absorb nutrients more efficiently. Additionally, compost additions improve your soil’s cation exchange capacity, essentially creating more storage spaces for nutrients.

Regular UMass soil testing helps you track these gradual improvements over time. By testing annually, you can see how your compost applications are changing nutrient levels, organic matter percentages, and pH. This data empowers you to adjust your compost quantities and application timing, ensuring you’re building soil health without overdoing any single nutrient.

Creating Your CSA Testing Schedule

Timing is everything when it comes to soil testing for your CSA operation. The ideal schedule balances getting actionable data with the practical realities of farm life and seasonal rhythms.

For farms integrating compost, late fall is your sweet spot for baseline testing. Sample after harvest but before applying winter compost or cover crops. This gives you a clear picture of what your soil needs and plenty of time to adjust your compost recipes before spring planting. UMass Extension recommends testing every three years for established fields, but if you’re actively building soil with compost, annual testing helps you track progress and avoid over-application of nutrients.

Different field zones need different attention. Test high-use areas like your main vegetable beds annually, especially if you’re rotating crops intensively. Less demanding zones, such as perennial beds or areas planted with nitrogen-fixing cover crops, can stretch to every two or three years.

Here’s a practical approach: divide your farm into zones based on crop rotation and compost application rates. Sample Zone A in year one, Zone B in year two, and Zone C in year three, while retesting Zone A. This staggers costs while maintaining comprehensive monitoring.

Spring testing works too, but sample at least six weeks before planting to allow time for receiving results and making adjustments. Sarah Chen, a CSA farmer in Western Massachusetts, follows this rhythm: “I test my intensive beds every November, get my results by December, and adjust my compost blends over winter. By March, I’m applying precisely what each bed needs.”

Coordinate your testing schedule with compost application timing. Sample before adding compost to understand baseline needs, then verify improvements the following season.

How to Collect Soil Samples the Right Way

Collecting accurate soil samples is simpler than you might think, and getting it right makes all the difference in your results. Here’s what you’ll need: a clean bucket, a soil probe or garden trowel, and a sampling container from UMass Extension.

Start by identifying the area you want to test. If you’re testing garden beds or fields where you plan to add compost, keep those areas separate from your lawn or other zones. Walk a zigzag pattern across your sampling area, collecting 10-15 small cores or slices from different spots. This random pattern gives you a true picture of your soil’s overall condition rather than just one small area.

For most garden and agricultural applications, sample to a depth of 6-8 inches. If you’re testing established perennial beds or orchards, go a bit deeper to 8-12 inches. Push your probe straight down, pull up the core, and place it in your clean bucket. Avoid sampling near buildings, roads, or burn piles where contamination could throw off your results.

Once you’ve collected all your cores, mix them thoroughly in the bucket to create one composite sample. Remove any rocks, roots, or debris, then fill your UMass sample container with about two cups of this mixed soil. Local farmer Maria Rodriguez from Western Massachusetts credits proper sampling technique with helping her dial in her compost application rates perfectly: “Following these steps gave me confidence that my test results truly represented what was happening across my whole field.”

Soil probe being inserted into garden soil for sample collection
Using proper soil sampling tools and technique ensures accurate test results that reflect your field’s true nutrient status.

Using Test Results to Fine-Tune Your Compost Program

When Compost Alone Isn’t Enough

Sometimes your UMass soil test results reveal challenges that even the best composting strategies can’t fully address. Don’t be discouraged if your report shows severe deficiencies in specific nutrients like phosphorus, potassium, or micronutrients. This is actually valuable information that helps you make targeted improvements.

Take Sara Chen, a Massachusetts CSA farmer who discovered her soil’s magnesium levels were critically low despite years of composting. After applying dolomitic limestone as recommended by her soil test, her tomato yields increased by 40 percent the following season. The key is understanding that compost excels at building organic matter and providing slow-release nutrients, but it may not supply enough of certain elements your crops desperately need.

When tests indicate specific deficiencies, consider approved organic amendments like rock phosphate for phosphorus, greensand for potassium, or kelp meal for trace minerals. Think of compost as your foundation and these targeted amendments as precision tools. By combining regular compost applications with strategic nutrient additions based on soil test guidance, you’ll create truly optimal growing conditions for abundant, healthy harvests.

Real Results: A Massachusetts CSA Farmer’s Story

When Sarah Chen started Green Valley CSA in Western Massachusetts five years ago, she knew healthy soil would be the foundation of her success. What she didn’t expect was how dramatically UMass soil testing would transform her operation.

“I thought our homemade compost was doing the job,” Sarah admits, “but our first UMass soil test told a different story.” The results revealed high phosphorus levels but dangerously low calcium, along with a pH of 5.8—far too acidic for most vegetables.

Armed with these insights, Sarah adjusted her composting program. She began sourcing crushed oyster shells from a local seafood processor and added lime based on UMass recommendations. She also diversified her compost ingredients, incorporating carbon-rich materials like wood chips to balance the nitrogen-heavy kitchen scraps and manure she’d been relying on.

The transformation didn’t happen overnight, but the metrics speak for themselves. After two growing seasons of targeted amendments guided by annual soil tests, her soil pH climbed to an optimal 6.5. Calcium levels doubled, and organic matter increased from 3.2 percent to 5.8 percent.

“Our tomato yields jumped by nearly 40 percent in year two,” Sarah shares enthusiastically. “But the real win? Our members noticed. They commented on how the vegetables tasted sweeter, stored longer, and had that deep, vibrant color you only get from truly healthy plants.”

By the third season, Sarah reduced her external fertilizer costs by 60 percent because her improved compost was finally providing balanced nutrition. Member retention hit 92 percent, well above the regional average.

“UMass soil testing gave me confidence,” Sarah reflects. “Instead of guessing what my soil needed, I knew exactly how to make my compost work harder for us.”

Colorful harvest of fresh CSA vegetables including tomatoes, kale, carrots, and eggplants
Healthy soil supported by proper testing and compost management produces vibrant, nutrient-dense vegetables for CSA members.

Getting Started With Your First Soil Sample

Ready to unlock the secrets hiding in your soil? Getting started with a UMass soil sample is easier than you might think. First, visit the UMass Extension Soil and Plant Nutrient Testing Laboratory website to order your testing kit. Current pricing runs approximately $20 for a standard soil test, which includes essential measurements like pH, phosphorus, potassium, and organic matter content. The investment is minimal compared to the insights you’ll gain.

When your kit arrives, you’ll find clear instructions for collecting samples. The key is taking samples from multiple spots across your growing area and mixing them together for an accurate representation. Submit your sample with payment through mail, and expect results within two weeks during peak season.

Your results will arrive with specific recommendations tailored to Massachusetts growing conditions. Don’t feel overwhelmed by the numbers – the report includes easy-to-understand explanations and application rates for amendments. Pay special attention to the organic matter percentage, as this becomes your baseline for tracking improvements over time.

Here’s a tip from seasoned CSA farmer Maria Rodriguez: “I test my fields every two years and keep a simple spreadsheet. Watching my organic matter climb from 3.2% to 5.8% over six years proved my compost program was working. Those numbers translate directly to healthier crops and happier customers.”

Start your soil health journey today, and you’ll have data-driven confidence as you build your compost integration strategy.

Taking the guesswork out of soil management is one of the most empowering steps you can take as a CSA farmer or home gardener. UMass soil testing provides the concrete data you need to make your compost work harder, transforming it from a simple soil amendment into a precision tool for building long-term soil health. Instead of wondering whether your compost application rates are right or if nutrients are balanced, you’ll have science-backed answers that guide every decision.

Starting your testing journey is straightforward and affordable. A single soil test can reveal opportunities to adjust your composting practices, save money on unnecessary amendments, and grow more nutritious produce for your community. Remember, healthy soil doesn’t just support plant growth—it creates vegetables and fruits with higher nutrient density, directly benefiting everyone who enjoys your harvest.

The connection between thriving soil and vibrant community health is undeniable. By investing in professional soil testing today, you’re not just improving your farm or garden—you’re contributing to a more sustainable local food system that nourishes both people and the planet. Take that first step and discover what your soil is telling you.

Why Organic Produce Might Be Your Best Defense Against Food Allergies

Posted by darrell on
0
Consumer Health and Nutrition
Why Organic Produce Might Be Your Best Defense Against Food Allergies

Food allergies affect millions of Americans, and if you’ve noticed mysterious reactions after meals, you’re right to question what’s in your food. The connection between genetically modified organisms and allergic reactions remains one of the most debated topics in food science, leaving concerned consumers searching for answers and safer alternatives.

GMOs are crops altered at the DNA level to resist pests, tolerate herbicides, or enhance nutritional content. While regulatory agencies maintain these foods are safe, the reality is more nuanced. When genes from allergenic sources like nuts or soybeans are transferred into other crops, they can potentially introduce new proteins that trigger immune responses in sensitive individuals. The 1990s StarLink corn incident, where an approved animal-feed GMO entered human food supplies and caused allergic reactions, demonstrated these risks aren’t merely theoretical.

Beyond direct genetic transfers, GMOs often contain higher pesticide residues because many are engineered to withstand heavy chemical applications. These residues can irritate digestive systems and exacerbate existing sensitivities, creating symptoms that mimic or worsen true allergies.

For families experiencing unexplained food reactions, switching to organic produce offers a practical solution. Organic certification prohibits GMOs entirely, ensuring you receive crops grown from traditional seeds without genetic modification. Local farms practicing organic methods provide the cleanest option, as produce travels shorter distances and requires fewer preservatives. Community Supported Agriculture programs connect you directly with farmers who can verify their growing practices, answer questions about seed sources, and provide the transparency conventional grocery stores cannot guarantee.

Understanding what enters your body starts with knowing where your food originates.

The GMO-Allergy Connection: What Science Actually Shows

Scientist examining corn cob in laboratory setting for GMO research
Scientific research examines how genetic modifications in crops like corn may alter protein structures that can trigger immune responses in sensitive individuals.

How Genetic Modification Changes Food Proteins

Genetic modification introduces new genes into crops, which can change the proteins these plants produce. Think of proteins as the building blocks that make up food—when scientists alter a plant’s DNA, they’re essentially teaching it to create proteins it wouldn’t naturally make.

Let’s look at Bt corn as an example. Scientists insert a gene from Bacillus thuringiensis bacteria into corn, enabling the plant to produce its own insect-fighting protein. While this protein targets specific pests, it’s a completely new addition to our food supply that wasn’t present in traditional corn varieties. For people with sensitivities, this introduces an unfamiliar protein their immune systems haven’t encountered before.

Herbicide-resistant crops tell a similar story. Soybeans and other crops modified to withstand weedkillers now produce proteins that help them survive chemical applications. These newly created proteins become part of the food we eat, whether in cooking oils, processed foods, or animal feed that eventually reaches our dinner plates.

Here’s why this matters for sensitive individuals: our immune systems recognize proteins as friend or foe. When a new protein enters the picture, some people’s bodies may flag it as a potential threat, triggering an immune response. While not everyone reacts to these modified proteins, those with existing food sensitivities or compromised immune systems might experience increased reactions.

The challenge is that these protein changes happen at the molecular level, making them invisible to consumers. This is precisely why many people concerned about allergies and sensitivities choose organic produce, where genetic modification isn’t permitted, giving them peace of mind about what proteins they’re consuming.

Real Cases Where GMOs Triggered Reactions

While GMOs undergo rigorous safety testing, a few documented cases have raised questions about unexpected reactions. The most notable example involved StarLink corn, which contained a protein called Cry9C. This variety was approved only for animal feed but accidentally entered the human food supply in 2000, prompting concerns about potential allergic responses. Though investigations couldn’t definitively link it to allergic reactions, the incident led to significant recalls and highlighted gaps in containment protocols.

Another case involved Brazil nuts genes transferred into soybeans to boost protein content. Testing revealed the modified soybeans could trigger reactions in people with Brazil nut allergies, so the project was discontinued before reaching consumers. This actually demonstrates how safety testing protocols work as intended.

It’s worth noting that these instances are rare exceptions rather than the rule. Regulatory agencies like the FDA require extensive allergenicity testing before any GMO reaches the market. However, for those with food sensitivities or anyone preferring a precautionary approach, choosing organic produce from local farms through community-supported agriculture programs offers peace of mind. Organic certification prohibits GMO use, giving you complete transparency about what you’re eating while supporting sustainable farming practices in your community.

Beyond GMOs: Hidden Allergy Triggers in Conventional Produce

Pesticide Residues and Immune System Stress

When we think about pesticides, we often focus on GMO crops, but the reality is that conventional produce—whether genetically modified or not—frequently carries chemical residues that can impact our bodies in unexpected ways. These pesticide residues don’t just wash off easily. They can accumulate in the digestive tract, where they interact with the delicate gut lining that plays a crucial role in gut health and immune function.

Research suggests that pesticide exposure may compromise the intestinal barrier, sometimes called the gut lining. When this protective barrier becomes irritated or damaged, it can allow partially digested proteins to pass into the bloodstream, potentially triggering immune responses that manifest as food sensitivities or allergic reactions. It’s not always the food itself causing problems—sometimes it’s the chemical hitchhikers coming along for the ride.

The good news? Choosing organic produce from local farms significantly reduces your pesticide exposure. Organic farming practices prohibit synthetic pesticides, giving your gut a chance to heal and function optimally. Many people who switch to organic report improvements in their digestive comfort and overall wellbeing.

Consider incorporating fermented foods and organic produce into your diet to support gut lining health. Supporting local organic farmers through CSA programs not only benefits your immune system but also helps build a healthier food system for everyone.

Cross-Contamination from Processing

Even when produce isn’t genetically modified, cross-contamination during processing can introduce unexpected allergens into your food. This happens more often than you might think, especially in conventional processing facilities that handle multiple crops through shared equipment.

Think about it: commercial facilities often process various crops on the same production lines, from corn and soybeans to wheat and tree nuts. When equipment isn’t thoroughly cleaned between batches, protein residues from allergenic foods can transfer to otherwise safe produce. For individuals with severe allergies, even trace amounts can trigger reactions.

The challenge extends beyond processing equipment. Shared storage facilities, transportation trucks, and packaging lines all create opportunities for allergen transfer. Dust particles containing allergenic proteins can settle on nearby produce, and cleaning protocols in large-scale operations sometimes prioritize efficiency over complete allergen removal.

This is where choosing organic produce from local farms offers a real advantage. Smaller-scale organic operations typically process fewer crop varieties and maintain more control over their facilities. Many organic farmers who sell through CSA programs or farmers markets handle their own post-harvest processing, reducing the risk of cross-contamination significantly.

When you connect directly with your local organic farmer, you can ask specific questions about their processing methods and what other crops share their facilities. This transparency simply isn’t possible with conventional produce that passes through multiple processing stages before reaching grocery store shelves. For those managing food allergies, this direct relationship provides invaluable peace of mind and safer food choices.

How Organic Farming Practices Protect Against Allergens

Fresh organic vegetables displayed at farmers market including tomatoes, peppers, and leafy greens
Organic produce maintains natural genetic profiles and eliminates synthetic pesticide residues that can stress immune systems in allergy-prone individuals.

No Synthetic Chemicals Means Cleaner Produce

When you choose organic produce, you’re getting more than just fruits and vegetables grown without GMOs. Organic certification standards strictly prohibit synthetic pesticides, herbicides, and fungicides that often leave residues on conventionally grown crops. These chemical residues can act as immune system irritants, potentially triggering inflammatory responses in sensitive individuals.

Research shows that pesticide exposure may heighten allergic reactions by disrupting the body’s natural defenses. Your immune system can misidentify these chemical compounds as threats, leading to increased sensitivity over time. For people already dealing with food allergies or sensitivities, eliminating this additional burden makes a meaningful difference.

Organic farmers use natural pest management strategies like crop rotation, beneficial insects, and companion planting instead of synthetic chemicals. This approach produces cleaner food that works with your body rather than against it. Many families switching to organic report fewer allergy symptoms and improved overall wellness.

Beyond reducing allergic reactions, organic vegetables provide additional benefits for your health. By choosing certified organic produce from local CSA farms, you’re supporting farming practices that prioritize both environmental health and human wellbeing while enjoying truly clean, nourishing food.

Preserving Natural Protein Structures

When you bite into an organic apple or slice an heirloom tomato, you’re experiencing food in its most natural form. Organic produce maintains its original genetic blueprint, meaning the proteins within these foods remain unchanged from how nature intended them. This preservation matters more than you might think when it comes to allergic reactions.

Our immune systems have evolved over thousands of years to recognize naturally occurring proteins in foods. When genetic modification introduces new proteins or alters existing ones, our bodies may struggle to recognize these unfamiliar structures. Think of it like meeting a friend who’s changed their appearance dramatically – there’s a moment of confusion while your brain processes the differences.

By choosing organic, you’re selecting produce with predictable protein profiles that your body recognizes. Sarah, an organic farmer from Vermont, shares how customers with food sensitivities often report fewer reactions when switching to her farm’s produce. While individual experiences vary, maintaining natural genetic structures provides peace of mind for those concerned about unexpected immune responses. The familiarity principle applies beautifully here – sticking with foods in their original form means fewer surprises for your digestive system and immune defenses.

Soil Health and Nutrient Density Connection

The connection between soil health and your body’s immune response is more direct than you might think. When farmers nurture their soil with organic practices, they’re creating an ecosystem rich in beneficial microorganisms, minerals, and organic matter. This living soil produces crops with higher levels of vitamins, minerals, and phytonutrients compared to conventionally grown alternatives.

Research shows that organically grown produce often contains more antioxidants and essential nutrients that strengthen immune systems naturally. These nutritional powerhouses help your body recognize and respond appropriately to real threats while reducing inflammatory responses that can trigger allergic reactions.

Local organic farmers understand this connection deeply. Many CSA farmers we’ve worked with report that their customers notice improved digestion and fewer sensitivities when switching to nutrient-dense organic produce. The secret lies in the soil—healthy, living soil creates resilient plants that, in turn, support resilient people. By choosing organic options from your local CSA, you’re not just avoiding potentially problematic GMO proteins; you’re actively nourishing your body with food grown in soil designed to support optimal health.

Real Stories: Families Who Found Relief Through Organic

When the Martinez family from Portland began experiencing unexplained skin rashes and digestive issues, they never suspected their food might be the culprit. After keeping a detailed food diary, Maria Martinez noticed their symptoms worsened after eating conventional produce. “We decided to try organic for three months,” she explains. “Within six weeks, my daughter’s eczema cleared up significantly, and my husband’s stomach problems practically disappeared.”

Their story isn’t unique. Local farmer Tom Chen witnessed a similar transformation after converting his 15-acre farm to organic practices five years ago. “I suffered from seasonal allergies my entire life,” Tom shares. “After working exclusively with organic crops and eliminating exposure to synthetic pesticides, my allergy symptoms decreased by about 70 percent. I rarely need antihistamines anymore.”

Sarah Patel, a long-time CSA member at Greenfield Farms, experienced relief from chronic hives after switching to their organic produce box. “I was skeptical at first, but desperate,” she recalls. “My dermatologist couldn’t pinpoint the cause of my hives. After eight weeks of eating only organic fruits and vegetables from the CSA, my skin was completely clear. When I accidentally ate conventional strawberries at a party, the hives returned within days.”

These experiences align with what many organic farmers observe in their communities. Jake Morrison, who runs a small organic operation in Vermont, notes that several customers specifically seek out his produce because of food sensitivities. “One family told me their son’s respiratory issues improved dramatically after switching to our organic apples and lettuce,” he says.

While individual experiences vary and more research is needed to establish direct causation, these families found meaningful relief by choosing organic options. Their stories remind us that sometimes the simplest solution—returning to food grown without synthetic chemicals—can make a remarkable difference in our daily lives and overall wellness.

Family holding crate of fresh organic vegetables in farm field
Families increasingly turn to local organic farms and CSA programs to access allergen-conscious produce that supports better health outcomes.

Making the Switch: Practical Steps for Allergy-Prone Households

Which Produce to Prioritize First

When considering which produce to prioritize for organic purchasing, start with the Environmental Working Group’s Dirty Dozen list, which identifies conventionally grown fruits and vegetables with the highest pesticide residues. Strawberries, spinach, and apples consistently top this list. While these aren’t necessarily GMO crops, the heavy pesticide use makes them priority switches to organic versions.

For GMO-specific concerns, focus on corn, soybeans, canola, and sugar beets, as these represent the most common genetically modified crops in our food system. Sweet corn and summer squash also have GMO varieties available commercially. If you’re managing food sensitivities, these should be your first organic purchases.

The good news? Many fruits and vegetables have minimal GMO presence. Items like broccoli, carrots, and cauliflower are naturally bred varieties, though organic versions still eliminate synthetic pesticide exposure.

Consider joining a local CSA or visiting farmers markets where you can ask growers directly about their growing practices. Many small-scale farmers follow organic methods even without formal certification, offering you fresh, locally grown produce at reasonable prices. This approach not only supports your health goals but also strengthens your community’s agricultural network. Start with just a few priority items and gradually expand your organic choices as your budget allows.

Finding Local Organic Sources Through CSAs

If you’re concerned about GMOs and potential allergic reactions, joining a Community Supported Agriculture (CSA) program offers a wonderful solution. CSAs connect you directly with local farms committed to organic practices, giving you access to fresh, seasonal produce that’s free from genetically modified organisms and typically grown without synthetic pesticides.

When you join a CSA, you purchase a share of a farm’s harvest at the beginning of the growing season. In return, you receive weekly boxes of freshly harvested vegetables, fruits, and sometimes eggs, meat, or dairy products. This direct relationship with your farmer means you know exactly where your food comes from and how it’s grown, which is especially important if you’re managing food sensitivities.

Choosing the right CSA requires a bit of research. Start by asking about their growing practices and whether they’re certified organic or use organic methods. Visit the farm if possible to see their operations firsthand and meet the farmers. Consider the pickup location and schedule to ensure it fits your routine. Some CSAs offer flexible options like half shares for smaller households or workplace delivery.

Many farmers have inspiring stories about transitioning to organic methods after witnessing the positive impact on both soil health and customer wellbeing. Ask about their crop variety too, since diverse farms provide better nutrition and help you explore new vegetables you might not find at conventional stores. CSA membership not only supports your health goals but also strengthens local food systems and builds community connections with like-minded individuals who value sustainable living.

While the scientific evidence linking GMOs directly to allergic reactions remains limited, choosing organic produce offers peace of mind and potential health benefits that matter to many families. By opting for foods grown without genetic modification, synthetic pesticides, or chemical fertilizers, you’re reducing your exposure to substances that may trigger sensitivities in some individuals.

The good news? Taking control of your food choices has never been easier. Community Supported Agriculture programs and local farmers markets provide wonderful opportunities to connect with growers who share your values about food quality and transparency. When you buy directly from organic farmers, you’re not just getting fresh, nutrient-dense produce—you’re also learning exactly how your food was grown and what practices were used.

Consider visiting your neighborhood farmers market this weekend or researching CSA options in your area. Many farms offer tours, allowing you to see their sustainable practices firsthand and build relationships with the people growing your food. These connections transform grocery shopping from a mundane task into an empowering journey toward better health.

Remember, every food choice you make is a vote for the kind of agriculture you want to support. By choosing organic, you’re investing in your wellbeing while supporting farming practices that nurture both people and planet.

The Real People Behind Your Farm-to-Table Meal (And Why Their Stories Matter)

Posted by darrell on
0
Farm-to-Table Experiences
The Real People Behind Your Farm-to-Table Meal (And Why Their Stories Matter)

Every bite you take connects you to someone’s labor story—and behind your fresh tomatoes, leafy greens, and crisp carrots are real people whose working conditions vary dramatically from farm to farm. The farm-to-table movement has revolutionized how we think about food quality and environmental impact, yet the human element often remains invisible on our plates.

Labor farming examines the critical intersection between agricultural work and human dignity. While industrial agriculture frequently relies on exploitative practices—including poverty wages, unsafe working conditions, and limited legal protections—a growing network of ethical farms demonstrates that food production can honor both land and laborers. These operations prove that fair wages, safe environments, and respectful treatment aren’t luxury add-ons but essential ingredients in truly sustainable agriculture.

Understanding labor justice transforms you from passive consumer to informed advocate. When farms provide living wages, health benefits, and safe working conditions, they create ripple effects throughout entire communities. Workers gain financial stability, families thrive, and local economies strengthen. The slightly higher price you might pay for ethically produced food directly funds human dignity—supporting parents who can afford quality housing, children who can pursue education, and communities that flourish rather than merely survive.

This guide equips you with practical knowledge to identify farms committed to fair labor, understand what genuine justice looks like in agricultural settings, and make purchasing decisions that align with your values while supporting the people who grow your food.

What Is Labor Farming and Why Should You Care?

When you bite into that fresh heirloom tomato or savor locally grown strawberries, you’re probably thinking about flavor, nutrition, and supporting local agriculture. But there’s an important part of the stories behind your food that often remains invisible: the hands that planted, tended, and harvested your meal.

Labor farming refers to the systems and practices farms use to source, manage, and compensate their agricultural workers. While the term sounds neutral, it often describes exploitative arrangements where workers face low wages, unsafe conditions, limited legal protections, and little control over their circumstances. This reality exists in stark contrast to the wholesome, picturesque farm-to-table narrative many of us envision.

Understanding labor farming matters because every purchase you make either supports or challenges these systems. The organic lettuce in your basket might be pesticide-free, but was it harvested by someone earning a living wage? That beautiful farmers market display represents countless hours of backbreaking work, but are those workers treated with dignity and respect?

As conscious consumers, we often focus on what our food choices mean for our health and the environment. These considerations are important, but they tell an incomplete story. True sustainability must include the well-being of farmworkers who make our food system possible. When farms cut corners on labor practices, they’re essentially passing hidden costs onto vulnerable workers.

The good news? You have more power than you might think. By learning to recognize fair labor practices and supporting farms committed to justice, you can help create positive change. Understanding labor farming isn’t about judgment or guilt; it’s about making informed choices that align with your values and supporting a food system that nourishes everyone involved, from soil to table.

Farmworkers harvesting fresh vegetables in agricultural field during golden hour
Farmworkers harvesting produce represent the essential human labor behind every farm-to-table meal.

The Hidden Reality of Farm Labor in America

Beyond the Pastoral Image

The picturesque images of farmers tending sun-drenched fields tell only part of the story. While these marketing photos capture genuine moments of agricultural beauty, they often obscure the challenging realities many farm workers face daily.

Seasonal workers, who make up a significant portion of the agricultural workforce, frequently navigate unstable employment that shifts with harvest cycles. Many positions offer no health insurance, paid time off, or retirement benefits. This creates particular hardship for families who depend on farming income year-round but find work available only during peak growing seasons.

Power dynamics present another layer of complexity. Workers in remote rural areas may have limited employment options, making it difficult to advocate for better conditions without risking their livelihoods. Language barriers and immigration status can further complicate these relationships, leaving some workers vulnerable to exploitation.

Understanding these challenges helps us appreciate farms that prioritize fair labor practices. Some inspiring farmers are creating models that include year-round employment, profit-sharing arrangements, and comprehensive benefits packages. These operations demonstrate that ethical treatment and agricultural success can coexist beautifully.

By recognizing both the struggles and the solutions, we can make purchasing decisions that support genuinely sustainable farming systems where both land and people thrive together.

The Migrant Worker Experience

Behind every harvest lies a workforce that often remains invisible to consumers. Migrant and immigrant farmworkers form the backbone of our food system, yet they face extraordinary challenges that many of us never consider when selecting produce at the market.

Language barriers frequently prevent these workers from understanding their rights, accessing healthcare, or reporting unsafe conditions. Many arrive in rural areas speaking languages that local support services don’t accommodate, creating isolation that extends beyond communication. This disconnect makes it difficult for workers to advocate for themselves or seek help when facing exploitation.

Legal vulnerabilities compound these challenges. Workers with temporary visas or uncertain immigration status may fear reporting violations, knowing that speaking up could jeopardize their employment or residency. This power imbalance leaves many susceptible to wage theft, unsafe working conditions, and substandard housing.

Geographic isolation further separates farmworkers from community resources, medical facilities, and social networks. Living in remote farm quarters without reliable transportation limits access to essential services and deepens feelings of disconnection.

Understanding these realities helps us appreciate why supporting farms with strong labor protections matters so profoundly. When we choose producers committed to fair wages, safe conditions, and worker dignity, we’re investing in a more just food system that honors everyone who brings food to our tables.

What Fair Food Labor Justice Actually Looks Like

Farmworker smiling while holding crate of freshly harvested organic vegetables
Fair labor practices prioritize worker dignity, safety, and meaningful compensation in sustainable agriculture.

Living Wages and Benefits That Matter

A living wage in agriculture goes beyond minimum wage requirements—it means workers can afford housing, food, healthcare, and savings in their local communities. According to the MIT Living Wage Calculator, this typically ranges from $15 to $25 per hour depending on the region, significantly higher than what many farmworkers traditionally earn.

Progressive farms are changing this narrative. Green Acres Farm in Vermont offers all full-time employees health insurance coverage, two weeks paid vacation, and contributes 3% to retirement accounts. Similarly, Harmony Valley Farm in Wisconsin provides paid sick leave and profit-sharing bonuses during strong harvest seasons. These benefits, standard in many industries but rare in agriculture, help reduce worker turnover and build experienced, dedicated teams.

Some farms creatively address housing challenges by offering on-site accommodations at reduced rates or partnering with local organizations for affordable housing access. Others provide childcare assistance, recognizing that family support is crucial for retention.

When you purchase from farms prioritizing fair compensation and benefits, you’re voting with your dollars for dignified work conditions. Ask farmers at your local market about their labor practices—ethical employers are usually proud to share their commitment to worker wellbeing.

Worker Voice and Empowerment

When farms genuinely value their workers, everyone benefits. Progressive farms are breaking the traditional hierarchy by bringing workers into decision-making processes, from crop planning to harvest schedules. This approach recognizes that the people working closest to the land often have invaluable insights about soil health, pest management, and efficient practices.

Many forward-thinking operations invest in worker development through bilingual training programs covering everything from organic certification standards to equipment operation and safety protocols. These opportunities help workers build skills that increase their value and open doors to advancement.

Perhaps most exciting are the pathways some farms create toward ownership and leadership. Worker cooperative models, like those emerging across California and the Northeast, allow farmworkers to become stakeholder-owners over time. Other farms offer management training programs that prepare experienced workers to oversee operations or even lease land to start their own enterprises.

One inspiring example comes from a Vermont vegetable farm where three former field workers now manage different production areas, making independent decisions about their crops. The farm owner credits this empowerment model with boosting both productivity and worker satisfaction while creating a more resilient business overall. These success stories demonstrate that investing in worker voice isn’t just ethically right—it’s smart farming.

Safe Working Conditions and Dignity

When we talk about ethical labor farming, the foundation starts with meeting basic human needs without compromise. Farm workers deserve access to shade during hot days, clean drinking water throughout their shifts, and proper restroom facilities. These aren’t luxuries—they’re fundamental requirements for human dignity.

Protective equipment matters too. Workers handling pesticides, operating machinery, or performing physically demanding tasks need appropriate gear to stay safe. Farms committed to labor justice invest in quality boots, gloves, hats, and any specialized equipment their team needs.

Beyond physical provisions, respectful treatment creates a positive work environment. This means fair scheduling, regular breaks, clear communication, and addressing worker concerns promptly. Some inspiring farmer success stories show how treating employees with dignity leads to lower turnover, higher productivity, and stronger farm communities. Workers who feel valued bring their best to the fields, which ultimately benefits everyone—from the farmers to the families enjoying fresh, sustainably grown produce at their dinner tables.

Success Stories: Farms Getting It Right

Across North America, progressive farms are proving that fair labor practices and profitability can go hand in hand. These operations demonstrate that treating workers with dignity isn’t just the right thing to do—it’s smart business.

At Full Belly Farm in California’s Capay Valley, owners Dru Rivers, Paul Muller, Judith Redmond, and Andrew Brait have built a thriving 400-acre organic operation around worker empowerment. Their crew members receive competitive wages starting well above minimum wage, comprehensive health insurance, and paid vacation time. But what sets Full Belly apart is their commitment to year-round employment, which provides stability rare in agricultural work. “When workers know they have consistent income and benefits, they invest in the farm’s success,” explains Muller. The farm also provides housing assistance and English language classes, creating pathways for advancement. This approach has resulted in remarkably low turnover, with many employees staying for over a decade. The institutional knowledge and dedication this creates translates directly to higher quality produce and stronger local food partnerships with restaurants and CSA members who value the farm’s ethical foundation.

On the East Coast, Wellspring Farm in Vermont takes a different but equally compelling approach. This 140-acre vegetable farm operates as a worker cooperative, where employees have ownership stakes and decision-making power. Farm manager Sarah Webb notes that this model addresses power imbalances inherent in traditional agricultural operations. “Our workers aren’t just following orders—they’re invested stakeholders who share in profits and have voices in farm direction,” she says. The cooperative structure has attracted skilled, committed workers willing to tackle the challenges of northeast farming. Workers earn living wages, receive profit shares, and participate in quarterly planning meetings. The model has proven economically sustainable, with the farm serving 200 CSA members and multiple wholesale accounts.

Meanwhile, Gaining Ground Farm in Massachusetts demonstrates fair labor practices within an educational framework. This nonprofit farm pays interns and apprentices actual wages rather than offering unpaid “learning experiences.” Executive Director Sarah Smith explains: “Education doesn’t justify exploitation. Our apprentices earn $15-18 per hour while learning organic techniques.” This approach attracts diverse candidates who couldn’t otherwise afford agricultural training, strengthening the sustainable farming movement’s future workforce while maintaining a successful operation that donates thousands of pounds of produce annually to local food pantries.

Farmworkers and farm owner engaging with customers at farmers market produce stand
Direct connections between farms and consumers create transparency and accountability in labor practices.

How to Support Fair Labor as a Consumer

Questions to Ask Your CSA or Farmers Market Vendor

Starting a conversation about labor practices doesn’t have to feel awkward. When you visit farms directly or chat with vendors at farmers markets, try these friendly questions:

“How many people work on your farm during peak season?” Listen for answers that acknowledge seasonal workers and their contributions, not just family members.

“Do you offer housing for your workers?” Fair farms often provide quality accommodations or housing stipends for employees who need them.

“What’s your approach to worker training and safety?” Look for enthusiasm about training programs and clear safety protocols.

“How do you handle extreme weather days?” Ethical operations have policies protecting workers during heat waves or storms.

“Do your workers have access to benefits?” While small farms may not offer full benefits, listen for efforts like paid time off or healthcare contributions.

The best answers show genuine respect for farm workers and acknowledge them as essential team members. Farmers who practice labor justice are usually proud to discuss their practices and appreciate your interest in supporting fair food systems.

Certifications and Programs That Verify Fair Labor

When shopping for produce, look for certifications that guarantee farms treat their workers fairly. The Fair Food Program stands out as a worker-centered initiative where farmworkers help design the standards themselves. Participating farms commit to fair wages, humane working conditions, and zero tolerance for abuse. You’ll find their seal on tomatoes, peppers, and strawberries from cooperating growers.

The Agricultural Justice Project certification covers both labor rights and fair pricing for farmers. Their standards include living wages, safe working conditions, and the right to organize. Food Justice Certified products meet these rigorous requirements.

Other reliable certifications include Equitable Food Initiative, which combines worker training with third-party audits, and Certified Humane, which extends ethical standards beyond animal welfare to farm labor. Some smaller farms participate in regional programs or adopt transparent practices verified through community-supported agriculture models.

These certifications aren’t perfect, but they provide a meaningful starting point for aligning your purchases with your values. By choosing certified products, you’re voting with your dollar for a food system that respects the people who grow your food.

Beyond Your Purchasing Power

Your voice matters even when your wallet has limits. Support farm labor justice by attending farm community events where you can learn workers’ stories firsthand. Contact local representatives to advocate for fair wage policies and stronger protections for agricultural workers. Share articles and documentaries about farm labor conditions on social media to raise awareness. Join community organizations working toward food justice, volunteer your time, or donate to farmworker advocacy groups. Small actions create meaningful change when we stand together for the people who nourish our communities.

When we embrace the farm-to-table movement, we’re celebrating more than fresh vegetables and sustainable soil practices—we’re honoring the hands that cultivate our food. True farm-to-table values extend from seed to harvest to the people who make it all possible. Every purchase is a vote, and choosing to support farms committed to fair labor practices creates ripples of positive change throughout our food system.

The good news? A growing movement of farmers, consumers, and advocates are proving that ethical agriculture isn’t just idealistic—it’s achievable. From Fair Food certified farms to community-supported agriculture programs prioritizing worker welfare, models for justice-centered farming are taking root across the country. These pioneers demonstrate that when we prioritize human dignity alongside environmental stewardship, everyone benefits: workers receive fair treatment, farmers build stronger communities, and consumers gain connection to food grown with integrity.

As you explore your local farmers market or choose where to shop, remember that sustainable agriculture encompasses both land and labor. Your conscious choices help cultivate a future where farming nourishes both soil and soul.

How Carbon Credits Could Transform Your Local CSA Farm

Posted by darrell on
0
Business and Economic Impact
How Carbon Credits Could Transform Your Local CSA Farm

Your CSA farm already sequesters carbon, nurtures pollinators, and filters water through your daily farming practices—now you can get paid for it. Ecosystem services market consortiums connect farmers like you with companies and organizations willing to pay for measurable environmental benefits your land provides, creating a revenue stream that rewards stewardship rather than just yield.

Think of these consortiums as agricultural cooperatives for the carbon age. Instead of pooling grain or milk, farmers combine their conservation efforts—cover cropping, hedgerow maintenance, reduced tillage—to meet the scale requirements that individual operations can’t achieve alone. A single 50-acre CSA might sequester 20 tons of carbon annually, but a consortium of twenty farms collectively offers 400 tons, making verification costs worthwhile and attracting serious buyers.

The mechanics are straightforward: you document existing sustainable practices, implement additional conservation measures, have third-party verifiers measure results, and receive payments through the consortium that handles contracts and reporting. Early adopters report earning $15-40 per acre annually while improving soil health and biodiversity—benefits that compound over time.

For consumers, these markets represent something bigger than carbon accounting. When your CSA participates in ecosystem services payments, your weekly vegetable box supports a farm that’s financially incentivized to prioritize environmental health alongside food production. The carrots taste the same, but the system behind them becomes more resilient and economically sustainable for the farmers who grow them.

What Is an Ecosystem Services Market Consortium?

The Basics of Carbon Markets for Farmers

Carbon markets might sound complicated, but they’re actually a straightforward way for farmers to earn income while fighting climate change. Think of it as getting paid for the environmental good your farm naturally does.

Here’s how it works: When you practice sustainable farming methods like cover cropping, reduced tillage, or composting, you’re helping your soil capture and store carbon from the atmosphere. This process, called carbon sequestration, turns your fields into carbon sinks. Instead of carbon floating around as greenhouse gas, it gets locked into the ground where it actually improves soil health and crop productivity.

Similar to CSA payment models that reward farmers upfront for their season’s work, carbon markets compensate growers for the environmental benefits their practices create. Companies and organizations looking to offset their carbon emissions purchase credits generated by farms that store carbon in their soil.

The verification process ensures credibility. Third-party organizations measure how much carbon your farm actually sequesters using soil samples and field assessments. They issue carbon credits based on these measurements, typically representing one ton of carbon dioxide stored per credit.

Payment structures vary by program. Some pay farmers upfront for committing to carbon-friendly practices over several years, while others pay annually based on verified results. Credits typically range from fifteen to thirty dollars per ton, though prices fluctuate based on market demand.

Many CSA farmers already use practices that qualify for carbon credits without realizing it. By entering carbon markets, you’re simply monetizing the sustainable methods you’re already passionate about. It’s an additional revenue stream that rewards your commitment to environmental stewardship while keeping your operation financially resilient.

Farmer's hands holding dark composted soil with earthworms and organic matter
Healthy soil rich in organic matter is the foundation of carbon sequestration on CSA farms participating in ecosystem services markets.

Beyond Carbon: Other Ecosystem Services That Pay

While carbon sequestration gets most of the headlines, CSA farms provide a treasure trove of other environmental benefits that consortiums are helping farmers turn into revenue. Think of your local farm as nature’s multitasker, quietly working to clean water, support pollinators, and provide habitat for wildlife while growing your weekly vegetables.

Water quality improvement is a big one. When farms use cover crops, reduced tillage, and organic practices, they prevent nutrient runoff into local waterways. Some consortiums now connect farmers with municipalities or watershed groups willing to pay for these clean water services, creating payment programs that recognize farms as natural water filters.

Biodiversity and pollinator habitat represent another income opportunity. By maintaining hedgerows, wildflower strips, and diverse crop rotations, CSA farms create essential homes for bees, butterflies, and beneficial insects. Conservation organizations and even corporations seeking to offset their environmental impact are increasingly willing to pay farms for documented biodiversity improvements.

Here’s where consortiums shine: they bundle these various ecosystem services together, making it easier for farmers to access multiple payment programs simultaneously. Rather than navigating separate applications for water quality credits, pollinator habitat incentives, and carbon payments, farmers work with one organization that handles the complexity. This approach recognizes what experienced farmers already know: sustainable practices deliver multiple benefits at once, and the financial rewards should reflect that interconnected reality.

Why CSA Farms Are Perfect for Ecosystem Services Markets

Organic Practices That Capture Carbon

Community-supported agriculture farms naturally employ several powerful practices that pull carbon dioxide from the atmosphere and store it in the soil. These climate-resilient farming practices not only combat climate change but also improve soil health and crop productivity.

Composting stands as one of the most effective carbon-capturing methods. When farmers transform crop residues, food scraps, and plant materials into nutrient-rich compost, they’re creating a stable form of carbon that enriches the soil rather than escaping into the atmosphere. Many CSA operations maintain active compost systems that process tons of organic matter annually, building soil carbon levels year after year.

Reduced tillage techniques keep carbon locked underground. Unlike conventional plowing that exposes soil and releases stored carbon, minimal tillage preserves soil structure and the beneficial microorganisms that help store carbon. Some CSA farmers have adopted no-till practices entirely, using specialized equipment or mulching techniques to prepare beds without disturbing the carbon-rich layers below.

Crop rotation naturally builds soil health while sequestering carbon. By alternating plant families throughout the growing season, farmers encourage diverse root systems that deposit carbon at different soil depths. Legumes like beans and peas even fix atmospheric nitrogen while their roots pump carbon into the ground.

Perennial plantings offer long-term carbon storage solutions. Unlike annual crops that require replanting each year, perennials like asparagus, rhubarb, berry bushes, and orchard trees develop extensive root systems that continuously store carbon. Many CSA farms dedicate portions of their land to these permanent plantings, creating carbon sinks that deepen with each passing season while providing members with diverse, delicious harvests.

Diverse CSA farm field showing cover crops, vegetable rows, and pollinator-friendly flower borders
CSA farms using regenerative practices like cover cropping and pollinator habitats are ideally positioned to generate multiple ecosystem service credits beyond carbon alone.
CSA farmer holding crate of freshly harvested vegetables in farm field
CSA farmers across the country are discovering new revenue opportunities through ecosystem services market consortiums while maintaining their commitment to sustainable local food production.

Real Farmers, Real Results: Success Stories

When Green Valley Farm in Vermont joined the Northeast Ecosystem Services Consortium in 2021, farmer Maria Chen was cautiously optimistic. Her 40-acre CSA operation had always prioritized soil health and biodiversity, but she wondered if these practices could actually generate additional income. Two years later, the results speak for themselves.

Through the consortium, Maria enrolled in both carbon sequestration and pollinator habitat programs. By documenting her cover cropping, reduced tillage, and hedgerow maintenance, she earned an extra $8,400 in her first year alone. “The consortium handled all the complicated verification and paperwork,” she explains. “I just kept doing what I was already doing, but with better record-keeping.”

The biggest challenge? Learning the documentation requirements. Maria spent about three hours monthly tracking specific practices and taking soil samples. However, the consortium provided templates and hosted monthly Q&A sessions that made the process manageable. Her advice for others: “Start small. Pick one program, get comfortable with it, then expand.”

Over in Oregon, Twin Oaks Community Farm took a different approach. Farmers Jake and Lisa Rodriguez focused exclusively on water quality credits, working through the Pacific Agriculture Consortium. Their 25-acre vegetable operation implemented expanded riparian buffers and constructed wetlands that filter runoff before it reaches nearby streams. These improvements generated $6,200 in ecosystem service payments during their first eighteen months.

“The upfront costs were our biggest hurdle,” Jake shares. The wetland construction required $3,000 in materials and equipment rental. Fortunately, the consortium connected them with cost-share grants that covered 70 percent of expenses. They broke even within the first year and now view the payments as reliable supplemental income that helps during slower sales months.

Lisa emphasizes the importance of choosing the right consortium partner. “Interview them like you would any business partner. Ask about payment timelines, verification requirements, and what support they provide.” She also recommends connecting with other farmers already in the program to get honest feedback about their experiences.

Both farms agree that ecosystem service markets aren’t get-rich-quick schemes, but they do provide meaningful financial recognition for stewardship practices that benefit everyone. As Maria puts it, “We’re finally getting paid for the invisible work we’ve always done.”

How to Get Your CSA Farm Involved

What Consortiums Look for in Member Farms

Ecosystem services market consortiums seek member farms that demonstrate genuine commitment to sustainable practices and can meet specific verification standards. Understanding these criteria helps farmers determine if joining aligns with their operations and the essential ingredients for farm success.

Farm size requirements vary considerably between consortiums. While some focus on larger operations exceeding 100 acres, many programs welcome smaller farms, recognizing that even modest acreage can deliver measurable environmental benefits. Community-supported agriculture farms often fit perfectly within these frameworks since they already prioritize sustainable methods.

Practice requirements typically include implementing conservation techniques like cover cropping, reduced tillage, diverse crop rotations, and efficient water management. Consortiums want evidence of practices that sequester carbon, improve soil health, enhance biodiversity, or protect water quality. The good news? Many CSA farms already employ these methods as part of their organic or regenerative approach.

Documentation needs can seem daunting initially but become routine over time. Expect to maintain detailed records of field activities, input applications, crop yields, and conservation practices. Most consortiums provide templates and support to simplify this process. Some require third-party verification or soil testing to establish baseline measurements and track progress.

Successful applicant farms demonstrate willingness to learn, adapt practices based on data, and participate in ongoing monitoring. Financial stability matters too, as programs often involve multi-year commitments. Consortiums value farmers who view environmental stewardship not as a burden but as an integral part of their agricultural mission.

What This Means for CSA Members and Consumers

For CSA members, participating in farms that engage with ecosystem services markets means your weekly produce box contributes to something bigger than fresh vegetables. When you support a CSA enrolled in carbon credit programs, you’re directly funding farming practices that capture carbon, improve soil health, and protect local waterways. Think of it as climate action that tastes delicious.

You might wonder if carbon market participation will affect your share prices. The good news is that revenue from ecosystem services can actually help stabilize costs. Many farmers use carbon credit income to offset operational expenses, invest in infrastructure like hoop houses or irrigation systems, or maintain affordable share prices despite rising production costs. Some CSAs even pass savings directly to members or expand share offerings.

The added value extends beyond your produce box. Members of carbon market-participating CSAs receive the assurance that their food dollars support verified environmental outcomes. You’re not just hoping your farm is sustainable—you’re backing practices with measurable climate benefits. This transparency strengthens the economic impact of CSA farms by attracting environmentally conscious members who value accountability.

Consider Sarah from Vermont, whose CSA membership now includes quarterly reports showing how much carbon her farm sequestered that season. “It helps me understand the real impact of my local food choices,” she shares. “I’m not just eating well—I’m part of a solution.”

For consumers evaluating CSA options, farms participating in ecosystem services markets demonstrate financial innovation and environmental commitment. They’re building resilient businesses while nurturing healthier landscapes, making your membership investment work harder for both community food security and planetary health.

Challenges and Honest Considerations

While ecosystem services markets offer exciting opportunities for CSA farmers, it’s important to approach them with clear expectations. The reality is that these programs come with challenges that won’t work for everyone.

The paperwork can feel overwhelming, especially if you’re already juggling farm operations, CSA box packing, and farmer’s market schedules. You’ll need to document baseline conditions, track practice changes, and submit regular reports. For small farms under five acres, the administrative burden sometimes outweighs the financial benefits. Consider starting with simpler programs that have streamlined applications before diving into complex carbon credit schemes.

Verification costs present another hurdle. Third-party auditors typically charge between $500 to $2,000 annually to confirm your sustainable practices. These fees can eat into payments, particularly during your first year when you’re still learning the system. Some consortiums offer cost-sharing arrangements or group verification options that spread expenses across multiple farms, making participation more affordable.

Market volatility is real. Carbon credit prices fluctuate based on policy changes, corporate demand, and overall market conditions. What pays $25 per credit this year might drop to $15 next year. Think of ecosystem service payments as supplemental income rather than guaranteed revenue you can budget around.

Here’s the good news: many farmers find success by starting small. Join a consortium that handles most administrative tasks for you. Partner with neighboring farms to share verification costs. Focus on practices you’re already implementing or planning to adopt anyway, like cover cropping or hedgerow planting, so you’re getting paid for improvements that benefit your farm regardless of payment fluctuations.

Sarah Martinez, who runs a three-acre CSA in Oregon, suggests keeping meticulous records from day one. “I spend thirty minutes weekly photographing and noting changes. When verification time comes, I’m prepared rather than scrambling,” she shares. This simple habit transformed her experience from stressful to manageable, proving that organization makes all the difference.

Ecosystem services markets represent an exciting frontier for CSA farms looking to diversify income while deepening their environmental impact. The opportunity to earn revenue for practices many sustainable farmers already embrace—like building healthy soil, protecting waterways, and sequestering carbon—feels like a natural evolution for community-supported agriculture. These markets can provide financial stability during challenging growing seasons and reward the long-term thinking that defines regenerative farming.

However, it’s important to approach these programs with realistic expectations. Participating requires time, documentation, and often upfront investments in verification processes. Not every farm will qualify immediately, and payment structures vary widely between programs. Start small by researching consortiums operating in your region and attending informational workshops to understand requirements. Many successful farmers recommend beginning with one program, learning the ropes, and expanding participation as you become comfortable with the processes.

For those ready to explore this path, consider reaching out to your local USDA office or cooperative extension for guidance on available programs. Organizations like the Ecosystem Services Market Consortium offer valuable resources and connection points. Talk with fellow farmers already enrolled in these markets to learn from their experiences—both the successes and challenges they’ve encountered.

The intersection of sustainable agriculture and environmental markets continues to evolve, creating opportunities for farms committed to stewardship. By taking informed, measured steps forward, CSA operations can position themselves at the forefront of this growing movement while staying true to their core mission of nourishing communities and nurturing the land.

How Smart Technology Transforms Your Urban CSA Garden into a Thriving Food System

Posted by darrell on
0
Technology and Innovation
How Smart Technology Transforms Your Urban CSA Garden into a Thriving Food System

Map your growing space by measuring every sunny spot—balconies, windowsills, rooftops, and shared yards—then calculate hours of direct sunlight each location receives daily. This data-driven approach helps you match crops to microclimates, ensuring tomatoes claim your south-facing balcony while shade-tolerant lettuce thrives under partial cover.

Design vertical growing systems using wall-mounted planters, trellises, and tiered shelving to multiply your productive area without expanding your footprint. A 4×8 foot balcony can yield over 100 pounds of produce annually when you grow upward rather than outward, stacking herbs, greens, and vining crops in carefully planned layers.

Schedule succession plantings every two weeks using a simple calendar system that tracks planting dates, expected harvest windows, and crop rotation patterns. This planning method prevents feast-or-famine cycles and keeps fresh vegetables flowing from spring through fall, maximizing every container’s productivity throughout the growing season.

Connect with urban Community Supported Agriculture programs that provide proven growing blueprints and seasonal crop plans tailored to city conditions. These partnerships offer structured guidance for beginners while creating food security through coordinated neighborhood efforts. Urban farmers who adopt integrated planning methods report harvesting 3-5 times more produce than those using random, unplanned approaches.

Transform scattered containers into productive mini-farms by treating your urban space as a complete agricultural system where every element—from water collection to companion planting—works together intentionally.

What Integrated Urban Planning Means for Your Garden

The CSA Connection: From Farm to Urban Plot

Traditional Community Supported Agriculture models are experiencing an exciting urban evolution. Instead of simply delivering produce from distant farms, modern CSA programs are embracing integrated urban planning to create interconnected food networks right in the heart of cities. This transformation turns urban members from passive consumers into active participants in local food production.

Urban CSA farms now work closely with city planners to establish micro-farms on vacant lots, rooftop gardens, and underutilized green spaces. These small-scale operations serve as demonstration sites and educational hubs, showing residents how professional farming techniques can scale down for home gardens. Members learn directly from farmers during work shares, then apply those same principles to their backyard plots or balcony containers.

The real magic happens when home gardens become recognized extensions of the larger CSA system. Some programs now offer seed sharing initiatives, where members receive the same heirloom varieties grown at the main farm. Others coordinate neighborhood growing clusters, where several households focus on different crops and share their harvests, mimicking the diversity of a traditional CSA box.

Sarah Martinez, a CSA member in Portland, transformed her 400-square-foot backyard into a productive plot after working weekend shifts at her local urban farm. “I grew enough tomatoes and herbs last season to supply three neighboring families,” she shares. “We’re essentially creating our own micro-CSA network, and it started with what I learned through the main farm’s integrated planning workshops.”

This model proves that urban agriculture isn’t just about individual gardens but rather coordinated systems that strengthen community food security together.

Why Your Backyard Matters to City Food Security

Your backyard might seem like just a small patch of green space, but when connected through smart planning systems, it becomes part of something much bigger. Individual urban gardens collectively create a network of local food production that strengthens community resilience during supply chain disruptions and reduces reliance on distant food sources.

Think of integrated planning as connecting the dots between your tomato plants and your neighbor’s herb garden, then linking those to community plots and local CSA farms. When cities implement coordinated urban agriculture solutions, they create systems where resources like compost, seeds, and knowledge flow efficiently between growers.

The impact is real. In Detroit, networked urban gardens now produce over 400,000 pounds of food annually, demonstrating how individual efforts add up. Your backyard contributions matter because they diversify what your neighborhood grows, reduce food miles, and create living examples that inspire others to start growing.

Smart planning systems help track what each garden produces, identify gaps in local food availability, and coordinate seasonal growing schedules. This transforms scattered individual efforts into a cohesive food security strategy that benefits everyone in your community.

Technology That Makes Urban Growing Smarter, Not Harder

Aerial view of urban rooftop garden with raised beds and soil moisture sensors
Smart sensors integrated into urban rooftop gardens help maximize yields in limited city spaces while optimizing water and resource use.

Sensors and Automation: Your Garden’s Digital Assistant

Urban gardening doesn’t require constant vigilance when you have the right digital tools working alongside you. Modern sensors and automation systems act as your garden’s tireless assistant, monitoring conditions and responding to your plants’ needs even when you’re at work or away.

Soil moisture sensors are the perfect entry point for beginners. These affordable devices measure water levels in your soil and send alerts to your phone when plants need watering. Basic models start around $20-30, while smart sensors with Bluetooth connectivity range from $50-100. They eliminate guesswork and prevent both overwatering and drought stress, crucial for apartment balconies where you can’t easily check soil daily.

Compact weather stations designed for urban settings track temperature, humidity, rainfall, and sunlight. These mini stations help you understand your microclimate—essential information since rooftop conditions differ dramatically from ground-level patios. Expect to invest $75-150 for reliable models that sync with smartphone apps.

Automated watering systems transform how city dwellers maintain gardens. Simple drip irrigation kits with timers cost $30-60 and work perfectly for balcony container gardens. More sophisticated systems ($150-300) integrate with moisture sensors and weather data, adjusting watering schedules automatically. This technology proves invaluable during summer vacations or busy work weeks.

Maria, a Toronto CSA member, installed a basic moisture sensor system in her vertical garden last spring. “I was drowning my tomatoes and under-watering my peppers,” she shares. “Now my phone tells me exactly what each section needs. My harvest doubled, and I’m spending less time worrying.”

The beauty of these systems is scalability. Start with one moisture sensor, then expand as you gain confidence. As IoT technology transforms commercial farming, similar tools become increasingly accessible and affordable for home gardeners seeking efficiency in limited urban spaces.

Apps That Connect Growers and Build Community

Technology is bringing urban growers together in exciting new ways, making it easier than ever to share knowledge, coordinate harvests, and build thriving digital communities around local food production.

Apps like Crop Swap and ShareHarvest connect neighbors who want to exchange surplus produce, seeds, and gardening supplies. These platforms help reduce food waste while strengthening community bonds. Simply post what you have available, browse nearby offerings, and arrange pickups with fellow growers in your area.

For CSA members, coordination apps like Harvie and Local Line streamline communication between farms and shareholders. Members can customize their weekly shares, swap items they don’t want, and even pick up extra produce when available. The real-time updates keep everyone informed about harvest schedules and farm happenings.

Knowledge-sharing platforms such as GrowIt! and PlantSnap function as social networks specifically for gardeners. Upload photos of your urban garden, identify unfamiliar plants, troubleshoot pest problems, and get advice from experienced growers worldwide. These apps create supportive spaces where beginners feel comfortable asking questions and experts enjoy sharing their wisdom.

Many urban farms now use apps like Growing Gardens to manage volunteer schedules, workshop registrations, and community events. Members receive notifications about planting days, harvest festivals, and educational sessions, making participation effortless.

These digital tools transform isolated backyard efforts into collaborative movements, proving that even in dense cities, growers can cultivate both vegetables and meaningful connections with their neighbors.

Person checking garden monitoring app on smartphone next to vertical hydroponic growing system
Mobile apps connect urban growers to real-time garden data and community networks, making high-tech food production accessible to apartment dwellers.

Vertical and Indoor Systems: Growing Beyond Ground Level

When ground space is scarce, thinking vertically transforms your urban growing potential. Hydroponic tower systems stack growing pockets upward, allowing you to cultivate dozens of plants in the footprint of a single houseplant. These innovative structures use nutrient-rich water instead of soil, making them perfect for balconies and patios where weight matters.

Indoor growing has evolved dramatically with LED grow light technology. These energy-efficient lights mimic natural sunlight, enabling year-round harvests regardless of weather or season. Modern LED systems use specific light spectrums to boost plant growth while consuming 40-60% less energy than traditional grow lights. You can now grow fresh lettuce, herbs, and even tomatoes right in your kitchen or spare bedroom.

Smart indoor systems take the guesswork out of urban farming. Automated controllers monitor moisture levels, adjust lighting schedules, and alert you when plants need attention. Some systems connect to smartphone apps, letting you tend your garden remotely during busy workdays.

Take Maria from Chicago, who transformed her studio apartment’s unused corner into a thriving vertical garden. Using a simple tower system and LED lights, she grows enough salad greens and herbs to supply her weekly meals and share with neighbors. She reports saving over $50 monthly on produce while enjoying fresher, pesticide-free food.

Starting small is key. Begin with a countertop herb garden to learn the basics, then expand as your confidence grows. The beauty of vertical and indoor systems is their scalability—you control exactly how much space and effort you invest.

Group of urban gardeners working together and sharing harvest in city backyard garden
Urban CSA members collaborate in shared growing spaces, combining traditional community-supported agriculture with modern city gardening techniques.

Real Success: Urban Growers Making It Work

The best proof that integrated urban planning works? Real people growing real food in real cities. Let’s meet some urban growers who’ve cracked the code.

Sarah Chen transformed her Brooklyn apartment building’s rooftop into a thriving CSA that now feeds 25 neighborhood families. She started with just three raised beds and a simple drip irrigation system controlled by her smartphone. By mapping sun exposure throughout the day and using vertical growing structures, Sarah maximized every square foot. Her secret weapon? A combination of automated watering scheduled around weather forecasts and a detailed planting calendar that ensures continuous harvests from April through November. What began as a personal experiment now generates enough produce to supply weekly shares while building community among her neighbors.

In Detroit, Marcus Williams turned his backyard and two vacant side lots into an urban farm that supplies three local restaurants. His integrated approach combines solar-powered irrigation, companion planting strategies, and a simple spreadsheet system that tracks what to plant when. Marcus emphasizes that you don’t need expensive technology to succeed. His planning notebook and basic weather app help him stay ahead of planting deadlines and pest problems. The key, he says, is consistency and observation.

Even balcony gardeners are seeing remarkable results. Lima Rodriguez feeds her family of four with vegetables grown entirely on her Chicago apartment balcony. She uses container gardens with self-watering systems and follows a succession planting schedule she learned from online gardening communities. By growing vertically and choosing high-yield varieties like cherry tomatoes, peppers, and leafy greens, Lima harvests something fresh almost daily during the growing season.

These growers share common threads: they all started small, learned from mistakes, and used simple planning tools to track what worked. They prove that integrated urban planning isn’t about having the perfect setup or expensive equipment. It’s about understanding your space, using available resources wisely, and staying committed to the process. Whether you have a rooftop, backyard, or just a sunny balcony, their stories show that thoughtful planning makes urban food production not just possible, but genuinely rewarding.

Getting Started: Your First Steps Toward an Integrated Garden

Assess Your Space and Resources

Before diving into urban agriculture, take time to understand what you’re working with. Start by observing your available space throughout the day. Which areas receive at least six hours of direct sunlight? These prime spots are perfect for fruiting plants like tomatoes and peppers, while shadier corners work well for leafy greens.

Next, evaluate your water situation. Is there easy access to a hose or outdoor faucet? Consider installing rain barrels to harvest free water while reducing your environmental footprint. One urban farmer in Chicago saved 40% on her water bill by collecting rainwater from her roof.

Measure your actual growing space, whether it’s a balcony, rooftop, or small yard. Don’t let limited square footage discourage you. Vertical gardens, container systems, and intensive planting methods can transform even tiny areas into productive gardens.

Finally, establish a realistic budget. Factor in initial setup costs for containers, soil, seeds, and any technology like drip irrigation systems or grow lights. Remember that many investments, like quality containers and automated watering systems, pay dividends through years of use. Start small if needed—you can always expand as you gain experience and confidence in your urban growing journey.

Start Small, Scale Smart

You don’t need to transform your entire urban garden overnight. The most successful city growers start with one or two simple technologies and expand as they learn what works in their specific environment. Begin by choosing a single system that addresses your biggest challenge. If watering is your struggle, try a basic drip irrigation timer before investing in a smart controller. If space is tight, test one vertical growing structure before covering every wall.

Consider running small experiments. Set up moisture sensors in half your containers while watering the others manually, then compare plant health and water usage over a month. This hands-on approach teaches you what your plants actually need rather than guessing. Maria, a Brooklyn balcony gardener, started with just three self-watering containers. After seeing her tomato yields double, she gradually expanded to 15 containers with a rainwater collection system.

Track what you observe in a simple notebook or phone app. Note which plants thrive, when pests appear, and how much you harvest. These insights become invaluable when deciding where to invest time and resources next. Remember, urban farming is about progress, not perfection. Each growing season offers new lessons that help you refine your approach and scale thoughtfully.

Overcoming Common Urban Growing Challenges

Urban gardening comes with its fair share of hurdles, but integrated planning paired with smart technology turns these obstacles into opportunities. Let’s explore how modern solutions tackle the common urban farming challenges that city growers face.

Limited space ranks as the biggest concern for urban farmers. Vertical growing systems, including tower gardens and wall-mounted planters, maximize every square foot available. Many urban CSAs now use tiered shelving with grow lights to transform small warehouses into productive farms. By mapping your space digitally using garden planning apps, you can optimize layouts and calculate exactly how many plants fit in your area.

Contaminated soil presents another significant barrier in cities where industrial history left behind harmful residues. Raised beds with purchased organic soil provide a clean growing medium, while container gardening eliminates ground contact entirely. Some urban farmers use soil testing kits to assess contamination levels before planting, then choose appropriate growing methods based on results.

Unpredictable microclimates make urban growing tricky. Tall buildings create wind tunnels and shade patterns that shift throughout the day. Temperature variations between sunny pavement and shaded areas can differ by 15 degrees. Weather monitoring stations and smartphone apps help you track these variations, allowing you to position heat-loving tomatoes in warm spots while placing leafy greens in cooler zones.

Water management also challenges city growers. Integrated drip irrigation systems with timers ensure consistent moisture without waste, while rainwater collection barrels turn rooftops into water sources. These technologies, combined with moisture sensors that alert you via smartphone, prevent both drought stress and overwatering, helping your urban garden thrive despite city conditions.

The beauty of integrated urban planning is that it transforms what seems impossible into something genuinely achievable. By combining thoughtful space design with accessible technology like soil sensors, vertical growing systems, and simple planning apps, city dwellers can create thriving food gardens right where they live. You don’t need a sprawling farm or expensive equipment to participate in CSA programs or grow your own fresh produce.

The success stories we’ve explored prove that anyone can start small and scale up gradually. Whether you’re joining a community garden with shared technology resources or setting up a modest balcony garden with a few smart tools, taking that first step matters most. Connect with your local CSA programs to learn what’s possible in your neighborhood and discover what resources already exist in your community.

Technology has democratized urban agriculture, making it accessible to beginners and experienced gardeners alike. Start by assessing your available space, research one or two tech tools that match your budget, and begin growing something simple. Your urban garden journey doesn’t have to be perfect from day one. The important thing is to begin, learn as you grow, and enjoy the fresh, organic produce you’ve cultivated yourself while contributing to a more sustainable food system in your city.

Keep Your Farm-Fresh Harvest Safe From Field to Table

Posted by darrell on
0
CSA Finder & Directory
Keep Your Farm-Fresh Harvest Safe From Field to Table

Wash your hands with soap for at least 20 seconds before touching any produce, and establish dedicated handwashing stations in your field and packing areas with clean water access. This single step prevents the majority of foodborne illness cases that originate at the farm level.

Harvest during cooler morning hours when produce temperatures naturally sit below 70°F, reducing bacterial growth rates by up to 90% compared to midday picking. Immediately move harvested crops into shade, and aim to refrigerate within two hours to maintain that critical cold chain.

Sanitize all harvest containers, knives, and tools between uses with a simple solution of one tablespoon unscented bleach per gallon of water, allowing surfaces to air dry completely. Even organic operations can use this method, as it leaves no residue when properly diluted and dried.

Inspect produce carefully during harvest, removing any items showing signs of damage, mold, or ground contact that could harbor pathogens. Small-scale farmers who implement this sorting practice report 60% fewer customer complaints and significantly longer shelf life for their produce.

Whether you’re evaluating CSA farm ratings as a consumer or establishing your own farm share program, understanding these fundamental safety practices creates trust and protects public health. The gap between field and table represents your greatest opportunity to preserve both nutritional value and food safety. These protocols don’t require expensive equipment or certifications, just consistent attention to cleanliness, temperature control, and timing. Every farmer who masters these basics builds a reputation for quality that transforms first-time customers into loyal community members who understand the care behind their food.

Why Food Safety Starts in the Field, Not the Kitchen

The Hidden Dangers in Organic Compost and Soil Amendments

That beautiful compost pile in your garden might be creating nutrient-rich soil, but without proper management, it could also harbor unwanted guests that threaten your harvest. Understanding the science behind safe composting is essential for protecting your crops and the families who enjoy them.

The key to pathogen-free compost lies in temperature control. Your compost pile needs to reach between 131°F and 170°F for at least three consecutive days to effectively eliminate harmful bacteria like E. coli and Salmonella. This heat comes from the natural decomposition process, where beneficial microorganisms break down organic matter and generate warmth as a byproduct. Think of it as nature’s sterilization system, working around the clock when conditions are right.

To achieve these critical temperatures, maintain the proper carbon-to-nitrogen ratio (about 30:1), ensure adequate moisture—your compost should feel like a wrung-out sponge—and turn your pile regularly to introduce oxygen. Use a compost thermometer to monitor progress, investing in this simple tool that typically costs under twenty dollars.

Local farmer Maria Santos shares her approach: “I keep a log of my compost temperatures and turning schedule. It takes an extra five minutes, but knowing my soil amendments are safe gives me peace of mind and protects my CSA members.”

Remember to avoid adding pet waste, diseased plants, or meat products to your compost pile, as these materials can introduce pathogens that survive even high temperatures. When applied correctly, your finished compost should have an earthy smell and crumbly texture, ready to nourish your crops safely.

Water Sources That Could Contaminate Your Entire Harvest

Water is the lifeblood of your crops, but it can also be their greatest threat. Contaminated irrigation water ranks among the top culprits in foodborne illness outbreaks on farms, making water management a critical component of your food safety plan.

Surface water sources like ponds, streams, and rivers can harbor harmful bacteria from wildlife, runoff from neighboring properties, or upstream agricultural operations. Even seemingly pristine water can contain E. coli, Salmonella, or parasites that attach to your produce and remain through harvest. This is especially concerning for crops eaten raw, like leafy greens and tomatoes.

The good news? Regular water testing gives you the knowledge to protect your harvest. Test irrigation water at least twice during the growing season, and more frequently if you’re using surface water sources. Many agricultural extensions offer affordable testing services specifically designed for small-scale farmers.

Consider these practical water management strategies: Create buffer zones between water sources and production areas, avoid overhead irrigation when possible (drip systems minimize leaf contact), and never use irrigation water from unknown sources. Sarah Martinez, who runs a three-acre organic farm in Vermont, switched to well water after testing revealed contamination in her creek. “It required upfront investment,” she shares, “but the peace of mind and food safety compliance made it worthwhile.”

If you’re limited to surface water, allow adequate time between final irrigation and harvest—typically 24 to 48 hours—to reduce contamination risks.

Farm worker washing fresh leafy greens at outdoor field station
Proper field washing and handling techniques are the first critical step in maintaining food safety from harvest to table.

Harvest Practices That Protect Your Produce (and Your Reputation)

Essential Hygiene Protocols Every Farm Worker Needs to Know

Creating a strong food safety culture starts with accessible handwashing stations positioned throughout your farm. Place them near field entrances, packing areas, and restrooms, ensuring workers can easily wash hands before starting work, after breaks, and after any potential contamination. Stock stations with clean water, soap, disposable towels, and post simple visual reminders in multiple languages if needed.

Your illness policy should clearly state that workers experiencing symptoms like vomiting, diarrhea, or open wounds must stay home without fear of penalty. Sarah Martinez, who runs a thriving organic vegetable operation in Vermont, implemented a paid sick day policy for her harvest crew and saw both morale and produce quality improve. She explains, “Investing in worker wellness protects everyone, from our team to the families who trust our food.”

Training shouldn’t be a one-time checklist. Schedule regular 15-minute refreshers throughout the season, covering basics like proper glove use, cross-contamination prevention, and when to alert supervisors about potential issues. Make these sessions interactive—ask questions, demonstrate techniques, and encourage workers to share observations.

Building a genuine safety culture means empowering every team member to speak up without hesitation. Recognize workers who identify potential problems and celebrate clean inspection results together. When your crew understands they’re protecting the health of real families who depend on your harvest, food safety transforms from a rulebook into a shared mission everyone takes pride in maintaining.

Cleaning Your Tools and Equipment Without Harsh Chemicals

Keeping your harvest equipment clean doesn’t mean reaching for commercial sanitizers loaded with synthetic ingredients. Many organic farmers successfully maintain food safety standards using simple, natural cleaning methods that align perfectly with organic principles.

Start with the basics: hot water and good old-fashioned elbow grease. For most harvest bins, baskets, and containers, a thorough scrub with hot water (at least 170°F) removes dirt and organic matter effectively. Adding food-grade vinegar creates a natural sanitizing solution that’s tough on bacteria but gentle on the environment.

For knives and smaller tools, a mixture of hydrogen peroxide and water works wonderfully. This combination breaks down into water and oxygen, leaving no harmful residues on surfaces that touch your produce. Many farms keep spray bottles of this solution handy throughout harvest season.

Consider rotating between cleaning methods to prevent bacterial resistance. Baking soda paste works great for stubborn residue on cutting surfaces, while citric acid solutions can tackle mineral deposits on equipment. One small-scale farmer in Vermont shared that switching to these natural methods actually reduced her cleaning supply costs by 60 percent while maintaining perfect food safety inspection results.

Always allow equipment to air-dry completely in direct sunlight when possible—UV rays provide an extra layer of natural sanitization that costs absolutely nothing.

Temperature Control: The Make-or-Break Factor in Post-Harvest Quality

Budget-Friendly Cooling Solutions for Small CSA Farms

Keeping your harvest cool doesn’t require breaking the bank. Many small CSA farms successfully maintain food safety with creative, budget-conscious cooling methods that preserve freshness from field to table.

Hydrocooling offers one of the most effective solutions for quick temperature reduction. This technique involves spraying or immersing freshly harvested produce in cold water, rapidly removing field heat. You can start small with a simple setup using a large tub, ice, and a pump system costing just a few hundred dollars. Sarah Chen from Green Valley Farm shares her experience: “We built a basic hydrocooler using recycled materials and it cut our leafy green spoilage by 60 percent in the first season.”

Shade structures provide immediate passive cooling while protecting workers from sun exposure. A simple hoop house covered with shade cloth can drop temperatures by 10-15 degrees, giving you precious time before refrigeration. Position these near harvest areas to minimize heat exposure during transport.

For refrigeration, consider starting with a used walk-in cooler or converting a standard shipping container with insulation and a CoolBot controller. These DIY options cost 50-70 percent less than commercial units while maintaining proper storage temperatures. Some farmers also share cooler space with neighboring farms to split costs.

Night harvesting naturally reduces field heat, requiring less energy for cooling. Combined with these affordable strategies, you’ll maintain quality produce while keeping your operation economically sustainable. Remember, even small cooling improvements significantly extend shelf life and enhance food safety.

Walk-in cooler with fresh vegetables stored in organized crates on shelving
Proper cold storage with organized shelving and consistent temperature control preserves produce quality and prevents spoilage.

Storage and Packaging That Keeps Produce Fresh and Safe

What CSA Members Need to Know About Storing Their Shares

Getting the most from your fresh CSA share starts the moment you bring it home. Proper storage keeps your vegetables crisp, flavorful, and safe to eat throughout the week. First, remember that not everything belongs in the refrigerator. Tomatoes, winter squash, potatoes, and onions prefer cool, dry countertop storage away from direct sunlight. Leafy greens, however, thrive when loosely wrapped in a damp towel inside a produce bag in your crisper drawer.

Before storing, remove any tight rubber bands or ties that can bruise delicate leaves. Wait to wash most produce until you’re ready to use it, as excess moisture can speed up spoilage. The exception? Muddy root vegetables can be gently rinsed and patted dry before refrigeration.

When washing time arrives, use cool running water and gently rub produce with your hands. For firmer items like carrots or cucumbers, a clean vegetable brush works wonders. Many farmers report that members who sync their meal planning with CSA pickup schedules experience less waste and enjoy fresher meals.

Keep raw vegetables separate from meat in your refrigerator, and always use clean cutting boards. These simple practices protect your family while honoring the care your farmer put into growing your food.

Building a Food Safety Culture on Your Farm

Creating a strong food safety culture transforms how your entire farm operates, turning safety protocols from a checklist into a shared value. This starts with developing clear standard operating procedures (SOPs) for every step of your operation, from field harvesting to packing and distribution. Write down your processes in simple, step-by-step guides that anyone on your team can follow, covering handwashing protocols, produce washing procedures, equipment sanitization, and temperature monitoring.

Training programs don’t need to be complicated. Schedule regular team meetings to review your SOPs, demonstrate proper techniques, and answer questions. New team members should shadow experienced workers before handling produce independently. Make food safety part of your daily conversations rather than an annual lecture.

Record-keeping systems help you track what’s working and identify areas for improvement. Maintain logs for cleaning schedules, water testing results, equipment maintenance, and harvest dates. Digital tools like simple spreadsheets work perfectly for small operations, though a well-organized binder does the job too. These records become invaluable if you ever need to trace a product or demonstrate your practices when choosing a CSA farm partnership.

Regular self-audits keep your protocols fresh. Walk through your operation monthly with a critical eye, checking that sanitizing stations are stocked, storage areas maintain proper temperatures, and team members follow procedures correctly.

Take inspiration from Green Valley Farm’s experience. Owner Maria Rodriguez implemented basic food safety protocols for her 50-member CSA, including written harvest procedures and weekly team check-ins. Within one season, she noticed fewer customer complaints about product quality, reduced waste from damaged produce, and increased confidence among her team. Her member retention rate jumped from 65% to 90%, with families specifically citing their trust in her farm’s practices as a reason for staying.

Farm workers practicing proper hygiene protocols at outdoor handwashing station
Building a strong food safety culture starts with comprehensive worker training and accessible hygiene facilities.

Common Food Safety Mistakes Even Experienced Farmers Make

Even seasoned farmers can fall into food safety traps that compromise their harvest. Let’s explore some common oversights and how to fix them.

Cross-contamination between livestock and crops remains surprisingly prevalent. When chickens roam freely through vegetable patches or manure runoff reaches growing beds, harmful bacteria like E. coli and Salmonella can hitch a ride onto your produce. The solution? Establish clear physical boundaries between animal and crop areas, maintain dedicated tools for each zone, and always wash hands thoroughly when moving between spaces.

Washing station design often gets overlooked in the rush of harvest season. A simple bucket and hose might seem adequate, but stagnant water becomes a breeding ground for pathogens. Create a three-sink system: one for initial rinse, one for washing with clean water, and one for final rinse. Change water frequently and sanitize surfaces between batches. Sarah, an organic farmer in Vermont, noticed dramatically improved shelf life after implementing this simple upgrade on her small farm.

Storage temperature inconsistencies can undo all your careful handling work. Many farmers lack proper thermometers in their coolers or allow harvested vegetables to sit in the sun while finishing fieldwork. Invest in reliable temperature monitoring and create a routine of immediately moving harvested produce to shaded areas, even if refrigeration isn’t immediately available.

Worker training gaps present another challenge. Your team members are your food safety partners, but without clear protocols and regular refreshers, critical steps get missed. Hold brief weekly check-ins to review procedures, and remember that clear communication prevents contamination far better than reactive fixes.

Food safety isn’t just a checkbox on your farm management list—it’s an ongoing commitment that weaves through every aspect of your operation. When you prioritize safe handling practices, you’re doing more than meeting regulations; you’re protecting the health of your community members and building the foundation of trust that makes CSA relationships thrive.

Think of safety protocols as investments rather than burdens. Each time you sanitize harvest containers, maintain proper storage temperatures, or document your procedures, you’re strengthening your farm’s reputation and sustainability. These practices protect your business from potential liability while demonstrating the professionalism that sets quality farms apart.

Sarah Martinez, who runs a successful organic CSA in Oregon, puts it simply: “Our members choose us because they trust us. That trust starts with knowing their food is handled with care from the moment we harvest it.” Her commitment to food safety has helped her maintain a waiting list of eager customers year after year.

For consumers exploring CSA farms with openings or researching affordable CSA options, understanding these safety standards helps you make informed choices about where your food comes from. For farmers, embracing these practices ensures your operation can grow and flourish while serving your community safely. Remember, every safe harvest is a step toward a more resilient, trusted farm business.

Why Pressure Canning Your CSA Harvest Could Save Your Life (or Make You Sick)

Posted by darrell on
0
Culinary and Food Preservation
Why Pressure Canning Your CSA Harvest Could Save Your Life (or Make You Sick)

That overflowing CSA box of green beans and summer squash deserves more than a week in your fridge—it deserves safe preservation that protects your family while honoring the work of your local farmers. Pressure canning stands as the only scientifically proven method to safely preserve low-acid vegetables like the beets, carrots, corn, and beans filling your weekly share. Unlike water bath canning, pressure canning reaches the 240°F needed to destroy Clostridium botulinum spores—the invisible threat lurking in improperly canned low-acid foods that causes potentially fatal botulism poisoning.

Understanding which food preservation techniques match your harvest transforms anxiety into confidence. Your CSA’s tomatoes and pickled cucumbers thrive with simple water bath canning, but those gorgeous Brussels sprouts, peppers, and pumpkin require pressure canning’s intense heat. The distinction isn’t about preference—it’s about chemistry. Foods with pH levels above 4.6 create the oxygen-free, low-acid environment where botulism spores survive and produce deadly toxins.

This guide walks you through pressure canning fundamentals specifically tailored to CSA vegetables, from selecting the right equipment to troubleshooting common concerns. You’ll discover that with proper technique and tested recipes, pressure canning becomes an empowering ritual—one that extends your connection to local agriculture throughout winter months while keeping your pantry both abundant and safe.

The Science Behind Pressure Canning: Heat, Time, and Botulism

Stainless steel pressure canner on stovetop with steam releasing and fresh vegetables nearby
A pressure canner in operation reaches the critical 240°F needed to safely preserve low-acid vegetables like green beans and carrots.

Why Boiling Water Isn’t Enough for Your Vegetables

Here’s the truth about preserving those beautiful CSA vegetables: not all canning methods are created equal. While water bath canning works wonderfully for high-acid foods like tomatoes and pickles, it simply can’t reach the temperatures needed to safely preserve low-acid vegetables.

Water bath canning maxes out at 212°F, the boiling point of water. This temperature kills most bacteria, yeasts, and molds, but there’s one dangerous exception: Clostridium botulinum spores. These heat-resistant spores thrive in low-acid environments like green beans, corn, carrots, and other common CSA vegetables. When canned improperly, they produce a deadly toxin that has no taste, smell, or visible signs.

To destroy these spores, you need temperatures of 240-250°F, which is only possible with a pressure canner. The pressurized environment raises the boiling point high enough to eliminate all botulism risks. Think of it as the difference between a warm bath and a sterilization chamber. Your CSA harvest deserves preservation methods that keep your family safe while honoring the care your farmers put into growing these nutritious vegetables.

Understanding pH Levels in Your CSA Produce

Understanding the pH scale is your key to safe pressure canning decisions. The pH scale runs from 0 to 14, with 7 being neutral. Foods with pH levels above 4.6 are considered low-acid, while those below 4.6 are high-acid. This number isn’t arbitrary—it’s the threshold where botulism spores can thrive in oxygen-free environments like sealed jars.

High-acid foods include tomatoes (though they’re borderline and need added acid), most fruits, pickled vegetables, and anything preserved with vinegar. These foods can be safely processed in a simple water bath canner because their acidity naturally prevents harmful bacteria growth.

Low-acid foods make up the majority of your CSA vegetable box. Green beans, corn, carrots, beets, squash, peas, potatoes, and leafy greens all fall into this category. These vegetables require the high temperatures that only a pressure canner can achieve—240°F at specific pressure levels—to eliminate botulism spores.

Here’s a helpful tip from successful CSA member Sarah, who preserves 200 jars annually: “I keep a simple chart on my pantry door listing which CSA vegetables need pressure canning versus water bath. It saves me from second-guessing every time I process a new harvest.”

When in doubt, always treat mixed vegetable combinations as low-acid foods requiring pressure canning. The vegetable with the lowest acidity determines your processing method, ensuring your preserved bounty remains safe for your family throughout the year.

Know Your CSA Produce: What Needs Pressure Canning

Assortment of fresh CSA vegetables including green beans, corn, tomatoes, and squash on wooden table
Common CSA harvest vegetables include both low-acid foods requiring pressure canning and high-acid foods suitable for water bath canning.

Low-Acid Foods That Always Need Pressure

Understanding which vegetables require pressure canning is essential for safely preserving your CSA bounty. All low-acid foods – those with a pH above 4.6 – need the higher temperatures that only pressure canning can achieve to eliminate the risk of botulism.

Green beans are perhaps the most common CSA vegetable for pressure canning. Whether you receive Kentucky Wonders or French filets from your local farm, these favorites must always be pressure canned. The same goes for corn, whether you’re preserving whole kernels or cream-style from late summer harvests.

Root vegetables like carrots, beets, and potatoes are CSA staples that need pressure processing too. Many members find themselves with abundant root vegetables during fall distribution weeks, making these perfect candidates for home preservation. Tip: peel and dice beets uniformly for even processing, and remember that potatoes should be cubed rather than canned whole for best results.

Summer squash and zucchini also require pressure canning, though many gardeners find themselves overwhelmed by the abundance these prolific plants produce. While you might be tempted to water bath can them, resist the urge – their low acidity makes pressure canning the only safe option.

Other common CSA vegetables requiring pressure processing include peas, asparagus, mushrooms, and pumpkin. Even winter squash varieties, despite their firm texture, are low-acid foods needing the full pressure canning treatment. When properly preserved, these vegetables maintain excellent quality and provide nutritious meals throughout the year, connecting you to your local farm even during off-season months.

High-Acid Foods Safe for Water Bath Canning

Good news for fruit and tomato lovers: not everything needs the pressure canner treatment! High-acid foods with a pH of 4.6 or lower can be safely preserved using the simpler water bath canning method, making them perfect starting points for your preservation journey.

Fruits like peaches, berries, apples, and pears are naturally acidic enough for water bath canning, which is wonderful news when your CSA box overflows with summer’s bounty. These beauties retain their vibrant flavors when transformed into jams, jellies, and preserves. Just imagine spreading homemade strawberry jam on your morning toast in January!

Pickled vegetables are another fantastic option. When you add vinegar to cucumbers, green beans, or carrots, you’re lowering the pH enough to make water bath canning safe. That zesty brine does double duty, creating both safety and incredible flavor.

Here’s where things get interesting with tomatoes. While most tomatoes hover right around that 4.6 pH threshold, their acidity can vary by variety and ripeness. The safe approach? Always add bottled lemon juice or citric acid to your tomato recipes. This simple step ensures you’re safely below that critical pH line. Think of it as your safety buffer, especially important since tomatoes from different farms or even different weeks can have varying acidity levels.

These high-acid foods offer a gentler introduction to home canning while you’re building your confidence and skills. Master these first, then graduate to pressure canning when you’re ready to tackle those low-acid vegetables.

Essential Equipment and Setup for Safe Pressure Canning

Dial Gauge vs. Weighted Gauge: What You Need to Know

When you’re shopping for a pressure canner, you’ll encounter two main types: dial gauge and weighted gauge models. Understanding the difference helps you choose the right tool for preserving your CSA harvest safely.

Dial gauge canners feature a numbered pressure dial that lets you monitor exact pressure levels throughout processing. They offer precision and are often preferred by experienced canners who appreciate the visual feedback. However, dial gauges require annual testing for accuracy. Your local extension office typically provides this free service, and it’s essential since gauges can drift over time, potentially compromising your food safety.

Weighted gauge canners use a three-piece weight system that jiggles when the correct pressure is reached. These models are wonderfully straightforward and don’t require annual calibration, making them ideal for beginners. The jiggling sound becomes your reliable indicator that everything’s working correctly. While they’re limited to specific pressure settings (usually 5, 10, and 15 pounds), they’re incredibly dependable and practically maintenance-free.

Both types safely preserve low-acid foods when used correctly. Your choice depends on personal preference and maintenance commitment. Many homesteaders in our community swear by weighted gauges for their simplicity and reliability, especially when processing large quantities of CSA vegetables throughout harvest season. Whichever you choose, always follow manufacturer instructions and maintain your equipment properly.

Person's hands checking and adjusting pressure gauge on pressure canner
Regular monitoring of pressure gauge readings ensures that canning temperature remains at safe levels throughout processing.

Altitude Adjustments That Could Save Your Batch

Here’s a surprising fact: water boils at different temperatures depending on how high you are above sea level! At higher elevations, atmospheric pressure decreases, meaning water boils at lower temperatures. This matters tremendously for pressure canning safety because you need adequate heat to destroy botulism spores.

If you live at sea level, your pressure canner gauge should read 11 pounds of pressure for safe processing. But as elevation increases, you’ll need to adjust upward to compensate for the lower boiling point. For weighted-gauge canners, use 10 pounds pressure at altitudes up to 1,000 feet, then increase to 15 pounds above that threshold.

Dial-gauge canners require more nuanced adjustments. Between 1,001-2,000 feet, increase pressure to 12 pounds. At 2,001-4,000 feet, use 13 pounds. For 4,001-6,000 feet, aim for 14 pounds, and above 6,000 feet, you’ll need 15 pounds.

Not sure of your exact elevation? Check your county extension office website or use an online elevation finder with your zip code. Many farmers I know keep their elevation written right on their canner lid as a helpful reminder. This simple adjustment ensures your carefully harvested CSA vegetables are preserved safely, protecting all that garden-fresh goodness you’ve worked so hard to store.

The Non-Negotiable Safety Rules Every CSA Member Should Follow

Always Use Tested Recipes from Trusted Sources

When preserving your CSA bounty, resist the temptation to tweak recipes or combine ingredients creatively. Unlike water bath canning, pressure canning requires precise scientific formulas to ensure safety. Each tested recipe accounts for specific factors like food density, acidity levels, processing times, and temperatures needed to eliminate dangerous pathogens, particularly the bacteria that causes botulism.

Experimenting with ingredient ratios, substitutions, or processing times can create unsafe conditions that aren’t visible to the eye or detectable by taste. That beautiful jar of home-canned vegetables could harbor invisible dangers if the recipe hasn’t been scientifically validated.

Your reliable resources for tested recipes include the USDA Complete Guide to Home Canning, the National Center for Home Food Preservation, and your local Cooperative Extension Service. These organizations conduct rigorous laboratory testing to develop safe canning procedures. Many CSA farms also provide research-based preservation guides tailored to their seasonal offerings, helping you master food preservation with confidence.

Think of tested recipes as your safety blueprint—they’ve done the scientific work so you can focus on enjoying the harvest-to-jar journey while protecting your family’s health.

Processing Times and Pressures Are Not Suggestions

When you’re preserving that beautiful CSA harvest, think of processing times and pressure levels as non-negotiable recipes for safety rather than flexible guidelines. Cutting even a few minutes off the recommended processing time or allowing the pressure to dip below the specified level can create pockets where botulism spores survive. These hardy spores need sustained heat at the correct pressure to be destroyed, and there’s no margin for error.

Here’s the reality: botulism toxin is odorless, colorless, and tasteless. You can’t see, smell, or detect whether your shortcuts worked. A processing time of 75 minutes exists because food scientists determined that’s how long it takes for heat to penetrate completely and reach every spot in that jar. Starting your timer before the canner reaches full pressure or “fudging” the last ten minutes doesn’t save much time, but it dramatically increases risk.

Your family’s health depends on following these specifications exactly. Set a reliable timer, maintain steady pressure throughout processing, and resist the temptation to rush. The peace of mind knowing your preserved food is genuinely safe is worth every minute.

Inspecting Jars Before and After: Your Safety Checklist

Before you even begin pressure canning your CSA harvest, grab each jar and inspect it carefully. Run your finger around the rim – you’re feeling for any chips, cracks, or rough spots that could prevent a proper seal. Hold jars up to the light to spot hairline cracks in the glass. Even tiny imperfections can compromise safety, so set aside any questionable jars for storing dry goods instead.

Once you’ve filled and processed your jars, the real safety check begins during cooling. Listen for that satisfying “ping” as lids seal – it’s like a little celebration for each successfully preserved jar! After jars cool completely (usually 12-24 hours), press the center of each lid. A proper seal means the lid stays down and doesn’t flex. If it pops up and down, the jar didn’t seal and needs refrigeration for immediate use.

Label your jars with contents and date, then store them in a cool, dark place. Before using any home-canned goods, examine each jar carefully. Check for these warning signs: bulging lids, leaks, spurting liquid when opened, off-odors, mold, or unusual cloudiness. Here’s an important success story from experienced canners: when in doubt, throw it out. No preserved vegetable is worth risking your family’s health.

This vigilant approach might seem tedious initially, but seasoned home canners develop a quick eye for quality. You’re not just preserving food – you’re becoming a guardian of your family’s wellness while reducing food waste from your local harvest.

Close-up of sealed mason jar showing proper lid seal with preserved vegetables inside
A properly sealed jar features a concave lid button that doesn’t flex when pressed, indicating safe vacuum seal formation.

Common Mistakes That Put Your Preserved Food at Risk

Overpacking Jars and Ignoring Headspace

One of the most common mistakes in pressure canning is cramming too much food into jars or ignoring headspace requirements. Headspace, that empty gap between the food and the jar lid, isn’t wasted space—it’s essential for safe preservation. Each recipe specifies headspace for a good reason: during processing, food expands and releases air. Without adequate room, this expansion can force food particles between the jar rim and lid, preventing a proper seal.

For most low-acid vegetables from your CSA box, you’ll need 1-inch headspace. When you skimp on this space, you risk seal failure, which means spoilage and wasted garden goodness. Overpacking also prevents proper heat penetration throughout the jar, creating cold spots where harmful bacteria might survive.

Think of headspace as your safety buffer. Measure it carefully using a ruler or headspace tool, checking from the jar’s rim to the top of the food or liquid. Your future self will appreciate the perfectly sealed jars of summer’s harvest come winter, knowing you followed this simple but crucial step for safe home preservation.

Mixing Processing Methods or Times

One common mistake that can turn dangerous is mixing vegetables with different processing requirements in the same jar. Each vegetable has specific processing times based on its density, acidity level, and how heat penetrates through it. For instance, green beans require 20-25 minutes of processing time, while carrots need 25-30 minutes, depending on jar size. When you combine them, you might follow the shorter time, leaving denser vegetables underprocessed and potentially unsafe.

Your CSA box might tempt you to create mixed vegetable medleys, but resist this urge when pressure canning. Instead, can each vegetable separately and combine them later when you’re ready to cook. This approach ensures every jar receives the exact processing time needed for food safety. If you’re determined to create mixed jars, always use the longest processing time required among all vegetables included, and verify that combination with tested recipes from reliable sources like the National Center for Home Food Preservation. Your family’s health depends on these precautions.

Skipping the Acidification Step for Borderline Foods

Tomatoes sit right on that pH borderline, making acidification essential for safe water bath canning. Many CSA boxes overflow with gorgeous heirloom tomatoes in late summer, tempting you to skip this crucial step. Don’t! Modern tomato varieties, especially heirlooms, often have lower acidity than their ancestors.

Add two tablespoons of bottled lemon juice or half a teaspoon of citric acid per quart jar before processing. Fresh lemon juice varies in acidity, so stick with bottled for consistency. This small step drops the pH below 4.6, making your preserved tomatoes safe without affecting flavor noticeably.

Other borderline foods include figs and Asian pears. When your CSA farmer shares their specialty varieties, ask about acidity levels and always follow tested recipes. Think of acidification as your insurance policy against botulism while helping you enjoy every bit of your local harvest. One farmer I know prints acidification instructions right on her tomato box labels, making safe preservation effortless for her members.

When to Toss It: Recognizing Spoilage and Staying Safe

Even when you’ve followed every safety protocol while preserving your harvest, it’s essential to inspect your canned goods before eating them. Think of it as your final safety checkpoint between shelf and table.

Start by examining the jar before opening. A bulging or unsealed lid signals trouble, as does any liquid leaking from the container. When you open the jar, listen for the satisfying pop of a proper seal. No pop? That’s a red flag. Check for spurting liquid or foam, which indicates unwanted microbial activity inside.

Your nose knows best. Any off, sour, or unusual odors mean the contents should go straight into the trash. Even if everything looks fine, never taste suspicious food to test it. Botulism toxin can be present without obvious signs, and even a tiny taste can cause serious illness.

Look for these visual warning signs: mold growth (even small spots), cloudy liquid in products that should be clear, unusual color changes, or rising air bubbles when the jar sits undisturbed. Sometimes the food itself appears slimy or mushy when it shouldn’t be.

Here’s the golden rule that every experienced home canner follows: when in doubt, throw it out. No amount of preserved food is worth risking your health or your family’s wellbeing. It might feel wasteful to discard a jar you worked hard to process, but it’s always the safer choice.

Remember, proper disposal matters too. Don’t compost or feed questionable canned goods to animals. Seal them in a plastic bag and dispose of them in the trash where nothing can access them.

You now have everything you need to safely preserve your CSA bounty through pressure canning. By following tested recipes, maintaining proper pressure and processing times, and using well-maintained equipment, you’re protecting your family while reducing food waste and supporting local agriculture. The science behind pressure canning isn’t complicated—it’s simply about reaching the right temperature to eliminate harmful bacteria, and modern pressure canners make this achievable for home food preservers.

Remember that millions of people successfully pressure can low-acid foods every year. Those colorful jars of green beans, corn, and vegetable soup on your pantry shelf represent more than preserved food—they’re your commitment to eating locally, reducing your environmental footprint, and enjoying the flavors of summer even in February.

Meet Sarah from Vermont, a CSA member who was initially nervous about pressure canning. After attending a local workshop and starting with simple recipes, she now preserves over 100 quarts of CSA vegetables annually. “My family loves opening a jar of summer tomatoes and peppers in winter,” she shares. “Once I understood the safety guidelines, pressure canning became my favorite weekend activity during harvest season.”

Start small, follow the guidelines closely, and soon you’ll develop the confidence that comes with practice. Your local agricultural community thrives when members like you embrace preservation methods that honor the harvest. Happy canning, and enjoy those delicious, safely preserved vegetables all year long!

Why Your Farmers Market Booth Isn’t Selling (And How to Fix It)

Posted by darrell on
0
Market Events and Community Engagement
Why Your Farmers Market Booth Isn’t Selling (And How to Fix It)

Track your customer conversations at every market by keeping a simple tally sheet marking how many people stop at your booth, how many ask questions, and how many make purchases. This three-number system reveals your engagement funnel immediately and shows exactly where you’re losing potential customers.

Position yourself in front of your table rather than behind it. Standing behind creates a barrier that signals “vendor mode” while being beside your display invites genuine conversation. Small farms thrive on relationships, not transactions, and your physical positioning communicates whether you’re open to connection or simply waiting for sales.

Ask one authentic question to every person who slows down near your booth. “Have you tried golden beets before?” or “What’s your favorite way to cook kale?” transforms browsers into engaged customers. These conversations provide instant feedback about what resonates with your community while building the personal connections that turn first-time buyers into loyal CSA members.

Observe which products people touch, pick up, or ask about most frequently, even if they don’t buy. This touch-rate data matters as much as sales figures because it reveals genuine interest. When three people ask about your tomatoes but nobody buys, you’ve discovered a pricing issue, a timing problem, or an opportunity to offer samples next week.

Document one specific interaction or observation after each market while details remain fresh. Sarah from Main Street loved your lettuce mix. The elderly couple always arrives at 9 AM. Parents with kids gravitate toward strawberries. These patterns become your roadmap for improving engagement, adjusting inventory, and creating the welcoming atmosphere that transforms casual market-goers into your farming community.

What Market Engagement Really Means for Your Farm

Customers browsing and interacting with vendor at colorful farmers market produce booth
Successful farmers market booths create inviting spaces that encourage customers to stop, engage, and connect with vendors.

The Three Levels of Customer Connection

Understanding how customers engage with your farm stand helps you meet them where they are and gently guide them toward deeper connections. Think of customer engagement as a journey with three distinct levels, each requiring different approaches from you as a farmer.

Passive interest represents your browsing visitors—those wandering past your booth, pausing to admire your tomato display, or picking up a product to examine. These folks are curious but not yet committed. They might snap photos of your beautiful produce or read your signage about growing practices. Don’t mistake their silence for disinterest. These browsers are gathering information and building familiarity with your farm. Make their experience welcoming by ensuring clear pricing, attractive displays, and visible information about your farming methods.

Active interaction marks a significant step forward. These customers ask questions about your pest management strategies, request recipe suggestions for kohlrabi, or sample your cherry tomatoes. They’re testing the waters, building trust, and considering a purchase. A farmer friend of mine, Maria, says this level is where relationships truly begin. She keeps recipe cards handy and trains herself to read body language—knowing when someone wants detailed conversation versus a quick answer. Active engagers need your attention and expertise to move forward.

Committed engagement represents your farm’s foundation—customers making purchases, signing up for CSA shares, following your social media, and most importantly, returning week after week. These loyal supporters often bring friends, leave positive reviews, and become ambassadors for your farm. They’ve moved beyond transaction into relationship. Nurturing this level means remembering their names, asking about last week’s vegetables, and occasionally surprising them with a bonus bunch of herbs. This is where sustainable farm businesses thrive.

Signs Your Market Engagement Needs Work

Empty farmers market booth with minimal display as customers walk past without stopping
Poor booth setup and lack of visual appeal cause potential customers to walk past without stopping to engage.

When Customers Walk Past Without Stopping

You’ve set up your beautiful display of organic tomatoes and fresh herbs, but potential customers keep walking right past your booth without a second glance. This common scenario at farmers markets usually points to three underlying issues that are easier to fix than you might think.

The first culprit is visual clutter or, conversely, an underwhelming presentation. When your booth looks chaotic with mismatched containers, unclear pricing, or produce hidden in boxes on the ground, shoppers can’t quickly grasp what you’re offering. Their eyes need somewhere to land, and without a focal point or cohesive visual appeal, they’ll simply move on to the next vendor.

Poor positioning and accessibility also deter engagement. If customers can’t easily approach your table or if you’re standing behind barriers that create a psychological wall, they’ll feel unwelcome. Similarly, a vendor buried in their phone or looking unapproachable sends the message that interaction isn’t desired.

The most critical mistake, however, is failing to communicate your farm’s unique story. Without clear signage explaining what makes your produce special, whether it’s your certified organic practices, heirloom varieties, or regenerative growing methods, you’re just another vegetable stand. Customers at farmers markets aren’t just buying food; they’re investing in values and relationships.

Take Sarah from Greenview Farm, who doubled her foot traffic simply by adding a vibrant sign reading “Pesticide-Free Since 2015” and positioning sample cherry tomatoes at the front edge of her table. Small changes in visual storytelling create big differences in engagement.

When They Stop But Don’t Buy

You’ve caught their eye, they’ve paused at your booth, touched your heirloom tomatoes, and lingered over your honey display. But then they walk away empty-handed. Sound familiar?

This frustrating gap between interest and purchase often reveals fixable issues in your market setup. The most common culprit? Missing price transparency. When customers can’t quickly see what items cost, they’re less likely to ask. Many people feel uncomfortable inquiring about prices, especially if they’re worried your organic produce might exceed their budget. Clear, visible price signs eliminate this barrier immediately.

Another obstacle is unclear product benefits. That beautiful purple cauliflower might intrigue shoppers, but if they don’t know how to prepare it or understand its nutritional advantages, they’ll stick with familiar choices. Brief signs explaining taste profiles, cooking methods, or health benefits can transform curiosity into sales.

Lack of sampling opportunities creates another disconnect. When customers can taste your strawberry jam or sample your specialty lettuce blend, the sensory experience often seals the deal. Consider how Sarah Mitchell, a small-scale berry farmer, doubled her preserves sales simply by offering samples with crackers at her market table.

Finally, booth atmosphere matters more than you might think. An intimidating setup with the farmer buried behind stacks of produce, appearing too busy to chat, or seeming unapproachable discourages questions and connection. Remember, farmers market shopping isn’t just transactional; it’s about building relationships with the people growing your food. Creating an inviting, welcoming space where customers feel comfortable asking questions transforms browsers into buyers.

How to Measure What’s Actually Working

Simple Tracking Methods Any Farmer Can Use

You don’t need fancy software or expensive analytics tools to understand how well you’re connecting with customers at your market booth. Some of the most valuable insights come from simple, hands-on tracking methods that fit naturally into your market routine.

Start by keeping a small notebook or using your phone to count meaningful conversations. Not every interaction deserves a tally mark, but when someone asks detailed questions about your growing practices, shares a recipe idea, or tells you why they’re seeking out organic produce, that’s a conversation worth noting. These deeper exchanges often signal genuine interest that can lead to loyal customers.

Tracking repeat customers is equally straightforward. You’ll naturally start recognizing faces, but consider keeping a simple list or making mental notes. When someone returns week after week, they’re voting with their feet. Sarah, a vegetable farmer from Vermont, noticed that customers who asked about her composting methods became her most reliable regulars, which led her to create informational handouts about her soil practices.

Pay attention to which products spark curiosity. If your heirloom tomatoes generate twice as many questions as your peppers, there’s valuable information in that pattern. These products often become your best conversation starters and community builders.

Observe how long people linger at your booth. Someone who rushes past differs dramatically from a visitor who examines your produce, reads your signs, and seems genuinely interested in learning more.

Finally, create a simple email sign-up sheet. Offer a seasonal recipe collection or growing tips in exchange for contact information. The number of sign-ups each week provides concrete data about engagement levels while building your direct marketing list for future CSA seasons.

The Questions That Tell You Everything

Simple questions during market interactions reveal surprisingly deep insights about your farm’s reach and reputation. Start with the basics: “How did you hear about us?” Listen carefully—responses like “I saw your Instagram post” indicate effective social media engagement, while “My neighbor recommended you” suggests strong word-of-mouth, the gold standard for CSA farms.

Next, ask “What brought you to our booth today?” Someone seeking specific produce shows high intent, while browsers offer valuable opportunities to convert curiosity into loyalty through meaningful customer conversations. Take note of their answers to identify patterns.

The follow-up “Have you tried our produce before?” separates new prospects from returning customers. First-timers need education about your growing practices and value proposition, while repeat visitors provide feedback gold. When someone says “I always buy your tomatoes,” dig deeper: “What brings you back?” Their answers—flavor, freshness, farming methods—tell you exactly what’s working.

Track these responses informally throughout the day. Martha, a Vermont CSA farmer, noticed most new customers heard about her through the farmers market directory, prompting her to update her listing with better photos and descriptions. Within weeks, she saw increased foot traffic.

These brief exchanges don’t require clipboards or surveys. Just genuine curiosity and mental notes. You’ll quickly spot whether people find you through digital channels, personal recommendations, or chance encounters—each revealing different engagement strengths to leverage.

Five Changes That Boost Engagement Immediately

Make Your Booth Inviting, Not Intimidating

Your booth should feel like a welcoming garden gate, not a fortress wall. Start by creating clear pathways that invite customers in rather than forcing them to squeeze past tables or products. Position your displays at angles that open toward foot traffic, leaving at least three feet of entry space.

Eye-level displays work wonders for engagement. Place your most vibrant produce and signage between hip and eye height, where shoppers naturally look first. Clear, friendly signage helps tremendously—use simple descriptions like “Just Picked This Morning” or “Ask Me About Our Growing Methods” to spark conversations.

Your body language speaks volumes before you say a word. Stand beside your table rather than behind it, creating an approachable presence. Make eye contact, smile genuinely, and keep your arms uncrossed. Sarah from Green Valley Farm increased her Saturday sales by 40% simply by repositioning herself at the corner of her booth, making it easier to greet passersby naturally.

Consider implementing proven booth display strategies that draw people in without overwhelming them. Keep your setup uncluttered—less is often more. Remember, customers who feel comfortable entering your space are far more likely to ask questions, sample products, and ultimately become loyal supporters of your farm.

Tell Your Farm’s Story Visually

Pictures speak louder than words at busy farmers markets. Create visual displays that tell your farm’s story while customers browse. Set up a photo board showing your fields, composting system, or beneficial insects at work. These images give shoppers an immediate connection to where their food comes from.

Use simple, attractive signs explaining your organic practices. A small placard next to your tomatoes might read “No synthetic pesticides—hand-picked daily” with a photo of you harvesting. This builds trust without lengthy conversations while you’re helping other customers.

Display your certification documents prominently, even if it’s just a printed statement about your growing methods. Transparency creates confidence, especially for environmentally conscious consumers who value sustainable agriculture.

Consider creating a visual timeline showing seed to harvest for seasonal crops. Mount before-and-after photos of your soil improvement efforts or succession plantings. One farmer increased sales by 30% after adding a simple photo display showing her chickens fertilizing between crop rotations.

Keep displays clean, weatherproof, and positioned where customers naturally pause. Your visual story becomes a silent salesperson, educating shoppers about your values and methods while you focus on personal interactions with those ready to buy.

Create Natural Conversation Starters

Your booth setup can do half the work of starting conversations if you give people something interesting to ask about. Think of your display as an invitation to engage rather than just a sales counter.

Start with the unexpected. Feature that purple cauliflower, watermelon radishes, or heirloom tomatoes in unusual colors right at the front of your table. These eye-catching varieties naturally prompt questions like “How do you cook that?” or “What does it taste like?” One farmer found that displaying kohlrabi prominently increased customer interactions by simply making people curious enough to approach.

Recipe cards positioned near specific produce create perfect conversation bridges. When customers pick up a card for roasted beet salad, you’ve got an opening to share cooking tips or suggest complementary items. Keep the recipes simple and seasonal to match what’s currently abundant.

Prepare samples during market hours whenever possible. The sound of chopping, the aroma of fresh herbs, or watching you slice a melon draws people in. It transforms your booth from a static display into a dynamic experience that invites participation.

Seasonal highlights deserve special attention too. Create small signs that say “Just harvested this morning” or “Last of the season” to spark urgency and interest. These authentic details give customers reasons to stop, ask questions, and connect with the story behind their food.

Farmer offering fresh vegetable samples to customer at farmers market booth
Offering samples creates natural opportunities for conversation and helps hesitant customers engage with your products.

Offer Small Commitments First

Not everyone is ready to commit to a full CSA share immediately, and that’s perfectly okay. Lower the barrier to entry by offering smaller commitments that let curious customers test the waters. Start with free samples at your market booth—a handful of cherry tomatoes or a small bag of salad greens speaks volumes about your product quality. Consider selling individual items or small mixed bags before promoting larger shares. Email newsletter sign-ups are excellent first steps, keeping you connected without financial commitment. Farm tour invitations work wonderfully too, allowing potential customers to see your growing practices firsthand and build trust. One farmer shared how offering $10 starter boxes converted 40% of those buyers into full share members within three months. These gentle entry points respect customer hesitation while demonstrating your value, ultimately creating more confident, committed members for your CSA program.

Build Recognition Through Consistency

Showing up consistently builds the foundation for deeper customer relationships. When you occupy the same booth location week after week, shoppers know exactly where to find you, creating a sense of reliability. Your regular presence signals commitment to the community and your craft. Maintain a recognizable booth setup with consistent signage and displays so customers can spot you immediately. Stock your signature products reliably—nothing disappoints more than arriving for your famous heirloom tomatoes only to find them unavailable. This predictability builds trust, encouraging shoppers to plan their market trips around your offerings and transforming casual buyers into loyal supporters who genuinely care about your farm’s success.

Real Farmers, Real Results

The stories of successful CSA farmers show that small, strategic changes in market engagement can create remarkable results. Here are three real-world examples that demonstrate the power of intentional connection with customers.

Sarah Chen from Green Valley Farm in Ontario struggled with stagnant CSA membership numbers for two years, hovering around 45 members. She decided to transform her market booth from a simple produce display into an interactive experience. Sarah added a weekly tasting station featuring recipes using that week’s harvest and started keeping a visitor sign-up sheet to follow up with interested shoppers. Within six months, her CSA membership jumped to 78 members, a 73 percent increase. The key? She discovered that people needed to taste the difference in fresh, organic produce and receive gentle follow-up reminders about joining the farm family.

Tom and Maria Rodriguez of Sunset Ridge Farm in British Columbia faced a different challenge: low customer retention at their Saturday farmers market booth. They implemented a simple customer recognition system, keeping notes about regular visitors’ preferences and family details. Maria started greeting returning customers by name and remembering conversations from previous weeks. They also created a loyalty punch card offering a free dozen eggs after ten visits. Their repeat customer rate climbed from 30 percent to 67 percent within one growing season, and their weekly market sales increased by $400 on average.

Meanwhile, Derek Patterson of Riverbend Organic Farm in Alberta transformed his entire approach to pre-season recruitment. Instead of relying solely on social media posts, he hosted three intimate farm dinners in early spring, inviting prospective members to meet the land and hear his farming story firsthand. Each dinner accommodated just fifteen guests, creating meaningful conversations around the table. This personal touch converted 62 percent of attendees into CSA members, compared to his previous 8 percent conversion rate from online marketing alone. Derek filled his 95-member CSA spots three weeks earlier than any previous year, allowing him to plan his growing season with confidence and financial security.

Beyond the Market: Turning Engagement into Lasting Relationships

The real magic of market engagement happens when those Saturday morning conversations transform into lasting connections that extend far beyond your booth. When you genuinely engage with customers at markets, you’re not just making sales—you’re building a community that supports your farm year-round.

Take Sarah’s experience at Green Valley Farm. After consistently sharing her farming stories and offering taste samples at markets, she noticed something remarkable. Customers started asking about visiting the farm, inquiring about volunteering opportunities, and requesting to join her email list. Within six months, her farmers market connections resulted in twelve families converting customers into CSA members, a 40% increase in her farm event attendance, and a social media following that grew by 300%.

Strong market engagement creates multiple relationship pathways. Customers who feel connected to you and your farming practices become natural ambassadors. They tag your farm in Instagram posts, recommend your produce to neighbors, and bring friends to the market. These word-of-mouth referrals carry incredible weight because they come from trusted sources rather than advertisements.

Your engaged customers also become your farm event attendees—showing up for harvest festivals, farm-to-table dinners, and educational workshops. They follow your seasonal updates on social media, creating a digital community that stays connected even during off-market months.

The key is recognizing that every meaningful interaction at the market plants seeds for deeper relationships. When you share the story behind your heirloom tomatoes or explain your soil-building practices, you’re inviting people into your farming journey. That invitation often grows into partnerships that sustain your farm through all seasons.

Farmer and customer shaking hands at farmers market booth showing relationship building
Strong market engagement builds lasting relationships that transform one-time customers into loyal CSA members and community advocates.

Here’s the truth about market engagement: it’s not about being pushy or transforming into a salesperson overnight. The most successful farmers at markets are simply those who’ve mastered the art of genuine connection. When you share your farm’s story, invite customers to sample fresh produce, or remember someone’s tomato preferences from last week, you’re building relationships that strengthen both your business and your local food community.

Start small and stay authentic. Choose just one or two strategies from this article to implement at your next market. Maybe it’s asking one conversation-starting question to each customer, or perhaps it’s creating simple signage that tells your growing story. Pay attention to how people respond. Do they linger longer at your booth? Are they asking more questions? These small shifts often lead to meaningful change.

Remember, every farmer who excels at market engagement started exactly where you are now. The difference is they took that first step toward connection. Your community needs the food you grow, but they also need the knowledge, passion, and authenticity you bring. By engaging more thoughtfully with your customers, you’re not just selling vegetables—you’re cultivating a movement toward sustainable, local agriculture that benefits everyone involved.

How Dairy Grazing Alliance Principles Transform Riparian Zones on Your CSA Farm

Posted by darrell on
0
Livestock & Grazing
How Dairy Grazing Alliance Principles Transform Riparian Zones on Your CSA Farm

Rotate your cattle through paddocks every 12-24 hours to prevent overgrazing while maximizing pasture health—this intensive management approach, championed by the Dairy Grazing Alliance, protects soil structure and keeps nutrients cycling naturally through your land. Establish 35-foot vegetative buffer zones along all streams and waterways using native grasses and deep-rooted plants that filter runoff before it reaches the water, creating natural barriers that align with both organic certification requirements and watershed protection goals.

Install temporary electric fencing to exclude livestock from riparian areas during wet seasons when hooves cause the most compaction and bank erosion, then allow controlled access during dry periods when impact is minimal. This flexible system costs under $500 for most small-scale operations and prevents thousands in soil loss annually. Create designated stream crossings with gravel or geotextile fabric at just two or three strategic points rather than allowing random access—your cattle will naturally follow these hardened paths, concentrating wear in reinforced areas instead of degrading entire streambanks.

The Dairy Grazing Alliance’s research demonstrates that farms combining managed rotational grazing with riparian buffers see 70-90% reductions in sediment and nutrient runoff while maintaining productive pastures. For CSA farmers adding dairy or meat animals to diversify income streams, these proven practices protect the water quality your vegetable production depends on while building the soil health that defines sustainable agriculture.

What the Dairy Grazing Alliance Brings to CSA Farming

Core Grazing Principles That Matter for CSA Operations

The Dairy Grazing Alliance has refined grazing principles over decades that work beautifully for integrating livestock into CSA operations, even on smaller acreages. At the heart of their approach is rotational grazing, which involves moving animals through paddocks regularly to prevent overgrazing and allow pasture recovery. This creates healthier, more productive forage while reducing feed costs.

The Alliance emphasizes matching livestock numbers to your land’s carrying capacity. Rather than maxing out your pasture, aim for moderate stocking rates that leave room for plant regrowth and soil health. This principle protects your investment in the land while maintaining productive grazing year after year.

Another core concept is the 70-30 rule: animals should graze when plants reach about 70 percent of their growth potential, taking only 30 percent of the plant material. This ensures roots stay strong and regrowth happens quickly. For CSA farmers juggling vegetables and animals, this means your pastures can bounce back faster between rotations.

Water access planning matters tremendously. The Alliance advocates for strategic water placement that draws animals away from streams and wetlands, using portable tanks or developed watering points instead. This simple shift protects riparian areas while improving livestock distribution across your paddocks. These time-tested principles create resilient grazing systems that complement your vegetable production and align with the sustainable values your CSA members appreciate.

Why Riparian Zones Need Special Attention on Your Farm

Healthy riparian zone with dense native vegetation along stream edge creating natural buffer
Well-managed riparian zones feature dense vegetation buffers that protect water quality while supporting farm biodiversity.

The Real Cost of Poor Riparian Management

When riparian areas along streams and ponds deteriorate, the consequences ripple far beyond the waterway itself. Without healthy vegetation buffers, heavy rains wash soil and nutrients directly into water sources, creating turbidity that harms aquatic life and can compromise drinking water quality for downstream communities. This erosion doesn’t just affect the environment—it literally washes away your farm’s most valuable asset: topsoil.

For CSA farmers, poor riparian management carries additional costs that hit close to home. Members who visit your farm want to see thriving ecosystems and responsible stewardship. Muddy streams and bare, eroded banks can shake their confidence in your environmental commitments, potentially affecting retention rates. Meanwhile, the loss of streamside habitat eliminates natural pest predators like birds and beneficial insects that would otherwise support your crop production.

The productivity impacts are measurable too. Compacted soil from livestock trampling near water reduces pasture regrowth and creates dead zones where nothing thrives. Cattle spending time in streams rather than grazing efficiently means lower milk production and wasted pasture resources. Integration with silvopasture practices can help, but without protecting waterways first, you’re building on an unstable foundation.

The good news? Addressing these issues proactively transforms problems into opportunities, creating demonstrable wins for water quality, wildlife, farm productivity, and member satisfaction—all elements that strengthen your CSA’s long-term viability.

Proven Strategies for Riparian Grazing from the Alliance Playbook

Rotational Grazing Near Water Sources

Protecting waterways while maintaining productive pastures requires thoughtful planning when you’re designing rotational grazing systems near water sources. The key is limiting both the duration and intensity of grazing in riparian zones where sensitive vegetation stabilizes streambanks and filters runoff.

Start by establishing buffer zones of at least 35 feet between active grazing paddocks and streams or ponds. Within these buffers, maintain permanent vegetation like native grasses, sedges, and woody plants that prevent erosion. If cattle must cross water to access paddocks, create designated crossing points with gravel or stone reinforcement rather than allowing random access that creates muddy, trampled banks.

When paddocks include riparian areas, reduce stocking rates by 25-40 percent compared to upland pastures and limit grazing time to 1-3 days maximum. This prevents overgrazing of moisture-loving plants that regrow more slowly than upland species. Schedule grazing during drier seasons when soil compaction risk is lower and avoid these areas entirely during spring snowmelt or after heavy rains.

Many CSA farmers find success by treating riparian zones as sacrifice areas during emergencies only, focusing regular rotation on higher, drier ground. Wisconsin farmer Tom Henderson reports his stream buffers have become wildlife havens while his upland paddocks produce excellent forage. By respecting these sensitive areas, you’re protecting water quality for your entire community while maintaining healthy, productive pastures that support both your dairy operation and CSA values.

Buffer Zones and Fencing Solutions

Creating effective buffer zones doesn’t have to drain your CSA farm budget. The key is matching your fencing solution to your specific needs while maintaining water quality protection.

Start with a simple assessment of your riparian areas. Walk the stream banks and identify high-traffic zones where livestock naturally congregate. These spots need your attention first. A 10-15 foot vegetated buffer strip along waterways can dramatically reduce sediment and nutrient runoff while still allowing productive grazing on the rest of your pasture.

For budget-friendly fencing, consider polywire or polytape electric options. These lightweight materials cost significantly less than traditional wooden fencing and can be easily moved between grazing seasons. A single strand placed 30 inches high works well for trained dairy cattle. Sarah Jenkins, who runs a 50-member CSA in Vermont, installed polywire buffers for under $2 per linear foot, a fraction of what permanent fencing would cost.

Combination approaches work beautifully too. Use permanent fencing along steep banks prone to erosion, then switch to portable electric options in flatter areas. This strategic mixing keeps costs manageable while protecting vulnerable spots.

Native plantings within your buffer zones serve double duty, stabilizing soil and providing wildlife habitat that delights CSA members during farm visits. Many conservation districts offer cost-share programs for riparian fencing projects, sometimes covering 50-75% of materials. This makes professional-grade protection accessible even for farms just starting their grazing programs.

Alternative Watering Systems

Keeping livestock away from streams and ponds doesn’t mean compromising their hydration needs. Several practical alternatives can deliver fresh water while protecting your riparian zones.

Off-stream watering tanks are the most popular solution. These gravity-fed or solar-powered systems draw water from streams or wells, transporting it to designated paddock locations through underground pipes. Animals access clean water without trampling streambanks, and you’ll notice improved herd health since they’re drinking from sanitary sources rather than potentially contaminated surface water.

Nose pumps offer a creative, energy-free option. These simple devices activate when livestock press their noses against a paddle, drawing groundwater through shallow wells. They’re remarkably durable and require minimal maintenance, making them ideal for diversified farms with limited infrastructure budgets.

For farms with existing ponds, consider fencing off direct access while installing a single protected watering point. This hybrid approach preserves some natural water sources while controlling where animals interact with them.

Many CSA graziers have found success with portable water systems using mobile tanks on skids. These move with your rotational grazing plan, ensuring livestock always have nearby access without establishing permanent infrastructure in every paddock. The flexibility perfectly matches the adaptive management style most diversified farmers prefer.

Cattle using elevated water trough in paddock with riparian zone protected in background
Alternative watering systems allow livestock to access fresh water while keeping them away from sensitive stream banks.

Real CSA Farms Making It Work

Seeing sustainable grazing principles come to life on working CSA farms is truly inspiring. Take Green Valley Farm in Wisconsin, where Sarah Martinez transformed her struggling vegetable operation into a thriving diversified farm by adding dairy goats and implementing rotational riparian grazing. When she first contacted the Dairy Grazing Alliance for guidance, her creek banks were eroding, and she worried about water quality affecting both her animals and crops downstream.

Sarah started small, fencing off a 35-foot buffer zone along her creek and dividing her pastures into smaller paddocks. Following Alliance recommendations, she allows her goats to graze these riparian areas for just 24-48 hours before rotating them out, giving vegetation time to recover. The results speak volumes: after two growing seasons, native grasses have stabilized the banks, and water testing shows significantly reduced sediment levels. Her CSA members love the addition of fresh goat cheese and yogurt to their weekly shares.

Over in Vermont, the Johnson family faced different challenges at Hillside Acres. Their small dairy cow herd needed creek access for water, but trampling was creating muddy mess and runoff concerns. They installed off-stream water tanks and strategic lane crossings with reinforced gravel pads. The initial investment seemed daunting, but they spread costs over three years and secured a conservation grant that covered 60 percent of materials.

Now in their fourth year, the Johnsons report healthier pastures, cleaner water, and enthusiastic feedback from CSA shareholders who appreciate their environmental stewardship. They’ve even added farm tours highlighting their riparian management as an educational component.

Both farms emphasize that success didn’t happen overnight. They started with one or two paddocks, learned from mistakes, and gradually expanded their systems. The key was connecting with mentors through the Dairy Grazing Alliance network and adapting proven dairy industry practices to their smaller-scale, diversified operations.

CSA farmer monitoring rotational grazing paddock with protected riparian area visible in background
CSA farmers successfully integrate livestock grazing with environmental stewardship through careful planning and management.

Getting Started: Your Riparian Grazing Action Plan

Start by walking your riparian zones—the areas alongside streams, ponds, or wetlands on your property. Take photos and notes about current vegetation, erosion spots, and how animals currently access water. This simple assessment reveals where you need to focus first.

Next, prioritize your improvements based on urgency and budget. If you’re seeing bare soil or muddy tracks leading directly into water, those areas need immediate attention. Create alternative water sources like nose pumps or troughs positioned at least 30 feet from stream banks. This often becomes your first project, typically costing $500-$1,500 depending on your setup.

For fencing, consider a phased approach. Many CSA farmers start by protecting their most vulnerable 100-200 feet of streambank in year one, budgeting around $2-$3 per linear foot for basic electric fencing. Permanent installations cost more but last longer. Grant programs through conservation districts often offset 50-75% of these expenses, so research funding before purchasing materials.

Implement rotational grazing schedules that give riparian vegetation recovery time. Begin with manageable paddocks and adjust based on seasonal conditions. Spring growth allows shorter grazing periods, while summer may require extended rest intervals. Following grazing management best practices helps you stay compliant while improving land health.

Set realistic timelines. Most farmers see noticeable improvements within one growing season once livestock pressure decreases. Full vegetation recovery typically takes 2-3 years. Track your progress with annual photos from the same spots—these visual records become powerful tools for sharing your stewardship story with CSA members and inspiring fellow farmers in your community.

Protecting your waterways while managing livestock doesn’t have to feel overwhelming. By drawing on the Dairy Grazing Alliance’s proven strategies and adapting them to your CSA operation, you’re making a powerful statement about your commitment to environmental stewardship. Your CSA members will notice and appreciate the tangible results—cleaner streams, healthier pastures, and thriving wildlife.

The beauty of riparian management is that you don’t need to transform your entire farm overnight. Start with one high-priority stream section or install a single watering system this season. Document your progress with photos and share updates in your CSA newsletter. Members love seeing how their support enables meaningful conservation work.

Remember, you’re not alone in this journey. The Dairy Grazing Alliance offers resources specifically designed for grazing operations, and many state conservation districts provide technical assistance and cost-share programs. Connect with other CSA farmers who’ve successfully integrated livestock to learn from their experiences.

Every step you take toward better riparian management strengthens both your land and your relationship with the community you serve. That’s the kind of farming that builds lasting success.