Yearly Archives

71 Articles

How Homemade Kimchi Transforms Your Gut Health From the Inside Out

Posted by darrell on
0
Consumer Health and Nutrition
How Homemade Kimchi Transforms Your Gut Health From the Inside Out

Your gut contains trillions of microorganisms that influence everything from digestion to immunity, and the living bacteria in kimchi can profoundly enhance this internal ecosystem. This traditional Korean fermented food delivers powerful probiotic strains like Lactobacillus plantarum and Leuconostoc mesenteroides directly to your digestive tract, where they help crowd out harmful bacteria, strengthen your intestinal barrier, and even produce vitamins your body needs.

Unlike shelf-stable pickles or pasteurized products, genuine fermented kimchi contains billions of active cultures per serving. These beneficial microbes survive the journey through your stomach acid to colonize your intestines, supporting diverse gut flora that scientists now link to reduced inflammation, improved mental health, and stronger immune function.

The connection between fermented foods and wellness runs deeper than probiotics alone. Kimchi provides prebiotic fiber from cabbage and vegetables that feeds your existing gut bacteria, creating a synergistic effect. The fermentation process also breaks down compounds that can cause digestive discomfort while increasing nutrient bioavailability, making vitamins and minerals easier for your body to absorb.

Sourcing matters tremendously. Mass-produced kimchi often undergoes heat treatment that kills beneficial bacteria, while organic, traditionally fermented versions from local producers maintain their microbial potency. Understanding how to identify quality kimchi and incorporate it meaningfully into your daily routine can transform your digestive wellness while supporting sustainable food systems that prioritize living, nutrient-dense ingredients over industrial convenience.

What Makes Kimchi a Microbiome Powerhouse

Glass jar of fermenting kimchi with visible layers of cabbage and fermentation bubbles
Homemade kimchi fermenting in a glass jar showcases the active probiotic cultures that support gut health.

The Living Cultures Inside Every Batch

Every spoonful of traditionally fermented kimchi contains billions of beneficial bacteria working to support your digestive health. The most abundant strains include Lactobacillus plantarum, which helps break down food and produce vitamins, and Leuconostoc mesenteroides, known for creating that signature tangy flavor while strengthening your gut lining.

What makes kimchi special is the diversity of these living cultures. Unlike single-strain supplements, fermented vegetables naturally develop multiple probiotic species that work together. Lactobacillus brevis supports your immune system, while Weissella species help maintain the proper pH balance in your digestive tract. These friendly bacteria also produce short-chain fatty acids that reduce inflammation and improve nutrient absorption.

The key to getting these benefits is choosing organic, unpasteurized kimchi. Heat treatment kills the beneficial bacteria, so look for refrigerated versions from local farms or farmers’ markets. Many small-scale organic farmers are now crafting kimchi using their own cabbage and radishes, ensuring the vegetables haven’t been exposed to pesticides that could interfere with the fermentation process. When you support these local producers, you’re getting fresher, more potent probiotics while strengthening sustainable food systems in your community.

Why Organic Ingredients Make a Difference

When you choose organic ingredients for your kimchi, you’re setting the stage for a healthier fermentation process right from the start. Pesticide-free cabbages, radishes, and other organic vegetables provide a cleaner environment where beneficial bacteria can thrive without chemical interference. Research shows that pesticide residues can actually disrupt the growth of probiotic strains during fermentation, reducing the diversity of microorganisms in your final product.

Organic produce also tends to carry more naturally occurring beneficial bacteria on its surface, which contributes to a richer starter culture for fermentation. These native microbes work alongside the salt and natural sugars in your vegetables to create that complex ecosystem of probiotics that makes kimchi so powerful for gut health.

Local organic farmers often harvest vegetables at peak ripeness too, meaning higher nutrient density. When you ferment nutrient-rich ingredients, you’re creating a probiotic food that delivers both live cultures and the vitamins, minerals, and fiber your gut microbiome needs to flourish. It’s a simple choice that makes a real difference in the quality of your fermented foods.

The Science Behind Kimchi and Your Gut Microbiome

Building a Diverse Bacterial Community

When you eat kimchi, you’re introducing billions of beneficial bacteria into your digestive system, particularly strains of Lactobacillus and other lactic acid bacteria that naturally develop during fermentation. Think of it like planting a garden—these friendly microbes settle into your gut and begin to flourish, creating a thriving ecosystem that leaves less room for harmful bacteria to take hold.

This process, called competitive exclusion, is one of kimchi’s greatest gifts to your digestive health. The beneficial bacteria from kimchi actively compete for nutrients and attachment sites along your intestinal walls, effectively crowding out potentially harmful microbes. They also produce natural antimicrobial compounds that further discourage unwanted bacterial growth.

Beyond just adding good bacteria, kimchi promotes gut microbiome diversity—a key marker of digestive wellness. A diverse bacterial community is more resilient, better equipped to handle dietary changes, and more effective at supporting your immune system. The various vegetable ingredients in kimchi, especially when made with organically grown produce, also provide prebiotics—the fiber compounds that feed your beneficial bacteria and help them thrive long after you’ve enjoyed that last spicy, tangy bite.

Beyond Digestion: Whole-Body Benefits

While kimchi’s impact on digestive health is well-documented, its benefits extend far beyond your stomach. The beneficial bacteria in this fermented superfood work throughout your entire system, creating ripple effects that support overall wellness.

Your immune system gets a significant boost from regular kimchi consumption. About 70% of your immune cells actually live in your gut, so when you feed them probiotic-rich foods, you’re essentially fortifying your body’s natural defense system. The living cultures in kimchi help train these immune cells to distinguish between helpful and harmful bacteria, improving your body’s response to potential threats.

Kimchi also excels at inflammation reduction thanks to compounds found in fermented cabbage and the various organic vegetables used in traditional recipes. This anti-inflammatory action may help with everything from joint discomfort to skin health.

Another often-overlooked benefit is enhanced nutrient absorption. When your gut microbiome is balanced and healthy, your body becomes more efficient at extracting vitamins and minerals from the foods you eat. Those organic vegetables from your CSA box deliver even more nutritional value when your digestive system is functioning optimally, making kimchi a perfect companion to your farm-fresh produce.

Making Your Own Kimchi: A Farm-to-Jar Journey

Farmer holding freshly harvested organic napa cabbage in vegetable field
Organic napa cabbage grown without pesticides provides the foundation for nutrient-rich kimchi with diverse beneficial bacteria.

Sourcing Organic Vegetables for Maximum Benefits

The quality of your kimchi starts with the vegetables you choose, and there’s no better source than local CSA farms or farmers markets. When shopping for kimchi ingredients, timing matters. Fall and winter napa cabbage tends to be sweeter and crisper, making it ideal for fermentation. Look for heads that feel heavy for their size with tightly packed, vibrant green outer leaves—these indicate freshness and nutrient density.

At your local farmers market, chat with growers about their practices. Organic vegetables grown in healthy, living soil contain more beneficial microbes that contribute to your kimchi’s probiotic diversity. Don’t worry about minor blemishes or irregular shapes; these are signs of chemical-free growing methods and won’t affect fermentation quality.

For daikon radishes and carrots, choose firm specimens without soft spots. Green onions should have crisp, bright green tops. Since you’ll be eating these vegetables raw and fermented, organic really matters—you’re preserving everything, including any pesticide residues from conventional farming.

Consider buying direct from farms through CSA subscriptions. Many farmers harvest vegetables the same day you pick them up, ensuring maximum freshness and microbial vitality. This farm-to-fermentation approach gives you the best possible foundation for creating gut-healthy kimchi while supporting your local agricultural community.

Simple Steps to Start Fermenting

Making your own kimchi at home is surprisingly simple and incredibly rewarding. Start by gathering your ingredients: napa cabbage, Korean chili flakes (gochugaru), garlic, ginger, sea salt, and optional additions like radish or green onions. Choose organic produce whenever possible to avoid pesticides that might interfere with beneficial fermentation bacteria.

Begin by salting your quartered cabbage for about two hours to draw out moisture and create the perfect environment for fermentation. Rinse thoroughly, then prepare your spice paste by mixing gochugaru, minced garlic, grated ginger, and a bit of salt. Massage this paste between each cabbage leaf, pack everything tightly into a clean jar, and press down to release air bubbles.

Leave your jar at room temperature for three to five days, pressing down daily to keep vegetables submerged in their brine. You’ll notice bubbling as fermentation begins, which means those beneficial microbes are hard at work. Once it reaches your preferred tanginess, move it to the refrigerator to slow fermentation.

Common troubleshooting tip: If your kimchi seems dry, simply add a saltwater brine to keep everything covered. This prevents mold and ensures even fermentation throughout.

Creating the Right Environment for Good Bacteria

Creating the perfect home for beneficial bacteria during kimchi fermentation is simpler than you might think. Start with clean, organic vegetables and let them ferment at room temperature, ideally between 65-75°F. During the first 3-5 days, lactobacillus bacteria naturally present on the vegetables begin converting sugars into lactic acid, which creates an acidic environment that keeps harmful bacteria away. This is your fermentation sweet spot. Once you see bubbles forming and smell that signature tangy aroma, move your kimchi to the refrigerator to slow the process. The cold preserves those probiotic powerhouses while preventing over-fermentation. Remember, you’re working with nature here, not against it. Using organically grown cabbage and ingredients means you’re starting with produce that hasn’t been treated with chemicals that might interfere with good bacteria growth. Think of it as creating a thriving neighborhood where beneficial microbes can flourish naturally.

Incorporating Kimchi Into Your Daily Routine

How Much Kimchi Does Your Gut Need

Good news for kimchi lovers—you don’t need massive amounts to reap gut health benefits! Most nutritionists recommend starting with 1-2 tablespoons per day, gradually increasing to about half a cup daily as your digestive system adjusts to the probiotics. This modest serving delivers billions of beneficial bacteria without overwhelming your gut or loading up on sodium.

For beginners, try incorporating kimchi into meals 3-4 times weekly. Listen to your body—some people thrive on daily servings, while others prefer every other day. The key is consistency rather than quantity. Organic, locally fermented kimchi from your CSA or farmers market offers the most active cultures, as these artisanal batches haven’t been pasteurized like many store-bought versions. Sarah Chen, an organic farmer in Oregon, notes that her customers report the best results when they make kimchi part of their regular routine, pairing it with seasonal vegetables for maximum digestive support. Remember, fermented foods work best alongside a diverse, plant-rich diet rather than as a standalone solution.

Bowl of kimchi fried rice with fried egg photographed from above
Incorporating kimchi into everyday meals like fried rice makes it easy to enjoy the probiotic benefits daily.

Easy Ways to Enjoy Kimchi Beyond the Jar

Getting kimchi into your daily routine doesn’t require fancy recipes or culinary expertise. Start simple by adding a forkful to your morning scrambled eggs or omelet for a probiotic breakfast boost with a flavorful kick. Layer it into grilled cheese sandwiches or quesadillas, where the melting cheese balances kimchi’s tangy bite perfectly.

For lunch, toss chopped kimchi into grain bowls with quinoa or brown rice, roasted vegetables, and a protein of your choice. The fermented cabbage adds complexity without extra effort. Mix it into tuna or chicken salad for sandwiches that pack extra nutrition and zing.

Dinner becomes more interesting when you top baked potatoes, burgers, or tacos with kimchi instead of traditional condiments. Even pizza lovers can experiment by sprinkling it over slices fresh from the oven.

If you’re feeling adventurous, blend kimchi into dips like hummus or cream cheese spreads for crackers and crudités. The beauty of kimchi lies in its versatility—start with small amounts and adjust to your taste preferences. Remember, you’re not just adding flavor; you’re feeding your gut microbiome with every delicious bite, supporting your digestive health through simple, sustainable food choices.

Farmer Spotlight: Growing Kimchi Ingredients the Organic Way

Meet Sarah Chen, a third-generation farmer who’s transformed her family’s 15-acre farm into a thriving CSA operation specializing in Korean vegetables for kimchi. Her journey into organic farming began when she noticed that her grandmother’s homemade kimchi tasted different depending on where the vegetables came from.

“I realized that soil health directly impacts the quality of fermentation,” Sarah explains while walking through rows of vibrant napa cabbage. “When vegetables are grown in nutrient-rich, living soil, they develop stronger cell structures and higher levels of natural beneficial bacteria, which creates better conditions for lacto-fermentation.”

Sarah practices a careful four-year crop rotation system, alternating her kimchi vegetables with nitrogen-fixing cover crops like clover and vetch. This approach naturally enriches the soil without synthetic fertilizers. Between growing seasons, she adds compost made from vegetable scraps and aged manure, creating a thriving ecosystem of microorganisms that mirror the beneficial bacteria found in fermented foods.

Her farm grows traditional kimchi staples including napa cabbage, Korean radish, green onions, and garlic. She’s discovered that organic methods produce vegetables with more complex flavor profiles. “The slower growth rate in organic farming allows vegetables to develop deeper flavors and more concentrated nutrients,” she notes. “My CSA members tell me the difference is noticeable in their finished kimchi.”

One key insight Sarah shares is timing the harvest. “We pick vegetables at peak maturity in cooler weather, which gives them a natural crispness that holds up beautifully during fermentation.” She also avoids washing vegetables too aggressively before delivery, preserving some of the beneficial soil microbes that can contribute to the fermentation process.

For aspiring kimchi gardeners, Sarah recommends starting small with napa cabbage and daikon radish. “These crops are forgiving and respond well to organic methods. Focus on building healthy soil first, and the vegetables will take care of themselves.”

Other Fermented Foods That Support Gut Health

While kimchi deserves its spotlight in the fermented foods family, creating a thriving gut microbiome is all about diversity. Think of your digestive system as a garden—the more varied the plantings, the healthier the ecosystem. Each fermented food brings its own unique community of beneficial bacteria to the table.

Sauerkraut, kimchi’s European cousin, offers Lactobacillus plantarum and other strains that complement those found in kimchi. Made simply from cabbage and salt, it’s wonderfully accessible for home fermenters and pairs beautifully with local organic cabbage from your CSA box.

Kombucha introduces beneficial yeasts alongside bacteria, creating a fizzy probiotic drink that supports gut health from a different angle. When sourced from local organic producers, you’re getting living cultures without the industrial processing that can diminish beneficial microbes.

Kefir, whether made from dairy or water, provides an entirely different spectrum of probiotic strains—sometimes up to 60 varieties in a single serving. This fermented beverage has been shown to support digestive health and immune function.

The beauty of exploring various fermented foods for gut health is that each one contributes unique bacterial strains, creating a more resilient and diverse microbiome. Rotate these foods throughout your week, sourcing organic options when possible to avoid pesticides that can harm beneficial gut bacteria. Your digestive system will thank you for the variety.

The journey to better gut health through kimchi beautifully illustrates how personal wellness connects to sustainable food systems. By choosing organic, locally fermented foods, you’re not just nourishing your microbiome with billions of beneficial bacteria—you’re supporting farmers who steward the land responsibly and keep harmful chemicals out of your food chain.

Starting your kimchi journey doesn’t require a complete lifestyle overhaul. Begin by visiting your local farmers market to find fresh, organic cabbage and vegetables from nearby growers. Many CSA programs now include fermented foods in their seasonal shares, making it easier than ever to access quality kimchi while directly supporting sustainable agriculture. If you’re feeling adventurous, try making a small batch at home using locally sourced produce.

Remember, every jar of organic kimchi you choose creates a ripple effect. You’re investing in your digestive health, reducing your environmental footprint, and helping local farmers thrive. This simple act of mindful eating transforms you from a passive consumer into an active participant in building a more sustainable food system. Your gut—and your community—will thank you for it.

Your Seeds Are Dying (Here’s How to Keep Them Alive for Years)

Posted by darrell on
0
Seed Preservation and Biodiversity
Your Seeds Are Dying (Here’s How to Keep Them Alive for Years)

Test your seeds before planting season by placing ten seeds between damp paper towels in a sealed plastic bag, then counting how many sprout within 7-14 days. If fewer than five germinate, your seed stock has dropped below 50% viability and needs replacement. This simple germination test costs nothing and saves you from disappointing harvests.

Store seeds in airtight glass jars with silica gel packets in a cool, dark location where temperatures stay between 32-41°F. Every 10-degree increase in storage temperature cuts seed life in half, while excess moisture triggers premature germination or fungal growth that destroys entire seed collections.

Prioritize fresh seeds for short-lived varieties like onions, parsnips, and lettuce, which lose viability within 1-2 years even under perfect conditions. Meanwhile, tomatoes, beans, and squash maintain strong germination rates for 4-6 years when properly stored, making them ideal candidates for long-term seed saving.

Label every container with variety name and harvest date, then rotate your seed inventory using the oldest stock first. This prevents the heartbreak of discovering your carefully saved heirloom seeds have silently failed after years in storage.

Understanding seed viability transforms your gardening from guesswork into precision. The difference between 90% germination and 40% germination means the difference between abundant harvests and patchy, disappointing rows. When small-scale farmer Maria Rodriguez tested her three-year-old pepper seeds before spring planting, she discovered only 30% viability and avoided wasting precious garden space, instead sourcing fresh seeds that delivered her best harvest yet.

What Seed Viability Actually Means (And Why It’s Not Just About Age)

Close-up of various vegetable seeds on wooden surface showing different conditions
Different seed varieties exhibit varying lifespans and viability characteristics depending on their type and storage conditions.

The Hidden Factor: Genetic Integrity

When you plant tomato seeds expecting juicy heirlooms but get something entirely different, you’ve encountered a genetic integrity issue. Think of genetic integrity as a seed’s biological blueprint—it determines whether your Cherokee Purple tomatoes will actually produce those distinctive dark fruits or if years of cross-pollination have altered their DNA.

For seed savers and organic farmers, maintaining genetic integrity isn’t just about predictability. It’s about preserving heirloom varieties that have been carefully cultivated over generations. These heritage seeds carry unique traits like drought resistance, specific flavor profiles, and regional adaptations that commercial hybrids simply can’t replicate.

The challenge comes from contamination—when different varieties cross-pollinate or seeds get mixed during storage. At our CSA farm, we learned this lesson when our Brandywine tomatoes started showing hybrid characteristics after planting them too close to other varieties. Now we maintain isolation distances and practice careful seed selection.

To protect genetic integrity, focus on proper plant spacing during the growing season, hand-pollinate when necessary, and source seeds from reputable suppliers who follow strict protocols. Keep detailed records of seed sources and growing conditions. This attention to detail ensures that when you save seeds from this year’s harvest, next season’s plants will be true to their heritage—producing the same reliable characteristics that made you fall in love with that variety in the first place.

The Three Silent Killers of Seed Viability

Mason jars containing seeds showing effects of different storage conditions
Environmental factors like moisture and temperature dramatically affect how long seeds remain viable in storage.

Moisture: The Fastest Way to Lose Your Seeds

Moisture is perhaps the most critical factor affecting seed viability, and it works against you faster than you might think. When seeds absorb moisture from humid air, they interpret this as a signal to start germinating. This premature awakening depletes their stored energy reserves, leaving them unable to sprout when you actually want them to. Even worse, excess moisture creates the perfect environment for mold and fungal growth, which can destroy an entire seed collection in just weeks.

The sweet spot for most vegetable and flower seeds is maintaining moisture content between 4-8%. At this level, seeds remain dormant and their metabolic processes stay in hibernation mode. Think of it like this: for every 1% increase in seed moisture content above 8%, you can cut storage life in half. That’s a dramatic difference that can mean the gap between five-year viability and less than one year.

Different seed types have varying moisture tolerances. Beans and peas can handle slightly higher moisture levels (around 8-9%), while tiny seeds like lettuce and carrots need to stay closer to 5-6%. One experienced organic farmer shared that after switching to silica gel packets in his storage containers, his germination rates jumped from 60% to over 90% the following season. Consider investing in a simple moisture meter to monitor your storage conditions, and always ensure seeds are completely dry before sealing them away.

Temperature Swings That Ruin Everything

Think of seeds as living time capsules—they’re just waiting for the right moment to burst into life. But here’s the catch: temperature swings are their worst enemy. Every 10°F increase in storage temperature roughly halves seed viability, speeding up the aging process dramatically. When seeds get warm, their metabolism kicks into overdrive, burning through precious energy reserves they need for germination.

The sweet spot for most seeds? A consistent 32-41°F, which you can achieve in a standard refrigerator. This cool environment puts seeds into a gentle dormancy, slowing down deterioration without freezing and damaging delicate cell structures. Freezers (0°F or below) work wonderfully for long-term storage of properly dried seeds, keeping them viable for years or even decades.

The real killer isn’t just heat—it’s inconsistency. Moving seeds from hot to cold and back again creates condensation, introducing moisture that triggers premature germination or mold. Local farmer Maria Torres learned this the hard way when her garage-stored heirloom tomato seeds failed after one summer. Now she keeps everything in a dedicated mini-fridge, and her germination rates have soared to 95 percent, even with three-year-old varieties. Consistency truly makes all the difference.

Why Oxygen Matters More Than You Think

You might not think much about the air around your seeds, but oxygen plays a surprisingly big role in their lifespan. When seeds breathe—yes, even dormant seeds respire slightly—they interact with oxygen in a process called oxidation. Think of it like a very slow burn that gradually breaks down the seed’s internal structures, particularly the fats and proteins essential for germination.

Over time, this oxidation damages cell membranes and genetic material, making it harder for seeds to sprout successfully. The good news? Reducing oxygen exposure dramatically slows this aging process. Many experienced seed savers use vacuum-sealed containers or oxygen absorber packets to create low-oxygen environments, effectively putting their seeds into deeper dormancy. Combined with cool, dry storage conditions, limiting oxygen exposure can extend seed viability by years—sometimes even decades. Understanding this simple chemistry empowers you to preserve your heirloom varieties and maintain strong germination rates season after season.

Simple Tests to Check If Your Seeds Are Still Good

Overhead view of hands conducting paper towel seed germination test
The simple paper towel germination test allows gardeners to accurately assess seed viability before planting season.

The Paper Towel Test That Never Fails

Testing your seeds at home is easier than you might think, and all you need are supplies from your kitchen drawer. Here’s how to conduct a reliable germination test that’ll tell you exactly which seed packets are worth planting this season.

Start by gathering paper towels, a dinner plate, and a resealable plastic bag. Count out ten seeds from the packet you’re testing—this number makes calculating percentages simple. Dampen a paper towel until it’s moist but not dripping, then lay it flat on your plate. Arrange your seeds in a single layer on one half of the towel, keeping them spaced apart. Fold the other half over to cover them, then slide everything into the plastic bag. This creates a mini greenhouse that maintains consistent moisture.

Place your setup somewhere warm, around 70-75°F, away from direct sunlight. Check daily to ensure the paper towel stays damp, adding water if needed. Most vegetable seeds will sprout within 5-10 days, though some varieties take longer.

Now comes the exciting part—counting your results. After the expected germination period passes, count how many seeds sprouted healthy roots or shoots. If seven out of ten germinated, that’s 70% viability. Anything above 80% is excellent for planting, 50-80% means you’ll need to sow more densely, and below 50% suggests it’s time to order fresh seeds.

One organic farmer I know tests all her saved tomato seeds this way each February, ensuring she never wastes precious garden space on duds.

Quick Visual Checks Before You Plant

Before investing time in formal germination tests, a quick visual inspection can save you from planting duds. Healthy seeds typically have vibrant, uniform coloring and feel firm to the touch. Dead or compromised seeds often reveal themselves through telltale signs that even beginners can spot.

Start by examining seed color. Discolored, faded, or unusually dark seeds may indicate aging or moisture damage. Tomato and pepper seeds, for example, should maintain a creamy-white to pale yellow appearance. If they’ve turned brown or gray, their viability is questionable.

Next, check for physical damage. Cracked seed coats, hollow or shriveled shells, and insect damage are red flags. Gently press larger seeds between your fingers—viable seeds feel solid and plump, while dead ones often feel papery or collapse easily.

Watch for mold or fuzzy growth, which signals excessive moisture exposure and likely renders seeds unusable. Any musty odor is another warning sign of deterioration.

Finally, perform the float test as a quick preliminary check. Place seeds in water—those that sink are generally viable, while floaters are often hollow or damaged. This simple visual screening helps you prioritize which seeds deserve proper germination testing and which belong in your compost pile instead.

Storage Protocols That Actually Work

The Mason Jar Method for Home Gardeners

You don’t need fancy equipment to preserve seed viability at home. The mason jar method remains one of the most effective seed storage systems for backyard gardeners and small-scale seed savers.

Start with clean, dry glass jars with tight-fitting lids. Wide-mouth mason jars work perfectly because they’re easy to access and create an airtight seal. Before storing seeds, ensure they’re completely dry by leaving them at room temperature for several days after harvest.

Drop one or two food-grade silica gel packets into each jar to control moisture levels. These inexpensive packets absorb excess humidity that can trigger premature germination or mold growth. You can purchase them at craft stores or reuse packets from vitamin bottles and packaged goods.

Label each jar clearly with the seed variety, harvest date, and germination rate if you’ve tested it. This simple step prevents confusion during planting season and helps you track which seeds need replacing.

Store your jars in a cool, dark location like a basement or closet. Consistent temperatures between 32-41°F work best, though a cool pantry will suffice for many varieties. This straightforward approach has helped countless home gardeners maintain viable seeds for years while spending minimal money.

Organized mason jar seed storage system with labels on wooden shelving
A well-organized seed storage system using mason jars and desiccant packets can maintain seed viability for years.

Small Farm Seed Banking Basics

Managing a diverse seed collection for your CSA farm requires thoughtful organization from the start. Think of your seed bank as a living library where each variety tells a story and deserves proper cataloging.

Start by designating a dedicated storage space with consistent cool temperatures between 32-41°F and humidity below 40%. Label everything clearly with variety name, harvest date, and expected viability period. Simple spreadsheet tracking works wonders for inventory management, noting quantities, germination test results, and planned grow-out schedules.

Group seeds by family and viability requirements. Short-lived seeds like parsnips and onions need annual attention, while tomatoes and brassicas can last five years or more under proper conditions. Use airtight containers with desiccant packets, checking moisture levels quarterly with a simple humidity meter.

Sarah Chen, who runs Green Valley Farm in Vermont, transformed her seed saving operation by implementing monthly inventory checks and a color-coded labeling system. “I stopped losing varieties to poor record-keeping once I committed to updating my spreadsheet after every seed cleaning session,” she shares. Her farm now maintains 150 heirloom varieties with 90% germination rates.

Schedule annual germination tests for your core production varieties, typically conducting them 6-8 weeks before planting season. This proactive approach ensures you’re never caught off-guard by declining viability when it’s time to start seedlings.

When to Use the Freezer (And When Not To)

For truly long-term storage beyond five years, freezing can be a game-changer for certain seeds. Before freezing, ensure seeds are properly dried to 6-8% moisture content, as any residual moisture can form ice crystals that damage cells. Place dried seeds in airtight, moisture-proof containers like glass jars with rubber seals or vacuum-sealed bags.

Seeds that thrive in freezer storage include tomatoes, peppers, lettuce, and most vegetables from the brassica family. These can maintain viability for 10-15 years when frozen. However, some seeds don’t appreciate the deep freeze. Onions, parsnips, and certain short-lived seeds may not show significant benefit and are better stored in cool, dry conditions for shorter periods.

One successful seed saver from a Vermont CSA shared how freezing heirloom tomato seeds helped preserve rare varieties for over a decade, maintaining 80% germination rates. When you’re ready to plant, allow frozen seeds to gradually return to room temperature before opening containers. This prevents condensation that could compromise your carefully preserved genetics.

How Long Different Seeds Actually Last

Understanding how long your seeds remain viable helps you plan purchases, avoid disappointing germination rates, and save money by not replacing seeds unnecessarily. Seed longevity varies dramatically depending on the plant species, so let’s break it down into practical categories.

Short-lived seeds (1-2 years) require the most attention in your storage system. Onions, parsnips, and parsley top this list, along with salsify and scorzonera. These seeds lose viability quickly even under ideal conditions. Sarah Martinez, who runs a successful CSA operation in Vermont, learned this lesson the hard way when her carefully stored parsnip seeds failed to germinate after just 18 months. Now she purchases these varieties fresh each season and marks them clearly in her seed inventory.

Medium-lived seeds (3-5 years) include many garden favorites that form the backbone of most organic operations. Carrots, beans, peas, lettuce, spinach, and most brassicas like broccoli, cabbage, and kale fall into this category. Tomatoes, peppers, eggplants, and squash also maintain good germination rates for three to five years when stored properly. These varieties offer flexibility for seed saving and purchasing in bulk during sales without immediate pressure to use everything.

Long-lived seeds (5+ years) are the champions of seed storage, sometimes remaining viable for a decade or more. Cucumbers, melons, and beets lead this category, with cucumber seeds documented to germinate successfully after ten years under optimal conditions. Radishes and turnips also demonstrate impressive longevity. These seeds provide excellent opportunities for building a diverse seed bank without constant replenishment.

Remember that these timelines assume proper storage conditions with cool temperatures, low humidity, and darkness. Seeds stored in hot garages or damp basements may fail much sooner. When working with older seeds, conduct germination tests before committing them to prime growing space, ensuring your time and soil investments yield the harvests you’re counting on.

Protecting Genetic Integrity: Beyond Just Staying Alive

Keeping your seeds viable is only half the battle—protecting their genetic integrity ensures future generations inherit the true characteristics of your beloved heirloom varieties. Cross-contamination can happen more easily than you might think, turning your prized Cherokee Purple tomatoes into something unrecognizable over a few seasons.

Understanding isolation distances is crucial for maintaining genetic purity. Different plant families require varying amounts of space to prevent unwanted cross-pollination. Squash and cucumbers, notorious wanderers in the plant world, need at least half a mile between varieties if you want pure seed. Tomatoes, being mostly self-pollinating, are more forgiving at just 10-20 feet. Corn, however, demands serious respect—plan for at least 400 feet between different varieties, or stagger planting times by three weeks.

Sarah Martinez, a small-scale organic farmer in Ontario, learned this lesson when her carefully preserved Glass Gem corn crossed with a neighbor’s sweet corn. “Now I use temporal isolation,” she explains. “I plant my seed-saving varieties early and my eating varieties late. It’s simple but effective.”

Harvesting timing matters too. Wait until seeds are fully mature on the plant—tomatoes should be overripe, beans dried and rattling in their pods, and lettuce showing fluffy seed heads. Premature harvesting often results in immature seeds that won’t germinate reliably.

Storage organization prevents accidental mixing. Label everything clearly with variety name and harvest date. Store different varieties in separate, clearly marked containers. Consider using a simple cataloging system—even a notebook works wonders for tracking your collection.

These careful seed saving practices preserve the agricultural heritage entrusted to us, ensuring future gardeners can enjoy these time-tested varieties exactly as nature intended.

Farmer Success Story: How One CSA Maintains a 95% Germination Rate

When Maria Santos started Green Valley CSA five years ago, she faced a frustrating problem that nearly derailed her first season. Despite purchasing quality organic seeds, her germination rates hovered around 65%, leaving gaps in her planting beds and disappointed CSA members waiting for their weekly boxes.

“I was storing seeds in my barn, thinking the cool temperature was enough,” Maria recalls. “I didn’t realize that humidity was wreaking havoc on viability, especially during our wet springs.”

The turning point came when Maria invested in a simple seed storage system and committed to regular testing protocols. She purchased affordable humidity-controlled containers and a small refrigerator dedicated solely to seed storage. Every January, three months before planting season, she conducts germination tests on a sample from each seed variety.

“I lay out ten seeds from each packet on damp paper towels, seal them in plastic bags, and wait seven to ten days,” she explains. “It takes maybe two hours total, but that small time investment has transformed my operation.”

Maria also maintains detailed records in a simple notebook, tracking which seed suppliers consistently deliver high viability and which varieties perform best in her climate. When a batch tests below 85% germination, she either purchases fresh seeds or adjusts her seeding density to compensate.

The results speak for themselves. Green Valley CSA now maintains a 95% germination rate across all crops, which means predictable harvests and happier members. Maria’s seed budget has actually decreased because she wastes less on failed plantings and can confidently save seeds from her best performers.

“The protocols seemed intimidating at first,” Maria admits, “but they’ve become second nature. Now I can’t imagine farming any other way. When you know your seeds are viable, you can plan with confidence and focus your energy on growing great food instead of troubleshooting poor germination.”

Your Seed Viability Action Plan

Ready to preserve your seeds with confidence? Here’s your practical roadmap to get started, whether you’re launching a new collection or upgrading your current setup.

Start with a viability baseline. Test a sample from each seed variety you currently have using the simple paper towel method. This takes just 7-14 days and reveals exactly where you stand. Mark your calendar to complete this assessment before spring planting season, so you’ll know which varieties need replacing.

Next, organize your storage environment. Within the first month, invest in airtight containers and food-grade desiccant packets. Transform a cool, dark closet or basement corner into your seed sanctuary. A small investment now prevents years of disappointment later.

Create your record-keeping system by month two. Whether you prefer a simple notebook or spreadsheet, document collection dates, germination test results, and storage conditions for each variety. One CSA farmer in Vermont credits her detailed records with identifying storage problems early, saving an entire season’s seed collection worth over $800.

For seasonal timing, test winter-stored seeds each February and March. Collect and dry seeds during your harvest months, typically July through October. Run follow-up germination tests in early autumn to verify your drying and storage methods worked before winter storage begins.

Priority actions include replacing seeds showing below 50 percent germination rates immediately, upgrading any seeds stored in paper envelopes to moisture-proof containers, and establishing a rotation schedule to use older seeds first. Remember, even small steps toward better seed viability multiply into healthier gardens and more resilient food systems for your community.

Taking control of your seed viability isn’t just a gardening skill—it’s an act of empowerment that connects you directly to food security and agricultural heritage. By implementing the simple testing and storage protocols we’ve covered, you’re joining a global community of seed savers who understand that viable seeds mean resilient gardens, thriving farms, and preserved biodiversity.

The beauty of these practices lies in their accessibility. You don’t need expensive equipment or specialized training to test germination rates or create proper storage conditions. A few basic supplies, attention to detail, and commitment to climate-resilient seed storage can transform your seed-saving efforts from hopeful guesswork into reliable science.

Consider Sarah, a small-scale farmer in Ontario, who increased her heirloom tomato germination from 40% to 95% simply by controlling moisture and temperature in her storage area. Her success demonstrates what’s possible when we apply these straightforward principles.

Now it’s your turn. Start small—test a handful of your oldest seeds this week. Assess your current storage setup and make one improvement. Label and date your seed packets. Each small action builds toward larger goals: reducing dependence on commercial seed sources, preserving rare varieties, and ensuring your garden’s future productivity.

Your seeds carry stories, genetics, and potential harvests waiting to unfold. Give them the care they deserve, and they’ll reward you season after season.

Why Fair Wages and Worker Dignity Matter More Than Your Organic Label

Posted by darrell on
0
Regenerative Agriculture Insights
Why Fair Wages and Worker Dignity Matter More Than Your Organic Label

Look beyond the soil when choosing where to buy your vegetables. The same farms that nurture the earth through organic regenerative practices don’t always extend that care to the people harvesting your food. While these farms rebuild soil health, sequester carbon, and eliminate synthetic pesticides, the uncomfortable truth is that environmental sustainability and fair labor practices don’t automatically go hand in hand.

The good news? A growing movement of regenerative farmers is proving that healing the land and honoring farmworkers are inseparable goals. These pioneers understand that true regeneration means living wages, safe working conditions, and decision-making power for everyone who tends the fields. They’re creating farm models where workers aren’t just laborers but valued partners in the agricultural ecosystem.

You have real power to support this shift. Every time you choose where to spend your food dollars, you’re casting a vote for the kind of agriculture you want to see flourish. The challenge lies in identifying which farms walk the talk on both environmental and social justice, and understanding how these two commitments strengthen each other.

This guide will help you recognize farms that practice genuine equity alongside regenerative methods, share inspiring stories from farmers who’ve built thriving, fair operations, and give you practical steps to support agricultural systems that regenerate both land and community. Because the future of farming depends on caring for soil and people with equal dedication.

The Missing Piece in Regenerative Agriculture

What Makes Regenerative Farming Different

While organic certification focuses primarily on what farmers don’t use—synthetic pesticides, GMOs, and chemical fertilizers—regenerative farming principles go several steps further. This approach asks not just “what are we avoiding?” but “what are we actively healing and improving?”

Regenerative farming treats the entire farm as a living ecosystem where soil health, water cycles, biodiversity, and carbon sequestration work together. Farmers using these methods might employ practices like cover cropping, rotational grazing, composting, and minimal tillage to actually rebuild topsoil rather than simply maintaining it.

But here’s what truly sets regenerative agriculture apart: it recognizes that people are part of the ecosystem too. A farm can restore watersheds and sequester carbon while exploiting workers or excluding community voices—that’s not genuinely regenerative. The most forward-thinking farmers understand that human wellbeing, fair labor practices, and community connection are just as essential as environmental restoration. When we support farms that honor both land and people, we’re investing in a food system that regenerates everything it touches.

Why Labor Issues Get Overlooked

The regenerative agriculture movement has captured hearts and minds with its promise of healing the soil and reversing climate change. Beautiful photos of lush pastures and thriving ecosystems dominate social media feeds and marketing materials. But here’s the reality: it’s easier to talk about carbon sequestration than uncomfortable conversations about wages and working conditions.

Farm economics play a significant role in this oversight. Many small-scale regenerative operations operate on razor-thin margins, making it genuinely challenging to provide competitive wages and benefits. This financial pressure creates a difficult situation where passionate farmers committed to environmental stewardship struggle to extend that same care to their workforce.

The marketing narrative around regenerative farming naturally gravitates toward tangible environmental wins because they’re measurable and visually compelling. Soil carbon levels, biodiversity counts, and water retention make for compelling stories. Social equity, however, requires deeper examination of power dynamics, compensation structures, and worker voices – topics that don’t translate as easily into Instagram-worthy content.

Additionally, many regenerative farms rely on volunteer labor, apprenticeships, or “work-trade” arrangements that can blur the lines between educational opportunities and fair employment practices. Without intentional focus on equity, these well-meaning models can inadvertently perpetuate exploitation.

The Real Cost of Your Organic Produce

Farmworkers harvesting fresh produce in an organic field during golden hour
Farmworkers are the backbone of organic agriculture, yet their contributions and wellbeing often go unrecognized in conversations about sustainable food.

Common Labor Challenges in Organic Farming

While organic and regenerative farms shine in environmental stewardship, they sometimes face the same labor challenges as conventional agriculture. Understanding these issues helps us support farms working toward truly holistic sustainability.

Seasonal work instability remains a significant concern. Many organic farms depend on seasonal employees during planting and harvest, leaving workers without steady income during slower months. This unpredictability makes it difficult for farmworkers to plan their lives and support their families year-round.

Housing conditions vary widely across farms. Some smaller operations struggle to provide adequate living quarters for workers, particularly during peak seasons when temporary help arrives. Rural locations can compound this challenge, as affordable housing options may be limited in the surrounding community.

Wage disparities persist even within the organic sector. While some farms pay living wages and offer benefits, others operate on tight margins and compensate workers at minimum wage or piece-rate systems that don’t always reflect the physically demanding nature of farm labor.

Benefits like health insurance, paid time off, and retirement contributions remain rare, especially on smaller farms where financial constraints are real. This gap leaves many farmworkers vulnerable during illness or injury.

Limited worker voice in farm decisions is another challenge worth addressing. When farmworkers lack opportunities to share input on working conditions, safety protocols, or operational practices, farms miss valuable perspectives from the people most intimately connected to daily operations. Creating space for worker feedback strengthens farm communities and improves outcomes for everyone involved.

Why ‘Organic’ Doesn’t Automatically Mean Fair

When you pick up a bundle of organic carrots at your local market, you’re making a choice for environmental health—but what about the people who grew them? Here’s something many consumers don’t realize: organic certification focuses exclusively on what goes into the soil and onto plants, not who’s doing the planting, weeding, or harvesting.

The USDA organic label verifies that farmers avoid synthetic pesticides and GMOs, use approved fertilizers, and follow specific land management practices. It’s a rigorous standard for environmental stewardship. However, it doesn’t require fair wages, safe working conditions, or benefits for farmworkers. A farm can maintain pristine organic soil while paying minimum wage with no healthcare coverage, and still earn that coveted green seal.

This doesn’t mean organic farmers are intentionally ignoring labor issues. Many small-scale organic growers genuinely care about their teams and create wonderful working environments. The point is simply that your organic purchase alone doesn’t guarantee it. Understanding this gap helps you ask better questions and seek out farms that prioritize both environmental and social sustainability—because truly regenerative farming should nurture people as carefully as it nurtures the land.

Farms That Are Getting It Right

Worker-Owned Cooperatives and Profit-Sharing Models

Some pioneering regenerative farms are reimagining labor relationships through worker-owned cooperatives and profit-sharing arrangements. These models transform employees into stakeholders, creating powerful incentives to care for soil health and long-term farm sustainability.

At cooperative farms, workers collectively own and govern the operation, making decisions about regenerative practices together. This shared ownership means everyone benefits when healthy soils produce better yields and when customers value the farm’s ecological methods. One Pennsylvania cooperative found that worker-owners took extra care with compost management and cover cropping because they directly profited from improved soil fertility.

Profit-sharing models offer similar benefits without full ownership transfer. Farms like Dancing Roots Farm in Oregon allocate a percentage of annual profits to their crew, rewarding the careful attention that regenerative agriculture requires. Workers report feeling genuinely invested in outcomes, from monitoring beneficial insects to maintaining biodiversity corridors.

These arrangements also improve economic resilience for farmworkers, addressing agriculture’s persistent income inequality. When a regenerative farm succeeds through premium pricing or expanded market access, workers share in that prosperity. This creates stable, dignified livelihoods while ensuring the people doing the hands-on work have real motivation to nurture the land for generations to come.

Farm workers and owners meeting together at outdoor table in collaborative setting
Worker-owned cooperatives and collaborative farm models demonstrate how social equity can be integrated into regenerative agriculture practices.

Year-Round Employment and Living Wages

Several pioneering farms have cracked the code on providing stable, well-paying jobs throughout all four seasons. At Singing Frogs Farm in California, farmer Paul Kaiser restructured his 3-acre operation around intensive market gardening techniques that require consistent labor year-round. By succession planting and diversifying crops, he maintains employment for his team with wages starting at $18 per hour plus health benefits.

Similarly, Muddy Boots Farm in Vermont transformed their business model by adding value-added products like fermented vegetables and winter storage crops. Owner Amy Ivy explains that processing these products during slower months keeps her crew of four employed full-time, earning living wages that reflect the local cost of living.

The economics work through strategic planning. These farmers maximize land productivity per square foot rather than per acre, allowing smaller operations to generate sufficient revenue. They’ve also built strong customer relationships through CSA programs and farmers markets, ensuring reliable income streams that support fair compensation.

Many successful farms combine crop production with educational workshops and agritourism, creating diverse revenue sources that sustain year-round employment. This approach proves that treating workers fairly isn’t just ethical but economically viable when farms think creatively about their business models.

Creating Pathways to Farm Ownership

Breaking down barriers to farm ownership is transforming the agricultural landscape and creating opportunities for the next generation of regenerative farmers. Several innovative programs are helping farmworkers build the skills, capital, and connections needed to own their own land.

The Agriculture and Land-Based Training Association (ALBA) in California stands out as a pioneering example. This nonprofit provides farmworker families with comprehensive business training, access to farmland, and technical support. Over the past two decades, ALBA has helped launch more than 200 Latino farm businesses, with graduates farming over 1,000 acres organically. Maria Gonzalez, an ALBA graduate, now runs a thriving five-acre organic farm that supplies local restaurants and farmers markets. “I went from picking strawberries to growing my own vegetables and building equity for my children,” she shares.

Similar initiatives like the New Entry Sustainable Farming Project in Massachusetts and the Hmong American Farmers Association in Minnesota offer incubator farm programs, land lease opportunities, and culturally specific support. These programs recognize that democratizing land access isn’t just about fairness—it strengthens local food systems by welcoming diverse knowledge and farming traditions. When farmworkers become owners, they build generational wealth while stewarding land with regenerative practices they’ve helped develop.

Consumer and farmer exchanging fresh vegetables at farmers market
Direct relationships between consumers and farmers create opportunities for meaningful conversations about labor practices and social equity.

What You Can Do as a Consumer

Questions to Ask Your CSA or Farmers Market Vendor

Striking up a conversation with your farmers market vendor or CSA farmer is a wonderful way to learn about the values behind your food. Approach these questions with genuine curiosity and an open heart—most farmers love sharing their story!

Start with appreciation: “I’m really interested in how your farm operates. Can you tell me a bit about your team?” This opens the door naturally. Follow up with, “How do you approach fair compensation for your workers?” Listen for details about living wages, benefits, or profit-sharing arrangements.

You might ask, “What does a typical day look like for farmworkers during harvest season?” This reveals working conditions without putting anyone on the spot. If you’re curious about growth opportunities, try: “Do you offer training or skill development for your team members?”

Questions about community impact work well too: “How does your farm support the local community beyond providing food?” Some farms partner with workforce development programs or offer apprenticeships for aspiring farmers.

Remember, farmers juggling market sales may have limited time for lengthy conversations. Consider visiting during slower moments or attending farm tours where deeper discussions naturally unfold. Your thoughtful questions show you value both the produce and the people who grow it, encouraging farms to prioritize social equity alongside environmental stewardship.

Certifications and Labels That Include Labor Standards

Several meaningful certifications help consumers identify farms that prioritize both environmental sustainability and fair labor practices. Food Justice Certified stands out as a comprehensive label that verifies living wages, safe working conditions, and community empowerment alongside regenerative farming methods. This certification particularly supports farmworkers’ voices in the verification process, ensuring authentic accountability.

Fair Trade USA has expanded beyond coffee and chocolate to include domestic produce, guaranteeing fair wages and worker welfare protections. The Agricultural Justice Project (AJP) offers another robust option, with standards covering everything from employment conditions to community relations. These certifications require third-party audits and regular renewals, providing reliable assurance for conscious consumers.

When shopping, look for these labels at farmers markets, food co-ops, and CSA programs. While certification can be expensive for smaller farms, many practice these principles without official labels. Don’t hesitate to ask farmers directly about their labor practices during market visits or farm tours. Supporting certified operations creates market demand that encourages more farms to adopt equitable practices, strengthening the connection between environmental health and social justice in our food system.

Supporting Policy Changes and Community Initiatives

Your purchasing power matters, but real change happens when we advocate beyond the farmers market. Consider joining or starting a local food policy council in your community—these grassroots groups shape regulations that affect farmworker conditions, from wage standards to housing requirements. You can also support farmworker-led organizations like the Coalition of Immokalee Workers or Food Chain Workers Alliance, which fight for dignity and fair treatment in agricultural settings.

Attend town halls and county meetings to voice support for policies that protect agricultural workers, including heat safety standards and pesticide exposure protections. Many regenerative farmers have shared success stories about how community advocacy helped them secure grants for worker housing improvements or health benefits programs. Write to your representatives about farm labor reform, and consider volunteering with organizations that provide legal aid, healthcare access, or education programs for farm families. When consumers and farmers work together on policy initiatives, we create lasting systemic change that extends far beyond individual farm practices. Even small actions, like signing petitions or sharing information on social media, amplify the voices of those working to feed us sustainably and ethically.

Building a Truly Regenerative Food System

Why Healthy Workers Mean Healthier Soil

Here’s a truth that regenerative farmers understand deeply: healthy soil doesn’t start with compost or cover crops—it starts with the people tending the land. When farm workers receive fair wages, stable employment, and safe working conditions, they develop a genuine stake in the farm’s long-term success. This investment translates directly into better care for the soil and crops.

Consider Maria, a farmhand at Green Valley Organics who’s been with the operation for eight years. With reliable year-round employment and health benefits, she’s learned to spot early signs of soil compaction and pest pressure, saving the farm thousands in potential losses. Her expertise wouldn’t exist without job security that encourages her to stay and grow.

Farms practicing regenerative practices recognize that rushed, stressed workers make mistakes—trampling delicate cover crops, misapplying amendments, or overlooking the subtle signs that soil biology is struggling. Conversely, workers who feel valued bring attention to detail that regenerative systems demand. They’re more likely to suggest improvements, notice patterns, and embrace the patient, observant approach that healthy ecosystems require. When we invest in people, we’re simultaneously investing in the land’s capacity to heal and thrive.

The Connection Between Food Justice and Climate Resilience

When farming communities prioritize fair wages, safe working conditions, and inclusive decision-making, they create stronger foundations for weathering climate challenges. Workers who feel valued and respected are more invested in the land’s long-term health, bringing innovative solutions and traditional knowledge to the table. Take Maria’s story at Green Valley Farm in Oregon, where transitioning to worker ownership transformed their resilience. When unexpected droughts hit, the team collaboratively redesigned their water management system, drawing on the diverse experiences of farmhands from different agricultural backgrounds.

Equitable farms also retain skilled workers longer, building institutional knowledge that proves invaluable during climate emergencies. These experienced teams can quickly adapt practices, from adjusting planting schedules to implementing emergency soil protection measures. Additionally, farms investing in their people tend to invest in infrastructure improvements, better equipment, and continued education about climate adaptation strategies.

This connection between social justice and environmental resilience strengthens sustainable food systems overall. When farmers and workers share equitably in both challenges and successes, they’re motivated to implement the kind of long-term regenerative practices our changing climate demands. Supporting these farms through your food choices means backing operations built to endure.

True regenerative agriculture goes beyond healing the soil—it must also regenerate the communities that tend it. When we choose farms that prioritize fair wages, safe working conditions, and equitable ownership models alongside carbon sequestration and biodiversity, we’re voting for a food system that values people as much as it values the planet. Every purchase from your local farmers market, every CSA membership, every conversation with a farmer is a powerful statement about the future you want to see.

Consider the story of Maria, who went from seasonal farmhand to co-owner at a worker-owned cooperative farm in Vermont. Her farm now not only builds healthy soil through cover cropping and compost, but also builds community wealth through profit-sharing and leadership development. This is what regeneration looks like when it includes everyone.

Your food choices ripple outward in ways you might not immediately see. Supporting farms that treat workers well creates jobs that allow people to stay in rural communities, raises standards across the agricultural sector, and demonstrates that ethical practices are economically viable. Look for farms that openly share their labor practices, offer living wages, and create pathways for advancement.

Start by visiting a local regenerative farm this season. Ask questions about their team, their values, and their vision. Join a CSA that aligns with your principles. Engage with farmers at markets and learn their stories. Together, we can cultivate a food system that truly nourishes everyone—from seed to soil to soul.

How Indigenous Communities Perfected Plant Breeding Centuries Before Modern Science

Posted by darrell on
0
Cultural Agriculture Practices
How Indigenous Communities Perfected Plant Breeding Centuries Before Modern Science

Select parent plants displaying your most desired traits—whether drought tolerance, exceptional flavor, or disease resistance—and save their seeds season after season. This simple act, practiced by indigenous farmers for millennia, allows plants to adapt naturally to your specific microclimate, soil conditions, and growing practices. Within three to five generations, you’ll notice remarkable improvements as your plants become uniquely suited to your garden’s environment.

Observe how traditional plant breeding differs fundamentally from laboratory genetic modification. Indigenous methods rely on careful observation, patient selection, and allowing plants to cross-pollinate naturally within your growing space. When you save seeds from the earliest-ripening tomatoes or the most cold-hardy lettuce, you’re actively shaping future generations to thrive in your exact conditions—no scientific equipment required.

Implement the “grow-out” technique used by Native American seed keepers for centuries: plant significantly more specimens than you need, then rigorously select only the top performers for seed saving. Remove plants showing weakness, pest susceptibility, or undesirable characteristics before they flower, ensuring only your strongest genetics move forward. This intensive selection process accelerates adaptation and creates locally resilient varieties.

Join the growing community of farmers and gardeners reclaiming this ancient wisdom. Sarah Martinez, a New Mexico CSA farmer, developed her own drought-resistant bean variety through just four seasons of dedicated selection, reducing her irrigation needs by forty percent while maintaining abundant harvests. Her success demonstrates how accessible and powerful these time-tested techniques remain for modern growers seeking sustainable, locally adapted crops.

What Indigenous Plant Breeding Really Means

Indigenous plant breeding is a time-honored approach that works with nature rather than against it. At its core, this method involves carefully observing plants in your own garden or farm, identifying those with desirable traits, and saving seeds from the best performers year after year. It’s essentially guided natural selection, where farmers and gardeners become partners with their plants.

Unlike modern industrial breeding that often happens in controlled laboratory settings or distant research facilities, indigenous breeding takes place right where you’re growing. You’re selecting varieties that thrive in your specific soil, climate, and growing conditions. This might mean choosing the tomato that ripened earliest in your short growing season, the squash that resisted local pests without chemicals, or the beans that produced abundantly despite that unusual dry spell.

The beauty of this approach lies in its sustainability and accessibility. You don’t need expensive equipment or specialized scientific knowledge to begin. Instead, you rely on careful observation, patience, and a genuine connection to your plants. Over multiple seasons, you’re essentially creating varieties perfectly adapted to your unique environment.

This method aligns beautifully with CSA values and organic farming principles. By saving and selecting seeds from plants that naturally resist pests and diseases in your conditions, you reduce the need for external inputs. You’re building resilience into your crops while maintaining genetic diversity, something increasingly important as our climate shifts.

Maria, a CSA farmer in Vermont, shared how she developed her own cold-hardy kale variety over seven seasons simply by saving seeds from plants that survived early frosts. Today, her variety extends her harvest season by nearly three weeks, delighting CSA members with fresh greens well into November.

Time-Tested Selection Methods That Still Work Today

Saving Seeds from the Best Performers

The heart of plant breeding lies in careful observation and selection. Each growing season, walk through your garden or field with a critical eye, identifying plants that truly shine. Look for those producing the sweetest tomatoes, the crispiest lettuce, or peppers with exceptional heat and flavor. Pay attention to plants that resist common diseases while their neighbors struggle, or those that keep producing long after others have finished.

Mark your star performers early in the season with stakes, ribbons, or tags so you can easily find them at harvest time. This practice, deeply rooted in traditional seed saving practices, allows you to gradually improve your crops year after year.

When saving seeds, let fruits fully ripen on the plant, even past the eating stage. For tomatoes and cucumbers, scoop out seeds and ferment them in water for a few days to remove germination inhibitors. Rinse thoroughly and dry on screens or plates. For beans and peas, simply let pods dry completely on the plant before harvesting.

Store your carefully selected seeds in paper envelopes labeled with the plant’s standout characteristics and the year. Keep them in a cool, dry location. Sarah Chen, a CSA farmer in British Columbia, credits this simple selection method with developing her now-famous drought-tolerant kale variety over just five seasons, proving that patient observation yields remarkable results for growers of all scales.

Growing Plants in Diverse Environments

Indigenous farmers were masters at reading their landscapes, and they used this knowledge brilliantly when developing resilient crop varieties. Rather than creating uniform growing conditions, these agricultural pioneers intentionally planted seeds across different microclimates—from sunny hilltops to shaded valleys, moist lowlands to well-drained slopes.

This strategic approach allowed plants to naturally adapt to varying conditions over generations. A corn variety might develop drought tolerance when grown on dry hillsides while its siblings in the valley became better at handling moisture. Farmers would then save seeds from plants that thrived in each specific location, gradually creating a collection of locally adapted varieties.

Take Maria Gonzales, a small-scale organic farmer in New Mexico, who revived this practice with heirloom beans. She planted the same variety across her farm’s three distinct zones—a sunny terrace, a partially shaded area, and a cooler north-facing slope. After five seasons of saving seeds from the best performers in each location, she now has three wonderfully adapted bean varieties that consistently outperform commercially available seeds in their respective areas. This time-tested method costs nothing but patience and observation, making it perfect for home gardeners and CSA farms looking to develop truly local varieties.

Community Knowledge Sharing and Seed Exchange

Indigenous plant breeding thrived through vibrant community collaboration, where knowledge flowed as freely as the seeds themselves. Through seed exchange networks, neighboring villages and distant communities shared their best varieties, creating a living library of genetic diversity. When a farmer discovered corn that resisted local pests or beans that thrived in drought, those seeds traveled along trade routes, carrying generations of accumulated wisdom.

These exchanges weren’t just about physical seeds. They included detailed observations about growing conditions, harvest timing, and companion planting relationships that made each variety successful. Elders taught younger generations to recognize desirable traits and preserve them through careful selection. This collective approach meant that plant improvements benefited entire regions rather than individual farms.

Today, you can embrace this tradition by participating in local seed swaps or joining heritage seed preservation groups. Share your garden successes with neighbors, document what works in your microclimate, and contribute to the collective knowledge that strengthens food security for everyone.

Crops Transformed by Indigenous Expertise

From Wild Teosinte to Modern Corn

Thousands of years ago, indigenous farmers in what’s now Mexico looked at a scrubby wild grass called teosinte and saw potential. This humble plant had tiny seed heads with just a handful of hard kernels, nothing like the plump corn cobs we know today. But through careful observation and patient selection, these agricultural pioneers began saving seeds from plants that showed desirable traits like larger kernels, more seeds per stalk, and easier-to-harvest ears.

Generation after generation, Mesoamerican communities shared seeds and knowledge, gradually transforming teosinte into maize. They selected plants that produced sweeter kernels, grew taller, and adapted to different climates and elevations. This remarkable achievement happened without laboratories or scientific equipment, just keen observation and deep understanding of plant behavior.

The result? One of humanity’s most successful breeding projects. Modern corn now feeds billions worldwide and comes in countless varieties, from blue corn in the Southwest to rainbow-colored heirloom types. This ancient success story reminds us that sustainable plant breeding doesn’t require complex technology. Instead, it relies on patience, observation, and respect for the natural variation within plant populations. Today’s organic farmers and gardeners can still use these time-tested principles to develop crops perfectly suited to their local conditions.

Hands holding multiple colorful heirloom corn cobs showing genetic diversity
Indigenous farmers developed remarkable diversity in corn varieties through centuries of careful seed selection and breeding practices.

Potato Diversity in the Andes

High in the Andes Mountains, indigenous farmers have been practicing plant breeding for over 8,000 years, creating an incredible legacy of potato diversity. These skilled cultivators developed more than 4,000 distinct potato varieties, each perfectly suited to specific microclimates and elevations ranging from sea level to 15,000 feet.

What makes this achievement remarkable is how farmers worked with nature rather than against it. They carefully observed which plants thrived in particular conditions, selecting seeds from the strongest performers season after season. Some varieties flourish in freezing highland temperatures, while others excel in warmer valley climates. Certain potatoes resist frost damage, others tolerate drought, and many possess natural defenses against local pests and diseases.

This patient, observational approach offers valuable lessons for today’s organic growers. Andean farmers didn’t need laboratories or complex technology. Instead, they relied on deep knowledge of their land, careful seed saving, and community collaboration to share successful varieties. Their methods prove that sustainable plant breeding can happen right in your own garden or farm, adapting crops to your unique growing conditions while preserving agricultural biodiversity for future generations.

The Three Sisters and Companion Breeding

Indigenous farmers across North America developed one of agriculture’s most elegant examples of companion breeding: the Three Sisters. Over centuries, they carefully selected corn varieties that grew tall and sturdy, providing natural trellises. They bred climbing bean varieties that could grip those corn stalks while fixing nitrogen in the soil to nourish their companions. Squash plants were developed with broad leaves that shaded the ground, retaining moisture and suppressing weeds.

This wasn’t accidental. These farmers observed how plants interacted and deliberately saved seeds from individuals that performed best together. They selected corn with strong stalks that wouldn’t topple under bean weight, beans with moderate vigor that wouldn’t overwhelm the corn, and squash varieties that thrived in partial shade.

Today, many small-scale farmers are rediscovering these time-tested combinations. Sarah Chen, who runs a community-supported agriculture program in Wisconsin, reports that planting heritage Three Sisters varieties reduced her fertilizer needs by forty percent while increasing overall yield per square foot. You can start this tradition in your own garden by choosing open-pollinated varieties specifically suited to companion planting and saving seeds from your most successful plant partnerships each season.

Overhead view of corn, beans, and squash growing together in traditional Three Sisters garden
The Three Sisters companion planting system demonstrates how indigenous farmers bred complementary crop varieties to grow together in harmony.

Why These Methods Matter for Your CSA or Garden

Building Resilience Without Chemicals

When you breed plants that naturally fend off pests and diseases, you’re essentially teaching your garden to protect itself. This approach, practiced by indigenous farmers for centuries, means selecting seeds from the strongest, healthiest plants each season—those that thrived despite pest pressure or disease challenges.

Over time, this creates varieties with built-in defenses. Instead of reaching for sprays or treatments, you’re growing plants with natural pest resistance already coded into their genetics. Think of it as building a stronger immune system for your crops.

Local CSA farmer Maria Rodriguez shares her experience: “After five years of saving seeds from my most robust tomato plants, I noticed fewer aphid problems and virtually no blight. My plants simply became tougher.” This resilience means less work, lower costs, and healthier produce for your family or customers.

The process is surprisingly simple. Observe which plants stay healthy when others struggle, save their seeds, and plant them next season. Each generation becomes stronger and better adapted to your specific growing conditions and local pest populations.

Creating Locally Adapted Varieties

Indigenous plant breeding techniques excel at creating varieties that thrive in your unique microclimate and soil conditions. Rather than forcing plants to adapt to your garden, these time-tested methods work with nature’s wisdom to develop crops that feel right at home.

The beauty of traditional breeding lies in its simplicity and effectiveness. By saving seeds from your best-performing plants year after year, you’re essentially teaching your crops to flourish in your specific environment. Those tomatoes that ripened earliest? Save their seeds. That squash plant that shrugged off the summer drought? It’s your breeding stock for next season.

Indigenous farmers have been perfecting climate-adapted varieties for thousands of years through careful observation and selection. They notice which plants handle their growing season’s quirks, whether that’s late spring frosts, intense summer heat, or early fall rains. This attention to detail creates resilient varieties that require fewer inputs and less fussing.

Starting your own breeding program doesn’t require scientific equipment or specialized knowledge. Begin by growing diverse varieties of your favorite crops, then observe closely throughout the season. Note which plants thrive without extra water, resist local pests, or produce abundantly. Save seeds only from these champions. Within just a few generations, you’ll notice remarkable improvements in vigor and productivity. Your plants will essentially become custom-tailored to your garden’s unique personality, creating a sustainable cycle of continuous improvement.

CSA farmer selecting seeds and examining plants in diverse vegetable garden
Modern CSA farmers apply time-tested indigenous seed selection methods to develop locally adapted crop varieties for their communities.

Getting Started with Indigenous-Inspired Plant Selection

Ready to bring indigenous-inspired plant selection into your growing space? The beauty of these traditional methods is that you can start small and scale up as you learn. Begin by observing your existing plants with fresh eyes. Which tomatoes consistently produce well despite that dry spell in August? Which beans seem unfazed by pests that attack their neighbors? These resilient performers are your foundation.

Start your selection journey by saving seeds from your top three to five best-performing plants of each variety you grow. Look beyond just yield—consider flavor, disease resistance, and how well plants handle your specific climate challenges. Keep detailed notes about what makes these plants special. Did they ripen earlier? Handle heat stress better? Produce reliably even during that unexpected cold snap?

For CSA farmers and market gardeners, designate a small breeding plot where you can grow out saved seeds and observe second-generation results. This doesn’t require fancy equipment or extensive land—even a 10×10 foot area can yield valuable insights. Home gardeners can dedicate a corner of their garden or a few containers to this experimentation.

Connect with other growers in your region who are working with the same varieties. Seed swaps and local gardening groups offer opportunities to share genetics that are already adapted to your area’s conditions. Many experienced farmers find that collaborating accelerates their learning curve significantly.

Maria Rodriguez, a CSA farmer in New Mexico, started with just one heirloom squash variety five years ago. By consistently selecting seeds from plants that thrived in her high-desert conditions, she now grows a uniquely adapted strain that her customers request specifically. Her advice? “Start simple, stay consistent, and trust what your land tells you.”

Remember, indigenous plant breeding is a long-term relationship with your seeds and soil. Even small steps today create stronger, more resilient crops for tomorrow.

Farmer Success Story: Reviving Heritage Varieties at Sundown Valley Farm

When Maria Chen took over Sundown Valley Farm in 2017, she inherited fields that had grown the same hybrid tomato varieties for decades. Today, her thriving 15-acre CSA operation showcases over thirty unique vegetable varieties, each perfectly adapted to her region’s challenging clay soil and unpredictable spring weather.

Maria’s journey into indigenous selection methods began with frustration. Commercial seeds consistently underperformed in her microclimate, and she was tired of fighting against nature. She decided to let nature guide her instead.

Her approach was beautifully simple. Each season, Maria planted diverse open-pollinated varieties and carefully observed which plants thrived without extra intervention. She saved seeds only from the strongest performers, those that naturally resisted local pests, tolerated her heavy soil, and produced abundantly despite weather extremes.

The results speak for themselves. After just four growing seasons, Maria’s cherry tomatoes now ripen two weeks earlier than standard varieties, crucial for her short season. Her Romano beans developed remarkable drought tolerance during the region’s dry summers. Most impressive is her signature butternut squash, which members rave about for its exceptional sweetness and storage quality lasting well into March.

The biggest challenge was patience. Maria admits the first two years felt uncertain as she watched some plants fail completely. She also faced skepticism from neighboring farmers who questioned abandoning proven commercial varieties.

Her advice for others is refreshingly practical: start small with one or two crops you know well. Keep detailed notes about which individual plants perform best under stress. Most importantly, trust the process and remember that you’re not just growing vegetables but creating a living legacy adapted specifically to your land. Maria now shares her unique seeds with other CSA farmers, spreading locally adapted resilience throughout her farming community.

Indigenous plant breeding practices offer us a roadmap toward more resilient, sustainable agriculture. These time-tested methods, refined over countless generations, remind us that working with nature rather than against it yields the most nourishing results. By observing how plants adapt to local conditions, saving seeds from our strongest performers, and sharing knowledge within our communities, we honor the wisdom of those who came before us.

You can become part of this living tradition right in your own garden. Start by joining a Community Supported Agriculture program where farmers are already embracing these sustainable approaches. Many CSA farms offer seed saving workshops and opportunities to learn hands-on techniques directly from experienced growers. Consider participating in local seed swaps or seed libraries to access regionally adapted varieties while connecting with fellow gardening enthusiasts.

Each seed you save and plant carries forward this precious heritage. By choosing to grow food using indigenous-inspired methods, you’re not just cultivating plants but nurturing a more sustainable future for your community and the planet. The journey begins with a single seed and your willingness to learn from the wisdom already growing around you.

Why Your Local Food Distribution Center Needs Food Safety Training (Before Someone Gets Sick)

Posted by darrell on
0
Local Food Systems and Distribution
Why Your Local Food Distribution Center Needs Food Safety Training (Before Someone Gets Sick)

Train your staff using a documented curriculum that covers proper produce handling, temperature control, and cross-contamination prevention—these three elements prevent 80% of foodborne illness outbreaks in small-scale distribution settings. Implement daily temperature logs and regular hand-washing protocols as non-negotiable practices that protect both your customers and your farm’s reputation.

Transform food safety from a compliance burden into a competitive advantage for your CSA operations by creating simple, visual training materials your team can reference during busy harvest seasons. Local food hubs that prioritize safety training see 40% fewer customer complaints and build stronger community trust.

Start with the Food Safety Modernization Act’s Produce Safety Rule requirements, then customize training to reflect your specific crops and distribution methods. Schedule monthly refresher sessions lasting just 15 minutes to reinforce critical practices without disrupting workflow. Document everything—training dates, topics covered, and staff signatures—because this paper trail demonstrates your commitment to safety during inspections and builds confidence with wholesale buyers.

Your distribution center becomes the bridge between farm freshness and family tables. Every team member who understands proper cooling procedures, sanitation standards, and allergen awareness becomes a guardian of public health and your farm’s legacy.

The Real Risks Hiding in Distribution Centers

Temperature Fluctuations That Spoil More Than Just Lettuce

When fresh produce leaves your farm destined for eager customers, maintaining the right temperature becomes absolutely critical. Even a few degrees difference can accelerate spoilage, diminish nutritional value, and create food safety risks. That’s where proper cold chain management training comes into play for distribution center staff.

Temperature abuse happens more often than you’d think. Maybe a cooler door gets left open during loading, or produce sits on a loading dock longer than planned. Within hours, leafy greens can wilt, berries develop mold, and bacterial growth accelerates on items like pre-cut vegetables. Training your team to monitor and document temperatures throughout storage and transit protects both food quality and consumer health.

Consider the story of Green Valley Farm Cooperative, which reduced spoilage by 40 percent after implementing strict temperature monitoring protocols and staff training. Workers learned to use thermometers correctly, recognize warning signs of temperature fluctuations, and respond quickly to equipment issues. This investment not only saved produce but also strengthened customer trust in their local food system.

Distribution center worker monitoring refrigeration temperature with clipboard in hand
Proper temperature monitoring is essential for maintaining the cold chain and preventing spoilage in distribution centers.

When Good Produce Goes Bad: Cross-Contamination Points

Cross-contamination in distribution centers happens more often than you might think, and understanding these risk points helps keep your beautiful organic produce safe from farm to table. Let’s explore where things can go wrong so you can prevent them.

Equipment surfaces are common culprits. Pallet jacks, conveyor belts, and sorting tables that handle multiple product types throughout the day can transfer harmful bacteria between items. Think about it: the same forklift moving raw root vegetables with soil residue might later transport ready-to-eat salad greens.

Personnel practices create another vulnerability. When team members move between different temperature zones or handle various products without proper handwashing or glove changes, they unknowingly become vectors for contamination. Something as simple as touching a phone or adjusting clothing can introduce pathogens.

Storage areas present challenges too. Raw products stored above ready-to-eat items can drip condensation or debris downward. Even well-intentioned practices like using the same cleaning cloths across different zones can spread contamination rather than prevent it.

The good news? Many small-scale distribution centers have successfully tackled these issues through color-coded equipment systems, clearly defined workflow patterns, and consistent training reinforcement. By identifying your specific cross-contamination points, you’re taking an essential step toward protecting the quality and safety of the local, organic produce your community depends on.

What Effective Food Safety Training Actually Covers

Personal Hygiene Standards That Actually Matter

Personal hygiene forms your first line of defense against food contamination in distribution centers. Let’s focus on the practices that truly make a difference in keeping your locally sourced produce safe.

Handwashing is non-negotiable. Team members should wash hands thoroughly for at least 20 seconds before starting work, after bathroom breaks, after handling packaging materials, and before touching fresh produce. Provide accessible handwashing stations with soap, warm water, and single-use towels near all work areas.

Protective clothing matters more than you might think. Clean gloves, hairnets, and smocks create barriers between workers and food. Change gloves between tasks, especially when switching from handling packaging to touching produce. One farm cooperative we know saw contamination incidents drop by 80% after implementing daily fresh uniforms.

Illness policies protect everyone. Workers experiencing symptoms like vomiting, diarrhea, or fever should stay home until symptom-free for 24 hours. This can feel challenging for small operations, but having backup staff or flexible scheduling prevents one sick employee from compromising entire shipments of organic vegetables destined for your community.

Close-up of hands in nitrile gloves being washed with soap and water
Proper handwashing technique is a fundamental food safety practice that prevents contamination at every stage of distribution.

Proper Handling and Storage Techniques

Start with a solid receiving protocol. When deliveries arrive, check temperatures immediately using calibrated thermometers—cold items should stay at 41°F or below, frozen at 0°F. Inspect packaging for damage, leaks, or unusual odors before accepting shipments. This first checkpoint prevents contaminated products from ever entering your facility.

Storage requires strategic organization. Practice FIFO (First In, First Out) by dating all items and placing newer stock behind older products. Keep raw and ready-to-eat foods separate, storing raw items on lower shelves to prevent cross-contamination through drips. Maintain proper spacing between boxes for air circulation, which helps preserve freshness and prevents mold growth.

Temperature monitoring is your daily safeguard. Record cooler and freezer readings twice daily, and address any deviations immediately. Clean storage areas weekly using food-safe sanitizers, and keep high-risk allergens clearly labeled and isolated.

When preparing orders for distribution, use clean, sanitized containers and practice proper hand hygiene. One small-scale CSA operator in Vermont credits their perfect safety record to these simple practices combined with regular team training—proving that consistent attention to basics protects both customers and your farm’s reputation.

Cleaning and Sanitation Protocols

Establishing robust cleaning and sanitation protocols protects the quality of your fresh, organic produce from field to customer. Start by creating daily cleaning schedules for all food-contact surfaces, including sorting tables, bins, and refrigeration units. Use food-safe sanitizers approved for organic handling, and train staff on proper dilution ratios to ensure effectiveness without leaving harmful residues.

Temperature-controlled storage areas deserve special attention. Schedule deep cleaning between shipments, paying close attention to corners, drains, and door seals where moisture and debris accumulate. Keep detailed logs of cleaning activities, including dates, times, and staff initials, which helps maintain accountability and demonstrates compliance during inspections.

Implement a color-coded system for cleaning tools to prevent cross-contamination between raw and ready-to-eat produce areas. Remember, a Vermont farm cooperative reduced product loss by 40% after implementing structured sanitation training. Your commitment to cleanliness directly supports local farmers by ensuring their carefully grown crops reach customers in peak condition, maintaining the trust that makes community-supported agriculture thrive.

Building a Food Safety Culture in Small-Scale Operations

Distribution center workers participating in food safety training session
Regular food safety training sessions help build a culture of safety awareness among all distribution center staff.

Making Training Accessible for Seasonal Staff

Seasonal workers are the backbone of many distribution operations during peak harvest times, yet training them efficiently can feel overwhelming. The good news? You can create streamlined onboarding that sticks without eating up precious time.

Start with a concise, visual training manual that covers essential food safety basics: proper handwashing, temperature control, cross-contamination prevention, and allergen awareness. Consider creating a one-page checklist format that new workers can reference throughout their shifts. Many successful CSA managers have found that 30-minute hands-on training sessions work better than lengthy lectures.

Buddy systems work wonderfully too. Pair each new seasonal worker with an experienced team member who can demonstrate proper protocols in real-time. This approach reinforces good habits immediately and creates a supportive learning environment.

Digital tools can help tremendously. Short video tutorials that workers can watch on their phones before their first shift ensure everyone starts with baseline knowledge. One Vermont food hub manager shared how brief daily safety huddles transformed their seasonal crew’s practices, reducing handling errors by 60 percent within one harvest season.

Remember, keeping training positive and practical helps temporary staff feel valued and invested in maintaining your operation’s food safety standards.

Low-Cost Tools That Make Compliance Easier

Keeping your distribution center compliant doesn’t require expensive software or consultants. Simple spreadsheet templates can help you track temperatures, cleaning schedules, and employee training records effectively. Many state agriculture departments offer free downloadable checklists specifically designed for small-scale food operations, making it easier to stay organized without breaking the budget.

Digital thermometers with data logging capabilities cost under $50 and provide reliable temperature monitoring for refrigerated storage areas. Free mobile apps like FoodKeeper help staff understand proper storage times and handling procedures right from their phones. Consider creating laminated quick-reference guides for handwashing stations and loading dock areas, which serve as constant visual reminders for your team.

A basic three-ring binder system works wonderfully for maintaining training certificates, supplier approvals, and inspection records. Color-coded sections make information retrieval quick during audits. Several successful CSA operations have shared how they use simple photo documentation on tablets to record daily cleaning tasks and receive conditions, creating accountability without complex systems.

Weekly team huddles, combined with these straightforward tools, build a culture where food safety becomes second nature rather than an overwhelming compliance burden for your operation.

Compliance Requirements You Can’t Ignore

FSMA Rules for Small and Mid-Sized Distributors

The Food Safety Modernization Act includes specific provisions that affect distribution centers of all sizes, though requirements vary based on your operation’s scale. The Preventive Controls for Human Food rule applies to most facilities that manufacture, process, pack, or hold food for consumption in the United States. This means your local food hub or CSA distribution point likely falls under FSMA oversight.

Here’s the good news for smaller operations: exemptions exist for qualified facilities. If your operation averages less than $1 million in annual food sales during the previous three-year period, you may qualify for modified requirements. Additionally, farms that distribute only their own raw agricultural commodities typically receive different treatment than multi-farm aggregators.

Even with exemptions, basic food safety practices remain essential. Many successful small distribution centers have found that implementing simplified hazard analysis and preventive control plans actually protects their business while building customer trust. One Vermont food hub manager shared how their straightforward training program helped them navigate inspections smoothly while maintaining their commitment to supporting local growers.

The key is understanding where your operation fits within FSMA’s framework. Whether you’re exempt or fully covered, documentation of your food safety practices demonstrates your dedication to protecting the community you serve while keeping locally grown food accessible and safe.

Documentation That Protects Your Operation

Keeping solid records isn’t just paperwork—it’s your safety net. When you document food safety training sessions, temperature logs, and cleaning schedules, you’re creating a trail that proves your commitment to safe handling practices. Think of these records as your operation’s insurance policy.

Start with training attendance sheets that note dates, topics covered, and employee signatures. Keep temperature monitoring logs for coolers and transport vehicles, recording times and readings throughout each shift. Document your cleaning and sanitation schedules with completion checkmarks. These simple practices demonstrate due diligence if questions ever arise.

Store records for at least two years, following food safety guidelines. Digital photos of your processes can provide valuable backup evidence. Many small distribution centers find success using simple spreadsheets or affordable apps designed for food operations. This organized approach protects your business while showing customers and inspectors that you take food safety seriously. Remember, consistent documentation reflects the same care you put into delivering quality produce to your community.

Real Stories: When Food Safety Training Made the Difference

When Maria took over as operations manager at Green Valley Food Hub, she inherited a team that handled everything from farm pickups to restaurant deliveries. Despite their best efforts, they struggled with recurring complaints about wilted greens and inconsistent product quality. After implementing a comprehensive food safety training program focused on proper temperature control and handling procedures, everything changed.

Her team learned the critical importance of maintaining the cold chain from farm to customer. They discovered they’d been loading refrigerated trucks inefficiently, creating warm spots that compromised product integrity. Within three months of training, customer complaints dropped by 78%, and their organic lettuce producers noticed significantly less waste. Maria’s biggest takeaway? “We thought we knew what we were doing, but training revealed blind spots we didn’t even know existed. Now our drivers check temperatures at every stop, and it’s just part of our culture.”

Similarly, Oak Ridge Farm Cooperative avoided a potentially devastating situation when their newly trained distribution staff caught a malfunctioning cooler before it spoiled an entire week’s harvest of organic strawberries worth $12,000. Their employee, James, had just completed training on monitoring equipment and immediately recognized the temperature fluctuation patterns. He transferred the berries to backup cooling within an hour.

The practical lesson from both stories? Food safety training isn’t just about passing inspections. It empowers your team to spot problems early, protect your investment in quality produce, and build trust with customers who depend on your commitment to excellence. Small investments in education consistently prevent much larger losses down the road.

Getting Started: Your First Steps Toward Safer Distribution

Starting your food safety journey doesn’t have to feel overwhelming. Whether you’re managing a small CSA distribution point or a regional food hub, taking those first steps can protect your community while building trust with your customers.

Begin by assessing your current operations. Walk through your facility and identify where food is received, stored, and distributed. Notice temperature-sensitive areas, cross-contamination risks, and employee handling procedures. This baseline understanding helps you prioritize where training is most needed.

Next, tap into free and low-cost resources designed for small-scale operations. The FDA offers downloadable guides specifically for produce distributors, while many state agriculture departments provide workshops tailored to local food systems. Organizations like the Local Food Safety Collaborative offer webinars and toolkits perfect for community-scale operations.

Your initial training priorities should focus on three core areas: proper temperature control, preventing cross-contamination, and personal hygiene practices. These fundamentals form the foundation of solid food safety practices that protect everyone from farm to table.

Consider partnering with nearby farms and distribution centers to share training costs and experiences. One successful food hub in Vermont started a regional training cooperative where five small distributors pooled resources for quarterly safety workshops. This collaborative approach made professional training affordable while building a supportive network.

Start small but start today. Even training one employee per week creates momentum. Remember, building a food safety culture is a journey, not a destination, and every step forward protects the health of the communities you serve.

When your distribution center prioritizes food safety training, you’re doing more than protecting products—you’re safeguarding the trust your community has placed in the local food movement. Every person who chooses locally grown organic produce over conventional supermarket options is making a conscious decision to support sustainable agriculture and their neighbors. They’re counting on you to honor that choice with safe, wholesome food.

Strong food safety practices aren’t just about compliance; they’re the foundation that allows the entire local food system to thrive. One foodborne illness incident can undermine years of relationship-building and damage the reputation of countless dedicated farmers and food hubs in your region. By investing in comprehensive training, you’re protecting not only your operation but the collective future of community-supported agriculture.

Think of food safety training as an essential investment in sustainability itself—right alongside composting, renewable energy, and regenerative farming practices. It strengthens community health, builds lasting customer relationships, and ensures the local food movement continues growing for generations to come.

Start today by assessing your current training program and identifying areas for improvement. Your commitment to food safety demonstrates the same care and integrity that drew you to local, organic food in the first place.

How PCF Carbon Footprinting Can Transform Your CSA Farm’s Environmental Impact

Posted by darrell on
0
Environmental Sustainability
How PCF Carbon Footprinting Can Transform Your CSA Farm’s Environmental Impact

Your Community Supported Agriculture operation has a measurable impact on our planet’s climate, and understanding your Product Carbon Footprint (PCF) is the first step toward making it a positive one. PCF tracks greenhouse gas emissions throughout your farm’s entire production cycle, from soil preparation and seed planting to harvest and distribution to your members’ doorsteps.

For CSA farmers, measuring carbon footprint isn’t just environmental responsibility—it’s becoming essential for market differentiation and meeting consumer expectations. Today’s environmentally conscious members increasingly want transparency about where their food comes from and how it affects the climate. When you can demonstrate lower emissions than industrial agriculture, you strengthen member loyalty and attract new subscribers who prioritize sustainability.

The good news? CSA operations naturally have advantages in carbon reduction. Your direct-to-consumer model eliminates supply chain emissions that plague grocery store produce. Your focus on seasonal, diverse crops builds soil health that captures carbon. Your local distribution reduces transportation miles dramatically compared to conventional agriculture.

This guide breaks down PCF measurement into manageable steps designed specifically for small-scale farmers. You’ll discover practical strategies to reduce emissions across your operation, from composting methods that minimize methane release to irrigation timing that cuts energy use. We’ll share real success stories from CSA farmers who’ve lowered their carbon footprint while improving profitability, proving that climate-friendly farming and financial sustainability go hand in hand.

What Is PCF Carbon Footprinting and Why It Matters for Your CSA

Wooden box filled with fresh vegetables on farm truck with agricultural fields in background
CSA operations connect local farms directly with community members through fresh, sustainably grown produce.

The Basics of PCF Measurement

Product Carbon Footprint (PCF) measurement tracks the greenhouse gas emissions generated throughout your farm’s entire production cycle. Think of it as following your crops’ environmental journey from start to finish.

The process begins with seed selection and soil preparation. PCF accounts for emissions from producing seeds, fertilizers, and amendments you use. For example, that organic compost you’re applying has a carbon story too—whether you made it on-site or had it delivered matters.

Next comes the growing season. This includes energy used for irrigation pumps, greenhouse heating, and any equipment operation. Even hand tools have a footprint from their manufacturing and transport to your farm.

Harvest and post-harvest activities count as well. Running coolers to store lettuce, washing root vegetables, and packing produce into containers all consume energy and resources.

Finally, delivery creates emissions through transportation. Whether you’re driving to farmers markets or delivering CSA boxes directly to members, those vehicle miles factor into your total PCF.

The good news? Understanding these basics helps you identify where to make meaningful changes. Many farmers discover that small adjustments—like switching to renewable energy or sourcing inputs locally—significantly reduce their overall carbon footprint while often saving money too.

Why CSA Members Are Starting to Ask About Carbon Data

Today’s CSA members are more climate-conscious than ever before. They’re not just asking where their food comes from—they want to know how it’s grown and what impact it has on the planet. This shift reflects a broader movement toward environmental transparency, with consumers seeking measurable data rather than general claims about sustainability.

PCF (Product Carbon Footprint) data meets this demand head-on by providing concrete numbers that demonstrate your farm’s commitment to reducing environmental impact. When you can share that your tomatoes produced 0.3 kg of CO2 per pound compared to the conventional average of 2 kg, members understand the real difference their support makes.

Many CSA farmers report that sharing carbon data strengthens member loyalty and attracts new subscribers who prioritize climate action. One Vermont farmer noticed a 25% increase in membership renewals after introducing carbon labeling on weekly harvest sheets. Members appreciate the honesty and education, often sharing the information with friends and family. This transparency transforms your CSA from simply a food source into a partnership for positive environmental change, deepening the community connection that makes CSAs special.

The Biggest Carbon Contributors in CSA Operations

Transportation and Distribution Footprint

Getting your produce from field to table involves transportation choices that significantly impact your PCF carbon footprint. The good news? Strategic planning can dramatically reduce these emissions while maintaining efficient delivery service.

Start by analyzing your distribution routes. Consolidating deliveries into fewer trips with optimized routes cuts fuel consumption substantially. Many successful CSAs use route-planning software to minimize mileage, reducing emissions by up to 30%. Consider central pickup points where members collect their shares, eliminating individual home deliveries altogether.

Vehicle selection matters immensely. Transitioning to eco-friendly delivery vehicles like electric vans or biodiesel trucks can slash transportation emissions by half or more. One Vermont farm reduced their delivery footprint by 60% simply by switching to an electric vehicle for local routes.

Encourage member participation through community pickup hubs at farmers markets, workplaces, or neighborhood spots. This shared responsibility model not only reduces your carbon output but strengthens community connections. Some farms even offer incentives like discounted shares for members who choose consolidated pickup locations over individual delivery.

Remember, every mile matters. Track your transportation data regularly to identify improvement opportunities and celebrate progress with your membership community.

Energy Use on the Farm

Energy use represents a significant portion of a CSA farm’s carbon footprint, though the specifics vary by season and scale. Greenhouse heating during cooler months can be one of the largest energy consumers, especially for farms extending their growing season. Many farmers are switching to high-efficiency systems or even passive solar designs to reduce this impact. If you measure your heating fuel consumption and multiply by the appropriate emission factors, you’ll get a clear picture of this portion of your footprint.

Irrigation pumps run regularly during dry periods, drawing electricity that contributes to your overall emissions. Consider the power source for your pumps—grid electricity, diesel generators, or renewable options like solar panels. Cold storage facilities for keeping harvested produce fresh also require consistent energy input, particularly during summer months.

Don’t overlook smaller operations like wash stations, packing facilities, and farm offices. One inspiring example comes from a Vermont CSA that installed solar panels covering 80% of their electricity needs, dramatically reducing their energy-related emissions while lowering operational costs. Track your utility bills monthly to identify patterns and opportunities for improvement, whether through equipment upgrades, renewable energy installations, or operational adjustments.

Soil Management and Input Choices

Your soil management choices play a starring role in determining your farm’s carbon footprint. Think of your soil as either a carbon savings account or a source of emissions—your practices determine which way it goes.

Synthetic fertilizers are significant carbon contributors, both in their energy-intensive manufacturing process and the nitrous oxide they release when applied. Consider switching to compost, cover crops, and organic amendments instead. These options actually feed carbon back into the soil while nourishing your plants. One Michigan CSA farmer reduced her fertilizer-related emissions by 40% simply by adopting a robust composting system and rotating legumes as natural nitrogen fixers.

Tillage practices matter too. Heavy plowing releases stored carbon from soil, while no-till or reduced-till methods keep it locked away. If you must till, timing and depth make a difference—shallow cultivation disturbs less carbon.

Here’s an actionable tip: start small by replacing just one synthetic input with an organic alternative this season. Track the results, adjust your approach, and gradually expand. Many farmers find that healthier soil actually reduces their need for amendments over time, creating a win-win for both emissions and your budget.

Practical Steps to Calculate Your CSA’s Product Carbon Footprint

Free and Low-Cost PCF Tools for Small Farms

Good news for small-scale farmers: you don’t need expensive consultants to start measuring your carbon footprint! Several free and affordable tools make PCF tracking accessible for operations of any size.

The USDA’s COMET-Farm calculator is a fantastic starting point, offering free carbon footprint assessments specifically designed for agricultural operations. It walks you through your farm’s activities, from tillage practices to livestock management, providing detailed emissions estimates. The Cool Farm Tool is another excellent option, particularly user-friendly for beginners who want straightforward carbon calculations.

For CSA farmers looking for something simpler, basic spreadsheet templates can track key activities like fuel usage, electricity consumption, and fertilizer applications. Many agricultural extension offices offer these templates free of charge, often with helpful guides explaining how to convert your farm activities into carbon measurements.

Consider starting with the “low-tech” approach: keep a notebook logging tractor hours, heating fuel for greenhouses, and purchased inputs. This data becomes the foundation for any calculator you choose later. Some farmers find success using smartphone apps like FarmLogs or AgriWebb, which include basic sustainability tracking features alongside their farm management tools. The key is choosing a system you’ll actually use consistently throughout the growing season.

What Data You’ll Need to Gather

Getting started with your PCF assessment means gathering the right records. Think of this as detective work, where every receipt and bill tells part of your farm’s carbon story. Start by collecting fuel receipts for tractors, trucks, and other equipment over the past year. You’ll also need electricity bills for barns, greenhouses, and irrigation systems, plus heating fuel records if you use propane or natural gas.

Don’t forget about your inputs. Gather information from suppliers about fertilizers, amendments, and livestock feed, including quantities purchased and transportation distances. If you buy seedlings or transplants, track those too. Keep records of any waste management services, like compost hauling or disposal fees.

Water usage data helps complete the picture, especially if you run pumps for irrigation. Finally, document any renewable energy you generate, like solar panels, as these offset your footprint. Many successful farmers discover that organizing these documents not only helps calculate their PCF but also reveals opportunities to save money while reducing emissions.

Setting Your Baseline Measurement

Before you can celebrate progress, you need to know where you’re starting. Begin by gathering data from a typical growing season—think of it as taking a snapshot of your current operations. Document everything from fuel consumption in tractors and delivery vehicles to electricity use in coolers and irrigation systems. Don’t forget to track fertilizer applications, whether organic or conventional, and any purchased inputs like seeds and packaging materials.

Create a simple spreadsheet or use carbon calculator tools designed specifically for farms. Many are free and user-friendly, walking you through each category step by step. Record your baseline measurements during your most representative season, avoiding years with unusual weather or major operational changes. This honest assessment isn’t about judgment—it’s about understanding your farm’s unique carbon profile. Once you’ve established this starting point, you’ll be equipped to set realistic reduction goals and watch your sustainable practices make a measurable difference. Local farmer Maria Chen reduced her operation’s footprint by 30% in two years simply by tracking these metrics consistently.

Proven Strategies to Reduce Carbon Footprint in Your CSA

Optimizing Your Distribution Model

Smart supply chain optimization starts with efficient distribution planning. Begin by mapping your member locations and grouping them into geographic clusters for pickup points. This approach significantly reduces delivery mileage compared to individual home deliveries. Consider offering incentives like a 5% discount for customers who pick up their shares at the farm or central locations, which can cut your distribution emissions dramatically.

Create consolidated delivery routes using free tools like Google Maps or Route4Me to minimize backtracking and fuel consumption. Schedule deliveries on specific days for each zone rather than scattering them throughout the week. One Massachusetts CSA farmer reduced weekly driving by 40% simply by organizing four neighborhood pickup hubs instead of 20 individual stops. Additionally, coordinate with neighboring farms to share delivery routes when possible, splitting transportation costs and emissions while strengthening your local farming community.

Renewable Energy Integration

Many farms are discovering that renewable energy integration significantly reduces their carbon footprint while cutting operational costs. Solar panels have become particularly popular for CSA operations, powering irrigation systems, cold storage, and processing facilities. At Green Valley Farm in Ontario, a 10-kilowatt solar array now covers 80% of their electricity needs, reducing their annual carbon emissions by 12 tons.

Wind turbines work well for farms with consistent breezes, though the initial investment is higher. Smaller-scale options include solar-powered electric fencing and water pumps, which are surprisingly affordable starting points. Some innovative farmers are even using biogas digesters to convert farm waste into energy, creating a closed-loop system that addresses both waste management and power generation. Geothermal heating systems can maintain greenhouse temperatures year-round with minimal environmental impact, though they require suitable soil conditions and upfront capital investment.

Farmer examining rich soil and plant roots in agricultural field with cover crops
Healthy soil management and regenerative practices play a crucial role in reducing carbon emissions on CSA farms.

Carbon-Sequestering Growing Practices

Regenerative farming techniques offer a powerful way to transform your CSA operation into a carbon-fighting ally. Cover cropping stands out as one of the most effective methods—planting species like clover, rye, or vetch between cash crops keeps living roots in the soil year-round, pulling CO2 from the atmosphere and storing it underground. No-till or reduced-till practices preserve this stored carbon by leaving soil structure intact, while also improving water retention and reducing fuel consumption from tractor passes.

Smart composting practices complete the regenerative cycle by converting farm waste into carbon-rich amendments that feed soil biology and lock carbon away for years. Many successful CSA farmers also incorporate rotational grazing if they have livestock, use mulching to suppress weeds while building organic matter, and plant hedgerows that serve as carbon sinks while supporting beneficial insects.

These practices work together synergistically—each amplifying the others’ benefits. The beauty is that while you’re sequestering carbon, you’re simultaneously improving soil health, reducing input costs, and growing more nutritious produce for your members.

Smarter Input Sourcing

One of the quickest wins for reducing your PCF is rethinking where your inputs come from. Choosing local suppliers for items like compost, mulch, and natural fertilizers significantly cuts transportation emissions. When a neighboring farm provides your soil amendments instead of shipping them cross-country, you’re instantly lowering your carbon impact while supporting your local agricultural community.

Consider transitioning away from synthetic inputs wherever possible. Organic fertilizers and natural pest management solutions typically have lower carbon footprints during production. Building healthy soil through composting and cover cropping reduces your dependence on purchased inputs altogether, creating a win-win for both your budget and the environment.

Packaging deserves attention too. Opt for reusable harvest bins and minimal packaging for your CSA shares. Many successful CSA farmers encourage members to return containers each week, creating a closed-loop system. When purchasing supplies, choose vendors offering bulk options with recyclable or compostable packaging. These small decisions add up, significantly reducing your operation’s overall carbon footprint while demonstrating your commitment to sustainability.

Success Story: How Green Valley CSA Cut Their Carbon Footprint by 40%

When Tom and Maria Chen took over Green Valley CSA in 2019, they knew their farm had potential, but they didn’t realize how much room there was for improvement until they started measuring their carbon footprint. Like many small-scale operations, they assumed their organic practices automatically meant they were doing everything right for the environment.

“We were in for a surprise,” Tom admits with a laugh. “Our initial PCF assessment revealed we were generating about 2.5 tons of CO2 equivalent per acre annually. That seemed low compared to conventional farms, but we knew we could do better.”

The Chens started by tracking their energy use, transportation patterns, and input sources. They discovered their biggest carbon contributors were diesel fuel for their tractor, refrigeration for their walk-in cooler, and the distance they traveled for off-farm inputs like organic fertilizer and seedlings.

Over the next 18 months, they implemented strategic changes. They installed solar panels to offset their cooler’s electricity needs, switched to a smaller, more fuel-efficient tractor for routine tasks, and partnered with a local composting facility to source amendments within ten miles of their farm. They also adjusted their crop planning to focus on varieties that thrived with minimal intervention.

The results were remarkable. By the 2022 growing season, Green Valley CSA had reduced their carbon footprint to 1.5 tons per acre, a 40 percent reduction. Their members noticed the changes too. The farm started including carbon impact reports in their weekly newsletters, showing shareholders exactly how their food choices were making a difference.

“What surprised us most was how many changes actually saved us money,” Maria shares. “Lower fuel costs, reduced input expenses, and the elimination of our electricity bill made our farm more profitable while helping the planet.”

Today, Green Valley CSA serves as a model for other farms in their network, proving that PCF tracking isn’t just about numbers on paper—it’s about creating a more sustainable future, one harvest at a time.

Communicating Your Carbon Reduction Efforts to CSA Members

Creating Simple Visual Reports

Making your carbon footprint data come alive doesn’t require fancy graphics or expensive software. Start with a simple monthly newsletter section highlighting one carbon-saving achievement, like “This month, we reduced delivery emissions by 15% through route optimization!” Use visual comparisons that resonate with your community: “Our farm’s carbon savings this quarter equals taking 3 cars off the road for a year.”

For farm stand signage, try eye-catching stats: “These tomatoes traveled 2 miles, not 2,000!” Social media posts work beautifully with before-and-after stories. Share a quick video showing your compost system or a photo of your cover crops with a caption explaining their carbon benefits.

Consider creating a simple infographic showing your farm’s carbon journey over the season. Use everyday language and relatable imagery—think trees planted rather than tons of CO2. Members love seeing their support translated into tangible environmental impact, strengthening their connection to your sustainable farming practices while encouraging continued participation in your CSA.

Turning Carbon Awareness Into Member Engagement

Your members care about sustainability—transform your carbon reduction efforts into shared victories that strengthen community bonds. Start by sharing your farm’s carbon footprint baseline through newsletters or member meetings, explaining what it means in relatable terms like “equivalent to taking X cars off the road.” Create visual progress trackers at pickup locations showing monthly reductions, making abstract numbers tangible.

Invite members to participate actively by bringing reusable containers, composting their CSA scraps, or volunteering for cover crop planting days that sequester carbon. One Wisconsin farm launched a “Carbon Champions” program where members logged their sustainable actions, collectively offsetting 15 tons annually while building enthusiasm.

Celebrate milestones together with seasonal gatherings highlighting achievements—perhaps a harvest dinner when you reach a reduction goal. Share farmer success stories in weekly newsletters, explaining how member participation directly contributed to lower emissions. Consider member surveys asking which reduction strategies matter most to them, fostering ownership in your environmental journey. When people understand their role in measurable impact, engagement naturally follows.

Understanding your farm’s carbon footprint isn’t just about crunching numbers or checking boxes—it’s about deepening the meaningful relationship between your sustainable farming practices and the community members who believe in your mission. When you measure and share your PCF data, you’re telling a powerful story about your commitment to the land and the future we’re all building together.

The beauty of carbon footprinting is that it meets you exactly where you are. Whether you’re managing an established CSA operation or just starting to explore sustainable agriculture, every small step toward reducing emissions makes a tangible difference. Maybe you’ll begin by tracking fuel usage, or perhaps you’ll experiment with cover cropping to boost soil carbon. The key is simply to start.

Remember Sarah’s story from earlier? She began with basic spreadsheets and a curious mindset. Within two seasons, her farm reduced emissions by 15 percent while strengthening member loyalty. Your journey will be unique, but the principles remain the same: measure what matters, implement changes gradually, and share your progress authentically.

Your community wants to support farms that care about environmental impact. By embracing PCF carbon footprinting, you’re not only reducing your ecological footprint—you’re inviting your members to be part of something bigger. Take that first step today, knowing that every improvement, no matter how small, contributes to a more resilient and sustainable food system for everyone.

How Smart Planning Transforms Your CSA Farm from Chaos to Clarity

Posted by darrell on
0
Operations and Logistics
How Smart Planning Transforms Your CSA Farm from Chaos to Clarity

Map your harvest cycles to member demand by tracking which vegetables your CSA members actually consume each week, then adjust planting schedules two to three weeks ahead to prevent the overflow of kale in October that nobody wants. Create a simple spreadsheet linking your seed orders, transplant dates, and expected harvest windows to your weekly box commitments—this synchronized planning reduces waste by up to 40% on small farms.

Coordinate your volunteer workforce and harvest crew by establishing a weekly rhythm where Wednesday assessments determine Friday harvest needs and Monday box assembly requirements. When Sarah Chen implemented this three-day planning cycle at Riverbend Farm, she eliminated the chaos of last-minute scrambling and reduced unharvested produce waste from 25% to under 8%. The key is matching labor availability to actual crop readiness rather than hoping everything aligns on distribution day.

Balance your cash flow against seasonal production by pre-selling membership shares in winter, purchasing seeds and amendments in early spring, and maintaining a reserve fund equal to six weeks of operating expenses. This integrated financial approach—linking money in, production costs, and distribution timing—prevents the common CSA trap of being crop-rich but cash-poor during peak season.

Connect procurement decisions directly to your distribution model by ordering boxes, bags, and packaging supplies based on confirmed member counts plus 10% buffer, not optimistic projections. Sync these orders with your planting calendar so materials arrive two weeks before first harvest, ensuring your supply chain flows smoothly from seed to member doorstep without expensive rush orders or storage headaches.

What IBP Supply Chain Actually Means for Your CSA Farm

Overhead view of colorful fresh organic vegetables in wooden CSA harvest box
A well-planned CSA box showcases the variety and quality that comes from integrated business planning in farm operations.

The Three Pillars of IBP in CSA Operations

Integrated Business Planning (IBP) might sound like corporate speak, but for CSA operations, it’s really about connecting three essential elements that keep your farm running smoothly: understanding what your members want, knowing what you can grow, and getting everything delivered efficiently.

Let’s start with demand planning. This means getting to know your members’ preferences and consumption patterns. Are your shareholders asking for more leafy greens? Do families with kids prefer cherry tomatoes over beefsteak varieties? By tracking member feedback through surveys, share customization requests, and pickup conversations, you can predict what produce will be most valued. This information helps you plan your planting schedules and variety selections months in advance, reducing waste and increasing member satisfaction.

Supply planning is where your agricultural expertise shines. Unlike typical supply chains, CSA farms work with nature’s calendar. You’ll need to coordinate seasonal crop availability with your demand forecasts. This means succession planting of popular items like lettuce, managing storage crops for winter shares, and building relationships with neighboring farmers to fill gaps in your offerings. Consider implementing smart storage solutions to extend the availability of root vegetables and winter squash, bridging the gap between harvest and distribution.

Finally, logistics coordination ties everything together. This involves planning efficient delivery routes for drop-off points, scheduling pickup times that work for members, and coordinating volunteer helpers during peak harvest. Creating a master calendar that shows when crops mature, when boxes need packing, and when deliveries occur helps prevent bottlenecks. One Ontario CSA farmer shared how mapping member locations helped reduce delivery time by 30 percent while keeping produce fresher.

Why Traditional Planning Falls Short for CSA Farms

If you’ve been running a CSA farm for even a season, you know the familiar sinking feeling. It’s early March, and you’re staring at boxes of heirloom tomato seeds—way more than you’ll ever need—because last year you ran out mid-season. Or perhaps it’s July, and your kale harvest came in two weeks earlier than planned, leaving you scrambling to adjust member boxes while summer squash sits disappointingly small on the vine.

These aren’t just minor hiccups. They’re the result of traditional planning methods that simply weren’t designed for the beautiful complexity of CSA farming. Most farmers rely on spreadsheets, gut instinct, and last year’s notes scribbled in margins. While this works to a degree, it leaves gaps that quickly become costly problems.

Overordering happens when we plan defensively, remembering that one disastrous season when blight took half the crop. Underestimating harvest timing occurs because weather patterns shift, microclimates surprise us, and succession planting schedules don’t always align with real-world conditions. Then there’s the distribution challenge—members go on vacation, request delivery changes, or want to pause their shares, and suddenly your carefully planned harvest quantities don’t match actual demand.

Managing relationships with multiple local suppliers adds another layer of complexity. Your seed company, compost provider, packaging supplier, and farmers market colleagues all operate on different timelines and minimums. Coordinating these relationships while tending crops and communicating with members often means something falls through the cracks.

The heart of the issue? Traditional planning treats farming as linear and predictable, when CSA operations are actually dynamic, interconnected systems where one change ripples through everything else. You deserve better tools that honor this complexity.

Building Your CSA’s Procurement Strategy with IBP

Farmer planning crop production while examining seedlings in garden rows
Modern CSA farmers combine traditional growing knowledge with strategic planning tools to optimize their operations.

Seasonal Forecasting That Actually Works

Predicting member demand doesn’t require a crystal ball—just smart use of your historical data and some agricultural intuition. Start by analyzing your past three seasons of harvest records and member orders. Notice patterns like which crops had surplus and which ran short. Sarah Martinez from Harvest Moon CSA tracks every weekly harvest alongside member preferences, discovering that her tomato demand spikes in late July, allowing her to plant accordingly.

Crop rotation planning plays a crucial role in forecasting too. Map out your rotation schedule and align it with member expectations. If lettuce follows your spring peas, factor that succession into your weekly share planning. This prevents those awkward gaps where you’re scrambling to fill boxes with purchased produce.

Building buffer inventory is your safety net against Mother Nature’s unpredictability. Plan for 15-20 percent overproduction on stable crops like root vegetables and winter squash. These store well and can compensate when weather damages your more delicate offerings. Consider investing in proper storage infrastructure, including reusable bins and crates that protect your buffer inventory.

Weather tracking apps combined with historical climate data help anticipate challenging seasons. When forecasts predict extended drought or excessive rain, adjust your planting density and variety selection accordingly. Keep detailed notes each season—your own farm’s data becomes your most valuable forecasting tool, helping you move from reactive scrambling to proactive planning that keeps members happy and reduces waste.

Strengthening Supplier Relationships

Building strong relationships with your suppliers is the backbone of successful Integrated Business Planning in your CSA operation. Start by establishing open communication channels with your local organic seed companies and neighboring farms. Set up regular check-in meetings, whether monthly or seasonal, to discuss upcoming needs, potential challenges, and harvest projections. This proactive approach helps everyone stay aligned and reduces last-minute scrambles.

Create shared planning calendars with your key suppliers that outline planting schedules, expected delivery dates, and quantity requirements. This transparency allows seed companies to ensure they have adequate inventory when you need it, and neighboring farms can coordinate their growing schedules to fill gaps in your production. One successful CSA farmer in Vermont implemented a digital shared spreadsheet system with three partner farms, resulting in a 40 percent reduction in supply delays.

Consider establishing formal agreements that outline quality standards, delivery expectations, and communication protocols. These don’t need to be overly complex, just clear enough that everyone understands their commitments. Include specific details about organic certification requirements, packaging preferences, and acceptable variance in order quantities.

Don’t forget the human element. Visit your suppliers’ farms, attend local agricultural events together, and celebrate shared successes. These personal connections create goodwill that becomes invaluable when unexpected challenges arise, like weather disruptions or pest outbreaks. Strong supplier relationships built on mutual respect and clear IBP coordination ensure your members receive consistent, high-quality organic produce throughout the season.

Streamlining Your Distribution and Logistics Operations

Creating Flexible Distribution Plans

Flexibility is the cornerstone of successful CSA distribution, especially when Mother Nature has other plans. Start by establishing multiple pickup windows throughout the week rather than a single rigid timeframe. This approach accommodates member schedules while giving you breathing room when unexpected weather delays harvesting.

Consider creating tiered distribution points based on member density. Community hubs like farmers markets, local businesses, or member homes can serve as satellite locations, reducing individual farm trips and building community connections. When implementing this strategy alongside optimizing delivery routes, you’ll save precious hours during peak season.

Communication is everything when plans shift. Develop a simple notification system using email, text messages, or a members-only app to announce changes quickly. Be transparent about why adjustments happen—members appreciate understanding the realities of farming. One Vermont farmer shares boxes adjusted for unexpected frost damage by explaining the situation and offering recipe suggestions for available crops, turning potential disappointment into an educational moment.

Build buffer stock arrangements with neighboring farms for crop shortages, creating a support network that benefits everyone while maintaining your organic standards.

Real-World Success: How Green Valley Farm Transformed Their Operations

When Sarah Chen took over Green Valley Farm five years ago, she inherited a beautiful 15-acre property and a passionate vision for connecting her community with fresh, organic produce. What she didn’t anticipate was the chaos that came with managing a 120-member CSA operation.

“I was constantly scrambling,” Sarah recalls. “We’d have gorgeous tomatoes rotting because I planted too many, while members complained about not getting enough greens because I underestimated demand. My cooler was a disaster, and I was working 80-hour weeks just trying to keep up.”

Sound familiar? Sarah’s challenges mirror what many small CSA farmers face: the juggling act of planning what to grow, coordinating harvests, and delivering consistent weekly boxes without breaking the bank or your back.

The turning point came when Sarah started implementing some straightforward organizational systems. First, she created a simple planning calendar that connected three critical pieces: what members wanted based on surveys and past preferences, what would actually grow well during each season, and what resources she had available like labor, water, and field space.

“I started treating my farm like the business it is, without losing the heart of it,” she explains. She began tracking which crops members raved about and which vegetables consistently ended up in the compost bin at pickup sites. This data informed her planting decisions for the following season.

Sarah also established weekly planning sessions every Sunday evening. She’d review the upcoming week’s harvest schedule, check her inventory, and coordinate with her two part-time workers. This simple habit eliminated the morning panic of not knowing what needed picking or packing.

The results speak volumes. Within two years, Green Valley reduced food waste by 40 percent. Member retention jumped from 65 to 88 percent, largely because boxes became more consistent and aligned with what people actually wanted to eat. Perhaps most importantly, Sarah’s profit margins improved by 30 percent, allowing her to pay workers better wages and finally take a day off each week.

“I’m not working harder; I’m working smarter,” Sarah says. “And my members notice the difference. They’re getting better produce, more variety, and they see that I’m sustainable in more ways than one, including financially and personally.”

CSA farmer distributing fresh produce to members at farm pickup location
Efficient distribution planning ensures CSA members receive fresh, quality produce while building strong farm-community relationships.

Getting Started: Simple Steps to Integrate IBP into Your CSA

Tools and Resources for Small-Scale Operations

Getting started with integrated business planning doesn’t require expensive enterprise software or a degree in supply chain management. Many CSA farmers successfully coordinate their operations using simple, practical tools that fit their budget and technical comfort level.

Start with what you already have: spreadsheets. Google Sheets or Excel can handle inventory tracking, harvest planning, and member distribution lists effectively. Create separate tabs for crop planning timelines, expected yields, and weekly harvest projections. The beauty of spreadsheets is their flexibility—you can customize them to match your farm’s unique rhythm and crops.

For farmers ready to step up, affordable farm management software like Tend, Farmbrite, or Local Line offers CSA-specific features without overwhelming complexity. These platforms typically range from free to under $50 monthly and help automate member communications, track harvest quantities, and manage subscription renewals. Take advantage of free trials to find what feels intuitive for your operation.

Don’t overlook community resources either. Many agricultural extension offices offer free workshops on farm business planning, and connecting with other CSA farmers through local farming networks can provide invaluable shared knowledge. One Vermont farmer I spoke with credits her farm’s improved efficiency to a simple planning template she discovered at a county farming cooperative meeting.

Remember, the goal isn’t perfect software—it’s having systems that help you make better decisions about what to plant, when to harvest, and how to communicate with your members. Start simple, track what matters most to your operation, and adjust as you grow.

If you’ve been worried that Integrated Business Planning sounds too corporate for your CSA farm, here’s the truth: IBP isn’t about turning your farm into a soulless operation. It’s simply about bringing intention and coordination to the beautiful chaos that is community-supported agriculture. You’re already doing much of this work—checking weather forecasts before planting, estimating harvest quantities for your members, coordinating delivery schedules. IBP just gives you a framework to do it more effectively.

The best part? You don’t need to overhaul everything overnight. Start small. Maybe this season, you create a simple spreadsheet connecting your planting calendar with member preferences. Next season, you might add a basic inventory tracking system. Small steps compound into significant improvements over time.

Remember that sustainable farming and smart planning aren’t opposites—they’re partners. When you reduce waste through better forecasting, coordinate your harvests more efficiently, and communicate clearly with your members, you’re actually strengthening the sustainable values that drew you to CSA farming in the first place. You’re honoring the land, your labor, and your community’s investment in local food.

Ready to take the next step? We’d love to hear about your planning challenges and victories. What systems are working on your farm? Where do you struggle with coordination? Share your experiences in the comments below, or explore more resources on sustainable farm management. Your journey toward more intentional farming operations starts with a single, thoughtful step.

How One Farm’s Career Training Program Is Reshaping the Local Food Economy

Posted by darrell on
0
Business and Economic Impact
How One Farm’s Career Training Program Is Reshaping the Local Food Economy

Growing your own food starts with knowledge, and one local agricultural business is turning that principle into economic opportunity by offering comprehensive career training programs that transform aspiring farmers into skilled professionals. Through hands-on apprenticeships, classroom instruction, and mentorship from experienced growers, trainees learn everything from soil preparation and crop rotation to pest management and direct-to-consumer marketing strategies that make small farms financially viable.

The ripple effects extend far beyond individual careers. When local businesses invest in training the next generation of farmers, they strengthen regional food systems, create living-wage jobs that keep young people in rural communities, and build a more resilient agricultural economy. Each trained farmer who launches their own operation multiplies the impact, supplying fresh produce to neighborhood markets, restaurants, and families who value knowing exactly where their food comes from.

These training programs address a critical gap in modern agriculture. With the average farmer age climbing above 58, the industry desperately needs skilled newcomers who understand both traditional growing methods and innovative sustainable practices. Local businesses providing this education aren’t just filling job openings; they’re preserving agricultural knowledge, revitalizing communities, and empowering people to build meaningful careers that nourish their neighbors while protecting the environment. The investment pays dividends in stronger local economies, healthier communities, and a more secure food future for everyone.

The Growing Demand for Trained Farm Workers

The sustainable agriculture movement has sparked tremendous consumer interest in locally grown, organic produce. Yet behind every thriving farmers market and bustling CSA box pickup, there’s a growing challenge: farms desperately need skilled workers, and they’re struggling to find them.

This labor shortage isn’t just about having extra hands during harvest season. Modern sustainable farms require workers who understand soil health, pest management, crop rotation, and the careful timing that organic growing demands. As more conventional farms transition to regenerative practices and new CSA operations launch to meet consumer demand, the gap between available jobs and qualified candidates continues to widen. These changes are reshaping local labor markets across the country.

Here’s the disconnect: while thousands of people express interest in sustainable food systems and dream of working the land, very few possess the practical skills needed to succeed. Gardening in your backyard differs vastly from managing acres of diverse crops, operating farm equipment safely, or implementing season extension techniques. Without proper training, well-intentioned newcomers often feel overwhelmed and farms lose valuable time and resources.

Career training programs have emerged as the essential bridge between enthusiasm and expertise. These programs offer hands-on experience in real farm settings, teaching everything from seed starting to post-harvest handling. Participants learn alongside experienced farmers, gaining confidence through practical application rather than theory alone.

Consider Sarah, who completed a six-month training program before launching her own market garden. “I thought I knew farming from reading books,” she shares. “But learning proper transplanting techniques and irrigation management changed everything. Now I’m actually profitable in my second season.”

This transformation from curious learner to confident farmer demonstrates why structured training has become indispensable for agriculture’s future.

What Farm-Based Career Training Actually Looks Like

Agricultural trainees working together in vegetable field learning farming techniques
Farm trainees gain hands-on experience in sustainable growing techniques through structured career development programs.

Hands-On Skills Development

The career training program offers comprehensive hands-on experience that transforms beginners into confident farmers. Trainees spend their days in the fields learning essential skills like proper seed selection, soil preparation, and planting techniques for various seasonal crops. Under the guidance of experienced farmers, participants master the art of transplanting seedlings, understanding proper spacing, and creating optimal growing conditions for each plant variety.

Harvesting skills form a crucial part of the curriculum, teaching trainees to identify peak ripeness, use proper cutting techniques, and handle produce gently to maintain quality. The program also covers integrated pest management, where participants learn to identify common pests and diseases while implementing organic solutions like companion planting, beneficial insects, and natural pest deterrents.

Sustainable farming practices weave through every aspect of the training. Participants discover composting methods, crop rotation strategies, water conservation techniques, and soil health management. One graduate, Maria, shares her success story: “I started knowing nothing about farming. Now I manage my own quarter-acre plot, providing fresh vegetables to twenty local families.” This practical, mentorship-based approach ensures trainees gain real-world skills they can immediately apply to their own farming ventures or careers in sustainable agriculture.

Business and Marketing Education

Beyond growing techniques, successful farming requires solid business acumen. Many local agricultural training programs recognize that understanding the entrepreneurial side is crucial for long-term viability. These programs teach aspiring farmers how to develop comprehensive business plans that cover startup costs, seasonal cash flow management, and pricing strategies for different market channels.

Participants learn the essential ingredients for farm success, including how to build lasting customer relationships through effective communication and transparency about growing practices. Training often includes practical modules on operating a Community Supported Agriculture (CSA) program, selling at farmers markets, and navigating wholesale partnerships with restaurants and local retailers.

Understanding local food distribution channels is essential in today’s market. Trainees explore various sales models, from direct-to-consumer approaches to cooperative distribution networks. They also learn basic marketing strategies, including social media promotion, creating compelling farm stories, and engaging with their community. This business education empowers graduates to transform their agricultural passion into sustainable livelihoods while strengthening local food systems and creating economic opportunities within their communities.

Measuring Economic Impact: Beyond the Farm Gate

Direct Economic Benefits

When local farms invest in career training programs, the economic ripple effects are substantial and measurable. Recent economic impact studies show that each trained agricultural worker contributes an average of $35,000 to $50,000 annually in wages to the local economy, money that typically stays within the community through local spending.

Training programs create immediate employment opportunities, with many farms reporting the ability to expand operations by 20-30% after bringing on skilled workers. Take Sarah Chen, who completed a season-long apprenticeship at Green Valley Farm. Within two years, she launched her own organic vegetable operation, now employing three additional workers and serving 85 member families.

The productivity gains are equally impressive. Farms with trained staff report 25-40% increases in crop yields through improved soil management, efficient planting schedules, and reduced crop loss. This translates to more fresh, organic produce available for community members while strengthening food security.

Beyond the farm gate, these trained workers often become educators themselves, sharing sustainable growing techniques with home gardeners and inspiring the next generation of environmental stewards. This knowledge transfer multiplies the economic and environmental benefits throughout the region.

Indirect Community Benefits

The ripple effects of career training in sustainable agriculture extend far beyond the classroom, creating a flourishing ecosystem of local food initiatives. As newly trained farmers launch their own operations, they naturally gravitate toward community gathering spaces like farmers markets, breathing fresh life into these beloved weekend destinations. These markets become more vibrant and diverse, offering shoppers greater variety while strengthening connections between growers and consumers.

The training also sparks an entrepreneurial wave of farm startups throughout the region. Graduates armed with practical knowledge and confidence often begin with small-scale operations, perhaps starting a backyard microgreens business or launching a specialty herb garden. These micro-enterprises might seem modest at first, but they collectively contribute to a more resilient local food system. One inspiring example comes from Maria, who transformed her half-acre plot into a thriving cut-flower farm after completing her training, now supplying three local florists and two farmers markets.

Beyond individual success stories, this training strengthens the entire local food supply chain. Restaurants gain access to reliable sources of fresh, seasonal produce. Food cooperatives expand their local vendor networks. Even school lunch programs benefit from increased availability of farm-fresh ingredients. This interconnected web of producers, distributors, and consumers creates economic stability while reducing our community’s dependence on distant food sources shipped from thousands of miles away.

Success Story: From Trainee to Farm Entrepreneur

When Maria Rodriguez enrolled in the apprenticeship program three years ago, she was working retail and dreaming of a different future. Today, she runs Verde Valley Farm, a thriving 5-acre organic operation that supplies fresh produce to over 80 local families and three restaurants in the community.

Maria’s journey began with an intensive six-month training program that covered everything from soil health and crop rotation to business planning and customer relations. She spent her mornings learning greenhouse management and her afternoons getting hands-on experience in the fields. The program didn’t just teach her how to grow vegetables—it equipped her with real-world skills to launch a sustainable business.

“I learned about companion planting, season extension techniques, and how to build healthy soil without synthetic inputs,” Maria shares. “But what really made the difference was understanding the business side. They taught us pricing strategies, how to connect with customers, and the importance of building relationships within the local food community.”

After completing her training, Maria leased land through a farmland access program and started small with just half an acre of mixed vegetables. Her first season, she served 15 CSA members and generated $12,000 in revenue. By her third year, she’d expanded to 5 acres and increased her annual revenue to $85,000 while creating two full-time positions and seasonal work for local high school students.

Beyond the numbers, Maria’s farm has become a community hub. She hosts monthly farm tours for families, donates surplus produce to the local food pantry, and mentors new trainees from the same program that launched her career. Her success demonstrates how accessible agricultural training can transform individual lives while strengthening local food systems.

“The training gave me confidence and practical knowledge,” Maria reflects. “Now I get to share fresh, organic food with my neighbors while making a living doing something I genuinely love.”

Young farmer selling fresh produce at local farmers market stand
Program graduates apply their business training by launching farm ventures and participating in local food markets.

The Multiplier Effect on Local Food Systems

When a local farm invests in training new farmers, the benefits ripple far beyond individual career development. These trained growers become vital threads in the fabric of local food systems, creating opportunities that strengthen the entire community’s access to fresh, sustainable produce.

Consider the journey of trained farmers like Sarah Martinez, who completed a two-year apprenticeship at Green Valley Farm. Within three years, she was supplying organic vegetables to eight local restaurants, two elementary schools, and running her own thriving CSA program with 75 member families. Her success story isn’t unique. Trained farmers consistently expand market channels that didn’t previously exist, creating new purchasing options for institutions and families alike.

The knowledge transfer continues as these graduates become mentors themselves. They host farm tours, lead workshops on composting and season extension techniques, and provide crucial guidance to the next generation of growers. This creates a self-sustaining cycle of agricultural expertise within the community.

Schools particularly benefit from this multiplier effect. When trained farmers understand food safety protocols and can maintain consistent supply schedules, they become reliable partners for farm-to-school programs. Children gain access to nutrient-dense produce while learning where their food originates.

The economic impact extends to related businesses too. Local seed companies, tool suppliers, farmers’ market organizations, and food hubs all experience increased activity as more trained farmers enter the field. Each new CSA operation creates demand for delivery services, packaging materials, and storage facilities.

This interconnected growth demonstrates how career training in sustainable agriculture doesn’t just create jobs but builds resilient food networks that serve entire regions for generations.

Overflowing harvest box filled with fresh colorful vegetables from local farm
Trained farmers strengthen local food systems by increasing the availability and quality of fresh produce for community members.

Finding Career Training Opportunities in Your Area

If you’re excited about pursuing agricultural career training or want to support farms investing in their workforce, here’s how to get started. Begin by reaching out directly to local farms and CSAs in your area—many offer apprenticeships or internship programs but don’t advertise them widely. Visit farmers markets and farm stands to ask growers about training opportunities they might offer or know about.

When evaluating a program’s quality, look for hands-on learning opportunities that cover diverse farm operations throughout growing seasons. Reputable programs provide clear expectations about work hours, learning outcomes, and any compensation or food shares offered. Ask about mentor availability and whether you’ll gain experience in areas like soil health, crop planning, and sustainable pest management. Programs connected to organic certification bodies or sustainable agriculture organizations often maintain high educational standards.

Don’t overlook resources like your local Cooperative Extension office, agricultural colleges, and community colleges offering beginning farmer courses. Many non-profit farming organizations also maintain directories of training opportunities and can connect you with established farmers willing to mentor newcomers.

As a consumer, you play a vital role in supporting workforce development. Join CSAs that actively train new farmers, spreading awareness about their commitment to education. Purchase produce from farms employing apprentices, knowing your dollars help fund the next generation of sustainable growers. Share success stories of farmers who started as apprentices, inspiring others to explore agricultural careers. Consider volunteering at teaching farms or donating to scholarship funds that make training accessible to diverse communities, strengthening local food systems for everyone.

When local farms invest in career training programs, they’re doing much more than filling immediate job openings. They’re building a foundation for resilient food systems that strengthen our entire community. These programs create ripple effects throughout the local economy, from reduced unemployment to increased spending at neighboring businesses, while nurturing the next generation of agricultural stewards.

The farmers who complete these training programs become ambassadors for sustainable agriculture, carrying forward time-tested practices while bringing fresh innovation to their work. Their success stories demonstrate that investing in people creates lasting value that extends far beyond any single growing season.

As consumers and community members, we have the power to support this vital cycle. Seek out farms that prioritize workforce development and career training. When you purchase from these businesses, you’re not just buying fresh, organic produce. You’re investing in jobs, strengthening local food security, and helping build a more sustainable agricultural future. Consider visiting local farmers markets, joining a CSA program, or simply asking your favorite farm about their training initiatives. Every purchase becomes a vote for the kind of community you want to see thrive.

What USDA Organic Standards Really Mean for Your CSA Farm

Posted by darrell on
0
Policy, Law & Certification
What USDA Organic Standards Really Mean for Your CSA Farm

Understanding USDA organic certification transforms your CSA operation from a local endeavor into a nationally recognized source of verified organic produce. The certification process requires documenting every aspect of your farming practices, from seed selection to harvest methods, but this rigor builds consumer trust that translates directly into member retention and premium pricing.

Review the National Organic Program standards focusing on three core requirements: maintaining soil health through approved amendments and crop rotation, using only substances on the National List of allowed materials, and keeping detailed records that trace every input back to its certified organic source. Your farm needs a three-year transition period where you follow all organic practices before crops can be certified, though you can market transitional produce during this time.

Create a comprehensive Organic System Plan that maps your fields, lists all inputs with their organic certifications, details your pest management strategies using cultural and biological controls, and outlines buffer zones separating your operation from conventional neighbors. This living document becomes your roadmap for compliance and your proof during annual inspections.

Calculate certification costs against potential benefits by comparing annual fees ranging from $400 to $2,000 plus inspector travel expenses against the 20-30% price premium most certified CSAs command and increased member confidence. Many farmers report that certification simplified their marketing message and opened doors to wholesale accounts requiring USDA verification.

Connect with certified CSA farmers in your region who navigate these same challenges successfully. Their experiences reveal practical solutions for record-keeping systems, approved pest control timing, and maintaining certification while experimenting with new crops that keep members excited about their weekly shares.

Breaking Down USDA Organic Standards: The Foundation

Farmer's hands holding dark organic soil with visible earthworms and organic matter
Healthy soil rich in organic matter forms the foundation of USDA organic certification standards.

The Three Pillars of Organic Certification

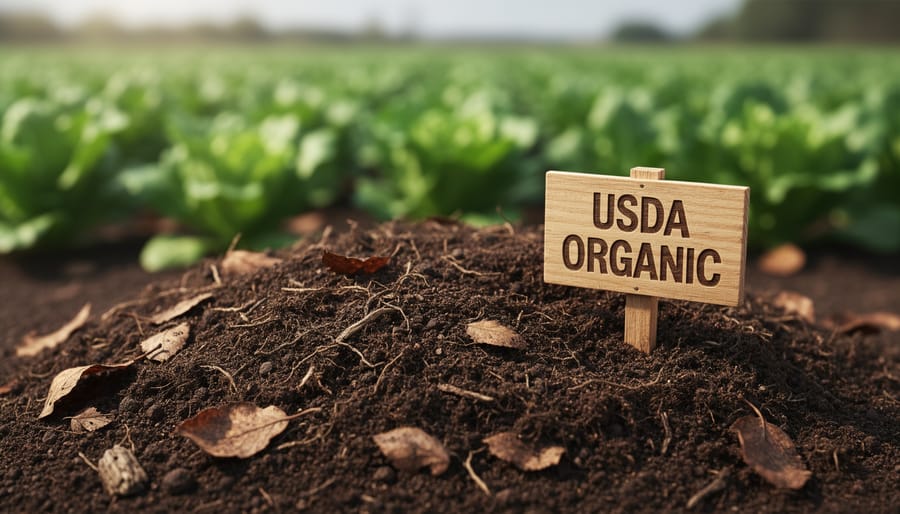
At the heart of USDA organic certification lie three essential pillars that guide every aspect of organic farming. Understanding these foundations will help you appreciate what goes into maintaining certified organic status on your local CSA farm.

The first pillar focuses on soil health and fertility management. Organic farmers must build and maintain healthy soil using natural methods like composting, cover cropping, and crop rotation. Instead of synthetic fertilizers, they rely on organic matter, beneficial microorganisms, and natural amendments to nourish the soil. This creates a living ecosystem beneath your feet that produces more nutritious, flavorful vegetables season after season.

The second pillar addresses pest and weed control through natural and mechanical methods. Organic farmers get creative here, using techniques like companion planting, biological pest controls, physical barriers, and good old-fashioned hand-weeding. While conventional farms might reach for chemical solutions, organic growers work with nature’s own pest management system. This approach aligns with broader pesticide regulations but goes even further in protecting environmental health.

The third pillar involves strictly prohibited substances and practices. The USDA maintains a detailed list of what organic farmers cannot use, including synthetic pesticides, herbicides, fertilizers, and genetically modified organisms. Farmers must also avoid sewage sludge and ionizing radiation. These restrictions ensure that when you bite into that organic tomato from your CSA box, you know exactly what didn’t go into growing it.

Timeline: From Application to Certification

The journey to USDA organic certification requires patience and planning. Before you can even apply, your farm must complete a three-year transition period where you follow all organic practices without using prohibited substances. This waiting period ensures your soil is genuinely free from synthetic chemicals.

Once your transition period nears completion, you’ll submit your application through a USDA-accredited certifying agent. The application includes detailed information about your growing practices, inputs used, and your farm’s history. Expect to provide field maps, seed sources, and records of everything applied to your land.

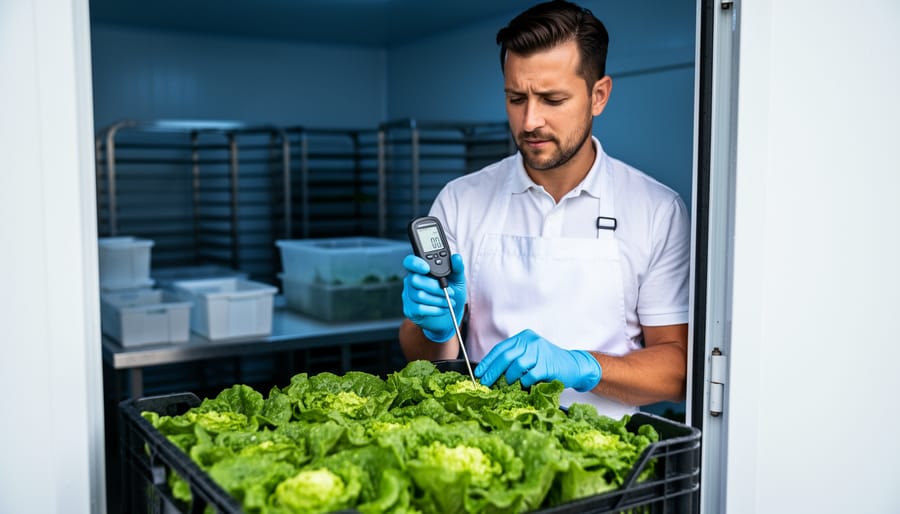
After submitting your application, an inspector will visit your farm to verify everything matches your documentation. They’ll walk your fields, review your recordkeeping system, and ask questions about your practices. This might feel similar to food safety compliance inspections if you’re already familiar with those.

The entire certification process typically takes three to six months from application to approval. Annual inspections become part of your routine, ensuring ongoing compliance. Many CSA farmers find that keeping meticulous records year-round makes these inspections straightforward. Remember, your certifier becomes a partner in your organic journey, offering guidance when questions arise about acceptable practices or new products.

SOE Compliance: Your Organic System Plan in Action

Creating Your Farm’s Organic System Plan

Your Organic System Plan (OSP) is the heart of your USDA certification—think of it as your farm’s organic blueprint. This living document tells your certifier exactly how you’ll meet organic standards across every aspect of your operation.

Start with a detailed field history for each growing area. Map out your crop rotation strategy, showing how you’ll build soil health while preventing pest and disease cycles. For CSA farms, this means planning diverse rotations that support your weekly harvest needs while maintaining organic integrity. Include specific planting schedules and succession plans that align with your member deliveries.

Your soil fertility section should outline every amendment you’ll use, from compost recipes to approved fertilizers. Document your composting process thoroughly—what goes in, how you turn it, temperature monitoring, and when it’s ready for application. This level of detail helps certifiers understand your soil-building approach.

The pest management portion requires listing potential challenges and your organic solutions. Include beneficial insect habitat plans, physical barriers like row covers, and any approved botanical sprays you might use as a last resort. CSA farmer Maria Rodriguez from Vermont shares: “My OSP became my teaching tool. When members ask about pest control, I show them exactly what’s in my plan—it builds incredible trust.”

Record-keeping requirements deserve special attention. You’ll need systems for tracking seed purchases, input applications, harvest logs, and sales records. Many CSA farmers use simple spreadsheets or farm management software to stay organized.

Remember, your OSP evolves with your farm. Plan for annual updates reflecting new fields, changed practices, or lessons learned. This flexibility allows your organic system to grow alongside your CSA operation while maintaining compliance.

Overhead view of farmer documenting harvest records with fresh vegetables in crates
Detailed record-keeping is essential for maintaining organic certification compliance on CSA farms.

Record-Keeping That Won’t Drive You Crazy

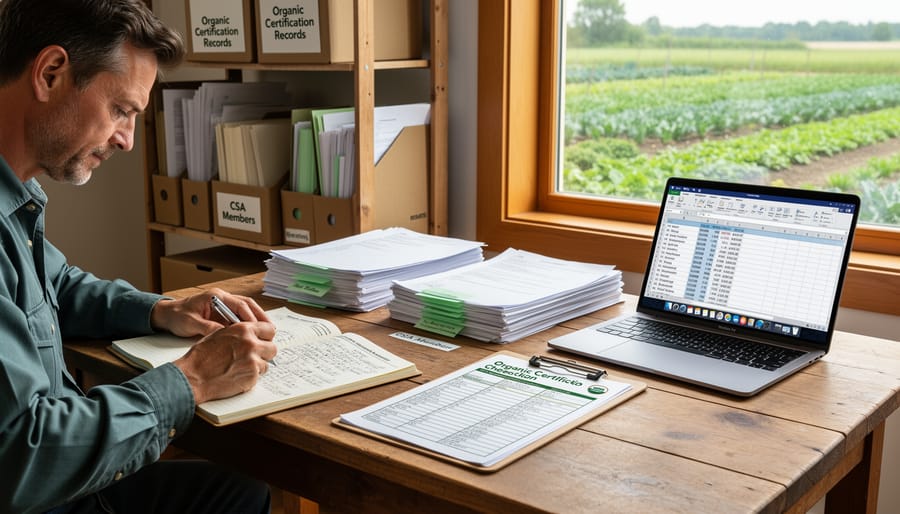
Keeping organic records doesn’t have to feel like drowning in paperwork. The key is building simple habits that capture what you need without consuming your entire day.

Start with a basic field notebook that lives in your pocket or truck. Jot down what you planted, when, and where immediately after doing the work. These quick notes become your official records later. Many farmers find that snapping photos with their phones creates instant documentation for field conditions, planting dates, and input applications.

Create a dedicated filing system, whether digital or physical, with clear categories: seeds and plants purchased, soil amendments, pest management, harvest records, and sales logs. A simple spreadsheet or even a three-ring binder with dividers works perfectly. The goal is knowing exactly where to find documentation when your certifier asks.

For traceability and record-keeping, batch your administrative tasks. Set aside 30 minutes each Friday to transfer field notes into your official log, file receipts, and update your field map. This weekly rhythm prevents the dreaded year-end scramble.

Successful farmer Maria Santos shares her tip: “I keep a camera roll album just for farm records. Every input bag, every planting, every harvest gets a photo with the date stamp. It’s saved me countless times during inspections.”

Remember to save all input receipts and labels, even for approved materials. Store product labels in page protectors for easy reference. Your future self will thank you when certification renewal arrives and everything is already organized and accessible.

Special Considerations for CSA Operations

Managing Multiple Crops and Rotation Requirements

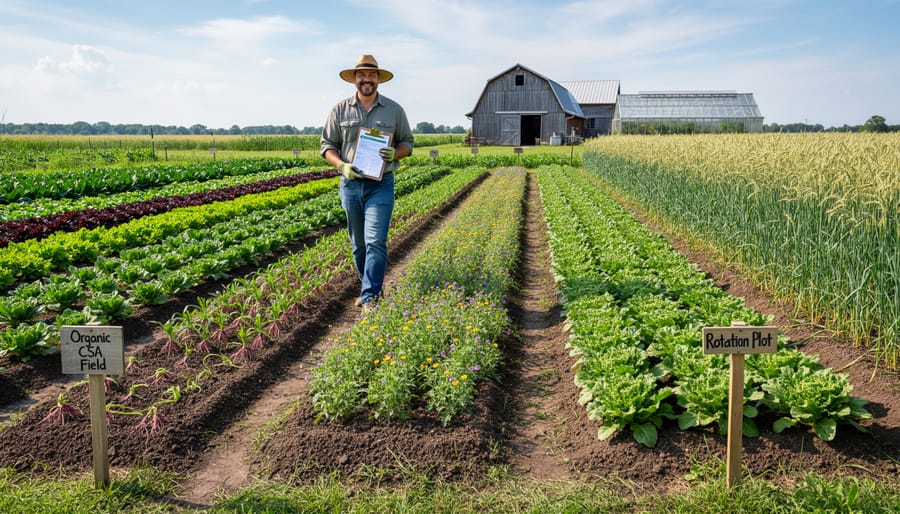
Here’s the good news: the incredible diversity that makes your CSA so appealing to members also helps you meet USDA organic crop rotation requirements. Instead of viewing rotation planning as a burden, CSA farmers can leverage their multi-crop model as a certification advantage.

Organic standards require crop rotation to maintain soil health and disrupt pest cycles, typically avoiding planting the same crop family in the same location for at least two years. With CSAs commonly growing 30 to 50 different varieties across multiple plant families, you’re naturally positioned to meet these requirements while keeping your harvest boxes exciting and varied.

Consider the story of Green Valley Farm, a certified organic CSA in Vermont. Owner Maria Rodriguez tracks her 40-crop rotation using a simple spreadsheet color-coded by plant family. “We rotate brassicas, nightshades, legumes, and root vegetables through different beds each season,” she explains. “Our members love the variety, and it makes our certification audit straightforward.”

The key is maintaining clear records showing which crops grew where each season. Many farmers use field maps, planting logs, or farm management software to document rotations. This documentation serves double duty: satisfying certification requirements while helping you plan future plantings for optimal soil health and member satisfaction.

Diverse organic vegetable field showing multiple crop varieties with farmer tending plants
CSA farms benefit from crop diversity when meeting organic certification rotation requirements.

Handling Non-Organic Inputs in a Pinch

Sometimes life throws curveballs, and you might need to source transplants or soil amendments from non-certified suppliers. The good news? USDA organic standards account for this reality. You can use non-organic seedlings if the organic version isn’t commercially available in your area, but you’ll need to document your search efforts. Keep records of calls made, websites checked, and supplier responses. This paper trail proves you made a genuine attempt to source organically first.

For soil amendments during emergencies, like an unexpected pest outbreak, work closely with your certifier before applying anything questionable. They can guide you toward compliant solutions or help document why a specific intervention was necessary. Many experienced CSA farmers maintain relationships with multiple certified suppliers to avoid last-minute scrambles. One Vermont farmer shared how keeping a simple spreadsheet of backup suppliers saved her season when her primary seedling source had crop failure. Remember, transparency with your certifier is key. They’re partners in your success, not obstacles, and early communication prevents compliance headaches down the road while keeping your members’ boxes beautifully full.

Real CSA Farmer Success Stories

Meet Sarah Chen, who runs Willow Creek Farm in Vermont. When Sarah decided to pursue USDA organic certification in 2019, she worried about the paperwork and cost. “I thought certification was only for large operations,” she admits. Her biggest challenge was creating the required Organic System Plan while managing daily farm tasks. Her solution? She dedicated one hour each morning to documentation before field work began, and she connected with other certified farmers through her state’s organic farming association for guidance. After eighteen months, Willow Creek earned certification. Sarah’s advice for aspiring organic CSA farmers: “Start record-keeping early, even before you apply. Track everything from seed sources to compost inputs. It makes the application process so much smoother.”

Meanwhile, in North Carolina, Marcus Thompson of Abundant Harvest Farm faced different hurdles. His farm had been using sustainable practices for years, but transitioning fields that had previously received conventional treatments required patience. “The three-year transition period felt long, but we used that time to build soil health and educate our CSA members about why organic certification mattered,” Marcus explains. He found creative solutions by designating certain fields for immediate organic production while transitioning others gradually. His farm also struggled with organic pest management initially, particularly with cucumber beetles. Through trial and error, Marcus discovered that companion planting and beneficial insect habitat made a significant difference.

Today, both farms credit certification with strengthening customer loyalty and commanding premium prices that offset certification costs. Marcus offers this encouragement: “Don’t let fear of the unknown stop you. Reach out to your state’s organic certifying agency early. They want you to succeed and offer tremendous support throughout the process.”

Common Pitfalls and How to Avoid Them

Buffer Zone Requirements That Catch Farmers Off Guard

One of the most overlooked aspects of USDA organic certification is the buffer zone requirement, which can be a real surprise during your first inspection. Organic operations must maintain adequate separation from conventional fields to prevent prohibited substance contamination through drift or runoff. While the USDA doesn’t specify exact distances, inspectors generally look for 25 to 30 feet as a minimum, though this varies based on your specific situation and risk factors.

For small CSA farms working with limited acreage, this can feel like a significant chunk of productive land. The good news is that creative solutions exist. Many farmers plant hedgerows or windbreaks in their buffer zones, which serve double duty by providing habitat for beneficial insects and pollinators. Others use these areas for tool storage, composting stations, or educational walking paths for CSA member tours.

Take inspiration from Green Valley Farm in Oregon, where owner Maria Chen transformed her buffer zones into berry bushes and perennial flowers. These additions not only satisfied certification requirements but also became popular pick-your-own additions to member shares. The key is documenting your buffer strategy clearly in your organic system plan and demonstrating how it effectively prevents contamination from neighboring properties.

Is Organic Certification Worth It for Your CSA?

Deciding whether to pursue USDA organic certification is one of the biggest choices CSA farmers face. Let’s break down the real costs and benefits to help you make an informed decision.

The financial investment starts with certification fees, which typically range from $500 to $2,000 annually depending on your farm’s size and gross sales. Add inspection costs, recordkeeping systems, and the time required for documentation, and you’re looking at a significant commitment. Some farmers also face transition costs if converting conventional land, which requires a three-year period before certification.

On the flip side, organic certification can substantially boost your market value. Many CSA members willingly pay premium prices for certified organic produce, often 20-40% more than conventional options. This certified status can attract health-conscious consumers who specifically seek out organic food and trust the USDA label’s rigorous standards. The certification also opens doors to additional revenue streams, including accepting government benefits and selling to retailers or restaurants requiring certification.

However, certification isn’t the only path forward. Many smaller CSA operations find success with alternatives like Certified Naturally Grown, a grassroots certification designed specifically for direct-market farmers. CNG follows similar standards but costs significantly less, usually under $200 annually, with peer-review inspections instead of third-party auditors.

Consider Sarah Martinez, who runs a 2-acre CSA in Vermont. She chose CNG initially, building trust with her 40 member families through farm tours and transparency. After five years, her waiting list grew so long that she pursued USDA certification to expand and access wholesale markets. Her advice? Start where your budget allows and grow strategically.

The right choice depends on your farm’s size, target market, and growth goals. If your members value personal relationships and farm visits, they may trust your growing practices without needing official certification. For those planning to scale up or reach broader markets, USDA certification might justify the investment.

Pursuing USDA organic certification for your CSA farm is absolutely achievable with the right approach and resources. While the process requires dedication and attention to detail, thousands of farmers have successfully navigated certification and continue to maintain their organic status year after year. The key is breaking down the requirements into manageable steps and building systems that work for your unique operation.

If you’re considering certification, start by requesting the organic standards documentation and connecting with your local certifying agent for a preliminary consultation. Many offer free initial assessments to help you understand what changes you’ll need to make. Farmers already in transition should focus on meticulous record-keeping and lean on your certifier’s expertise when questions arise. For those maintaining compliance, remember that annual reviews are opportunities to refine your practices and strengthen your organic systems.

The commitment to organic farming extends beyond certification paperwork. It’s an investment in soil health, environmental stewardship, and the trust your CSA members place in you. Every certified organic farm strengthens the movement toward sustainable agriculture and demonstrates that growing food in harmony with nature isn’t just possible, it’s profitable and deeply rewarding. Your journey toward or within organic certification contributes to a healthier food system for everyone.

Why Sustainable Refilleries Are Changing How We Shop for Food

Posted by darrell on
0
Sustainable Consumer Practices
Why Sustainable Refilleries Are Changing How We Shop for Food

Refilleries are revolutionizing how we shop for everyday essentials by eliminating single-use packaging from the equation. Picture walking into a store with your own containers, filling them with grains, oils, household cleaners, and even locally sourced honey, then paying only for what you need. This zero-waste approach mirrors the community-focused values of farm-to-table movements, where knowing your food’s origin matters as much as the packaging it comes in.

The concept is refreshingly simple: bring reusable jars, bottles, or bags to a refillery, weigh them empty, fill them with bulk products, and pay by weight. Many refilleries partner with local farms and producers to stock organic grains, dried beans, nut butters, and seasonal produce, creating a direct connection between sustainable agriculture and conscious consumption. You’re not just reducing plastic waste; you’re supporting small-scale farmers who prioritize soil health and biodiversity.

What makes refilleries particularly powerful is their ability to transform routine shopping into an act of environmental stewardship. Every refill prevents another container from entering landfills or oceans, while building resilient local food systems that benefit farmers, communities, and the planet simultaneously.

What Is a Sustainable Refillery?

The Refill Model Explained

The refill model is beautifully simple and puts you in control of reducing waste. Here’s how it works: bring your own clean containers from home—mason jars, cloth bags, or any reusable container works perfectly. When you arrive at the refillery, you’ll first weigh your empty container at the designated station. This “tare weight” gets noted so you only pay for the product itself, not the container.

Next comes the fun part: filling up! Browse the selection of bulk items, from organic grains and dried beans to cleaning supplies and personal care products. Use the dispensers or scoops to fill your container with exactly the amount you need—no more, no less. This means zero food waste and complete portion control.

Finally, weigh your filled container again. The staff subtracts the tare weight and charges you only for the product. Many refilleries price items per pound or ounce, making it easy to budget and buy precisely what you need. The entire process eliminates single-use packaging while supporting local sustainable businesses and reducing your environmental footprint with every visit.

Hands filling reusable glass jar with dried lentils from bulk dispenser at sustainable refillery
Customers bring their own containers to fill with bulk items, eliminating single-use packaging waste.

Beyond the Bulk Bins

Today’s refilleries have evolved far beyond bulk bins of grains and beans. Many now showcase an impressive array of locally sourced treasures that connect you directly to regional farmers and producers. Imagine filling your containers with cold-pressed olive oil from a nearby grove, raw honey harvested just miles away, or fresh-ground nut butters made from local almonds and peanuts. Some refilleries partner with community farms to offer seasonal produce, farm-fresh eggs, and even artisanal dairy products. This expanded selection transforms your shopping trip into a journey through your local food landscape. By choosing these options, you’re not only eliminating packaging waste but also supporting small-scale farmers who prioritize sustainable growing practices. Each refill becomes an opportunity to taste the difference that local, seasonal eating makes while building resilience in your community’s food system.

How Refilleries Support Local Farms and Food Systems

Creating Direct Farm-to-Consumer Connections

Refilleries are revolutionizing local food sourcing by creating direct partnerships with nearby farms. Instead of sourcing products through traditional distributors, these zero-waste stores work hand-in-hand with local producers to stock bulk items like grains, legumes, honey, dried fruits, and seasonal produce. This farm-to-shelf approach eliminates multiple middlemen, ensuring farmers receive fair prices while customers enjoy fresher products at competitive rates.

Take Sarah’s organic grain farm in Ontario, for example. By partnering with three local refilleries, she increased her income by 40% compared to selling through conventional channels. Customers can now scoop her heritage wheat, oats, and barley directly into reusable containers, knowing exactly where their food comes from.

These partnerships strengthen community food systems while reducing transportation emissions and packaging waste. Many refilleries display information about their farming partners, including growing practices and harvest dates, fostering transparency and trust. For consumers, this means access to traceable, often organic products while directly supporting the hardworking farmers who grow their food. It’s a win-win arrangement that keeps dollars circulating within local communities.

Farmer and refillery owner meeting in store with local farm products displayed on shelves
Direct partnerships between refilleries and local farms create stronger community food networks and support small-scale producers.

Supporting Small-Scale Organic Producers

Refilleries create meaningful partnerships with small-scale organic producers who might otherwise struggle to reach retail customers. Take Meadowbrook Farm in Vermont, where farmer Sarah Chen started supplying her herb-infused vinegars and raw honey to a local refillery. Within six months, her products reached 200 households without the need for expensive individual packaging or complicated distribution networks.

These partnerships work beautifully because refilleries handle the logistics of storage, dispensing, and customer education while farmers focus on what they do best: growing quality organic products. Small producers can test new items like flavored oils, fermented foods, or specialty grains with minimal upfront investment. If a product doesn’t sell well, there’s no waste from unused packaging materials.

The model also helps beginning farmers establish steady income streams. Many refilleries commit to purchasing set quantities throughout the season, providing financial predictability that’s often missing in farmers market sales alone. This stability allows producers to reinvest in soil health, expand certified organic acreage, and experiment with regenerative growing practices. For customers, it means accessing truly local products while supporting the people growing their food sustainably.

Environmental Benefits That Go Beyond Reducing Plastic

The True Cost of Single-Use Packaging

Every year, North Americans generate over 35 million tons of plastic packaging waste, with single-use containers making up a staggering portion of what ends up in our landfills and oceans. To put this in perspective, that’s like filling an entire garbage truck every minute. The average household throws away approximately 70 pounds of plastic packaging annually, much of it from food and personal care products.

These containers don’t just disappear. Most take 400-1,000 years to decompose, releasing harmful chemicals into our soil and waterways along the way. When we consider that only 9% of plastic ever produced has been recycled, the picture becomes clearer: our convenience comes at a steep environmental price.

Here’s where reducing packaging waste through refilleries makes real impact. By choosing reusable containers over single-use packaging, one person can eliminate hundreds of plastic bottles, jars, and bags each year. This shift doesn’t just reduce waste, it cuts down the energy and resources needed to produce new packaging. Small changes in how we shop create ripples that benefit our communities and planet for generations to come.

Shorter Supply Chains Mean Lower Carbon Footprints

One of the most compelling environmental benefits of shopping at a refillery is the dramatic reduction in transportation emissions. When refilleries partner with local farmers and producers, your food travels dozens of miles instead of thousands. Think about it: conventional grocery items often journey across continents, burning fossil fuels every step of the way. A tomato from California to New York logs about 3,000 miles, while your local refillery’s tomatoes might travel just 30 miles from a nearby farm.

These shorter supply chains mean dramatically lower carbon footprints. Food miles matter because transportation accounts for a significant portion of our food system’s greenhouse gas emissions. By sourcing seasonally from regional growers, refilleries eliminate the need for long-haul trucking, air freight, and refrigerated storage.

Here’s a practical tip: ask your refillery which local farms they work with. Many proudly display maps showing their supplier radius, often within 100 miles. Supporting these businesses creates a ripple effect—encouraging more farmers to sell locally and further reducing our collective environmental impact. It’s a simple choice that makes a measurable difference in fighting climate change while enjoying fresher, more nutritious food.

Starting Your Refillery Journey: A Practical Guide

What to Bring and How to Prepare

Your first refillery visit is easier than you might think! Start by gathering clean, dry containers from home—mason jars, glass bottles, cloth bags, and food-safe plastic containers all work perfectly. Don’t worry if your collection is mismatched; refilleries welcome any reusable container.

Before heading out, give your containers a quick wash and let them dry completely. Most refilleries will weigh your empty containers first, then you fill them with products, and pay based on the weight of just the contents. It’s that simple!

First-timers should know that staff members are genuinely excited to help you navigate the space. Don’t hesitate to ask questions about products, container sizes, or the weighing process. Many refilleries offer a starter selection of containers for purchase if you need them.

Consider bringing a shopping list and start small with a few staple items like grains, beans, or cleaning supplies. This helps you get comfortable with the process without feeling overwhelmed. Remember, every refill—no matter how small—makes a positive environmental impact. Local farmer Maria from Green Valley Farm shares, “Switching to refillery shopping reduced our farm store’s packaging waste by 60 percent while strengthening our community connections.”

Best Products to Start With

Starting your refillery journey doesn’t have to be overwhelming. Begin with pantry staples you already use regularly in your kitchen. Dry goods like rice, quinoa, oats, and lentils are perfect first choices since they’re easy to measure, transport in reusable containers, and store at home. Flour, sugar, and various beans are also excellent beginner options that keep well and integrate seamlessly into everyday cooking.

Once you’re comfortable with dry goods, expand to cooking oils, honey, maple syrup, and nut butters. These items significantly reduce single-use plastic waste while supporting local producers. Many refilleries also stock cleaning products and personal care items, making them ideal for extending your zero-waste cooking practices beyond food preparation.

Choose products you use frequently to maximize your environmental impact and create lasting sustainable habits in your home.

Finding Refilleries Near Your CSA or Farmers Market

Finding a refillery near your CSA pickup location or farmers market is easier than you might think. These eco-conscious businesses often pop up in the same neighborhoods that support local food systems, creating convenient hubs for sustainable shopping. Start by searching online directories like Litterless or Zero Waste Near Me, or simply ask your CSA coordinator and fellow members for recommendations. Many farmers markets now host refillery vendors alongside produce stands, letting you stock up on pantry staples, cleaning products, and personal care items in one trip.

Don’t overlook natural food co-ops and independent grocery stores, which increasingly offer bulk refill stations. Sarah Chen, who runs an organic vegetable farm in Vermont, discovered that partnering with a nearby refillery helped her customers adopt a more holistic zero-waste lifestyle. She now keeps reusable containers at her farm stand for members who want to refill cleaning supplies after picking up their weekly harvest, proving that local food communities naturally embrace these sustainable solutions.

Return Programs: Closing the Loop on Food Packaging

How Return Programs Work in Practice

The deposit-return system is beautifully simple and helps close the loop on packaging waste. Here’s how it typically works: When you purchase items like milk, yogurt, or specialty sauces from participating farms and producers, you pay a small deposit on each glass container, usually between $1 to $3. Keep those jars and bottles safe at home, then bring them back on your next shopping trip or delivery day.

The producer collects the empties, sanitizes them according to food safety standards, and refills them with fresh products. Once you return your containers, you receive your deposit back, often as credit toward your next purchase. Many local dairies have perfected this system over generations. Take Green Valley Dairy, whose founder shares that their bottle return rate hits 95 percent because customers love the nostalgia and environmental impact of reusable glass bottles.

Some farms make returns even easier by collecting containers during regular delivery routes or at farmers market booths. The key is keeping containers clean and returning them promptly so they can get back into circulation. This simple practice significantly reduces single-use packaging while strengthening the connection between you and your local food producers.

Collection of clean reusable glass containers and jars arranged for return program
Container return programs allow bottles and jars to be sterilized and reused multiple times, closing the loop on packaging waste.

Success Stories from Local Farms

Green Valley Cooperative in Vermont has transformed their dairy operation by partnering with local refilleries to distribute milk, yogurt, and cream in returnable glass containers. Since launching their return program two years ago, they’ve eliminated over 50,000 single-use plastic containers from their distribution chain. Farmer Sarah Mitchell explains their success: “Customers love the nostalgic feel of glass bottles, and we’ve seen a 30% increase in repeat purchases. The deposit system ensures a 95% return rate, and we simply sanitize and refill.” The cooperative now saves $8,000 annually on packaging costs while building stronger relationships with customers who appreciate knowing exactly where their food comes from and how it’s packaged sustainably.

Making Refilleries Work in Your Community

Talk to Your Local CSA or Farm Stand

Your local CSA or farm stand might be closer to offering refill options than you think! Many farmers are already passionate about reducing waste and would welcome the conversation. Start by asking if they’d consider accepting clean containers for items like honey, maple syrup, grains, or dried beans. You could say something like, “I’m trying to reduce my packaging waste. Would you be open to filling my own containers?” Most farmers appreciate customer feedback and are part of broader community food networks where sustainable ideas spread quickly. If enough customers express interest, you might inspire a whole new service. Bring clean glass jars or cloth bags on your next visit and gauge their response. Remember, farmers are innovators at heart, and your request could spark the next step in their sustainability journey.

Starting Small: DIY Community Refill Initiatives

You don’t need a storefront to start making a difference! Community-based refill initiatives are sprouting up everywhere, bringing zero-waste shopping closer to home. Consider organizing a neighborhood buying club where members pool orders for bulk staples like grains, beans, and oils, then divide them into personal containers during monthly meetups.

Co-op refill programs work beautifully in community gardens or farmer’s markets. Local growers we’ve spoken with have successfully partnered with neighbors to offer weekly refills of honey, maple syrup, or pantry essentials alongside their fresh produce. One farmer in Vermont started small, offering just olive oil and vinegar refills at market, and now serves 50 regular customers.

Start by connecting with like-minded friends, reach out to local farms about sourcing products in bulk, and designate a regular pickup spot. Even a garage or community center works! These grassroots efforts build strong local food networks while dramatically cutting packaging waste. The key is starting simple and growing organically as your community embraces the refill mindset.

Every time you choose a refillery or participate in a return program, you’re casting a vote for the kind of food system you want to see flourish. These simple acts ripple outward, supporting the organic farmers who nurture your soil, reducing waste that burdens our environment, and strengthening the local economy right in your community. The beauty of this movement is that it doesn’t require perfection. Start small: bring one jar to your next refillery visit, return those glass bottles, or ask your local CSA about their container programs.

Across the country, farmers and entrepreneurs are reimagining how we access wholesome food without the packaging waste. From the small-town refillery partnering with nearby organic growers to the urban farm offering bottle deposits, these pioneers are proving that convenient and sustainable can go hand in hand. Their success stories remind us that change happens one reusable container at a time. By embracing refilleries and return programs, you’re not just reducing your environmental footprint—you’re becoming part of a growing community committed to waste-free living and thriving local farms. Your choices matter, and together, we’re building a more sustainable future, one refill at a time.